 .
To copy specimen click on the
.
To copy specimen click on the
 button. A window will open
where you can
choose several options for your copies.
button. A window will open
where you can
choose several options for your copies.
For an introduction see a short tutorial
.
To copy specimen click on the
button. A window will open
where you can
choose several options for your copies.
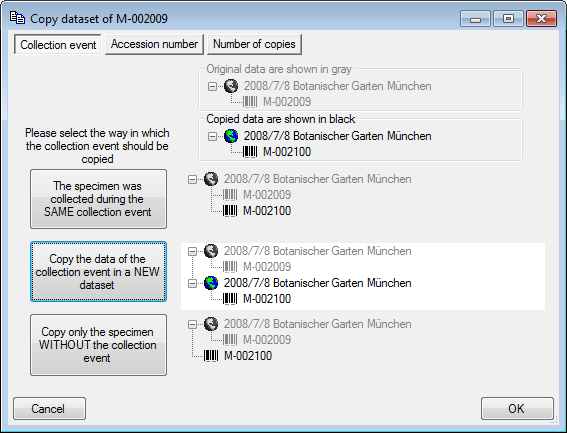
In the first tab choose in which way the CollectionEvent - if present - for the new data sets should be created (see image below). In the first option the new specimen will be located in the same collection event as the original dataset. In the second option a new collection event copied from the original will be created while in the last option the data in the collection event will be ignored altogether.
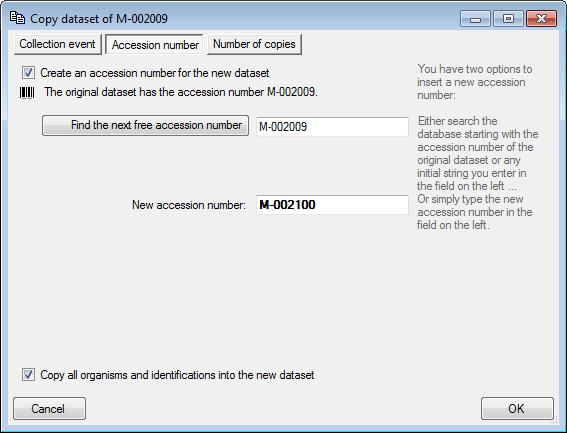
In the Accession number tab you can search for or enter the accession number you wish to use for your new data set (see below).
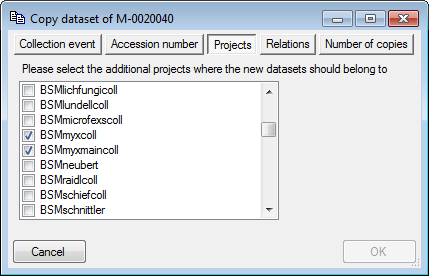
In the Projects tab you can add additional projects for you new datasets (see below).
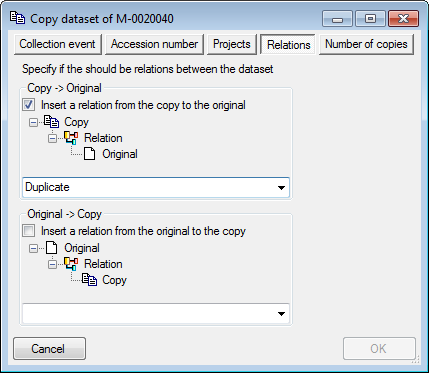
In the Relations tab you can add relations between the original dataset and the copy in either direction (see below).
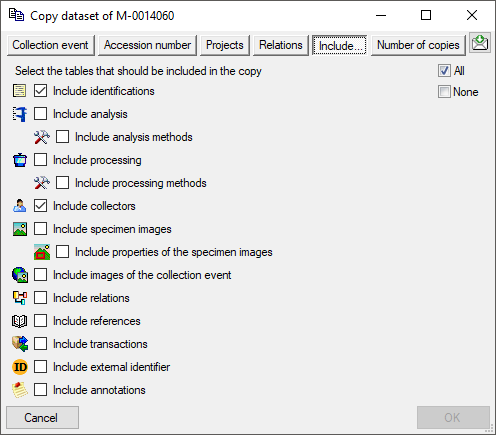
In the Include... tab you can choose the ranges of data that
should be included in the copy (see
below). Click on the
 All or
 None buttons to select all resp. none
of the tables.
None buttons to select all resp. none
of the tables.
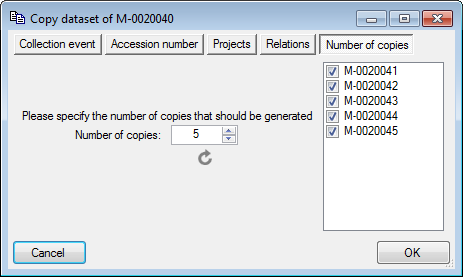
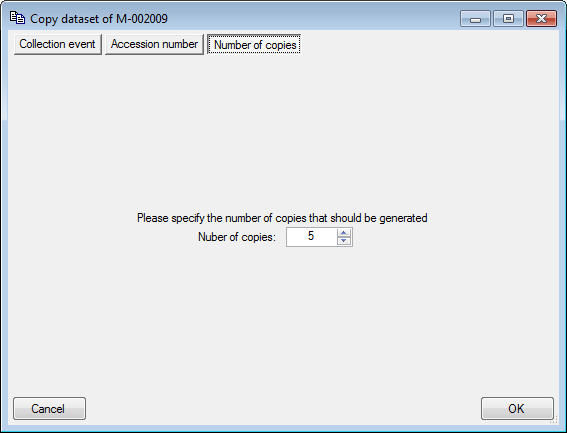
In the Number of copies tab you can specify the
number of copies. If you
checked Create an accession number for the new data
set, the program will list all accession
numbers which will be created (see below). After you changed the number of
copies, click on the
![]() button to refresh the list.
button to refresh the list.
If you do not wish to create new accession numbers for the copies the list will not be shown (see below).
If only the event data should be copied and a selected specimen should be transferred into the new event you can choose the last option (see below). This option is only available for events containing several specimen.
