 .
.This mode is used to modify all samples (objects and images) which are currently visible on the working area. It applies to the elements of the Sample List as well as to the current sample.
To change an object one has to move the vertices ("corner points") which are defining
it. To do so just move the mouse close to a vertex to localize it. As soon as the
corner has been grabbed the cursor changes its shape to a hand symbol
.
Now press the left mouse button and hold it, then move the mouse to change the position of the vertex accordingly. The shape of the object or the marker will change in the same manner. Release the mouse button when the preferred position has been set.
Note that areas and line strings cannot be moved in total while keeping their shapes!
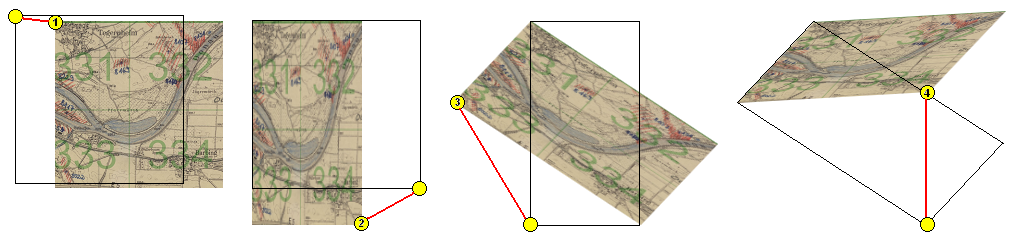
Images (e.g. maps) can be moved completely (keeping their aspect ratio), scaled in horizontal and vertical direction and skewed within an affine transformation. Editing an image can be divided into 4 stages by grabbing and moving the following corners:
Stages 1 to 4:
Color and transparency can be set independently (or simultaneously) for the objects using the appropriate controls and check boxes for Stroke or Fill. The setting will affect all visible objects, so objects which should not be changed have to be switched off before with their toggle buttons. The color of images could not be changed, of course, but the transparency can be set if the Fill box is checked. The transparency of the background map cannot be changed.