 Export ->
 Export lists ->
 Descriptors list ... from the menu to open the window for the export.
With this form you can export descriptor data from the
database to an tabulator separated text file. Choose Data ->
Export ->
Export lists ->
Descriptors list ... from the menu to open the window for the export.
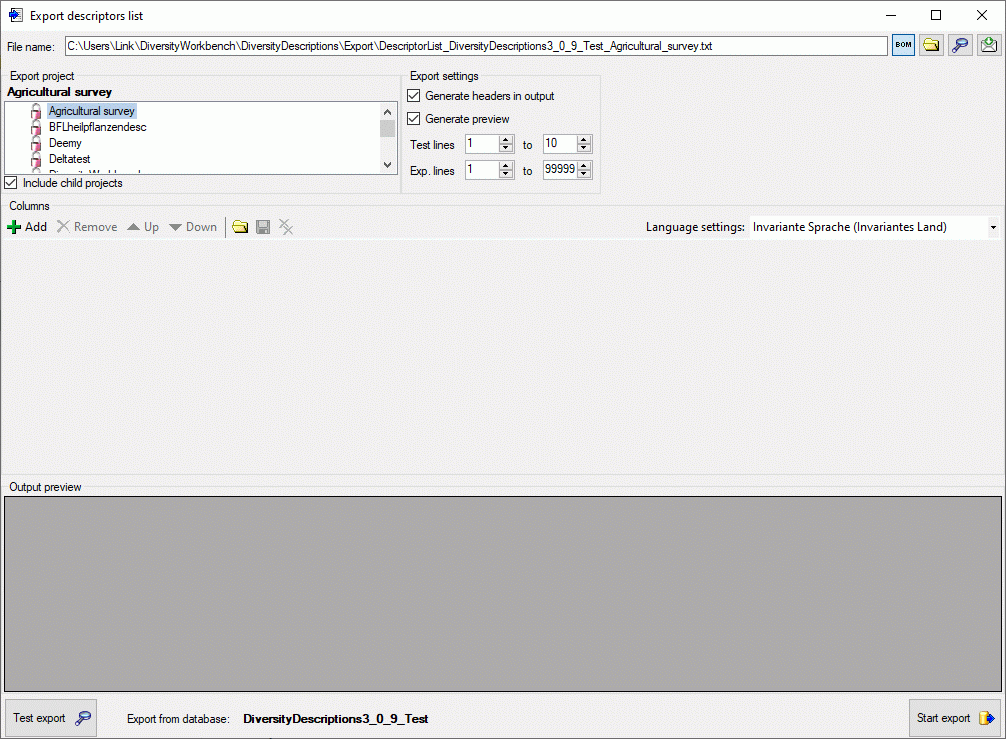
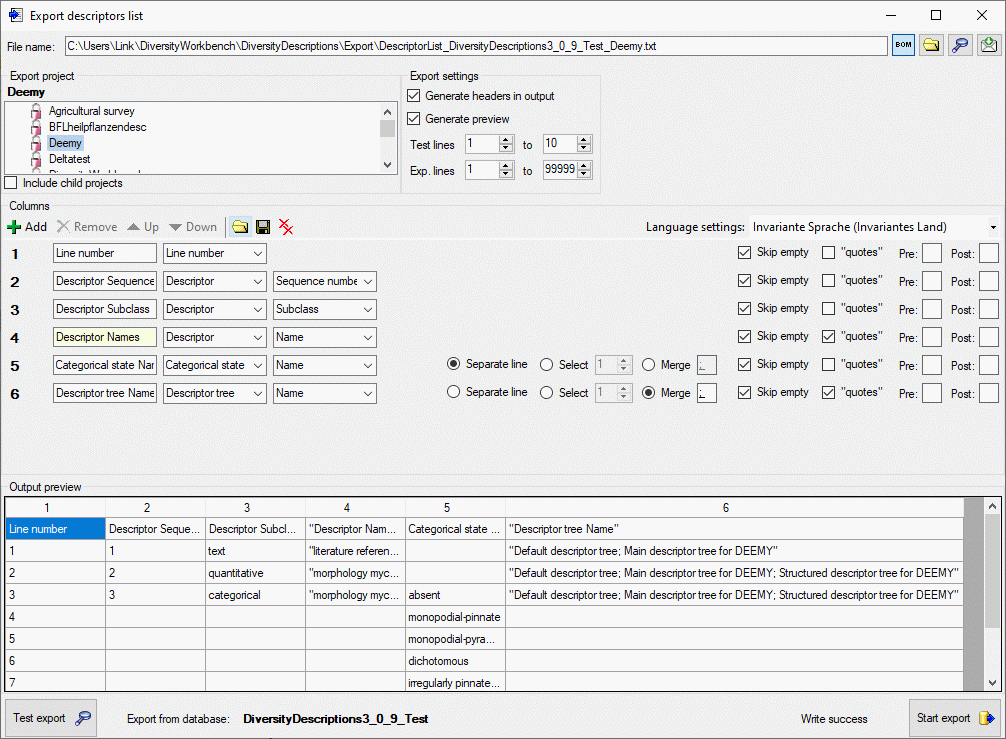
In the Export project section all projects of the database are shown as a tree. Select here the project that shall be exported. In case of hierarchically organized projects the subordinated projects will be included for export, if the Include child projects option is checked.
The Export settings allows the inclusion of a header line in the output by checking the option Generate headers in output. Additionally the lines displayed in the Test output section may be selected by specifying the first and last line number in Test lines [start] to [end]. For the generated output you may adjust the lines that shall be exported in Exp. lines [start] to [end]. For the end line a maximum value of 99999 may be entered, which means export of the whole data beginning from the start line.
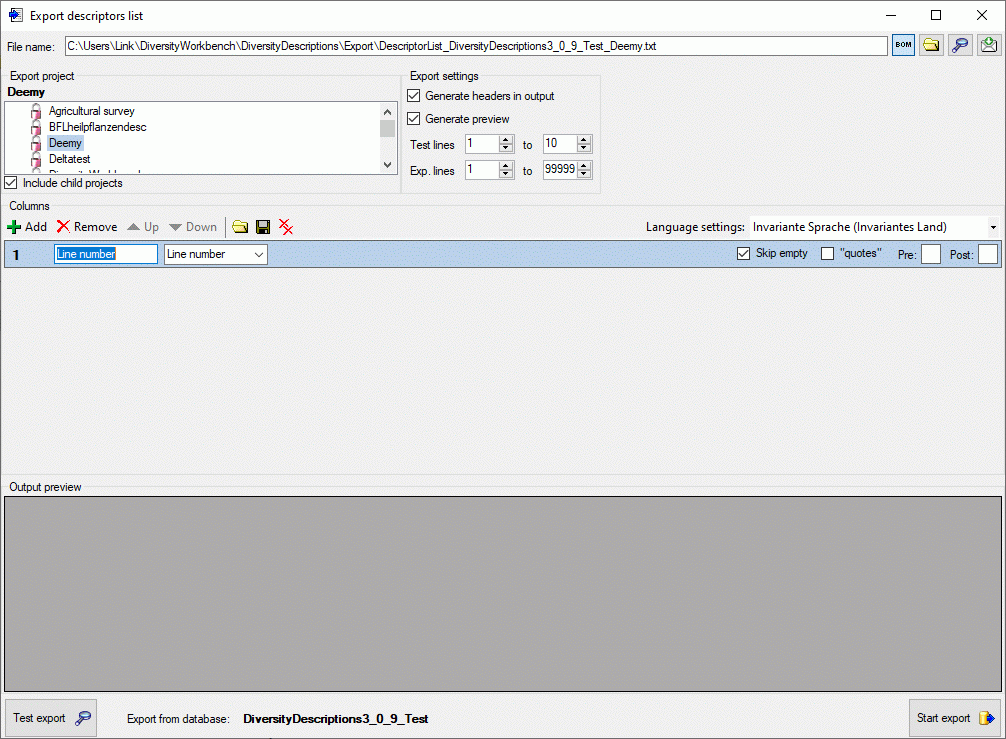
 Add button in the tool strip of the Columns section.
A control representing a single output column will be added at the end of the column
list (see picture below).
Add button in the tool strip of the Columns section.
A control representing a single output column will be added at the end of the column
list (see picture below).
The Columns control shows the column number, a text box for the column header (title) and the source selector (see below).
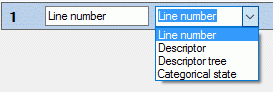
As source you may select one of the following values:
| Line number |
Number of the data line in the output file |
| Descriptor |
Descriptor data, e.g. name of the descriptor |
| Descriptor tree |
Assigned descriptor tree(s) |
| Categorical state |
Categorical state(s) of a certain descriptor |
Depending on the selected data source one or more additional selection boxes will appear in the descriptor column control. The target (see picture below) selects the filed from the database that shall be inserted.

As long as you did not enter a value for the column header, a reasonable suggestion depending on the selected values will be inserted. You may enter a different column header, then the background color changes to light yellow to indicate that it will not be updated automatically anymore (see picture below, column 4). Double-click on the header to open a separate edit window.
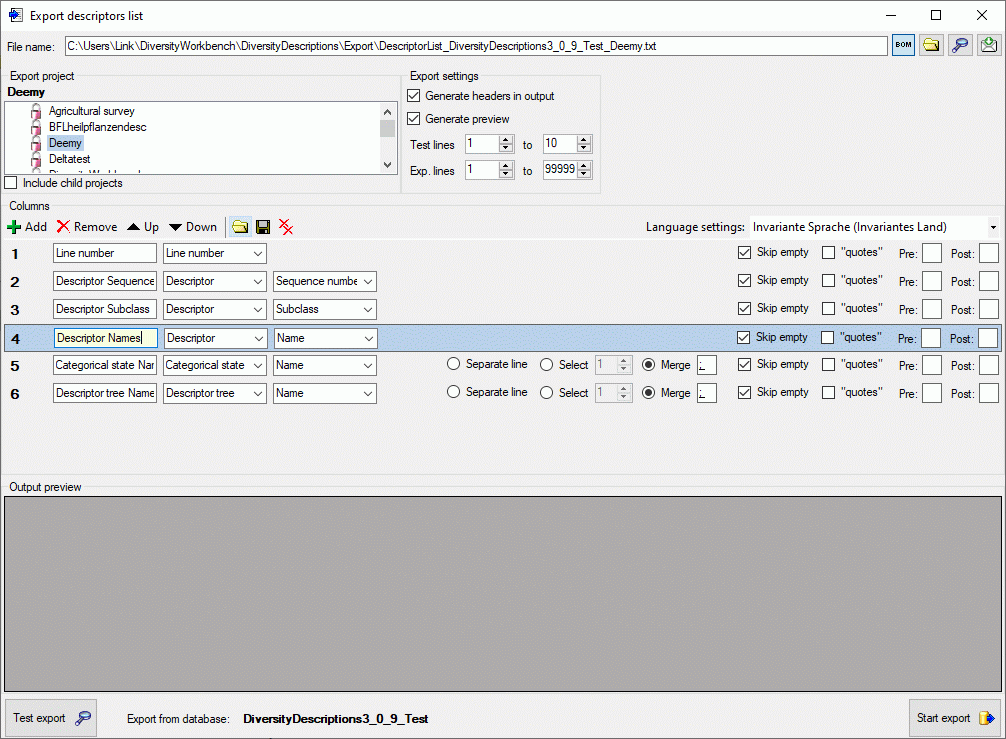
Output formatting is controlled with check box "quotes" that includes the whole output text in quotes and text boxes Pre: and Post:, which allow inclusion of the values in prefix and postfix strings. By selecting the check box Skip empty a blank output will be inserted instead of the specified prefix and postfix strings or quotes, if no value is present. If for a column multiple values may be present, e.g. in case of categorical descriptors where several categorical states might be present, there is the choice of inserting additional lines for multiple values (Separate line), selecting a single value (Select) or merging the values to a single output string (Merge). For option Select you have specify if the first, second or other values shall be selected. For option Merge you may specify a separator string that shall be inserted between two values (default is ; ). To open a separate edit window for the Pre, Post or Merge values strings, e.g. because a longer value shall be entered, double-click on the correspondent text box.
Any selected column may be shifted to another position
using the
 Up and
 Down buttons or deleted with the
 Remove button of the tool strip. With button
 you may delete
all columns. The complete export schema may be saved into an XML file using the
button
you may delete
all columns. The complete export schema may be saved into an XML file using the
button
 , which opens a dialog window to enter the file
name and location. By default the schema file name is generated as:
, which opens a dialog window to enter the file
name and location. By default the schema file name is generated as:
<resources directory>\ExportSchema\DescriptiorList_<Database name>_<Project>.xml
The XML schema file includes information concerning the
database, the project and the output columns. By pressing the
 button in the Columns section, a schema file can be opened.
Before starting the export, the export file name should
be checked. The file name is generated as <resources
directory>\Export\DescriptorList_<Database name>_<Project>.txt.
This default setting may be changed by editing the File name or
by navigating at the target location by pressing the
button besides the file name. If you uncheck the option Generate preview,
no output preview will be generated for the export. To generate an output without
BOM, release the
 button.
To check the export, click on the Test export
 button.
By changing the selected Language settings: you may adapt the output
of floating point numbers or date and time fields to your needs. In the Output
preview grid view the lines specified in the Export settings
(Test lines [start] to [end]) will be displayed (see picture above).
To generate the table file press the Start export
button.
During test and export the icon of the button changes to
button.
By changing the selected Language settings: you may adapt the output
of floating point numbers or date and time fields to your needs. In the Output
preview grid view the lines specified in the Export settings
(Test lines [start] to [end]) will be displayed (see picture above).
To generate the table file press the Start export
button.
During test and export the icon of the button changes to
 and you may abort processing by clicking
the button.
and you may abort processing by clicking
the button.