Import questionnaire data
With this form you can import response data generated
by an HTML questionnaire (see Export questionnaires).
Choose Data ->
 Import ->
 Import questionnaire data ... from the menu to open the window for
the import. In the window click on the
Import questionnaire data ... from the menu to open the window for
the import. In the window click on the
 button to select the text file with the data you want to import. If during analysis
or import any problem occurs, you may click on the
button to select the text file with the data you want to import. If during analysis
or import any problem occurs, you may click on the
 button to reload the file and re-initialize the window.
The contents of the file will be shown in the upper part
of the Import contents section. You may edit the contents or even enter the
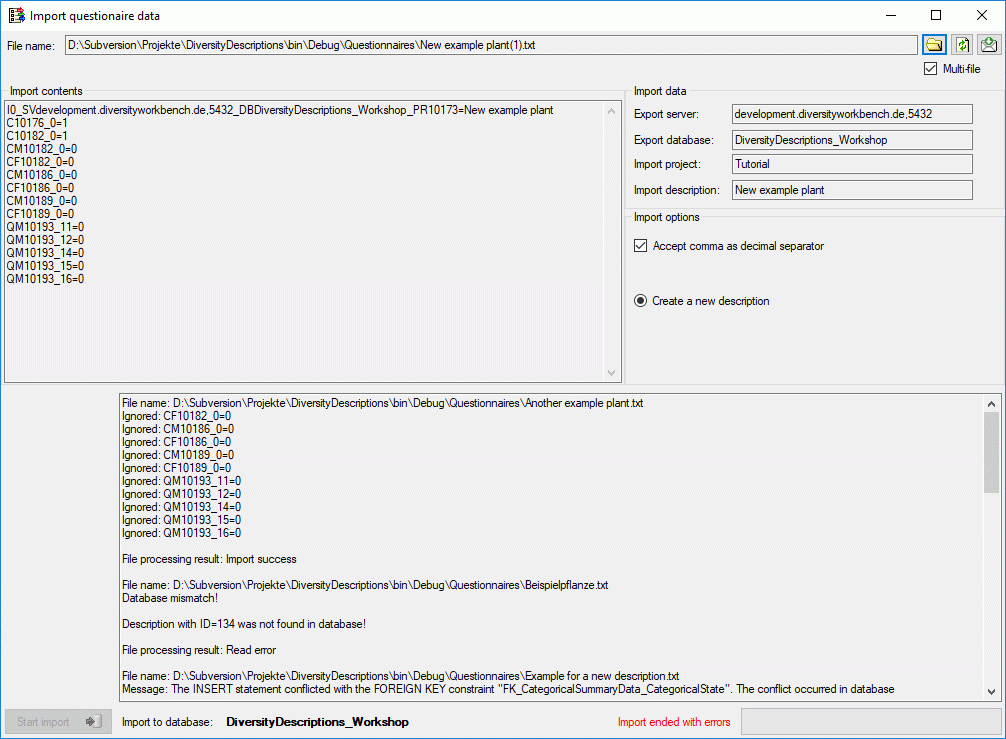
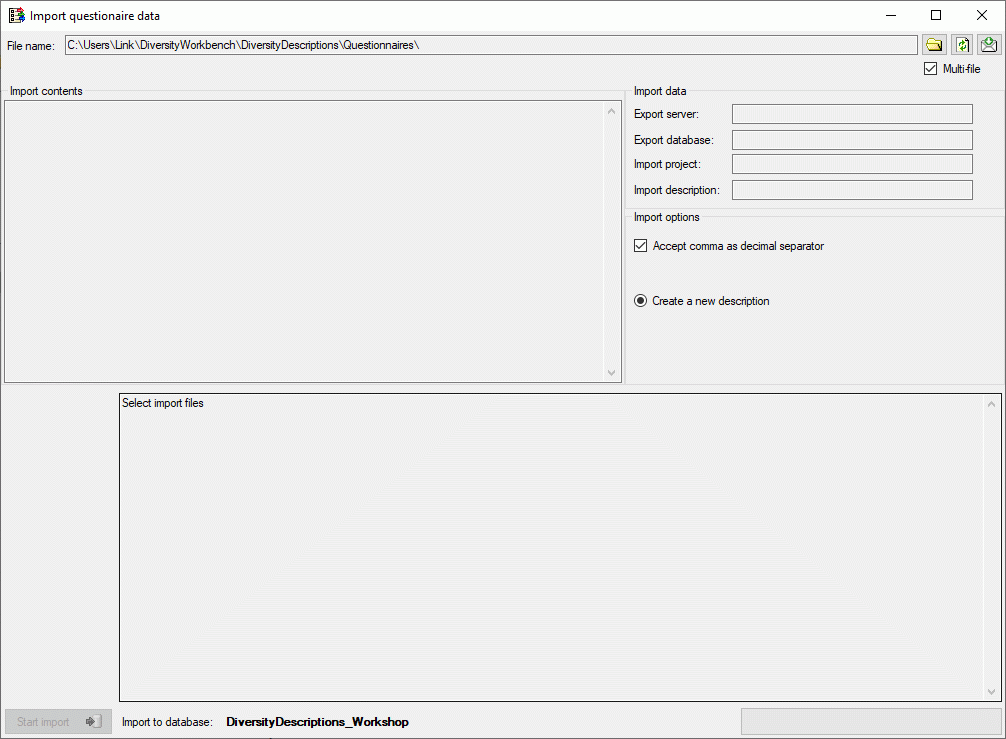
whole data by copy - paste. In the Import data part you find the basic dataset
parameters Export server, Export database,
Import project and Import description (see image below).
If there is a mismatch, e.g. because the questionnaire was generated from a different
database than your import database, an appropriate error will be reported.
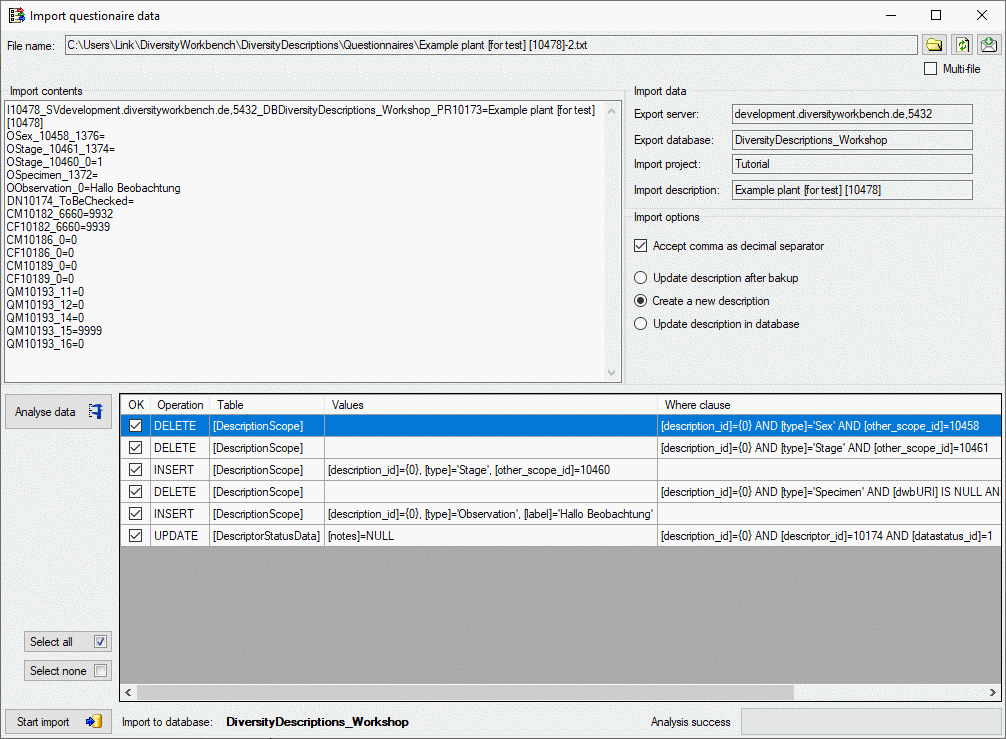
Analysis
To analyse the data in the file click on the Analyse
data
 button. During
the analysis the program compares the reported data to the entries in the database
and presents the planned database operations in the lower part of the window (see
image below). By checking Accept comma as decimal separator in
the Import options section you can overcome problems with localization
of the computer where the questionnaire was filled in. If this option is checked,
a floating point value like "1,0" (e.g. used in german localizations)
instead of "1.0" will be accepted as "1".
button. During
the analysis the program compares the reported data to the entries in the database
and presents the planned database operations in the lower part of the window (see
image below). By checking Accept comma as decimal separator in
the Import options section you can overcome problems with localization
of the computer where the questionnaire was filled in. If this option is checked,
a floating point value like "1,0" (e.g. used in german localizations)
instead of "1.0" will be accepted as "1".
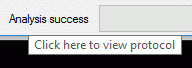
After analysis a message window informs you about errors
or ignored input lines. By clicking on the status text besides the progress bar,
you can open an analysis protocol (see below).

If an analysis error occured, you are not able to proceed.
If ignored lines are reported, this fact is usually uncritical. Most of them concern
"modifier" or "frequency" values (prefix CM, CF or QM) where
the questionnaire reports the actual values, not only the differences.
Import
Before starting the import, you should take a look at
the remaining Import options:
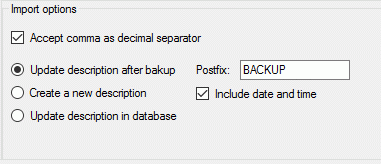
- Update description after backup
Create a backup of the original description data and then update the original description
in the database. If this option is chosen, you may enter a Postfix
that will be appended at the backup description name. Additionally you may select
the option Include data and time to append these data at the backup
name, too (see image below).
- Create a new description (only option for new
descriptions)
Make a copy of the original description data and then updatde the copy in the database.
- Update description in database
The original description in the database will be updated.
If the description entries in your database are referenced
by other applications, you should update the original database entry, i.e. use the
first or third option. The reason is that references from other databases usually
use the description id, which will be different for the copied description. To ensure
that the questionnaire data are correct, you can import them useing the option Create
a new description, verify the imported data and finally import them to the
original description using option Update description in database.
Before performing the import you may include or exclude
single database operations by setting or removing the check mark in column "OK".
You may select or deselect all operations by clicking the buttons Select all
rsp. Select none. Please be aware that deselecting single operation
might lead to unexpected results.
To start the import click on the Start import
button (see
image below).

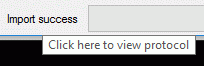
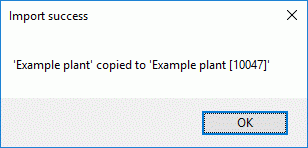
After import a message window inform you if any occured.
Sucessful database operations are shown with green background,
unsuccessful operations with red background. When you
move the mouse curser over the red entries, you get additional information as bubble
help. By clicking on the status text besides the progress bar, you can open an import
protocol (see below).
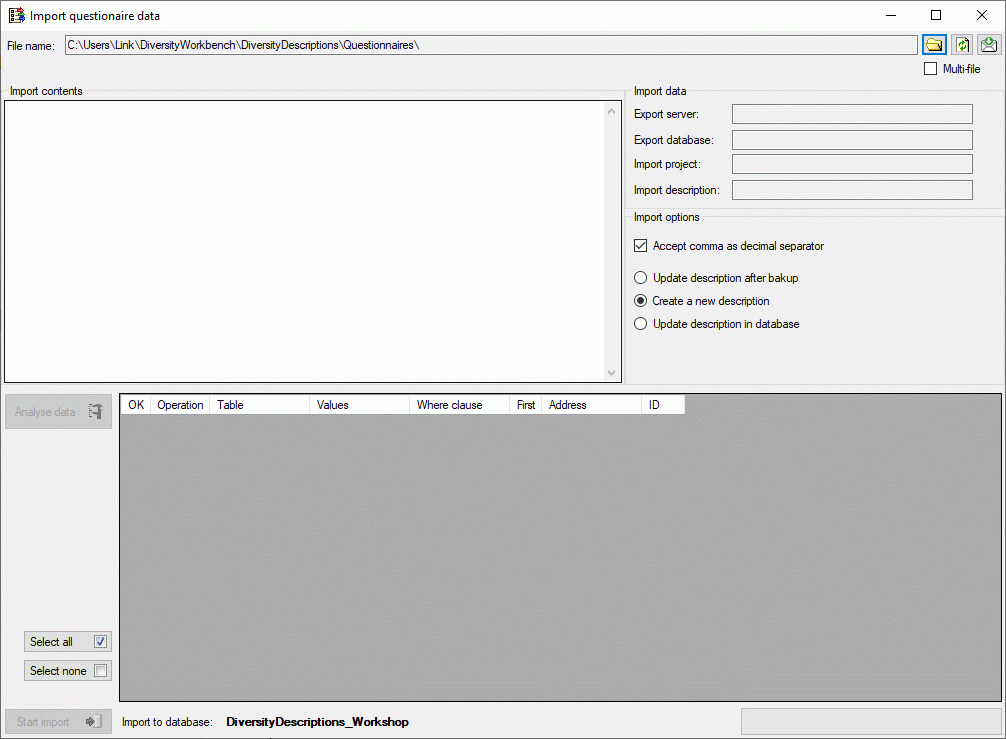
Batch import
If you want to import several questionaire result files,
there is the comfortable option to do a batch import. When you select the option
Multi-file, the window changes as shown below. For batch import you only have the
option to create a new description that will be updated with the questionnaire data.
Click on the
button and select all text files you want to import. In the lower part of the window
the selected files will belisted (see image below).

After checking the remaining Import options
click on the Start import
button to
start the import. In the lower part of the window you find the processing result
for each selected file (see image below).