 Import mapping ->
 Description ... from the menu and open file "Deemy_ITEM.txt"
(see below).
Description ... from the menu and open file "Deemy_ITEM.txt"
(see below).
Close the import form for descriptors. In the
Import session form choose
Import mapping ->
Description ... from the menu and open file "Deemy_ITEM.txt"
(see below).
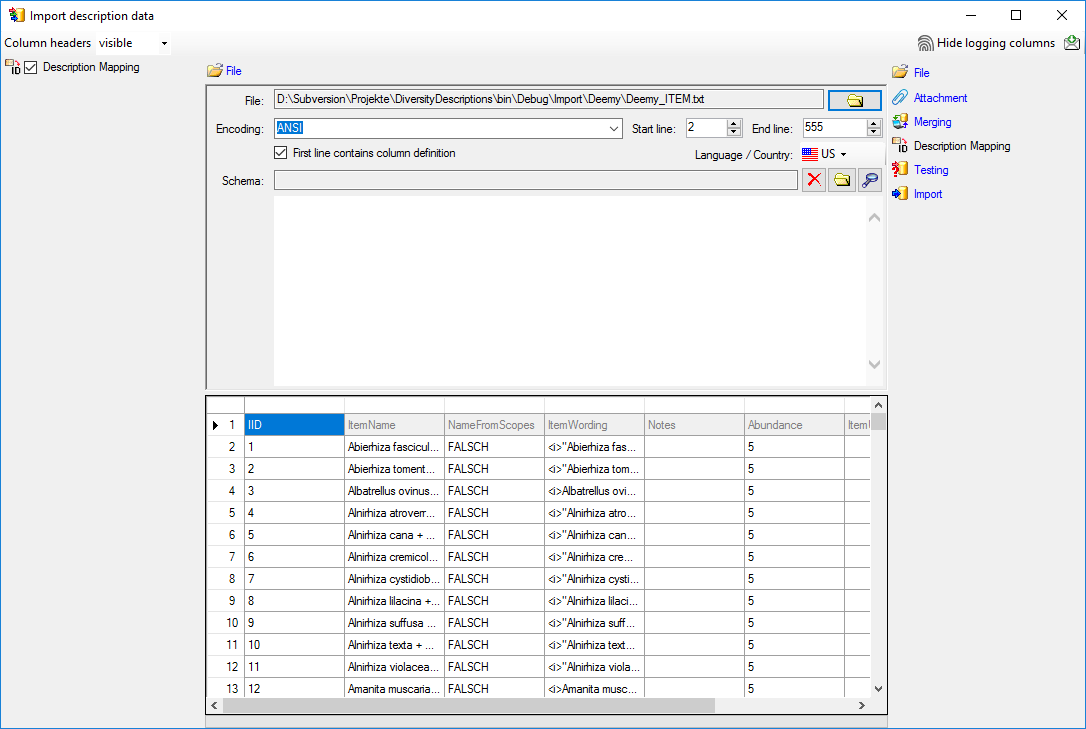
The only available import step
 Description Mapping is already selected at the left side of the
window. In the step table at the right side you find the import step
Description Mapping, too. Click on it and in the center window the
assignemt data for the internal "object_id" and the "external_key"
are displayed. In column "object_id" click on
Description Mapping is already selected at the left side of the
window. In the step table at the right side you find the import step
Description Mapping, too. Click on it and in the center window the
assignemt data for the internal "object_id" and the "external_key"
are displayed. In column "object_id" click on
 to make this the decisive column, further click on
 From file to select the column "ItemName" as data source.
In column "external_key" click on
From file to select the column "ItemID" as data source. After
that the columns should look as shown below.
From file to select the column "ItemName" as data source.
In column "external_key" click on
From file to select the column "ItemID" as data source. After
that the columns should look as shown below.


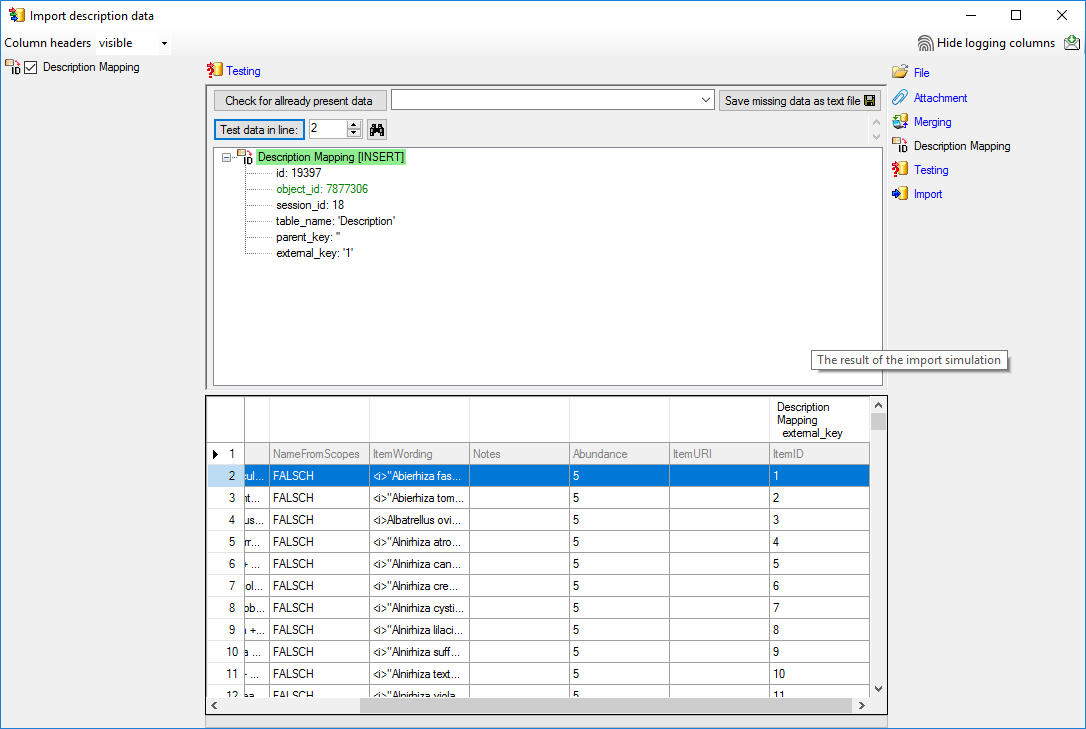
To test if all requirements for the import are met use
the
Testing step. You can use a certain
line in the file for your test and then click on the Test data in line: button.
If there are still unmet requirements, these will be listed in a window. In our
example no error occured and the test for the first data line is shown below.
With the last step you can start to import the data into the database. If you want to repeat the import with the same settings and data of the same structure, you can save a schema of the current settings. The imported data lines are marked green (see below).
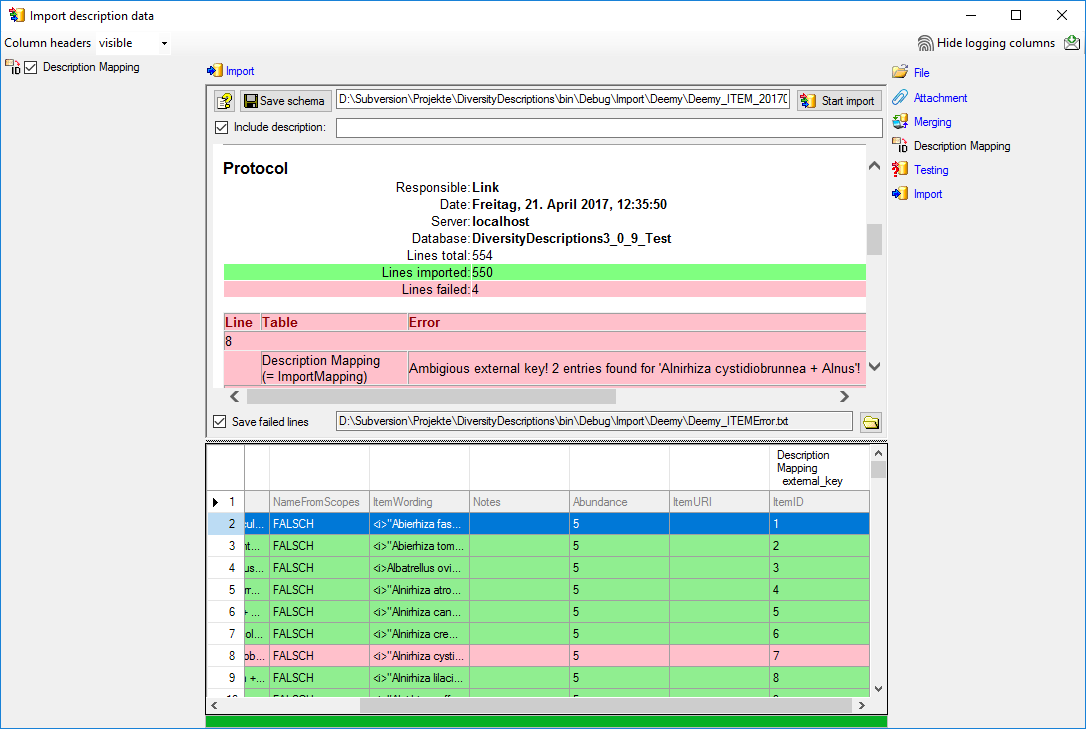
The failed lines are in this example caused by duplicate item names twice in the database. This problem can be fixed by renaming the ambigious entries in the database and the import file, e.g. to "Alnirhiza cystidiobrunnea + Alnus 1" and "Alnirhiza cystidiobrunnea + Alnus 2" rsp. "Lactarius omphaliformis Romagn. + Alnus 1" and "Lactarius omphaliformis Romagn. + Alnus 2".