Step 8 - Import of resource variants
The import wizards used in step 5 up to step 7 allow appending
a resource variant to one resource. Those wizards can be used most efficiently if
the data that are needed for the resource table and the resource variant are located
at the same file. In our example there is the complication that the direction of
the resource reference is in the opposite direction than in the original database.
In DiversityDescription a resource references e.g. a descriptor and one or more
resource variants reference the resource. In the original database several entities,
e.g. descriptors or states, may reference the same picture.
During the import of the resources we used the picture
number as the external key of the resources. Together with their parent key, e.g.
a descriptor ID, this gives unambiguous entries although the external resource ID
alone is ambiguous. Now we want to create a resource variant, containing the URL
of the picture, for each resource entry with the same external resource ID.
Since this "multiple" import is no standard
feature of the import wizard, the following description shows a work-around: During
the import the first resource entry with a matching "Resource ID" that
is not referenced by any Resource variant will be available for data update and
appending of a new resource variant. A repeated import with the same setting will
find the next resource entry and so on until all ambigious resource entries are
processed.
Close the import wizard for the description resources.
Now choose Data -> Import -> Wizard ->
 Import resources ->
 Resource variants ... from the menu, select the session for project
"Deemy". The following window opens that will lead you through the import
of the categorical state resource data. Open file "Deemy_IMG.txt" (see
below).
Resource variants ... from the menu, select the session for project
"Deemy". The following window opens that will lead you through the import
of the categorical state resource data. Open file "Deemy_IMG.txt" (see
below).

Selecting the data ranges
In the selection list on the left side of the window all
possible import steps for the data are listed according to the type of data you
want to import. The available steps
Update resource and
Resource variant are already selected.
We want to update some fields of the resource table with
values form the data file attach the resource variant to the resource. In import
step
 Attachment
at the right side select
Update resource
Attachment
at the right side select
Update resource
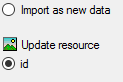
 id (see below). Note: With this import wizard only update of resources is
supported.
id (see below). Note: With this import wizard only update of resources is
supported.
Select the import step
 Merge from the list. For
Update resource
we keep the
Merge from the list. For
Update resource
we keep the
 Merge option because this table shall be updated, for the other step
 Insert should already be selected, because a new entry has to be inserted
(see below).
Insert should already be selected, because a new entry has to be inserted
(see below).

In the import step
Update resource
click on
 Resource ID and in the center window the assignment data for the
resource id ("id") are displayed. Click on
Resource ID and in the center window the assignment data for the
resource id ("id") are displayed. Click on
 to make this the decisive column. Mark the "id" column as
 Key column for comparison during attachment
and click on
Key column for comparison during attachment
and click on
 From file to select the column "PID" as data source. After
that the column should look as shown below.
From file to select the column "PID" as data source. After
that the column should look as shown below.

Click on
 Resource name. The center window shows the data column "label"
and "detail". Deselect the "label" entry and select "detail".
Click on
From file to select the column "SourceTitle" as data source
and enter Source: in field
Pre.: (double-click in the field to open a separate edit window). Now
click on the
Resource name. The center window shows the data column "label"
and "detail". Deselect the "label" entry and select "detail".
Click on
From file to select the column "SourceTitle" as data source
and enter Source: in field
Pre.: (double-click in the field to open a separate edit window). Now
click on the
 button at the end of line "detail", select file column "Volume"
and enter , vol. in field
Pre.:. Repeat the last step for file columns "Pages" (, p. ) and "ReferenceNotes" (, notes: ). After that the column should
look as shown below.
button at the end of line "detail", select file column "Volume"
and enter , vol. in field
Pre.:. Repeat the last step for file columns "Pages" (, p. ) and "ReferenceNotes" (, notes: ). After that the column should
look as shown below.

Click on
 Resource rights and in the center window the assignment data for
the resource rights are displayed. Select "rights_text". Click on
From file to select the column "Author" as data source and
enter © (Alt+0169 and a blank)
in field Pre.:. Now click on the
button at the end of line "rights_text", select file column "DateYear"
and enter , in field Pre.:.
After that the column should look as shown below.
Resource rights and in the center window the assignment data for
the resource rights are displayed. Select "rights_text". Click on
From file to select the column "Author" as data source and
enter © (Alt+0169 and a blank)
in field Pre.:. Now click on the
button at the end of line "rights_text", select file column "DateYear"
and enter , in field Pre.:.
After that the column should look as shown below.

In the import step
Resource variant click on
 Resource link. The center window shows the data column "url".
Click on
to make this the decisive column and on
From file in the "url" line to select file column "FileName".
Double-click on the text box after Pre.: to open a separate edit
window. Here enter the web address of the picture server where the files are located
and confirm with "OK". After that the column should look
as shown below.
Resource link. The center window shows the data column "url".
Click on
to make this the decisive column and on
From file in the "url" line to select file column "FileName".
Double-click on the text box after Pre.: to open a separate edit
window. Here enter the web address of the picture server where the files are located
and confirm with "OK". After that the column should look
as shown below.

Click on
 Variant type. In the center
window select the data column "variant_id", click on
For all: and select the value "good quality" (see below).
Variant type. In the center
window select the data column "variant_id", click on
For all: and select the value "good quality" (see below).

Click on the import step
Resource variant to find some ungrouped fields. In the center window select
the data column "pixel_width", click on
From file and select the value "WidthD". Now select the data
column "pixel_height", click on
From file and select the value "HeightD". Finally select
the data column "mime_type", click on
From file and select the value "FileName". Click on button
 to define a transformation. In the transformation window click on the
 cut transformation, enter Position: 2,
click on
to enter splitter character . (period)
to extract the file extension. Now click on
cut transformation, enter Position: 2,
click on
to enter splitter character . (period)
to extract the file extension. Now click on
 to insert a translation table and
 to insert the values contained in the file column. "gif" shall be converted
to image/gif, "jpg"
will become image/jpeg (see below).
to insert the values contained in the file column. "gif" shall be converted
to image/gif, "jpg"
will become image/jpeg (see below).
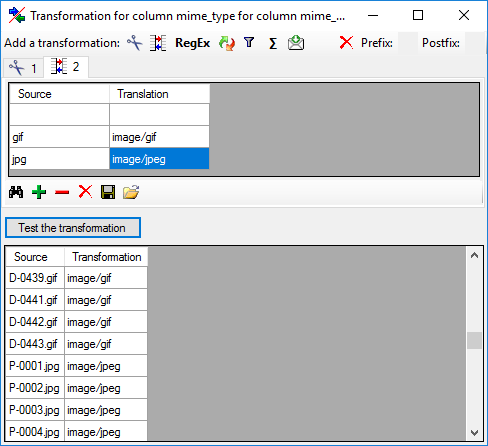
After that the columns should look as shown below.

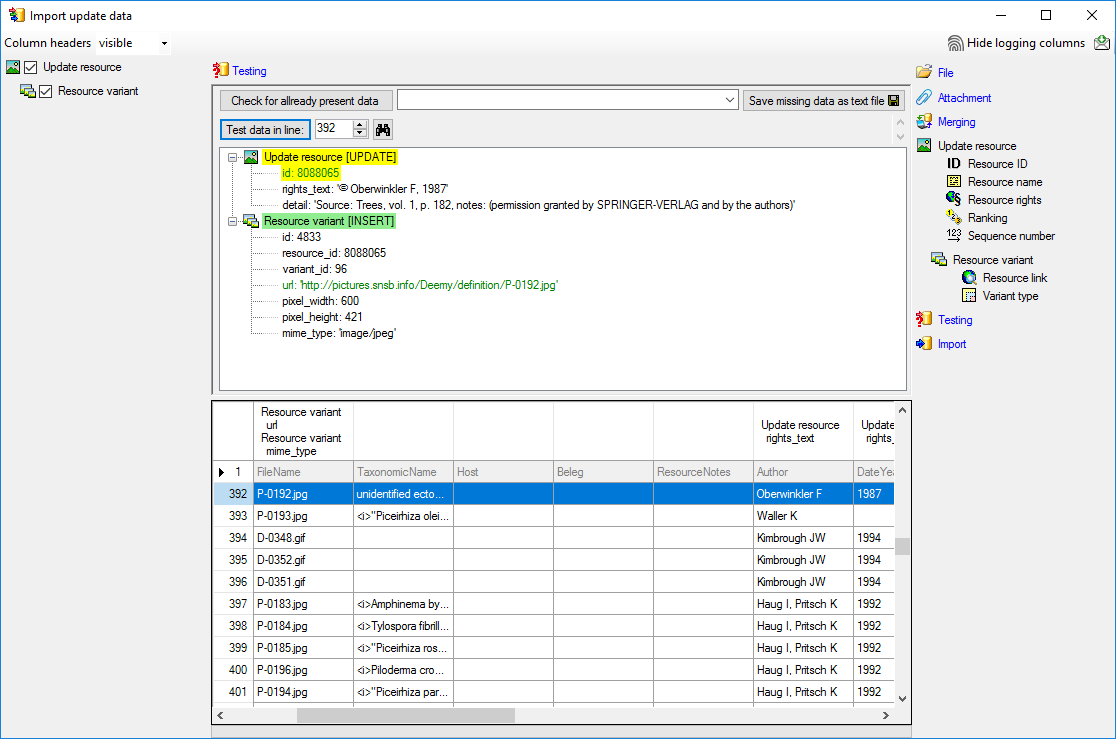
Testing

To test if all requirements for the import are met use
the
Testing step. The test for the first
data line is shown below.
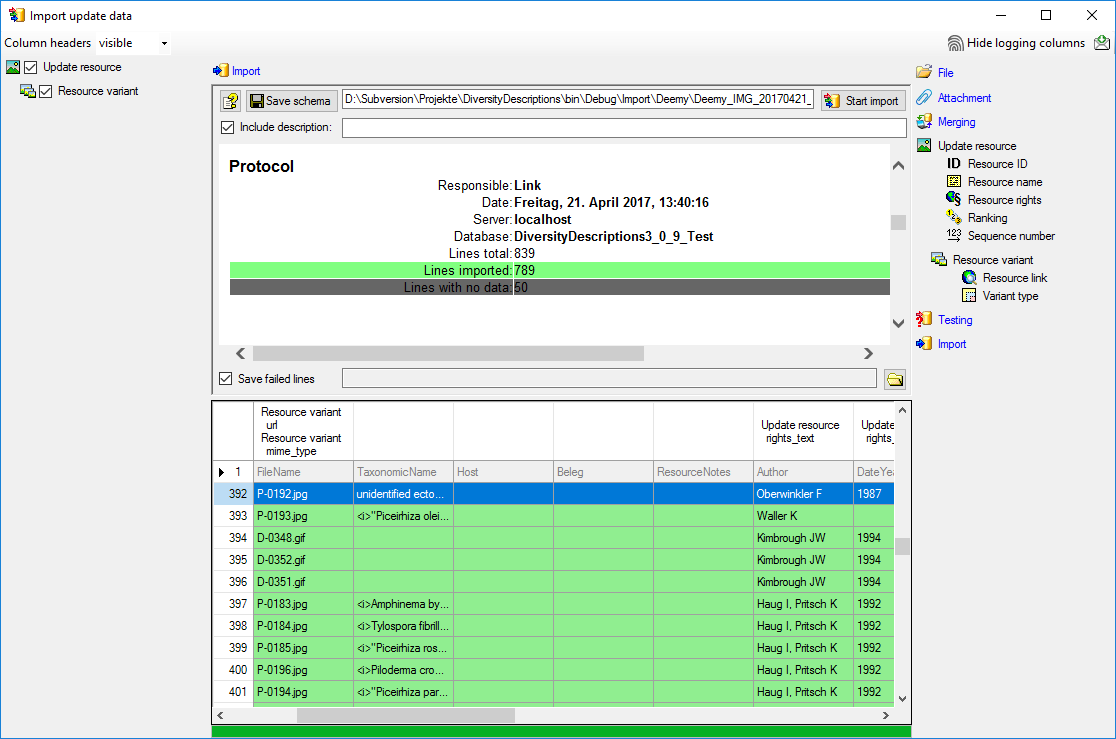
Import

With the last step you can start to import the data into
the database. If you want to repeat the import with the same settings and data of
the same structure, you can save a schema of the current settings. As mentioned
in the introduction, the import step has to be repeated until no more resource variant
is imported. At the first run 789 lines were imported (see below).
At the second run, started by another click on
 Start import, 152 lines were imported (see below).

Finally, at the seventh run no further line is imported
(see below).
