Settings for the transfer of the projects in the cache database
To edit the general settings for the transfer,
click on the
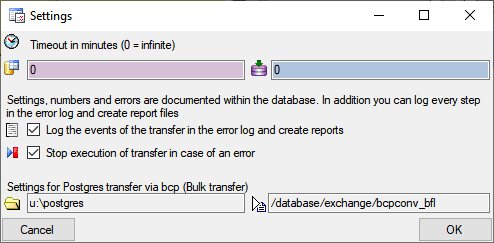
 button in the main form. A window as
shown below will open. Here you can set the
 timeout for the transfer in minutes. The
value 0 means that no time limit is set and the program should try infinite to
transfer the data.
The
transfer via bcp
 does not rely
on these numbers and uses a much faster way of transfer, yet its
needs detailed configuration. If you are connected to a postgres
database, the transfer directory
 and the bash file
 for
conversion and import can be set in the last line.

For the detection of certain
errors it may help to log the events of the transfer by activating the logging:

 →
→

 . The logging is set per application, not per database. So to detect errors in a
transfer started by a scheduler on a server, you have to activate the logging in
the application started by the server. The log is written
into the error log of the
application. To see the content of the log either use the
 Protocol section
or in the main window select Help -
 ErrorLog from the menu.
In case of an error during the transfer
you can stop the transfer:

 →
→

 . The stop in case of an
error is set per application, not per database. So to stop the
transfer in case of errors in a
transfer started by a scheduler on a server, you have to activate
this in
the application started by the server.
Scheduled
transfer

The scheduled transfer is meant to be launched on a
server on a regular basis, e.g. once a week, once a day, every hour etc.. The
transfer of the data via the scheduled transfer will take place according to the
settings. This means the program will check if the next planned time for a data
transfer is passed and only than start to transfer the data. To include a source
in the schedule, check the
 selector for the scheduler. To set
the time and days scheduled for a transfer, click on the
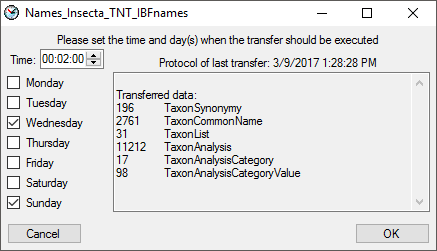
 button. A window as shown below will
open where you can select the time and the day(s) of the week when the transfer
should be executed.

The planned points in time are shown in the form as
shown below.

The protocol of the last transfer can be seen as in
the window above or if you click on the
 button. If an error occurred this can be
inspected with a click no the
 button.
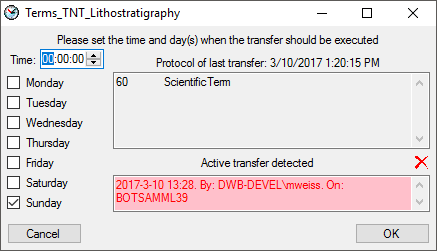
If another transfer on the
same source has been started, no further transfer will be started. In the
program this competing transfer is shown as below.

You can remove this block with a click on the
 button. In opening window (see below)
click on the
 button. This will as well remove error
messages from previous transfers.

A further option for restriction of the transfers
is the comparison of the date when the last transfer has been executed. Click
on the
 button to change it to
 . In this state the program will compare the
dates of the transfers and execute the transfer only if new data are available.
 button in the main form. A window as
shown below will open. Here you can set the
 timeout for the transfer in minutes. The
value 0 means that no time limit is set and the program should try infinite to
transfer the data.
 does not rely
on these numbers and uses a much faster way of transfer, yet its
needs detailed configuration. If you are connected to a postgres
database, the transfer directory
 and the bash file


 . The logging is set per application, not per database. So to detect errors in a
transfer started by a scheduler on a server, you have to activate the logging in
the application started by the server. The log is written
into the


 button.

 button. This will as well remove error
messages from previous transfers.

 button to change it to
 . In this state the program will compare the
dates of the transfers and execute the transfer only if new data are available.