 list.
list.
To focus on the specimen and its
organisms hide
all other entries from the tree by clicking on the corresponding
buttons (see
point
1 in image below). To enter the organism
choose the specimen entry in the tree (see point
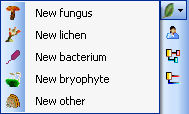
2 in image below). Then select the organism from
the
list.
This will insert an entry for the
organism underneath
the entry of the
 specimen (see image below). To enter details for this
organism select
the entry in the tree (see point
3 in image below and image above).
specimen (see image below). To enter details for this
organism select
the entry in the tree (see point
3 in image below and image above).
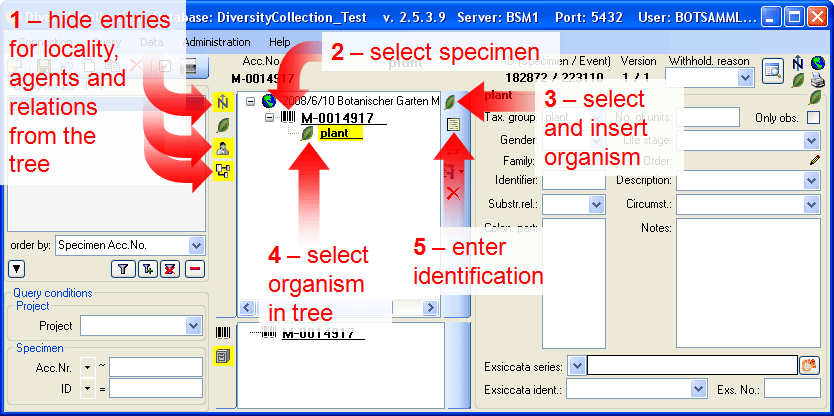
To enter an identification for
this organism
select it in the tree (see point
4 in image above) and click on the  button (see point
5 in image above). This will insert a data set
for the
identification of the organism underneath the organism as shown
above. Select this
entry to enter the details of the identification.
button (see point
5 in image above). This will insert a data set
for the
identification of the organism underneath the organism as shown
above. Select this
entry to enter the details of the identification.
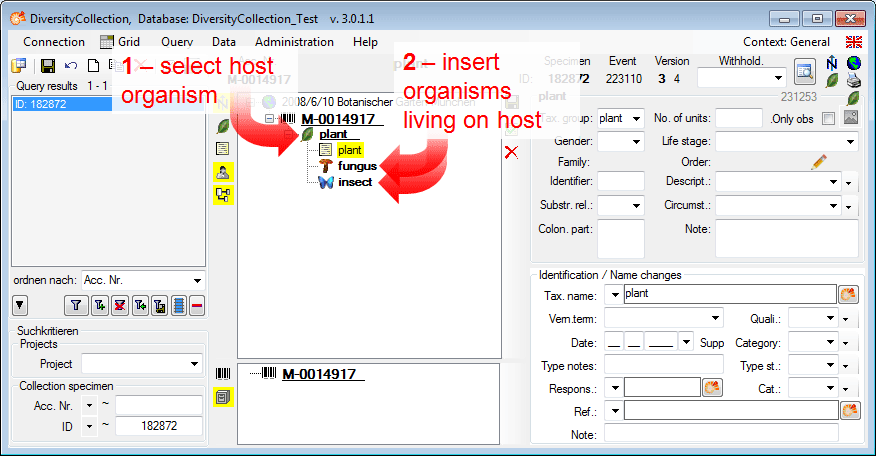
To enter more organisms living on
the plant
select the
plant in the tree (see point
1 in image below) and create new organisms as
described above
(see point
2 in image below).
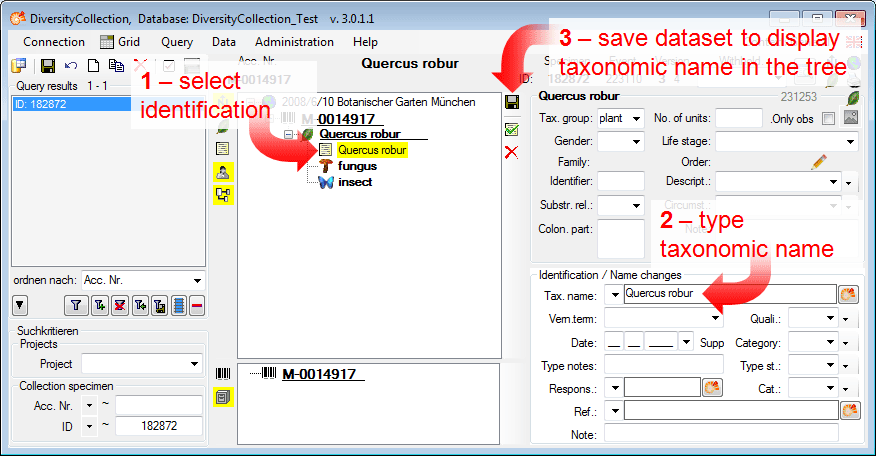
Now let's enter the taxonomic name
of the plant.
Select the entry for the
identification in the tree (see point
1 in image below). As a simple method to enter a
taxonomic name simply
type it in the field Tax. name (see point
2 in image below). To save the data set and
display the
taxonomic name in the tree click on the  button (see point
3 in image below).
button (see point
3 in image below).
Now insert an
identification for the fungus (see point
1 in image below).
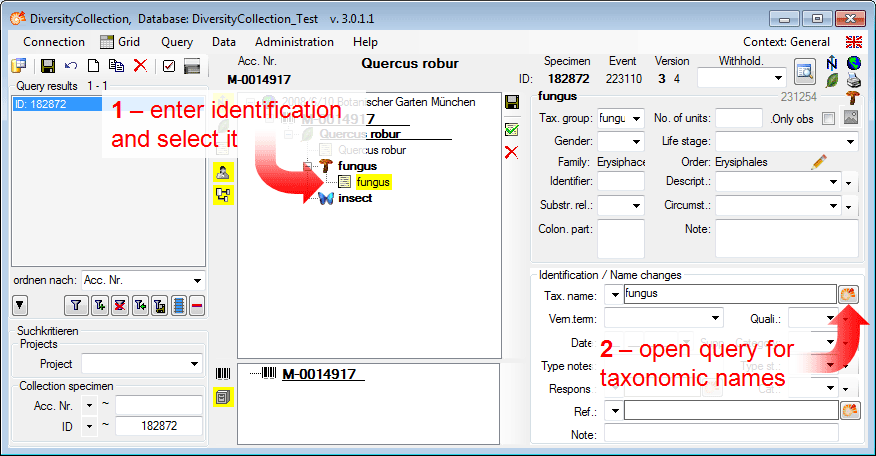
Select the identification in the
tree and click on the
 button (see point
2 in image above) to open a
remote query as shown
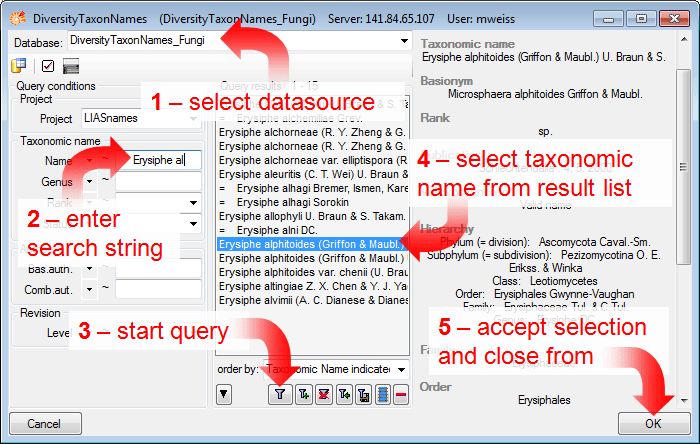
below. Choose the
database DiversityTaxonNames_Fungi (see point
1 in image below), enter the conditions for the
query, e.g. the
beginning of the taxonomic name (see point
2 in image below) and start the query
button (see point
2 in image above) to open a
remote query as shown
below. Choose the
database DiversityTaxonNames_Fungi (see point
1 in image below), enter the conditions for the
query, e.g. the
beginning of the taxonomic name (see point
2 in image below) and start the query
 (see point
3 in image below). From the result list select
the taxonomic
name (see point
4 in image below) and click OK (see point
5 in image below) to transfer the selected name
to the main form.
(see point
3 in image below). From the result list select
the taxonomic
name (see point
4 in image below) and click OK (see point
5 in image below) to transfer the selected name
to the main form.
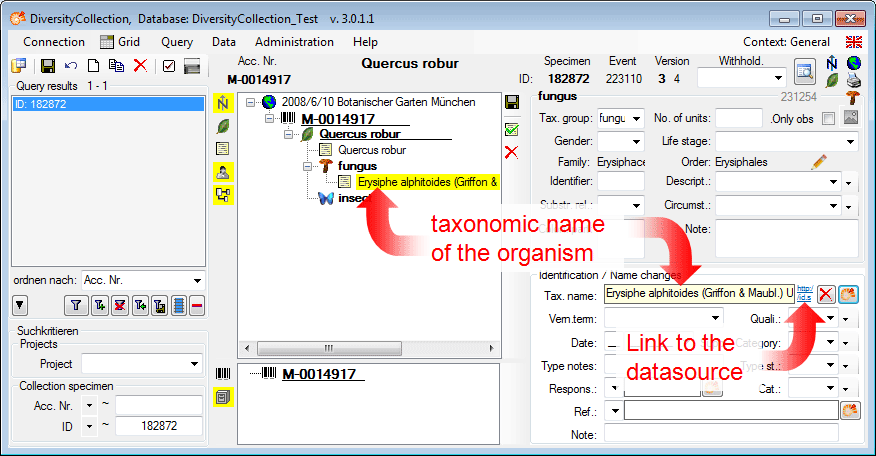
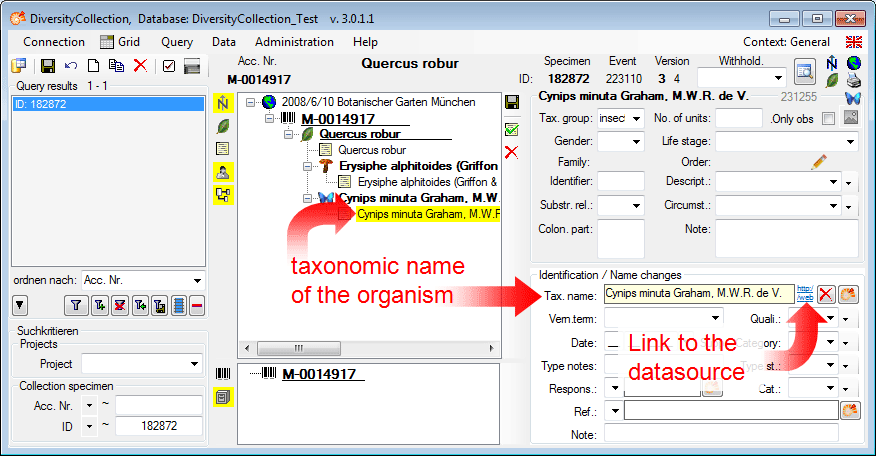
The name of the selected taxon
together with the
link to the datasource (see image below) will be inserted in
the field for the taxonomic name. The taxonomic name can not be
directly edited as
long as the name is linked to a datasource (indicated by the
yellow background).
To remove the link you need to use the
 button. To see the entire
information on the
linked name as stored in the datasource click on the
button.
button. To see the entire
information on the
linked name as stored in the datasource click on the
button.
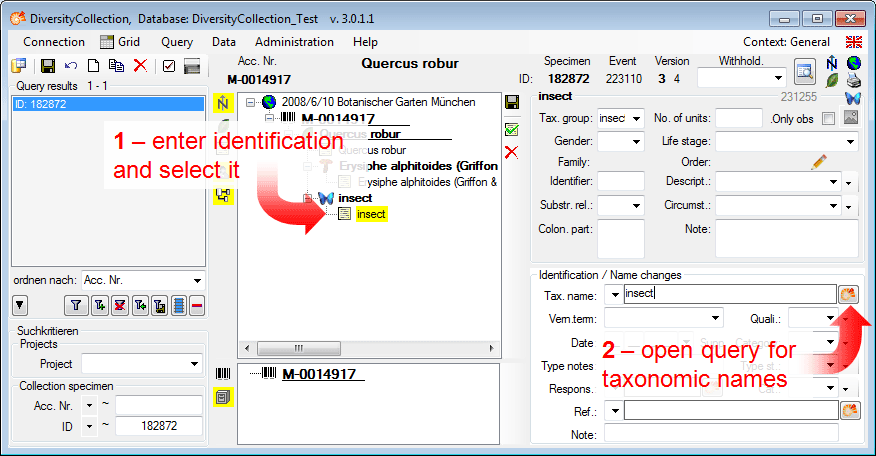
As an example for the last
variant enter an
identification for the insect (see below). Select the
identification in the tree
(see point
1 in image below) and click on the
button (see point
2 in image below) to open a
remote
query.
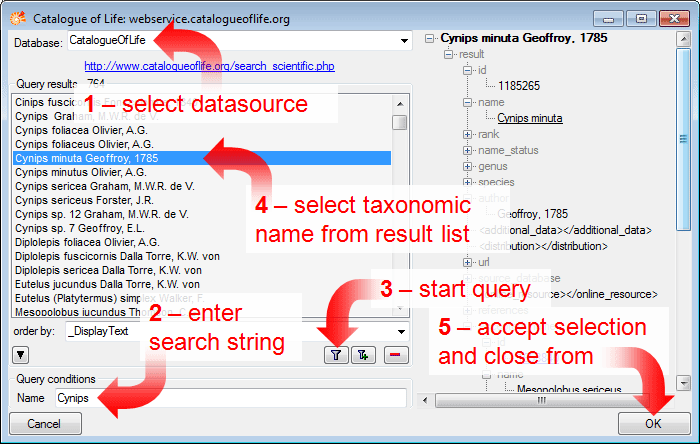
A window for the access to
webservices and other
modules will open as shown below. Here select CatalogueOfLife
(see point
1 in image below) as
a datasource. This will query the webservice of
Catalogue of
Life
for a taxonomic name. Enter the beginning of the taxonomic name
(see point
2 in image below) and start the query
(see point
3 in image below). From the result list select
the taxonomic
name (see point
4 in image below) and click OK (see point
5 in image below) to transfer the selected name
to the main form.
The name of the selected taxon
together with the
link (see image below) to the data source will be inserted in
the field for the taxonomic name. The taxonomic name can not be
directly edited as
long as the name is linked to a data source (indicated by the
yellow background).
To remove the link you need to use the
button. To see the entire
information on the
linked name as stored in the data source click on the
button.
This tutorial is continued in the sections listed below.