To create a new text descriptor, select edit mode descriptors
from menu Edit->Descriptors. Now click on the
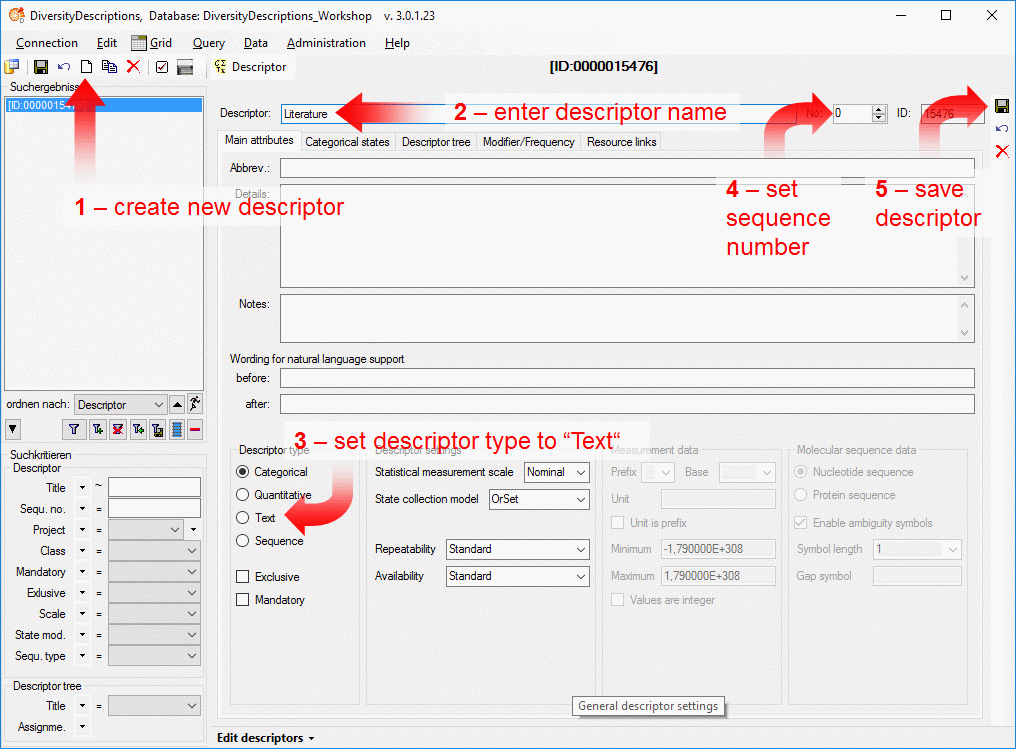
![]() button in the upper left panel (see point 1 in image below).
button in the upper left panel (see point 1 in image below).

The new descriptor is created with a numeric name. Change it to "Literature" (see point 2 in image above), because this descriptor shall allow insert of literature references or citations as free form text into the description data. Then set the descriptor type to "Text" (see points 3 in image above) and set the sequence number to "1" (see points 4 in image above). Finally save the descriptor (see point 5 in image above) and the descriptor name will be updated in the header and the query panel at the left side of the window.
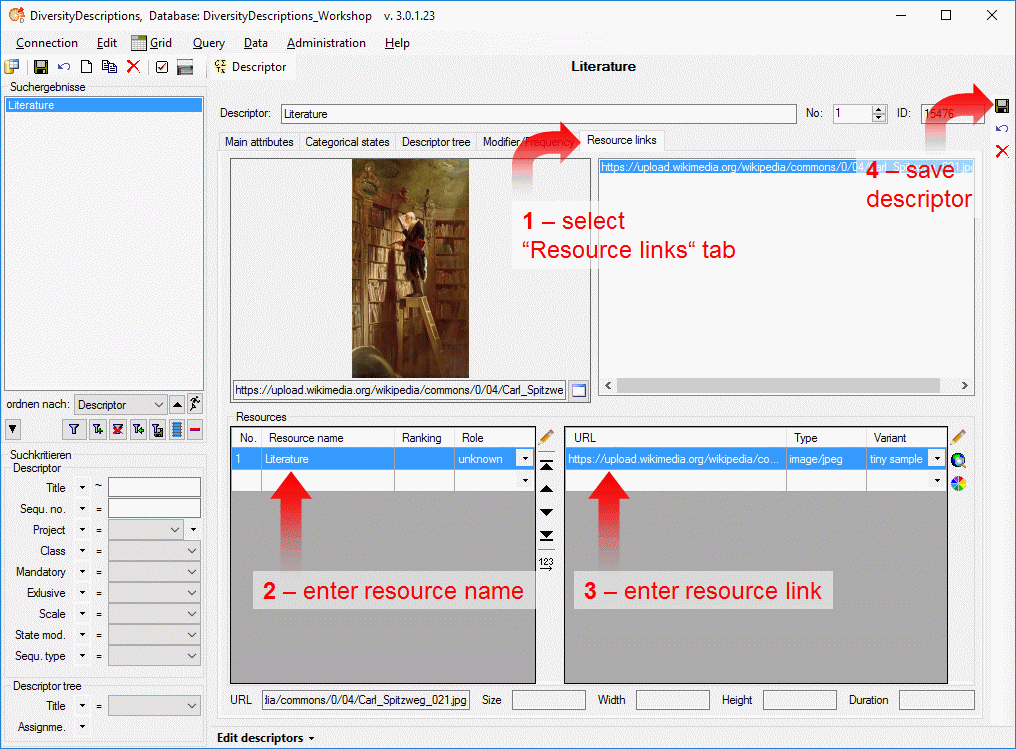
If you like, you may now enter additional descriptor data like a detailled project descripition ("Details") or "Notes". But we want to attach a resource link to our new text descriptor, that symbolizes the descriptor's duty. Therefore select the "Resource links" tab (see point 1 in image below) and enter the resource name "Literature" (see point 2 in image below). Now you can enter the URL of a picture that is reachable in the internet (see point 3 in image below, a link to Wikipedia was used). Alternatively you may double-click on the "URL" field to open a browser window, where you can navigate to the picture location. Finally, don't forget to save your changes (see point 4 in image below).

Until now the descriptor is not assigned to any project, i.e. it cannot be used for entering descriptive data. Assignment of descriptors to projects is done by using "descriptor trees". This allows on the one hand a thematical grouping of the descriptors, on the other hand the descriptors may be appended to several trees simultaniously. I.e. descriptors my be used in several distinct projects.
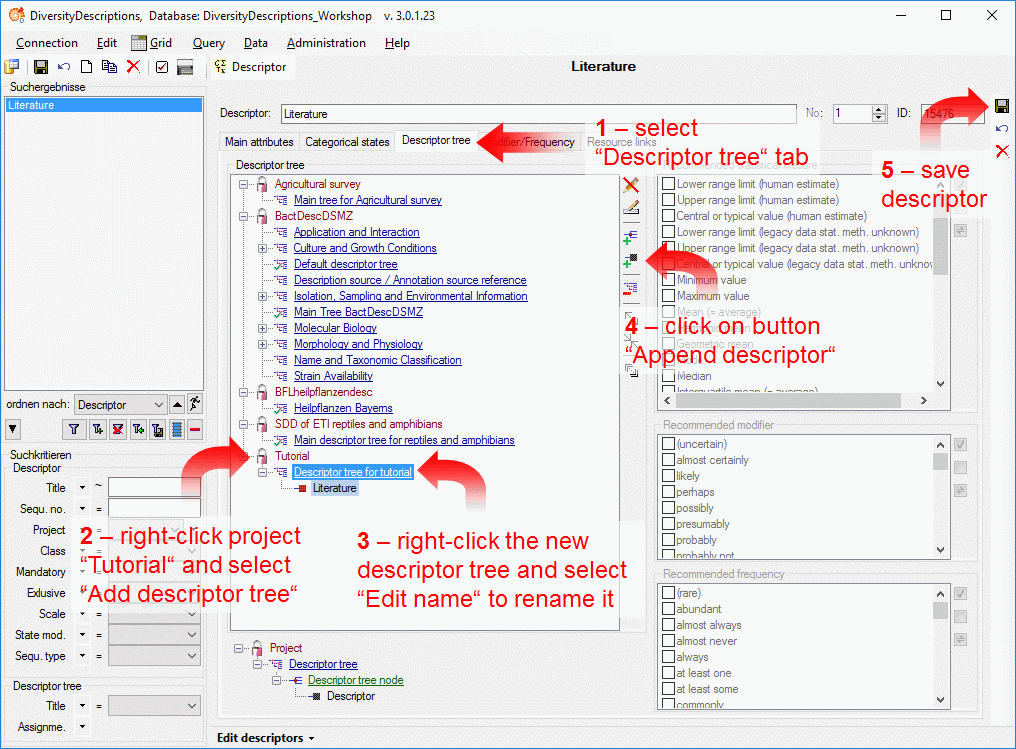
Since no descriptor tree has been created yet, select
the "Descriptor tree" tab (see point
1 in image below), right-click the project "Tutorial" and
select context menu entry "Add descriptor tree" (see point 2 in image below). A new descriptor tree is appended
to the project "Tutorial" with a numeric name. Right-click the descriptor
tree and select "Edit name" from the context menu to change the name to
"Descriptor tree for tutorial" (see point
3 in image below). To append the actual descriptor to the tree, click
button
 at the right tool bar (see point 4
in image below). In the "Descriptor tree" tab most functions are alternatively
accessible by the tool bar at the right or by the context menu that opens when you
right-click a tree node. Finally, don't forget to save your changes (see point
5 in image below).

A more detailled description of all editing options can be found in the Edit descriptors section of this manual.
This tutorial is continued in the sections listed below.