Subsections of Access
Diversity Agents
Login Administration
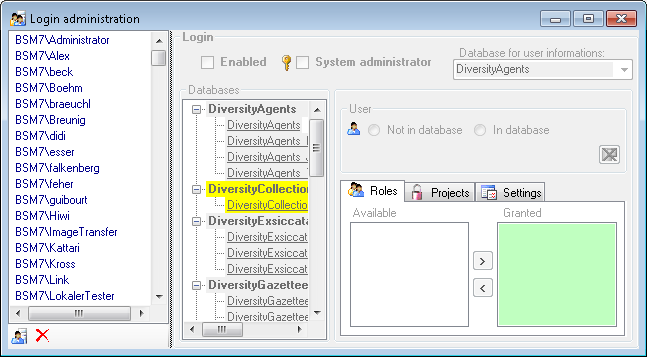
To administrate the logins on the database server, their permissions and
roles respectively as well as access to projects choose
Administration - Database - Logins ... from the menu. A window
will open as shown below.
To set the website where information about details concerning the
General Data Protection
Regulation
are shown, click on the  button.
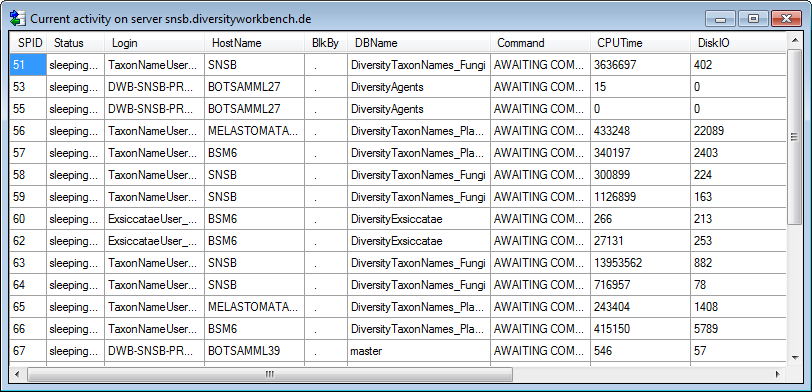
To see the current activity on the server click on the
 button. A window as shown below will open
listing all user related processes on the server.
button. A window as shown below will open
listing all user related processes on the server.
To administrate the linked servers, click on the
 button.
To send a feedback click on the  feedback button.
Statistics
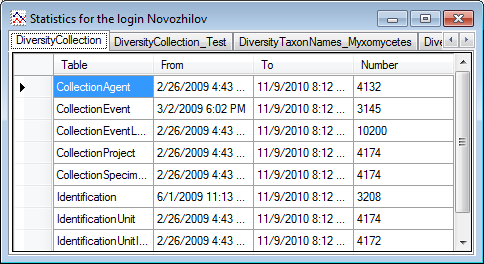
To see the activity of a login click on the  button. A window will open as shown below listing all databases and
tables together with the time span (From - To) and the number of data
sets where any activity of the current login has been found.
button. A window will open as shown below listing all databases and
tables together with the time span (From - To) and the number of data
sets where any activity of the current login has been found.
Creation of login
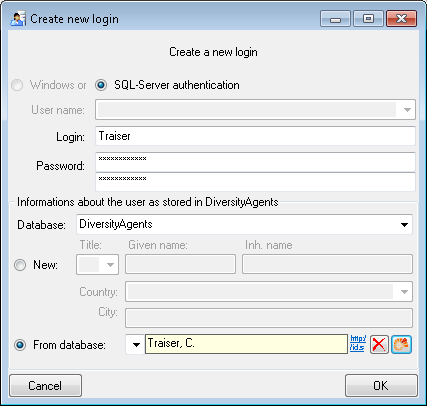
To create a new login click on the  button. A
window will open as shown below. A login that should be able to create
new logins must to be a System administrator.
button. A
window will open as shown below. A login that should be able to create
new logins must to be a System administrator.
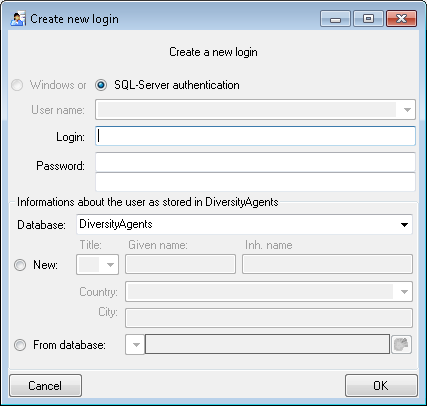
Here you can enter the name of the new login, the password and the
information about the user which will be stored in a DiversityAgents
database. You may either create a new entry in this database or select
an existing one: Click on the  DWB button
to search for a name in the database (see below).
DWB button
to search for a name in the database (see below).
Copy a login
To copy a login including all permissions etc. into a new login, select
the original login in the list and click on the
 button.
Edit a login
To edit the access for a login on the server select the login in the
list. If a login should be disabled , uncheck
the enabled checkbox (see below).

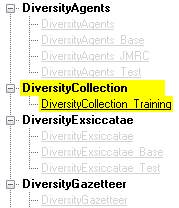
All databases on the server will be listed with the current database
showing a yellow background. The databases where the login has [no
access] will be listed in
[gray] while the databases accessible for a
login are black.
Access of a login to a database
To allow the access to a database select the database from the list and
choose database as shown below.

The state  and date of
the privacy consent according to the General Data Protection
Regulation
is shown in dependence of the selected database.
and date of
the privacy consent according to the General Data Protection
Regulation
is shown in dependence of the selected database.
Roles of a login in a database
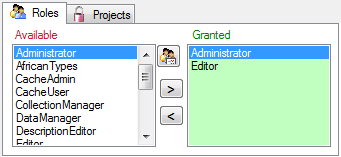
Use the > and < buttons to add or remove roles for the login
in the database (see below).
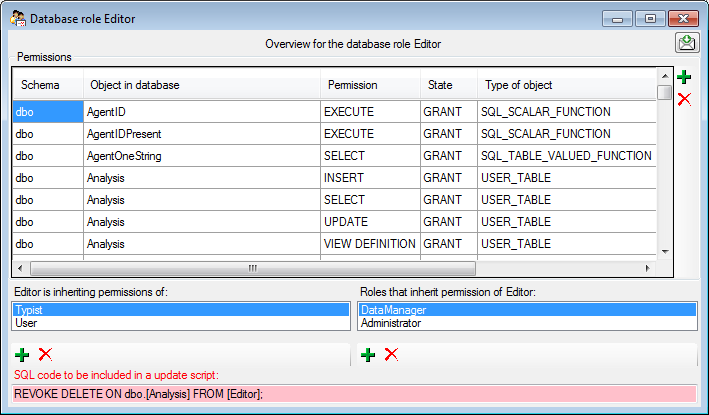
To see the detailed permissions of a role, select it in the list of
[Available] roles and click on the
 button. A window as shown below will open
listing all objects in the database the role has permissions for (see
below).
button. A window as shown below will open
listing all objects in the database the role has permissions for (see
below).
As a database owner you can edit the permissions and role memberships
with the  and
and  buttons. Please
keep in mind that any change of the permissions may cause serious
troubles and should only be used for testing and bug fixing. The final
setting of the permissions should be performed by a proper update script
of the database. For every action you will get the code that is to be
included in an update script (see below).
buttons. Please
keep in mind that any change of the permissions may cause serious
troubles and should only be used for testing and bug fixing. The final
setting of the permissions should be performed by a proper update script
of the database. For every action you will get the code that is to be
included in an update script (see below).
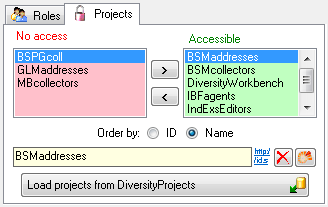
Projects for a login in a database
Depending on the database you can edit the list of projects accessible
for a login (see below). Projects are related to the module
DiversityProjects. To get additional information about a project select
it in the list and click on the
button.
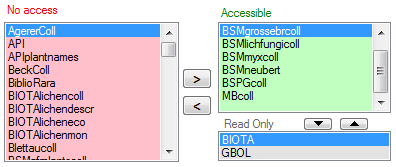
Starting with database version 02.05.35 next to the projects with full
access, a second list provides projects with [Read
Only] access (see image
below). Use the  and
and  buttons to
move projects between Accessible and Read Only. If a
project is set on [Read Only]
a user can still add annotations. Starting with
version 4.3.219 a project as a whole can be locked with the restriction
of access to read only. For more details see chapter Project
administration.
buttons to
move projects between Accessible and Read Only. If a
project is set on [Read Only]
a user can still add annotations. Starting with
version 4.3.219 a project as a whole can be locked with the restriction
of access to read only. For more details see chapter Project
administration.
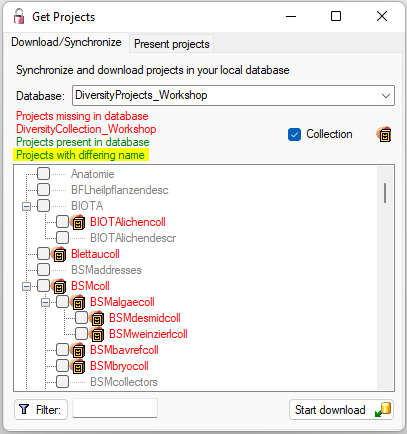
To load additional projects click on the Load projects
 button. A window will open as shown below.
Projects already in the database will be listed in
green, missing projects in red (see below). Check all projects you need in your database and
click the Start download button.
button. A window will open as shown below.
Projects already in the database will be listed in
green, missing projects in red (see below). Check all projects you need in your database and
click the Start download button.
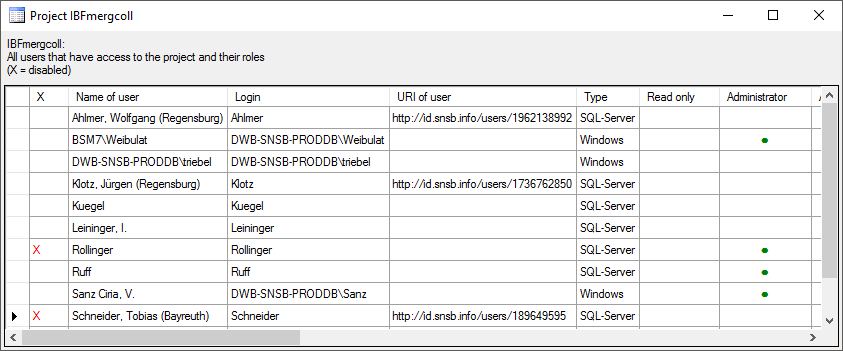
To see an overview of the users within a project select one of the
project in either list and click on the corresponding button
 . A window as shown below will open listing all
users and their roles with access to the selected project.
. A window as shown below will open listing all
users and their roles with access to the selected project.
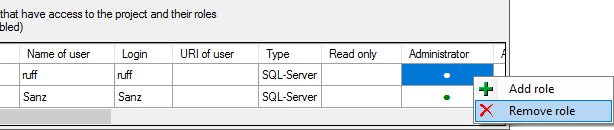
To add or remove a role for a login, select the corresponding field and
choose or from the context
menu (see below).
Settings of a login in a database
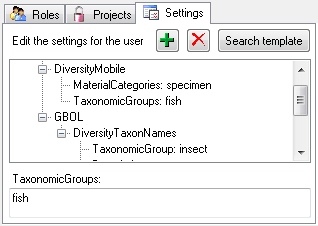
Depending on the database you can edit the settings of a login as shown
below.
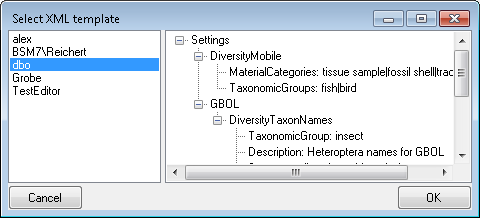
If you wish to use settings already defined for another login, click on
the Search template button. A window (see below) will open where you can
choose among the settings defined for logins in the database.
Overview for a login
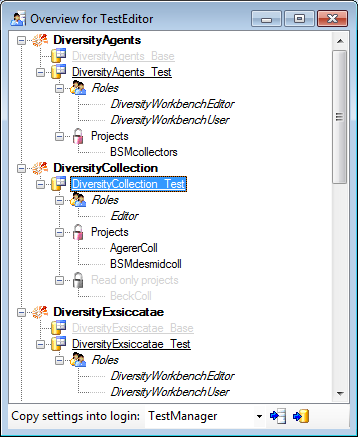
If you want to see an overview of all permissions and project for a
login, click on the  button. A window as shown
below will open. It lists all modules
and their
button. A window as shown
below will open. It lists all modules
and their  databases, the
  roles,
  accessible projects and
 read only projects for a login.
To copy the permissions and projects of the current login to another
login, select the login where the settings should be copied to from the
list at the base of the window and click on the  button to copy the settings for all databases or the
 button to copy the settings of the selected
database into this login.
button to copy the settings of the selected
database into this login.
Overview for a database
If you see an overview of all user and roles in a database, click on the
 button. A window a shown below will open.
It lists all user, roles and
projects in the database.
button. A window a shown below will open.
It lists all user, roles and
projects in the database.
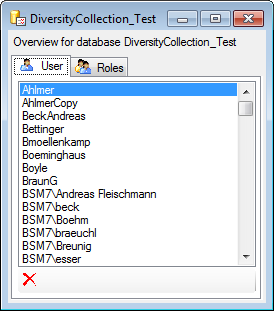
To remove a user, select it in the list and click on the
button.
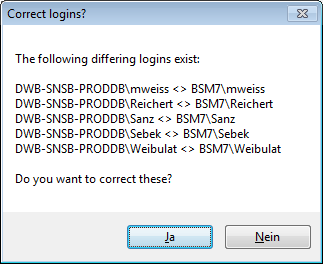
Correction of logins
If you select one of the databases, at the base a
 button may appear. This indicates that
there are windows logins listed where the name of the login does not
match the logins of the server. This may happen if e.g. a database was
moved from one server to another. To correct this, click on the button.
A list of deviating logins will be shown, that can be corrected
automatically.
button may appear. This indicates that
there are windows logins listed where the name of the login does not
match the logins of the server. This may happen if e.g. a database was
moved from one server to another. To correct this, click on the button.
A list of deviating logins will be shown, that can be corrected
automatically.
If logins with the same name but different server are found, one of them
has to be deleted to make the correction possible. You will get a list
where you can select those that should be removed.
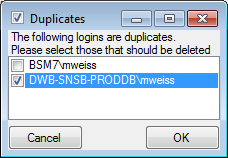
Select the duplicate logins that should be removed and click OK.
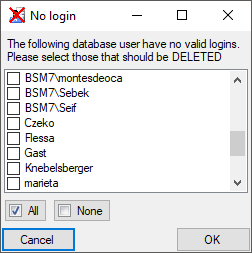
To find users within the database that have no valid login, click on the
 button. A window as shown below will open,
listing the users without a login. Select those that should be removed
and click OK. This will include a removal from the collection
managers.
button. A window as shown below will open,
listing the users without a login. Select those that should be removed
and click OK. This will include a removal from the collection
managers.
Diversity Agents
Security
A user may be in several groups with diverse rights in the database.
Here certain higher groups have all rights of lower groups in addition
to special rights for the higher group, e.g. the group User may only
read data of certain tables while Typist has the rights of User and
additionally may edit the data in certain tables - see overview below.
Summarized overview of some of the groups and their permissions as an example for the module DiversityCollection
| Role |
Permissions in addition to lower role and user group respectively |
Included rights |
| Administrator |
Delete data, edit user permissions |
DataManager |
| CollectionManager |
Administration of collections, handling loans etc. |
StorageManager |
| DataManager |
Delete data, edit image descripton templates |
Editor |
| Editor |
Create new entries and delete details (not entire data sets) |
Typist |
| Requester |
Has the right to place requests for specimen |
|
| StorageManager |
Administration of stored parts, handling loans etc. |
User |
| Typist |
Edit data |
User |
| User |
See the data of the data tables, add annotations |
|
To place a user in one of the groups, select Administration -
Database - Logins... from the menu. In the window that will open
select a login and a database. The roles available in the selected
database will be listed as shown below. Use the > and <
buttons to add or remove roles for the login in the database (see
below).
To see the detailed permissions of a role, select it in the list of
[Available] roles and click on the
button. A window as shown below will open
listing all objects in the database the role has permissions for (see
below).
If you are an Administrator you may add a user to one of these
groups.
Any user may have access to several projects.
Diversity Agents
Project access for user
The accessibility of projects for users can have 4 different states:
- No access: The current user has no access to
the project
 Accessible: The current user has access
to the project
Accessible: The current user has access
to the project- [Read only]: The
current user has read only access to the project
- [Locked]: The
project is locked. Any user can either none or read only access to
the project
To allow the current user access projects use the [ >
] button
for the selected project resp. the [ >>
] button
for all projects. To revoke access for the current user use the [ <
] button for the selected project resp. the [ <<
] button for all projects. To change the access for a
project to read only use the  button and the
button to remove a project from the read only
list.
button and the
button to remove a project from the read only
list.
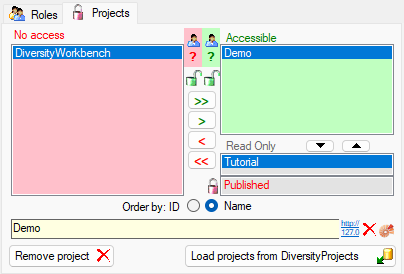
Locking of a project
To lock a selected project use the button.
For all users the project will be removed from the accessible or read
only list and transferred to the locked list.
This is only allowed for a database owner (dbo). Please make sure that
you really want to lock a project. Any dataset related to this project
will be set to read only for all users. For an introduction, please see
the a short tutorial
 .
.
To remove the locked state of a project, select the project in the No
access list and click on the button. The selected project will be moved
from the locked list into the read only list for those users that had
access to the project.
Retrieval of projects from DiversityProjects
 Details of the projects within the DiversityWorkbench are stored in the
database DiversityProjects. To access further information on a project
click on the button. To edit details in projects you require the
application DiversityProjects.exe in your application directory and
access to the database DiversityProjects. To synchronize the projects
listed in DiversityProjects you may use the synchronize function in the
user administration window as shown below. If
DiversityProjects is not available, you may create a new project by
clicking the project button. If DiversityProjects is
available, use the synchronize function
Details of the projects within the DiversityWorkbench are stored in the
database DiversityProjects. To access further information on a project
click on the button. To edit details in projects you require the
application DiversityProjects.exe in your application directory and
access to the database DiversityProjects. To synchronize the projects
listed in DiversityProjects you may use the synchronize function in the
user administration window as shown below. If
DiversityProjects is not available, you may create a new project by
clicking the project button. If DiversityProjects is
available, use the synchronize function
 .
.
Subsections of Database
Installation
Diversity Workbench modules use Microsoft SQL-Server 2014 or above as database
engine. If you do not have a database server with DiversityAgents
already available, you have to install the
database engine first. Download the free version of Microsoft SQL Server
Express 2016 or above from http://www.microsoft.com/downloads/.. Start
the program and follow the instructions for the installation.
Server configuration
To configure your server for remote access, launch the SQL Server
Configuration Manager (see image below).
If the tool is not available via the app menu but you have SqlServerManagmentStudio and SqlServer installed type [Win] + r to open the Run dialog, type the command SQLServerManager16.msc and press [Enter] to start the tool.
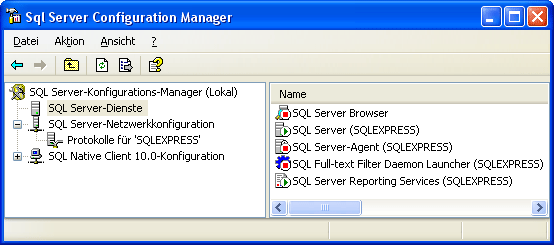
Then click on the "Protocols for SQLEXPRESS" node. Right click on
"TCP/IP" in the list of Protocols and choose "enable" for
TCP/IP.
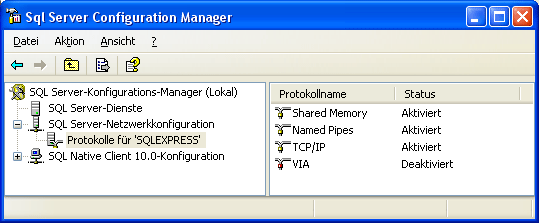
Right click on the TCP/IP node and select, "Properties" to open a
window as shown below.
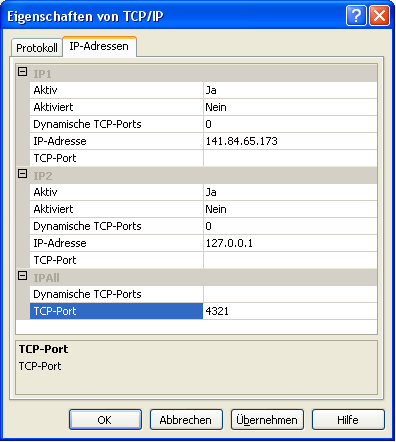
In the part IPALL clear out the value for "TCP Dynamic Ports".
Give a TCP-Port number to use when making remote connections, e.g.
"4321" as shown above. You have to restart the SQL Server Express
service before you can connect to your database.
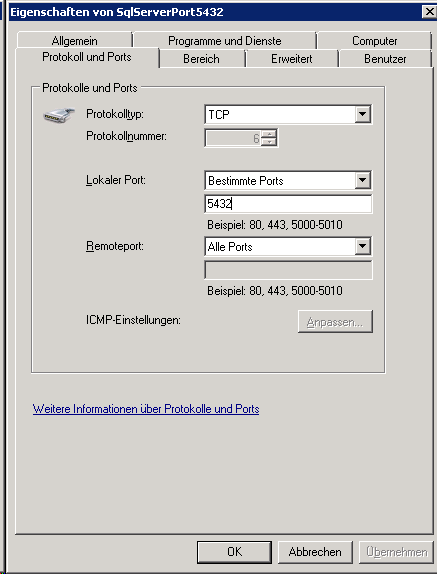
If you use a database on a server, make sure that the firewall of the
server allows access via the port you set for the connections (see
below).
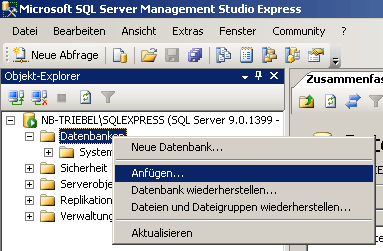
Start the Microsoft SQL Server Managment Studio and attach the database
as shown below. Choose the node "databases" and right-click on it to
open the context menu (see below). Then choose "attach" from the
context menu. A window will open where you can choose the file
DiversityAgents_Data.MDF from your database directory and attach it to
the database engine.
After the installation make shure to get the latest updates from
http://windowsupdate.microsoft.com/.
Database configuration
To configure your Database, use the Client as described in
Database configuration.
Diversity Agents
Creation
To configure your Database, choose Administration →
Database →  Rename
database to change the name of the database according to your
requirements. During this renaming all processes in the database will be
terminated (you will get a warning if processes from other host are
active).
Rename
database to change the name of the database according to your
requirements. During this renaming all processes in the database will be
terminated (you will get a warning if processes from other host are
active).
Afterwards you should adapt the address that is published by the
database for access by other modules. Choose Administration →
Database → Set
published address from the menu. This will change the published
address to the name of the server where your database is located and an
identifier for you database, e.g.
http://xy.diversityworkbench.de/Collection/.
Diversity Agents
Configuration
To configure your Database, choose Administration →
Database → Rename
database to change the name of the database according to your
requirements. During this renaming all processes in the database will be
terminated (you will get a warning if processes from other host are
active).
Afterwards you should adapt the address that is published by the
database for access by other modules. Choose Administration →
Database → Set
published address from the menu. This will change the published
address to the name of the server where your database is located and an
identifier for you database, e.g.
http://xy.diversityworkbench.de/Collection/.
DiversityAgents
Model 2.1.24
(10 October, 2024)
|
|
| Authors |
M. Weiss, A. Grunz, G. Hagedorn, D. Triebel, S. Seifert |
| License |
CC BY-ND 3.0 |
| Suggested citation |
M. Weiss, A. Grunz, G. Hagedorn, D. Triebel & S. Seifert (2024). DiversityAgents information model (version 2.1.24). http://www.diversityworkbench.net/Portal/DiversityAgentsModel_2.1.24 |
| Notes |
The model is implemented on MS SQL Server and the data types are also MS SQL Server specific |
Introduction:
DiversityAgents is the module for the administration of agents within the Diversity Workbench. Agents can be persons, organisations, institutions or departments and DiversityAgents allows the management of all sorts of information on those agents like details about names and addresses, allows the modelling of hierarchies in institutions or the relations between agents. It is manly used in Diversity Workbench for detailed information about collectors, editors or observers of specimens or collections but is also used in the access management in Diversity Workbench. But DiversityAgents keeps only data directly connected with the handling of agents and provides this information for other modules like DiversityCollection and DiversityTaxonNames. Data of other realms like e.g. projects or general references are handled in separate modules. DiversityAgents can be used as a stand-alone application.
- Agent is the central entity, containing the information directly related to the agent.
- AgentProject keeps the relation to the projects. Each agent may be included in several projects.
- AgentImage keeps the images for an agent.
- AgentContactInformation is the central entity, containing the contact informations for the Agent.
- AgentRelation keeps the relations between the agents.
- AgentReference keeps the references containing informations about the agent.
The following sections define the information model used in DiversityAgents. First the ER-diagram is presented to give an overview over the relations between the entities/tables and views. Then the structure is separately documented for each table with textual information which attributes are stored in which column.
ER-Diagram
Overview over all entities and relations used in the database model

TABLES
Table Agent
The main table with the data of the agent
| Column |
Data type |
Description |
Nullable |
Relation |
| AgentID |
int |
Unique ID for the Agent (= Primary key) |
NO |
- |
| AgentParentID |
int |
The AgentID of the superior agent if agents are organized within a hierarchy |
YES |
Refers to table Agent |
| AgentName |
nvarchar (200) |
The whole name of the agent as shown e.g. for selection in a user interface. For persons this entry will be generated as follows: LastName, FirstNames, AgentTitle. Default value: '' |
NO |
- |
| Version |
smallint |
The version of an agent record (revision number, internally filled by system). Default value: (1) |
NO |
- |
| AgentTitle |
nvarchar (50) |
The title of the agent, e.g. Dr., Prof. |
YES |
Refers to table AgentTitle_Enum |
| GivenName |
nvarchar (255) |
The first names of the agent (if a person) or the name of e.g. an institution |
YES |
- |
| GivenNamePostfix |
nvarchar (50) |
Variable part of name, correctly placed at end of given names |
YES |
- |
| InheritedNamePrefix |
nvarchar (50) |
Variable part of name, correctly placed at the beginning of the inherited names |
YES |
- |
| InheritedName |
nvarchar (255) |
The last names of the agent (if a person) |
YES |
- |
| InheritedNamePostfix |
nvarchar (50) |
Additions after inherited name, like generation (Jr., III.) or names of religious orders |
YES |
- |
| Abbreviation |
nvarchar (50) |
Abbreviation of the agent |
YES |
- |
| AgentType |
nvarchar (50) |
The type of the agent, e.g. person, company. Default value: N’person' |
YES |
Refers to table AgentType_Enum |
| AgentRole |
nvarchar (255) |
The role of an agent esp. a person within an organization. e.g. “Database Administrator” or “Curator” |
YES |
- |
| AgentGender |
nvarchar (50) |
The gender of the agent |
YES |
Refers to table AgentGender_Enum |
| Description |
nvarchar (1000) |
A description of the agent |
YES |
- |
| OriginalSpelling |
nvarchar (200) |
Name as originally written in e.g. chinese or cyrillic letters |
YES |
- |
| Notes |
nvarchar (MAX) |
Notes about the agent |
YES |
- |
| ValidFromDate |
datetime |
The date of the begin of the existence of the agent, e.g. the birthday of a person or the founding of an institution, calculated from ValidFromDay, - Month and -Year |
YES |
- |
| ValidFromDay |
tinyint |
The day of the begin of the existence of the agent |
YES |
- |
| ValidFromMonth |
tinyint |
The month of the begin of the existence of the agent |
YES |
- |
| ValidFromYear |
smallint |
The year of the begin of the existence of the agent |
YES |
- |
| ValidUntilDate |
datetime |
The date of the end of the exsistence of the agent, e.g. death of a person or closing of an institute, calculated from ValidUntilDay, - Month and -Year |
YES |
- |
| ValidUntilDay |
tinyint |
The day of the end of the existence of the agent |
YES |
- |
| ValidUntilMonth |
tinyint |
The month of the end of the existence of the agent |
YES |
- |
| ValidUntilYear |
smallint |
The year of the end of the existence of the agent |
YES |
- |
| ValidDateSupplement |
nvarchar (255) |
Verbal or additional date information, e.g. ’end of summer 1985’, ‘first quarter’. The time of the valid date if necessary. |
YES |
- |
| PlaceOfBirth |
nvarchar (500) |
The place (e.g. a city) where a person was born or an institution was founded |
YES |
- |
| PlaceOfDeath |
nvarchar (500) |
The place (e.g. a city) where the person died |
YES |
- |
| SynonymToAgentID |
int |
The AgentID of the agent which was selected as a replacement for the current agent, e.g. if to equal datasets were imported from different sources |
YES |
Refers to table Agent |
| SynonymisationType |
nvarchar (50) |
The type of the synonymisation like “replaced with”, “synonym to” |
YES |
Refers to table AgentSynonymisationType_Enum |
| RevisionLevel |
nvarchar (50) |
The level of the revision of the agent, e.g. ‘unchecked’, ‘final revision’. Default value: N’unchecked’ |
YES |
Refers to table RevisionLevel_Enum |
| DataWithholdingReason |
nvarchar (255) |
If the dataset is withhold, the reason for withholding the data, otherwise null |
YES |
- |
| IgnoreButKeepForReference |
bit |
If true, the record is ignored for all purposes of evaluation (because contradicted). It is kept only to maintain the cited reference. If no reference is given, it may be deleted instead. Default value: (0) |
YES |
- |
| LogUpdatedBy |
nvarchar (50) |
Name of user who last updated the data. Default value: suser_sname() |
YES |
- |
| LogUpdatedWhen |
smalldatetime |
Date and time when the data were last updated. Default value: getdate() |
YES |
- |
| ContentLanguage |
nvarchar (50) |
The language of the content |
YES |
Refers to table LanguageCode_Enum |
Depending on:
- AgentGender_Enum
- AgentSynonymisationType_Enum
- AgentTitle_Enum
- AgentType_Enum
- LanguageCode_Enum
- RevisionLevel_Enum
trgInsAgent
Setting the value of column AgentName according to standard derived from content of given values in columns InheritedNamePrefix, Inheritedname, GivenName, GivenNamePostfix, InheritedNamePostfix and AgentTitle
The contact information resp. addresses of the agents
| Column |
Data type |
Description |
Nullable |
Relation |
| AgentID |
int |
Refers to the ID of Agent (= Foreign key and part of primary key) |
NO |
Refers to table Agent |
| DisplayOrder |
tinyint |
Display order of records in user interface. DisplayOrder 1 corresponds to the preferred address (= part of primary key) |
NO |
- |
| AddressType |
nvarchar (50) |
Type of the adress, e.g. private |
YES |
Refers to table AddressType_Enum |
| Country |
nvarchar (255) |
Country of the address |
YES |
- |
| City |
nvarchar (255) |
City of the address |
YES |
- |
| PostalCode |
nvarchar (50) |
ZIP or postcode of the address (usually output before or after the city) |
YES |
- |
| Streetaddress |
nvarchar (255) |
Usually street name and number, but may also contain post office box |
YES |
- |
| Address |
nvarchar (255) |
Free text postal address of the agent |
YES |
- |
| Telephone |
nvarchar (50) |
Phone number, including area code |
YES |
- |
| CellularPhone |
nvarchar (50) |
The number of a mobile telephone device of the agent |
YES |
- |
| Telefax |
nvarchar (50) |
Fax number, including area code |
YES |
- |
| Email |
nvarchar (255) |
E-mail address of the agent |
YES |
- |
| URI |
nvarchar (255) |
URI pointing to a homepage containing further information |
YES |
- |
| Notes |
nvarchar (MAX) |
Notes about this address |
YES |
- |
| ValidFrom |
datetime |
The date when this address became valid as date according to ISO 8601 |
YES |
- |
| ValidUntil |
datetime |
The date of the expiration of the validity of this address as date according to ISO 8601 |
YES |
- |
| DataWithholdingReason |
nvarchar (255) |
If the dataset is withhold, the reason for withholding the data, otherwise null. Default value: N’Withhold by default’ |
YES |
- |
| LogUpdatedBy |
nvarchar (50) |
Name of user who last updated the data. Default value: suser_sname() |
YES |
- |
| LogUpdatedWhen |
smalldatetime |
Date and time when the data were last updated. Default value: getdate() |
YES |
- |
Depending on:
Table AgentDescriptor
The Descriptors for the agents
| Column |
Data type |
Description |
Nullable |
Relation |
| AgentID |
int |
Unique ID for the Agent (foreign key + part of primary key) |
NO |
Refers to table Agent |
| DescriptorID |
int |
Unique ID for the descriptor, Part of PK |
NO |
- |
| Descriptor |
nvarchar (200) |
The Descriptor. Default value: '’ |
NO |
- |
| URL |
varchar (500) |
URL of the Descriptor. In case of a module related Descriptor, the link to the module entry resp. the related webservice. Default value: '' |
YES |
- |
| DescriptorType |
nvarchar (50) |
Type of the Descriptor as described in table AgentDescriptorType_Enum. Default value: N’Descriptor' |
YES |
Refers to table AgentDescriptorType_Enum |
| LogInsertedBy |
nvarchar (50) |
Name of user who first entered (typed or imported) the data. Default value: suser_sname() |
YES |
- |
| LogInsertedWhen |
smalldatetime |
Date and time when the data were first entered (typed or imported) into this database. Default value: getdate() |
YES |
- |
| LogUpdatedBy |
nvarchar (50) |
Name of user who last updated the data. Default value: suser_sname() |
YES |
- |
| LogUpdatedWhen |
smalldatetime |
Date and time when the data were last updated. Default value: getdate() |
YES |
- |
| RowGUID |
uniqueidentifier |
-. Default value: newsequentialid() |
NO |
- |
Depending on:
- Agent
- AgentDescriptorType_Enum
Table AgentExternalDatabase
The external databases from which data in the database may have been imported from
| Column |
Data type |
Description |
Nullable |
Relation |
| ExternalDatabaseID |
int |
An ID to identify an external data collection of plant names (primary key, the ID has no meaning outside of the DiversityWorkbench system) |
NO |
- |
| ExternalDatabaseName |
nvarchar (100) |
The name of the data collection that has been integrated or can be linked to for further analysis |
YES |
- |
| ExternalDatabaseVersion |
nvarchar (255) |
The version of this data collection (either official version number, or dates when the collection was integrated) |
YES |
- |
| Rights |
nvarchar (500) |
A description of copyright agreements or permission to use data from the external database |
YES |
- |
| ExternalDatabaseAuthors |
nvarchar (200) |
The persons or institutions responsible for the external database |
YES |
- |
| ExternalDatabaseURI |
nvarchar (300) |
The link to the database provider resp. the external database |
YES |
- |
| ExternalDatabaseInstitution |
nvarchar (300) |
The institution responsible for the external database |
YES |
- |
| InternalNotes |
nvarchar (1500) |
Additional notes concerning this data collection |
YES |
- |
| ExternalAttribute_AgentID |
nvarchar (255) |
The table and field name in the external data collection to which PlantNameAnalysis.ExternalNameID refers |
YES |
- |
| PreferredSequence |
tinyint |
For selection in e.g. picklists: of several equal names only the name from the source with the lowest preferred sequence will be provided. |
YES |
- |
| Disabled |
bit |
If this source should be disabled for selection of names e.g. in picklists |
YES |
- |
| LogInsertedBy |
nvarchar (50) |
Name of user who first entered (typed or imported) the data. |
YES |
- |
| LogInsertedWhen |
smalldatetime |
Date and time when the data were first entered (typed or imported) into this database. |
YES |
- |
| LogUpdatedBy |
nvarchar (50) |
Name of user who last updated the data. |
YES |
- |
| LogUpdatedWhen |
smalldatetime |
Date and time when the data were last updated. |
YES |
- |
Table AgentExternalID
The ID’s of data that were imported from foreign souces
| Column |
Data type |
Description |
Nullable |
Relation |
| AgentID |
int |
Unique ID for the Agent (foreign key + part of primary key) |
NO |
Refers to table Agent |
| ExternalDatabaseID |
int |
The ID of an external taxonomic data collection as defined in AgentExternalDatabase (foreign key + part of primary key). Default value: '' |
NO |
Refers to table AgentExternalDatabase |
| ExternalAgentURI |
varchar (255) |
The URI (e.g. LSID) of the external agent |
YES |
- |
| LogInsertedBy |
nvarchar (50) |
Name of user who first entered (typed or imported) the data. Default value: suser_sname() |
YES |
- |
| LogInsertedWhen |
smalldatetime |
Date and time when the data were first entered (typed or imported) into this database. Default value: getdate() |
YES |
- |
| LogUpdatedBy |
nvarchar (50) |
Name of user who last updated the data. Default value: suser_sname() |
YES |
- |
| LogUpdatedWhen |
smalldatetime |
Date and time when the data were last updated. Default value: getdate() |
YES |
- |
Depending on:
- Agent
- AgentExternalDatabase
Table AgentHierarchyOther
Other hierarchies of the agent
| Column |
Data type |
Description |
Nullable |
Relation |
| AgentID |
int |
Refers to the ID of Agent (= Foreign key and part of primary key) |
NO |
Refers to table Agent |
| HierarchyID |
int |
Identifier of the hierarchy, part of PK |
NO |
- |
| AgentParentID |
int |
The AgentID of the superior agent if agents are organized within a hierarchy |
NO |
Refers to table Agent |
| ValidFrom |
datetime |
The start time of the hierarchy, e.g. when a person was employed in an institution |
YES |
- |
| ValidUntil |
datetime |
The end of a hierarchy, e.g. when an employment ended |
YES |
- |
| Notes |
nvarchar (MAX) |
Notes about the other hierarchy |
YES |
- |
| LogCreatedWhen |
datetime |
Point in time when this data set was created. Default value: getdate() |
YES |
- |
| LogCreatedBy |
nvarchar (50) |
Name of the creator of this data set. Default value: suser_sname() |
YES |
- |
| LogUpdatedBy |
nvarchar (50) |
Name of user who last updated the data. Default value: suser_sname() |
YES |
- |
| LogUpdatedWhen |
smalldatetime |
Date and time when the data were last updated. Default value: getdate() |
YES |
- |
| RowGUID |
uniqueidentifier |
-. Default value: newsequentialid() |
NO |
- |
Depending on:
Table AgentIdentifier
Identifier for the agent
| Column |
Data type |
Description |
Nullable |
Relation |
| AgentID |
int |
Refers to the ID of Agent (= Foreign key and part of primary key) |
NO |
Refers to table Agent |
| Identifier |
nvarchar (400) |
Identifier for the agent, part of PK |
NO |
- |
| IdentifierURI |
varchar (500) |
URI of Identifier |
YES |
- |
| Type |
nvarchar (50) |
Type of the identifier as defined in table AgentIdentifierType_Enum |
YES |
Refers to table AgentIdentifierType_Enum |
| Notes |
nvarchar (MAX) |
Notes about the identifier |
YES |
- |
| LogCreatedWhen |
datetime |
Point in time when this data set was created. Default value: getdate() |
YES |
- |
| LogCreatedBy |
nvarchar (50) |
Name of the creator of this data set. Default value: suser_sname() |
YES |
- |
| LogUpdatedWhen |
smalldatetime |
Date and time when the data were last updated. Default value: getdate() |
YES |
- |
| LogUpdatedBy |
nvarchar (50) |
Name of user who last updated the data. Default value: suser_sname() |
YES |
- |
| RowGUID |
uniqueidentifier |
-. Default value: newsequentialid() |
NO |
- |
Depending on:
- Agent
- AgentIdentifierType_Enum
Table AgentImage
The images of the agents
| Column |
Data type |
Description |
Nullable |
Relation |
| AgentID |
int |
Unique ID for the Agent (foreign key + part of primary key) |
NO |
Refers to table Agent |
| URI |
varchar (255) |
The complete URI address of the image. This is only a cached value if ResourceID is available referring to the module DiversityResources |
NO |
- |
| LogInsertedBy |
nvarchar (50) |
Name of user who first entered (typed or imported) the data. Default value: suser_sname() |
YES |
- |
| LogInsertedWhen |
smalldatetime |
Date and time when the data were first entered (typed or imported) into this database. Default value: getdate() |
YES |
- |
| LogUpdatedBy |
nvarchar (50) |
Name of user who last updated the data. Default value: suser_sname() |
YES |
- |
| LogUpdatedWhen |
smalldatetime |
Date and time when the data were last updated. Default value: getdate() |
YES |
- |
| Description |
nvarchar (MAX) |
Description of the resource |
YES |
- |
| Type |
nvarchar (50) |
The type of the image |
YES |
Refers to table AgentImageType_Enum |
| Sequence |
int |
The sequence of the image. Default value: (1) |
YES |
- |
| DataWithholdingReason |
nvarchar (255) |
If the dataset is withhold, the reason for withholding the data, otherwise null. Default value: N’Withhold by default' |
YES |
- |
Depending on:
- Agent
- AgentImageType_Enum
trgInsAgentImage
Table AgentKeyword
The keywords for the agents
| Column |
Data type |
Description |
Nullable |
Relation |
| AgentID |
int |
Unique ID for the Agent (foreign key + part of primary key) |
NO |
Refers to table Agent |
| Keyword |
nvarchar (200) |
The keyword |
NO |
- |
| LogInsertedBy |
nvarchar (50) |
Name of user who first entered (typed or imported) the data. Default value: suser_sname() |
YES |
- |
| LogInsertedWhen |
smalldatetime |
Date and time when the data were first entered (typed or imported) into this database. Default value: getdate() |
YES |
- |
| LogUpdatedBy |
nvarchar (50) |
Name of user who last updated the data. Default value: suser_sname() |
YES |
- |
| LogUpdatedWhen |
smalldatetime |
Date and time when the data were last updated. Default value: getdate() |
YES |
- |
Depending on:
trgInsAgentKeyword
Table AgentProject
The projects of the agents
| Column |
Data type |
Description |
Nullable |
Relation |
| AgentID |
int |
Unique ID for the Agent (= Foreign key) |
NO |
Refers to table Agent |
| ProjectID |
int |
The ID of the project. Default value: (0) |
NO |
Refers to table ProjectProxy |
| LogInsertedBy |
nvarchar (50) |
Name of user who first entered (typed or imported) the data. Default value: suser_sname() |
YES |
- |
| LogInsertedWhen |
smalldatetime |
Date and time when the data were first entered (typed or imported) into this database. Default value: getdate() |
YES |
- |
| LogUpdatedBy |
nvarchar (50) |
Name of user who last updated the data. Default value: suser_sname() |
YES |
- |
| LogUpdatedWhen |
smalldatetime |
Date and time when the data were last updated. Default value: getdate() |
YES |
- |
Depending on:
Table AgentReference
References containing informations about the agent
| Column |
Data type |
Description |
Nullable |
Relation |
| AgentID |
int |
Refers to the ID of Agent (= Foreign key and part of primary key) |
NO |
Refers to table Agent |
| ReferenceTitle |
nvarchar (255) |
The title of the publication where information about the agent was published. Note this is only a cached value where ReferenceURI is present |
NO |
- |
| ReferenceURI |
varchar (255) |
URI of reference where information about the agent, e.g. referring to the module DiversityReferences |
YES |
- |
| ReferenceDetails |
nvarchar (50) |
Details within the reference, e.g. pages |
YES |
- |
| ContainsImage |
tinyint |
If the reference contains an image of the agent |
YES |
- |
| ContainsReferencelist |
tinyint |
If the reference contains a publication list of the agent |
YES |
- |
| Notes |
nvarchar (255) |
Notes about the reference |
YES |
- |
| LogUpdatedBy |
nvarchar (50) |
Name of user who last updated the data. |
YES |
- |
| LogUpdatedWhen |
smalldatetime |
Date and time when the data were last updated. |
YES |
- |
Depending on:
trgInsAgentReference
Table AgentRelation
Relations of the agent to other agents
| Column |
Data type |
Description |
Nullable |
Relation |
| AgentID |
int |
Refers to the ID of Agent (= Foreign key and part of primary key) |
NO |
Refers to table Agent |
| RelatedAgentID |
int |
The AgentID of the related agent |
NO |
- |
| RelationType |
nvarchar (50) |
The type of the relation between the agents, e.g. “parent of”, “child of”, “married to” |
YES |
Refers to table AgentRelationType_Enum |
| Notes |
nvarchar (255) |
Notes about the relation |
YES |
- |
| DataWithholdingReason |
nvarchar (255) |
If the dataset is withhold, the reason for withholding the data, otherwise null |
YES |
- |
| LogUpdatedBy |
nvarchar (50) |
Name of user who last updated the data. |
YES |
- |
| LogUpdatedWhen |
smalldatetime |
Date and time when the data were last updated. |
YES |
- |
Depending on:
- Agent
- AgentRelationType_Enum
trgInsAgentRelation
Enumeration tables
Tabledesign
| Column |
Data type |
Description |
| Code |
nvarchar (50) |
A text code that uniquely identifies each object in the enumeration (primary key). This value may not be changed, because the application may depend upon it. |
| ParentCode |
nvarchar (50) |
The code of the superior entry, if a hierarchy within the entries is necessary |
| ParentRelation |
nvarchar (50) |
Relation to parent entry, e.g. part of |
| Description |
nvarchar (500) |
Description of enumerated object, displayed in the user interface |
| DisplayText |
nvarchar (50) |
Short abbreviated description of the object, displayed in the user interface |
| DisplayOrder |
smallint |
The order in which the entries are displayed. The order may be changed at any time, but all values must be unique. |
| DisplayEnable |
bit |
Enumerated objects can be hidden from the user interface if this attribute is set to false (= unchecked check box) |
| URL |
varchar (500) |
A link to further information about the enumerated object |
| InternalNotes |
nvarchar (500) |
Internal development notes about usage, definition, etc. of an enumerated object |
| Icon |
image |
A symbol representing this entry in the user interface |
| ModuleName |
varchar (50) |
If the enumerated entry is related to a DiversityWorkbench module or a related webservice, the name of the DiversityWorkbench module, e.g. DiversityAgents |
| RowGUID |
uniqueidentifier |
-. Default value: newsequentialid() |
Table AddressType_Enum
Lookup table for the types of the addresses
Dependent tables:
Content
| Code |
Description |
| office |
office address |
| private |
private address |
Table AgentDescriptorType_Enum
The type of the Descriptors
Dependent tables:
Table AgentGender_Enum
Gender of the agent: female or male
Dependent tables:
Content
| Code |
Description |
| female |
|
| male |
|
Table AgentIdentifierType_Enum
Types of the agent identifier, e.g. ISNI
Dependent tables:
Content
| Code |
Description |
| ISNI |
International Standard Name Identifier (ISO 27729) |
| ORCID |
Open Researcher Contributor Identification |
| ROR |
Research Organization Registry |
Table AgentImageType_Enum
Types of images in table AgentImage, e.g. Logo
Dependent tables:
Content
| Code |
Description |
| Logo |
Logo |
| Portrait |
Portrait |
Table AgentNameDisplayType_Enum
Display types of the names of the agents, defining e.g. the position of title, given and inherited part of the name and their abbreviation
Dependent tables:
Content
| Code |
Description |
| Abbr |
The international defined standard arbbreviation; e.g. L. for Linne |
| G. Ii |
Given name. Inherited name; e.g. H. Hertel |
| Gg Ii |
Given name InheritedName; e.g. Hannes Hertel |
| Ii, G. |
Inherited name, GivenName; e.g. Hertel, H. |
| Ii, Gg |
Inherited name, GivenName; e.g. Hertel, Hannes |
| Tt. G. Ii |
Titel Given name. Inherited name; e.g. Prof. H. Hertel |
| Tt. Gg Ii |
Titel Given name Inherited name; e.g. Prof. Hannes Hertel |
Table AgentRelationType_Enum
Relation types of agents, e.g. Child of
Dependent tables:
Content
| Code |
Description |
| Child of |
|
| Married to |
|
| Parent of |
|
Table AgentSynonymisationType_Enum
Synonymisation types of agents, e.g. synonym to
Dependent tables:
Content
| Code |
Description |
| replaced with |
if the agent was replaced by another entry |
| synonym to |
if the agent is synonym to another agent |
Table AgentTitle_Enum
Lookup table for the titles of the agents
Dependent tables:
Content
| Code |
Description |
|
|
| Dr. |
|
| Frater |
|
| Pater |
|
| Prof. |
|
| Prof. Dr. |
|
Table AgentType_Enum
Lookup table for the types of the agents
Dependent tables:
Content
| Code |
Description |
| Collection |
|
| Company |
|
| Department |
|
| Group |
|
| Institution |
|
| Person |
|
| University |
|
Table LanguageCode_Enum
The codes for the languages
Dependent tables:
Content
| Code |
Description |
|
|
| af |
Afrikaans |
| ar |
Arabisch |
| az |
Aserbaidschanisch |
| be |
Belarussisch |
| bg |
Bulgarisch |
| ca |
Katalanisch |
| cs |
Tschechisch |
| da |
Dänisch |
| de |
Deutsch |
| el |
Griechisch |
| en |
Englisch |
| es |
Spanisch |
| et |
Estnisch |
| eu |
Baskisch |
| fa |
Farsi |
| fi |
Finnisch |
| fo |
Färingisch |
| fr |
Französisch |
| gl |
Galizisch |
| gu |
Gujarati |
| he |
Hebräisch |
| hi |
Hindi |
| hr |
Kroatisch |
| hu |
Ungarisch |
| hy |
Armenisch |
| id |
Indonesisch |
| is |
Isländisch |
| it |
Italienisch |
| ja |
Japanisch |
| ka |
Georgisch |
| kk |
Kasachisch |
| kn |
Kannada |
| ko |
Koreanisch |
| ky |
Kirgisisch |
| lt |
Litauisch |
| lv |
Lettisch |
| mk |
Mazedonisch |
| mn |
Mongolisch |
| mr |
Marathi |
| ms |
Malaiisch |
| nl |
Niederländisch |
| no |
Norwegisch |
| pa |
Punjabi |
| pl |
Polnisch |
| pt |
Portugiesisch |
| ro |
Rumänisch |
| ru |
Russisch |
| sa |
Sanskrit |
| sk |
Slowakisch |
| sl |
Slowenisch |
| sq |
Albanisch |
| sv |
Schwedisch |
| sw |
Swahili |
| ta |
Tamil |
| te |
Telugu |
| th |
Thai |
| tr |
Türkisch |
| tt |
Tatarisch |
| uk |
Ukrainisch |
| ur |
Urdu |
| uz |
Usbekisch |
| vi |
Vietnamesisch |
| zh |
Chinesisch |
Table RevisionLevel_Enum
Lookup table for the revision level
Dependent tables:
Content
| Code |
Description |
| checked |
checked |
| final revision |
final revision |
| review required |
review required |
| to be deleted |
to be deleted |
| unchecked |
unchecked |
Diversity Agents
TABLES, VIEWS, FUNCTIONS, PROCEDURES, ROLES
The following objects are not included:
- Logging tables
- Enumeration tables
- System objects
- Objects marked as obsolete
- Previous versions of objects
TABLES
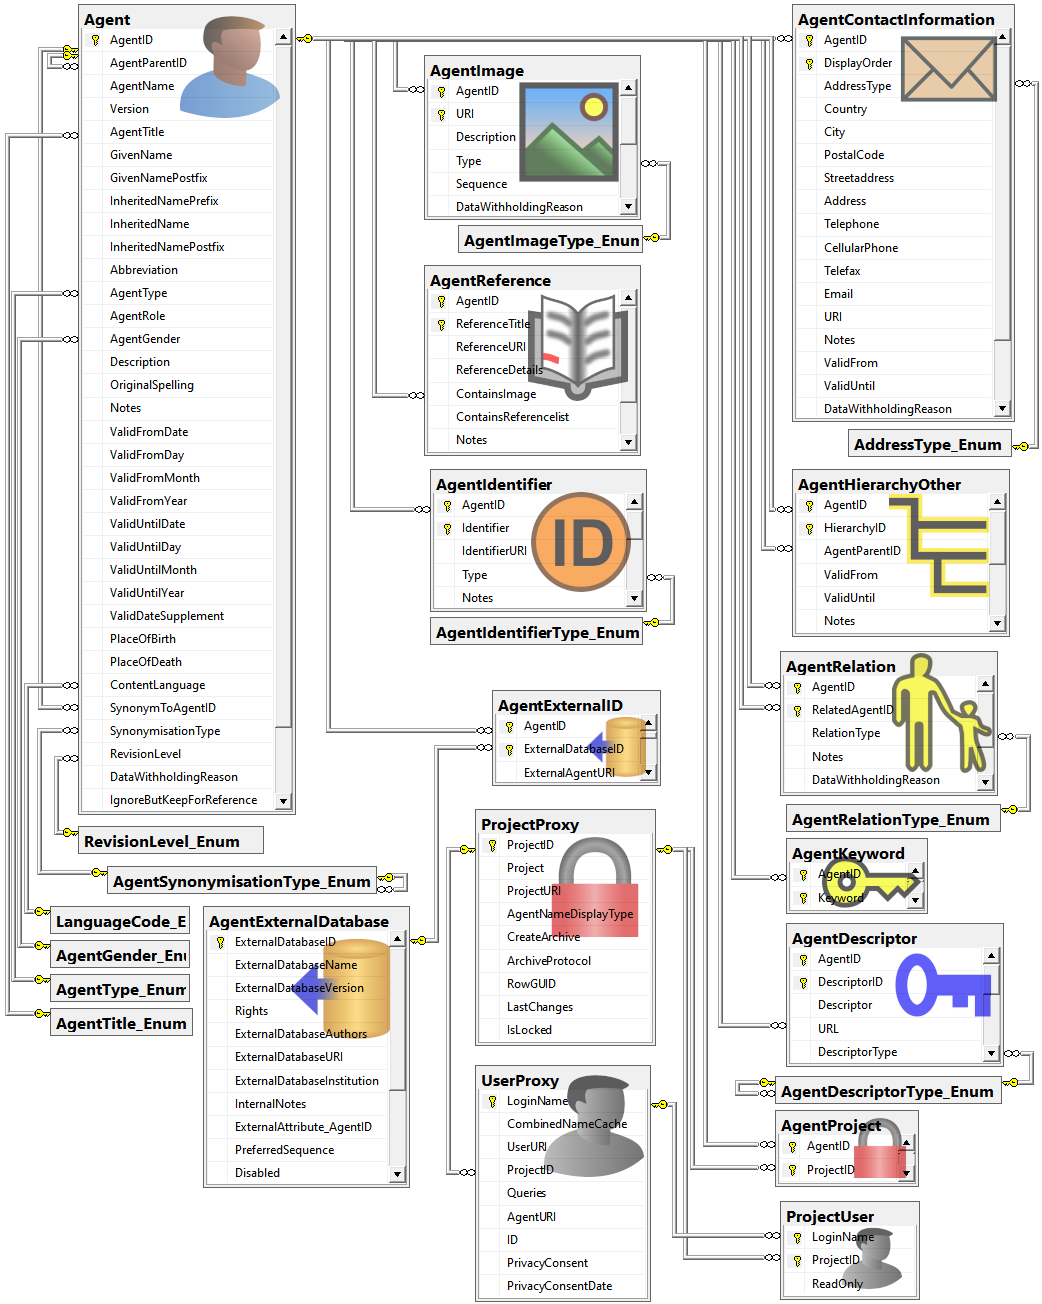
Table Agent
The main table with the data of the agent
| Column |
Data type |
Description |
Nullable |
Relation |
| AgentID |
int |
Unique ID for the Agent (= Primary key) |
NO |
- |
| AgentParentID |
int |
The AgentID of the superior agent if agents are organized within a hierarchy |
YES |
Refers to table Agent |
| AgentName |
nvarchar (200) |
The whole name of the agent as shown e.g. for selection in an user interface. For persons this entry will be generated as follows: LastName, FirstNames, AgentTitleDefault value: '' |
NO |
- |
| Version |
smallint |
The version of a agent record (revision number, internally filled by system)Default value: (1) |
NO |
- |
| AgentTitle |
nvarchar (50) |
The title of the agent, e.g. Dr., Prof. |
YES |
Refers to table AgentTitle_Enum |
| GivenName |
nvarchar (255) |
The first names of the agent (if a person) or the name of e.g. an institution |
YES |
- |
| GivenNamePostfix |
nvarchar (50) |
Variable part of name, correctly placed at end of given names |
YES |
- |
| InheritedNamePrefix |
nvarchar (50) |
Variable part of name, correctly placed at the beginning of the inherited names |
YES |
- |
| InheritedName |
nvarchar (255) |
The last names of the agent (if a person) |
YES |
- |
| InheritedNamePostfix |
nvarchar (50) |
Additions after inherited name, like generation (Jr., III.) or names of religious orders |
YES |
- |
| Abbreviation |
nvarchar (50) |
Abbreviation of the agent |
YES |
- |
| AgentType |
nvarchar (50) |
The type of the agent, e.g. person, companyDefault value: N’person' |
YES |
Refers to table AgentType_Enum |
| AgentRole |
nvarchar (255) |
The role of an agent esp. a person within an organization. e.g. “Database Administrator” or “Curator” |
YES |
- |
| AgentGender |
nvarchar (50) |
The gender of the agent |
YES |
Refers to table AgentGender_Enum |
| Description |
nvarchar (1000) |
A description of the agent |
YES |
- |
| OriginalSpelling |
nvarchar (200) |
Name as originally written in e.g. chinese or cyrillic letters |
YES |
- |
| Notes |
nvarchar (MAX) |
Notes about the agent |
YES |
- |
| ValidFromDate |
datetime |
The date of the begin of the exsistence of the agent, e.g. the birthday of a person or the founding of an institution, calculated from ValidFromDay, - Month and -Year |
YES |
- |
| ValidFromDay |
tinyint |
The day of the begin of the exsistence of the agent |
YES |
- |
| ValidFromMonth |
tinyint |
The month of the begin of the exsistence of the agent |
YES |
- |
| ValidFromYear |
smallint |
The year of the begin of the exsistence of the agent |
YES |
- |
| ValidUntilDate |
datetime |
The date of the end of the exsistence of the agent, e.g. death of a person or closing of an institute, calculated from ValidUntilDay, - Month and -Year |
YES |
- |
| ValidUntilDay |
tinyint |
The day of the end of the exsistence of the agent |
YES |
- |
| ValidUntilMonth |
tinyint |
The month of the end of the exsistence of the agent |
YES |
- |
| ValidUntilYear |
smallint |
The year of the end of the exsistence of the agent |
YES |
- |
| ValidDateSupplement |
nvarchar (255) |
Verbal or additional date information, e.g. ’end of summer 1985’, ‘first quarter’. The time of the valid date if necessary. |
YES |
- |
| PlaceOfBirth |
nvarchar (500) |
The place (e.g. a city) where a person was born or an institution was founded |
YES |
- |
| PlaceOfDeath |
nvarchar (500) |
The place (e.g.a city) where the person died |
YES |
- |
| SynonymToAgentID |
int |
The AgentID of the agent which was selected as a replacement for the current agent, e.g. if to equal datasets were imported from different sources |
YES |
Refers to table Agent |
| SynonymisationType |
nvarchar (50) |
The type of the synonymisation like “replaced with”, “synonym to” |
YES |
Refers to table AgentSynonymisationType_Enum |
| RevisionLevel |
nvarchar (50) |
The level of the revision of the agent, e.g. ‘unchecked’, ‘final revision’Default value: N’unchecked’ |
YES |
Refers to table RevisionLevel_Enum |
| DataWithholdingReason |
nvarchar (255) |
If the dataset is withhold, the reason for withholding the data, otherwise null |
YES |
- |
| IgnoreButKeepForReference |
bit |
If true, the record is ignored for all purposes of evaluation (because contradicted). It is kept only to maintain the cited reference. If no reference is given, it may be deleted instead.Default value: (0) |
YES |
- |
| LogUpdatedBy |
nvarchar (50) |
Name of user who last updated the data.Default value: suser_sname() |
YES |
- |
| LogUpdatedWhen |
smalldatetime |
Date and time when the data were last updated.Default value: getdate() |
YES |
- |
| ContentLanguage |
nvarchar (50) |
The language of the content |
YES |
Refers to table LanguageCode_Enum |
Depending on:
- AgentGender_Enum
- AgentSynonymisationType_Enum
- AgentTitle_Enum
- AgentType_Enum
- LanguageCode_Enum
- RevisionLevel_Enum
trgInsAgent
Setting the value of column AgentName according to standard derived from content of given values in columns InheritedNamePrefix, Inheritedname, GivenName, GivenNamePostfix, InheritedNamePostfix and AgentTitle
The contact information resp. addresses of the agents
| Column |
Data type |
Description |
Nullable |
Relation |
| AgentID |
int |
Refers to the ID of Agent (= Foreign key and part of primary key) |
NO |
Refers to table Agent |
| DisplayOrder |
tinyint |
Display order of records in user interface. DisplayOrder 1 corresponds to the preferred address (= part of primary key) |
NO |
- |
| AddressType |
nvarchar (50) |
Type of the adress, e.g. private |
YES |
Refers to table AddressType_Enum |
| Country |
nvarchar (255) |
Country of the address |
YES |
- |
| City |
nvarchar (255) |
City of the address |
YES |
- |
| PostalCode |
nvarchar (50) |
ZIP or postcode of the address (usually output before or after the city) |
YES |
- |
| Streetaddress |
nvarchar (255) |
Usually street name and number, but may also contain post office box |
YES |
- |
| Address |
nvarchar (255) |
Free text postal address of the agent |
YES |
- |
| Telephone |
nvarchar (50) |
Phone number, including area code |
YES |
- |
| CellularPhone |
nvarchar (50) |
The number of a mobile telephone device of the agent |
YES |
- |
| Telefax |
nvarchar (50) |
Fax number, including area code |
YES |
- |
| Email |
nvarchar (255) |
E-mail address of the agent |
YES |
- |
| URI |
nvarchar (255) |
URI pointing to a homepage containing further information |
YES |
- |
| Notes |
nvarchar (MAX) |
Notes about this address |
YES |
- |
| ValidFrom |
datetime |
The date when this address became valid as date according to ISO 8601 |
YES |
- |
| ValidUntil |
datetime |
The date of the expiration of the validity of this address as date according to ISO 8601 |
YES |
- |
| DataWithholdingReason |
nvarchar (255) |
If the dataset is withhold, the reason for withholding the data, otherwise nullDefault value: N’Withhold by default’ |
YES |
- |
| LogUpdatedBy |
nvarchar (50) |
Name of user who last updated the data.Default value: suser_sname() |
YES |
- |
| LogUpdatedWhen |
smalldatetime |
Date and time when the data were last updated.Default value: getdate() |
YES |
- |
Depending on:
Table AgentDescriptor
The Descriptors for the agents
| Column |
Data type |
Description |
Nullable |
Relation |
| AgentID |
int |
Unique ID for the Agent (foreign key + part of primary key) |
NO |
Refers to table Agent |
| DescriptorID |
int |
Unique ID for the descriptor, Part of PK |
NO |
- |
| Descriptor |
nvarchar (200) |
The DescriptorDefault value: '’ |
NO |
- |
| URL |
varchar (500) |
URL of the Descriptor. In case of a module related Descriptor, the link to the module entry resp. the related webserviceDefault value: '' |
YES |
- |
| DescriptorType |
nvarchar (50) |
Type of the Descriptor as described in table AgentDescriptorType_EnumDefault value: N’Descriptor' |
YES |
Refers to table AgentDescriptorType_Enum |
| LogInsertedBy |
nvarchar (50) |
Name of user who first entered (typed or imported) the data.Default value: suser_sname() |
YES |
- |
| LogInsertedWhen |
smalldatetime |
Date and time when the data were first entered (typed or imported) into this database.Default value: getdate() |
YES |
- |
| LogUpdatedBy |
nvarchar (50) |
Name of user who last updated the data.Default value: suser_sname() |
YES |
- |
| LogUpdatedWhen |
smalldatetime |
Date and time when the data were last updated.Default value: getdate() |
YES |
- |
| RowGUID |
uniqueidentifier |
-Default value: newsequentialid() |
NO |
- |
Depending on:
- Agent
- AgentDescriptorType_Enum
Table AgentExternalDatabase
The external databases from which data in the database may have been imported from
| Column |
Data type |
Description |
Nullable |
Relation |
| ExternalDatabaseID |
int |
An ID to identify an external data collection of plant names (primary key, the ID has no meaning outside of the DiversityWorkbench system) |
NO |
- |
| ExternalDatabaseName |
nvarchar (100) |
The name of the data collection that has been integrated or can be linked to for further analysis |
YES |
- |
| ExternalDatabaseVersion |
nvarchar (255) |
The version of this data collection (either official version number, or dates when the collection was integrated) |
YES |
- |
| Rights |
nvarchar (500) |
A description of copyright agreements or permission to use data from the external database |
YES |
- |
| ExternalDatabaseAuthors |
nvarchar (200) |
The persons or institutions responsible for the external database |
YES |
- |
| ExternalDatabaseURI |
nvarchar (300) |
The link to the database provider resp. the external database |
YES |
- |
| ExternalDatabaseInstitution |
nvarchar (300) |
The institution responsible for the external database |
YES |
- |
| InternalNotes |
nvarchar (1500) |
Additional notes concerning this data collection |
YES |
- |
| ExternalAttribute_AgentID |
nvarchar (255) |
The table and field name in the external data collection to which PlantNameAnalysis.ExternalNameID refers |
YES |
- |
| PreferredSequence |
tinyint |
For selection in e.g. picklists: of several equal names only the name from the source with the lowest preferred sequence will be provided. |
YES |
- |
| Disabled |
bit |
If this source should be disabled for selection of names e.g. in picklists |
YES |
- |
| LogInsertedBy |
nvarchar (50) |
Name of user who first entered (typed or imported) the data. |
YES |
- |
| LogInsertedWhen |
smalldatetime |
Date and time when the data were first entered (typed or imported) into this database. |
YES |
- |
| LogUpdatedBy |
nvarchar (50) |
Name of user who last updated the data. |
YES |
- |
| LogUpdatedWhen |
smalldatetime |
Date and time when the data were last updated. |
YES |
- |
Table AgentExternalID
The ID’s of data that were imported from foreign souces
| Column |
Data type |
Description |
Nullable |
Relation |
| AgentID |
int |
Unique ID for the Agent (foreign key + part of primary key) |
NO |
Refers to table Agent |
| ExternalDatabaseID |
int |
The ID of an external taxonomic data collection as defined in AgentExternalDatabase (foreign key + part of primary key)Default value: '' |
NO |
Refers to table AgentExternalDatabase |
| ExternalAgentURI |
varchar (255) |
The URI (e.g. LSID) of the external agent |
YES |
- |
| LogInsertedBy |
nvarchar (50) |
Name of user who first entered (typed or imported) the data.Default value: suser_sname() |
YES |
- |
| LogInsertedWhen |
smalldatetime |
Date and time when the data were first entered (typed or imported) into this database.Default value: getdate() |
YES |
- |
| LogUpdatedBy |
nvarchar (50) |
Name of user who last updated the data.Default value: suser_sname() |
YES |
- |
| LogUpdatedWhen |
smalldatetime |
Date and time when the data were last updated.Default value: getdate() |
YES |
- |
Depending on:
- Agent
- AgentExternalDatabase
Table AgentHierarchyOther
Other hierarchies of the agent
| Column |
Data type |
Description |
Nullable |
Relation |
| AgentID |
int |
Refers to the ID of Agent (= Foreign key and part of primary key) |
NO |
Refers to table Agent |
| HierarchyID |
int |
Identifier of the hierarchy, part of PK |
NO |
- |
| AgentParentID |
int |
The AgentID of the superior agent if agents are organized within a hierarchy |
NO |
Refers to table Agent |
| ValidFrom |
datetime |
The start time of the hierarchy, e.g. when a person was employed in an institution |
YES |
- |
| ValidUntil |
datetime |
The end of a hierarchy, e.g. when an employment ended |
YES |
- |
| Notes |
nvarchar (MAX) |
Notes about the other hierarchy |
YES |
- |
| LogCreatedWhen |
datetime |
Point in time when this data set was createdDefault value: getdate() |
YES |
- |
| LogCreatedBy |
nvarchar (50) |
Name of the creator of this data setDefault value: suser_sname() |
YES |
- |
| LogUpdatedBy |
nvarchar (50) |
Name of user who last updated the data.Default value: suser_sname() |
YES |
- |
| LogUpdatedWhen |
smalldatetime |
Date and time when the data were last updated.Default value: getdate() |
YES |
- |
| RowGUID |
uniqueidentifier |
-Default value: newsequentialid() |
NO |
- |
Depending on:
Table AgentIdentifier
Identifier for the agent
| Column |
Data type |
Description |
Nullable |
Relation |
| AgentID |
int |
Refers to the ID of Agent (= Foreign key and part of primary key) |
NO |
Refers to table Agent |
| Identifier |
nvarchar (400) |
Identifier for the agent, part of PK |
NO |
- |
| IdentifierURI |
varchar (500) |
URI of Identifier |
YES |
- |
| Type |
nvarchar (50) |
Type of the identifier as defined in table AgentIdentifierType_Enum |
YES |
Refers to table AgentIdentifierType_Enum |
| Notes |
nvarchar (MAX) |
Notes about the identifier |
YES |
- |
| LogCreatedWhen |
datetime |
Point in time when this data set was createdDefault value: getdate() |
YES |
- |
| LogCreatedBy |
nvarchar (50) |
Name of the creator of this data setDefault value: suser_sname() |
YES |
- |
| LogUpdatedWhen |
smalldatetime |
Date and time when the data were last updated.Default value: getdate() |
YES |
- |
| LogUpdatedBy |
nvarchar (50) |
Name of user who last updated the data.Default value: suser_sname() |
YES |
- |
| RowGUID |
uniqueidentifier |
-Default value: newsequentialid() |
NO |
- |
Depending on:
- Agent
- AgentIdentifierType_Enum
Table AgentImage
The images of the agents
| Column |
Data type |
Description |
Nullable |
Relation |
| AgentID |
int |
Unique ID for the Agent (foreign key + part of primary key) |
NO |
Refers to table Agent |
| URI |
varchar (255) |
The complete URI address of the image. This is only a cached value if ResourceID is available referring to the module DiversityResources |
NO |
- |
| LogInsertedBy |
nvarchar (50) |
Name of user who first entered (typed or imported) the data.Default value: suser_sname() |
YES |
- |
| LogInsertedWhen |
smalldatetime |
Date and time when the data were first entered (typed or imported) into this database.Default value: getdate() |
YES |
- |
| LogUpdatedBy |
nvarchar (50) |
Name of user who last updated the data.Default value: suser_sname() |
YES |
- |
| LogUpdatedWhen |
smalldatetime |
Date and time when the data were last updated.Default value: getdate() |
YES |
- |
| Description |
nvarchar (MAX) |
Description of the resource |
YES |
- |
| Type |
nvarchar (50) |
The type of the image |
YES |
Refers to table AgentImageType_Enum |
| Sequence |
int |
The sequence of the imageDefault value: (1) |
YES |
- |
| DataWithholdingReason |
nvarchar (255) |
If the dataset is withhold, the reason for withholding the data, otherwise nullDefault value: N’Withhold by default' |
YES |
- |
Depending on:
- Agent
- AgentImageType_Enum
trgInsAgentImage
Table AgentKeyword
The keywords for the agents
| Column |
Data type |
Description |
Nullable |
Relation |
| AgentID |
int |
Unique ID for the Agent (foreign key + part of primary key) |
NO |
Refers to table Agent |
| Keyword |
nvarchar (200) |
The keyword |
NO |
- |
| LogInsertedBy |
nvarchar (50) |
Name of user who first entered (typed or imported) the data.Default value: suser_sname() |
YES |
- |
| LogInsertedWhen |
smalldatetime |
Date and time when the data were first entered (typed or imported) into this database.Default value: getdate() |
YES |
- |
| LogUpdatedBy |
nvarchar (50) |
Name of user who last updated the data.Default value: suser_sname() |
YES |
- |
| LogUpdatedWhen |
smalldatetime |
Date and time when the data were last updated.Default value: getdate() |
YES |
- |
Depending on:
trgInsAgentKeyword
Table AgentProject
The projects of the agents
| Column |
Data type |
Description |
Nullable |
Relation |
| AgentID |
int |
Unique ID for the Agent (= Foreign key) |
NO |
Refers to table Agent |
| ProjectID |
int |
The ID of the projectDefault value: (0) |
NO |
Refers to table ProjectProxy |
| LogInsertedBy |
nvarchar (50) |
Name of user who first entered (typed or imported) the data.Default value: suser_sname() |
YES |
- |
| LogInsertedWhen |
smalldatetime |
Date and time when the data were first entered (typed or imported) into this database.Default value: getdate() |
YES |
- |
| LogUpdatedBy |
nvarchar (50) |
Name of user who last updated the data.Default value: suser_sname() |
YES |
- |
| LogUpdatedWhen |
smalldatetime |
Date and time when the data were last updated.Default value: getdate() |
YES |
- |
Depending on:
Table AgentReference
References containing informations about the agent
| Column |
Data type |
Description |
Nullable |
Relation |
| AgentID |
int |
Refers to the ID of Agent (= Foreign key and part of primary key) |
NO |
Refers to table Agent |
| ReferenceTitle |
nvarchar (255) |
The title of the publication where information about the agent was published. Note this is only a cached value where ReferenceURI is present |
NO |
- |
| ReferenceURI |
varchar (255) |
URI of reference where information about the agent, e.g. referring to the module DiversityReferences |
YES |
- |
| ReferenceDetails |
nvarchar (50) |
Details within the reference, e.g. pages |
YES |
- |
| ContainsImage |
tinyint |
If the reference contains an image of the agent |
YES |
- |
| ContainsReferencelist |
tinyint |
If the reference contains a publication list of the agent |
YES |
- |
| Notes |
nvarchar (255) |
Notes about the reference |
YES |
- |
| LogUpdatedBy |
nvarchar (50) |
Name of user who last updated the data. |
YES |
- |
| LogUpdatedWhen |
smalldatetime |
Date and time when the data were last updated. |
YES |
- |
Depending on:
trgInsAgentReference
Table AgentRelation
Relations of the agent to other agents
| Column |
Data type |
Description |
Nullable |
Relation |
| AgentID |
int |
Refers to the ID of Agent (= Foreign key and part of primary key) |
NO |
Refers to table Agent |
| RelatedAgentID |
int |
The AgentID of the related agent |
NO |
- |
| RelationType |
nvarchar (50) |
The type of the relation between the agents, e.g. “parent of”, “child of”, “married to” |
YES |
Refers to table AgentRelationType_Enum |
| Notes |
nvarchar (255) |
Notes about the relation |
YES |
- |
| DataWithholdingReason |
nvarchar (255) |
If the dataset is withhold, the reason for withholding the data, otherwise null |
YES |
- |
| LogUpdatedBy |
nvarchar (50) |
Name of user who last updated the data. |
YES |
- |
| LogUpdatedWhen |
smalldatetime |
Date and time when the data were last updated. |
YES |
- |
Depending on:
- Agent
- AgentRelationType_Enum
trgInsAgentRelation
VIEWS
View Agent_Core
Agents that are available for a user and are not ignored
| Column |
Data type |
Description |
Nullable |
| AgentID |
int |
Unique ID for the Agent (= Primary key) |
NO |
| AgentParentID |
int |
The AgentID of the superior agent if agents are organized within a hierarchy |
YES |
| AgentName |
nvarchar (200) |
The whole name of the agent as shown e.g. for selection in an user interface. For persons this entry will be generated as follows: LastName, FirstNames, AgentTitle |
NO |
| DisplayText |
nvarchar (204) |
The name of the agent including indentation for synonyms |
NO |
| Version |
smallint |
The version of a agent record (revision number, internally filled by system) |
NO |
| AgentTitle |
nvarchar (50) |
The title of the agent, e.g. Dr., Prof. |
YES |
| GivenName |
nvarchar (255) |
The first names of the agent (if a person) or the name of e.g. an institution |
YES |
| GivenNamePostfix |
nvarchar (50) |
Variable part of name, correctly placed at end of given names |
YES |
| InheritedNamePrefix |
nvarchar (50) |
Variable part of name, correctly placed at the beginning of the inherited names |
YES |
| InheritedName |
nvarchar (255) |
The last names of the agent (if a person) |
YES |
| InheritedNamePostfix |
nvarchar (50) |
Additions after inherited name, like generation (Jr., III.) or names of religious orders |
YES |
| Abbreviation |
nvarchar (50) |
Abbreviation of the agent |
YES |
| AgentType |
nvarchar (50) |
The type of the agent, e.g. person, company |
YES |
| AgentRole |
nvarchar (255) |
The role of an agent esp. a person within an organization. e.g. “Database Administrator” or “Curator” |
YES |
| AgentGender |
nvarchar (50) |
The gender of the agent |
YES |
| Description |
nvarchar (1000) |
A description of the agent |
YES |
| OriginalSpelling |
nvarchar (200) |
Name as originally written in e.g. chinese or cyrillic letters |
YES |
| Notes |
nvarchar (MAX) |
Notes about the agent |
YES |
| ValidFromDate |
datetime |
The date of the begin of the exsistence of the agent, e.g. the birthday of a person or the founding of an institution, calculated from ValidFromDay, - Month and -Year |
YES |
| ValidFromDay |
tinyint |
The day of the begin of the exsistence of the agent |
YES |
| ValidFromMonth |
tinyint |
The month of the begin of the exsistence of the agent |
YES |
| ValidFromYear |
smallint |
The year of the begin of the exsistence of the agent |
YES |
| ValidUntilDate |
datetime |
The date of the end of the exsistence of the agent, e.g. death of a person or closing of an institute, calculated from ValidUntilDay, - Month and -Year |
YES |
| ValidUntilDay |
tinyint |
The day of the end of the exsistence of the agent |
YES |
| ValidUntilMonth |
tinyint |
The month of the end of the exsistence of the agent |
YES |
| ValidUntilYear |
smallint |
The year of the end of the exsistence of the agent |
YES |
| ValidDateSupplement |
nvarchar (255) |
Verbal or additional date information, e.g. ’end of summer 1985’, ‘first quarter’. The time of the valid date if necessary. |
YES |
| PlaceOfBirth |
nvarchar (500) |
The place (e.g. a city) where a person was born or an institution was founded |
YES |
| PlaceOfDeath |
nvarchar (500) |
The place (e.g.a city) where the person died |
YES |
| SynonymToAgentID |
int |
The AgentID of the agent which was selected as a replacement for the current agent, e.g. if to equal datasets were imported from different sources |
YES |
| SynonymisationType |
nvarchar (50) |
The type of the synonymisation like “replaced with”, “synonym to” |
YES |
| RevisionLevel |
nvarchar (50) |
The level of the revision of the agent, e.g. ‘unchecked’, ‘final revision’ |
YES |
| DataWithholdingReason |
nvarchar (255) |
If the dataset is withhold, the reason for withholding the data, otherwise null |
YES |
| IgnoreButKeepForReference |
bit |
If true, the record is ignored for all purposes of evaluation (because contradicted). It is kept only to maintain the cited reference. If no reference is given, it may be deleted instead. |
YES |
| ValidFrom |
varchar (92) |
- |
YES |
| ValidUntil |
varchar (92) |
- |
YES |
Depending on:
- Agent
- AgentID_UserAvailable
View AgentID_AvailableReadOnly
Available AgentIDs that are ReadOnly or Locked
| Column |
Data type |
Description |
Nullable |
| AgentID |
int |
Unique ID for the Agent (= Foreign key) |
NO |
Depending on:
- AgentID_Locked
- AgentProject
- ProjectUser
View AgentID_FullAccess
ID of agents with full access (neither read only or locked)
| Column |
Data type |
Description |
Nullable |
| AgentID |
int |
Unique ID for the Agent (= Foreign key) |
NO |
Depending on:
- AgentProject
- ProjectProxy
- ProjectUser
View AgentID_Locked
AgentIDs that are locked due to locking of the project
| Column |
Data type |
Description |
Nullable |
| AgentID |
int |
Unique ID for the Agent (= Foreign key) |
NO |
Depending on:
- AgentProject
- ProjectProxy
View AgentID_ReadOnly
AgentIDs that are ReadOnly for a User or are locked due to locking of the project
| Column |
Data type |
Description |
Nullable |
| AgentID |
int |
Unique ID for the Agent (= Foreign key) |
NO |
Depending on:
- AgentID_Locked
- AgentProject
- ProjectUser
View AgentID_UserAvailable
IDs of the agent available for a user
| Column |
Data type |
Description |
Nullable |
| AgentID |
int |
Unique ID for the Agent (= Primary key) |
NO |
Depending on:
- Agent
- AgentProject
- ProjectUser
View ProjectList
Projects available for a user
| Column |
Data type |
Description |
Nullable |
| ProjectID |
int |
The ID of the project, Primary key |
NO |
| Project |
nvarchar (50) |
The name of the project as stored in the module DiversityProjects |
NO |
| ReadOnly |
int |
If the user has only read access to data of this project |
YES |
| IsLocked |
bit |
If the data within the project should not be changeed and the access for all users is restricted to read only |
YES |
Depending on:
View PublicAgent
Content of table Agent available for the public
| Column |
Data type |
Description |
Nullable |
| DisplayText |
nvarchar (200) |
Corresponds to content of column AgentName |
NO |
| URI |
varchar (285) |
Combines BaseURL of the database and AgentID to provide unique identifier of the dataset |
YES |
| AgentID |
int |
Unique ID for the Agent (= Primary key) |
NO |
| AgentParentID |
int |
The AgentID of the superior agent if agents are organized within a hierarchy |
YES |
| AgentName |
nvarchar (200) |
The whole name of the agent as shown e.g. for selection in an user interface. For persons this entry will be generated as follows: LastName, FirstNames, AgentTitle |
NO |
| Version |
smallint |
The version of a agent record (revision number, internally filled by system) |
NO |
| AgentTitle |
nvarchar (50) |
The title of the agent, e.g. Dr., Prof. |
YES |
| GivenName |
nvarchar (255) |
The first names of the agent (if a person) or the name of e.g. an institution |
YES |
| GivenNamePostfix |
nvarchar (50) |
Variable part of name, correctly placed at end of given names |
YES |
| InheritedNamePrefix |
nvarchar (50) |
Variable part of name, correctly placed at the beginning of the inherited names |
YES |
| InheritedName |
nvarchar (255) |
The last names of the agent (if a person) |
YES |
| InheritedNamePostfix |
nvarchar (50) |
Additions after inherited name, like generation (Jr., III.) or names of religious orders |
YES |
| Abbreviation |
nvarchar (50) |
Abbreviation of the agent |
YES |
| AgentType |
nvarchar (50) |
The type of the agent, e.g. person, company |
YES |
| AgentRole |
nvarchar (255) |
The role of an agent esp. a person within an organization. e.g. “Database Administrator” or “Curator” |
YES |
| AgentGender |
nvarchar (50) |
The gender of the agent |
YES |
| Description |
nvarchar (1000) |
A description of the agent |
YES |
| OriginalSpelling |
nvarchar (200) |
Name as originally written in e.g. chinese or cyrillic letters |
YES |
| Notes |
nvarchar (MAX) |
Notes about the agent |
YES |
| ValidFromDate |
datetime |
The date of the begin of the exsistence of the agent, e.g. the birthday of a person or the founding of an institution, calculated from ValidFromDay, - Month and -Year |
YES |
| ValidFromDay |
tinyint |
The day of the begin of the exsistence of the agent |
YES |
| ValidFromMonth |
tinyint |
The month of the begin of the exsistence of the agent |
YES |
| ValidFromYear |
smallint |
The year of the begin of the exsistence of the agent |
YES |
| ValidUntilDate |
datetime |
The date of the end of the exsistence of the agent, e.g. death of a person or closing of an institute, calculated from ValidUntilDay, - Month and -Year |
YES |
| ValidUntilDay |
tinyint |
The day of the end of the exsistence of the agent |
YES |
| ValidUntilMonth |
tinyint |
The month of the end of the exsistence of the agent |
YES |
| ValidUntilYear |
smallint |
The year of the end of the exsistence of the agent |
YES |
| ValidDateSupplement |
nvarchar (255) |
Verbal or additional date information, e.g. ’end of summer 1985’, ‘first quarter’. The time of the valid date if necessary. |
YES |
| PlaceOfBirth |
nvarchar (500) |
The place (e.g. a city) where a person was born or an institution was founded |
YES |
| PlaceOfDeath |
nvarchar (500) |
The place (e.g.a city) where the person died |
YES |
| SynonymToAgentID |
int |
The AgentID of the agent which was selected as a replacement for the current agent, e.g. if to equal datasets were imported from different sources |
YES |
| SynonymisationType |
nvarchar (50) |
The type of the synonymisation like “replaced with”, “synonym to” |
YES |
| RevisionLevel |
nvarchar (50) |
The level of the revision of the agent, e.g. ‘unchecked’, ‘final revision’ |
YES |
| LogUpdatedWhen |
smalldatetime |
Date and time when the data were last updated. |
YES |
Depending on:
- Agent
- AgentNames
- BaseURL
- DefaultAgentNameDisplayType
Accumulated public address of an agent within a hierarchy of up to 4 levels
| Column |
Data type |
Description |
Nullable |
| AgentID |
int |
Unique ID for the Agent (= Primary key) |
NO |
| DisplayOrder |
tinyint |
Display order of records in user interface. DisplayOrder 1 corresponds to the preferred address (= part of primary key) |
NO |
| ParentName |
nvarchar (200) |
Name of the superior agent within the hierarchy |
YES |
| AddressType |
nvarchar (50) |
Type of the adress, e.g. private |
YES |
| Country |
nvarchar (255) |
Country of the address |
YES |
| City |
nvarchar (255) |
City of the address |
YES |
| PostalCode |
nvarchar (50) |
ZIP or postcode of the address (usually output before or after the city) |
YES |
| Streetaddress |
nvarchar (255) |
Usually street name and number, but may also contain post office box |
YES |
| Address |
nvarchar (255) |
Free text postal address of the agent |
YES |
| Telephone |
nvarchar (50) |
Phone number, including area code |
YES |
| CellularPhone |
nvarchar (50) |
The number of a mobile telephone device of the agent |
YES |
| Telefax |
nvarchar (50) |
Fax number, including area code |
YES |
| Email |
nvarchar (255) |
E-mail address of the agent |
YES |
| URI |
nvarchar (255) |
URI pointing to a homepage containing further information |
YES |
| Notes |
nvarchar (MAX) |
Notes about the agent |
YES |
| ValidFrom |
datetime |
The date when this address became valid as date according to ISO 8601 |
YES |
| ValidUntil |
datetime |
The date of the expiration of the validity of this address as date according to ISO 8601 |
YES |
| LogUpdatedWhen |
smalldatetime |
Date and time when the data were last updated. |
YES |
Depending on:
- AgentContactInformation_Public
View PublicIdentifier
Content of table AgentIdentifier available for the public
| Column |
Data type |
Description |
Nullable |
| AgentID |
int |
Unique ID for the Agent (= Primary key) |
NO |
| Identifier |
nvarchar (400) |
Identifier for the agent, part of PK |
NO |
| IdentifierURI |
varchar (500) |
URI of Identifier |
YES |
| Type |
nvarchar (50) |
Type of the identifier as defined in table AgentIdentifierType_Enum |
YES |
| Notes |
nvarchar (MAX) |
Notes about the agent |
YES |
| LogUpdatedWhen |
smalldatetime |
Date and time when the data were last updated. |
YES |
Depending on:
View PublicImage
Content of table AgentImage available for the public
| Column |
Data type |
Description |
Nullable |
| AgentID |
int |
Unique ID for the Agent (= Primary key) |
NO |
| URI |
varchar (255) |
The complete URI address of the image. This is only a cached value if ResourceID is available referring to the module DiversityResources |
NO |
| Description |
nvarchar (MAX) |
A description of the agent |
YES |
| Type |
nvarchar (50) |
The type of the image |
YES |
| Sequence |
int |
The sequence of the image |
YES |
| LogUpdatedWhen |
smalldatetime |
Date and time when the data were last updated. |
YES |
Depending on:
View PublicReference
Content of table AgentReference available for the public
| Column |
Data type |
Description |
Nullable |
| AgentID |
int |
Unique ID for the Agent (= Primary key) |
NO |
| ReferenceTitle |
nvarchar (255) |
The title of the publication where information about the agent was published. Note this is only a cached value where ReferenceURI is present |
NO |
| ReferenceURI |
varchar (255) |
URI of reference where information about the agent, e.g. referring to the module DiversityReferences |
YES |
| ReferenceDetails |
nvarchar (50) |
Details within the reference, e.g. pages |
YES |
| ContainsImage |
tinyint |
If the reference contains an image of the agent |
YES |
| ContainsReferencelist |
tinyint |
If the reference contains a publication list of the agent |
YES |
| Notes |
nvarchar (255) |
Notes about the agent |
YES |
| LogUpdatedWhen |
smalldatetime |
Date and time when the data were last updated. |
YES |
Depending on:
View PublicRelation
Content of table AgentRelation available for the public
| Column |
Data type |
Description |
Nullable |
| AgentID |
int |
Unique ID for the Agent (= Primary key) |
NO |
| RelatedAgentID |
int |
The AgentID of the related agent |
NO |
| RelationType |
nvarchar (50) |
The type of the relation between the agents, e.g. “parent of”, “child of”, “married to” |
YES |
| Notes |
nvarchar (255) |
Notes about the agent |
YES |
| LogUpdatedWhen |
smalldatetime |
Date and time when the data were last updated. |
YES |
Depending on:
View UserInfo
Information about the user as stored in table UserProxy
| Column |
Data type |
Description |
Nullable |
| LoginName |
nvarchar (50) |
The login name of the user, Primary key |
NO |
| CombinedNameCache |
nvarchar (50) |
A combined name of the user, created on the base of an entry in the module DiversityUsers |
YES |
| UserURI |
varchar (255) |
Refers to UserInfo.UserID in database DiversityUsers |
YES |
| ProjectID |
int |
The ID of the default project of the user as stored in table ProjectProxy |
YES |
Depending on:
View ViewAgentAddress
Accumulated address of an agent within a hierarchy of up to 4 levels
| Column |
Data type |
Description |
Nullable |
| AgentID |
int |
Refers to the ID of Agent (= Foreign key and part of primary key) |
YES |
| DisplayOrder |
tinyint |
Display order of records in user interface. DisplayOrder 1 corresponds to the preferred address (= part of primary key) |
YES |
| ParentName |
nvarchar (200) |
Name of the superior agent within the hierarchy |
YES |
| AddressType |
nvarchar (50) |
Type of the adress, e.g. private |
YES |
| Country |
nvarchar (255) |
Country of the address |
YES |
| City |
nvarchar (255) |
City of the address |
YES |
| PostalCode |
nvarchar (50) |
ZIP or postcode of the address (usually output before or after the city) |
YES |
| Streetaddress |
nvarchar (255) |
Usually street name and number, but may also contain post office box |
YES |
| Address |
nvarchar (255) |
Free text postal address of the agent |
YES |
| Telephone |
nvarchar (50) |
Phone number, including area code |
YES |
| CellularPhone |
nvarchar (50) |
The number of a mobile telephone device of the agent |
YES |
| Telefax |
nvarchar (50) |
Fax number, including area code |
YES |
| Email |
nvarchar (255) |
E-mail address of the agent |
YES |
| URI |
nvarchar (255) |
URI pointing to a homepage containing further information |
YES |
| Notes |
nvarchar (MAX) |
Notes about this address |
YES |
| ValidFrom |
datetime |
The date when this address became valid as date according to ISO 8601 |
YES |
| ValidUntil |
datetime |
The date of the expiration of the validity of this address as date according to ISO 8601 |
YES |
Depending on:
- ViewAgentAddress0
- ViewAgentAddress1
- ViewAgentAddress2
- ViewAgentAddress3
- ViewAgentAddress4
View ViewAgentNames
The names of the agents as retrieved for the default display type with function AgentNames
| Column |
Data type |
Description |
Nullable |
| AgentID |
int |
Unique ID for the Agent (= Primary key) |
NO |
| AgentName |
nvarchar (200) |
The whole name of the agent as shown e.g. for selection in an user interface. For persons this entry will be generated as follows: LastName, FirstNames, AgentTitle |
NO |
Depending on:
- AgentNames
- DefaultAgentNameDisplayType
View ViewBaseURL
Provides the basic address for accessing the database as defined in function BaseURL
| Column |
Data type |
Description |
Nullable |
| BaseURL |
varchar (255) |
Basic address for accessing the database |
YES |
Depending on:
View ViewDefaultAgentNameDisplayType
The default display type as set for the default project as defined in function DefaultAgentNameDisplayType
| Column |
Data type |
Description |
Nullable |
| DefaultAgentNameDisplayType |
nvarchar (50) |
The default display type |
YES |
Depending on:
- DefaultAgentNameDisplayType
View ViewDiversityWorkbenchModule
Provides the name of the DiversityWorkbench module as defined in function DiversityWorkbenchModule
| Column |
Data type |
Description |
Nullable |
| DiversityWorkbenchModule |
nvarchar (50) |
The name of the DiversityWorkbench module |
YES |
Depending on:
FUNCTIONS
Function AgentAddress
The address of the agent as collected from the hierarchy
| Parameter |
DataType |
Description |
| @AgentID |
int |
The ID of the Agent |
| Column |
DataType |
Description |
| AgentID |
int |
Unique ID for the Agent (= Primary key) |
| DisplayOrder |
tinyint |
Display order of records in user interface. DisplayOrder 1 corresponds to the preferred address (= part of primary key) |
| ParentName |
nvarchar (4000) |
- |
| AddressType |
nvarchar (50) |
Type of the adress, e.g. private |
| Country |
nvarchar (255) |
Country of the address |
| City |
nvarchar (255) |
City of the address |
| PostalCode |
nvarchar (50) |
ZIP or postcode of the address (usually output before or after the city) |
| Streetaddress |
nvarchar (255) |
Usually street name and number, but may also contain post office box |
| Address |
nvarchar (255) |
Free text postal address of the agent |
| Telephone |
nvarchar (50) |
Phone number, including area code |
| CellularPhone |
nvarchar (50) |
The number of a mobile telephone device of the agent |
| Telefax |
nvarchar (50) |
Fax number, including area code |
| Email |
nvarchar (255) |
E-mail address of the agent |
| URI |
nvarchar (255) |
URI pointing to a homepage containing further information |
| Notes |
nvarchar (MAX) |
Notes about the agent |
| ValidFrom |
datetime |
The date when this address became valid as date according to ISO 8601 |
| ValidUntil |
datetime |
The date of the expiration of the validity of this address as date according to ISO 8601 |
Depending on:
- Agent
- AgentContactInformation
Function AgentChildNodes
Returns the list of agents within the hierarchy underneath the agent with the given ID (=AgentID)
| Parameter |
DataType |
Description |
| @ID |
int |
The AgentID of the agent for which the hierarchy should be retrieved |
| Column |
DataType |
Description |
| AgentID |
int |
Unique ID for the Agent (= Primary key) |
| AgentParentID |
int |
The AgentID of the superior agent if agents are organized within a hierarchy |
| AgentName |
nvarchar (200) |
The whole name of the agent as shown e.g. for selection in an user interface. For persons this entry will be generated as follows: LastName, FirstNames, AgentTitle |
| Version |
smallint |
The version of a agent record (revision number, internally filled by system) |
| AgentTitle |
nvarchar (50) |
The title of the agent, e.g. Dr., Prof. |
| GivenName |
nvarchar (255) |
The first names of the agent (if a person) or the name of e.g. an institution |
| InheritedName |
nvarchar (255) |
The last names of the agent (if a person) |
| Abbreviation |
nvarchar (50) |
Abbreviation of the agent |
| AgentType |
nvarchar (50) |
The type of the agent, e.g. person, company |
| AgentRole |
nvarchar (255) |
The role of an agent esp. a person within an organization. e.g. “Database Administrator” or “Curator” |
| Description |
nvarchar (1000) |
A description of the agent |
| Notes |
nvarchar (500) |
Notes about the agent |
| ValidFromDate |
datetime |
The date of the begin of the exsistence of the agent, e.g. the birthday of a person or the founding of an institution, calculated from ValidFromDay, - Month and -Year |
| ValidFromDay |
tinyint |
The day of the begin of the exsistence of the agent |
| ValidFromMonth |
tinyint |
The month of the begin of the exsistence of the agent |
| ValidFromYear |
smallint |
The year of the begin of the exsistence of the agent |
| ValidUntilDate |
datetime |
The date of the end of the exsistence of the agent, e.g. death of a person or closing of an institute, calculated from ValidUntilDay, - Month and -Year |
| ValidUntilDay |
tinyint |
The day of the end of the exsistence of the agent |
| ValidUntilMonth |
tinyint |
The month of the end of the exsistence of the agent |
| ValidUntilYear |
smallint |
The year of the end of the exsistence of the agent |
| ValidDateSupplement |
nvarchar (255) |
Verbal or additional date information, e.g. ’end of summer 1985’, ‘first quarter’. The time of the valid date if necessary. |
| SynonymToAgentID |
int |
The AgentID of the agent which was selected as a replacement for the current agent, e.g. if to equal datasets were imported from different sources |
| SynonymisationType |
nvarchar (50) |
The type of the synonymisation like “replaced with”, “synonym to” |
| RevisionLevel |
nvarchar (50) |
The level of the revision of the agent, e.g. ‘unchecked’, ‘final revision’ |
| PlaceOfBirth |
nvarchar (500) |
The place (e.g. a city) where a person was born or an institution was founded |
| PlaceOfDeath |
nvarchar (500) |
The place (e.g.a city) where the person died |
| DataWithholdingReason |
nvarchar (255) |
If the dataset is withhold, the reason for withholding the data, otherwise null |
| ContentLanguage |
nvarchar (50) |
The language of the content |
Depending on:
Provides the first contact information that is not withheld and valid including contact information of parent agents
| Column |
DataType |
Description |
| AgentID |
int |
Unique ID for the Agent (= Primary key) |
| DisplayOrder |
tinyint |
Display order of records in user interface. DisplayOrder 1 corresponds to the preferred address (= part of primary key) |
| ParentName |
nvarchar (200) |
- |
| AddressType |
nvarchar (50) |
Type of the adress, e.g. private |
| Country |
nvarchar (255) |
Country of the address |
| City |
nvarchar (255) |
City of the address |
| PostalCode |
nvarchar (50) |
ZIP or postcode of the address (usually output before or after the city) |
| Streetaddress |
nvarchar (255) |
Usually street name and number, but may also contain post office box |
| Address |
nvarchar (255) |
Free text postal address of the agent |
| Telephone |
nvarchar (50) |
Phone number, including area code |
| CellularPhone |
nvarchar (50) |
The number of a mobile telephone device of the agent |
| Telefax |
nvarchar (50) |
Fax number, including area code |
| Email |
nvarchar (255) |
E-mail address of the agent |
| URI |
nvarchar (255) |
URI pointing to a homepage containing further information |
| Notes |
nvarchar (MAX) |
Notes about the agent |
| ValidFrom |
datetime |
The date when this address became valid as date according to ISO 8601 |
| ValidUntil |
datetime |
The date of the expiration of the validity of this address as date according to ISO 8601 |
| LogUpdatedWhen |
smalldatetime |
Date and time when the data were last updated. |
Depending on:
- Agent
- AgentContactInformation
Function AgentHierarchy
Returns the list of agents within the hierarchy starting at the topmost agent related to the agent with the given AgentID
| Parameter |
DataType |
Description |
| @AgentID |
int |
The AgentID of the agent for which the hierarchy should be retrieved |
| Column |
DataType |
Description |
| AgentID |
int |
Unique ID for the Agent (= Primary key) |
| AgentParentID |
int |
The AgentID of the superior agent if agents are organized within a hierarchy |
| AgentName |
nvarchar (200) |
The whole name of the agent as shown e.g. for selection in an user interface. For persons this entry will be generated as follows: LastName, FirstNames, AgentTitle |
| Version |
smallint |
The version of a agent record (revision number, internally filled by system) |
| AgentTitle |
nvarchar (50) |
The title of the agent, e.g. Dr., Prof. |
| GivenName |
nvarchar (255) |
The first names of the agent (if a person) or the name of e.g. an institution |
| InheritedName |
nvarchar (255) |
The last names of the agent (if a person) |
| Abbreviation |
nvarchar (50) |
Abbreviation of the agent |
| AgentType |
nvarchar (50) |
The type of the agent, e.g. person, company |
| AgentRole |
nvarchar (255) |
The role of an agent esp. a person within an organization. e.g. “Database Administrator” or “Curator” |
| Description |
nvarchar (1000) |
A description of the agent |
| Notes |
nvarchar (500) |
Notes about the agent |
| ValidFromDate |
datetime |
The date of the begin of the exsistence of the agent, e.g. the birthday of a person or the founding of an institution, calculated from ValidFromDay, - Month and -Year |
| ValidFromDay |
tinyint |
The day of the begin of the exsistence of the agent |
| ValidFromMonth |
tinyint |
The month of the begin of the exsistence of the agent |
| ValidFromYear |
smallint |
The year of the begin of the exsistence of the agent |
| ValidUntilDate |
datetime |
The date of the end of the exsistence of the agent, e.g. death of a person or closing of an institute, calculated from ValidUntilDay, - Month and -Year |
| ValidUntilDay |
tinyint |
The day of the end of the exsistence of the agent |
| ValidUntilMonth |
tinyint |
The month of the end of the exsistence of the agent |
| ValidUntilYear |
smallint |
The year of the end of the exsistence of the agent |
| ValidDateSupplement |
nvarchar (255) |
Verbal or additional date information, e.g. ’end of summer 1985’, ‘first quarter’. The time of the valid date if necessary. |
| SynonymToAgentID |
int |
The AgentID of the agent which was selected as a replacement for the current agent, e.g. if to equal datasets were imported from different sources |
| SynonymisationType |
nvarchar (50) |
The type of the synonymisation like “replaced with”, “synonym to” |
| RevisionLevel |
nvarchar (50) |
The level of the revision of the agent, e.g. ‘unchecked’, ‘final revision’ |
| PlaceOfBirth |
nvarchar (500) |
The place (e.g. a city) where a person was born or an institution was founded |
| PlaceOfDeath |
nvarchar (500) |
The place (e.g.a city) where the person died |
| DataWithholdingReason |
nvarchar (255) |
If the dataset is withhold, the reason for withholding the data, otherwise null |
| ContentLanguage |
nvarchar (50) |
The language of the content |
Depending on:
- Agent
- AgentChildNodes
- AgentTopID
Function AgentHierarchyAllSuperior
Returns the list of all superior agents within the hierarchy and other hierarchies related to the agent with the given AgentID
| Parameter |
DataType |
Description |
| @AgentID |
int |
The ID of the Agent |
| Column |
DataType |
Description |
| AgentID |
int |
Unique ID for the Agent (= Primary key) |
| AgentParentID |
int |
The AgentID of the superior agent if agents are organized within a hierarchy |
| AgentName |
nvarchar (200) |
The whole name of the agent as shown e.g. for selection in an user interface. For persons this entry will be generated as follows: LastName, FirstNames, AgentTitle |
Depending on:
- Agent
- AgentHierarchyOther
- AgentSuperiorList
Function AgentNames
Returns a table that lists all the agents with their names according to the selected display type
| Parameter |
DataType |
Description |
| @DisplayType |
nvarchar (50) |
The type of the display as documented in the table dbo.AgentNameDisplayType_Enum |
| Column |
DataType |
Description |
| AgentID |
int |
Unique ID for the Agent (= Primary key) |
| AgentName |
nvarchar (200) |
The whole name of the agent as shown e.g. for selection in an user interface. For persons this entry will be generated as follows: LastName, FirstNames, AgentTitle |
Depending on:
Function AgentSuperiorList
Returns the list of superior agents as retrieved from the hierarchy
| Parameter |
DataType |
Description |
| @AgentID |
int |
Unique ID for the Agent (= Primary key) |
| Column |
DataType |
Description |
| AgentID |
int |
Unique ID for the Agent (= Primary key) |
| AgentParentID |
int |
The AgentID of the superior agent if agents are organized within a hierarchy |
| AgentName |
nvarchar (200) |
The whole name of the agent as shown e.g. for selection in an user interface. For persons this entry will be generated as follows: LastName, FirstNames, AgentTitle |
| Version |
smallint |
The version of a agent record (revision number, internally filled by system) |
| AgentTitle |
nvarchar (50) |
The title of the agent, e.g. Dr., Prof. |
| GivenName |
nvarchar (255) |
The first names of the agent (if a person) or the name of e.g. an institution |
| InheritedName |
nvarchar (255) |
The last names of the agent (if a person) |
| Abbreviation |
nvarchar (50) |
Abbreviation of the agent |
| AgentType |
nvarchar (50) |
The type of the agent, e.g. person, company |
| AgentRole |
nvarchar (255) |
The role of an agent esp. a person within an organization. e.g. “Database Administrator” or “Curator” |
| Description |
nvarchar (1000) |
A description of the agent |
| Notes |
nvarchar (500) |
Notes about the agent |
| ValidFromDate |
datetime |
The date of the begin of the exsistence of the agent, e.g. the birthday of a person or the founding of an institution, calculated from ValidFromDay, - Month and -Year |
| ValidFromDay |
tinyint |
The day of the begin of the exsistence of the agent |
| ValidFromMonth |
tinyint |
The month of the begin of the exsistence of the agent |
| ValidFromYear |
smallint |
The year of the begin of the exsistence of the agent |
| ValidUntilDate |
datetime |
The date of the end of the exsistence of the agent, e.g. death of a person or closing of an institute, calculated from ValidUntilDay, - Month and -Year |
| ValidUntilDay |
tinyint |
The day of the end of the exsistence of the agent |
| ValidUntilMonth |
tinyint |
The month of the end of the exsistence of the agent |
| ValidUntilYear |
smallint |
The year of the end of the exsistence of the agent |
| ValidDateSupplement |
nvarchar (255) |
Verbal or additional date information, e.g. ’end of summer 1985’, ‘first quarter’. The time of the valid date if necessary. |
| SynonymToAgentID |
int |
The AgentID of the agent which was selected as a replacement for the current agent, e.g. if to equal datasets were imported from different sources |
| SynonymisationType |
nvarchar (50) |
The type of the synonymisation like “replaced with”, “synonym to” |
| RevisionLevel |
nvarchar (50) |
The level of the revision of the agent, e.g. ‘unchecked’, ‘final revision’ |
| PlaceOfBirth |
nvarchar (500) |
The place (e.g. a city) where a person was born or an institution was founded |
| PlaceOfDeath |
nvarchar (500) |
The place (e.g.a city) where the person died |
| DataWithholdingReason |
nvarchar (255) |
If the dataset is withhold, the reason for withholding the data, otherwise null |
| ContentLanguage |
nvarchar (50) |
The language of the content |
| DisplayOrder |
int |
Display order according to the hierarchy with 1 for the current dataset und increasing values for higher levels in the hierarchy |
Depending on:
Function AgentSynonymTopID
Returns the top AgentID within the synyonym hierarchy for a given AgentID
DataType: int
| Parameter |
DataType |
Description |
| @AgentID |
int |
Unique ID for the Agent (= Primary key) |
Depending on:
Function AgentSynonymy
Returns all agents within the synonymy of the given agent
| Parameter |
DataType |
Description |
| @AgentID |
int |
Unique ID for the Agent (= Primary key) |
| Column |
DataType |
Description |
| AgentID |
int |
Unique ID for the Agent (= Primary key) |
| AgentParentID |
int |
The AgentID of the superior agent if agents are organized within a hierarchy |
| AgentName |
nvarchar (200) |
The whole name of the agent as shown e.g. for selection in an user interface. For persons this entry will be generated as follows: LastName, FirstNames, AgentTitle |
| Version |
smallint |
The version of a agent record (revision number, internally filled by system) |
| AgentTitle |
nvarchar (50) |
The title of the agent, e.g. Dr., Prof. |
| GivenName |
nvarchar (255) |
The first names of the agent (if a person) or the name of e.g. an institution |
| InheritedName |
nvarchar (255) |
The last names of the agent (if a person) |
| Abbreviation |
nvarchar (50) |
Abbreviation of the agent |
| AgentType |
nvarchar (50) |
The type of the agent, e.g. person, company |
| AgentRole |
nvarchar (255) |
The role of an agent esp. a person within an organization. e.g. “Database Administrator” or “Curator” |
| Description |
nvarchar (1000) |
A description of the agent |
| Notes |
nvarchar (500) |
Notes about the agent |
| ValidFromDate |
datetime |
The date of the begin of the exsistence of the agent, e.g. the birthday of a person or the founding of an institution, calculated from ValidFromDay, - Month and -Year |
| ValidFromDay |
tinyint |
The day of the begin of the exsistence of the agent |
| ValidFromMonth |
tinyint |
The month of the begin of the exsistence of the agent |
| ValidFromYear |
smallint |
The year of the begin of the exsistence of the agent |
| ValidUntilDate |
datetime |
The date of the end of the exsistence of the agent, e.g. death of a person or closing of an institute, calculated from ValidUntilDay, - Month and -Year |
| ValidUntilDay |
tinyint |
The day of the end of the exsistence of the agent |
| ValidUntilMonth |
tinyint |
The month of the end of the exsistence of the agent |
| ValidUntilYear |
smallint |
The year of the end of the exsistence of the agent |
| ValidDateSupplement |
nvarchar (255) |
Verbal or additional date information, e.g. ’end of summer 1985’, ‘first quarter’. The time of the valid date if necessary. |
| SynonymToAgentID |
int |
The AgentID of the agent which was selected as a replacement for the current agent, e.g. if to equal datasets were imported from different sources |
| SynonymisationType |
nvarchar (50) |
The type of the synonymisation like “replaced with”, “synonym to” |
| RevisionLevel |
nvarchar (50) |
The level of the revision of the agent, e.g. ‘unchecked’, ‘final revision’ |
| PlaceOfBirth |
nvarchar (500) |
The place (e.g. a city) where a person was born or an institution was founded |
| PlaceOfDeath |
nvarchar (500) |
The place (e.g.a city) where the person died |
| DataWithholdingReason |
nvarchar (255) |
If the dataset is withhold, the reason for withholding the data, otherwise null |
| ContentLanguage |
nvarchar (50) |
The language of the content |
Depending on:
- Agent
- AgentSynonymTopID
- AgentSynonymyChildNodes
Function AgentSynonymyChildNodes
The depending synonymys of a given agent
| Parameter |
DataType |
Description |
| @ID |
int |
The AgentID of the agent for which the depending synonymys should be retrieved |
| Column |
DataType |
Description |
| AgentID |
int |
Unique ID for the Agent (= Primary key) |
| AgentParentID |
int |
The AgentID of the superior agent if agents are organized within a hierarchy |
| AgentName |
nvarchar (200) |
The whole name of the agent as shown e.g. for selection in an user interface. For persons this entry will be generated as follows: LastName, FirstNames, AgentTitle |
| Version |
smallint |
The version of a agent record (revision number, internally filled by system) |
| AgentTitle |
nvarchar (50) |
The title of the agent, e.g. Dr., Prof. |
| GivenName |
nvarchar (255) |
The first names of the agent (if a person) or the name of e.g. an institution |
| InheritedName |
nvarchar (255) |
The last names of the agent (if a person) |
| Abbreviation |
nvarchar (50) |
Abbreviation of the agent |
| AgentType |
nvarchar (50) |
The type of the agent, e.g. person, company |
| AgentRole |
nvarchar (255) |
The role of an agent esp. a person within an organization. e.g. “Database Administrator” or “Curator” |
| Description |
nvarchar (1000) |
A description of the agent |
| Notes |
nvarchar (500) |
Notes about the agent |
| ValidFromDate |
datetime |
The date of the begin of the exsistence of the agent, e.g. the birthday of a person or the founding of an institution, calculated from ValidFromDay, - Month and -Year |
| ValidFromDay |
tinyint |
The day of the begin of the exsistence of the agent |
| ValidFromMonth |
tinyint |
The month of the begin of the exsistence of the agent |
| ValidFromYear |
smallint |
The year of the begin of the exsistence of the agent |
| ValidUntilDate |
datetime |
The date of the end of the exsistence of the agent, e.g. death of a person or closing of an institute, calculated from ValidUntilDay, - Month and -Year |
| ValidUntilDay |
tinyint |
The day of the end of the exsistence of the agent |
| ValidUntilMonth |
tinyint |
The month of the end of the exsistence of the agent |
| ValidUntilYear |
smallint |
The year of the end of the exsistence of the agent |
| ValidDateSupplement |
nvarchar (255) |
Verbal or additional date information, e.g. ’end of summer 1985’, ‘first quarter’. The time of the valid date if necessary. |
| SynonymToAgentID |
int |
The AgentID of the agent which was selected as a replacement for the current agent, e.g. if to equal datasets were imported from different sources |
| SynonymisationType |
nvarchar (50) |
The type of the synonymisation like “replaced with”, “synonym to” |
| RevisionLevel |
nvarchar (50) |
The level of the revision of the agent, e.g. ‘unchecked’, ‘final revision’ |
| PlaceOfBirth |
nvarchar (500) |
The place (e.g. a city) where a person was born or an institution was founded |
| PlaceOfDeath |
nvarchar (500) |
The place (e.g.a city) where the person died |
| DataWithholdingReason |
nvarchar (255) |
If the dataset is withhold, the reason for withholding the data, otherwise null |
| ContentLanguage |
nvarchar (50) |
The language of the content |
Depending on:
Function AgentTopID
Returns the top ID within the hierarchy for a given AgentID from the table Agent.
DataType: int
| Parameter |
DataType |
Description |
| @AgentID |
int |
The AgentID of the agent for which the top ID should be retrieved |
Depending on:
Function BaseURL
Provides the basic address for accessing the database
DataType: varchar (255)
Function DefaultAgentNameDisplayType
The default display type as set for the default project
DataType: nvarchar (50)
Depending on:
- DefaultProjectID
- ProjectProxy
Function DefaultProjectID
Returns the default ProjectID for a user as set in table UserProxy
DataType: int
Depending on:
Function DiversityWorkbenchModule
The name of the DiversityWorkbench module
DataType: nvarchar (50)
Function UserID
ID of the User as stored in table UserProxy
DataType: int
Depending on:
Function Version
The version of the database
DataType: nvarchar (8)
Function VersionClient
Version of the client software compatible with the version of the database
DataType: nvarchar (11)
PROCEDURES
Procedure procInsertAgentCopy
Creates a copy of a given agent and returns the AgentID of the new agent
| Parameter |
DataType |
Description |
| @AgentID |
int |
The AgentID of the created agent |
| @CopyID |
int |
The AgentID of the agent that should be copied |
| @AgentName |
nvarchar (200) |
A temporary display text for the created agent |
Depending on:
- Agent
- AgentContactInformation
- AgentExternalID
- AgentImage
- AgentKeyword
- AgentProject
- AgentReference
- AgentRelation
Procedure procSetVersionAgent
Setting the version of a dataset
| Parameter |
DataType |
Description |
| @ID |
int |
The AgentID of the agent |
Depending on:
Procedure SetUserProjects
Create database user and assign training projects
| Parameter |
DataType |
Description |
| @User |
varchar (50) |
LoginName of the User |
Depending on:
ROLES
| Content of cell |
Permission |
|
Not granted |
| Name of other role |
Inherited from other role |
| • |
Granted |
Role DiversityWorkbenchAdministrator
Role for the adminstration of the database
| Permissions |
SELECT |
INSERT |
UPDATE |
DELETE |
EXECUTE |
Type |
| AddressType_Enum |
Diversity Workbench User |
|
|
|
|
TABLE |
| Agent |
Diversity Workbench User |
Diversity Workbench Editor |
Diversity Workbench Editor |
• |
|
TABLE |
| Agent_log |
Diversity Workbench Editor |
Diversity Workbench Editor |
|
|
|
TABLE |
| AgentContactInformation |
Diversity Workbench User |
Diversity Workbench Editor |
Diversity Workbench Editor |
• |
|
TABLE |
| AgentContactInformation_log |
Diversity Workbench Editor |
Diversity Workbench Editor |
|
|
|
TABLE |
| AgentDescriptor |
Diversity Workbench User |
Diversity Workbench Editor |
Diversity Workbench Editor |
Diversity Workbench Editor |
|
TABLE |
| AgentDescriptor_log |
Diversity Workbench User |
Diversity Workbench Editor |
|
|
|
TABLE |
| AgentDescriptorType_Enum |
Diversity Workbench User |
• |
• |
• |
|
TABLE |
| AgentExternalDatabase |
Diversity Workbench User |
|
|
|
|
TABLE |
| AgentExternalDatabase_log |
|
|
|
|
|
TABLE |
| AgentExternalID |
Diversity Workbench User |
Diversity Workbench Editor |
Diversity Workbench Editor |
• |
|
TABLE |
| AgentExternalID_log |
|
|
|
|
|
TABLE |
| AgentGender_Enum |
Diversity Workbench User |
|
|
|
|
TABLE |
| AgentHierarchyOther |
Diversity Workbench User |
Diversity Workbench Editor |
Diversity Workbench Editor |
Diversity Workbench Editor |
|
TABLE |
| AgentHierarchyOther_log |
Diversity Workbench Editor |
Diversity Workbench Editor |
|
|
|
TABLE |
| AgentIdentifier |
Diversity Workbench User |
Diversity Workbench Editor |
Diversity Workbench Editor |
Diversity Workbench Editor |
|
TABLE |
| AgentIdentifier_log |
Diversity Workbench Editor |
Diversity Workbench Editor |
|
|
|
TABLE |
| AgentIdentifierType_Enum |
Diversity Workbench User |
• |
• |
• |
|
TABLE |
| AgentImage |
Diversity Workbench User |
Diversity Workbench Editor |
Diversity Workbench Editor |
Diversity Workbench Editor |
|
TABLE |
| AgentImage_log |
Diversity Workbench Editor |
Diversity Workbench Editor |
|
|
|
TABLE |
| AgentImageType_Enum |
Diversity Workbench User |
• |
• |
• |
|
TABLE |
| AgentKeyword |
Diversity Workbench User |
Diversity Workbench Editor |
Diversity Workbench Editor |
Diversity Workbench Editor |
|
TABLE |
| AgentKeyword_log |
Diversity Workbench Editor |
Diversity Workbench Editor |
|
|
|
TABLE |
| AgentNameDisplayType_Enum |
Diversity Workbench User |
|
|
|
|
TABLE |
| AgentProject |
Diversity Workbench User |
Diversity Workbench Editor |
|
• |
|
TABLE |
| AgentProject_log |
Diversity Workbench Editor |
Diversity Workbench Editor |
|
|
|
TABLE |
| AgentReference |
Diversity Workbench User |
Diversity Workbench Editor |
Diversity Workbench Editor |
Diversity Workbench Editor |
|
TABLE |
| AgentReference_log |
Diversity Workbench Editor |
Diversity Workbench Editor |
|
|
|
TABLE |
| AgentRelation |
Diversity Workbench User |
Diversity Workbench Editor |
Diversity Workbench Editor |
Diversity Workbench Editor |
|
TABLE |
| AgentRelation_log |
Diversity Workbench Editor |
Diversity Workbench Editor |
|
|
|
TABLE |
| AgentRelationType_Enum |
Diversity Workbench User |
|
|
|
|
TABLE |
| AgentSynonymisationType_Enum |
Diversity Workbench User |
|
|
|
|
TABLE |
| AgentTitle_Enum |
Diversity Workbench User |
|
|
|
|
TABLE |
| AgentType_Enum |
Diversity Workbench User |
|
|
|
|
TABLE |
| LanguageCode_Enum |
Diversity Workbench User |
• |
• |
• |
|
TABLE |
| RevisionLevel_Enum |
Diversity Workbench User |
|
|
|
|
TABLE |
| Agent_Core |
Diversity Workbench User |
|
|
|
|
VIEW |
| AgentID_AvailableReadOnly |
Diversity Workbench User |
|
|
|
|
VIEW |
| AgentID_FullAccess |
Diversity Workbench User |
|
|
|
|
VIEW |
| AgentID_Locked |
Diversity Workbench User |
|
|
|
|
VIEW |
| AgentID_ReadOnly |
Diversity Workbench User |
|
|
|
|
VIEW |
| AgentID_UserAvailable |
Diversity Workbench User |
|
|
|
|
VIEW |
| ProjectList |
Diversity Workbench User |
|
|
|
|
VIEW |
| PublicAgent |
Diversity Workbench User |
|
|
|
|
VIEW |
| PublicContactInformation |
Diversity Workbench User |
|
|
|
|
VIEW |
| PublicIdentifier |
Diversity Workbench User |
|
|
|
|
VIEW |
| PublicImage |
Diversity Workbench User |
|
|
|
|
VIEW |
| PublicReference |
Diversity Workbench User |
|
|
|
|
VIEW |
| PublicRelation |
Diversity Workbench User |
|
|
|
|
VIEW |
| UserInfo |
Diversity Workbench Editor |
|
Diversity Workbench Editor |
|
|
VIEW |
| ViewAgentAddress |
Diversity Workbench User |
|
|
|
|
VIEW |
| ViewAgentNames |
Diversity Workbench User |
|
|
|
|
VIEW |
| ViewBaseURL |
Diversity Workbench User |
|
|
|
|
VIEW |
| ViewDefaultAgentNameDisplayType |
Diversity Workbench User |
|
|
|
|
VIEW |
| ViewDiversityWorkbenchModule |
Diversity Workbench User |
|
|
|
|
VIEW |
| AgentAddress |
Diversity Workbench User |
|
|
|
|
FUNCTION |
| AgentChildNodes |
Diversity Workbench User |
|
|
|
|
FUNCTION |
| AgentContactInformation_Public |
Diversity Workbench User |
|
|
|
|
FUNCTION |
| AgentHierarchy |
Diversity Workbench User |
|
|
|
|
FUNCTION |
| AgentHierarchyAllSuperior |
Diversity Workbench User |
|
|
|
|
FUNCTION |
| AgentNames |
Diversity Workbench User |
|
|
|
|
FUNCTION |
| AgentSuperiorList |
Diversity Workbench User |
|
|
|
|
FUNCTION |
| AgentSynonymTopID |
|
|
|
|
Diversity Workbench User |
FUNCTION |
| AgentSynonymy |
Diversity Workbench User |
|
|
|
|
FUNCTION |
| AgentSynonymyChildNodes |
Diversity Workbench User |
|
|
|
|
FUNCTION |
| AgentTopID |
|
|
|
|
Diversity Workbench User |
FUNCTION |
| BaseURL |
|
|
|
|
Diversity Workbench User |
FUNCTION |
| DefaultAgentNameDisplayType |
|
|
|
|
Diversity Workbench User |
FUNCTION |
| DefaultProjectID |
|
|
|
|
Diversity Workbench User |
FUNCTION |
| DiversityWorkbenchModule |
|
|
|
|
Diversity Workbench User |
FUNCTION |
| UserID |
|
|
|
|
Diversity Workbench User |
FUNCTION |
| Version |
|
|
|
|
Diversity Workbench User |
FUNCTION |
| VersionClient |
|
|
|
|
Diversity Workbench User |
FUNCTION |
| procInsertAgentCopy |
|
|
|
|
Diversity Workbench Editor |
PROCEDURE |
| procSetVersionAgent |
|
|
|
|
Diversity Workbench Editor |
PROCEDURE |
| SetUserProjects |
|
|
|
|
|
PROCEDURE |
| Inheriting from roles: |
|
|
|
|
|
|
Role DiversityWorkbenchEditor
Role with write access for the database
| Permissions |
SELECT |
INSERT |
UPDATE |
DELETE |
EXECUTE |
Type |
| AddressType_Enum |
Diversity Workbench User |
|
|
|
|
TABLE |
| Agent |
Diversity Workbench User |
• |
• |
|
|
TABLE |
| Agent_log |
• |
• |
|
|
|
TABLE |
| AgentContactInformation |
Diversity Workbench User |
• |
• |
|
|
TABLE |
| AgentContactInformation_log |
• |
• |
|
|
|
TABLE |
| AgentDescriptor |
Diversity Workbench User |
• |
• |
• |
|
TABLE |
| AgentDescriptor_log |
Diversity Workbench User |
• |
|
|
|
TABLE |
| AgentDescriptorType_Enum |
Diversity Workbench User |
|
|
|
|
TABLE |
| AgentExternalDatabase |
Diversity Workbench User |
|
|
|
|
TABLE |
| AgentExternalDatabase_log |
|
|
|
|
|
TABLE |
| AgentExternalID |
Diversity Workbench User |
• |
• |
|
|
TABLE |
| AgentExternalID_log |
|
|
|
|
|
TABLE |
| AgentGender_Enum |
Diversity Workbench User |
|
|
|
|
TABLE |
| AgentHierarchyOther |
Diversity Workbench User |
• |
• |
• |
|
TABLE |
| AgentHierarchyOther_log |
• |
• |
|
|
|
TABLE |
| AgentIdentifier |
Diversity Workbench User |
• |
• |
• |
|
TABLE |
| AgentIdentifier_log |
• |
• |
|
|
|
TABLE |
| AgentIdentifierType_Enum |
Diversity Workbench User |
|
|
|
|
TABLE |
| AgentImage |
Diversity Workbench User |
• |
• |
• |
|
TABLE |
| AgentImage_log |
• |
• |
|
|
|
TABLE |
| AgentImageType_Enum |
Diversity Workbench User |
|
|
|
|
TABLE |
| AgentKeyword |
Diversity Workbench User |
• |
• |
• |
|
TABLE |
| AgentKeyword_log |
• |
• |
|
|
|
TABLE |
| AgentNameDisplayType_Enum |
Diversity Workbench User |
|
|
|
|
TABLE |
| AgentProject |
Diversity Workbench User |
• |
|
• |
|
TABLE |
| AgentProject_log |
• |
• |
|
|
|
TABLE |
| AgentReference |
Diversity Workbench User |
• |
• |
• |
|
TABLE |
| AgentReference_log |
• |
• |
|
|
|
TABLE |
| AgentRelation |
Diversity Workbench User |
• |
• |
• |
|
TABLE |
| AgentRelation_log |
• |
• |
|
|
|
TABLE |
| AgentRelationType_Enum |
Diversity Workbench User |
|
|
|
|
TABLE |
| AgentSynonymisationType_Enum |
Diversity Workbench User |
|
|
|
|
TABLE |
| AgentTitle_Enum |
Diversity Workbench User |
|
|
|
|
TABLE |
| AgentType_Enum |
Diversity Workbench User |
|
|
|
|
TABLE |
| LanguageCode_Enum |
Diversity Workbench User |
|
|
|
|
TABLE |
| RevisionLevel_Enum |
Diversity Workbench User |
|
|
|
|
TABLE |
| Agent_Core |
Diversity Workbench User |
|
|
|
|
VIEW |
| AgentID_AvailableReadOnly |
Diversity Workbench User |
|
|
|
|
VIEW |
| AgentID_FullAccess |
Diversity Workbench User |
|
|
|
|
VIEW |
| AgentID_Locked |
Diversity Workbench User |
|
|
|
|
VIEW |
| AgentID_ReadOnly |
Diversity Workbench User |
|
|
|
|
VIEW |
| AgentID_UserAvailable |
Diversity Workbench User |
|
|
|
|
VIEW |
| ProjectList |
Diversity Workbench User |
|
|
|
|
VIEW |
| PublicAgent |
Diversity Workbench User |
|
|
|
|
VIEW |
| PublicContactInformation |
Diversity Workbench User |
|
|
|
|
VIEW |
| PublicIdentifier |
Diversity Workbench User |
|
|
|
|
VIEW |
| PublicImage |
Diversity Workbench User |
|
|
|
|
VIEW |
| PublicReference |
Diversity Workbench User |
|
|
|
|
VIEW |
| PublicRelation |
Diversity Workbench User |
|
|
|
|
VIEW |
| UserInfo |
• |
|
• |
|
|
VIEW |
| ViewAgentAddress |
Diversity Workbench User |
|
|
|
|
VIEW |
| ViewAgentNames |
Diversity Workbench User |
|
|
|
|
VIEW |
| ViewBaseURL |
Diversity Workbench User |
|
|
|
|
VIEW |
| ViewDefaultAgentNameDisplayType |
Diversity Workbench User |
|
|
|
|
VIEW |
| ViewDiversityWorkbenchModule |
Diversity Workbench User |
|
|
|
|
VIEW |
| AgentAddress |
Diversity Workbench User |
|
|
|
|
FUNCTION |
| AgentChildNodes |
Diversity Workbench User |
|
|
|
|
FUNCTION |
| AgentContactInformation_Public |
Diversity Workbench User |
|
|
|
|
FUNCTION |
| AgentHierarchy |
Diversity Workbench User |
|
|
|
|
FUNCTION |
| AgentHierarchyAllSuperior |
Diversity Workbench User |
|
|
|
|
FUNCTION |
| AgentNames |
Diversity Workbench User |
|
|
|
|
FUNCTION |
| AgentSuperiorList |
Diversity Workbench User |
|
|
|
|
FUNCTION |
| AgentSynonymTopID |
|
|
|
|
Diversity Workbench User |
FUNCTION |
| AgentSynonymy |
Diversity Workbench User |
|
|
|
|
FUNCTION |
| AgentSynonymyChildNodes |
Diversity Workbench User |
|
|
|
|
FUNCTION |
| AgentTopID |
|
|
|
|
Diversity Workbench User |
FUNCTION |
| BaseURL |
|
|
|
|
Diversity Workbench User |
FUNCTION |
| DefaultAgentNameDisplayType |
|
|
|
|
Diversity Workbench User |
FUNCTION |
| DefaultProjectID |
|
|
|
|
Diversity Workbench User |
FUNCTION |
| DiversityWorkbenchModule |
|
|
|
|
Diversity Workbench User |
FUNCTION |
| UserID |
|
|
|
|
Diversity Workbench User |
FUNCTION |
| Version |
|
|
|
|
Diversity Workbench User |
FUNCTION |
| VersionClient |
|
|
|
|
Diversity Workbench User |
FUNCTION |
| procInsertAgentCopy |
|
|
|
|
• |
PROCEDURE |
| procSetVersionAgent |
|
|
|
|
• |
PROCEDURE |
| SetUserProjects |
|
|
|
|
|
PROCEDURE |
| Inheriting from roles: |
|
|
|
|
|
|
Role DiversityWorkbenchUser
Role with read only access to the database
| Permissions |
SELECT |
INSERT |
UPDATE |
DELETE |
EXECUTE |
Type |
| AddressType_Enum |
• |
|
|
|
|
TABLE |
| Agent |
• |
|
|
|
|
TABLE |
| Agent_log |
|
|
|
|
|
TABLE |
| AgentContactInformation |
• |
|
|
|
|
TABLE |
| AgentContactInformation_log |
|
|
|
|
|
TABLE |
| AgentDescriptor |
• |
|
|
|
|
TABLE |
| AgentDescriptor_log |
• |
|
|
|
|
TABLE |
| AgentDescriptorType_Enum |
• |
|
|
|
|
TABLE |
| AgentExternalDatabase |
• |
|
|
|
|
TABLE |
| AgentExternalDatabase_log |
|
|
|
|
|
TABLE |
| AgentExternalID |
• |
|
|
|
|
TABLE |
| AgentExternalID_log |
|
|
|
|
|
TABLE |
| AgentGender_Enum |
• |
|
|
|
|
TABLE |
| AgentHierarchyOther |
• |
|
|
|
|
TABLE |
| AgentHierarchyOther_log |
|
|
|
|
|
TABLE |
| AgentIdentifier |
• |
|
|
|
|
TABLE |
| AgentIdentifier_log |
|
|
|
|
|
TABLE |
| AgentIdentifierType_Enum |
• |
|
|
|
|
TABLE |
| AgentImage |
• |
|
|
|
|
TABLE |
| AgentImage_log |
|
|
|
|
|
TABLE |
| AgentImageType_Enum |
• |
|
|
|
|
TABLE |
| AgentKeyword |
• |
|
|
|
|
TABLE |
| AgentKeyword_log |
|
|
|
|
|
TABLE |
| AgentNameDisplayType_Enum |
• |
|
|
|
|
TABLE |
| AgentProject |
• |
|
|
|
|
TABLE |
| AgentProject_log |
|
|
|
|
|
TABLE |
| AgentReference |
• |
|
|
|
|
TABLE |
| AgentReference_log |
|
|
|
|
|
TABLE |
| AgentRelation |
• |
|
|
|
|
TABLE |
| AgentRelation_log |
|
|
|
|
|
TABLE |
| AgentRelationType_Enum |
• |
|
|
|
|
TABLE |
| AgentSynonymisationType_Enum |
• |
|
|
|
|
TABLE |
| AgentTitle_Enum |
• |
|
|
|
|
TABLE |
| AgentType_Enum |
• |
|
|
|
|
TABLE |
| LanguageCode_Enum |
• |
|
|
|
|
TABLE |
| RevisionLevel_Enum |
• |
|
|
|
|
TABLE |
| Agent_Core |
• |
|
|
|
|
VIEW |
| AgentID_AvailableReadOnly |
• |
|
|
|
|
VIEW |
| AgentID_FullAccess |
• |
|
|
|
|
VIEW |
| AgentID_Locked |
• |
|
|
|
|
VIEW |
| AgentID_ReadOnly |
• |
|
|
|
|
VIEW |
| AgentID_UserAvailable |
• |
|
|
|
|
VIEW |
| ProjectList |
• |
|
|
|
|
VIEW |
| PublicAgent |
• |
|
|
|
|
VIEW |
| PublicContactInformation |
• |
|
|
|
|
VIEW |
| PublicIdentifier |
• |
|
|
|
|
VIEW |
| PublicImage |
• |
|
|
|
|
VIEW |
| PublicReference |
• |
|
|
|
|
VIEW |
| PublicRelation |
• |
|
|
|
|
VIEW |
| UserInfo |
• |
|
|
|
|
VIEW |
| ViewAgentAddress |
• |
|
|
|
|
VIEW |
| ViewAgentNames |
• |
|
|
|
|
VIEW |
| ViewBaseURL |
• |
|
|
|
|
VIEW |
| ViewDefaultAgentNameDisplayType |
• |
|
|
|
|
VIEW |
| ViewDiversityWorkbenchModule |
• |
|
|
|
|
VIEW |
| AgentAddress |
• |
|
|
|
|
FUNCTION |
| AgentChildNodes |
• |
|
|
|
|
FUNCTION |
| AgentContactInformation_Public |
• |
|
|
|
|
FUNCTION |
| AgentHierarchy |
• |
|
|
|
|
FUNCTION |
| AgentHierarchyAllSuperior |
• |
|
|
|
|
FUNCTION |
| AgentNames |
• |
|
|
|
|
FUNCTION |
| AgentSuperiorList |
• |
|
|
|
|
FUNCTION |
| AgentSynonymTopID |
|
|
|
|
• |
FUNCTION |
| AgentSynonymy |
• |
|
|
|
|
FUNCTION |
| AgentSynonymyChildNodes |
• |
|
|
|
|
FUNCTION |
| AgentTopID |
|
|
|
|
• |
FUNCTION |
| BaseURL |
|
|
|
|
• |
FUNCTION |
| DefaultAgentNameDisplayType |
|
|
|
|
• |
FUNCTION |
| DefaultProjectID |
|
|
|
|
• |
FUNCTION |
| DiversityWorkbenchModule |
|
|
|
|
• |
FUNCTION |
| UserID |
|
|
|
|
• |
FUNCTION |
| Version |
|
|
|
|
• |
FUNCTION |
| VersionClient |
|
|
|
|
• |
FUNCTION |
| procInsertAgentCopy |
|
|
|
|
|
PROCEDURE |
| procSetVersionAgent |
|
|
|
|
|
PROCEDURE |
| SetUserProjects |
|
|
|
|
|
PROCEDURE |
Diversity Agents
Enumeration tables
The following objects are not included:
- Logging tables
- System objects
- Objects marked as obsolete
- Previous versions of objects
Table
| Column |
Data type |
Description |
| Code |
nvarchar (50) |
A text code that uniquely identifies each object in the enumeration (primary key). This value may not be changed, because the application may depend upon it. |
| ParentCode |
nvarchar (50) |
The code of the superior entry, if a hierarchy within the entries is necessary |
| ParentRelation |
nvarchar (50) |
Relation to parent entry, e.g. part of |
| Description |
nvarchar (500) |
Description of enumerated object, displayed in the user interface |
| DisplayText |
nvarchar (50) |
Short abbreviated description of the object, displayed in the user interface |
| DisplayOrder |
smallint |
The order in which the entries are displayed. The order may be changed at any time, but all values must be unique. |
| DisplayEnable |
bit |
Enumerated objects can be hidden from the user interface if this attribute is set to false (= unchecked check box) |
| URL |
varchar (500) |
A link to further information about the enumerated object |
| InternalNotes |
nvarchar (500) |
Internal development notes about usage, definition, etc. of an enumerated object |
| Icon |
image |
A symbol representing this entry in the user interface |
| ModuleName |
varchar (50) |
If the enumerated entry is related to a DiversityWorkbench module or a related webservice, the name of the DiversityWorkbench module, e.g. DiversityAgents |
| RowGUID |
uniqueidentifier |
-Default value: newsequentialid() |
Table AddressType_Enum
Lookup table for the types of the addresses
Dependent tables:
Content
| Code |
Description |
| office |
office address |
| private |
private address |
Table AgentDescriptorType_Enum
The type of the Descriptors
Dependent tables:
Table AgentGender_Enum
Gender of the agent: female or male
Dependent tables:
Content
| Code |
Description |
| female |
|
| male |
|
Table AgentIdentifierType_Enum
Types of the agent identifier, e.g. ISNI
Dependent tables:
Content
| Code |
Description |
| ISNI |
International Standard Name Identifier (ISO 27729) |
| ORCID |
Open Researcher Contributor Identification |
| ROR |
Research Organization Registry |
Table AgentImageType_Enum
Types of images in table AgentImage, e.g. Logo
Dependent tables:
Content
| Code |
Description |
| Logo |
Logo |
| Portrait |
Portrait |
Table AgentNameDisplayType_Enum
Display types of the names of the agents, defining e.g. the position of title, given and inherited part of the name and their abbreviation
Dependent tables:
Content
| Code |
Description |
| Abbr |
The international defined standard arbbreviation; e.g. L. for Linne |
| G. Ii |
Given name. Inherited name; e.g. H. Hertel |
| Gg Ii |
Given name InheritedName; e.g. Hannes Hertel |
| Ii, G. |
Inherited name, GivenName; e.g. Hertel, H. |
| Ii, Gg |
Inherited name, GivenName; e.g. Hertel, Hannes |
| Tt. G. Ii |
Titel Given name. Inherited name; e.g. Prof. H. Hertel |
| Tt. Gg Ii |
Titel Given name Inherited name; e.g. Prof. Hannes Hertel |
Table AgentRelationType_Enum
Relation types of agents, e.g. Child of
Dependent tables:
Content
| Code |
Description |
| Child of |
|
| Married to |
|
| Parent of |
|
Table AgentSynonymisationType_Enum
Synonymisation types of agents, e.g. synonym to
Dependent tables:
Content
| Code |
Description |
| replaced with |
if the agent was replaced by another entry |
| synonym to |
if the agent is synonym to another agent |
Table AgentTitle_Enum
Lookup table for the titles of the agents
Dependent tables:
Content
| Code |
Description |
|
|
| Dr. |
|
| Frater |
|
| Pater |
|
| Prof. |
|
| Prof. Dr. |
|
Table AgentType_Enum
Lookup table for the types of the agents
Dependent tables:
Content
| Code |
Description |
| Collection |
|
| Company |
|
| Department |
|
| Group |
|
| Institution |
|
| Person |
|
| University |
|
Table LanguageCode_Enum
The codes for the languages
Dependent tables:
Content
| Code |
Description |
|
|
| af |
Afrikaans |
| ar |
Arabisch |
| az |
Aserbaidschanisch |
| be |
Belarussisch |
| bg |
Bulgarisch |
| ca |
Katalanisch |
| cs |
Tschechisch |
| da |
Dänisch |
| de |
Deutsch |
| el |
Griechisch |
| en |
Englisch |
| es |
Spanisch |
| et |
Estnisch |
| eu |
Baskisch |
| fa |
Farsi |
| fi |
Finnisch |
| fo |
Färingisch |
| fr |
Französisch |
| gl |
Galizisch |
| gu |
Gujarati |
| he |
Hebräisch |
| hi |
Hindi |
| hr |
Kroatisch |
| hu |
Ungarisch |
| hy |
Armenisch |
| id |
Indonesisch |
| is |
Isländisch |
| it |
Italienisch |
| ja |
Japanisch |
| ka |
Georgisch |
| kk |
Kasachisch |
| kn |
Kannada |
| ko |
Koreanisch |
| ky |
Kirgisisch |
| lt |
Litauisch |
| lv |
Lettisch |
| mk |
Mazedonisch |
| mn |
Mongolisch |
| mr |
Marathi |
| ms |
Malaiisch |
| nl |
Niederländisch |
| no |
Norwegisch |
| pa |
Punjabi |
| pl |
Polnisch |
| pt |
Portugiesisch |
| ro |
Rumänisch |
| ru |
Russisch |
| sa |
Sanskrit |
| sk |
Slowakisch |
| sl |
Slowenisch |
| sq |
Albanisch |
| sv |
Schwedisch |
| sw |
Swahili |
| ta |
Tamil |
| te |
Telugu |
| th |
Thai |
| tr |
Türkisch |
| tt |
Tatarisch |
| uk |
Ukrainisch |
| ur |
Urdu |
| uz |
Usbekisch |
| vi |
Vietnamesisch |
| zh |
Chinesisch |
Table RevisionLevel_Enum
Lookup table for the revision level
Dependent tables:
Content
| Code |
Description |
| checked |
checked |
| final revision |
final revision |
| review required |
review required |
| to be deleted |
to be deleted |
| unchecked |
unchecked |
History
To inspect the history of a dataset click on the  history button. A form will open, showing all former
states of the data in the tables with the current dataset at the top.
The version is shown in the header of the
main.
history button. A form will open, showing all former
states of the data in the tables with the current dataset at the top.
The version is shown in the header of the
main.
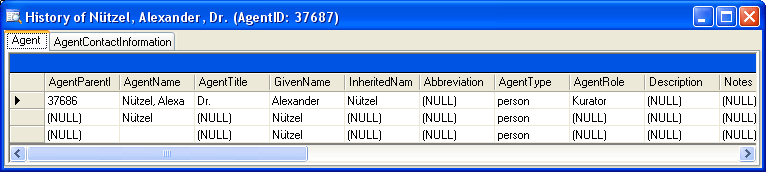
The version will be set automatically. If a dataset is changed the
version will be increased if the last changes where done by a different
user or the last change is more than 24 hours ago (for further details
see topic Logging
).
For analysis of the succession of changes the log tables contain additional columns:
- Kind of change: This column is set by the trigger inserting data into the log table
- current version: This is the current state of the data in the table
- UPDATE: This is the state of the data before an update happened
- DELETE: This is the state of the data when the data have been deleted
- Date of change: The date and time of the changes. This column has the default value getdate() that means the current date an time is set when any data are inserted into the log table
- Responsible: The user reponsible for the changes. This column has the default value suser_sname() that means the current user is set when any data are inserted into the log table
- LogID: A unique ID of the logtable. This column is an identity that means it is set by the database when any data are inserted into the log table
Logging
Changes within the database will be documented for each dataset with the
time and the responsible user in the columns shown in the image below.
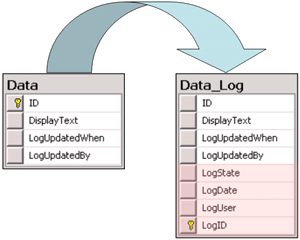
All main tables have a corresponding logging table. If you change or
delete a dataset the orignial dataset will be stored in this logging
table together with informations about who has done the changes and when
it happend. To see the data stored in the logging tables, click on the
button to open the history of a dataset.
Login administration
To administrate the logins on the database server, their permissions and
roles respectively as well as access to projects choose
Administration - Database - Logins ... from the menu. A window
will open as shown below.
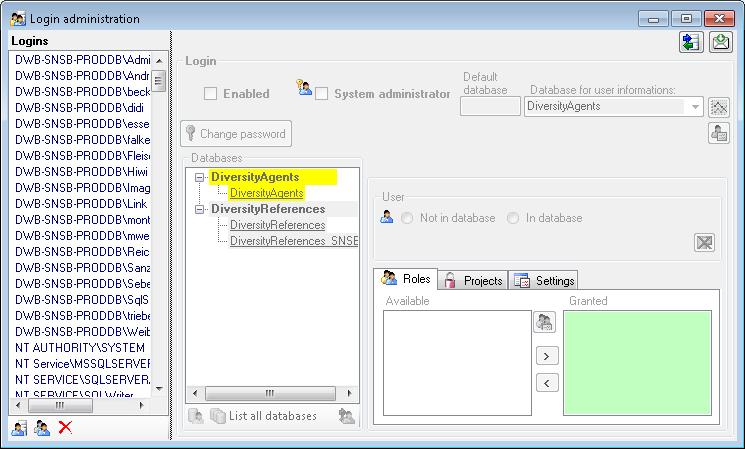
Statistics
To see the activity of a login click on the
button. A window will open as shown below listing all databases and
tables together with the timespan (From - To) and the number of data
sets where any activity of the current login has been found.
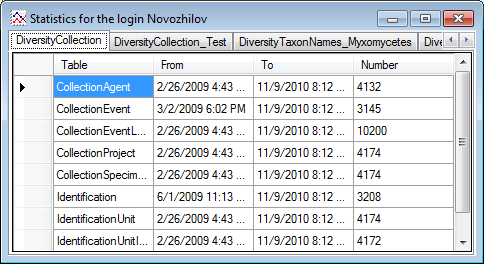
To see the current activity on the server click on the
button. A window as shown below will open
listing all user related processes on the server.
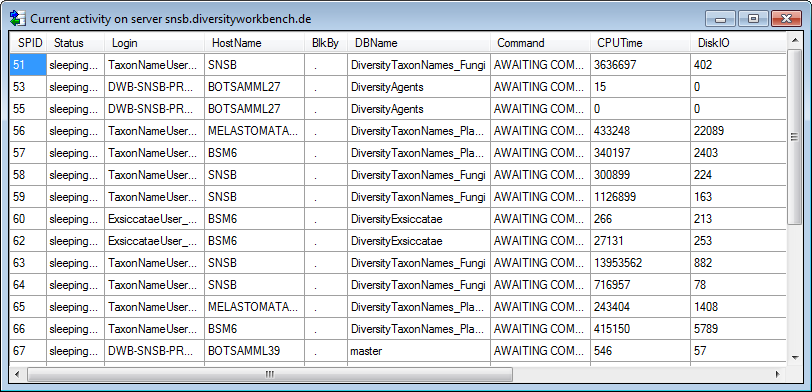
Creation of login
To create a new login click on the button. A
window will open as shown below.
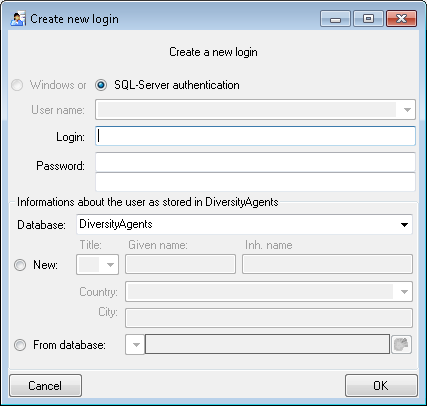
Here you can enter the name of the new login, the password and the
information about the user which will be stored in a DiversityAgents
database. You may either create a new entry in this database or select
an existing one: Click on the DWB button
to search for a name in the database (see below).
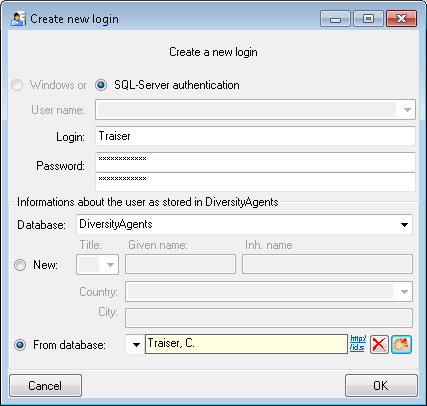
Copy a login
To copy a login including all permissions etc. into a new login, select
the original login in the list and click on the
 button.
Edit a login
To edit the access for a login on the server select the login in the
list. If a login should be disabled , uncheck
the enabled checkbox (see below).

All databases on the server will be listed with the current database
showing a yellow background. The databases where the login has no
access will be listed in gray while the databases accessible for a
login are black.

Access of a login to a database
To allow the access to a database select the database from the list and
choose database as shown below.

Roles of a login in a database
Use the > and < buttons to add or remove roles for the login
in the database (see below).
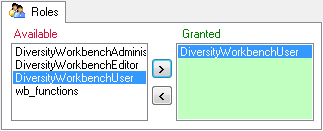
Projects for a login in a database
Depending on the database you can edit the list of projects accessible
for a login (see below).
There are 4 states of accessibility for projects
- Full access: The user can edit the
data
- Read only access: The user can only
read the data
- Locked: The project is locked. Nobody
can change the data
 No access: The user has no access via a
project
No access: The user has no access via a
project
Projects are related to the module DiversityProjects. To get additional
information about a project select it in the the list and click on the
button.

To load additional projects click on the Load projects
button. A window will open as shown below.
Projects already in the database will be listed in
green, missing projects in red (see below). Check all projects you need in your database and
click the Start download button.
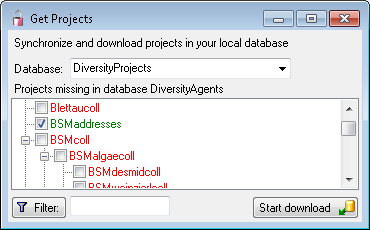
Overview for a login
If you see an overview of all permissions and project for a login, click
on the  button. A window a shown below will
open. It lists all modules and their
databases, the roles,
accessible projects and
read only projects for a login.
button. A window a shown below will
open. It lists all modules and their
databases, the roles,
accessible projects and
read only projects for a login.
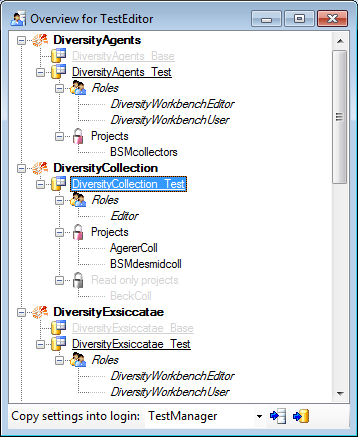
To copy the permissions and projects of the current login to another
login, select the login where the settings should be copied to from the
list at the base of the window and click on the  button to copy the settings for all databases or the
button to copy the settings of the selected
database into this login.
button to copy the settings for all databases or the
button to copy the settings of the selected
database into this login.
Overview for a database
If you see an overview of all user and roles in a database, click on the
 button. A window a shown below will open.
It lists all
button. A window a shown below will open.
It lists all  user and roles
in the database.
user and roles
in the database.
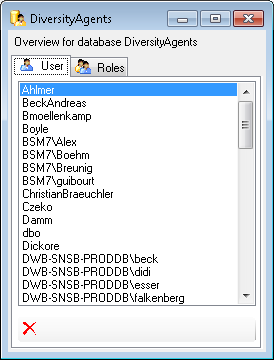
To remove a user, select it in the list and click on the
button.
Correction of logins
If you select one of the databases, at the base a
 button may appear. This indicates, that
there are windows logins listed where the name of the login does not
match the logins of the server. This may happen if e.g. a database was
moved from one server to another. To correct this, click on the button.
A list of deviating logins will be shown, that can be corrected
automatically.
button may appear. This indicates, that
there are windows logins listed where the name of the login does not
match the logins of the server. This may happen if e.g. a database was
moved from one server to another. To correct this, click on the button.
A list of deviating logins will be shown, that can be corrected
automatically.
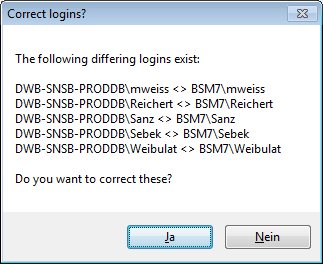
If logins with the same name but different server are found, one of them
has to be deleted to make the correction possible. You will get a list
where you can select those that should be removed.
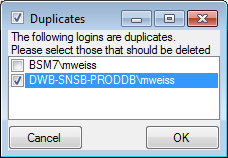
Select the duplicate logins that should be removed and click OK.
Diversity Agents
Linked server
Databases not available on the local server may be accessible via a
linked server. Provided the option for
loading the connections is set, the program will
automatically try to connect to these databases. Otherwise you can
connect to these databases as described in chapter ModuleConnections. To
administrate the linked servers, choose Administration -
Linked servers ... from the menu. A form
(see below) will open where you can add linked servers and inspect the
content of the available databases.
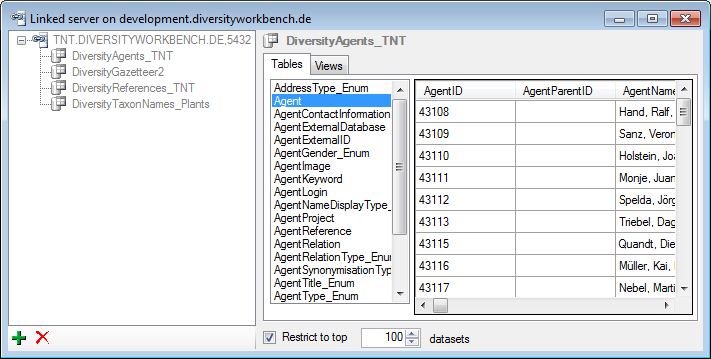
Use the resp. buttons to add
or remove a linked server. To add a linked server, you need the name of
the server and the port, e.g. tnt.diversityworkbench.de,
5432, the login associated with the
connection of the linked server e.g. TNT and the password for this login.
Permissions
Please keep in mind, that any user accessing databases via the established linked server will get the permissions of the login you set for the linked server. In most cases a login with read only access is an appropriate choise.
The available databases will be
listed as shown above. To inspect the content, select among the tables
or views listed in the right part as shown above. Linked servers have
certain restrictions for the availability of data, e.g. XML and
geography data are not available via a linked server. For a table or
view containing incompatible content you may encounter a corresponding
error mentioning the reason for the incompatibility.
An expample for a linked server as provided for central databases is shown below (using the management studio for SQL-Server)
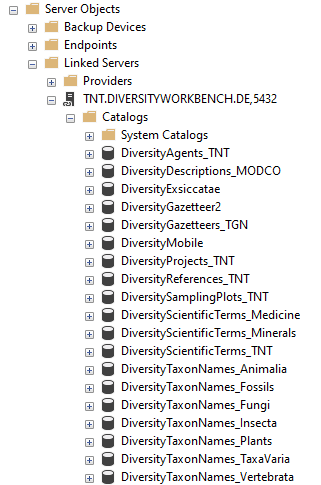
Diversity Agents
These are the tools to handle the basic parts of the database. These
tools are only available for the owner of the database and should be
handled with care as any changes in the database may disable
the connection of your client to the database. Before changing any parts
of the database it is recommended to backup the current state
of the database. To use these tools, choose Administation → Database
→  Database tools ... from the menu. A
window will open as shown below.
Database tools ... from the menu. A
window will open as shown below.
Description
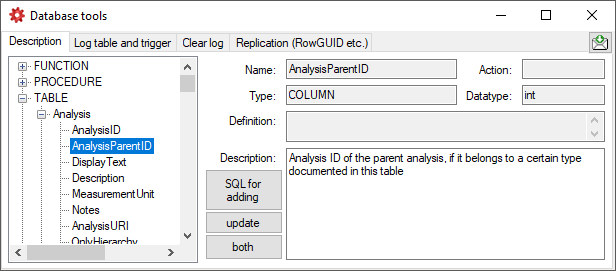
The Description section (see above) shows the basic definitions of
the objects in the database and enables you to enter a description for
these objects including tables and their columns, functions and their
parameter etc. With the buttons SQL for adding, update and
both you can generate SQL statements for the creation of the
descriptions in your database. Use the button both if you are not
sure if a description is already present as it will generate a SQL
statement working with existing and missing descriptions (see below).
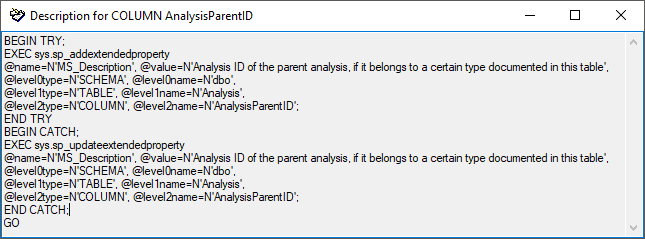
The button  Fill Cache fills the
table CacheDescription where all descriptions are collected for easy
access.
Fill Cache fills the
table CacheDescription where all descriptions are collected for easy
access.
Log table and trigger
In the Log table and trigger section (see below) click on the List
tables button to see all tables within the database. The Table
section shows the basic definitions of a selected table. If columns for
logging the date and responsible user for inserting and updating the
data are missing, you can use the Attach ... button to attach these
columns to the table. Furthermore you may add a RowGUID to the table
as e.g. a preparation for a replication.
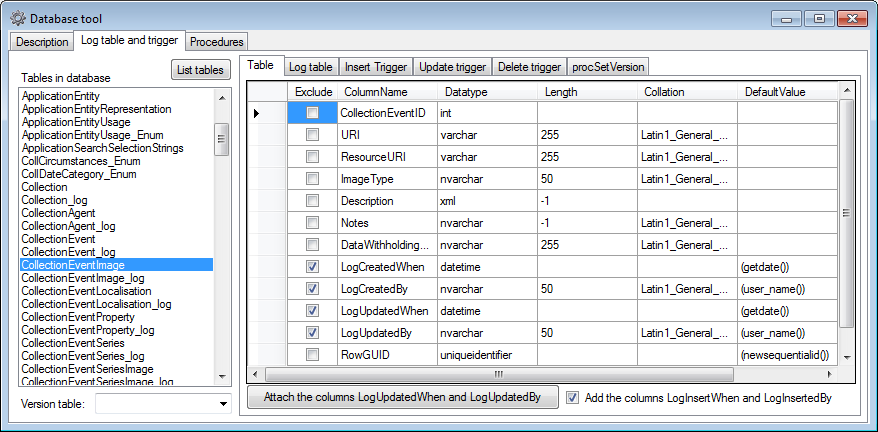
In the Log table section (see below) you can create a logging table
for the selected table in a format as used within the Diversity
Workbench. Click on the Show SQL ... button to show the
SQL-statement that will create the logging table. If an old logging
table should be kept, choose the Keep old log table option. If your
table should support the version setting from a main table, choose the
Add the column LogVersion option. To finally create the logging
table click on the Create LogTable ... button.
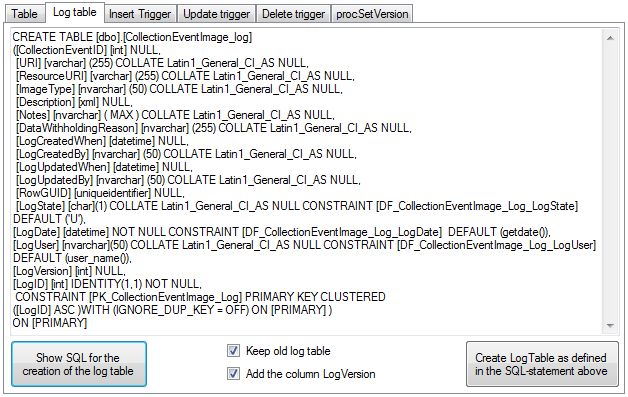
The triggers for insert, update and delete are created
in the according sections (see below). If an old trigger exists, its
definition will be shown in the upper part of the window. Click on the
Show SQL button to see the definition of the trigger according to
the current definition of the table in a format as used in the Diversity
Workbench. If a trigger should set the version in a main table, which
the current table is related to, choose the Add version setting to
trigger option. To enable this option you must select the version
table first. To finally create the trigger click on the Create
trigger button. The update and delete triggers will transfer the
original version of the data into the logging tables as defined above,
where you can inspect the history of the data sets.
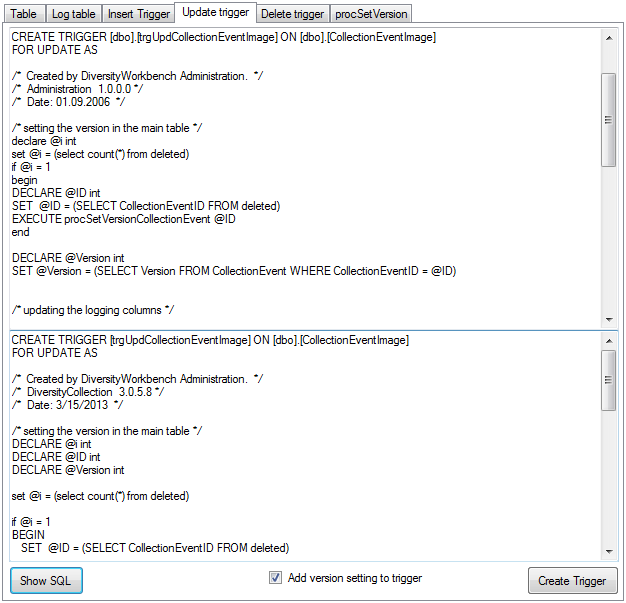
If so far no procedure for setting the version in a main table is
defined, you can create this procedure in the last section. Click on the
Show SQL button to see the definition and on the Create Procedure button
to create the procedure (see below).
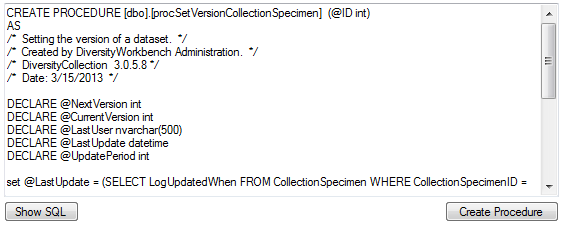
Preparation for replication
If you want to use replication within you module, the tables need
certain columns and a log table. These preparations can be performed by
a script, generated in the section Replication (see below). Select the
tables you want to include in the process and create the script. This
script can than be included in an update of the database. Please ensure
that these changes are only be done by expert staff.
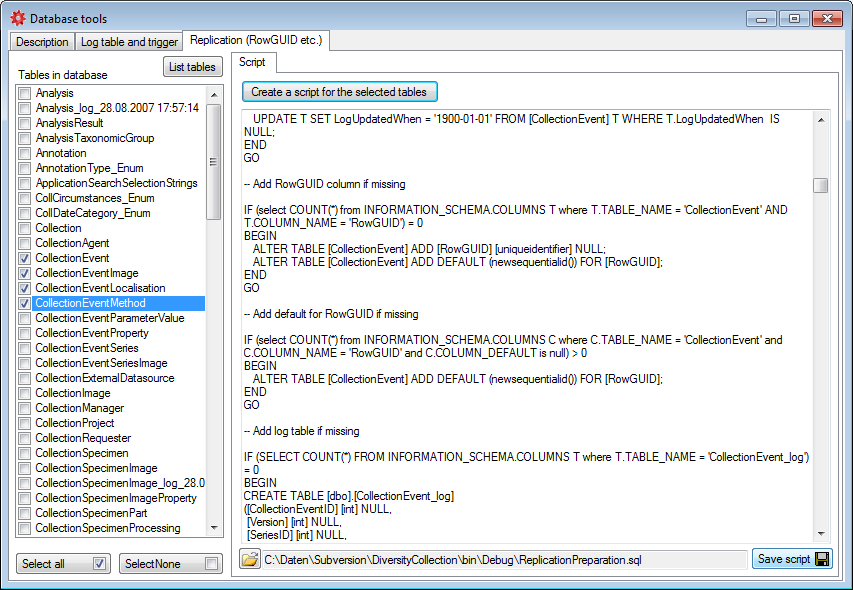
Clear logtables
If for any reason you want to clear the log tables of the database, this
can be done in the Clear log tab as shown below. Click on the List
tables button to list the log tables. Then select those that should be
cleared and click on the Clear log of selected tables
button (see below). Please keep in mind that
any restoration of data from the log is only possible as long as the
data can be retrieved from the log.
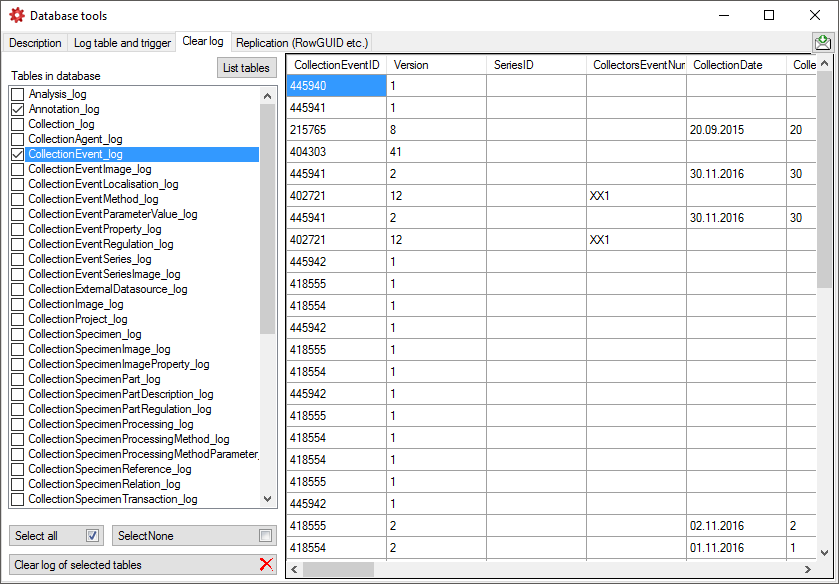
Data protection
To implement the General Data Protection Regulation of the European
Union several steps have to be performed in a database:
- Generate a skript using this tool (see below) to convert all tables
and insert objects according to the requirements:
- Add columns ID, PrivacyConsent and PrivacyConsentDate in table
UserProxy
- Grant update to PrivacyConsent and PrivacyConsentDate in table
UserProxy
- Create update trigger for UserProxy setting the
PrivacyConsentDate
- Create the function providing the ID of the user from UserProxy
- Create the function providing the name of the user from
UserProxy
- Create the function PrivacyConsentInfo providing common
information
- For every table:
- Insert users from a table into UserProxy (if missing so far)
- Insert users from the corresponding log table into UserProxy
(if missing so far)
- Change the constraints for the logging columns (User_Name()
→ UserID())
- Replace user name with ID in logging columns
- Replace user name with ID in logging columns of the log
table
- Adapt description of the logging columns
- Include the skript in an update of the database
- Check the database for update triggers, functions using e.g.
CURRENT_USER, USER_NAME, SUSER_SNAME etc. where user names must be
replaced with their IDs. Create a script performing these tasks and
include it into an update for the database
- Adapt the client to the now changed informations (e.g. query for
responsible etc.)
After these changes the only place where the name of a user is stored is
the table UserProxy together with the ID. Removing the name (see below)
will remove any information about the user leaving only a number linked
to the information within depending data.
To generate a script for the objects and changes needed to implement the
General Data Protection
Regulation
use the Data protection tab as shown below. The
generated script will handle the standard objects (logging columns) but
not any additional circumstances within the database. For these you need
to inspect the database in detail and create a script to handle them on
your own.
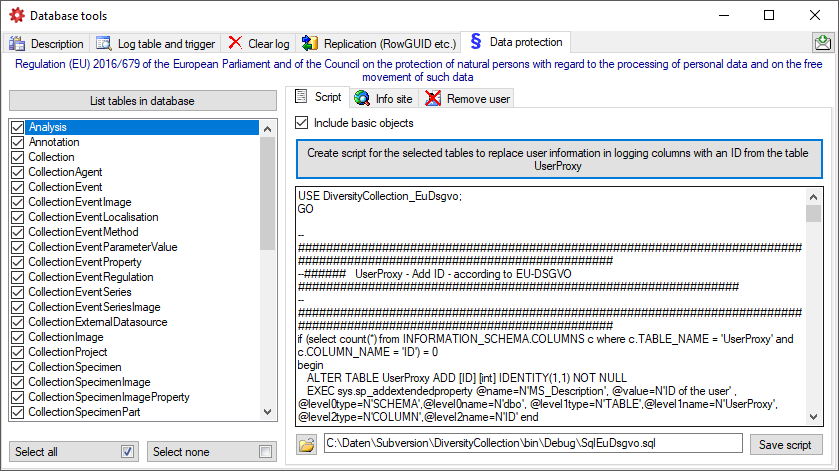
To set the website where detailed information about the handling of the
General Data Protection
Regulation
within the DiversityWorkbench resp. the current database is provided,
click on the  button on the
Info site tab. If unchanged, the default
site
for the DiversityWorkbench is set (see below).
button on the
Info site tab. If unchanged, the default
site
for the DiversityWorkbench is set (see below).
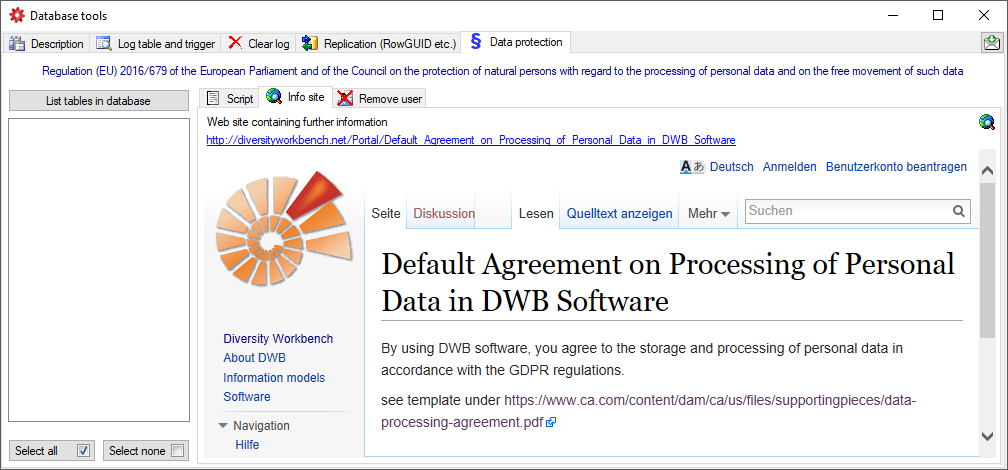
If for any reason a user wants his name to be removed from the database,
select the users name from the list as shown below and click on
the button (see below).
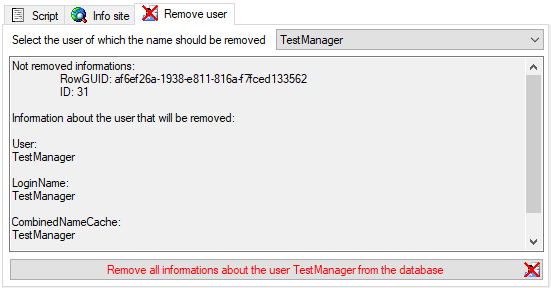
Diversity Agents
No-SQL Interface
JSON Cache
Databases of the modules provid a No-SQL interface where the data of the main table and the depending tables are merged as JSON.
Table JsonCache
Content of table JsonCache restricted to public available data
| Column |
Data type |
Description |
Nullable |
Relation |
| ID |
int |
Unique ID for the Dataset, Primary key |
NO |
ID of the source |
| URI |
varchar (500) |
The URL as combination of BaseURL and ID |
NO |
BaseURL and ID of the source |
| DisplayText |
nvarchar (500) |
Representation in the interface |
NO |
Main table of the source |
| LogUpdatedWhen |
datetime |
Date and time when the data were last updated |
NO |
- |
| Data |
json |
Data related to the current dataset |
NO |
- |
procFillJsonCache is started by an update trigger trgUpd… of the main table in the database
Interface in clients
All modules provide data via a cache table. In the header of the clients you can inspect the content of the JsonCache with a click on the  button. For modules with a difference between local and public data, you can inspect the content of the public data with a click of the right mouse button.
Update
Apart of the update via the Trigger (see below) you can update the JsonCache via the  update button underneath the button.
To update the JsonCache for the whole database select Administration - JsonCache… from the menu. a window as shown below will open where you can update the JsonCache for single datasets or the whole database.
Summary
graph TD;
    TaxonName[Main table in database]
    trgUpdTaxonName[trgUpd.. of main table in database]
    TaxonName --> |Update in table| trgUpdTaxonName
    proc[Procedure procFillJsonCache setting the content in table JsonCache]
    trgUpdTaxonName --> proc
graph TD;
    Mainform[Main form]
    ButtonShow[Button show JsonCache of current dataset]
    Mainform --> ButtonShow
    Left[Show Data]
    ButtonShow --> |Left click| Left
graph TD;
    Mainform[Main form]
    Admin[Administration menu]
    Mainform --> Admin
    Cache[JsonCache...]
    Admin --> Cache
    Adminform[Administration form]
    Cache --> Adminform
    AdminUpdateSingle[Update single dataset]
    Adminform --> AdminUpdateSingle
    AdminUpdateDB[Update for whole database]
    Adminform --> AdminUpdateDB
Diversity Agents
Documentation
These are the tools to describe the parts of the database and create
documentations of the structure. To use these tools, choose
Administation - Database -
 Documentation… from the menu. A
window will open as shown below.
Documentation… from the menu. A
window will open as shown below.

Click on the List objects button to list the objects of
the database. With the button
resp.  button you can select
resp. deselect the types in the type selection and the object in the
list.
button you can select
resp. deselect the types in the type selection and the object in the
list.
Select the objects that should be listed
all button resp. none button you can select resp. deselect the types in the type selection and the object in the list.
Select the objects that should be included in the documentation:
- Tables
- Views
- Roles
- Functions and procedures
- Context
… and exclude the objects that should not be included in the
documentation:
- Logging tables
- Enumeration tables
- Old versions of objects
- System objects
- Deprecated objects
The button Set default seletion will select all items in
the list without:
- System objects
- Older version of an object indicated by the number at the last
position
- Logging tables
- Enumeration tables
- Objects with a description starting with e.g. outdated, deprecated,
obsolete etc.
- HTML options:
- include index for objects
- include NULL / NOT NULL
- include relations and dependencies
- include Description
- exclude standard trigger
- exclude definition
- include permissions for *_Enum etc.
- exclude obsolete columns
- exclude columns starting or ending with the given strings
- include list of tables that are depending on a table
The buttons Add to seletion and
Remove from seletion  will use the
given strings with * as wildcard to add resp. remove items from the
selection.
will use the
given strings with * as wildcard to add resp. remove items from the
selection.
With the Context option you
can show or hide the context area for the html and media wiki tab as
shown above.
To create a documentation choose among the provided options and click on
the button Create ... documentation to create the
documentation in one of the available formats (HTML, MediaWiki,
JSP-Wiki).
Subsections of Documentation
Diversity Agents
Documentation
chm
With the chm tab you can generate index and keyword html files as well
as markdown files for a website generated out of the hhc and hhk files
of the HTML Help Workshop for the creation of chm manual as described in
the video
.
The button Generate keywords for HUGO creates a text file keywords.txt containing the keywords needed for the HUGO manual in a simple format. A pre- or postfix is set for every module to avoid conflicts. Use the Open  button to open the file in a text editor.

Diversity Agents
Documentation
HUGO
In the  HUGO / HTML tab you generate markdown files according to HUGO and the relearn theme.
The conversion and adaptions are explained in a short tutorial:
For enumeration tables the content can be exported as explained in a short tutorial:
In the tab you can fix links in markdown files according to HUGO shortcodes.
The fixes for broken links are explained in a short tutorial:
The adaptions for links for HUGO as related references are explained in a short tutorial:
To map the files in the original links to new files in the documentation follow the steps shown in a short tutorial:
Installation of HUGO
Update des Themes
um das Theme auf die letzte Version zu bringen kann man den Befehl
git submodule update --remote --merge themes/relearn
verwenden
Übersetzung des Bestands an html
- Übersetzung der *.html Seiten mit pandoc in *.md
- Aufbau einer Ordnerstruktur die dem Index der chm Datei entspricht
- Das Basisdokument der Ordner wird in die Ordner verschoben und in _index.md umbenannt
- Dort im Frontmatter steht der Titel der im Menü angezeigt wird, e.g.:
---
title: Installation
---
Überarbeitung der md Dateien
- Korrektur der Bildverweise
- Ordner mit den Bildern in den Ordner static kopieren
- von e.g.
 in 
- ACHTUNG - Case sensitiv. Namen müssen stimmen
- Icons gegebenenfalls freistellen für Darkmode
- Entfernung aller störenden Formatierungsangaben
- Entfernung der Kopfzeile (Überschrift wird von HUGO automatisch erzeugt)
- Korrektur der internen Verweise
- ändern von
[](http://media.snsb.info/Tutorials/dwb/Editing/OeffentlicheKontaktdaten.webm)
zu
[](http://media.snsb.info/Tutorials/dwb/Editing/OeffentlicheKontaktdaten.webm)
- ansonsten wird das Bild gezeigt statt das Video zu starten
- ändern von
zu e.g.
[Contact](editingdata/contact)
- Wenn als Basisadresse in hugo.toml etwas angegeben wurde, e.g.
baseURL = "http://www.diversityworkbench.de" dann muss diese auch für Verweise innerhalb der Files verwendet werden.
- e.g. Bildverweise

- Dateiverweise
[Anmelden](database)
- HUGO relearn erzeugt für Überschriften Anker die man ansteuern kann, e.g. kann man
### Table **AgentResource** über die Adresse database/database/#table-agentresource erreichen. Ein Index Eintrag dafür wäre e.g. [AgentResource](database/database/#table-agentresource). ACHTUNG - Case sensitiv: ### Table **AgentResource** wird in #table-agentresource übersetzt
- Kommentare starten mit # ohne folgendes Leerzeichen
Frontmatter
You can change the frontmatter to a default using the documentation tool
- Steht am Anfang der Datei und ist bei yaml durch
--- oben und unten abgegrenzt, e.g.
---
title: Login administration
linktitle: Logins
weight: 5
menuPre: img/Documentation.svg
alwaysopen: false
---
- Seiten die noch in Entwicklung sind kann man mit
draft: true im Frontmatter markieren. Diese werden dann nicht in die Ausgabe übernommen
- Der Titel wird mit
title: Login administration angegeben. Dieser erscheint dann auch in der Seite als Überschrift
- Der Text im Menü kann abweichend definiert werden mit
linktitle: Logins. Ansonsten erscheit der Titel im Menü
- Die Reihenfolge im Menü kann mit
weight: 5 angegeben werden. Ansonsten wird alphabetisch sortiert
- Ein Logo kann man mit `menuPre: img/LinkedServer.svg
- Wenn das Untermenue erst beim Anwählen geöffnet werden soll:
alwaysopen: false
Template files
Starting with a Dash: If the first line of your Markdown file starts with a dash (-), Hugo might misinterpret it as a YAML delimiter, leading to an error
Bilder
You can adapt the images to a default using the documentation tool
- Icons die e.g. in den Text integriert werden sollen, müssen folgedermassen eingebaut werden:

- Die Bilder am Anfang der Seite werde wie folgt eingebaut:

mit px wird das Bild mitgezoomt, bei vw bleibt es gleich gross
- noch nicht zu svg konvertierte Bilder die im Fliesstest erscheinen sollen werden wie folgt eingebunden:

- sonstige Bilder mit

mit der Angabe ...lightbox=false wird verhindert, dass ein Bild beim Anklicken mit der Maus geöffnet wird. Dies sollte bei Bildern die nicht nach svg konvertiert wurden und nicht im Fliesstext erscheinen nicht verwendet werden, damit der User bei kleinen Bildern diese in Originalauflösung betrachten kann. Unten 2 Beispiele


Für Bilder die aus der Quelle fontawesome kommen kann man hier suchen: fontawesome. Es funktionieren nicht alle die dort bereitstehen. Daher bitte testen!
Links innerhalb des Manuals
Für Links innerhalb des Manuals kann man shortcodes verwenden. Dafür entweder auf den Namen der Datei oder auf Links von Überschriften (ab ##) verwenden. Diese müssen innerhalb des Manuals eindeutig sein. Für Header als erstes Zeichen # dann Überschrift und alles lower case und Leerzeichen werden durch - ersetzt. Beispiel:
## Main form of diversityexsiccatae
wird zu sofern es sich in der gleichen Datei befindet:
2 x { und % relref "#main-form-of-diversityexsiccatae" % und 2 x }
Für Links ausserhalb der Datei werden Verweise unter Einschluss des Dateinamens verwendet:
Verweis auf ein Kapitel innerhalb einer Datei
2 x { und % relref "diversityexsiccatae#main-form-of-diversityexsiccatae" % und 2 x }
bzw. nur auf die Datei
2 x { und % relref "diversityexsiccatae" % und 2 x }
Leerzeichen zwischen 2 x { und % und % und 2 x } entfernen
Links auf das Manual
Von ausserhalb kann e.g. eine Überschrift mit
https://www.diversityworkbench.demodules/diversityexsiccatae/index.html#main-form-of-diversityexsiccatae
aufgerufen werden. Diese können direkt aus dem Manual kopiert werden.
Logo
- hierfür das Logo in den Ordner static kopieren
- im Ordner layouts einen Ordner partials anlegen
- dort eine Datei logo.html anlegen
- in dieser auf das Logo verweisen e.g.:
<h4><b>DiversityAgents</b></h4>
<img src="/DA_4D.svg">
- in static - layouts - partials die Datei menu-footer.html anlegen und anpassen
favicon
Im Ordner static den Ordner images anlegen
Datei favicon.ico in der Ordner static/images kopieren
Einschliessen von Dateien
Das Verzeichnis templates enthält Dateien die in andere Dateien über eine shortcode eingeschlossen werden können, e.g.:
2 x { und % include file="templates/template_workbench.md" % und 2 x }
Diese Dateien dürfen kein frontmatter enthalten. Shortcodes müssen überprüft werden, da diese in der Regel nicht ausgewertet werden.
ER-Diagramm
dieses kann als Mermaid eingebaut werden, e.g.
graph LR;
    A[Agent] --> B[AgentContact<br/>Kontaktdaten der Agents]
    A --> C[AgentReference]
    A --> D[AgentIdentifier]
    A --> E[AgentResource]
    A --> F[AgentExternalID]
    G[AgentExternalDatabase] --> F[AgentExternalID]
soll das Diagramm zoombar sein wird die Version 5.23 des Themes benoetigt. Ausserdem kann der Parameter nur für die Shortcode Version angegeben werden, nicht für die Codefences:
2 x { und % mermaid align="center" zoom="true" % und 2 x }
...
(remove space between 2 x { und  and < resp > and  und 2 x } in header and footer for correct code)
...
2 x { und % /mermaid % und 2 x }
Anpassung des Themes
Konfiguration - in hugo.toml:
```native
baseURL = "http://www.diversityworkbench.de"
languageCode = "en-us"
title = "DiversityAgents"
theme = "relearn"
[outputs]
home = ["HTML", "RSS", "SEARCH", "SEARCHPAGE"]
section = ["HTML", "RSS", "PRINT"]
page = ["HTML", "RSS", "PRINT"]
[params]
themeVariant = [ "auto", "dwb", "dwb-dark" ]
</code></pre>
<h2 id="start-des-testservers">Start des Testservers:</h2>
<ul>
<li>mit einem Terminal in das Verzeichnis des Projekts wechseln</li>
<li>dort <code>hugo server </code> eingeben.</li>
<li>bei Problem mit Sonderzeichen: den Inhalt der Datei config.toml in hugo.toml kopieren und config.toml löschen (beide sollten wenn vorhanden UTF8 sein - werden manchmal als UTF16 angelegt - dieses dann nach UTF8 ändern)
<ul>
<li>Error: “…\diversityworkbench\hugo.toml:1:1”: unmarshal failed: toml: invalid character at start of key: ÿ</li>
</ul>
</li>
<li>Im Browser an die angegebene Adresse navigieren, e.g. <code>localhost:1313</code></li>
<li>Wenn als Basisadresse in hugo.toml etwas angegeben wurde, e.g. <code>baseURL = "http://www.diversityworkbench.de"</code> dann muss die passende Adresse eingeben werden also e.g. <code>localhost:1313</code></li>
</ul>
Diversity Agents
Documentation
With the  MediaWiki tab you can generate markdown files according to MediaWiki.
 DiversityAgents is the module for the administration of agents within the Diversity Workbench. DiversityAgents provides information for other modules like DiversityCollection and DiversityTaxonNames. DiversityAgents keeps only data connected with the handling of agents. Data of other realms like e.g. projects or references are handled in separate modules. For an overview of the available modules see the image below. DiversityAgents might also be used as a stand-alone application.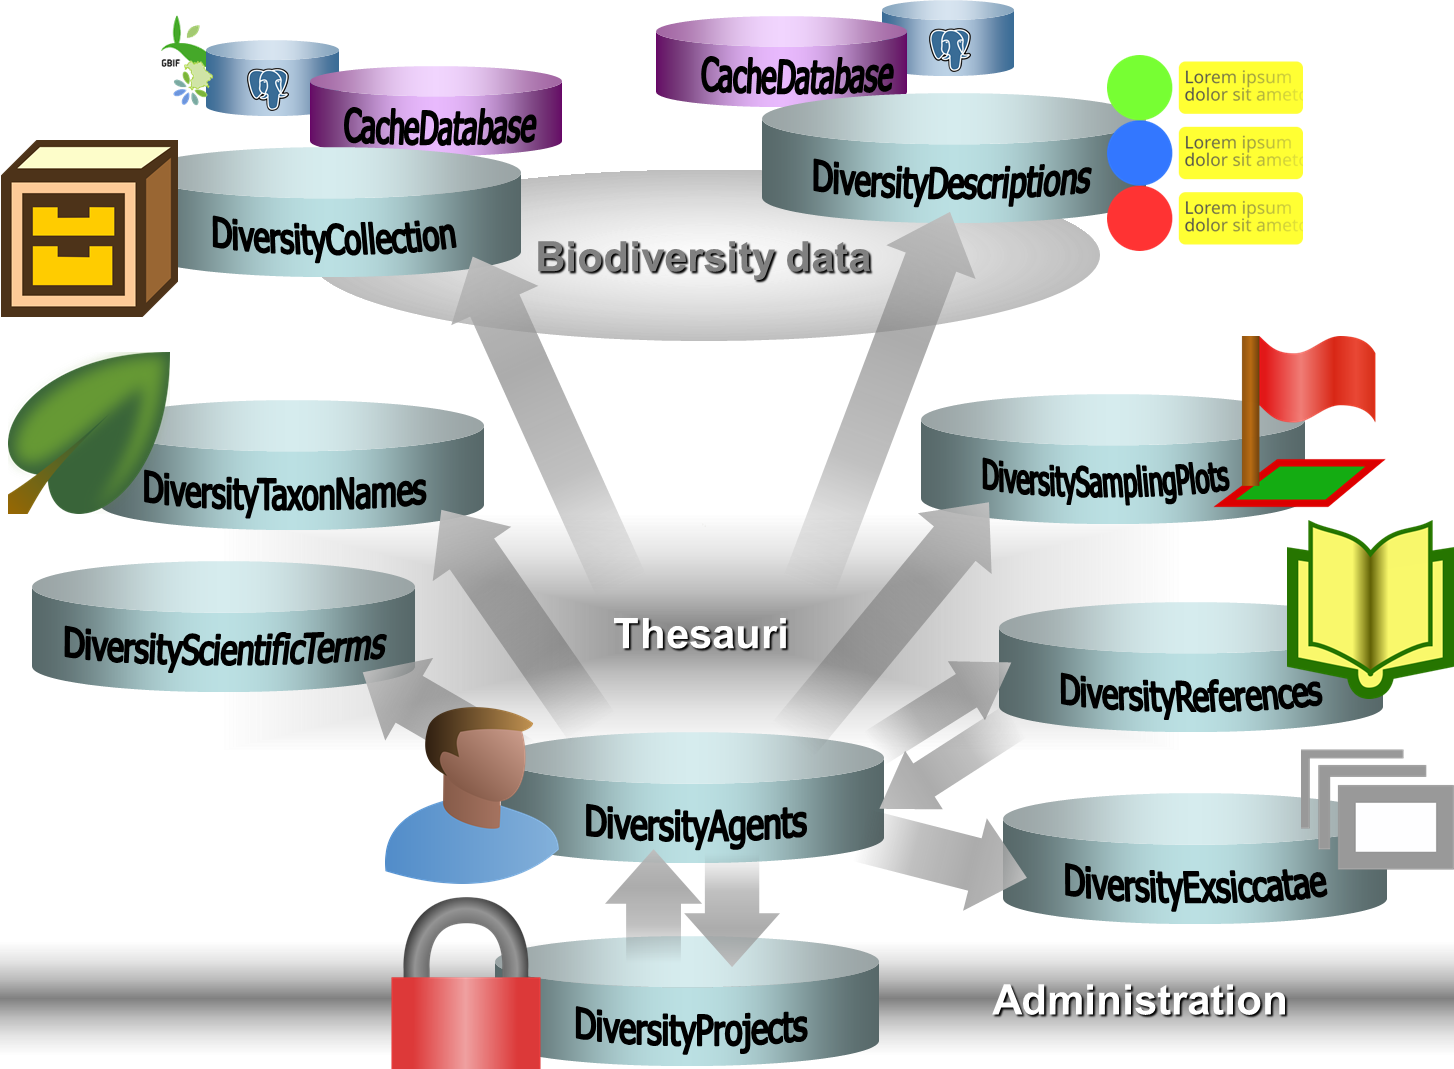
 Contacts
 Keyword
 Images
 References
 Hierarchy
 Relations
 Descriptor
 Identifier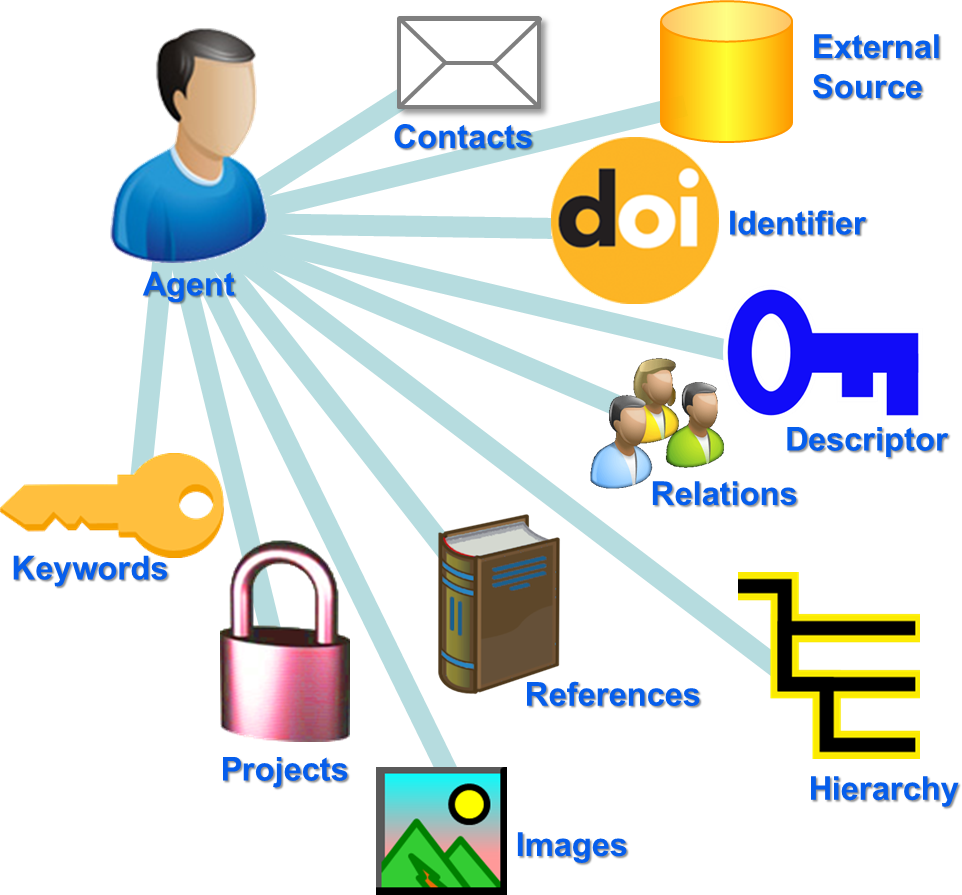
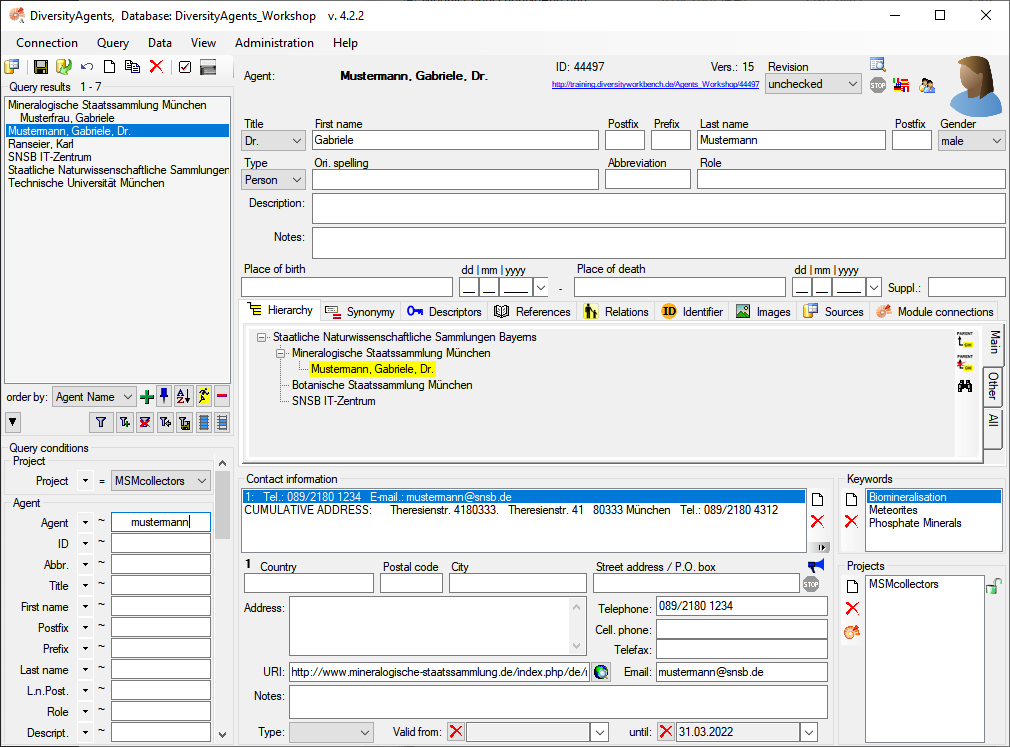

 Import wizard with optional translation of \r\n in data into line break
 Fixing width of controls in detail section
 Query: Inclusion of datawithholding and agent gender in query
 Export wizard included
 Editing of enumerations included
 Bugfix saving data
 Update of linked data in DiversityCollection and DiversityProjects
 Webservice Catalogue of Life available
 Archive
 Optional inclusion of log tables
 Progress bars included
 Export of enumeration table content
 Adding current dataset.
 Adding all datasets from the list.
 Showing content of the list.
 Clearing the list.
 Spreadsheet:
 Showing message for button ShowDetail if no detail is defined
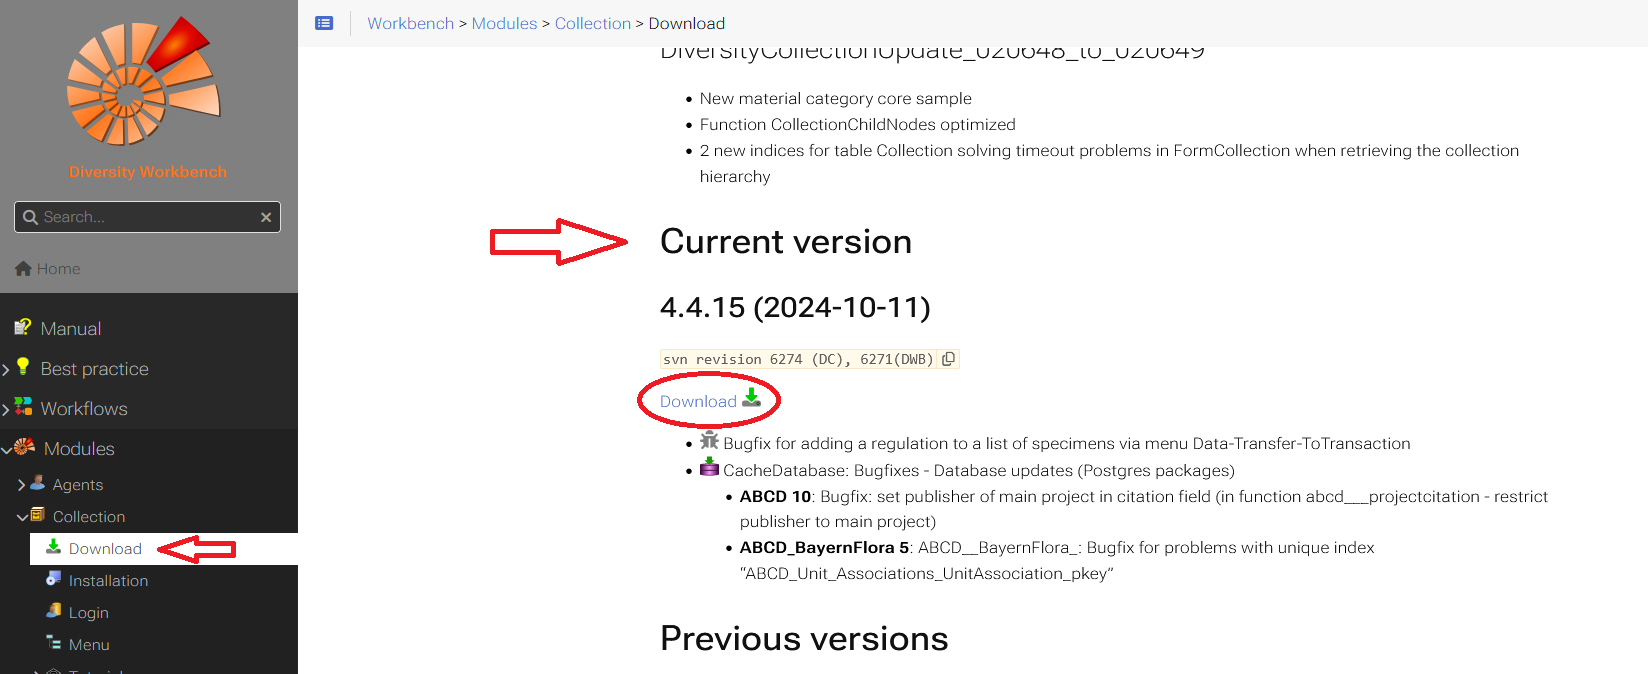
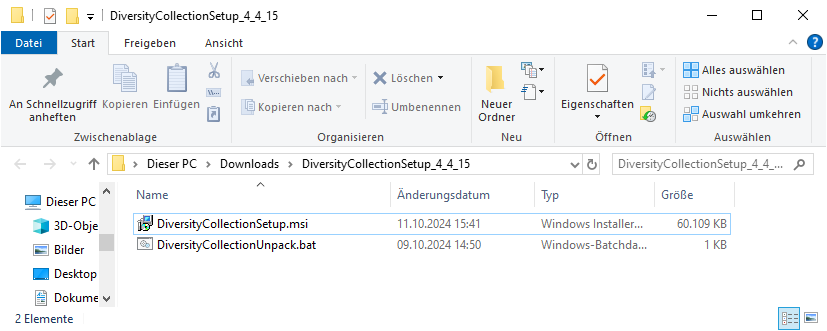
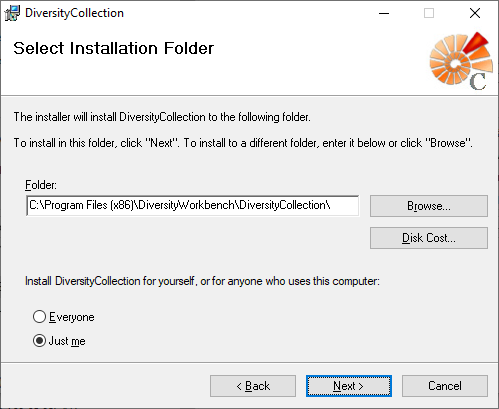
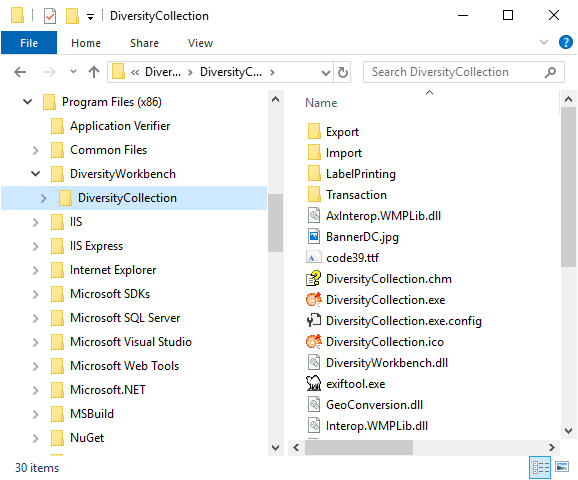
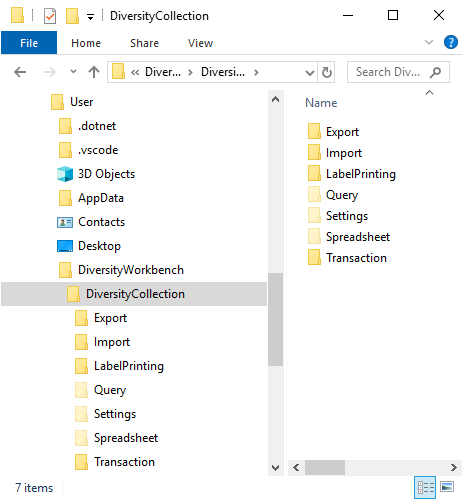



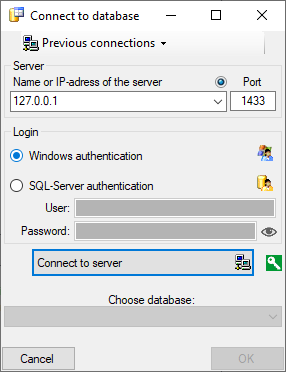
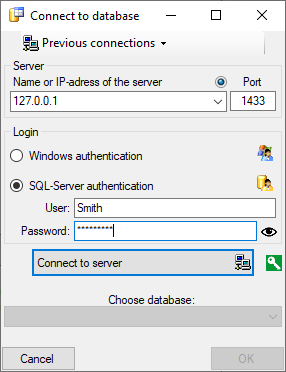
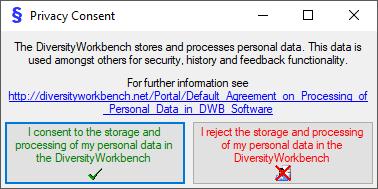
 .
. .
.
 next to the Connect to server button indicates an encrypted connection.
By clicking on the icon, you can switch to an unencrypted connection, indicated by the icon
next to the Connect to server button indicates an encrypted connection.
By clicking on the icon, you can switch to an unencrypted connection, indicated by the icon  .
.
 Create database Create a new module database on the current server
 Reconnect to database Reconnect to the current database
 Module connections Edit the connections to the other modules within the current module.
 Transfer settings Transfer previous settings IP-Address and port of the server, name of the database, login etc. of a previous version of the client to the current version.
 Timeout for database Setting the timeout for queries in the database.
 Timeout web requests Setting the timeout for web requests.
 Quit Quit the application and stop all processes started by the application
 Create archive Create a new archive
 Reset archive Reset the database resp. clear user tables
 Restore archive Restore an existing archive
 Create schema Create a schema of the database
 Relation
 Agent display types Administration of the agent Agent display types
 Setting the directory for the resources directory
 Manual Opens the online manual
 Errorlog
 Information model Inspect the information model on the website of the Diveristy Workbench project
 Update database Update the database to the current version
 Client Download the current version of the client
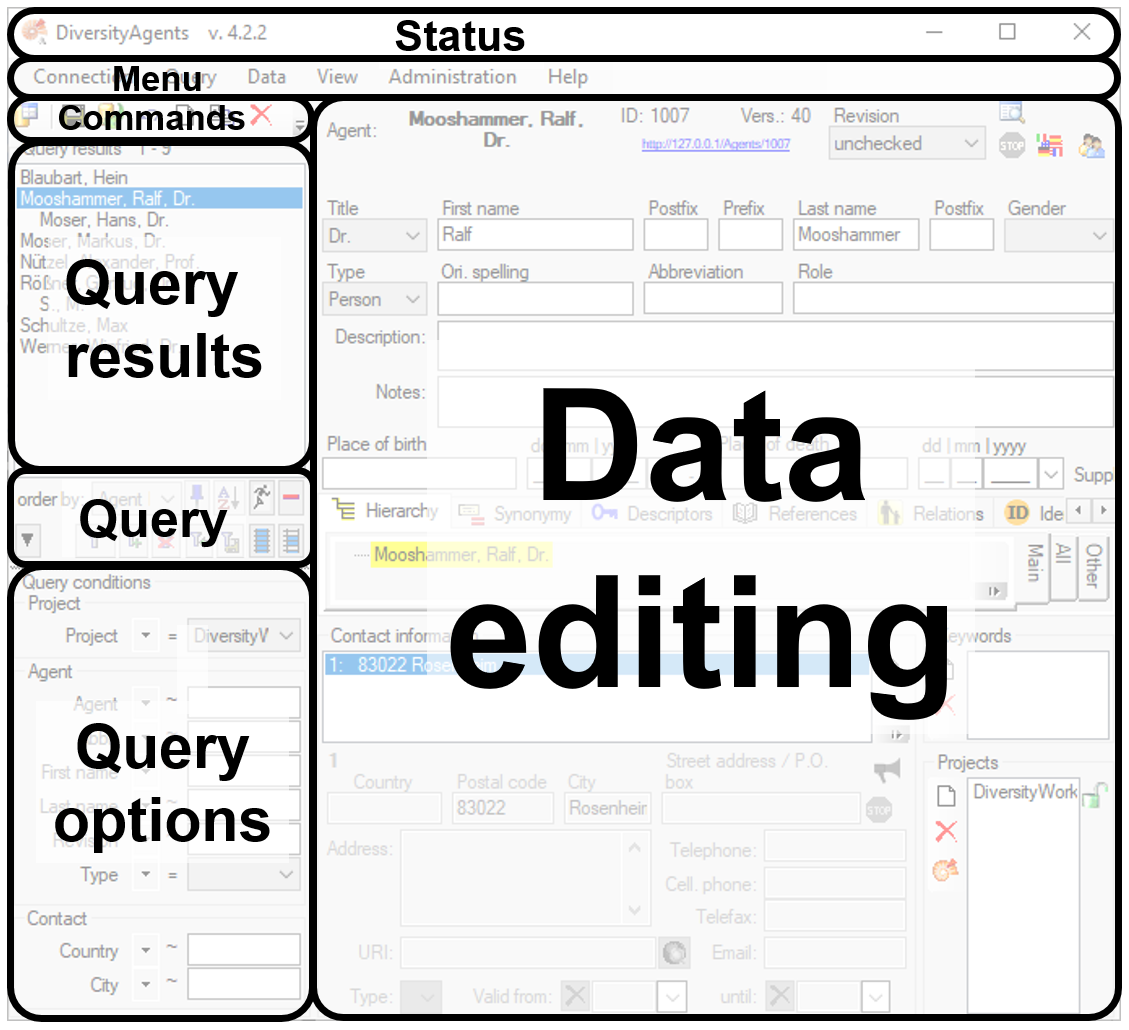
 - To save the changes in a dataset click on the
  - To undo the changes a dataset click the
  - To create a new entry in the database, click on
the
- To create a new entry in the database, click on
the  - To copy a specimen, choose it from the list and click on the button
 - To options a dataset click on the button
 - To change the arrangement of the query click on the
 button.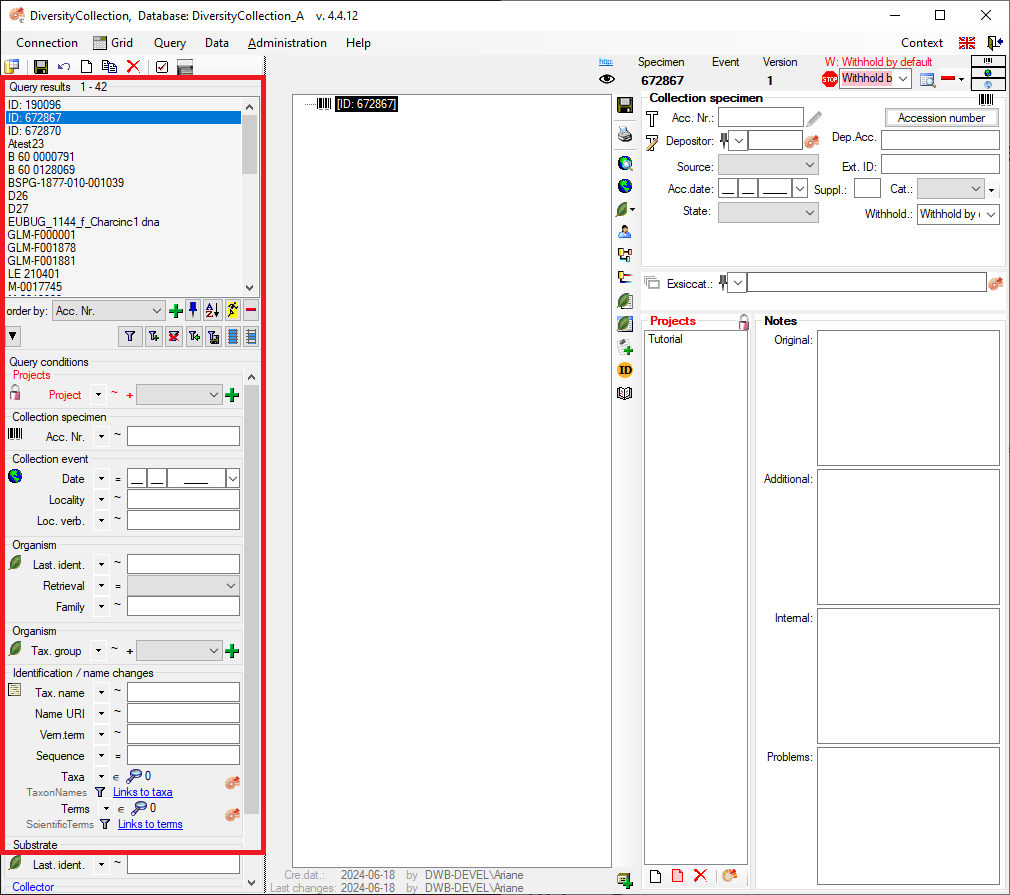

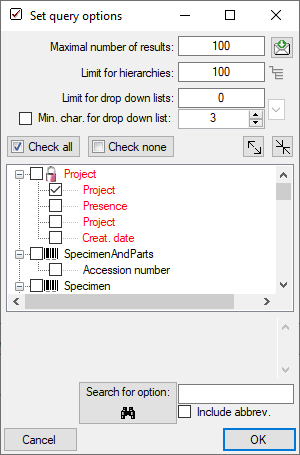
 .
. .
. , Problem
  , Reference

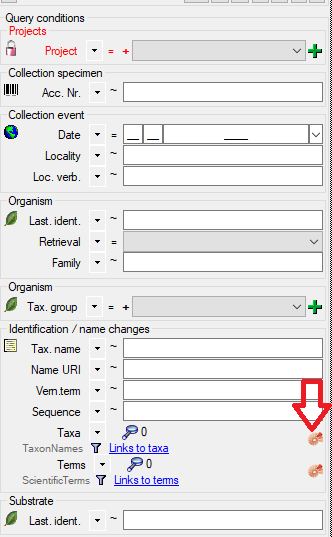



 . To display
several columns in the result list, click on the
. To display
several columns in the result list, click on the  button.
To change the sorting of the added order column click on the
button.
To change the sorting of the added order column click on the
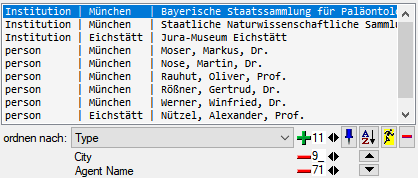

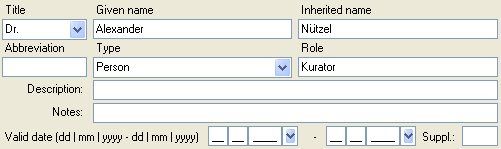

 . If an agent should be published, click on the stop sign
  indicating the agent is now
available for publication.
indicating the agent is now
available for publication.  . The ISO-639-1-Code for the selected
language will be shown and the icon will change to a flag sign of the selected
language.
. The ISO-639-1-Code for the selected
language will be shown and the icon will change to a flag sign of the selected
language. 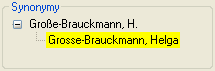
 to open a
window where you can search for the entry, the current entry should
become a synonym of. In the field [Syn.type] set the type of the
synonymy. The service of DiversityAgents is used by other modules.
Therefore it must be avoided to delete datasets. Instead of deleting an
entry, set it a synonym of a valid entry and set the type of the
synonymy to replaced with. If an agent was replaced or declared a
synonym, the synonym button
to open a
window where you can search for the entry, the current entry should
become a synonym of. In the field [Syn.type] set the type of the
synonymy. The service of DiversityAgents is used by other modules.
Therefore it must be avoided to delete datasets. Instead of deleting an
entry, set it a synonym of a valid entry and set the type of the
synonymy to replaced with. If an agent was replaced or declared a
synonym, the synonym button  . Click on this button to get to the dataset that
replaced the current dataset resp. its synonym.
If a dataset was replaced by another entry, the form will change as shown below.
. Click on this button to get to the dataset that
replaced the current dataset resp. its synonym.
If a dataset was replaced by another entry, the form will change as shown below.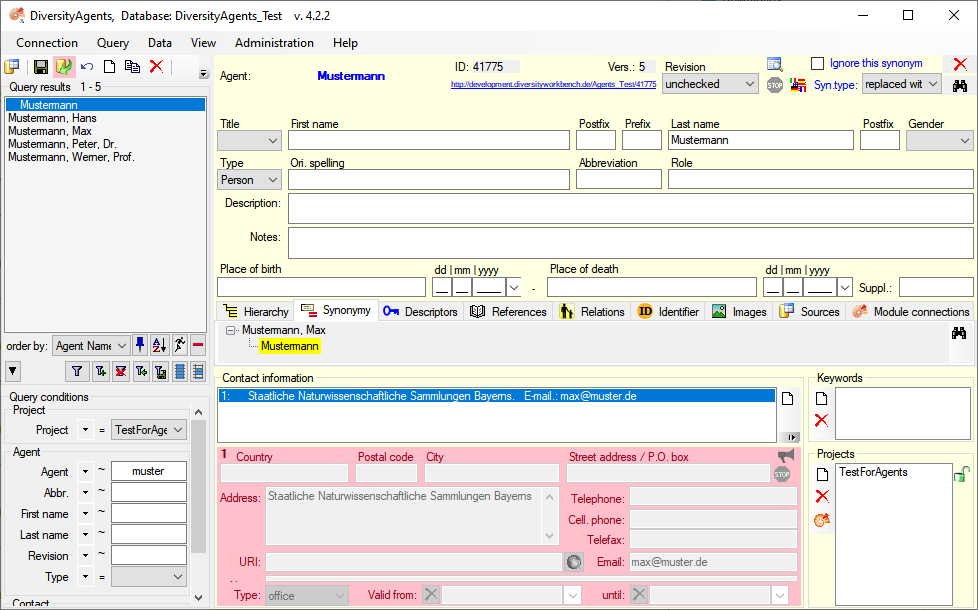
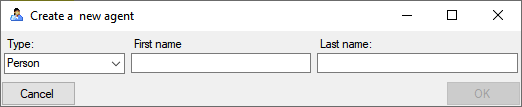
 connections
 Insert current ID in backlink list
 select all
 Grid -
  Organisms from the menu. A window as shown below will open where the data are marked and organized according to the database tables. If values in one of the tables are missing, this will be indicated with a grey background. The colors correspond to the overview for the database.
 button. Now the application will directly open the spreadsheet with the same parameters when you close it.
  button.
 Event
and M-0014196 for the
Event
and M-0014196 for the
 Specimen. The next block then starts with
Hildesheim... indicated by a
change in the color containing 2 Organisms. For most of the spreadsheets, the
presence of the
Specimen. The next block then starts with
Hildesheim... indicated by a
change in the color containing 2 Organisms. For most of the spreadsheets, the
presence of the 
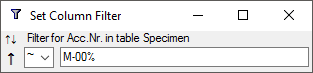
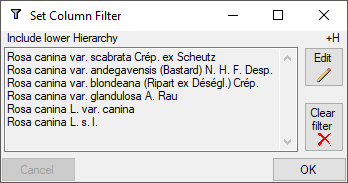
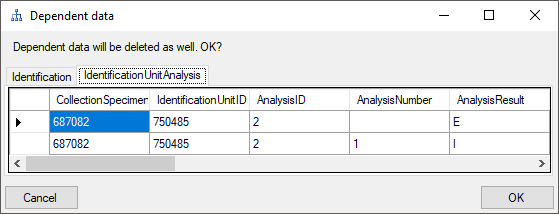
 button. Once you have selected the
contents to change, select the mode of change:
button. Once you have selected the
contents to change, select the mode of change: Append: Append the given value at the end of the content
 Overwrite: Remove current content and insert given value
 Replace: Replace a string in the content with the given value
 Clear: Remove the content
 Tranfer or
  Insert the content
of the clipboard into the selected cells.
Insert the content
of the clipboard into the selected cells. 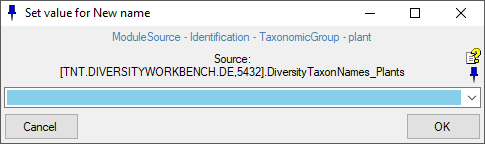
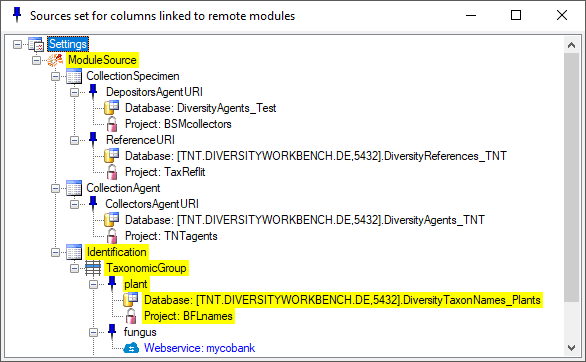
 and if the column has no relation to a module, the button will appear like
 checkbox
  checkbox. Displayed columns are indicated by a yellow background while hidden columns get a light yellow background. Certain columns are required (indicated by a purple color) and can not be removed e.g. if they are involved in a link to a remote module like in the example below the columns FamilyCache and OrderCache. Columns linked to a module are indicated by a blue color.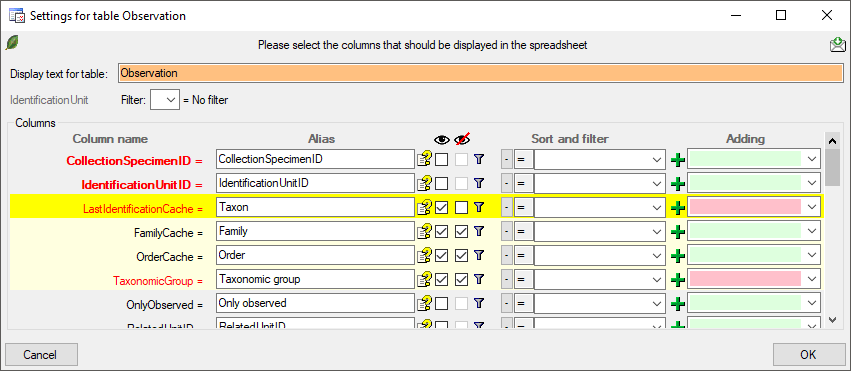
 button allows you to include one of the tables missing in the sheet (see image below). After selection of the table, select the column(s) you want to include in the sheet as shown in the image above.
 button. If a setting file has been corrupted click on the
 button. This will reset the data to the
last saved version. If you want your changes to be saved, click the
button. This will reset the data to the
last saved version. If you want your changes to be saved, click the
 button. The data
will be exported into the SQLite database DiversityAgentTables.sqlite in
the folder Export in your application directory. If you want to save
previous exports, please rename the SQLite database or copy it to a
different directory.
button. The data
will be exported into the SQLite database DiversityAgentTables.sqlite in
the folder Export in your application directory. If you want to save
previous exports, please rename the SQLite database or copy it to a
different directory. 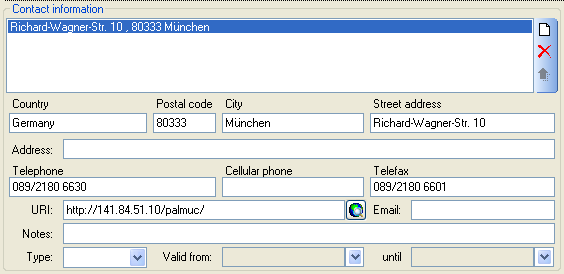
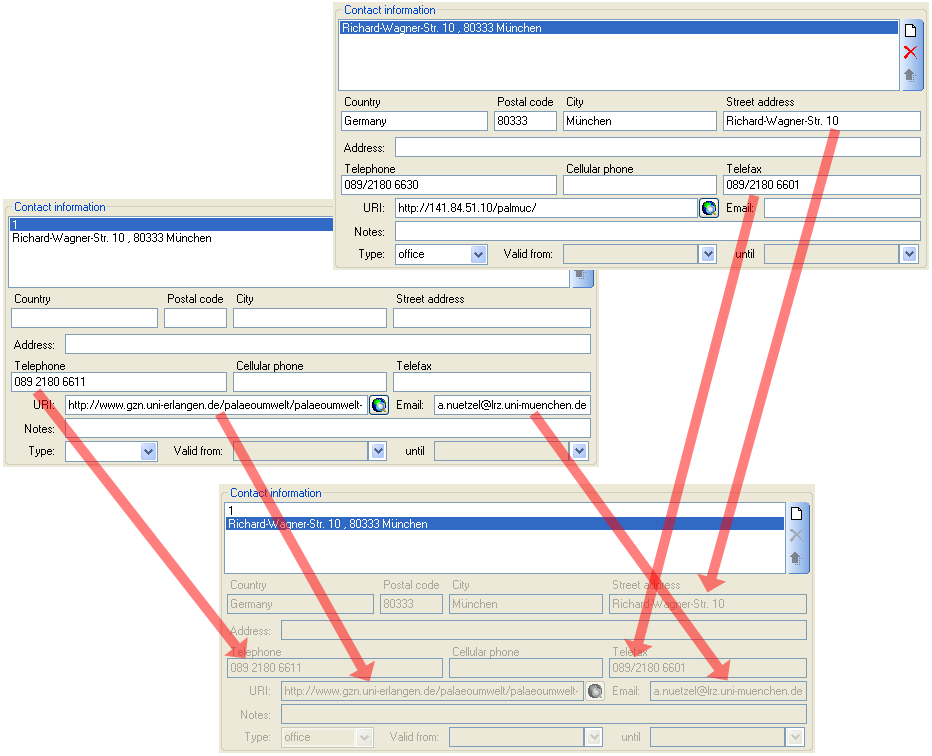
 sign and a pink background (see below). To
enable the publication of a contact, click on the
sign and a pink background (see below). To
enable the publication of a contact, click on the 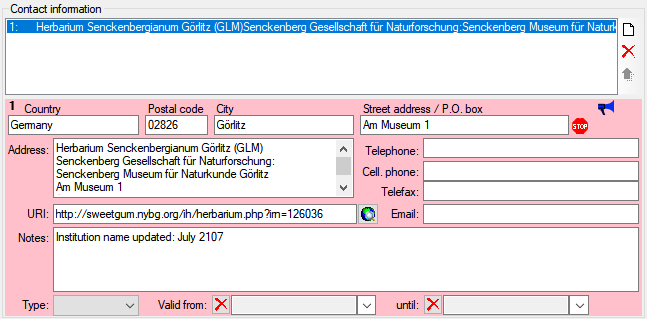
 button. The window that will open shows the
public available contact information including those of parent data (see
image below). The cumulative address will collect data of every first
contact information of the superior agents in the main hierarchy
provided these are public and valid.
button. The window that will open shows the
public available contact information including those of parent data (see
image below). The cumulative address will collect data of every first
contact information of the superior agents in the main hierarchy
provided these are public and valid. 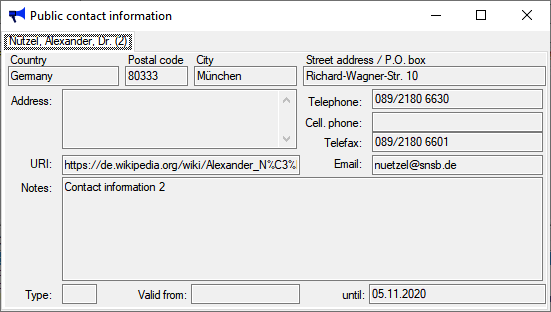
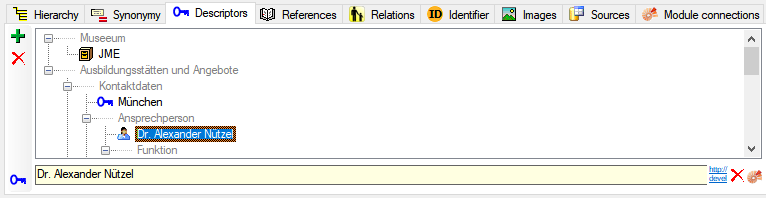
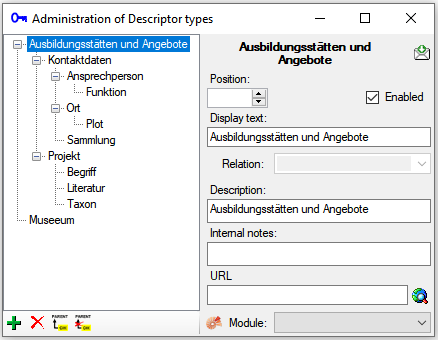
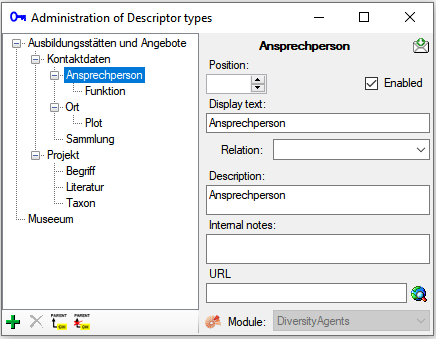


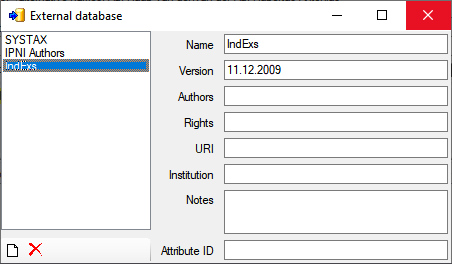
 button. To remove the superior
agent click on the
button. To remove the superior
agent click on the  remove parent button. To change to
another agent in the hierarchy, select it and click on the
remove parent button. To change to
another agent in the hierarchy, select it and click on the 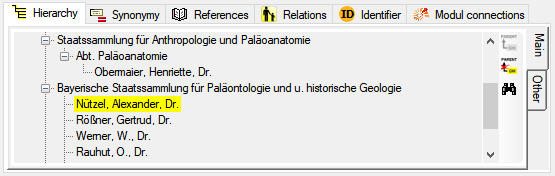
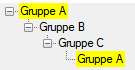
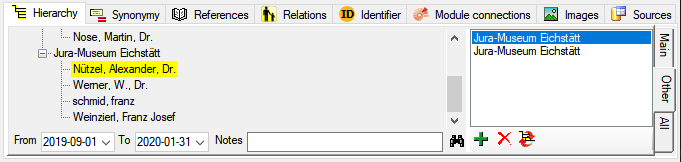
 button to set a selected entry
in the other hierarchies as the main hierarchical entry. If a parent for
main hierarchy is defined, it will be transferred into the other
hierarchies. The selected entry from the other hierarchies will be
removed unless there are entries in the details, e.g.
Notes.
button to set a selected entry
in the other hierarchies as the main hierarchical entry. If a parent for
main hierarchy is defined, it will be transferred into the other
hierarchies. The selected entry from the other hierarchies will be
removed unless there are entries in the details, e.g.
Notes. button where you have no access you will get the
message
button where you have no access you will get the
message 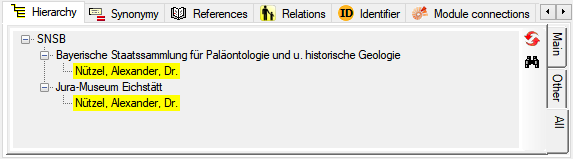
 button for an update of the tree. Use the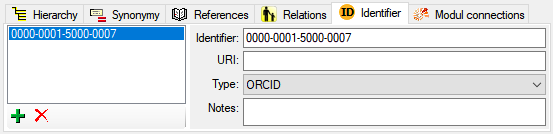
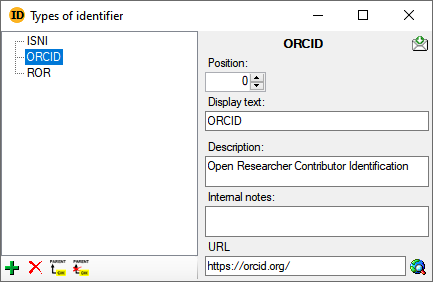
 button. The path of the image is
shown under the image list. Click on it to open a browser with the
image. you may as well click on the
button. The path of the image is
shown under the image list. Click on it to open a browser with the
image. you may as well click on the

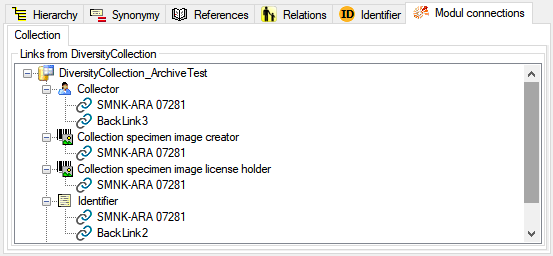
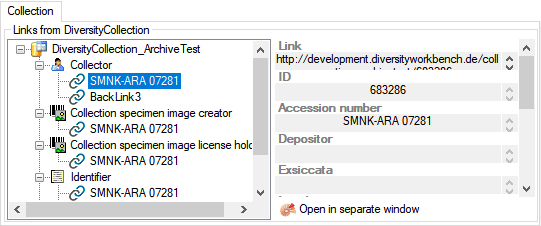
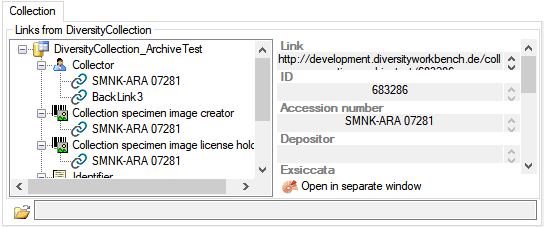
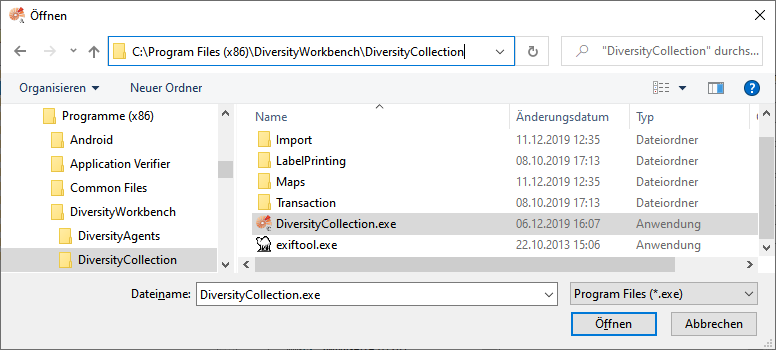
 Remote database
 Cache database

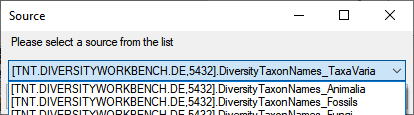



 button to search the
webservice for matching entries. Choose among the provided results to
fill the textfield and the set the link to the webservice.
button to search the
webservice for matching entries. Choose among the provided results to
fill the textfield and the set the link to the webservice.
 chart button
to open a table where you can select one of the provided taxa resp.
terms.
chart button
to open a table where you can select one of the provided taxa resp.
terms.
 button.
Either requery all connections as described in chapter
button.
Either requery all connections as described in chapter
 No access: The user has no access via a
project
No access: The user has no access via a
project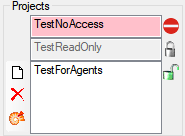
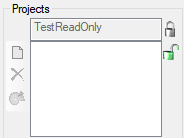
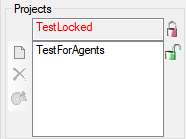
 Agent display types ... from the menu.
A window as shown below will open, where you can set the type for every
project.
Agent display types ... from the menu.
A window as shown below will open, where you can set the type for every
project.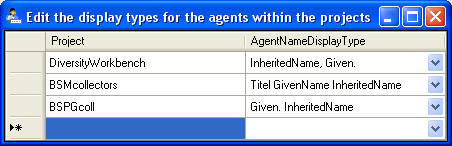
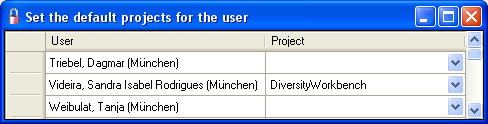
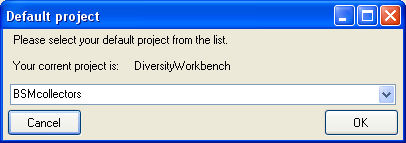
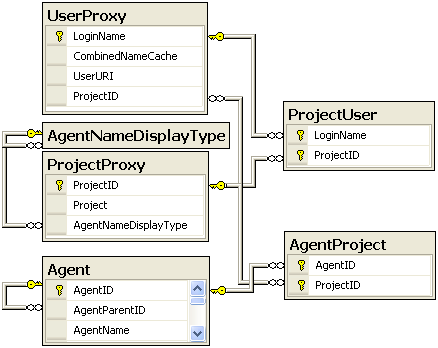

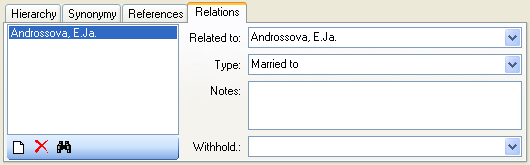
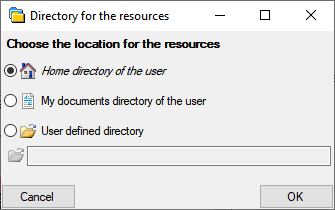
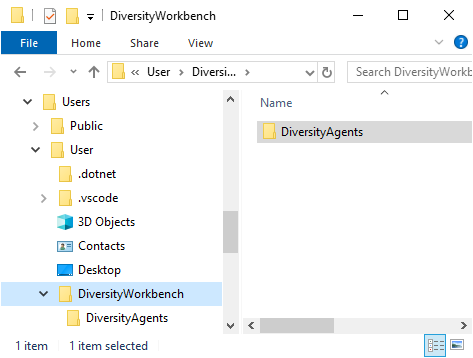
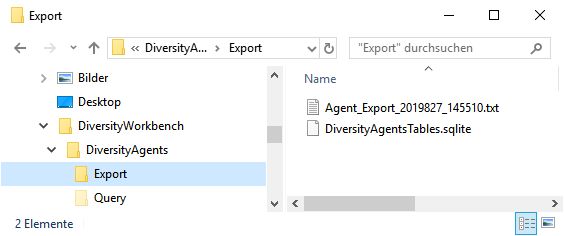
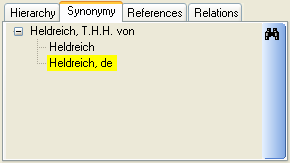
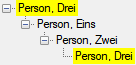

 Replication are available in most of the modules.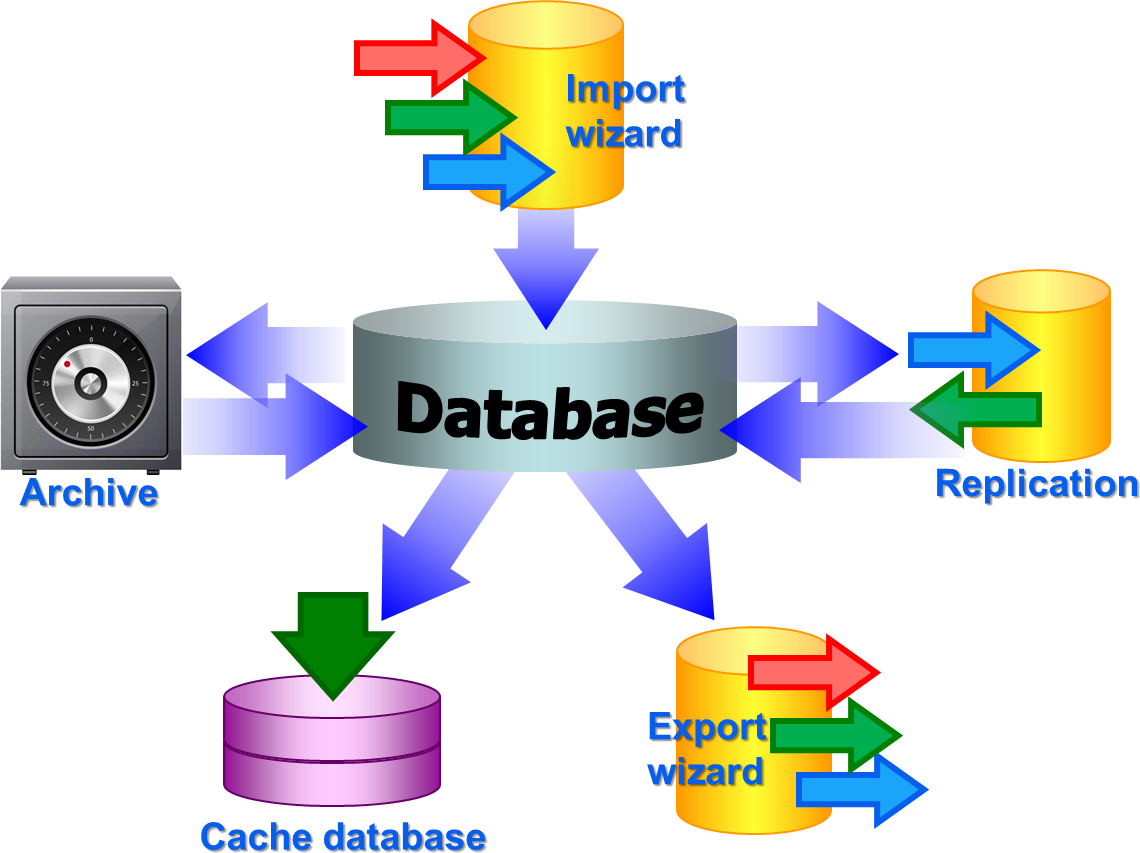
 . From
there they are transferred into a
. From
there they are transferred into a  containing a package for conversion into
ABCD. Finally the
containing a package for conversion into
ABCD. Finally the BioCASE tool for mapping the
data is used to provide the data for GBIF.
BioCASE tool for mapping the
data is used to provide the data for GBIF.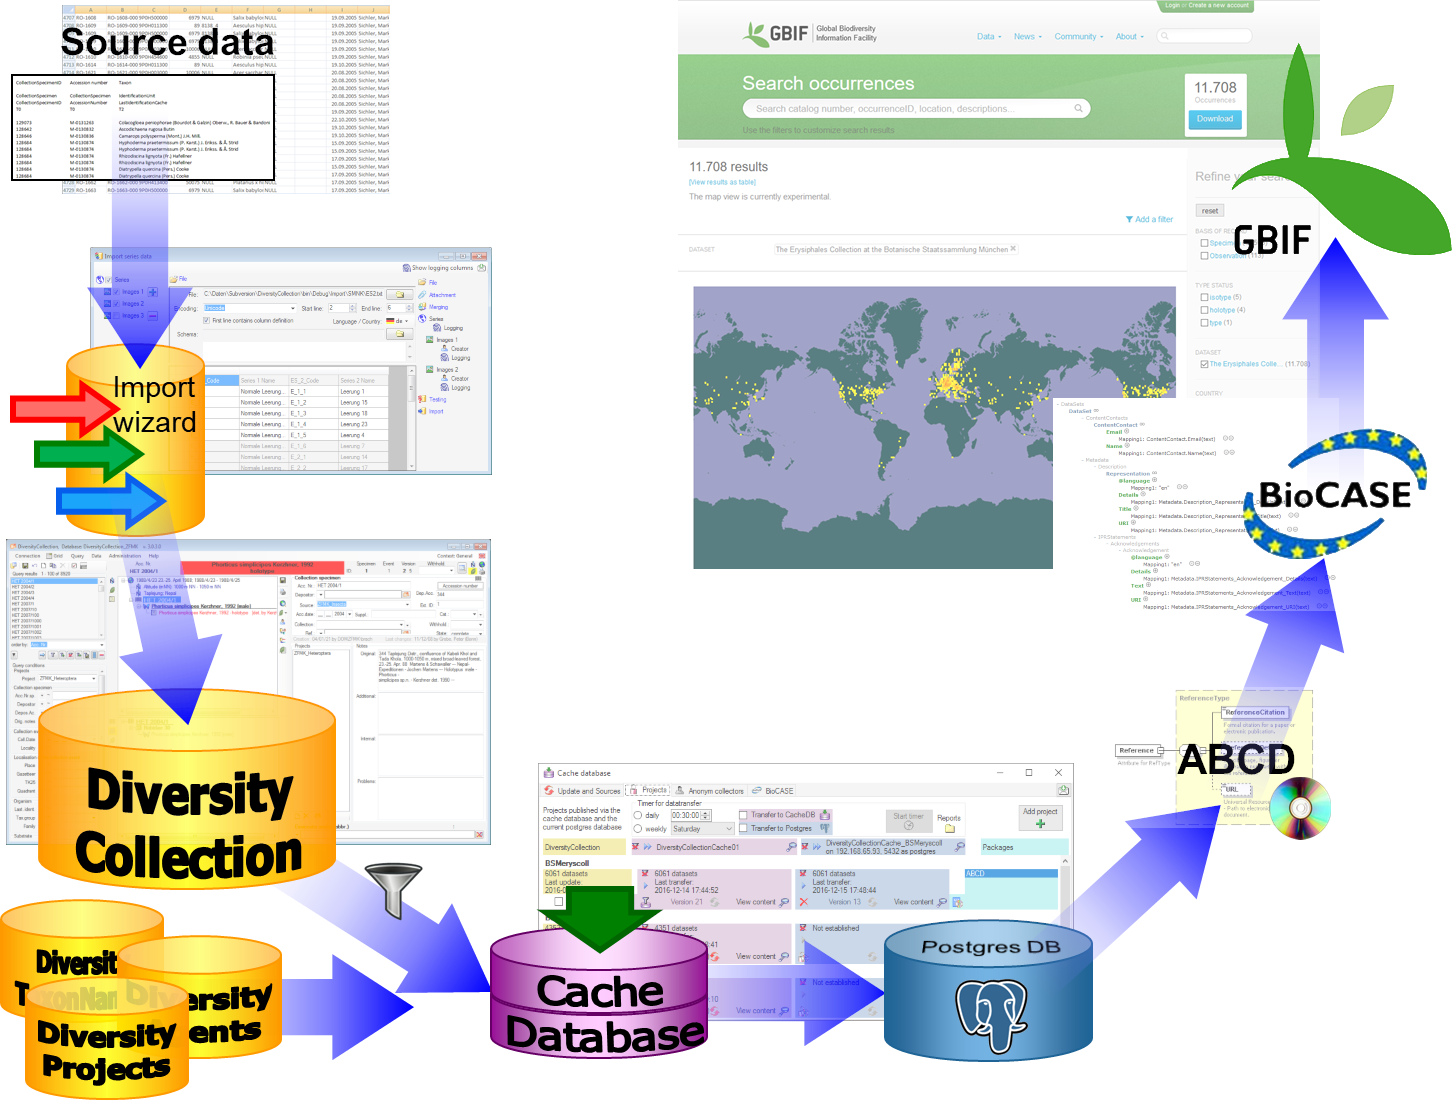
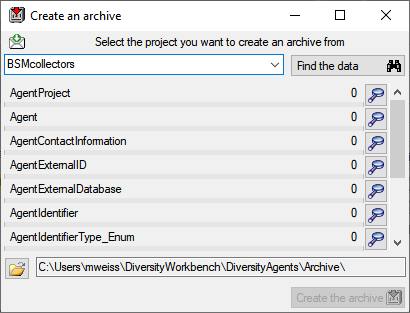
 option as described in the tutorial: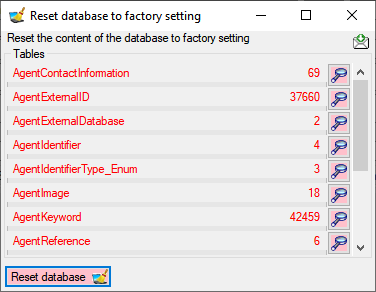
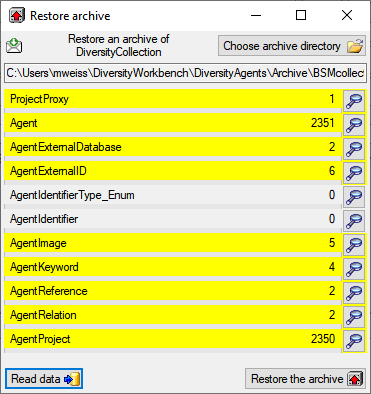
 button. If you select the
  option as described in the tutorial: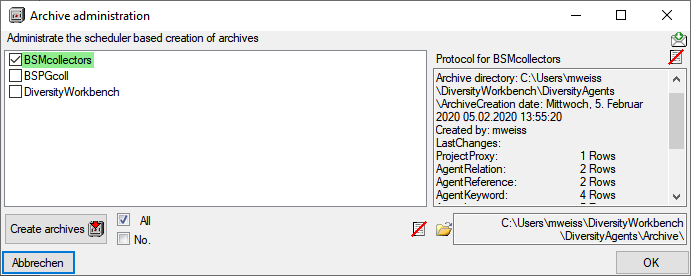
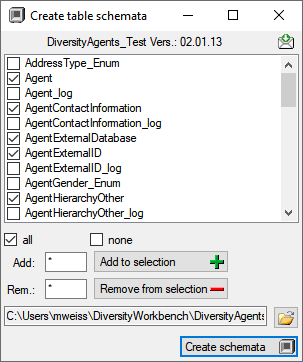
 none buttons resp. the Add to
selection
none buttons resp. the Add to
selection 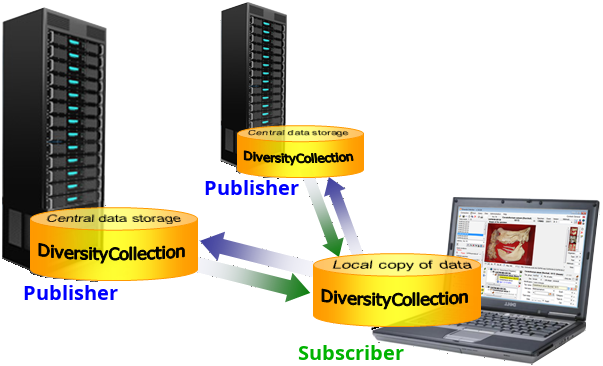
 Add Publisher from the menu. A window will
open where you choose the publisher. After the publisher is set, you
may transfer data between your local database (subscriber) and the
publisher. This function is only available for administrators.
Add Publisher from the menu. A window will
open where you choose the publisher. After the publisher is set, you
may transfer data between your local database (subscriber) and the
publisher. This function is only available for administrators.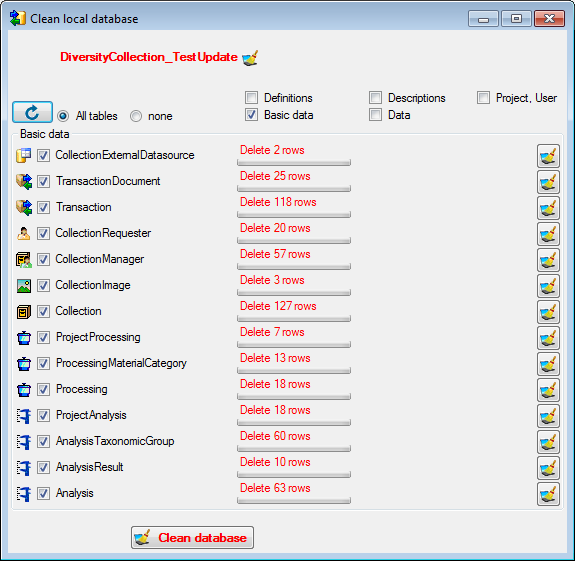
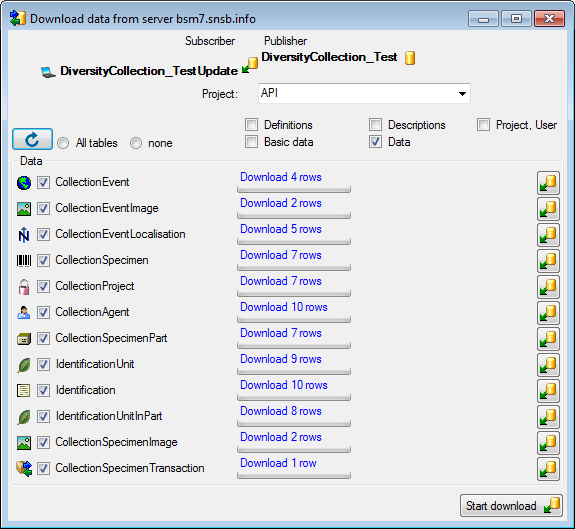
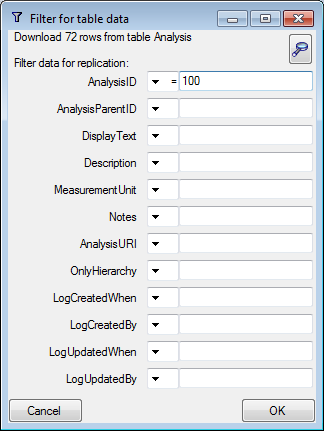
 .
.
 Merge** from the menu ([Publisher] is the
name of the publishing database on the publishing server). As described
for the download, choose the data ranges and click on the
Merge** from the menu ([Publisher] is the
name of the publishing database on the publishing server). As described
for the download, choose the data ranges and click on the

 To fix problems that may interfere with the replication you find some
tools under the menu Data →
To fix problems that may interfere with the replication you find some
tools under the menu Data →
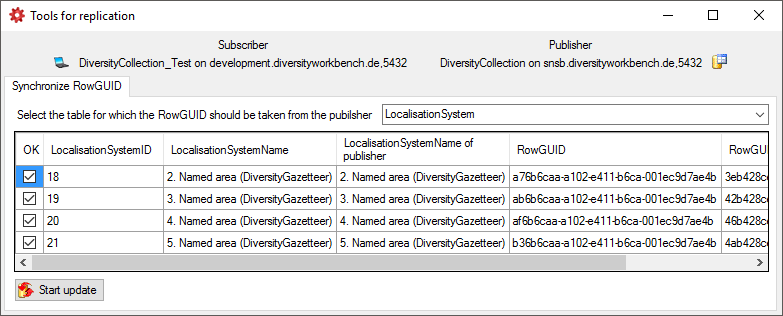


 button to open a window as shown below
where you can choose between the two versions of the data as found in
the publisher and the subscriber database.
button to open a window as shown below
where you can choose between the two versions of the data as found in
the publisher and the subscriber database.
 button. If you can not solve a conflict, use
the Ignore conflict
button. If you can not solve a conflict, use
the Ignore conflict
 or Stop conflict resolution
 buttons respectively.
 CSV(bcp)
... from the menu. A window will open as shown below, where you can
select the tables that should be exported. Click on the Start Export
button to export your data. If you choose the option as shown below 2
files will be created for every table. The first file (*.csv) contains
the data while the second file (*.xml) contains the structure of the
table.
CSV(bcp)
... from the menu. A window will open as shown below, where you can
select the tables that should be exported. Click on the Start Export
button to export your data. If you choose the option as shown below 2
files will be created for every table. The first file (*.csv) contains
the data while the second file (*.xml) contains the structure of the
table.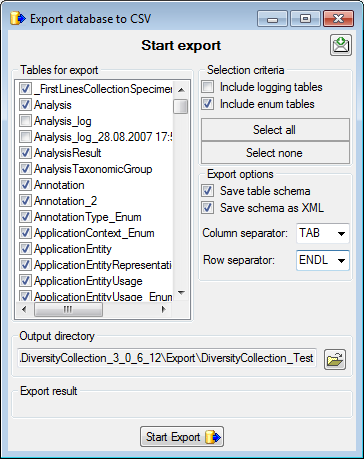
 Backup database from the menu. This
will create a SQL-Server backup on the server where the database is
located. Ensure that there is enough space on the server.
Backup database from the menu. This
will create a SQL-Server backup on the server where the database is
located. Ensure that there is enough space on the server.
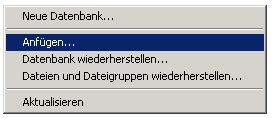
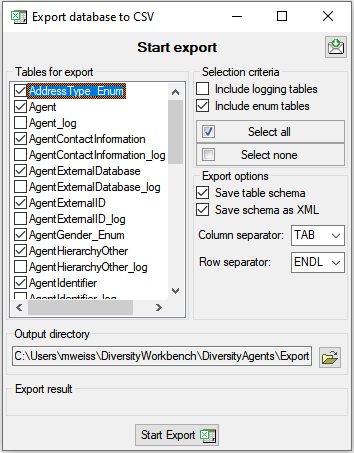
 button. By default the data will be exported into a directory
...\Export\<database_name> below your application directory. Click
on the
button. By default the data will be exported into a directory
...\Export\<database_name> below your application directory. Click
on the 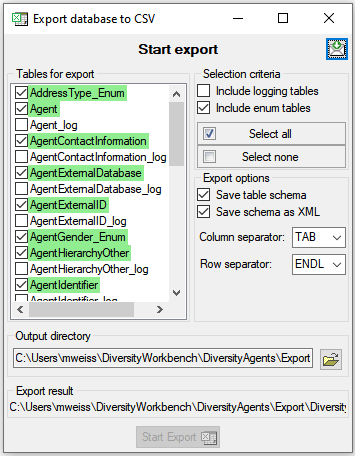
 Several parallel tables according to
selected data
Several parallel tables according to
selected data Dependent table
 resp.
resp.  on the left side of the column that will change to
  for fused columns. To remove a file column, use the
  This filter in contrast to the filter above strictly applies to the row
according to the sequence of the data. For an explanation see a short
tutorial
This filter in contrast to the filter above strictly applies to the row
according to the sequence of the data. For an explanation see a short
tutorial
 To test the export choose the
  To export your data into a
 Translate contents from the file,
RegEx apply regular expressions or
Translate contents from the file,
RegEx apply regular expressions or  Seq starting at the first position and
 starting at the last position. Click on
the button Test the transformation to see the result of your
transformation.
starting at the last position. Click on
the button Test the transformation to see the result of your
transformation.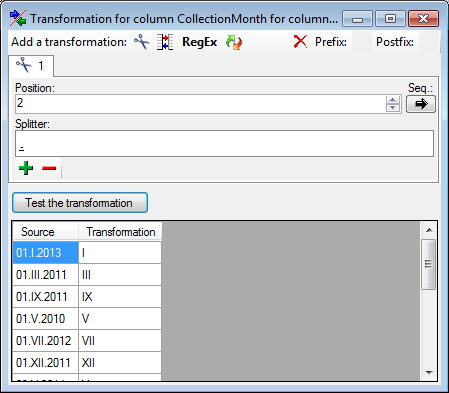
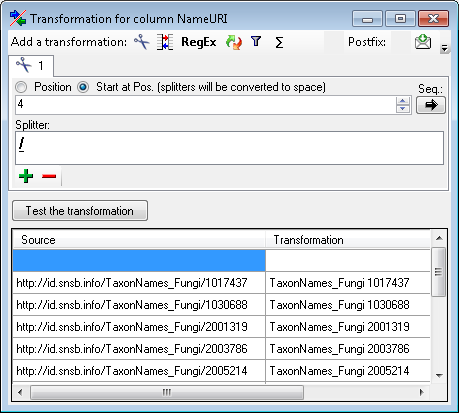
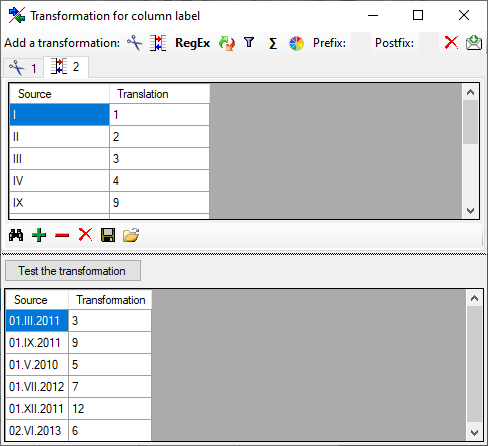
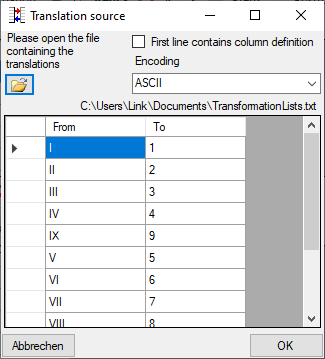
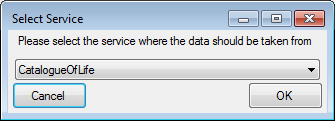
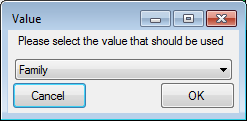
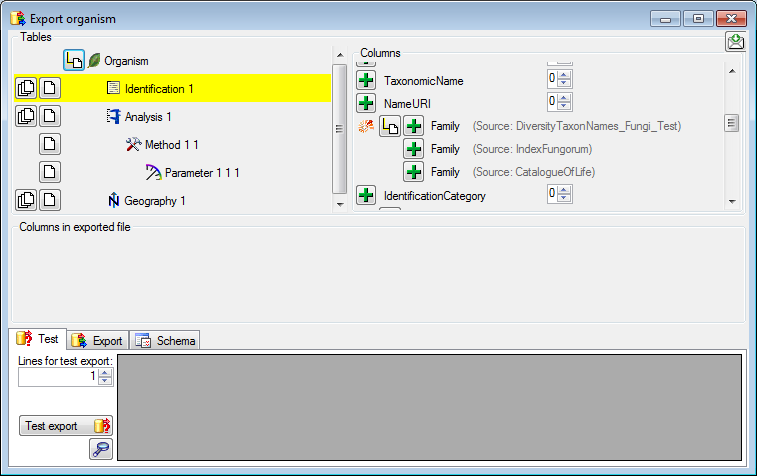
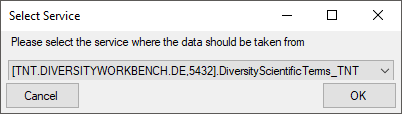

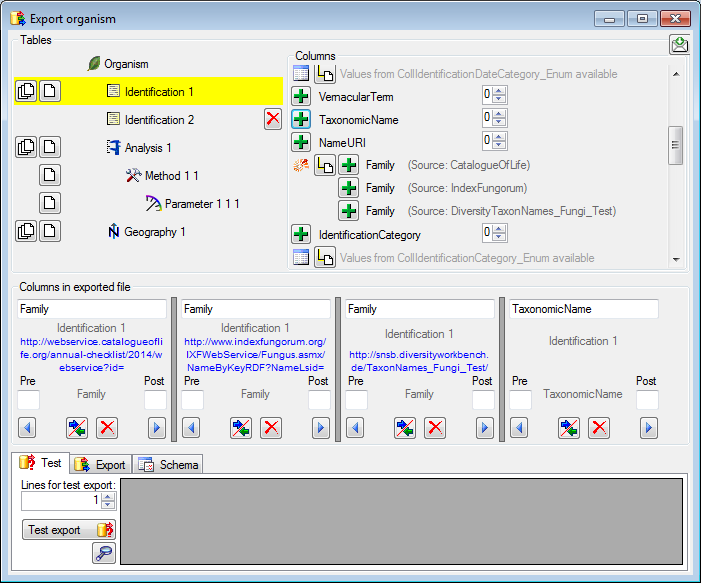
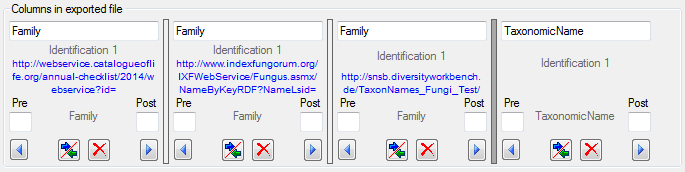

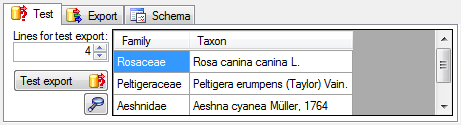
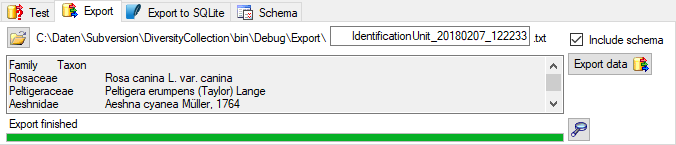
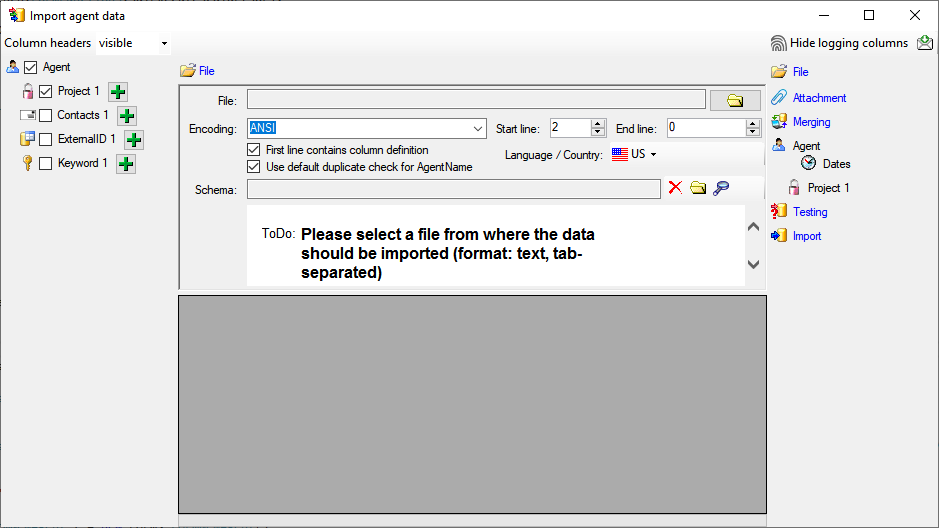
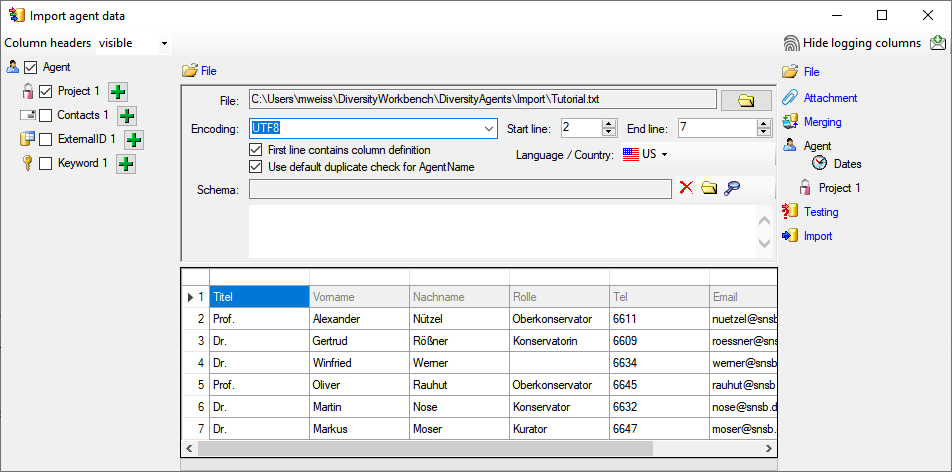
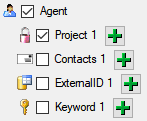
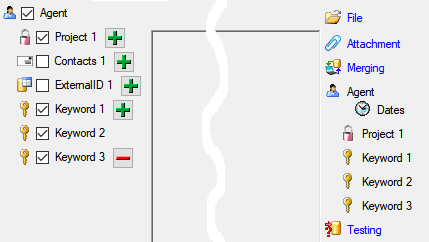
 include logging columns button in the header line. This will include additional substeps for every step containing the
logging columns (see below). If you do not import these data, they will
be automatically filled by default values like the current time and
user.
include logging columns button in the header line. This will include additional substeps for every step containing the
logging columns (see below). If you do not import these data, they will
be automatically filled by default values like the current time and
user.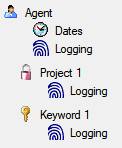
 Attach
them to data in the database. Select the import step
Attach
them to data in the database. Select the import step
 Import as new data or one of the
columns the attachment columns offered like SeriesCode in the table
Series in the example below.
Import as new data or one of the
columns the attachment columns offered like SeriesCode in the table
Series in the example below.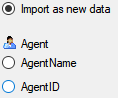

 Merge them with data in the
database. Select the import step
Merge them with data in the
database. Select the import step  Insert,
  Update and
  Key columns (see below). If no matching data are
found in the database, the data from the file will be imported.
Otherwise the data will be updated.
Key columns (see below). If no matching data are
found in the database, the data from the file will be imported.
Otherwise the data will be updated.
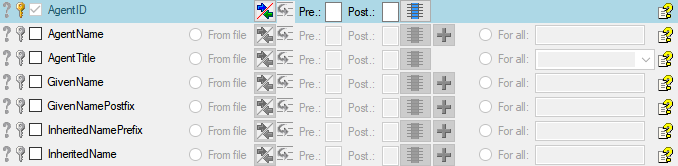
 = If data will be imported depends on the content of decisive
columns, so at least one must be selected.
= If data will be imported depends on the content of decisive
columns, so at least one must be selected. = You have
to select a value from the provided list
= You have
to select a value from the provided list = You have to enter
a value used for all datasets
= You have to enter
a value used for all datasets - To test if all requirements for the import are met use the
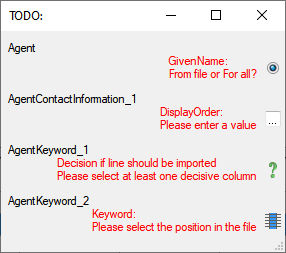
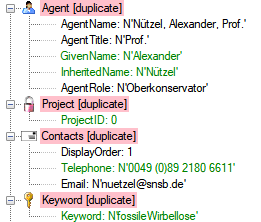

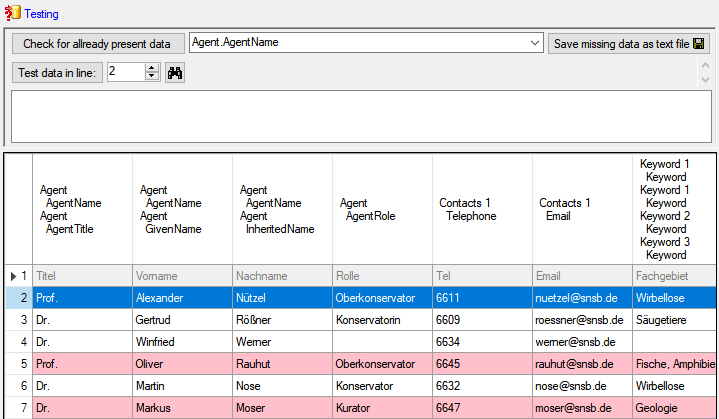
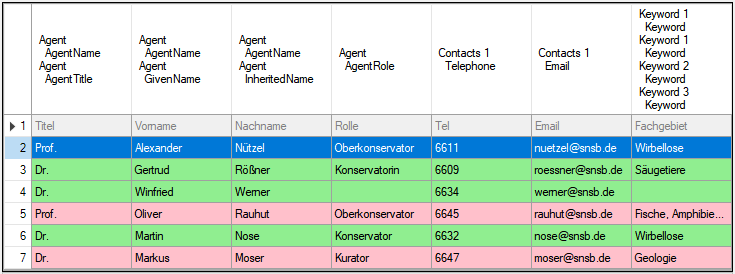
 How to export the content of enum tables for inclusion in the manual for HUGO


 from the menu. A window will open where
you can browse your past feedback together with the state of progress.
from the menu. A window will open where
you can browse your past feedback together with the state of progress.


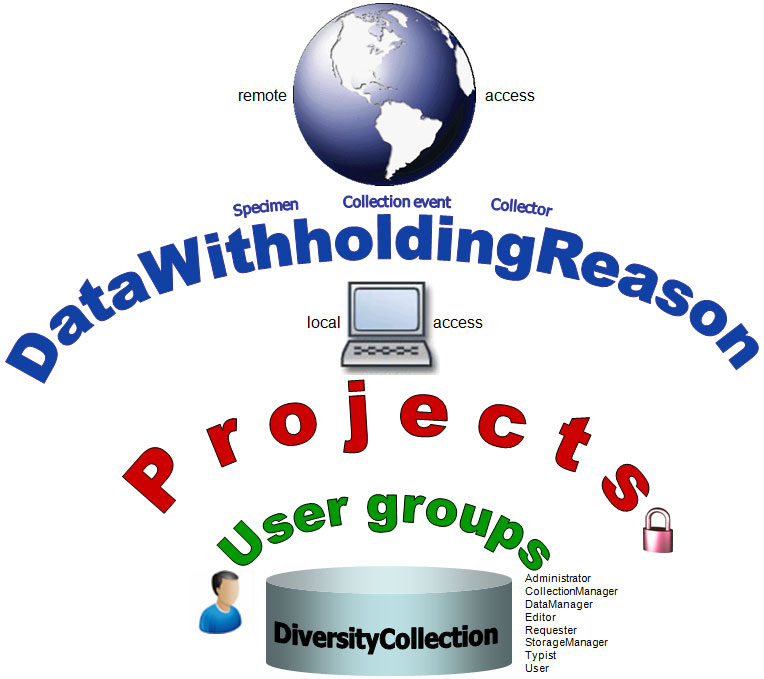



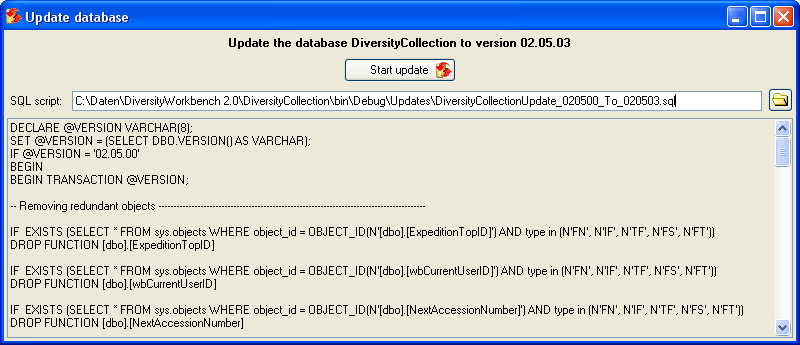

 Clear ErrorLog.