Diversity Agents

Scope of DiversityAgents within the Diversity Workbench
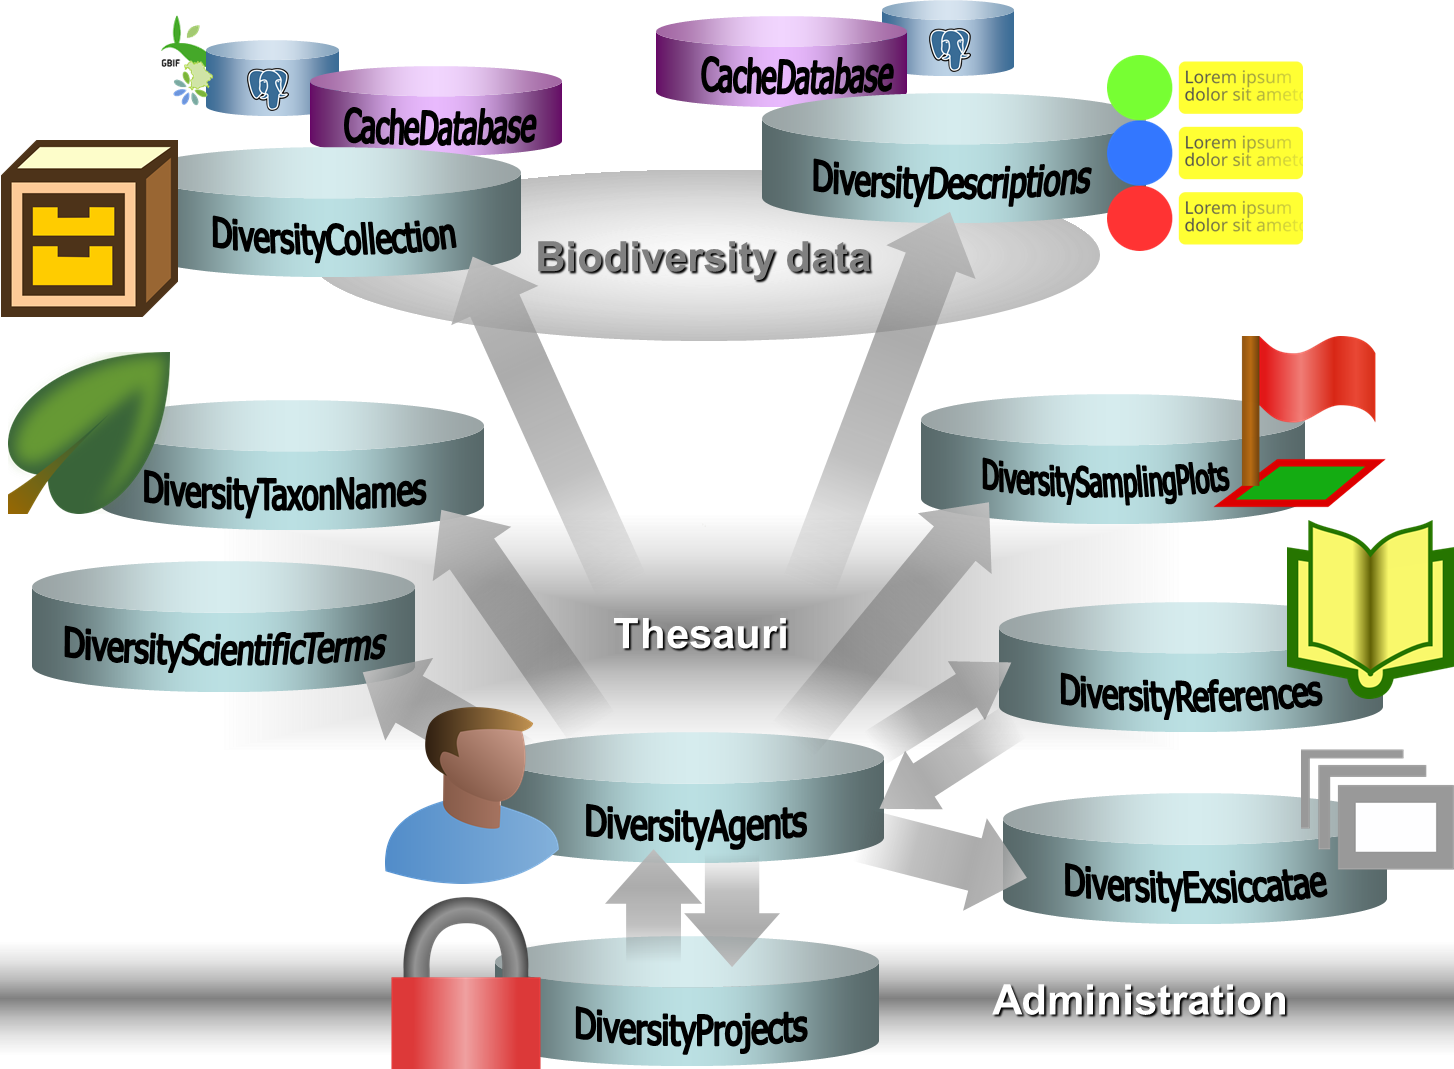
 DiversityAgents is the module for the administration of agents within the Diversity Workbench. DiversityAgents provides information for other modules like DiversityCollection and DiversityTaxonNames. DiversityAgents keeps only data connected with the handling of agents. Data of other realms like e.g. projects or references are handled in separate modules. For an overview of the available modules see the image below. DiversityAgents might also be used as a stand-alone application.
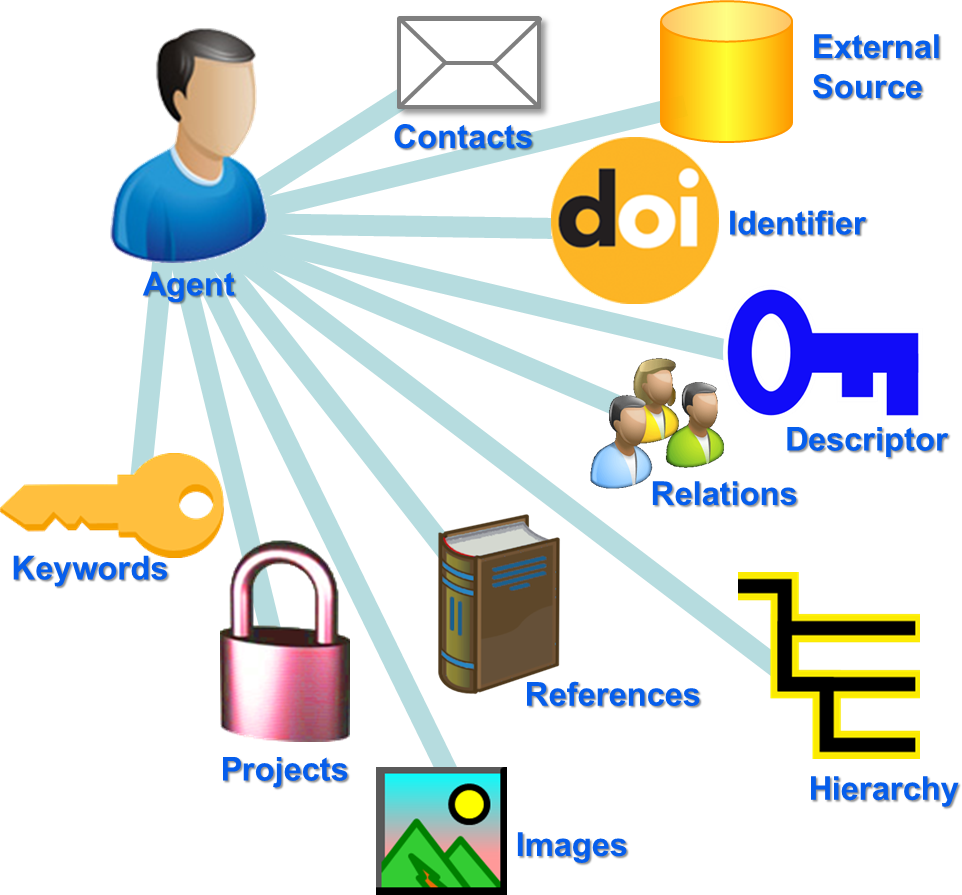
Data managment sectors of the application
| Sector | Description |
|---|---|
| Agent |
A person, institution etc. |
 Contacts Contacts |
Contacts of an agent including address, phone number, e-mail etc. |
 Keyword Keyword |
Keywords characterizing the agent |
 Project Project |
The projects that a agent is a part of |
 Images Images |
Images related to the agent, e.g. a portrait |
 References References |
The references related to the agent |
 Hierarchy Hierarchy |
Additional hierarchies of the agent, e.g. when an agent has contracts in several companies |
 Relations Relations |
Relations of the agent, e.g. child of … |
 Descriptor Descriptor |
Descriptors of the agent |
 Identifier Identifier |
IDs of the agents, e.g. ORCID |
 External sources External sources |
Source where the data have been taken or relation to external soucres |
Usage example
An agent with several contact addresses (office, private, mobile) is working for two institutions. This agent has been included in several projects and there are images of the agent. The agent has children working in one of the institution. The agent among other identifiers has an ORCID. The instituions where the agent is working for are described with predefined values.
Relations and connections between the various sectors
Main form of DiversityAgents
To start the application double click on DiversityAgents.exe.
The first time you start the application you have to configure the connection to the database (Connection, Server ... ) you want to work with. The header of your form allways shows you, with which database you are working, the version of the client, the database server and your login.
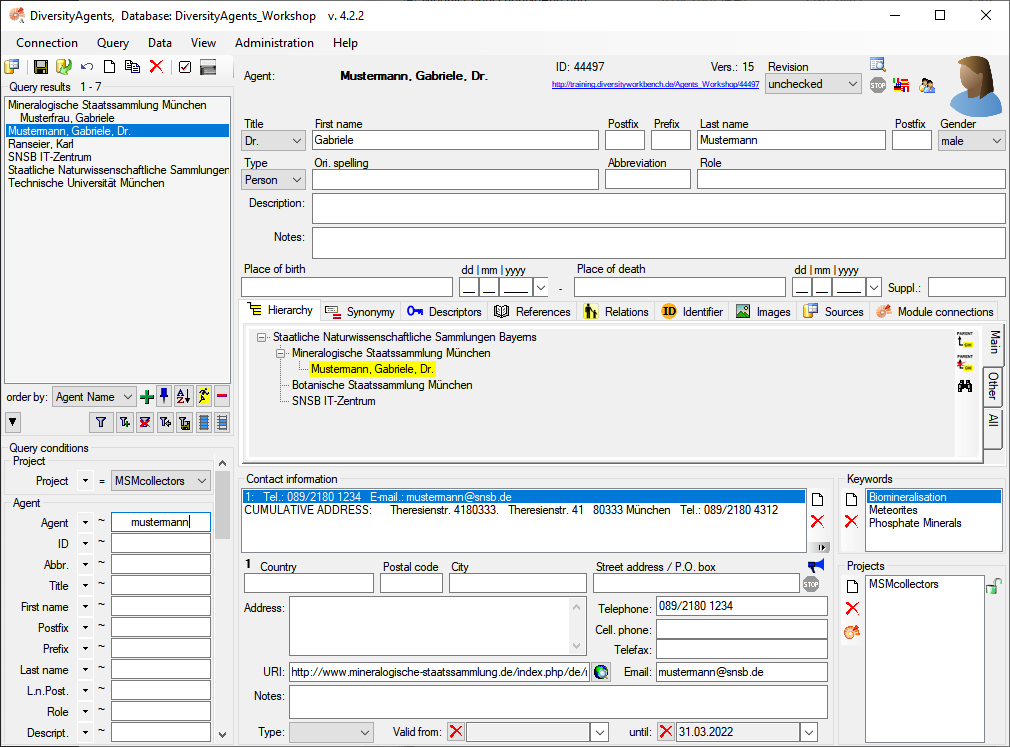
To see the descriptions for the fields of the database, simply move your mouse over it. A tooltip will appear with an explanation of the field.
Where you have to choose items from lists, type the beginning of the
item name in the field and then click on the drop down button
 . This will start a query in the database and list
the result in the combobox. If contents can be linked to an other
module, click on the
. This will start a query in the database and list
the result in the combobox. If contents can be linked to an other
module, click on the  button to start
a query in this module.
button to start
a query in this module.