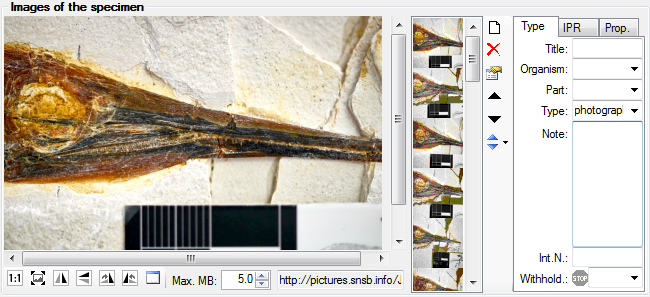
Diversity Collection

Specimen image
To see the specimen images select the specimen image
 in the header menu. Each specimen may be
documented with several images. The images are stored as their path,
either locally or provided by a server. To enter a new image click on
the
in the header menu. Each specimen may be
documented with several images. The images are stored as their path,
either locally or provided by a server. To enter a new image click on
the  button. For more details see the section
Images.
button. For more details see the section
Images.
To delete an image select it from the list and click on the  delete button (see below).
To change the sequence of the images, use the  resp.
resp.  buttons to change the position of the
selected image. To adapt the sequence of the whole list, you can select
one of the options offered when you click on the
buttons to change the position of the
selected image. To adapt the sequence of the whole list, you can select
one of the options offered when you click on the
 button: Ordering ascending resp. descending
by the name (= URI) or the creation date of the images. For a short
introduction see the tutorial
button: Ordering ascending resp. descending
by the name (= URI) or the creation date of the images. For a short
introduction see the tutorial
 .
.
With the button  you can
change to a new chromium based browser for the display of images.
you can
change to a new chromium based browser for the display of images.
To change the image sequence for a whole project, use the functionality within maintenance maintenance.
To document the relation of an image to an organism or a part of the specimen choose the corresponding entries from the drop-down lists Organisms: and/or Part:.
To restrict the displayed images to either images which are related to a
certain part or a certain organism within the specimen, choose e.g. the
organism in the tree. If the selected organism is related to any image
the  button
(see below) will change to .
button
(see below) will change to .

Click on the button to restrict the images
displayed in the list to those, which are related to e.g. the selected
organism. The button will receive a red background
to remind you of
the restriction. Next to the image list a button
 will appear which enables you to show all
images again.
will appear which enables you to show all
images again.
The data is stored in the table CollectionSpecimenImage.