Diversity Collection
Export Wizard
 The export wizard provides a possibility to export the data selected in
the main form. The data are exported as tab separated text file. The
export may include transformations of the data as well as information
provided by linked modules and webservices. Choose Data - Export -
Export wizard from the menu and then
select one of the export targets (Event, Specimen, ...). For a short
introduction see the tutorial.
The export wizard provides a possibility to export the data selected in
the main form. The data are exported as tab separated text file. The
export may include transformations of the data as well as information
provided by linked modules and webservices. Choose Data - Export -
Export wizard from the menu and then
select one of the export targets (Event, Specimen, ...). For a short
introduction see the tutorial.
Adding tables
 There are the following ways to add tables:
- One parallel table
 Several parallel tables according to
selected data
Several parallel tables according to
selected data Dependent table
All options will include the depending tables as defined for the default
table. The option for several tables will add
as many tables as there are found in the data.
If you added parallel tables, you should set the sequence of the
datasets within these tables: For the columns that should be used for
sorting the data, set the ordering sequence to a value > 0 and choose
if the ordering sequence should be ascending  or
descending
or
descending  .
.
Certain columns in the database may provide information linked to
another table  or a module resp. webservice
 . Click on the button
to add a linked value.
. Click on the button
to add a linked value.
Adding and editing file columns
 To add columns to the exported file, use the
buttons. In the textbox at the top of the file column, you can change
the header for the column. To change the position of a file column use
the
To add columns to the exported file, use the
buttons. In the textbox at the top of the file column, you can change
the header for the column. To change the position of a file column use
the  resp.
resp.  button. To fuse
a column with the previous column, click in the gray bar
button. To fuse
a column with the previous column, click in the gray bar
 on the left side of the column that will change to
  for fused columns. To remove a file column, use the
  delete button. Pre- and postfixes for the columns can directly be entered in the corresponding fields. To apply transformations on the data click on the
  button.
Filter
 To filter the exported data, use the filter function. Click on the
button and
enter the text for the filter. Only data matching the filter string will
be exported. If a filter is set, the
button will have a red background to remind you of the filter. The
filter may be set for any number of columns you need for the restriction
of the exported data.
To filter the exported data, use the filter function. Click on the
button and
enter the text for the filter. Only data matching the filter string will
be exported. If a filter is set, the
button will have a red background to remind you of the filter. The
filter may be set for any number of columns you need for the restriction
of the exported data.
Rowfilter
 This filter in contrast to the filter above strictly applies to the row
according to the sequence of the data. For an explanation see a short
tutorial
This filter in contrast to the filter above strictly applies to the row
according to the sequence of the data. For an explanation see a short
tutorial
 .
.
Test
 To test the export choose the Test tab,
set the number of lines that should be included in the test and click on
the Test export button. To inspect the
result in a separate window, click on the
To test the export choose the Test tab,
set the number of lines that should be included in the test and click on
the Test export button. To inspect the
result in a separate window, click on the  button.
SQL
If you want to inspect the SQL commands created during the test check this option. To see the generated SQL click on the SQL button after the Test export. A window containing all commands including their corresponding tables will be shown.
Export
To export your data to a file, choose the Export tab. If you want to store the file in different place use the
 button to choose the directory and edit the name of
the file if necessary. Check the
button to choose the directory and edit the name of
the file if necessary. Check the  include a schema option if you want to save a schema together with your
export. To start the export, click on the Export data
button. To open the exported file, use the button.
include a schema option if you want to save a schema together with your
export. To start the export, click on the Export data
button. To open the exported file, use the button.
Export to SQLite
 To export your data into a SQLite
database, choose the Export to SQLite tab. You may change the preset name of the database in order to keep previous exports. Otherwise you overwrite previous exports with the same filename. To start the export, click on the Export data
button. To view the exported data, use the
button.
To export your data into a SQLite
database, choose the Export to SQLite tab. You may change the preset name of the database in order to keep previous exports. Otherwise you overwrite previous exports with the same filename. To start the export, click on the Export data
button. To view the exported data, use the
button.
Schema
 To handle the settings of your export, choose the
Schema tab. To load a predefined schema,
click on the open button. To reset the settings to the
default, click on the
To handle the settings of your export, choose the
Schema tab. To load a predefined schema,
click on the open button. To reset the settings to the
default, click on the  undo button. To save the current
schema click on the
undo button. To save the current
schema click on the  save button. With the
button you can inspect the schema in a separate
window.
save button. With the
button you can inspect the schema in a separate
window.
Diversity Collection
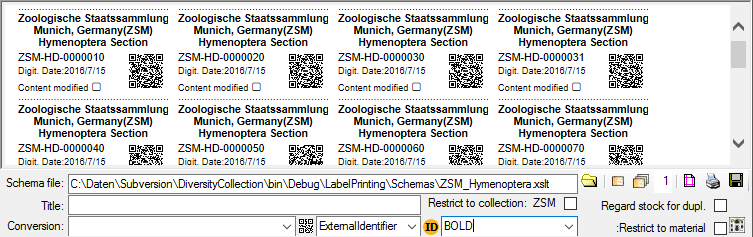
Label
Select the printer  in the header menu to switch to
the printing mode. Next choose
the part of the specimen for which the label should be generated. The
sequence is shown in the image below and in a short tutorial
.
in the header menu to switch to
the printing mode. Next choose
the part of the specimen for which the label should be generated. The
sequence is shown in the image below and in a short tutorial
.
If you do not choose a part, resp. choose the specimen for printing the label some options like the restriction to a certain collection or material will not be available.
Additional information about a label is entered in the label section
(see image below). The title may contain a longer text that can be
displayed by switching from a combobox to a textbox using the
 resp. button to return to
the combobox. The data are stored in the table
CollectionSpecimen.
resp. button to return to
the combobox. The data are stored in the table
CollectionSpecimen.
The organisms of a specimen are printed on a label according to the
display order.
Schema
If you do not select a schema file, i.e. the textbox Schema file: is
empty, you will see the generated XML-file as shown in the image below.
The XML file is the base for all label types you wish to generate. To
create your own labels simply design your own XSLT-schema file
.
See e.g. http://www.w3.org/TR/xslt for further information about
schema files.
To print a label for a specimen you have to select a schema file. There
are default schema files available on github or in the folder
LabelPrinting/Schemas in your application directory (see below).
This is the default place to store schema files.
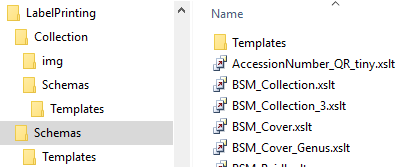
Click on the open button to open the directory. You will
find several prepared schema files among which you can choose or change
them to your own needs or create new ones respectively. The schema file
/LabelPrinting/Schemas/Templates/LabelTemplates.xslt provides
templates for the other schema files. If this file is missing the
generation of the label may fail and you will get a warning. You may
give a title for the print in the field Title. From the Collection and
MaterialCategory available for the selected specimen choose one from the
list (Coll./Mat.). To generate the label for the current specimen
click on the  button. To generate labels for all
specimens selected in your query click on the
button. To generate labels for all
specimens selected in your query click on the
 button (you may use the
 button to select all specimens). If you need
duplicates of your labels change the number in the duplicates box
button to select all specimens). If you need
duplicates of your labels change the number in the duplicates box
 to the desired value. You can print 1 - 99
duplicates of one label. If there are more than 20 specimens in the
list, you receive a warning whether you really wish to create all these
labels as this could be somewhat time consuming. The labels are
generated as XML files with XSLT-schema files, transformed to HTML-files
and depicted in a browser. To print the label click on
the button.
to the desired value. You can print 1 - 99
duplicates of one label. If there are more than 20 specimens in the
list, you receive a warning whether you really wish to create all these
labels as this could be somewhat time consuming. The labels are
generated as XML files with XSLT-schema files, transformed to HTML-files
and depicted in a browser. To print the label click on
the button.
Duplicates
If you wish to print labels for duplicates which are stored in a
different collection, the duplicate should be a child of the original
specimen as shown in the example below.
Depending on the schema you use, the label will be marked as duplicate
and contain a reference to the original specimen (see below).

Save
If you wish to save the generated files for later printing, click on
the button to do so. Note that the program will by
default create a file Label.xml and in case a schema file is
specified a file Label.htm in the LabelPrinting directory which
will be overwritten every time you generate a new label. Thus, you need
to save the file under a different name or in a different directory to
prevent the program to erase this data.
If you wish to print labels for all the specimens in the specimen list,
you can restrict these to the collection and the material category of
the current specimen part (see image above).
Accession number
If you wish to reformat the accession number, you may choose among the
options provided by the program, e.g. conversion of arabic to roman
numbers (BSPG-1988-007-00001 → BSPG-1988-VII-00001). Select the format
from the combobox Conversion shown above.
Codes
For a short tutorial about the inclusion of codes in the label see a
short tutorial
.
Code 39
If you use  Code 39 for your labels and wish to print the barcodes on
the labels, you need the font
Code 39 for your labels and wish to print the barcodes on
the labels, you need the font  , which is included in
the DiversityCollection package. Place this font in the folder where
your fonts are stored (e.g.: C:\WINNT\Fonts). If the font is not
available, the barcode will appear as the accession number between two
'*' signs. If this font does not do the job you may try other fonts,
e.g. code 39 fromlogitogo.
Download the font, copy it into your fonts directory and adapt the xslt
file according to the line below:
, which is included in
the DiversityCollection package. Place this font in the folder where
your fonts are stored (e.g.: C:\WINNT\Fonts). If the font is not
available, the barcode will appear as the accession number between two
'*' signs. If this font does not do the job you may try other fonts,
e.g. code 39 fromlogitogo.
Download the font, copy it into your fonts directory and adapt the xslt
file according to the line below:
<xsl:variable name=\"FontBarcode\"\> font-size: 10pt; font-family:[Code-39-Logitogo]\</xsl:variable\>
QR-code
The QR-codes are restricted to labels for specimen parts. Select a part in the lower tree to enable the QR-codes.
To include a  QR-Code in the label, activate the QR-Code generator
and select the source for the QR code. For certain sources you can specify the type of the
source (see below).
QR-Code in the label, activate the QR-Code generator
and select the source for the QR code. For certain sources you can specify the type of the
source (see below).
- AccessionNumber
- CollectorsEventNumber
- DepositorsAccessionNumber
- ExternalIdentifier
- PartAccessionNumber
- StableIdentier
- StorageLocation
Depending on your XSLT-schema the QR code will
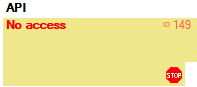
appear in your label (see below). By Default the QR-Codes are generated via a
an Api provided by the SNSB IT-Center using a python library, which is only available if you have access to the Internet.
The created QR-Code images will be stored in the folder LabelPrint/img with the filenames corresponding to the ID of the specimen part.
This folder will be cleared for every printout. So if you want to keep
the label you need to copy the created file Lable.html together with the
folder img.
You can change the default size and the default service for generating the QR-code. Use the context menu of the QR-code button to open a window where you can enter either the size or the template of your preferred service as in the example shown below where the parameter {0} corresponds to the text that should be coded e.g. the accession number (as selected in the interface) and parameter {1} the size in pixel (as integer) for the QR code.
https://services.snsb.info/qrcode/?size={1}&text={0}
Subsections of Cache Database
Diversity Collection
Data Flow
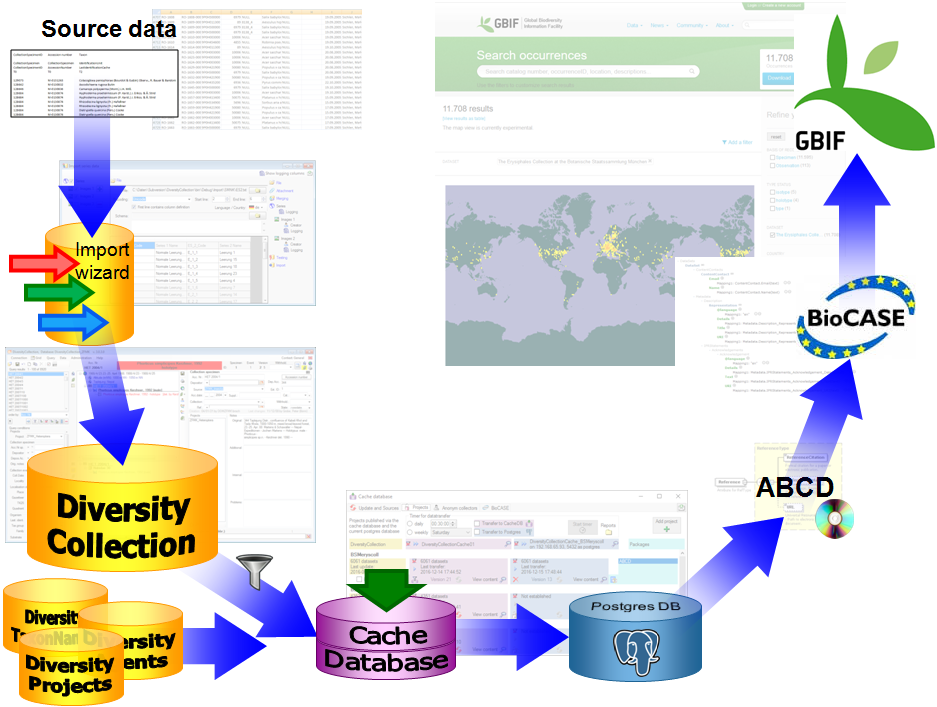
Import / Export - example for a data flow
In the image below, an expample for a data flow from the original source
to the final GBIF-portal is shown. As a first step the data are imported
via the Import wizard  are imported into the
database. After the data are given free for
publication, they are transferred into the cachedatabase
are imported into the
database. After the data are given free for
publication, they are transferred into the cachedatabase  . From
there they are transferred into a Postgresdatabase
. From
there they are transferred into a Postgresdatabase  containing a package for conversion into
ABCD. Finally the
containing a package for conversion into
ABCD. Finally the  BioCASE tool for mapping the
data is used to provide the data for GBIF.
BioCASE tool for mapping the
data is used to provide the data for GBIF.
Cache Database
Tutorial
Basic steps for publication of data via the cache database
1 - Create the cache database
To create a cache database as shown in a short tutorial
and in the chapter Creation of the cachedatabase you need to be a system
administrator (s. Login administration).
After this step the cache database should be available and you can
create a Postgres database as final target of your data.
2 - Create a Postgres database
The final formatting of the data e.g. for publication via webservice are
performed in a Postgres database. If no server providing Postgres is
available, you may install Postgres on your local machine (see
https://www.postgresql.org/ for further information). The creation and
administration of a Postgres database is described in a short tutorial
and in chapter Administration of the Postgres cachedatabases.
3 - Insert sources for taxonomic names, scientific terms, agents etc.
This step is optional and depends upon the availability of a source for
e.g. taxonomic names. You may either use sources from your local server
or the public available sources provided by tnt.diversityworkbench.de
(turn to http://www.snsb.info for further information). For a
introduction see a short tutorial
.
The needed settings are described in chapter Sources from othermodules.
4 - Insert a project
The data published in the cache database are organized according to the  projects. Add a project as shown in a short tutorial
and described in chapter Projects in the cachedatabase. In the source database, make sure
that the data within this project are not withheld from publication (see
chapter Availability of data sets for more
details) and that the ranges you want to publish are set properly (see
chapter Restrictions for the datatransfer into the cachedatabase).
projects. Add a project as shown in a short tutorial
and described in chapter Projects in the cachedatabase. In the source database, make sure
that the data within this project are not withheld from publication (see
chapter Availability of data sets for more
details) and that the ranges you want to publish are set properly (see
chapter Restrictions for the datatransfer into the cachedatabase).
5 - Transfer the data
The final transfer of the data is described in chapter Sources for
other modules and chapter Transfer of the
data.
6 - Publish
Publish  or export
  the data
To export the data or prepare them for publication according to the
specifications of webservices etc. the data frequently need to be
formatted. This is done with packages as described in chapter
Administration of the Packages.
7 - BioCASe
Map data via BioCASe (only for ABCD consuming publishers like GBIF)
For publishers using ABCD like GBIF, use the
BioCASe provider software and mapping tool to
link the data formatted with the ABCDpackage.
Create Cache Database
Creation of the cache database
To create a cache database you need to be a system administrator (s.
Login administration). To create the cache
database, choose Data - Cache database
... from the menu. If so far no cache database exists, you will be
asked if a new one should be generated. Next you have to select the
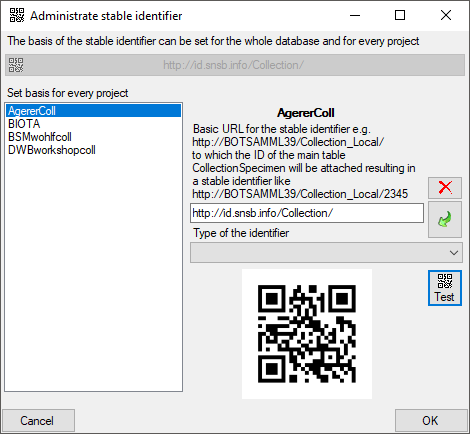
corresponding DiversityProjects database placed on the same server. If
the stable identifier has not been defined in this DiversityProjects
database, you get a message, that this has to be done first. Please see
the manual of DiversityProjects for details. Next you have to select the
corresponding DiversityAgents database placed on the same server.
Finally you are asked for the name of the Cachedatabase. We recommend to
accept the suggestion shown in the dialog. After the generation of the
cache database a window as shown below will open. For an introduction
see a short tutorial
.

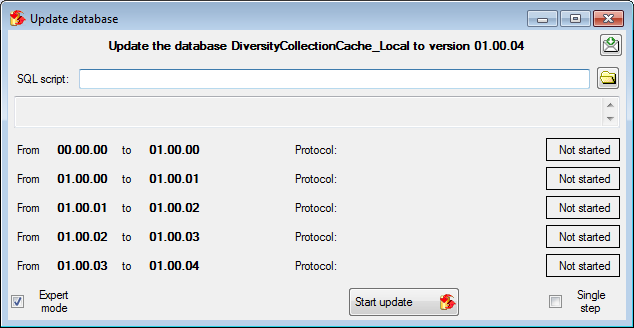
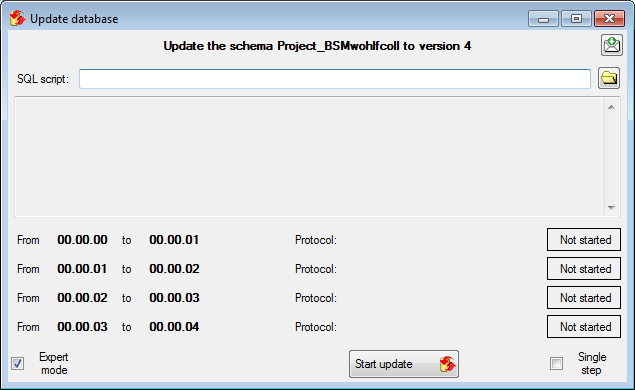
Click on the Update  button to update
the database to the latest version. A window as shown below will open.
Click on Start update to execute all
the scripts needed for the latest version of the database.
button to update
the database to the latest version. A window as shown below will open.
Click on Start update to execute all
the scripts needed for the latest version of the database.
During the update you may encounter under certain circumstances the
message that the test of the generic functions failed (see below).

The most probable reason for this is that the name of your projects
database does not correspond to the specifications of the update-script.
This error can easily be fixed. As an administrator use the Microsoft
SQL Server Management Studio. In the directory of your cache database
select the Scalar-valued Function
dbo.ProjectsDatabase()
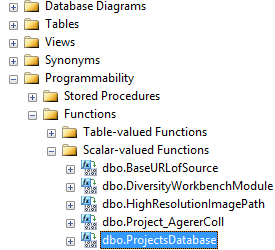
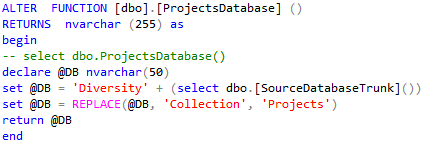
... and use Modify from the context menu. In the Code of the function
(see below) change the last set @DB = ... to the real name of your
projects database.
The result may look as shown below. After the change, press F5 to
execute the script.
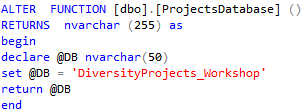
After the function returns the correct name of the ProjectsDatabase, the
update script should proceed without further error messages.
Cache Database
Logins
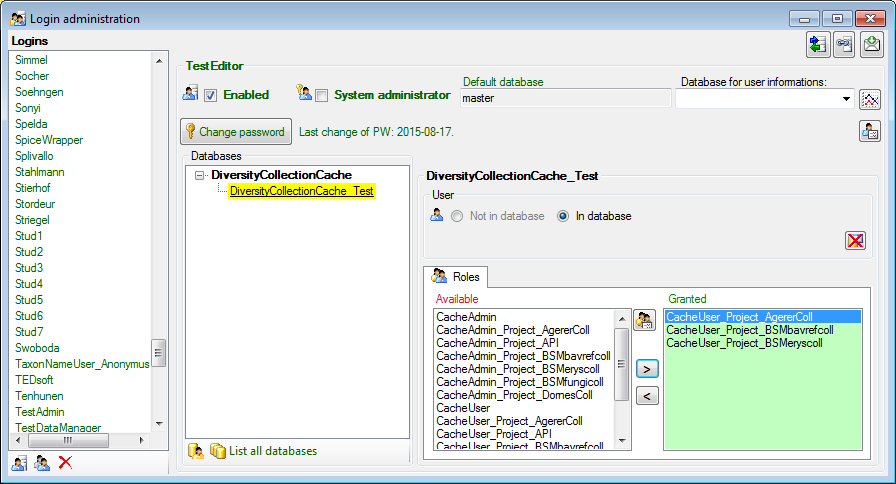
Cache database - User administration
There are 2 roles in the cache database with a general access to the
data: CacheAdmin (for the administration and transfer of the data) and
CacheUser (with read only access).
To administrate the logins in the SQL-Server
database, click on the  button to open a window
as shown below. To administrate the access for other logins, you have to
be a System administator. For further details please see the chapter
about the login administration for the main database.
button to open a window
as shown below. To administrate the access for other logins, you have to
be a System administator. For further details please see the chapter
about the login administration for the main database.
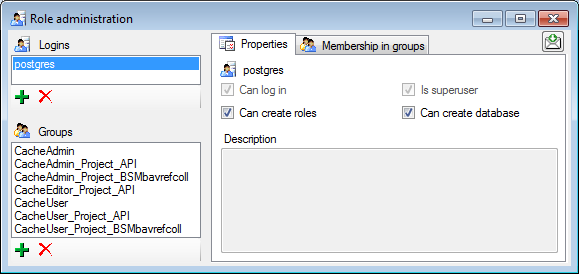
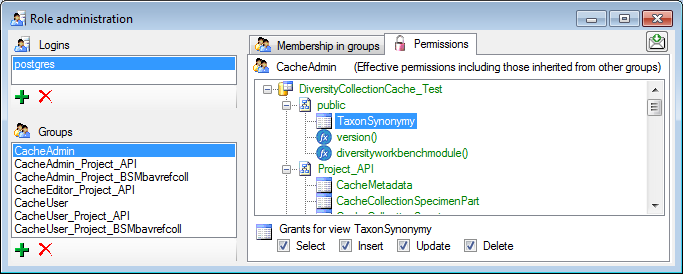
Postgres database
To handle the logins and user groups on the Postgres database server,
click on the button. A window as shown below
will open, where you can create and delete logins and groups. For the
logins you can change their membership in groups and their properties
(see below). On the left you find 2 lists, with the upper list
containing the logins and the list below with the groups resp. roles.
For the logins you can set the general properties as shown below. The
login postgres is created with the installation of the database and is
the login for the administration of the database including the updates
etc. For details about predefined properties like Is superuser, please turn to the Postgresdocumentation.
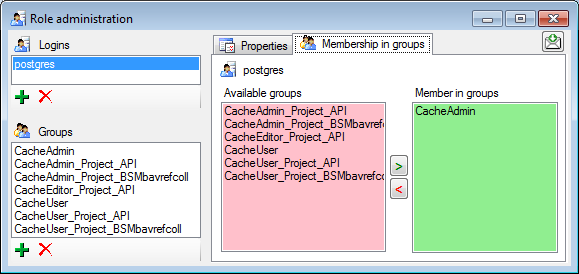
In the Membership in groups area you can define the groups in which
the login is a member (see below).
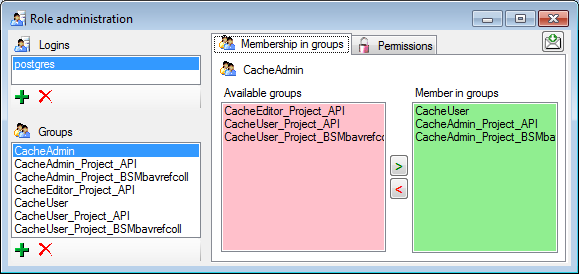
For the groups you can change their membership in other groups and their
permissions (see below).
Cache Database
Configuratation
The cache databases for DiversityCollection are designed as sources for
preformated data for publication in e.g. public user portals like
GBIF. There may be several cache databases which
can be located on several servers. The restrictions of the published
data are defined in the main database via projects,
data withholding and
embargos. The publication of the data is
allways related to a project, defined in DiversityProjects, holding the
metadata that will be transfered into the cache database. Therefore
every dataset copied from the source into the cache database contains a
reference to the project (ProjectID). The publication of the data
includes several steps:
- Setting of restrictions within the original data with data withholding
- Selection of the project
- Transfer of the data into the cache database
- Conversion of the data into the format required by the portal
In Addition to the data transfered from DiversityCollection, the data
for the taxonomy has to be transfered from the relevant sources. The
links to these sources and the project dependent retrieval are stored in
the cache database.
The image below gives an overview for the process described above.

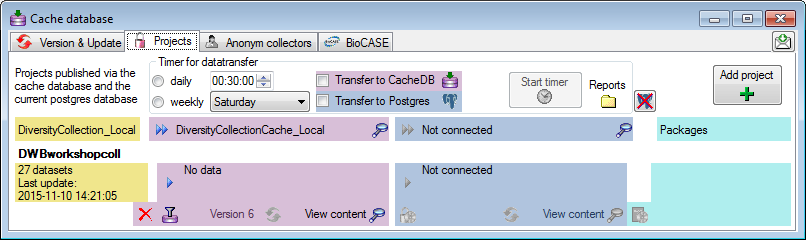
To configure your cache databases, choose Administration →
Cache database from the menu. A window will
open as shown below.
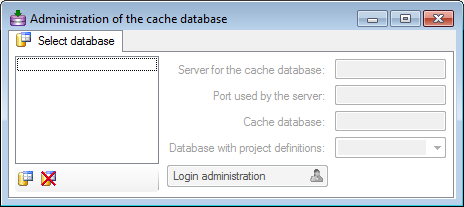
Creation of a cache database
If no cache database has been defined so far, use the
 button to create a new cache database. You
have to be a System administrator to be able
to create a cache database. You will be asked for the server,
the port used by the server, the directory of the
database files, the name of the new cache database and
finally the name of the projects database where the metadata of the
projects transfered into the cache database are stored.
button to create a new cache database. You
have to be a System administrator to be able
to create a cache database. You will be asked for the server,
the port used by the server, the directory of the
database files, the name of the new cache database and
finally the name of the projects database where the metadata of the
projects transfered into the cache database are stored.
To delete a once created cache database, use the
 button.
Updates of the cache database
After the new cache database has been created or if you select an
outdated cache database, a button Update database
will appear, instructing you to run updates
for the cache database. Click on the button to open a window as shown
below.

All update scripts for the database will be listed. Click on the Start update button to update the database to the
current version.
Login administration
To handle the data for the cache database a user needs access to the
data on the source database, the cache database,
the project database and the taxon databases. To
administrate the users that can transfer data into the cache database
use the button  Login administration. For
details see the chapter Loginadministration.
Login administration. For
details see the chapter Loginadministration.
Configuration, Projects
Data transfer to the cache database is linked to projects
. To add a project of which the data should
be transfered into the cache database click on the
button. For every project that should be transferred you have several
options for configuration:
- Restriction of transfered taxonomic groups
- Restriction of transfered material categories
- Restriction of transfered localisations
- Restriction of the precision of the coordinates
- Restriction of transfered images
Data types handle the data for the cache database. A user needs access
to the data in the [source] database, the [cache]
database, the [project] database and the [taxon]
databases. To administrate the users who can transfer data into the
cache database, use the button Login administration. For details see the chapter Login
administration.
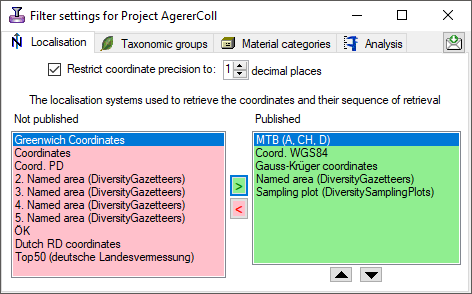
Restriction
- Taxonomic groups

- Material categories

- Localisation systems

- Images

To restrict the Taxonomic groups, Material catagories, Localisation
systems or Images that are transferred to the cache database choose the
corresponding options and select those that should be transferred into
the cache database in the tab pages that are added.
Coordinate precision
To reduce the precision of the coordinates of the localisation systems
transferred to the cache database you can check the corresponding option
and determine the number of digits after the decimal point.
Taxonomy
The collection data may be linked to sources holding taxonomic
information ( DiversityTaxonNames). To provide this information add all
sources used in your collection data and transfer the corresponding data
into the cache database. The data in the taxonomic sources are organized
by projects, thus, you need to provide the sequence of the projects that
should be imported into the cache database for every source. A name will
be imported only once. This means that the name with synonymy to the
first imported project will be imported, all following data with this
name will be ignored.
DiversityTaxonNames). To provide this information add all
sources used in your collection data and transfer the corresponding data
into the cache database. The data in the taxonomic sources are organized
by projects, thus, you need to provide the sequence of the projects that
should be imported into the cache database for every source. A name will
be imported only once. This means that the name with synonymy to the
first imported project will be imported, all following data with this
name will be ignored.
Anonym Colletors
Anonymous collectors
If collectors should be published as an anonym string, edit the
 Anonymous collectors list. Use the
> button to move a collector from the selected project into the
list of anonymous collectors. To remove a collector from this list, just
delete it from the table (see below).
Anonymous collectors list. Use the
> button to move a collector from the selected project into the
list of anonymous collectors. To remove a collector from this list, just
delete it from the table (see below).
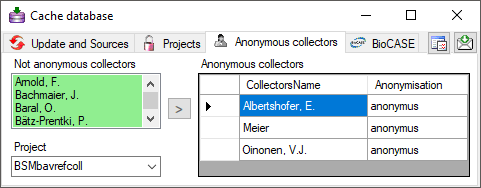
In the cache database these collectors will be translated into the
selected Anonymisation and a number, e.g. Anonymus 1. So the
data of one collector can still be recognized without revealing the name
of the collector.
Cache Database
Linked Server
Transfer of data to Postgres via linked server
For projects with great amounts of data the preferred way to transfer
data is a linked server. To use a linked server you have too install the
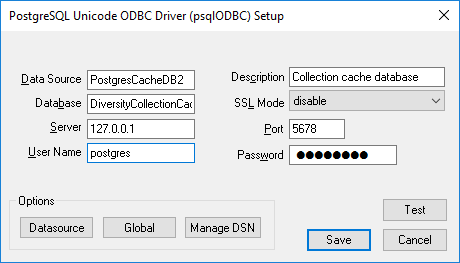
ODBC driver software for Postgres on your SQL-Server, e.g. provided
here: postgresql. Download and
install the software, e.g.:

After the software has been installed, add a ODBC datasource.
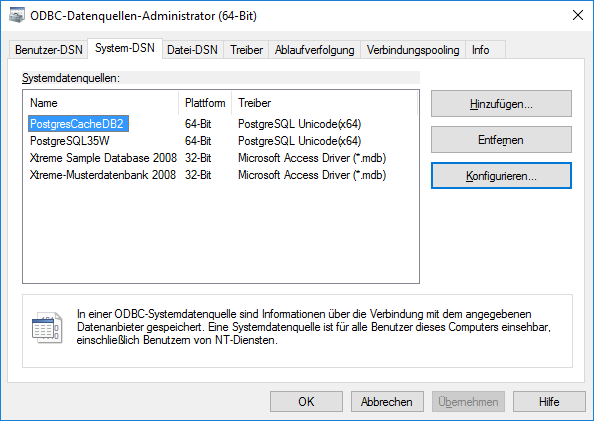
Configured to access your Postgres cache database.
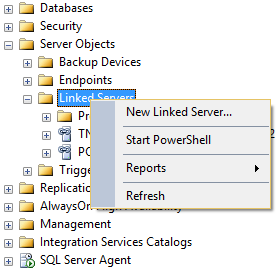
Now you can add a linked server in the SQL-Server Management Studio
 (see below).
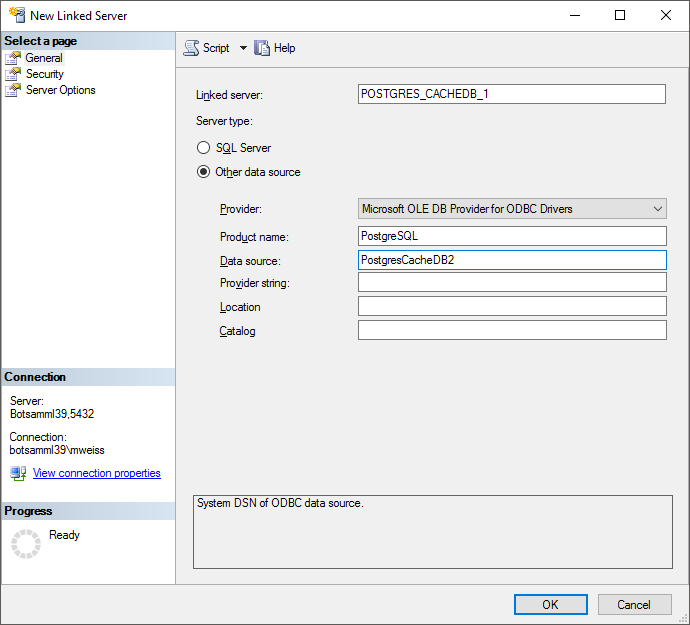
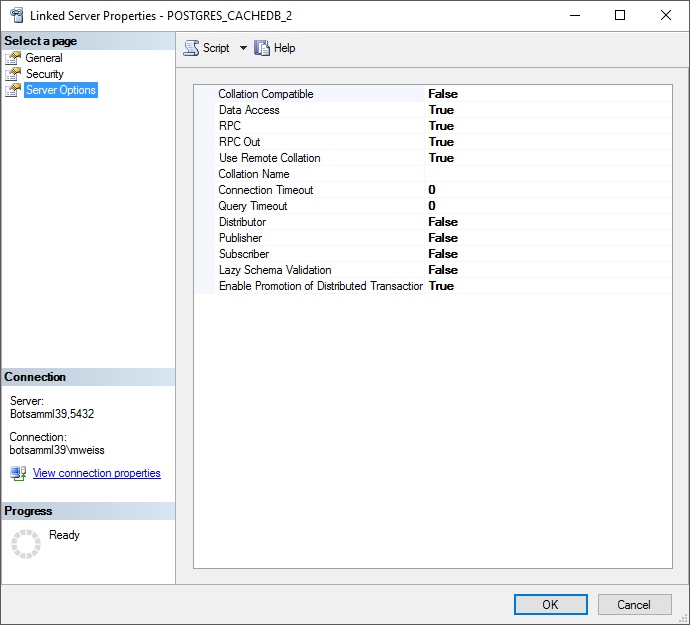
Configure the linked server using Microsoft OLE DB provider for ODBC
Drivers and the new created ODBC source as Data source (see below).
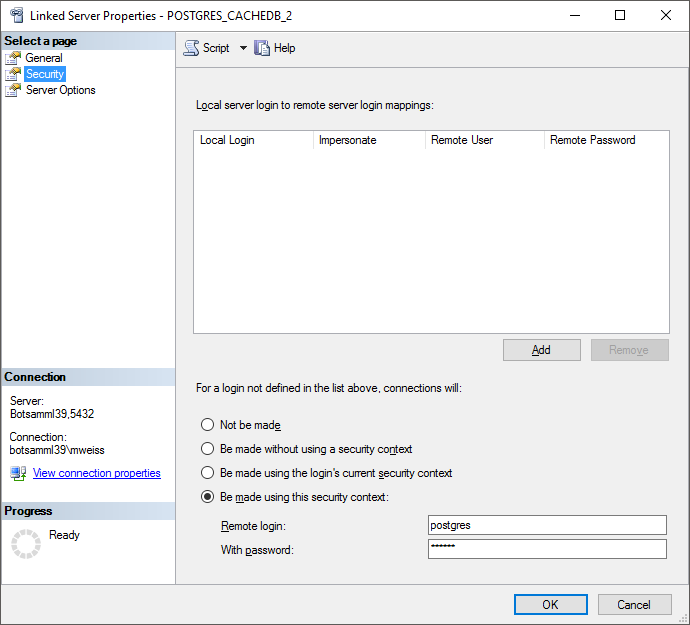
Now you are prepared to transfer your data on the fast route to the
postgres database.
Configure the linked server using Microsoft OLE DB provider for ODBC
Drivers and the new created ODBC source as Data source (see below).ow
you can add a linked server in the SQL-Server Management Studio
(see below). edit the
general settings for the transfer, click on the button in the main
form. A window as shown below will open. Here you can set the  timeout for the transfer in minutes. The value
0 means that no time limit is set and the program should try inifinite
to transfer the data. Furthermore you can set the parameters for the
transfer of the data in chunks. If the amount of data is above a certain
threshold, it is faster to devide the data into smaller chunks. The
threshold for transfer into the cache
database and into the Postgres database can
be set as shown below, together with the maximal size of the chunks.
timeout for the transfer in minutes. The value
0 means that no time limit is set and the program should try inifinite
to transfer the data. Furthermore you can set the parameters for the
transfer of the data in chunks. If the amount of data is above a certain
threshold, it is faster to devide the data into smaller chunks. The
threshold for transfer into the cache
database and into the Postgres database can
be set as shown below, together with the maximal size of the chunks.
The scheduled transfer is meant to be lanched on a server on a regular
basis, e.g. once a week, once a day, every hour etc. . The transfer of
the data via the scheduled transfer will take place according to the
settings. This means the program will check if the next planned time for
a data transfer is passed and only than start to transfer the data. To
include a source in the schedule, check the
selector for the scheduler. To set the time and days scheduled for a
transfer, click on the button. A window as
shown below will open where you can select the time and the day(s) of
the week when the transfer should be executed.
The planned points in time a shown in the form as shown below.
The protocol of the last transfer can seen as in the window above or if
you click on the button. If an error occurred
this can be inspected with a click no the  button.
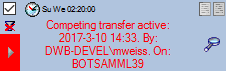
If another transfer on the same source has been started, no further
transfer will be started. In the program this competing transfer is
shown as below.
You can remove this block with a click on the
button. In opening window (see below) click on the delete button. This will as well remove error
messages from previous transfers.
A further option for restriction of the transfers is the comparision of
the date when the last transfer has been executed. Click on the  button to change it to
. In this state the program will compare the
dates of the transfers and execute the transfer only if new data are
available.
button to change it to
. In this state the program will compare the
dates of the transfers and execute the transfer only if new data are
available.
Cache Database
Projects
Adding Projects
The data transferred into the [cache
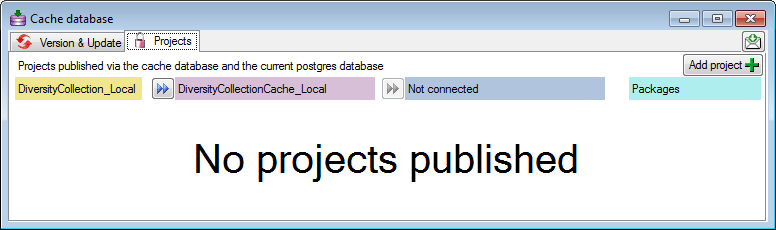
database] are always transferred
according to a project they belong to. If no projects were added so far
the window will appear like shown below. For an introduction see a short
tutorial
.
To add a new project for the transfer into the cache database, click on
the Add project button. In the area below a
new entry as shown below will appear. The area on the right shows the
number of datasets in the project in the [source
database] together with the date of
the last update. To ensure the separation of the data between the
projects, DiversityCollection creates a separate schema for every
project named Project_[name of the project] together with needed
roles, tables etc..

In case there are projects where you do not have access to, this will be
indicated as shown below.
In case a project has been renamed in the main database, a
 button will appear as shown below. The
displayed name corresponds to the name in the main database. To see the
original name, click on the button.
button will appear as shown below. The
displayed name corresponds to the name in the main database. To see the
original name, click on the button.

Update
Before transferring data you have to update the project schema to the
latest version, indicated by the appearance of an update button
 . Click on the button to open a window as
shown below. Click on the Start update
button to update the schema to the latest version.
. Click on the button to open a window as
shown below. Click on the Start update
button to update the schema to the latest version.
After the update the database is ready to transfer data into.
Restrictions
Besides the restrictions in the source database, you can set further
restrictions for this transfer. Click on
the  button to edit the datawithholding reasons
for the data of the project. Click on the
button to edit the datawithholding reasons
for the data of the project. Click on the
 button and choose the ranges of the
data that should be transferred (see below).
button and choose the ranges of the
data that should be transferred (see below).
Transfer
To transfer the data you have 3 options as described in the
Transfer chapter.
Afterwards the number and date of the transferred data are visible as
shown below.

Content
To inspect the transferred data use the View content
button. A window as shown below will open where
all tables containing the data of the project are listed.
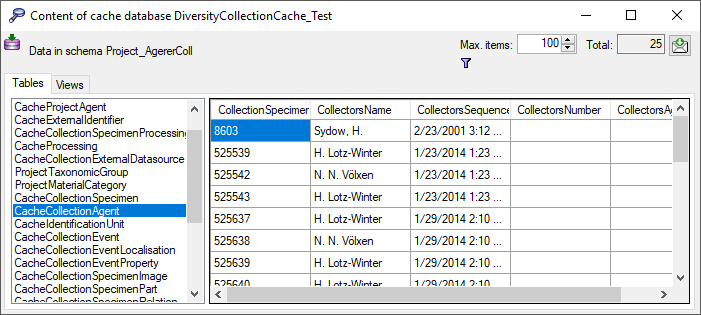
Filter
Click on the button to filter the content. A
window as shown below will open. Choose the column for the filter, the
operator (e.g. = ) and the filter value (see below).
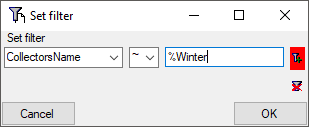
Now click on the  button to add the filter
criteria to the table filter. You may add as many criteria as needed
(see below). With the button you can
clear the filter..
button to add the filter
criteria to the table filter. You may add as many criteria as needed
(see below). With the button you can
clear the filter..

Postgres
Before you can transfer the data into the Postgresdatabase, you have to connect
 to the Postgres database and click on the
  button to establish
the project and run necessary updates . After
the project is established and up to date, use the
button to transfer the data in the Postgres
area (see below).
button to establish
the project and run necessary updates . After
the project is established and up to date, use the
button to transfer the data in the Postgres
area (see below).

If a project is exported into another
Postgres database on the same
server, these databases will be listed underneath the Postgres block
(see image below). For an overview of all target Postgres databases
click on the  button.

If the target is placed on the current server, the text will appear in
black (see image below). Packages will be listed for the other targets
as well.

In the Postgres
database you can install
packages
to adapt the data to any needed
format.
Cache Database
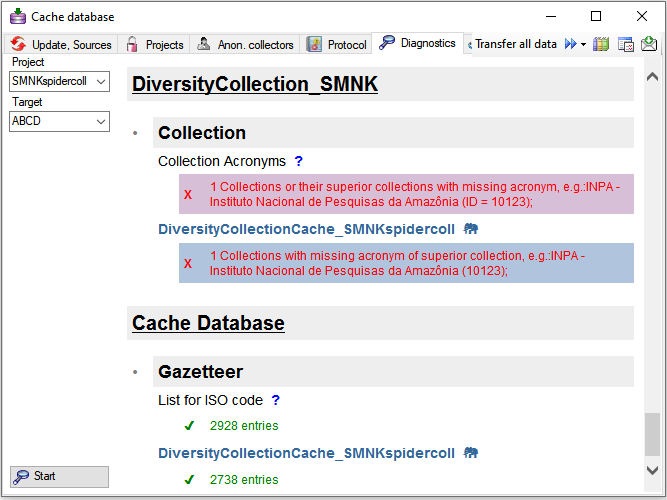
Diagnostics
To test data completeness of data targets you can use the diagnostics
. Choose the project and the target
you want to test and start the diagnostics. If the data in a postgres
database should be included in the test, please connect to this database
before starting the test. The result of the diagnose as shown below
marks missing information.
Diversity Collection
Cache database
Infrastructure
For the administration of the data that are published via the cache
database, certain tables as shown below are used. These are either
placed in the schema dbo or a schema named according to the published
project, e.g. Project_Test for a project with the name Test.
Central tables
There are a number of tables placed in the schema dbo that are
accessible by all projects.
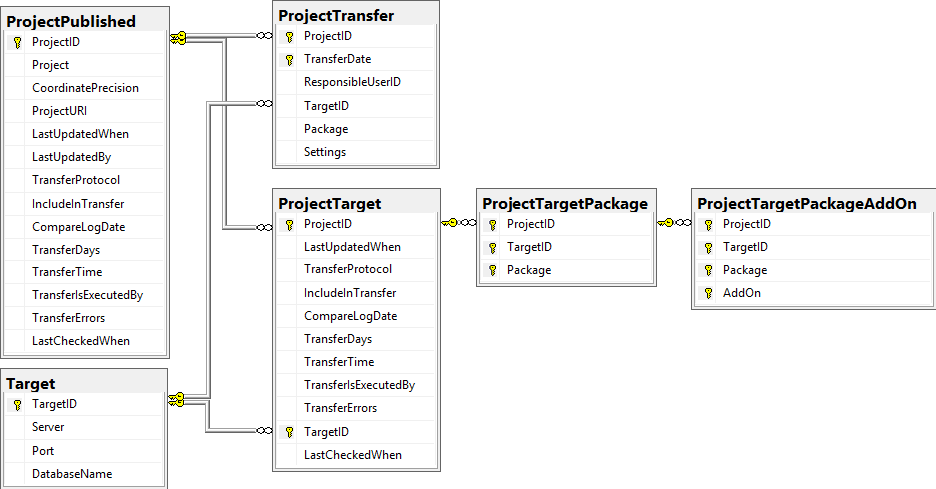
Project tables
The central project tables contain the information about the projects
that are published together with the target (Postgres) databases and the
packages including optional add-ons into which they had been
transferred. This information is used to ensure a recovery in case of a
loss of the targets.
Source tables
To access sources from other modules (e.g. DiversityAgents) there are
tables for the storage of the principal access to the modules and a
number of tables containing the data (depending on the module).
Access tables
These tables contain the principal access like the name of the view
defined to access the data. The example below lists the tables defined
for the module DiversityAgents, but there are corresponding tables for
every module accessed by the cache database.
Data tables
These tables contain the data provided by the module and therefore
depend on the module. The example below lists the tables defined for the
module DiversityAgents, but there are corresponding tables for every
module accessed by the cache database.
To access the data in the module there are views generated by the
client. The name of these views are composed according to the name of
the database, the server and the project to ensure a unique name. These
are stored in the table AgentSource and are used by the client for a
transfer of the data from the module database into the tables in the
cache database. The example below lists the views for the module
DiversityAgents.
Project tables
These tables contain the data of the projects with every project having
its own schema. These tables correspond to the tables in the main
database of the module with certain limitations (no logging columns,
internal notes etc.)
Project procedures for the data transfer into the project tables
For every project table there is a procedure that transfers the data
from the main database into the cache table. The names of these
procedures are procPublish + the name of the table in the main database
e.g. procPublishAnalysis for the transfer from the table
Analysis into the table CacheAnalysis.
Subsections of Infrastructure
Diversity Collection
Cache database
TABLES
The following objects are not included:
- Logging tables
- Enumeration tables
- System objects
- Objects marked as obsolete
- Previous versions of objects
Table Agent
The main table with the data of the agent
| Column |
Data type |
Description |
Nullable |
Relation |
| BaseURL |
varchar (500) |
The basic URL as defined in the module database |
NO |
- |
| AgentID |
int |
Unique ID for the Agent (= Primary key) |
NO |
- |
| AgentURI |
varchar (255) |
The link to the dataset, i. e. the BaseURL + the AgentID |
YES |
- |
| AgentParentID |
int |
The AgentID of the superior agent if agents are organized within a hierarchy |
YES |
- |
| AgentName |
nvarchar (200) |
The whole name of the agent as shown e.g. for selection in an user interface. For persons this entry will be generated as follows: LastName, FirstNames, AgentTitle |
NO |
- |
| AgentTitle |
nvarchar (50) |
The title of the agent, e.g. Dr., Prof. |
YES |
- |
| GivenName |
nvarchar (255) |
The first names of the agent (if a person) or the name of e.g. an institution |
YES |
- |
| GivenNamePostfix |
nvarchar (50) |
Variable part of name, correctly placed at end of given names |
YES |
- |
| InheritedNamePrefix |
nvarchar (50) |
Variable part of name, correctly placed at the beginning of the inherited names |
YES |
- |
| InheritedName |
nvarchar (255) |
The last names of the agent (if a person) |
YES |
- |
| InheritedNamePostfix |
nvarchar (50) |
Additions after inherited name, like generation (Jr., III.) or names of religious orders |
YES |
- |
| Abbreviation |
nvarchar (50) |
Abbreviation of the agent |
YES |
- |
| AgentType |
nvarchar (50) |
The type of the agent, e.g. person, company |
YES |
- |
| AgentRole |
nvarchar (255) |
The role of an agent esp. a person within an organization. e.g. “Database Administrator” or “Curator” |
YES |
- |
| AgentGender |
nvarchar (50) |
The gender resp. sex of the agent |
YES |
- |
| Description |
nvarchar (1000) |
A description of the agent |
YES |
- |
| OriginalSpelling |
nvarchar (200) |
Name as originally written in e.g. chinese or cyrillic letters |
YES |
- |
| Notes |
nvarchar (MAX) |
Notes about the agent |
YES |
- |
| ValidFromDate |
datetime |
The date of the begin of the exsistence of the agent, e.g. the birthday of a person or the founding of an institution, calculated from ValidFromDay, - Month and -Year |
YES |
- |
| ValidUntilDate |
datetime |
The date of the end of the exsistence of the agent, e.g. death of a person or closing of an institute, calculated from ValidUntilDay, - Month and -Year |
YES |
- |
| SynonymToAgentID |
int |
The AgentID of the agent which was selected as a replacement for the current agent, e.g. if to equal datasets were imported from different sources |
YES |
- |
| ProjectID |
int |
The ID of the project in the module database containing the data |
NO |
- |
| LogInsertedWhen |
smalldatetime |
Date and time when record was first entered (typed or imported) into this system.Default value: getdate() |
YES |
- |
| SourceView |
nvarchar (200) |
The name of the source view of the data |
NO |
- |
The contact information resp. addresses of the agents
| Column |
Data type |
Description |
Nullable |
Relation |
| AgentID |
int |
Refers to the ID of Agent (= Foreign key and part of primary key) |
NO |
- |
| DisplayOrder |
tinyint |
Display order of records in user interface. DisplayOrder 1 corresponds to the preferred address (= part of primary key) |
NO |
- |
| AddressType |
nvarchar (50) |
Type of the adress, e.g. private |
YES |
- |
| Country |
nvarchar (255) |
Country of the address |
YES |
- |
| City |
nvarchar (255) |
City of the address |
YES |
- |
| PostalCode |
nvarchar (50) |
ZIP or postcode of the address (usually output before or after the city) |
YES |
- |
| Streetaddress |
nvarchar (255) |
Usually street name and number, but may also contain post office box |
YES |
- |
| Address |
nvarchar (255) |
Free text postal address of the agent |
YES |
- |
| Telephone |
nvarchar (50) |
Phone number, including area code |
YES |
- |
| CellularPhone |
nvarchar (50) |
The number of a mobile telephone device of the agent |
YES |
- |
| Telefax |
nvarchar (50) |
Fax number, including area code |
YES |
- |
| Email |
nvarchar (255) |
E-mail address of the agent |
YES |
- |
| URI |
nvarchar (255) |
URI pointing to a homepage containing further information |
YES |
- |
| Notes |
nvarchar (MAX) |
Notes about this address |
YES |
- |
| ValidFrom |
datetime |
The date when this address became valid as date according to ISO 8601 |
YES |
- |
| ValidUntil |
datetime |
The date of the expiration of the validity of this address as date according to ISO 8601 |
YES |
- |
| SourceView |
nvarchar (200) |
The name of the source view of the data |
NO |
- |
| BaseURL |
varchar (500) |
- |
NO |
- |
Table AgentIdentifier
| Column |
Data type |
Description |
Nullable |
Relation |
| AgentID |
int |
- |
NO |
- |
| Identifier |
nvarchar (190) |
- |
NO |
- |
| IdentifierURI |
varchar (500) |
- |
YES |
- |
| Type |
nvarchar (50) |
- |
YES |
- |
| Notes |
nvarchar (MAX) |
- |
YES |
- |
| SourceView |
varchar (128) |
- |
NO |
- |
| BaseURL |
varchar (500) |
- |
NO |
- |
Table AgentImage
| Column |
Data type |
Description |
Nullable |
Relation |
| AgentID |
int |
- |
NO |
- |
| URI |
varchar (255) |
- |
NO |
- |
| Description |
nvarchar (MAX) |
- |
YES |
- |
| Type |
nvarchar (50) |
- |
YES |
- |
| Sequence |
int |
- |
YES |
- |
| SourceView |
varchar (128) |
- |
NO |
- |
| BaseURL |
varchar (500) |
- |
NO |
- |
Table AgentSource
The sources for the data from a module database accessed via a view defined in the cache database
| Column |
Data type |
Description |
Nullable |
Relation |
| SourceView |
nvarchar (200) |
the name of the view retrieving the data from the database |
NO |
- |
| Source |
nvarchar (500) |
The name of the source, e.g. the name of the project as defined in the source module |
YES |
- |
| SourceID |
int |
The ID of the source, e.g. the ID of the project as defined in the source module |
YES |
- |
| LinkedServerName |
nvarchar (500) |
If the source is located on a linked server, the name of the linked server |
YES |
- |
| DatabaseName |
nvarchar (50) |
The name of the database where the data are taken from |
YES |
- |
| Subsets |
nvarchar (500) |
Subsets of a source: The names of the tables included in the transfer separted by " |
" |
YES |
| TransferProtocol |
nvarchar (MAX) |
The protocol created during the transfer of the data |
YES |
- |
| IncludeInTransfer |
bit |
If the source should be included in a schedule based data transfer |
YES |
- |
| LastUpdatedWhen |
datetime |
The date of the last update of the data |
YES |
- |
| CompareLogDate |
bit |
If the log dates of the transferred data should be compared to decide if data are transferredDefault value: (0) |
YES |
- |
| TransferDays |
varchar (7) |
The days the transfer should be done, coded as integer values with Sunday = 0 up to Saturday = 6Default value: ‘0’ |
YES |
- |
| TransferTime |
time |
The time when the transfer should be executedDefault value: ‘00:00:00.00’ |
YES |
- |
| TransferIsExecutedBy |
nvarchar (500) |
If any transfer of the data is active |
YES |
- |
| TransferErrors |
nvarchar (MAX) |
Errors that occurred during the data transfers |
YES |
- |
| LastCheckedWhen |
datetime |
The date and time when the last check for the need of an update of the content occurred |
YES |
- |
| Version |
int |
-Default value: (0) |
YES |
- |
Table AgentSourceTarget
The targets of the projects, i.e. the Postgres databases
| Column |
Data type |
Description |
Nullable |
Relation |
| SourceView |
nvarchar (200) |
SourceView as defined in table AgentSource |
NO |
Refers to table AgentSource |
| Target |
nvarchar (200) |
The targets of the projects, i.e. the Postgres databases where the data should be transferred to |
NO |
- |
| LastUpdatedWhen |
datetime |
The date of the last update of the project data |
YES |
- |
| TransferProtocol |
nvarchar (MAX) |
The protocol created during the transfer of the data |
YES |
- |
| IncludeInTransfer |
bit |
If the project should be included in a schedule based data transferDefault value: (1) |
YES |
- |
| CompareLogDate |
bit |
If the log dates of the transferred data should be compared to decide if data are transferredDefault value: (0) |
YES |
- |
| TransferDays |
varchar (7) |
The days the transfer should be done, coded as integer values with Sunday = 0 up to Saturday = 6Default value: (0) |
YES |
- |
| TransferTime |
time |
The time when the transfer should be executedDefault value: ‘00:00:00.00’ |
YES |
- |
| TransferIsExecutedBy |
nvarchar (500) |
If any transfer of the data is active |
YES |
- |
| TransferErrors |
nvarchar (MAX) |
Errors that occurred during the data transfers |
YES |
- |
| LastCheckedWhen |
datetime |
The date and time when the last check for the need of an update of the content occurred |
YES |
- |
Table AgentSourceView
| Column |
Data type |
Description |
Nullable |
Relation |
| BaseURL |
varchar (500) |
- |
NO |
- |
| AgentID |
int |
- |
NO |
- |
| SourceView |
nvarchar (128) |
The name of the source view of the data |
NO |
- |
| LogInsertedWhen |
smalldatetime |
Date and time when record was first entered (typed or imported) into this system.Default value: getdate() |
YES |
- |
Table bcpPostgresTableDefinition
| Column |
Data type |
Description |
Nullable |
Relation |
| SchemaName |
varchar (200) |
- |
NO |
- |
| TableName |
varchar (200) |
- |
NO |
- |
| ColumnName |
varchar (200) |
- |
NO |
- |
| DataType |
varchar (50) |
- |
YES |
- |
| OrdinalPositon |
int |
- |
YES |
- |
Table Gazetteer
| Column |
Data type |
Description |
Nullable |
Relation |
| BaseURL |
varchar (255) |
- |
NO |
- |
| NameID |
int |
- |
NO |
- |
| Name |
nvarchar (400) |
- |
NO |
- |
| LanguageCode |
nvarchar (50) |
- |
YES |
- |
| PlaceID |
int |
- |
NO |
- |
| PlaceType |
nvarchar (50) |
- |
YES |
- |
| PreferredName |
nvarchar (400) |
- |
NO |
- |
| PreferredNameID |
int |
- |
NO |
- |
| PreferredNameLanguageCode |
nvarchar (50) |
- |
YES |
- |
| ProjectID |
int |
- |
NO |
- |
| LogInsertedWhen |
smalldatetime |
Date and time when record was first entered (typed or imported) into this system.Default value: getdate() |
YES |
- |
| SourceView |
nvarchar (200) |
The name of the source view of the data |
NO |
- |
| NameURI |
varchar (255) |
- |
YES |
- |
| ExternalNameID |
nvarchar (50) |
- |
YES |
- |
| ExternalDatabaseID |
int |
- |
YES |
- |
Table GazetteerExternalDatabase
| Column |
Data type |
Description |
Nullable |
Relation |
| ExternalDatabaseID |
int |
- |
NO |
- |
| ExternalDatabaseName |
nvarchar (60) |
- |
NO |
- |
| ExternalDatabaseVersion |
nvarchar (255) |
- |
NO |
- |
| ExternalAttribute_NameID |
nvarchar (255) |
- |
YES |
- |
| ExternalAttribute_PlaceID |
nvarchar (255) |
- |
YES |
- |
| ExternalCoordinatePrecision |
nvarchar (255) |
- |
YES |
- |
| SourceView |
nvarchar (200) |
- |
NO |
- |
| BaseURL |
varchar (500) |
- |
NO |
- |
Table GazetteerSource
| Column |
Data type |
Description |
Nullable |
Relation |
| SourceView |
nvarchar (200) |
the name of the view retrieving the data from the database |
NO |
- |
| Source |
nvarchar (500) |
- |
YES |
- |
| SourceID |
int |
- |
YES |
- |
| LinkedServerName |
nvarchar (500) |
If the source is located on a linked server, the name of the linked server |
YES |
- |
| DatabaseName |
nvarchar (50) |
The name of the database where the data are taken from |
YES |
- |
| Subsets |
nvarchar (500) |
Subsets of a source: The names of the tables included in the transfer separted by " |
" |
YES |
| TransferProtocol |
nvarchar (MAX) |
The protocol created during the transfer of the data |
YES |
- |
| IncludeInTransfer |
bit |
If the source should be included in a schedule based data transfer |
YES |
- |
| LastUpdatedWhen |
datetime |
The date of the last update of the data |
YES |
- |
| CompareLogDate |
bit |
If the log dates of the transferred data should be compared to decide if data are transferredDefault value: (0) |
YES |
- |
| TransferDays |
varchar (7) |
The days the transfer should be done, coded as integer values with Sunday = 0 up to Saturday = 6Default value: ‘0’ |
YES |
- |
| TransferTime |
time |
The time when the transfer should be executedDefault value: ‘00:00:00.00’ |
YES |
- |
| TransferIsExecutedBy |
nvarchar (500) |
If any transfer of the data is active |
YES |
- |
| TransferErrors |
nvarchar (MAX) |
Errors that occurred during the data transfers |
YES |
- |
| LastCheckedWhen |
datetime |
The date and time when the last check for the need of an update of the content occurred |
YES |
- |
| Version |
int |
-Default value: (0) |
YES |
- |
Table GazetteerSourceTarget
The targets of the projects, i.e. the Postgres databases
| Column |
Data type |
Description |
Nullable |
Relation |
| SourceView |
nvarchar (200) |
SourceView as defined in table GazetteerSource |
NO |
Refers to table GazetteerSource |
| Target |
nvarchar (200) |
The targets of the projects, i.e. the Postgres databases where the data should be transferred to |
NO |
- |
| LastUpdatedWhen |
datetime |
The date of the last update of the project data |
YES |
- |
| TransferProtocol |
nvarchar (MAX) |
The protocol created during the transfer of the data |
YES |
- |
| IncludeInTransfer |
bit |
If the project should be included in a schedule based data transferDefault value: (1) |
YES |
- |
| CompareLogDate |
bit |
If the log dates of the transferred data should be compared to decide if data are transferredDefault value: (0) |
YES |
- |
| TransferDays |
varchar (7) |
The days the transfer should be done, coded as integer values with Sunday = 0 up to Saturday = 6Default value: (0) |
YES |
- |
| TransferTime |
time |
The time when the transfer should be executedDefault value: ‘00:00:00.00’ |
YES |
- |
| TransferIsExecutedBy |
nvarchar (500) |
If any transfer of the data is active |
YES |
- |
| TransferErrors |
nvarchar (MAX) |
Errors that occurred during the data transfers |
YES |
- |
| LastCheckedWhen |
datetime |
The date and time when the last check for the need of an update of the content occurred |
YES |
- |
Table GazetteerSourceView
| Column |
Data type |
Description |
Nullable |
Relation |
| BaseURL |
varchar (500) |
- |
NO |
- |
| NameID |
int |
- |
NO |
- |
| SourceView |
nvarchar (128) |
The name of the source view of the data |
NO |
- |
| LogInsertedWhen |
smalldatetime |
Date and time when record was first entered (typed or imported) into this system.Default value: getdate() |
YES |
- |
Table ProjectPublished
The projects published via the cache database (Details about the projects are defined in DiversityProjects)
| Column |
Data type |
Description |
Nullable |
Relation |
| ProjectID |
int |
ID of the project to which the specimen belongs (Projects are defined in DiversityProjects) |
NO |
- |
| Project |
nvarchar (50) |
The name or title of the project as shown in a user interface (Projects are defined in DiversityProjects) |
YES |
- |
| CoordinatePrecision |
tinyint |
Optional reduction of the precision of the coordinates within the project |
YES |
- |
| ProjectURI |
varchar (255) |
The URI of the project, e.g. as provided by the module DiversityProjects. |
YES |
- |
| LastUpdatedWhen |
datetime |
The date of the last update of the project data |
YES |
- |
| LastUpdatedBy |
nvarchar (50) |
The user reponsible for the last update. |
YES |
- |
| TransferProtocol |
nvarchar (MAX) |
The protocol created during the transfer of the data |
YES |
- |
| IncludeInTransfer |
bit |
If the project should be included in a schedule based data transfer |
YES |
- |
| CompareLogDate |
bit |
If the log dates of the transferred data should be compared to decide if data are transferredDefault value: (0) |
YES |
- |
| TransferDays |
varchar (7) |
The days the transfer should be done, coded as integer values with Sunday = 0 up to Saturday = 6Default value: ‘0’ |
YES |
- |
| TransferTime |
time |
The time when the transfer should be executedDefault value: ‘00:00:00.00’ |
YES |
- |
| TransferIsExecutedBy |
nvarchar (500) |
If any transfer of the data is active |
YES |
- |
| TransferErrors |
nvarchar (MAX) |
Errors that occurred during the data transfers |
YES |
- |
| LastCheckedWhen |
datetime |
The date and time when the last check for the need of an update of the content occurred |
YES |
- |
| Restriction |
nvarchar (MAX) |
An additional restriction of the content of the published data |
YES |
- |
Table ProjectTarget
The targets of the projects, i.e. the Postgres databases
| Column |
Data type |
Description |
Nullable |
Relation |
| ProjectID |
int |
ID of the project to which the specimen belongs (Projects are defined in DiversityProjects) |
NO |
Refers to table ProjectPublished |
| LastUpdatedWhen |
datetime |
The date of the last update of the project data |
YES |
- |
| TransferProtocol |
nvarchar (MAX) |
The protocol created during the transfer of the data |
YES |
- |
| IncludeInTransfer |
bit |
If the project should be included in a schedule based data transferDefault value: (1) |
YES |
- |
| CompareLogDate |
bit |
If the log dates of the transferred data should be compared to decide if data are transferredDefault value: (0) |
YES |
- |
| TransferDays |
varchar (7) |
The days the transfer should be done, coded as integer values with Sunday = 0 up to Saturday = 6Default value: (0) |
YES |
- |
| TransferTime |
time |
The time when the transfer should be executedDefault value: ‘00:00:00.00’ |
YES |
- |
| TransferIsExecutedBy |
nvarchar (500) |
If any transfer of the data is active |
YES |
- |
| TransferErrors |
nvarchar (MAX) |
Errors that occurred during the data transfers |
YES |
- |
| TargetID |
int |
The ID of the server, relates to table Target |
NO |
Refers to table Target |
| LastCheckedWhen |
datetime |
The date and time when the last check for the need of an update of the content occurred |
YES |
- |
| UseBulkTransfer |
bit |
If the bulk transfer should be used for the transfer of data |
YES |
- |
Table ProjectTargetPackage
Packages for projects as documented in the table Package in the Postgres database
| Column |
Data type |
Description |
Nullable |
Relation |
| ProjectID |
int |
Refers to ProjectID in table ProjectTarget |
NO |
Refers to table ProjectTarget |
| TargetID |
int |
Referes to TargetID in table ProjectTarget |
NO |
Refers to table ProjectTarget |
| Package |
nvarchar (50) |
Package installed for this project target |
NO |
- |
Table ProjectTargetPackageAddOn
The installed add-ons for packages
| Column |
Data type |
Description |
Nullable |
Relation |
| ProjectID |
int |
Refers to ProjectID in table ProjectTarget |
NO |
Refers to table ProjectTargetPackage |
| TargetID |
int |
Referes to TargetID in table ProjectTarget |
NO |
Refers to table ProjectTargetPackage |
| Package |
nvarchar (50) |
Package installed for this project target |
NO |
Refers to table ProjectTargetPackage |
| AddOn |
nvarchar (50) |
Add-on installed for this package |
NO |
- |
Table ProjectTransfer
The transfers of data of a project
| Column |
Data type |
Description |
Nullable |
Relation |
| ProjectID |
int |
ID of the project, part of PK |
NO |
Refers to table ProjectPublished |
| TransferDate |
datetime |
Date of the transfer. Part of PKDefault value: getdate() |
NO |
- |
| ResponsibleUserID |
int |
The ID of the user as stored in table UserProxy of the source database, responsible for the transferDefault value: (-1) |
YES |
- |
| TargetID |
int |
If the transfer regards a postgres database, the ID of the target (= Postgres database) as stored in table Target |
YES |
Refers to table Target |
| Package |
nvarchar (50) |
If the transfer regards a package, the name of the package, otherwise empty |
YES |
- |
| Settings |
nvarchar (MAX) |
The versions, number of transfered data etc. of the objects concerned by the transfer [format: JSON] |
YES |
- |
Table ReferenceRelator
| Column |
Data type |
Description |
Nullable |
Relation |
| RefID |
int |
- |
NO |
- |
| Role |
nvarchar (3) |
- |
NO |
- |
| Sequence |
int |
- |
NO |
- |
| Name |
nvarchar (255) |
- |
NO |
- |
| AgentURI |
varchar (255) |
- |
YES |
- |
| SortLabel |
nvarchar (255) |
- |
YES |
- |
| Address |
nvarchar (1000) |
- |
YES |
- |
| SourceView |
nvarchar (200) |
- |
NO |
- |
| BaseURL |
varchar (500) |
- |
NO |
- |
Table ReferenceTitle
| Column |
Data type |
Description |
Nullable |
Relation |
| BaseURL |
varchar (500) |
- |
NO |
- |
| RefType |
nvarchar (10) |
- |
NO |
- |
| RefID |
int |
- |
NO |
- |
| RefDescription_Cache |
nvarchar (255) |
- |
NO |
- |
| Title |
nvarchar (4000) |
- |
NO |
- |
| DateYear |
smallint |
- |
YES |
- |
| DateMonth |
smallint |
- |
YES |
- |
| DateDay |
smallint |
- |
YES |
- |
| DateSuppl |
nvarchar (255) |
- |
NO |
- |
| SourceTitle |
nvarchar (4000) |
- |
NO |
- |
| SeriesTitle |
nvarchar (255) |
- |
NO |
- |
| Periodical |
nvarchar (255) |
- |
NO |
- |
| Volume |
nvarchar (255) |
- |
NO |
- |
| Issue |
nvarchar (255) |
- |
NO |
- |
| Pages |
nvarchar (255) |
- |
NO |
- |
| Publisher |
nvarchar (255) |
- |
NO |
- |
| PublPlace |
nvarchar (255) |
- |
NO |
- |
| Edition |
smallint |
- |
YES |
- |
| DateYear2 |
smallint |
- |
YES |
- |
| DateMonth2 |
smallint |
- |
YES |
- |
| DateDay2 |
smallint |
- |
YES |
- |
| DateSuppl2 |
nvarchar (255) |
- |
NO |
- |
| ISSN_ISBN |
nvarchar (18) |
- |
NO |
- |
| Miscellaneous1 |
nvarchar (255) |
- |
NO |
- |
| Miscellaneous2 |
nvarchar (255) |
- |
NO |
- |
| Miscellaneous3 |
nvarchar (255) |
- |
NO |
- |
| UserDef1 |
nvarchar (4000) |
- |
NO |
- |
| UserDef2 |
nvarchar (4000) |
- |
NO |
- |
| UserDef3 |
nvarchar (4000) |
- |
NO |
- |
| UserDef4 |
nvarchar (4000) |
- |
NO |
- |
| UserDef5 |
nvarchar (4000) |
- |
NO |
- |
| WebLinks |
nvarchar (4000) |
- |
NO |
- |
| LinkToPDF |
nvarchar (4000) |
- |
NO |
- |
| LinkToFullText |
nvarchar (4000) |
- |
NO |
- |
| RelatedLinks |
nvarchar (4000) |
- |
NO |
- |
| LinkToImages |
nvarchar (4000) |
- |
NO |
- |
| SourceRefID |
int |
- |
YES |
- |
| Language |
nvarchar (25) |
- |
NO |
- |
| CitationText |
nvarchar (1000) |
- |
NO |
- |
| CitationFrom |
nvarchar (255) |
- |
NO |
- |
| LogInsertedWhen |
datetime |
-Default value: getdate() |
YES |
- |
| ProjectID |
int |
- |
NO |
- |
| SourceView |
nvarchar (200) |
- |
NO |
- |
| ReferenceURI |
varchar (255) |
- |
YES |
- |
| AuthorsCache |
nvarchar (1000) |
- |
YES |
- |
Table ReferenceTitleSource
| Column |
Data type |
Description |
Nullable |
Relation |
| SourceView |
nvarchar (200) |
the name of the view retrieving the data from the database |
NO |
- |
| Source |
nvarchar (500) |
- |
YES |
- |
| SourceID |
int |
- |
YES |
- |
| LinkedServerName |
nvarchar (500) |
If the source is located on a linked server, the name of the linked server |
YES |
- |
| DatabaseName |
nvarchar (50) |
The name of the database where the data are taken from |
YES |
- |
| Subsets |
nvarchar (500) |
Subsets of a source: The names of the tables included in the transfer separted by " |
" |
YES |
| TransferProtocol |
nvarchar (MAX) |
The protocol created during the transfer of the data |
YES |
- |
| IncludeInTransfer |
bit |
If the source should be included in a schedule based data transfer |
YES |
- |
| LastUpdatedWhen |
datetime |
The date of the last update of the data |
YES |
- |
| CompareLogDate |
bit |
If the log dates of the transferred data should be compared to decide if data are transferredDefault value: (0) |
YES |
- |
| TransferDays |
varchar (7) |
The days the transfer should be done, coded as integer values with Sunday = 0 up to Saturday = 6Default value: ‘0’ |
YES |
- |
| TransferTime |
time |
The time when the transfer should be executedDefault value: ‘00:00:00.00’ |
YES |
- |
| TransferIsExecutedBy |
nvarchar (500) |
If any transfer of the data is active |
YES |
- |
| TransferErrors |
nvarchar (MAX) |
Errors that occurred during the data transfers |
YES |
- |
| LastCheckedWhen |
datetime |
The date and time when the last check for the need of an update of the content occurred |
YES |
- |
| Version |
int |
-Default value: (0) |
YES |
- |
Table ReferenceTitleSourceTarget
The targets of the projects, i.e. the Postgres databases
| Column |
Data type |
Description |
Nullable |
Relation |
| SourceView |
nvarchar (200) |
SourceView as defined in table ReferenceSource |
NO |
Refers to table ReferenceTitleSource |
| Target |
nvarchar (200) |
The targets of the projects, i.e. the Postgres databases where the data should be transferred to |
NO |
- |
| LastUpdatedWhen |
datetime |
The date of the last update of the project data |
YES |
- |
| TransferProtocol |
nvarchar (MAX) |
The protocol created during the transfer of the data |
YES |
- |
| IncludeInTransfer |
bit |
If the project should be included in a schedule based data transferDefault value: (1) |
YES |
- |
| CompareLogDate |
bit |
If the log dates of the transferred data should be compared to decide if data are transferredDefault value: (0) |
YES |
- |
| TransferDays |
varchar (7) |
The days the transfer should be done, coded as integer values with Sunday = 0 up to Saturday = 6Default value: (0) |
YES |
- |
| TransferTime |
time |
The time when the transfer should be executedDefault value: ‘00:00:00.00’ |
YES |
- |
| TransferIsExecutedBy |
nvarchar (500) |
If any transfer of the data is active |
YES |
- |
| TransferErrors |
nvarchar (MAX) |
Errors that occurred during the data transfers |
YES |
- |
| LastCheckedWhen |
datetime |
The date and time when the last check for the need of an update of the content occurred |
YES |
- |
Table ReferenceTitleSourceView
| Column |
Data type |
Description |
Nullable |
Relation |
| BaseURL |
varchar (500) |
- |
NO |
- |
| RefID |
int |
- |
NO |
- |
| SourceView |
nvarchar (128) |
The name of the source view of the data |
NO |
- |
| LogInsertedWhen |
smalldatetime |
Date and time when record was first entered (typed or imported) into this system.Default value: getdate() |
YES |
- |
Table SamplingPlot
Holds cached data from DiversitySamplingPlots as base for other procedures.
| Column |
Data type |
Description |
Nullable |
Relation |
| BaseURL |
varchar (500) |
- |
NO |
- |
| PlotID |
int |
- |
NO |
- |
| PartOfPlotID |
int |
- |
YES |
- |
| PlotURI |
nvarchar (255) |
- |
YES |
- |
| PlotIdentifier |
nvarchar (500) |
- |
YES |
- |
| PlotGeography_Cache |
nvarchar (MAX) |
- |
YES |
- |
| PlotDescription |
nvarchar (MAX) |
- |
YES |
- |
| PlotType |
nvarchar (50) |
- |
YES |
- |
| CountryCache |
nvarchar (50) |
- |
YES |
- |
| LogInsertedWhen |
smalldatetime |
Date and time when record was first entered (typed or imported) into this system.Default value: getdate() |
YES |
- |
| ProjectID |
int |
- |
YES |
- |
| SourceView |
nvarchar (200) |
The source of the data,i.e. the name of the view in the database |
NO |
- |
Table SamplingPlotLocalisation
| Column |
Data type |
Description |
Nullable |
Relation |
| PlotID |
int |
- |
NO |
- |
| LocalisationSystemID |
int |
- |
NO |
- |
| Location1 |
nvarchar (255) |
- |
YES |
- |
| Location2 |
nvarchar (255) |
- |
YES |
- |
| LocationAccuracy |
nvarchar (50) |
- |
YES |
- |
| LocationNotes |
nvarchar (MAX) |
- |
YES |
- |
| Geography |
nvarchar (MAX) |
- |
YES |
- |
| AverageAltitudeCache |
float |
- |
YES |
- |
| AverageLatitudeCache |
float |
- |
YES |
- |
| AverageLongitudeCache |
float |
- |
YES |
- |
| SourceView |
nvarchar (200) |
- |
NO |
- |
| BaseURL |
varchar (500) |
- |
NO |
- |
Table SamplingPlotProperty
| Column |
Data type |
Description |
Nullable |
Relation |
| PlotID |
int |
- |
NO |
- |
| PropertyID |
int |
- |
NO |
- |
| DisplayText |
nvarchar (255) |
- |
YES |
- |
| PropertyURI |
varchar (255) |
- |
YES |
- |
| PropertyHierarchyCache |
nvarchar (MAX) |
- |
YES |
- |
| PropertyValue |
nvarchar (255) |
- |
YES |
- |
| Notes |
nvarchar (MAX) |
- |
YES |
- |
| AverageValueCache |
float |
- |
YES |
- |
| SourceView |
nvarchar (200) |
- |
NO |
- |
| BaseURL |
varchar (500) |
- |
NO |
- |
Table SamplingPlotSource
| Column |
Data type |
Description |
Nullable |
Relation |
| SourceView |
nvarchar (200) |
the name of the view retrieving the data from the database |
NO |
- |
| Source |
nvarchar (50) |
- |
YES |
- |
| SourceID |
int |
- |
YES |
- |
| LinkedServerName |
nvarchar (400) |
If the source is located on a linked server, the name of the linked server |
YES |
- |
| DatabaseName |
nvarchar (400) |
The name of the database where the data are taken from |
YES |
- |
| Subsets |
nvarchar (500) |
List of additional data transferred into the cache database separated by |
|
YES |
| TransferProtocol |
nvarchar (MAX) |
The protocol created during the transfer of the data |
YES |
- |
| IncludeInTransfer |
bit |
If the source should be included in a schedule based data transfer |
YES |
- |
| LastUpdatedWhen |
datetime |
The date of the last update of the dataDefault value: getdate() |
YES |
- |
| CompareLogDate |
bit |
If the log dates of the transferred data should be compared to decide if data are transferredDefault value: (0) |
YES |
- |
| TransferDays |
varchar (7) |
The days the transfer should be done, coded as integer values with Sunday = 0 up to Saturday = 6Default value: ‘0’ |
YES |
- |
| TransferTime |
time |
The time when the transfer should be executedDefault value: ‘00:00:00.00’ |
YES |
- |
| TransferIsExecutedBy |
nvarchar (500) |
If any transfer of the data is active |
YES |
- |
| TransferErrors |
nvarchar (MAX) |
Errors that occurred during the data transfers |
YES |
- |
| LastCheckedWhen |
datetime |
The date and time when the last check for the need of an update of the content occurred |
YES |
- |
| Version |
int |
-Default value: (0) |
YES |
- |
Table SamplingPlotSourceTarget
The targets of the projects, i.e. the Postgres databases
| Column |
Data type |
Description |
Nullable |
Relation |
| SourceView |
nvarchar (200) |
SourceView as defined in table SamplingPlotSource |
NO |
Refers to table SamplingPlotSource |
| Target |
nvarchar (200) |
The targets of the projects, i.e. the Postgres databases where the data should be transferred to |
NO |
- |
| LastUpdatedWhen |
datetime |
The date of the last update of the project dataDefault value: getdate() |
YES |
- |
| TransferProtocol |
nvarchar (MAX) |
The protocol created during the transfer of the data |
YES |
- |
| IncludeInTransfer |
bit |
If the project should be included in a schedule based data transferDefault value: (1) |
YES |
- |
| CompareLogDate |
bit |
If the log dates of the transferred data should be compared to decide if data are transferredDefault value: (0) |
YES |
- |
| TransferDays |
varchar (7) |
The days the transfer should be done, coded as integer values with Sunday = 0 up to Saturday = 6Default value: (0) |
YES |
- |
| TransferTime |
time |
The time when the transfer should be executedDefault value: ‘00:00:00.00’ |
YES |
- |
| TransferIsExecutedBy |
nvarchar (500) |
If any transfer of the data is active |
YES |
- |
| TransferErrors |
nvarchar (MAX) |
Errors that occurred during the data transfers |
YES |
- |
| LastCheckedWhen |
datetime |
The date and time when the last check for the need of an update of the content occurred |
YES |
- |
Table SamplingPlotSourceView
| Column |
Data type |
Description |
Nullable |
Relation |
| BaseURL |
varchar (500) |
- |
NO |
- |
| PlotID |
int |
- |
NO |
- |
| SourceView |
nvarchar (128) |
The name of the source view of the data |
NO |
- |
| LogInsertedWhen |
smalldatetime |
Date and time when record was first entered (typed or imported) into this system.Default value: getdate() |
YES |
- |
Table ScientificTerm
Holds cached data from DiversityScientificTerms as base for other procedures.
| Column |
Data type |
Description |
Nullable |
Relation |
| RepresentationURI |
nvarchar (255) |
- |
NO |
- |
| DisplayText |
nvarchar (255) |
- |
YES |
- |
| HierarchyCache |
varchar (900) |
- |
YES |
- |
| HierarchyCacheDown |
nvarchar (900) |
- |
YES |
- |
| RankingTerm |
nvarchar (200) |
- |
YES |
- |
| LogInsertedWhen |
smalldatetime |
Date and time when record was first entered (typed or imported) into this system.Default value: getdate() |
YES |
- |
| SourceView |
nvarchar (200) |
The source of the data,i.e. the name of the view in the database |
NO |
- |
| RepresentationID |
int |
- |
NO |
- |
| BaseURL |
varchar (500) |
- |
NO |
- |
Table ScientificTermSource
| Column |
Data type |
Description |
Nullable |
Relation |
| SourceView |
nvarchar (200) |
the name of the view retrieving the data from the database |
NO |
- |
| Source |
nvarchar (50) |
- |
YES |
- |
| SourceID |
int |
- |
YES |
- |
| LinkedServerName |
nvarchar (400) |
If the source is located on a linked server, the name of the linked server |
YES |
- |
| DatabaseName |
nvarchar (400) |
The name of the database where the data are taken from |
YES |
- |
| Subsets |
nvarchar (500) |
List of additional data transferred into the cache database separated by |
|
YES |
| TransferProtocol |
nvarchar (MAX) |
The protocol created during the transfer of the data |
YES |
- |
| IncludeInTransfer |
bit |
If the source should be included in a schedule based data transfer |
YES |
- |
| LastUpdatedWhen |
datetime |
The date of the last update of the data |
YES |
- |
| CompareLogDate |
bit |
If the log dates of the transferred data should be compared to decide if data are transferredDefault value: (0) |
YES |
- |
| TransferDays |
varchar (7) |
The days the transfer should be done, coded as integer values with Sunday = 0 up to Saturday = 6Default value: ‘0’ |
YES |
- |
| TransferTime |
time |
The time when the transfer should be executedDefault value: ‘00:00:00.00’ |
YES |
- |
| TransferIsExecutedBy |
nvarchar (500) |
If any transfer of the data is active |
YES |
- |
| TransferErrors |
nvarchar (MAX) |
Errors that occurred during the data transfers |
YES |
- |
| LastCheckedWhen |
datetime |
The date and time when the last check for the need of an update of the content occurred |
YES |
- |
| Version |
int |
-Default value: (0) |
YES |
- |
Table ScientificTermSourceTarget
The targets of the projects, i.e. the Postgres databases
| Column |
Data type |
Description |
Nullable |
Relation |
| SourceView |
nvarchar (200) |
SourceView as defined in table ScientificTermSource |
NO |
Refers to table ScientificTermSource |
| Target |
nvarchar (200) |
The targets of the projects, i.e. the Postgres databases where the data should be transferred to |
NO |
- |
| LastUpdatedWhen |
datetime |
The date of the last update of the project data |
YES |
- |
| TransferProtocol |
nvarchar (MAX) |
The protocol created during the transfer of the data |
YES |
- |
| IncludeInTransfer |
bit |
If the project should be included in a schedule based data transferDefault value: (1) |
YES |
- |
| CompareLogDate |
bit |
If the log dates of the transferred data should be compared to decide if data are transferredDefault value: (0) |
YES |
- |
| TransferDays |
varchar (7) |
The days the transfer should be done, coded as integer values with Sunday = 0 up to Saturday = 6Default value: (0) |
YES |
- |
| TransferTime |
time |
The time when the transfer should be executedDefault value: ‘00:00:00.00’ |
YES |
- |
| TransferIsExecutedBy |
nvarchar (500) |
If any transfer of the data is active |
YES |
- |
| TransferErrors |
nvarchar (MAX) |
Errors that occurred during the data transfers |
YES |
- |
| LastCheckedWhen |
datetime |
The date and time when the last check for the need of an update of the content occurred |
YES |
- |
Table ScientificTermSourceView
| Column |
Data type |
Description |
Nullable |
Relation |
| BaseURL |
varchar (500) |
- |
NO |
- |
| RepresentationID |
int |
- |
NO |
- |
| SourceView |
nvarchar (128) |
The name of the source view of the data |
NO |
- |
| LogInsertedWhen |
smalldatetime |
Date and time when record was first entered (typed or imported) into this system.Default value: getdate() |
YES |
- |
Table SourceTransfer
The transfers of data of a source
| Column |
Data type |
Description |
Nullable |
Relation |
| Source |
nvarchar (50) |
The type of the source, e.g. Taxa, part of PK |
NO |
- |
| SourceView |
nvarchar (200) |
The name of the main view for the data defined for retrieving the data from the source. Part of PK |
NO |
- |
| TransferDate |
datetime |
Date of the transfer, part of PKDefault value: getdate() |
NO |
- |
| ResponsibleUserID |
int |
The ID of the user as stored in table UserProxy of the source database, responsible for the transferDefault value: (-1) |
YES |
- |
| TargetID |
int |
If the transfer regards a postgres database, the ID of the target (= Postgres database) as stored in table Target |
YES |
Refers to table Target |
| Settings |
nvarchar (MAX) |
The versions, number of transfered data etc. of the objects concerned by the transfer [format: JSON] |
YES |
- |
Table Target
The postgres databases as targets for the data
| Column |
Data type |
Description |
Nullable |
Relation |
| TargetID |
int |
ID of the target on a postgres server, PK |
NO |
- |
| Server |
nvarchar (255) |
Name or IP of the Server |
NO |
- |
| Port |
smallint |
Port for accessing the server |
NO |
- |
| DatabaseName |
nvarchar (255) |
The name of the database |
NO |
- |
| TransferDirectory |
varchar (500) |
Directory on the Postgres server used for the transfer of data |
YES |
- |
| BashFile |
varchar (500) |
BashFile on the Postgres server used for conversion of the data |
YES |
- |
| MountPoint |
varchar (50) |
Mount point name of the transfer folder |
YES |
- |
Table TaxonAnalysis
| Column |
Data type |
Description |
Nullable |
Relation |
| NameID |
int |
- |
NO |
- |
| ProjectID |
int |
- |
NO |
Refers to table TaxonList |
| AnalysisID |
int |
- |
NO |
Refers to table TaxonAnalysisCategory |
| AnalysisValue |
nvarchar (MAX) |
- |
YES |
- |
| Notes |
nvarchar (MAX) |
- |
YES |
- |
| SourceView |
nvarchar (200) |
- |
NO |
- |
| BaseURL |
varchar (500) |
- |
NO |
- |
Table TaxonAnalysisCategory
| Column |
Data type |
Description |
Nullable |
Relation |
| AnalysisID |
int |
- |
NO |
- |
| AnalysisParentID |
int |
- |
YES |
- |
| DisplayText |
nvarchar (50) |
- |
YES |
- |
| Description |
nvarchar (MAX) |
- |
YES |
- |
| AnalysisURI |
varchar (255) |
- |
YES |
- |
| ReferenceTitle |
nvarchar (600) |
- |
YES |
- |
| ReferenceURI |
varchar (255) |
- |
YES |
- |
| SourceView |
nvarchar (200) |
- |
NO |
Refers to table TaxonSynonymySource |
| SortingID |
int |
- |
YES |
- |
| BaseURL |
varchar (500) |
- |
NO |
- |
Table TaxonAnalysisCategoryValue
| Column |
Data type |
Description |
Nullable |
Relation |
| AnalysisID |
int |
- |
NO |
Refers to table TaxonAnalysisCategory |
| AnalysisValue |
nvarchar (255) |
- |
NO |
- |
| Description |
nvarchar (500) |
- |
YES |
- |
| DisplayText |
nvarchar (50) |
- |
YES |
- |
| DisplayOrder |
smallint |
- |
YES |
- |
| Notes |
nvarchar (500) |
- |
YES |
- |
| SourceView |
nvarchar (200) |
- |
NO |
- |
| BaseURL |
varchar (500) |
- |
NO |
- |
Table TaxonCommonName
| Column |
Data type |
Description |
Nullable |
Relation |
| NameID |
int |
- |
NO |
- |
| CommonName |
nvarchar (300) |
- |
NO |
- |
| LanguageCode |
varchar (2) |
- |
NO |
- |
| CountryCode |
varchar (2) |
- |
NO |
- |
| SourceView |
nvarchar (200) |
- |
NO |
- |
| BaseURL |
varchar (500) |
- |
NO |
- |
Table TaxonList
| Column |
Data type |
Description |
Nullable |
Relation |
| ProjectID |
int |
- |
NO |
- |
| Project |
nvarchar (50) |
- |
NO |
- |
| DisplayText |
nvarchar (50) |
- |
YES |
- |
| SourceView |
nvarchar (200) |
- |
NO |
Refers to table TaxonSynonymySource |
| BaseURL |
varchar (500) |
- |
NO |
- |
Table TaxonNameExternalDatabase
| Column |
Data type |
Description |
Nullable |
Relation |
| ExternalDatabaseID |
int |
- |
NO |
- |
| ExternalDatabaseName |
nvarchar (800) |
- |
YES |
- |
| ExternalDatabaseVersion |
nvarchar (255) |
- |
YES |
- |
| Rights |
nvarchar (500) |
- |
YES |
- |
| ExternalDatabaseAuthors |
nvarchar (200) |
- |
YES |
- |
| ExternalDatabaseURI |
nvarchar (300) |
- |
YES |
- |
| ExternalDatabaseInstitution |
nvarchar (300) |
- |
YES |
- |
| ExternalAttribute_NameID |
nvarchar (255) |
- |
YES |
- |
| SourceView |
nvarchar (200) |
- |
NO |
Refers to table TaxonSynonymySource |
| BaseURL |
varchar (500) |
- |
NO |
- |
Table TaxonNameExternalID
| Column |
Data type |
Description |
Nullable |
Relation |
| NameID |
int |
- |
NO |
- |
| ExternalDatabaseID |
int |
- |
NO |
- |
| ExternalNameURI |
varchar (255) |
- |
YES |
- |
| SourceView |
nvarchar (200) |
- |
NO |
- |
| BaseURL |
varchar (500) |
- |
NO |
- |
Table TaxonSynonymy
Holds cached data from DiversityTaxonNames as base for other procedures.
| Column |
Data type |
Description |
Nullable |
Relation |
| NameID |
int |
- |
NO |
- |
| BaseURL |
varchar (255) |
- |
NO |
- |
| TaxonName |
nvarchar (255) |
- |
YES |
- |
| AcceptedNameID |
int |
- |
YES |
- |
| AcceptedName |
nvarchar (255) |
- |
YES |
- |
| TaxonomicRank |
nvarchar (50) |
- |
YES |
- |
| SpeciesGenusNameID |
int |
- |
YES |
- |
| GenusOrSupragenericName |
nvarchar (200) |
- |
YES |
- |
| NameParentID |
int |
- |
YES |
- |
| TaxonNameSinAuthor |
nvarchar (2000) |
- |
YES |
- |
| LogInsertedWhen |
smalldatetime |
Date and time when record was first entered (typed or imported) into this system.Default value: getdate() |
YES |
- |
| ProjectID |
int |
- |
YES |
- |
| AcceptedNameSinAuthor |
nvarchar (2000) |
- |
YES |
- |
| NameURI |
varchar (255) |
- |
YES |
- |
| SourceView |
nvarchar (200) |
The source of the data, e.g. the name of the database |
NO |
Refers to table TaxonSynonymySource |
Table TaxonSynonymySource
| Column |
Data type |
Description |
Nullable |
Relation |
| SourceView |
nvarchar (200) |
- |
NO |
- |
| Source |
nvarchar (500) |
- |
YES |
- |
| SourceID |
int |
- |
YES |
- |
| LinkedServerName |
nvarchar (500) |
If the source is located on a linked server, the name of the linked server |
YES |
- |
| DatabaseName |
nvarchar (50) |
- |
YES |
- |
| Subsets |
nvarchar (500) |
List of additional data transferred into the cache database separated by |
|
YES |
| TransferProtocol |
nvarchar (MAX) |
The protocol created during the transfer of the data |
YES |
- |
| IncludeInTransfer |
bit |
If the source should be included in a schedule based data transfer |
YES |
- |
| LastUpdatedWhen |
datetime |
The date of the last update of the data |
YES |
- |
| CompareLogDate |
bit |
If the log dates of the transferred data should be compared to decide if data are transferredDefault value: (0) |
YES |
- |
| TransferDays |
varchar (7) |
The days the transfer should be done, coded as integer values with Sunday = 0 up to Saturday = 6Default value: ‘0’ |
YES |
- |
| TransferTime |
time |
The time when the transfer should be executedDefault value: ‘00:00:00.00’ |
YES |
- |
| TransferIsExecutedBy |
nvarchar (500) |
If any transfer of the data is active |
YES |
- |
| TransferErrors |
nvarchar (MAX) |
Errors that occurred during the data transfers |
YES |
- |
| LastCheckedWhen |
datetime |
The date and time when the last check for the need of an update of the content occurred |
YES |
- |
| Version |
int |
-Default value: (0) |
YES |
- |
Table TaxonSynonymySourceTarget
The targets of the projects, i.e. the Postgres databases
| Column |
Data type |
Description |
Nullable |
Relation |
| SourceView |
nvarchar (200) |
SourceView as defined in table TaxonSynonymySource |
NO |
Refers to table TaxonSynonymySource |
| Target |
nvarchar (200) |
The targets of the projects, i.e. the Postgres databases where the data should be transferred to |
NO |
- |
| LastUpdatedWhen |
datetime |
The date of the last update of the project data |
YES |
- |
| TransferProtocol |
nvarchar (MAX) |
The protocol created during the transfer of the data |
YES |
- |
| IncludeInTransfer |
bit |
If the project should be included in a schedule based data transferDefault value: (1) |
YES |
- |
| CompareLogDate |
bit |
If the log dates of the transferred data should be compared to decide if data are transferredDefault value: (0) |
YES |
- |
| TransferDays |
varchar (7) |
The days the transfer should be done, coded as integer values with Sunday = 0 up to Saturday = 6Default value: (0) |
YES |
- |
| TransferTime |
time |
The time when the transfer should be executedDefault value: ‘00:00:00.00’ |
YES |
- |
| TransferIsExecutedBy |
nvarchar (500) |
If any transfer of the data is active |
YES |
- |
| TransferErrors |
nvarchar (MAX) |
Errors that occurred during the data transfers |
YES |
- |
| LastCheckedWhen |
datetime |
The date and time when the last check for the need of an update of the content occurred |
YES |
- |
Table TaxonSynonymySourceView
| Column |
Data type |
Description |
Nullable |
Relation |
| BaseURL |
varchar (500) |
- |
NO |
- |
| NameID |
int |
- |
NO |
- |
| SourceView |
nvarchar (128) |
The name of the source view of the data |
NO |
- |
| LogInsertedWhen |
smalldatetime |
Date and time when record was first entered (typed or imported) into this system.Default value: getdate() |
YES |
- |
Diversity Collection
Cache database
VIEWS
The following objects are not included:
- Logging tables
- Enumeration tables
- System objects
- Objects marked as obsolete
- Previous versions of objects
View Agents_TNT_TNTagents
| Column |
Data type |
Description |
Nullable |
| BaseURL |
varchar (255) |
- |
YES |
| AgentID |
int |
- |
NO |
| AgentParentID |
int |
- |
YES |
| AgentName |
nvarchar (200) |
- |
NO |
| AgentTitle |
nvarchar (50) |
- |
YES |
| GivenName |
nvarchar (255) |
- |
YES |
| GivenNamePostfix |
nvarchar (50) |
- |
YES |
| InheritedNamePrefix |
nvarchar (50) |
- |
YES |
| InheritedName |
nvarchar (255) |
- |
YES |
| InheritedNamePostfix |
nvarchar (50) |
- |
YES |
| Abbreviation |
nvarchar (50) |
- |
YES |
| AgentType |
nvarchar (50) |
- |
YES |
| AgentRole |
nvarchar (255) |
- |
YES |
| AgentGender |
nvarchar (50) |
- |
YES |
| Description |
nvarchar (1000) |
- |
YES |
| OriginalSpelling |
nvarchar (200) |
- |
YES |
| Notes |
nvarchar (MAX) |
- |
YES |
| ValidFromDate |
datetime |
- |
YES |
| ValidUntilDate |
datetime |
- |
YES |
| SynonymToAgentID |
int |
- |
YES |
| ProjectID |
int |
- |
NO |
| LogUpdatedWhen |
smalldatetime |
- |
YES |
View Agents_TNT_TNTagents_C
| Column |
Data type |
Description |
Nullable |
| BaseURL |
varchar (255) |
- |
YES |
| AgentID |
int |
- |
NO |
| DisplayOrder |
tinyint |
- |
NO |
| AddressType |
nvarchar (50) |
- |
YES |
| Country |
nvarchar (255) |
- |
YES |
| City |
nvarchar (255) |
- |
YES |
| PostalCode |
nvarchar (50) |
- |
YES |
| Streetaddress |
nvarchar (255) |
- |
YES |
| Address |
nvarchar (255) |
- |
YES |
| Telephone |
nvarchar (50) |
- |
YES |
| CellularPhone |
nvarchar (50) |
- |
YES |
| Telefax |
nvarchar (50) |
- |
YES |
| Email |
nvarchar (255) |
- |
YES |
| URI |
nvarchar (255) |
- |
YES |
| Notes |
nvarchar (MAX) |
- |
YES |
| ValidFrom |
datetime |
- |
YES |
| ValidUntil |
datetime |
- |
YES |
| LogUpdatedWhen |
smalldatetime |
- |
YES |
View Agents_TNT_TNTagents_I
| Column |
Data type |
Description |
Nullable |
| BaseURL |
varchar (255) |
- |
YES |
| AgentID |
int |
- |
NO |
| URI |
varchar (255) |
- |
NO |
| Type |
nvarchar (50) |
- |
YES |
| Sequence |
int |
- |
YES |
| Description |
nvarchar (MAX) |
- |
YES |
| LogUpdatedWhen |
smalldatetime |
- |
YES |
View Agents_TNT_TNTagents_ID
| Column |
Data type |
Description |
Nullable |
| BaseURL |
varchar (255) |
- |
YES |
| AgentID |
int |
- |
NO |
| Identifier |
nvarchar (190) |
- |
YES |
| IdentifierURI |
varchar (500) |
- |
YES |
| Type |
nvarchar (50) |
- |
YES |
| Notes |
nvarchar (MAX) |
- |
YES |
| LogUpdatedWhen |
smalldatetime |
- |
YES |
View Sources
| Column |
Data type |
Description |
Nullable |
| SourceView |
nvarchar (400) |
The name of the source view of the data |
YES |
| URI |
nvarchar (255) |
- |
YES |
| DisplayText |
nvarchar (500) |
- |
YES |
| ID |
int |
- |
YES |
| BaseURL |
nvarchar (500) |
The basic URL as defined in the module database |
YES |
View TaxonNames_Insecta_TNT_IBFnames
| Column |
Data type |
Description |
Nullable |
| NameID |
int |
- |
NO |
| BaseURL |
varchar (52) |
- |
NO |
| TaxonName |
nvarchar (255) |
- |
YES |
| AcceptedNameID |
int |
- |
NO |
| AcceptedName |
nvarchar (255) |
- |
YES |
| TaxonomicRank |
nvarchar (50) |
- |
NO |
| GenusOrSupragenericName |
nvarchar (200) |
- |
NO |
| SpeciesGenusNameID |
int |
- |
YES |
| TaxonNameSinAuthor |
nvarchar (1058) |
- |
YES |
| ProjectID |
int |
- |
NO |
| AcceptedNameSinAuthor |
nvarchar (1058) |
- |
YES |
| LogUpdatedWhen |
smalldatetime |
- |
YES |
View TaxonNames_Insecta_TNT_IBFnames_C
| Column |
Data type |
Description |
Nullable |
| BaseURL |
varchar (255) |
- |
YES |
| NameID |
int |
- |
NO |
| CommonName |
nvarchar (220) |
- |
NO |
| LanguageCode |
varchar (2) |
- |
NO |
| CountryCode |
varchar (2) |
- |
NO |
| LogUpdatedWhen |
smalldatetime |
- |
YES |
View TaxonNames_Insecta_TNT_IBFnames_E
| Column |
Data type |
Description |
Nullable |
| BaseURL |
varchar (255) |
- |
YES |
| ExternalDatabaseID |
int |
- |
NO |
| ExternalDatabaseName |
nvarchar (800) |
- |
NO |
| ExternalDatabaseVersion |
nvarchar (255) |
- |
YES |
| Rights |
nvarchar (500) |
- |
YES |
| ExternalDatabaseAuthors |
nvarchar (200) |
- |
YES |
| ExternalDatabaseURI |
nvarchar (300) |
- |
YES |
| ExternalDatabaseInstitution |
nvarchar (300) |
- |
YES |
| ExternalAttribute_NameID |
nvarchar (255) |
- |
YES |
| LogUpdatedWhen |
datetime |
- |
YES |
View TaxonNames_Insecta_TNT_IBFnames_EID
| Column |
Data type |
Description |
Nullable |
| BaseURL |
varchar (255) |
- |
YES |
| NameID |
int |
- |
NO |
| ExternalDatabaseID |
int |
- |
NO |
| ExternalNameURI |
varchar (255) |
- |
YES |
| LogUpdatedWhen |
datetime |
- |
YES |
View TaxonNames_Insecta_TNT_IBFnames_H
| Column |
Data type |
Description |
Nullable |
| BaseURL |
varchar (255) |
- |
YES |
| NameID |
int |
- |
NO |
| NameParentID |
int |
- |
YES |
| LogUpdatedWhen |
smalldatetime |
- |
YES |
View TaxonNames_Insecta_TNT_IBFnames_L
| Column |
Data type |
Description |
Nullable |
| BaseURL |
varchar (255) |
- |
YES |
| ProjectID |
int |
- |
NO |
| Project |
nvarchar (50) |
- |
NO |
| DisplayText |
nvarchar (50) |
- |
YES |
View TaxonNames_Insecta_TNT_IBFnames_LA
| Column |
Data type |
Description |
Nullable |
| BaseURL |
varchar (255) |
- |
YES |
| NameID |
int |
- |
NO |
| ProjectID |
int |
- |
NO |
| AnalysisID |
int |
- |
NO |
| AnalysisValue |
nvarchar (MAX) |
- |
YES |
| Notes |
nvarchar (MAX) |
- |
YES |
| LogUpdatedWhen |
smalldatetime |
- |
YES |
View TaxonNames_Insecta_TNT_IBFnames_LAC
| Column |
Data type |
Description |
Nullable |
| BaseURL |
varchar (255) |
- |
YES |
| AnalysisID |
int |
- |
NO |
| AnalysisParentID |
int |
- |
YES |
| DisplayText |
nvarchar (50) |
- |
YES |
| Description |
nvarchar (MAX) |
- |
YES |
| AnalysisURI |
varchar (255) |
- |
YES |
| ReferenceTitle |
nvarchar (800) |
- |
YES |
| ReferenceURI |
varchar (400) |
- |
YES |
| SortingID |
int |
- |
YES |
| LogUpdatedWhen |
datetime |
- |
YES |
View TaxonNames_Insecta_TNT_IBFnames_LACV
| Column |
Data type |
Description |
Nullable |
| BaseURL |
varchar (255) |
- |
YES |
| AnalysisID |
int |
- |
NO |
| AnalysisValue |
nvarchar (255) |
- |
NO |
| Description |
nvarchar (500) |
- |
YES |
| DisplayText |
nvarchar (50) |
- |
YES |
| DisplayOrder |
smallint |
- |
YES |
| Notes |
nvarchar (500) |
- |
YES |
| LogUpdatedWhen |
smalldatetime |
- |
YES |
View ViewAnalysis
View for analysis used in the published data
| Column |
Data type |
Description |
Nullable |
| AnalysisID |
int |
- |
NO |
| AnalysisParentID |
int |
- |
YES |
| DisplayText |
nvarchar (50) |
- |
YES |
| Description |
nvarchar (MAX) |
- |
YES |
| MeasurementUnit |
nvarchar (50) |
- |
YES |
| Notes |
nvarchar (MAX) |
- |
YES |
| AnalysisURI |
varchar (255) |
- |
YES |
| OnlyHierarchy |
bit |
- |
YES |
| LogUpdatedWhen |
datetime |
- |
YES |
View ViewAnnotation
View for all annotations
| Column |
Data type |
Description |
Nullable |
| AnnotationID |
int |
- |
NO |
| ReferencedAnnotationID |
int |
- |
YES |
| AnnotationType |
nvarchar (50) |
- |
NO |
| Title |
nvarchar (50) |
- |
YES |
| Annotation |
nvarchar (MAX) |
- |
NO |
| URI |
varchar (255) |
- |
YES |
| ReferenceDisplayText |
nvarchar (500) |
- |
YES |
| ReferenceURI |
varchar (255) |
- |
YES |
| SourceDisplayText |
nvarchar (500) |
- |
YES |
| SourceURI |
varchar (255) |
- |
YES |
| IsInternal |
bit |
- |
YES |
| ReferencedID |
int |
- |
NO |
| ReferencedTable |
nvarchar (500) |
- |
NO |
| LogUpdatedWhen |
datetime |
- |
YES |
View ViewCollection
View for all not withheld collections
| Column |
Data type |
Description |
Nullable |
| CollectionID |
int |
- |
NO |
| CollectionParentID |
int |
- |
YES |
| CollectionName |
nvarchar (255) |
- |
NO |
| CollectionAcronym |
nvarchar (10) |
- |
YES |
| AdministrativeContactName |
nvarchar (500) |
- |
YES |
| AdministrativeContactAgentURI |
varchar (255) |
- |
YES |
| Description |
nvarchar (MAX) |
- |
YES |
| Location |
nvarchar (255) |
- |
YES |
| CollectionOwner |
nvarchar (255) |
- |
YES |
| DisplayOrder |
smallint |
- |
YES |
| LogUpdatedWhen |
datetime |
- |
YES |
View ViewCollectionAgent
View for all not withheld collectors
| Column |
Data type |
Description |
Nullable |
| CollectionSpecimenID |
int |
- |
NO |
| CollectorsName |
nvarchar (255) |
- |
NO |
| CollectorsSequence |
datetime2 |
- |
YES |
| CollectorsNumber |
nvarchar (50) |
- |
YES |
| CollectorsAgentURI |
varchar (255) |
- |
YES |
| LogUpdatedWhen |
datetime |
- |
YES |
View ViewCollectionEvent
View for all not withheld collection events
| Column |
Data type |
Description |
Nullable |
| CollectionEventID |
int |
- |
NO |
| Version |
int |
- |
NO |
| CollectorsEventNumber |
nvarchar (50) |
- |
YES |
| CollectionDate |
datetime |
- |
YES |
| CollectionDay |
tinyint |
- |
YES |
| CollectionMonth |
tinyint |
- |
YES |
| CollectionYear |
smallint |
- |
YES |
| CollectionDateSupplement |
nvarchar (100) |
- |
YES |
| CollectionTime |
varchar (50) |
- |
YES |
| CollectionTimeSpan |
varchar (50) |
- |
YES |
| LocalityDescription |
nvarchar (MAX) |
- |
YES |
| HabitatDescription |
nvarchar (MAX) |
- |
YES |
| ReferenceTitle |
nvarchar (255) |
- |
YES |
| CollectingMethod |
nvarchar (MAX) |
- |
YES |
| Notes |
nvarchar (MAX) |
- |
YES |
| CountryCache |
nvarchar (50) |
- |
YES |
| ReferenceDetails |
nvarchar (50) |
- |
YES |
| LocalityVerbatim |
nvarchar (MAX) |
- |
YES |
| CollectionEndDay |
tinyint |
- |
YES |
| CollectionEndMonth |
tinyint |
- |
YES |
| CollectionEndYear |
smallint |
- |
YES |
| LogUpdatedWhen |
datetime |
- |
YES |
View ViewCollectionEventLocalisation
View for all not withheld localisations
| Column |
Data type |
Description |
Nullable |
| CollectionEventID |
int |
- |
NO |
| LocalisationSystemID |
int |
- |
NO |
| Location1 |
nvarchar (255) |
- |
YES |
| Location2 |
nvarchar (255) |
- |
YES |
| LocationAccuracy |
nvarchar (50) |
- |
YES |
| LocationNotes |
nvarchar (MAX) |
- |
YES |
| DeterminationDate |
smalldatetime |
- |
YES |
| DistanceToLocation |
varchar (50) |
- |
YES |
| DirectionToLocation |
varchar (50) |
- |
YES |
| ResponsibleName |
nvarchar (255) |
- |
YES |
| ResponsibleAgentURI |
varchar (255) |
- |
YES |
| AverageAltitudeCache |
float |
- |
YES |
| AverageLatitudeCache |
float |
- |
YES |
| AverageLongitudeCache |
float |
- |
YES |
| RecordingMethod |
nvarchar (500) |
- |
YES |
| Geography |
nvarchar (MAX) |
- |
YES |
| LogUpdatedWhen |
datetime |
- |
YES |
View ViewCollectionEventProperty
View for all not withheld collection site properties
| Column |
Data type |
Description |
Nullable |
| CollectionEventID |
int |
- |
NO |
| PropertyID |
int |
- |
NO |
| DisplayText |
nvarchar (255) |
- |
YES |
| PropertyURI |
varchar (255) |
- |
YES |
| PropertyHierarchyCache |
nvarchar (MAX) |
- |
YES |
| PropertyValue |
nvarchar (255) |
- |
YES |
| ResponsibleName |
nvarchar (255) |
- |
YES |
| ResponsibleAgentURI |
varchar (255) |
- |
YES |
| Notes |
nvarchar (MAX) |
- |
YES |
| AverageValueCache |
float |
- |
YES |
| LogUpdatedWhen |
datetime |
- |
YES |
View ViewCollectionExternalDatasource
View for all external datasources
| Column |
Data type |
Description |
Nullable |
| ExternalDatasourceID |
int |
- |
NO |
| ExternalDatasourceName |
nvarchar (255) |
- |
YES |
| ExternalDatasourceVersion |
nvarchar (255) |
- |
YES |
| Rights |
nvarchar (500) |
- |
YES |
| ExternalDatasourceAuthors |
nvarchar (200) |
- |
YES |
| ExternalDatasourceURI |
nvarchar (300) |
- |
YES |
| ExternalDatasourceInstitution |
nvarchar (300) |
- |
YES |
| InternalNotes |
nvarchar (1500) |
- |
YES |
| ExternalAttribute_NameID |
nvarchar (255) |
- |
YES |
| PreferredSequence |
tinyint |
- |
YES |
| Disabled |
bit |
- |
YES |
| LogUpdatedWhen |
datetime |
- |
YES |
View ViewCollectionProject
View for all not withheld collection specimen within the projects
| Column |
Data type |
Description |
Nullable |
| CollectionSpecimenID |
int |
- |
NO |
| ProjectID |
int |
ID of the project to which the specimen belongs (Projects are defined in DiversityProjects) |
NO |
| LogUpdatedWhen |
datetime |
- |
YES |
View ViewCollectionSpecimen
View for all not withheld specimen
| Column |
Data type |
Description |
Nullable |
| CollectionSpecimenID |
int |
- |
NO |
| LabelTranscriptionNotes |
nvarchar (255) |
- |
YES |
| OriginalNotes |
nvarchar (MAX) |
- |
YES |
| LogUpdatedWhen |
datetime |
- |
YES |
| CollectionEventID |
int |
- |
YES |
| AccessionNumber |
nvarchar (50) |
- |
YES |
| AccessionDate |
datetime |
- |
YES |
| AccessionDay |
tinyint |
- |
YES |
| AccessionMonth |
tinyint |
- |
YES |
| AccessionYear |
smallint |
- |
YES |
| DepositorsName |
nvarchar (255) |
- |
YES |
| DepositorsAccessionNumber |
nvarchar (50) |
- |
YES |
| ExsiccataURI |
varchar (255) |
- |
YES |
| ExsiccataAbbreviation |
nvarchar (255) |
- |
YES |
| AdditionalNotes |
nvarchar (MAX) |
- |
YES |
| ReferenceTitle |
nvarchar (255) |
- |
YES |
| ReferenceURI |
varchar (255) |
- |
YES |
| ExternalDatasourceID |
int |
- |
YES |
View ViewCollectionSpecimenImage
View for all not withheld collection specimen images
| Column |
Data type |
Description |
Nullable |
| CollectionSpecimenID |
int |
- |
NO |
| URI |
varchar (255) |
- |
NO |
| ResourceURI |
varchar (255) |
- |
YES |
| SpecimenPartID |
int |
- |
YES |
| IdentificationUnitID |
int |
- |
YES |
| ImageType |
nvarchar (50) |
- |
YES |
| Notes |
nvarchar (MAX) |
- |
YES |
| LicenseURI |
varchar (500) |
- |
YES |
| LicenseNotes |
nvarchar (500) |
- |
YES |
| DisplayOrder |
int |
- |
YES |
| LicenseYear |
nvarchar (50) |
- |
YES |
| LicenseHolderAgentURI |
nvarchar (500) |
- |
YES |
| LicenseHolder |
nvarchar (500) |
- |
YES |
| LicenseType |
nvarchar (500) |
- |
YES |
| CopyrightStatement |
nvarchar (500) |
- |
YES |
| CreatorAgentURI |
varchar (255) |
- |
YES |
| CreatorAgent |
nvarchar (500) |
- |
YES |
| IPR |
nvarchar (500) |
- |
YES |
| Title |
nvarchar (500) |
- |
YES |
| LogUpdatedWhen |
datetime |
- |
YES |
Depending on:
View ViewCollectionSpecimenPart
View for all not withheld collection specimen parts
| Column |
Data type |
Description |
Nullable |
| SpecimenPartID |
int |
- |
NO |
| DerivedFromSpecimenPartID |
int |
- |
YES |
| PreparationMethod |
nvarchar (MAX) |
- |
YES |
| PreparationDate |
datetime |
- |
YES |
| PartSublabel |
nvarchar (50) |
- |
YES |
| CollectionID |
int |
- |
NO |
| MaterialCategory |
nvarchar (50) |
- |
NO |
| StorageLocation |
nvarchar (255) |
- |
YES |
| Stock |
float |
- |
YES |
| Notes |
nvarchar (MAX) |
- |
YES |
| CollectionSpecimenID |
int |
- |
NO |
| AccessionNumber |
nvarchar (50) |
- |
YES |
| StorageContainer |
nvarchar (500) |
- |
YES |
| StockUnit |
nvarchar (50) |
- |
YES |
| ResponsibleName |
nvarchar (255) |
- |
YES |
| LogUpdatedWhen |
datetime |
- |
YES |
View ViewCollectionSpecimenProcessing
View for all not withheld collection specimen processings
| Column |
Data type |
Description |
Nullable |
| CollectionSpecimenID |
int |
- |
NO |
| SpecimenProcessingID |
int |
- |
NO |
| ProcessingDate |
datetime |
- |
YES |
| ProcessingID |
int |
- |
NO |
| Protocoll |
nvarchar (100) |
- |
YES |
| SpecimenPartID |
int |
- |
YES |
| ProcessingDuration |
varchar (50) |
- |
YES |
| ResponsibleName |
nvarchar (255) |
- |
YES |
| ResponsibleAgentURI |
varchar (255) |
- |
YES |
| Notes |
nvarchar (MAX) |
- |
YES |
| LogUpdatedWhen |
datetime |
- |
YES |
View ViewCollectionSpecimenReference
View for all not withheld references
| Column |
Data type |
Description |
Nullable |
| CollectionSpecimenID |
int |
- |
NO |
| ReferenceID |
int |
- |
NO |
| ReferenceTitle |
nvarchar (400) |
- |
NO |
| ReferenceURI |
varchar (500) |
- |
YES |
| IdentificationUnitID |
int |
- |
YES |
| SpecimenPartID |
int |
- |
YES |
| ReferenceDetails |
nvarchar (500) |
- |
YES |
| Notes |
nvarchar (MAX) |
- |
YES |
| ResponsibleName |
nvarchar (255) |
- |
YES |
| ResponsibleAgentURI |
varchar (255) |
- |
YES |
| LogUpdatedWhen |
datetime |
- |
YES |
View ViewCollectionSpecimenRelation
View for all not withheld collection specimen processings
| Column |
Data type |
Description |
Nullable |
| CollectionSpecimenID |
int |
- |
NO |
| RelatedSpecimenURI |
varchar (255) |
- |
NO |
| RelatedSpecimenDisplayText |
varchar (255) |
- |
NO |
| RelationType |
nvarchar (50) |
- |
YES |
| RelatedSpecimenCollectionID |
int |
- |
YES |
| RelatedSpecimenDescription |
nvarchar (MAX) |
- |
YES |
| Notes |
nvarchar (MAX) |
- |
YES |
| IdentificationUnitID |
int |
- |
YES |
| SpecimenPartID |
int |
- |
YES |
| LogUpdatedWhen |
datetime |
- |
YES |
View ViewExternalIdentifier
View for all external identifiers
| Column |
Data type |
Description |
Nullable |
| ID |
int |
- |
NO |
| Type |
nvarchar (50) |
- |
YES |
| Identifier |
nvarchar (500) |
- |
YES |
| URL |
varchar (500) |
- |
YES |
| Notes |
nvarchar (MAX) |
- |
YES |
| ReferencedTable |
nvarchar (128) |
- |
NO |
| ReferencedID |
int |
- |
NO |
| LogUpdatedWhen |
datetime |
- |
YES |
View ViewIdentification
View for all identifications
| Column |
Data type |
Description |
Nullable |
| CollectionSpecimenID |
int |
- |
NO |
| IdentificationUnitID |
int |
- |
NO |
| IdentificationSequence |
smallint |
- |
NO |
| IdentificationDay |
tinyint |
- |
YES |
| IdentificationMonth |
tinyint |
- |
YES |
| IdentificationYear |
smallint |
- |
YES |
| IdentificationDateSupplement |
nvarchar (255) |
- |
YES |
| IdentificationCategory |
nvarchar (50) |
- |
YES |
| IdentificationQualifier |
nvarchar (50) |
- |
YES |
| VernacularTerm |
nvarchar (255) |
- |
YES |
| TaxonomicName |
nvarchar (255) |
- |
YES |
| NameURI |
varchar (255) |
- |
YES |
| Notes |
nvarchar (MAX) |
- |
YES |
| TypeStatus |
nvarchar (50) |
- |
YES |
| TypeNotes |
nvarchar (MAX) |
- |
YES |
| ReferenceTitle |
nvarchar (255) |
- |
YES |
| ReferenceDetails |
nvarchar (50) |
- |
YES |
| ResponsibleName |
nvarchar (255) |
- |
YES |
| LogUpdatedWhen |
datetime |
- |
YES |
View ViewIdentificationUnit
View for all not withheld identification units
| Column |
Data type |
Description |
Nullable |
| CollectionSpecimenID |
int |
- |
NO |
| IdentificationUnitID |
int |
- |
NO |
| LastIdentificationCache |
nvarchar (255) |
- |
NO |
| TaxonomicGroup |
nvarchar (50) |
- |
NO |
| RelatedUnitID |
int |
- |
YES |
| RelationType |
nvarchar (50) |
- |
YES |
| ExsiccataNumber |
nvarchar (50) |
- |
YES |
| DisplayOrder |
smallint |
- |
NO |
| ColonisedSubstratePart |
nvarchar (255) |
- |
YES |
| FamilyCache |
nvarchar (255) |
- |
YES |
| OrderCache |
nvarchar (255) |
- |
YES |
| LifeStage |
nvarchar (255) |
- |
YES |
| Gender |
nvarchar (50) |
- |
YES |
| HierarchyCache |
nvarchar (500) |
- |
YES |
| UnitIdentifier |
nvarchar (50) |
- |
YES |
| UnitDescription |
nvarchar (50) |
- |
YES |
| Circumstances |
nvarchar (50) |
- |
YES |
| Notes |
nvarchar (MAX) |
- |
YES |
| NumberOfUnits |
smallint |
- |
YES |
| OnlyObserved |
bit |
- |
YES |
| RetrievalType |
nvarchar (50) |
- |
YES |
| LogUpdatedWhen |
datetime |
- |
YES |
View ViewIdentificationUnitAnalysis
View for all not withheld identification units
| Column |
Data type |
Description |
Nullable |
| AnalysisID |
int |
- |
NO |
| AnalysisNumber |
nvarchar (50) |
- |
NO |
| AnalysisResult |
nvarchar (MAX) |
- |
YES |
| ExternalAnalysisURI |
varchar (255) |
- |
YES |
| ResponsibleName |
nvarchar (255) |
- |
YES |
| ResponsibleAgentURI |
varchar (255) |
- |
YES |
| AnalysisDate |
nvarchar (50) |
- |
YES |
| SpecimenPartID |
int |
- |
YES |
| Notes |
nvarchar (MAX) |
- |
YES |
| CollectionSpecimenID |
int |
- |
NO |
| IdentificationUnitID |
int |
- |
NO |
| LogUpdatedWhen |
datetime |
- |
YES |
View ViewIdentificationUnitGeoAnalysis
View for all not withheld geo analysis
| Column |
Data type |
Description |
Nullable |
| CollectionSpecimenID |
int |
- |
NO |
| IdentificationUnitID |
int |
- |
NO |
| AnalysisDate |
datetime |
- |
NO |
| Geography |
nvarchar (MAX) |
- |
YES |
| Geometry |
nvarchar (MAX) |
- |
YES |
| ResponsibleName |
nvarchar (255) |
- |
YES |
| ResponsibleAgentURI |
varchar (255) |
- |
YES |
| Notes |
nvarchar (MAX) |
- |
YES |
| LogUpdatedWhen |
datetime |
- |
YES |
Depending on:
- IdentificationUnitGeoAnalysis
View ViewIdentificationUnitInPart
View for all not withheld identification units in a specimen part
| Column |
Data type |
Description |
Nullable |
| Description |
nvarchar (500) |
- |
YES |
| CollectionSpecimenID |
int |
- |
NO |
| IdentificationUnitID |
int |
- |
NO |
| SpecimenPartID |
int |
- |
NO |
| DisplayOrder |
smallint |
- |
NO |
| LogUpdatedWhen |
smalldatetime |
- |
YES |
View for metadata
| Column |
Data type |
Description |
Nullable |
| ProjectID |
int |
- |
NO |
| SettingID |
int |
- |
NO |
| Value |
nvarchar (MAX) |
- |
NO |
| LogUpdatedWhen |
smalldatetime |
- |
YES |
View ViewProcessing
View for processings
| Column |
Data type |
Description |
Nullable |
| ProcessingID |
int |
- |
NO |
| ProcessingParentID |
int |
- |
YES |
| DisplayText |
nvarchar (50) |
- |
YES |
| Description |
nvarchar (MAX) |
- |
YES |
| Notes |
nvarchar (MAX) |
- |
YES |
| ProcessingURI |
varchar (255) |
- |
YES |
| OnlyHierarchy |
bit |
- |
YES |
| LogUpdatedWhen |
datetime |
- |
YES |
View ViewTaxononmy
View for all identifications including the accepted names and synonyms as derived from the table TaxonSynonymy
| Column |
Data type |
Description |
Nullable |
| CollectionSpecimenID |
int |
- |
NO |
| IdentificationUnitID |
int |
- |
NO |
| IdentificationSequence |
smallint |
- |
NO |
| IdentificationDay |
tinyint |
- |
YES |
| IdentificationMonth |
tinyint |
- |
YES |
| IdentificationYear |
smallint |
- |
YES |
| IdentificationDateSupplement |
nvarchar (255) |
- |
YES |
| IdentificationCategory |
nvarchar (50) |
- |
YES |
| IdentificationQualifier |
nvarchar (50) |
- |
YES |
| VernacularTerm |
nvarchar (255) |
- |
YES |
| TaxonomicName |
nvarchar (255) |
- |
YES |
| NameURI |
varchar (255) |
- |
YES |
| Notes |
nvarchar (MAX) |
- |
YES |
| TypeStatus |
nvarchar (50) |
- |
YES |
| TypeNotes |
nvarchar (MAX) |
- |
YES |
| ReferenceTitle |
nvarchar (255) |
- |
YES |
| ReferenceDetails |
nvarchar (50) |
- |
YES |
| SynonymName |
nvarchar (255) |
- |
YES |
| AcceptedName |
nvarchar (255) |
- |
YES |
| TaxonomicRank |
nvarchar (50) |
- |
YES |
| AcceptedNameURI |
varchar (255) |
- |
YES |
| GenusOrSupragenericName |
nvarchar (255) |
- |
YES |
| TaxonNameSinAuthor |
nvarchar (2000) |
- |
YES |
| ValidTaxonName |
nvarchar (255) |
- |
YES |
| ValidTaxonWithQualifier |
nvarchar (560) |
- |
YES |
| ValidTaxonNameSinAuthor |
nvarchar (2000) |
- |
YES |
| ValidTaxonIndex |
nvarchar (259) |
- |
YES |
| ValidTaxonListOrder |
int |
- |
NO |
| ResponsibleName |
nvarchar (255) |
- |
YES |
View ViewWithholdAgent
View for all withheld collectors of published specimen
| Column |
Data type |
Description |
Nullable |
| CollectionSpecimenID |
int |
- |
NO |
View ViewWithholdPart
View for all withheld parts of published specimen
| Column |
Data type |
Description |
Nullable |
| SpecimenPartID |
int |
- |
NO |
View ViewWithholdUnit
View for all withheld units of published specimen
| Column |
Data type |
Description |
Nullable |
| IdentificationUnitID |
int |
- |
NO |
Diversity Collection
Cache database
FUNCTIONS and PROCEDURES
The following objects are not included:
- Logging tables
- Enumeration tables
- System objects
- Objects marked as obsolete
- Previous versions of objects
FUNCTIONS
Function BaseURLofSource
The URL of the source database as defined in the source database, e.g. http://tnt.diversityworkbench.de/collection
DataType: nvarchar (500)
Function DiversityWorkbenchModule
DataType: nvarchar (50)
Function HighResolutionImagePath
This function translates the path of an image into the corresponding path of a web resource with of high resolution version of the image. Currently only valid for installations on the SNSB-Server. May be changed to adapt to other installations
DataType: nvarchar (500)
Function ProjectsDatabase
The name of the DiversityProjects database where the project definition are found
DataType: nvarchar (255)
Function ServerURL
The URL of the server where the database is installed
DataType: nvarchar (255)
Function SourceDatabase
The name of the source database, e.g. DiversityCollection
DataType: nvarchar (255)
Function SourceDatabaseTrunk
The name of the source database without the leading “Diversity”, e.g. Collection
DataType: nvarchar (255)
Function Version
DataType: nvarchar (8)
PROCEDURES
Procedure procBcpExport
Procedure procBcpInitExport
Procedure procBcpRemoveFile
Procedure procBcpViewCreate
Procedure procProjectName
Procedure procTaxonNameHierarchy
Procedure procTransferAgent
Procedure procTransferGazetteer
Procedure procTransferReferenceTitle
Procedure procTransferScientificTerm
Procedure procTransferTaxonSynonymy
Procedure procUnitIDforABCD
Diversity Collection
Cache database
ROLES
The following objects are not included:
- Logging tables
- Enumeration tables
- System objects
- Objects marked as obsolete
- Previous versions of objects
Role CacheAdmin
Read/write access to objects related to cache database
| Permissions |
SELECT |
INSERT |
UPDATE |
DELETE |
EXECUTE |
Type |
| AnnotationType_Enum |
User |
|
|
|
|
TABLE |
| CollCircumstances_Enum |
User |
|
|
|
|
TABLE |
| CollCollectionImageType_Enum |
User |
|
|
|
|
TABLE |
| CollCollectionType_Enum |
User |
|
|
|
|
TABLE |
| CollDateCategory_Enum |
User |
|
|
|
|
TABLE |
| CollEventDateCategory_Enum |
User |
|
|
|
|
TABLE |
| CollEventImageType_Enum |
User |
|
|
|
|
TABLE |
| CollEventSeriesDescriptorType_Enum |
|
|
|
|
|
TABLE |
| CollEventSeriesImageType_Enum |
User |
|
|
|
|
TABLE |
| CollExchangeType_Enum |
User |
|
|
|
|
TABLE |
| CollIdentificationCategory_Enum |
User |
|
|
|
|
TABLE |
| CollIdentificationDateCategory_Enum |
User |
|
|
|
|
TABLE |
| CollIdentificationQualifier_Enum |
User |
|
|
|
|
TABLE |
| CollLabelTranscriptionState_Enum |
User |
|
|
|
|
TABLE |
| CollLabelType_Enum |
User |
|
|
|
|
TABLE |
| CollMaterialCategory_Enum |
User |
|
|
|
|
TABLE |
| CollRetrievalType_Enum |
User |
|
|
|
|
TABLE |
| CollSpecimenImageType_Enum |
User |
|
|
|
|
TABLE |
| CollSpecimenRelationType_Enum |
User |
|
|
|
|
TABLE |
| CollTaskMetricAggregation_Enum |
User |
|
|
|
|
TABLE |
| CollTaxonomicGroup_Enum |
User |
|
|
|
|
TABLE |
| CollTransactionType_Enum |
User |
|
|
|
|
TABLE |
| CollTypeStatus_Enum |
User |
|
|
|
|
TABLE |
| CollUnitRelationType_Enum |
User |
|
|
|
|
TABLE |
| EntityAccessibility_Enum |
User |
|
|
|
|
TABLE |
| EntityContext_Enum |
User |
|
|
|
|
TABLE |
| EntityDetermination_Enum |
User |
|
|
|
|
TABLE |
| EntityLanguageCode_Enum |
User |
|
|
|
|
TABLE |
| EntityUsage_Enum |
User |
|
|
|
|
TABLE |
| EntityVisibility_Enum |
User |
|
|
|
|
TABLE |
| LanguageCode_Enum |
|
|
|
|
|
TABLE |
| MeasurementUnit_Enum |
|
|
|
|
|
TABLE |
| ParameterValue_Enum |
User |
|
|
|
|
TABLE |
| PropertyType_Enum |
|
|
|
|
|
TABLE |
| RegulationType_Enum |
User |
|
|
|
|
TABLE |
| TaskDateType_Enum |
User |
|
|
|
|
TABLE |
| TaskModuleType_Enum |
User |
|
|
|
|
TABLE |
| TaskType_Enum |
User |
|
|
|
|
TABLE |
| ViewCollectionSpecimenImage |
User |
|
|
|
|
VIEW |
| ViewIdentificationUnitGeoAnalysis |
User |
|
|
|
|
VIEW |
| DiversityWorkbenchModule |
|
|
|
|
User |
FUNCTION |
| Version |
|
|
|
|
User |
FUNCTION |
| Inheriting from roles: |
|
|
|
|
|
|
Role CacheUser
Reading access to objects related to the cache database
| Permissions |
SELECT |
INSERT |
UPDATE |
DELETE |
EXECUTE |
Type |
| AnnotationType_Enum |
User |
|
|
|
|
TABLE |
| CollCircumstances_Enum |
User |
|
|
|
|
TABLE |
| CollCollectionImageType_Enum |
User |
|
|
|
|
TABLE |
| CollCollectionType_Enum |
User |
|
|
|
|
TABLE |
| CollDateCategory_Enum |
User |
|
|
|
|
TABLE |
| CollEventDateCategory_Enum |
User |
|
|
|
|
TABLE |
| CollEventImageType_Enum |
User |
|
|
|
|
TABLE |
| CollEventSeriesDescriptorType_Enum |
|
|
|
|
|
TABLE |
| CollEventSeriesImageType_Enum |
User |
|
|
|
|
TABLE |
| CollExchangeType_Enum |
User |
|
|
|
|
TABLE |
| CollIdentificationCategory_Enum |
User |
|
|
|
|
TABLE |
| CollIdentificationDateCategory_Enum |
User |
|
|
|
|
TABLE |
| CollIdentificationQualifier_Enum |
User |
|
|
|
|
TABLE |
| CollLabelTranscriptionState_Enum |
User |
|
|
|
|
TABLE |
| CollLabelType_Enum |
User |
|
|
|
|
TABLE |
| CollMaterialCategory_Enum |
User |
|
|
|
|
TABLE |
| CollRetrievalType_Enum |
User |
|
|
|
|
TABLE |
| CollSpecimenImageType_Enum |
User |
|
|
|
|
TABLE |
| CollSpecimenRelationType_Enum |
User |
|
|
|
|
TABLE |
| CollTaskMetricAggregation_Enum |
User |
|
|
|
|
TABLE |
| CollTaxonomicGroup_Enum |
User |
|
|
|
|
TABLE |
| CollTransactionType_Enum |
User |
|
|
|
|
TABLE |
| CollTypeStatus_Enum |
User |
|
|
|
|
TABLE |
| CollUnitRelationType_Enum |
User |
|
|
|
|
TABLE |
| EntityAccessibility_Enum |
User |
|
|
|
|
TABLE |
| EntityContext_Enum |
User |
|
|
|
|
TABLE |
| EntityDetermination_Enum |
User |
|
|
|
|
TABLE |
| EntityLanguageCode_Enum |
User |
|
|
|
|
TABLE |
| EntityUsage_Enum |
User |
|
|
|
|
TABLE |
| EntityVisibility_Enum |
User |
|
|
|
|
TABLE |
| LanguageCode_Enum |
|
|
|
|
|
TABLE |
| MeasurementUnit_Enum |
|
|
|
|
|
TABLE |
| ParameterValue_Enum |
User |
|
|
|
|
TABLE |
| PropertyType_Enum |
|
|
|
|
|
TABLE |
| RegulationType_Enum |
User |
|
|
|
|
TABLE |
| TaskDateType_Enum |
User |
|
|
|
|
TABLE |
| TaskModuleType_Enum |
User |
|
|
|
|
TABLE |
| TaskType_Enum |
User |
|
|
|
|
TABLE |
| ViewCollectionSpecimenImage |
User |
|
|
|
|
VIEW |
| ViewIdentificationUnitGeoAnalysis |
User |
|
|
|
|
VIEW |
| DiversityWorkbenchModule |
|
|
|
|
User |
FUNCTION |
| Version |
|
|
|
|
User |
FUNCTION |
| Inheriting from roles: |
|
|
|
|
|
|
Diversity Collection - Cache DB
Sources from other modules
To provide details from other modules like DiversityTaxonNames,
DiversityAgents, DiversityScientificTerms etc. in the cached data, this
information is transferred into the cache
database together with the data from
DiversityCollection database. Use the add button to
add a source for the data you need. The data for the cache database are
provided via views that will be created for you. With the
 find button you can list the sources used in the
projects to get a hint of what may be needed. The tables and view for
the sources are placed in the schema dbo in the
SQL-Server cache database and public in the
Postgres cache databases. In case a new
version for the source is available you get a notation like Needs recreation to version 2 . In this case you can either try to update the source with a click on the button or
remove the source with a click on the
button and use the button to recreate the
source. For an introduction see a short tutorial
.
For the inclusion of sources from services like Catalogue of Life see
the chapter Sources from webservices.
find button you can list the sources used in the
projects to get a hint of what may be needed. The tables and view for
the sources are placed in the schema dbo in the
SQL-Server cache database and public in the
Postgres cache databases. In case a new
version for the source is available you get a notation like Needs recreation to version 2 . In this case you can either try to update the source with a click on the button or
remove the source with a click on the
button and use the button to recreate the
source. For an introduction see a short tutorial
.
For the inclusion of sources from services like Catalogue of Life see
the chapter Sources from webservices.
Subsets
The sources of some module provide additional subsets to the main data.
To select the subsets that should be transferred to the cache database,
click on the button. In the upcoming dialog
(see the example for DiversityTaxonNames below) select those subsets you
want to transfer in addition to the basic list. By default all subsets
are selected.

Transfer
Single manual transfer
To transfer the data of a single source into the
cache
database use the
next button and the details button
to inspect the content.
To transfer the data into the Postgres
database, you have to connect with a
database first. Use the next button to transfer the
data from the cache
database into the
Postgres
database. The
 button will transfer the data of all
sources in the list into the cache database (see below).
button will transfer the data of all
sources in the list into the cache database (see below).
Scheduled transfer
To transfer the data of all sources into the
cache
database and all available
Postgres
databases, use the scheduledtransfer as background process. With this
transfer all available Postgres databases will be included in the data
transfer. These targets are indicated underneath the Postgres block (see
image below).
If the target is placed on the current server, the text will appear in
black as shown below.

Removal
With the button you can remove the sources
together with the views (see above).
Subsections of Sources
Cache Database
Taxonomy
Sources for the taxonomy
To provide the taxonomy with accepted names and synonyms for the
identifications in the cached data, this information is transferred into
the [cache database] together with
the data from the collection database. To add a source from a database
on the local or a a linked server, use the
button. In the appearing dialogs, select the database and the project of
the data. The data for the cache database are provided via views that
will be created. To inspect the data from the views, click on the
button. With the
button you can remove the views (see below). To restrict the data
subsets that are transferred to the cache database, click on the
button. In the upcoming dialog (see below)
select those subsets you want to transfer in addition to the basic name
list.
To transfer the data into the cache
database resp.
[Postgres
database] use the
buttons and the
buttons to inspect the content. To transfer resp. inspect data within
the Postgres database, you have to connect with a database first.

With the buttons you can transfer all
sources in the list from the original source into the
cache
database resp. into the
Postgres
database.
Cache Database
Terms
Sources for the scientific terms
To provide details from DiversityScientificTerms in the cached data,
this information is transferred into the [cache
database] together with the data from
the collection database. Use the button to add a
source for the data you need. The data for the cache database are
provided via views that will be created. To select a source for the
schedule based transfer resp. the transfer with
the buttons, use the
checkbox. To see the protocol of the
transfers, click on the button. To transfer all
sources that had been selected use the

 button (Source database to cache database)
resp.
button (Source database to cache database)
resp.
 button (Cache database to Postgres
database). To inspect the data from the views, click on the
button. With the
button you can remove the views (see below). To transfer the data into
the cache
database resp.
Postgres
database use the
buttons and the
buttons to inspect the content. To transfer resp. inspect data within
the Postgres database, you have to connect with a database first.
button (Cache database to Postgres
database). To inspect the data from the views, click on the
button. With the
button you can remove the views (see below). To transfer the data into
the cache
database resp.
Postgres
database use the
buttons and the
buttons to inspect the content. To transfer resp. inspect data within
the Postgres database, you have to connect with a database first.
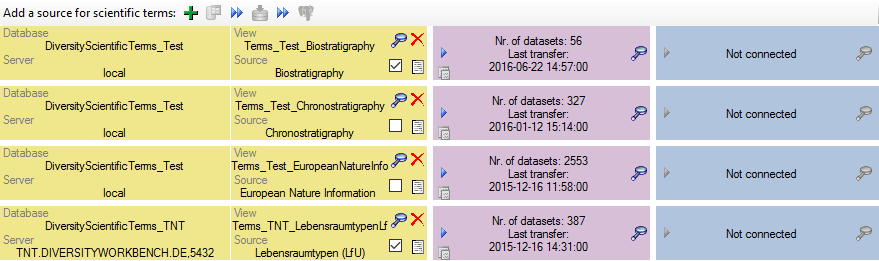
Cache Database
Webservices
Sources from webservices
To provide details for datasets linked to webservices like Catalogue ofLife etc. in the cached data, this
information can be transferred into the cache
database together with the data from
the DiversityCollection database. Use the button
to add the webservice you need.
Transfer
To transfer the data of a webservice into the
cache
database use the
 button. A window a shown below will open
where you must select all projects that should be checked for data
related to the webservice you selected. Only names found within these
projects will be transferred.
button. A window a shown below will open
where you must select all projects that should be checked for data
related to the webservice you selected. Only names found within these
projects will be transferred.
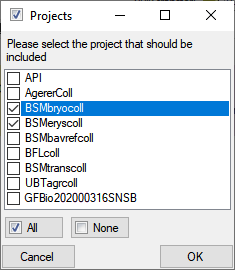
Use the buttons to inspect the
content. Names that are already present will not be transferred again.
So if you need these values to be updated you have to remove it (see
below) and add it again. Links that refer to lists of names instead of
single names will not be inserted. These links will be stored in the
Errorlog to enable their inspection.
To transfer the data into the Postgres
database, you have to connect with a
database first. Use the button to transfer the
data from the cache
database into the
Postgres
database and the
buttons to inspect the content.
Removal
With the button you can remove the sources.
Agents
Sources for the agents
To provide details for the agents in the cached data, this information
is transferred into the cache
database together with the data from
the collection database. Use the add button to add a
source. The data for the cache database are provided via views that will
be created. To inspect the data from the views, click on the
button. With the
button you can remove the views (see below). To restrict the data
subsets that are transferred to the cache database, click on the
button. In the upcoming dialog select those
subsets you want to transfer in addition to the basic name list. To
transfer the data into the cache resp.
Postgres
database use the
buttons and the
buttons to inspect the content. To transfer resp. inspect data within
the Postgres database, you have to connect with a database first.

Cache Database Transfer
Transfer of the data
To transfer the data you have several options:
- Single transfer : Transfer data of a single
project
- Transfer via bcp
 : Transfer data
of the data via bcp
: Transfer data
of the data via bcp
- Bulk transfer : Transfer data of all
projects and sources selected for the schedule based transfer
With the resp.
button you can decide if the data should
be checked for updates. If this option is active (
) the program will compare the contents and
decide if a transfer is needed. If a transfer is needed, this will be
indicated with a red border of the transfer button
 . If you transferred only a part
of the data this will be indicated by a thin red border for the current
session
. If you transferred only a part
of the data this will be indicated by a thin red border for the current
session  . The context menu of
the button View
differences will show the accession numbers of the datasets with
changes after the last transfer (see below).
. The context menu of
the button View
differences will show the accession numbers of the datasets with
changes after the last transfer (see below).
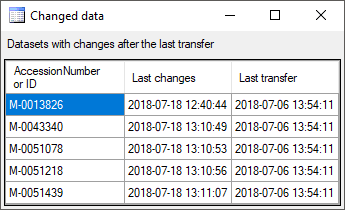
Embargo
If an embargo has been defined in DiversityProjects, a message will be
shown (see below) and you well get a warning if you start a transfer.
The automatic transfer for projects with an embargo will be blocked.

Competing transfer
If a  competing transfer is active for the same step, this will be
indicated as shown below. While this transfer is active, any further
transfer for this step will be blocked.
competing transfer is active for the same step, this will be
indicated as shown below. While this transfer is active, any further
transfer for this step will be blocked.

If this competing transfer is due to e.g. a crash and is not active any
more, you have to get rid of the block to preceed with the transfer of
the date. To do so you have to reset the status of the transfer. Check
the scheduler as shown
below. This will activate the button.
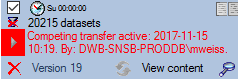
Now click on the button to open the window for
setting the scheduler options as shown below.
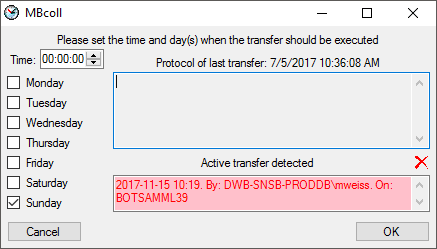
To finally remove the block by the [Active
transfer], click on the
button. This will remove the block and you
can preceed with the transfer of the data.
Single transfer
To transfer the data for a certain project, click on the
button in the
Cache- or Postgres data range (see below).
A window as shown below will open, where all data ranges for the
transfer will be listed. With the button you can set the timeout for
the transfer of the data where 0 means infinite and is recommended for
large amounts of data. With the button you can
switch on resp. of the generation of a report. To stop the execution in
case of an error click on the button. The
button will change from to
 and the execution will stop in case of an
error. Click on the Start transfer button
to start the transfer.
and the execution will stop in case of an
error. Click on the Start transfer button
to start the transfer.
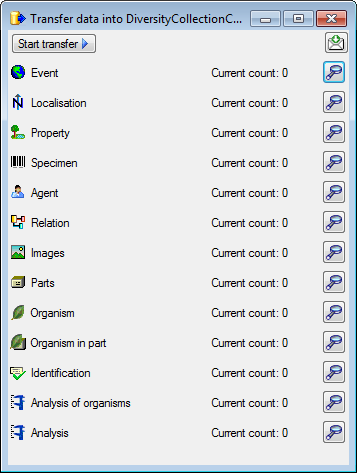
After the data are transferred, the number and data are visible as shown
below.
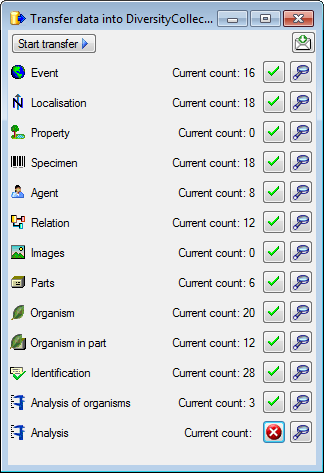
After the data are transferred successful transfers as indicated by
 an error by
 . The reason for the failure is
shown if you click on the
button. For the transfer to the Postgres database the number in the
source and the target will be listed as shown below indicating deviating
numbers of the data. For the detection of certain errors it may help to
activate the logging as described in the chapter TransferSettings.
. The reason for the failure is
shown if you click on the
button. For the transfer to the Postgres database the number in the
source and the target will be listed as shown below indicating deviating
numbers of the data. For the detection of certain errors it may help to
activate the logging as described in the chapter TransferSettings.
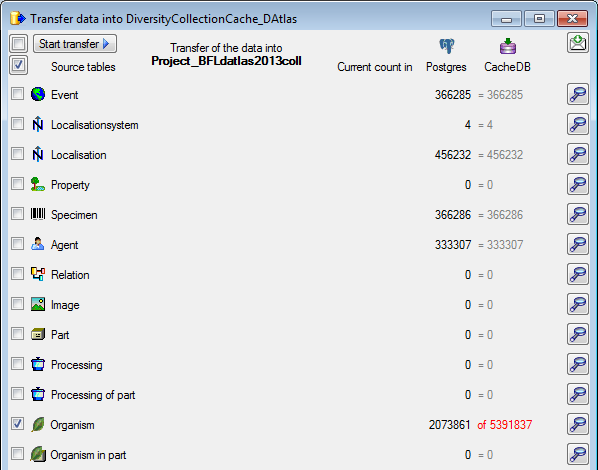
To inspect the first 100 lines of the transferred data click on the
button.
Bulk transfer
To transfer the data for all projects selected for the schedule based
transfer, click on the button in the cache- or Postgres data
range (see below).

Together with the transfer of the data, reports will be generated and
stored in the reports directory. Click on the  button in the Timer area to open this directory. To inspect data in the
default schemas (dbo for SQL-Server
button in the Timer area to open this directory. To inspect data in the
default schemas (dbo for SQL-Server  and
public for Postgres ) outside the project
schemata, use the buttons shown in the image
above.
and
public for Postgres ) outside the project
schemata, use the buttons shown in the image
above.
Transfer as background process
Transfer data from database to cache database and all Postgres databases
To transfer the data as a background process use the following
arguments:
- CacheTransfer
- Server of the SQL-server database
- Port of SQL-server
- Database with the source data
- Server for Postgres cache database
- Port for Postgres server
- Name of the Postgres cache database
- Name of Postgres user
- Password of Postgres user
For example:
C:\DiversityWorkbench\DiversityCollection> DiversityCollection.exe
CacheTransfer snsb.diversityworkbench.de 5432 DiversityCollection
127.0.0.1 5555 DiversityCollectionCache PostgresUser myPostgresPassword
The application will transfer the data according to the
settings, generate a protocol as
described above and quit automatically after the transfer of the data.
For an introduction see a short tutorial
.
The user starting the process needs a Windows authentication with access
to the SQL-Server database and proper rights to transfer the data. The
sources and projects within DiversityCollection will be transferred
according to the settings
(inclusion, filter, days and time). The transfer will be documented in
report files. Click on the button to access
these files. For a simulation of this transfer click on the Transfer
all data according to the settings
button at the top of the form. This will
ignore the time restrictions as defined in the settings and will start
an immediate transfer of all selected data.
To generate transfer reports and document every step performed by the
software during the transfer of the data use a different first argument:
- CacheTransferWithLogging
- ...
C:\DiversityWorkbench\DiversityCollection> DiversityCollection.exe
CacheTransferWithLogging snsb.diversityworkbench.de 5432
DiversityCollection 127.0.0.1 5555 DiversityCollectionCache PostgresUser
myPostgresPassword
To transfer only the data from the main database into the cache database
use a different first argument:
To transfer only the data from the cache database into the postgres
database use a different first argument:
- CacheTransferPostgres
- ...
The remaining arguments correspond to the list above. The generated
report files are located in the directory .../ReportsCacheDB and the
single steps are witten into the file DiversityCollectionError.log.
History
For every transfer of the data along the pipeline, the settings (e.g.
version of the databases) the number of transferred data together with
the execution time and additional information are stored. Click on
the  button in the respective part to get a
list of all previous transfers together with these data (see below).
button in the respective part to get a
list of all previous transfers together with these data (see below).
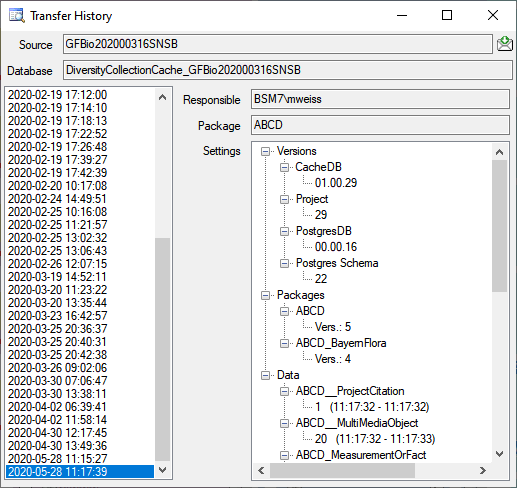
Infrastructure
Sources
The transfer of the data from the main databases into the cache database is handled via views and stored procedures in the cache database that are generated by the program. The views provide the data in the main databases while the procedures refer to these views to copy the data from the tables in the main database into the cache database. The views are listed in the table [Module]Source where [Module] is the Name of the module without the leading “Diversity”.
As an example for the module DiversityAgents the cache database contains a view Agents_TNT_TaxRefagents where the source is the module DiversityAgents, the server is TNT and the project is TaxRefagents. The views for a source are listed in the table AgentSource. This view refers to the corresponding data in the module. The procedure procTransferAgent selects data in the view and copies the data into the table Agent.
For source objects the schema is dbo.
Projects
The transfer of the data from the main database into the cache database is handled via views and stored procedures in the cache database that are generated by the program. The views provide the data in the main database while the procedures refer to these views to copy the data from the tables in the main database into the cache database.
As an example the cache database contains a view ViewAnalysis that selects data in the table Analysis in the main database. The procedure [Project].procPublishAnalysis refers to the view and copies the data into the table [Project].CacheAnalysis where [Project] is the schema of the project.
The transfers together with information on the versions, settings etc. are listed in the table ProjectTransfer.
Subsections of Transfer
Cache Database Transfer
Transfer of the data triggered by a batch command
Transfer as background process
Transfer data from database to cache database and all Postgres databases
The server has to start the application with a Windows account with
access to the database server and the databases with the following
permissions/roles:
- DiversityCollection:
- DiversityProjects:
- Role DiversityWorkbenchUser
- Additional sources, e.g. DiversityTaxonNames:
- In every database from which data should be transferred: Role
DiversityWorkbenchUser or corresponding roles
To transfer the data as a background process use the following
arguments:
- CacheTransfer
- Server of the SQL-server database
- Port of SQL-server
- Database with the source data
- Server for Postgres cache database
- Port for Postgres server
- Name of the Postgres cache database
- Name of Postgres user
- Password of Postgres user
For example:
C:\\DiversityWorkbench\\DiversityCollection\> DiversityCollection.exe CacheTransfer snsb.diversityworkbench.de 5432 DiversityCollection 127.0.0.1 5555 DiversityCollectionCache postgres myPassword
The application will transfer the data according to the
settings, generate a protocol as
described above and quit automatically after the transfer of the data.
For an introduction see a short tutorial
.
The user starting the process needs a Windows authentication with access
to the SQL-Server database and proper rights to transfer the data. The
sources and projects within DiversityCollection will be transferred
according to the settings
(inclusion, filter, days and time). The transfer will be documented in
report files. Click on the button to access
these files. For a simulation of this transfer click on the Transfer all data according to the settings
button at the top of the form.
Cache Database
Transfer Settings
General settings
To edit the general settings for the transfer, click on the
button in the main form. A window as shown
below will open. Here you can set the timeout
for the transfer in minutes. The value 0 means that no time limit is set
and the program should try infinite to transfer the data.
The transfer via bcp
does not rely on these numbers and uses a
much faster way of transfer, yet its needs detailed configuration. If
you are connected to a postgres database, the transfer directory
 and the bash file
for conversion and import can be set in the last line.
and the bash file
for conversion and import can be set in the last line.
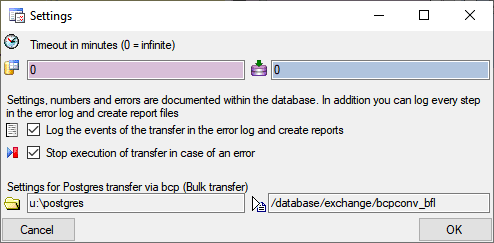
Logging
For the detection of certain errors it may help to log the events of the
transfer by activating the logging: 
 →
. The logging is set per application, not per
database. So to detect errors in a transfer started by a scheduler on a
server, you have to activate the logging in the application started by
the server. The log is written into the error log of the
application. To see the content of the log either use the
→
. The logging is set per application, not per
database. So to detect errors in a transfer started by a scheduler on a
server, you have to activate the logging in the application started by
the server. The log is written into the error log of the
application. To see the content of the log either use the  Protocol
section or in the main window
select Help - ErrorLog from
the menu.
Protocol
section or in the main window
select Help - ErrorLog from
the menu.
Stop on error
In case of an error during the transfer you can stop the transfer:
→
. The stop in case of
an error is set per application, not per database. So to stop the
transfer in case of errors in a transfer started by a scheduler on a
server, you have to activate this in the application started by the
server.
Scheduled transfer
The scheduled transfer is meant to be launched on a server on a regular
basis, e.g. once a week, once a day, every hour etc.. The transfer of
the data via the scheduled transfer will take place according to the
settings. This means the program will check if the next planned time for
a data transfer is passed and only than start to transfer the data. To
include a source in the schedule, check the
selector for the scheduler. To set the time and days scheduled for a
transfer, click on the button. A window as
shown below will open where you can select the time and the day(s) of
the week when the transfer should be executed.
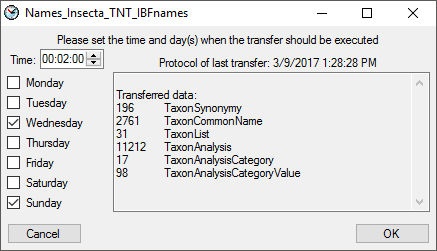
The planned points in time are shown in the form as shown below.

The protocol of the last transfer can be seen as in the window above or
if you click on the button. If an error
occurred this can be inspected with a click no the
button.
If another transfer on the same source has been started, no further
transfer will be started. In the program this competing transfer is
shown as below.
You can remove this block with a click on the
button. In opening window (see below) click on the
button. This will as well remove error
messages from previous transfers.
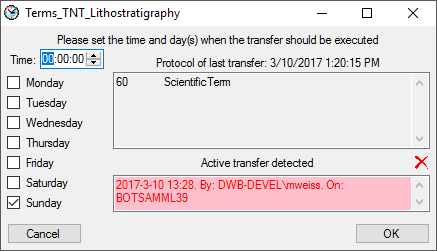
A further option for restriction of the transfers is the comparison of
the date when the last transfer has been executed. Click on the
button to change it to
. In this state the program will compare the
dates of the transfers and execute the transfer only if new data are
available.
Diversity Collection
Transfer Protocol
The protocol of any transfer is written into the error log of the
application. To examine the messages of the transfers within the cache
database you may for every single step click on the
button in the transfer window in
case an error occurred. In the main window the protocol for all
transfers is shown in the  Protocol
part. A click on the
button requeries resp. shows the
protocol. The
Protocol
part. A click on the
button requeries resp. shows the
protocol. The  option will show the line
numbers of the protocol and the option will
restrict the output to failures and errors stored in the protocol. By
default both options are seleted and the number of lines is restricted
to 1000. In case of longer protocols change the number of lines for the
output. The
option will show the line
numbers of the protocol and the option will
restrict the output to failures and errors stored in the protocol. By
default both options are seleted and the number of lines is restricted
to 1000. In case of longer protocols change the number of lines for the
output. The  button will show the protocol in
the default editor of your computer. The
button will show the protocol in
the default editor of your computer. The  button will clear the protocol.
Cache Database
Transfer Via BCP
Transfer of data from SQL-Server to Postgres via bcp
To transfer large amounts of data from the SQL-Server database to a
Postgres database the normal path is clearly too slow. For these cases
an alternative option is provided using the transfer in a csv file on a
shared folder on the server where the Postgres databases are hosted.
If the shared directory, mount point and the bash file are set (see
below - on first tab [Update,
Sources] ) the batch transfer can be
activated. Click e.g. on the open button to set the
values. The window that will open offers a list with existing entries
for the respecitive value. Please ask the postgres server administrator
for details.

To use the batch transfer for a project, click in the checkbox as shown
below.

The image for the transfer will change from to
. Now the data of every table within the
project will be transferred via bcp. To return to the standard transfer,
just deselect the checkbox.
To stop the execution in case of an error click on the
button in the window that will open after you
clicked the button to start the transfer.
The button will change from to
and the execution will stop in case of an
error. The objects created for the transfer (csv file, tables) of the
data will not be removed to enable an inspection.
Details about the setup are described in the chapter Setup for thetransfer via bcp.
Details about the export are described in the chapter Export using thetransfer via bcp.
Subsections of Transfer Via BCP
Cache Database
Transfer Via BCP Export
Export using the transfer via bcp
Overview
To set up the transfer between the SQL-Server cache database (CollectionCache in the image below) and the Postgres database a bulk export and bulk import methord is used. The tool BCP.exe from SQL-Server exports a table to the filesystem on the SQL-Server side (see step 3 below). This file is accessible from Postgres via file-shareing. The Postgres bulk imports the csv into a table. An intermediate script converts the SQL-Server output format into a usefull format for Postgres. This script is called directly from Postgres while importing the data.
A lot of intermediate Views and Tables are used to convert columns types and ensure consistency.
The image shows an overview of the steps described below. The numbers in
the arrows refer to the described steps.
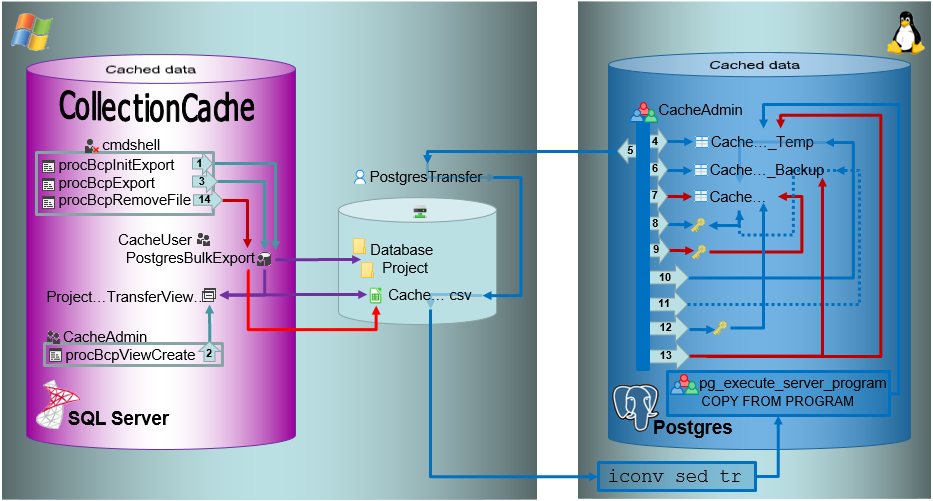
Currently the tooling on the SQL-Server side assumes the shared folder to be present at U:\postgres and is accessible (read and write) by the user PostgresBulkExport. This path is used as base path for creatng the exported csv files and some logging (Outfile.txt)
On the Postgres side the shared folder is mounted on /database/exchange/<instance>/
Both things need to be setup by the system adminstrator.
All Transfersteps are controlled by the client, for exampe in DiversityCollection
Export
Initialization of the batch export
In the shared directory folders will be created according to
.../<Database>/<Schema>. The data will be exported into a csv file
in the created schema (resp. project) folder in the shared directory.
The initialization of the export is performed by the procedure
procBpcInitExport (see below and
[ 1 ]
in the overview image above).
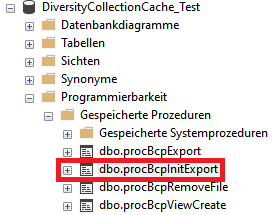
Creation of view as source for the batch export
To export the data into the file a view (see below) will be created
transforming the data in the table of the SQL-Server database according
to the requirements of the export (quoting and escaping of existing
quotes). The creation of the view is performed by the procedure
procBcpViewCreate (see above and
[ 2 ]
in the overview image above).
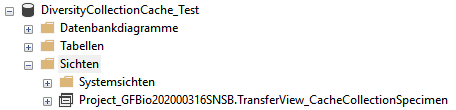
The views provide the data from the SQL-Server tables in the sequence as
defined in the Postgres tables and perform a reformatting of the string
values (see example below).
CASE WHEN \[AccessionNumber\] IS NULL THEN NULL ELSE \'\"\' + REPLACE(\[AccessionNumber\], \'\"\', \'\"\"\') + \'\"\' END AS \[AccessionNumber\]
Export of the data in to a csv file in the transfer directory
The data will be exported using the procedure procBcpExport (see above and
[ 3 ]
in the overview image above) into a csv file in the directory created in
the shared folder (see below).

For the intermediate storage of the data, a temporary table (..._Temp)
is created (see below and
[ 4 ]
in the overview image above). This table is the target of the bash
import described below.
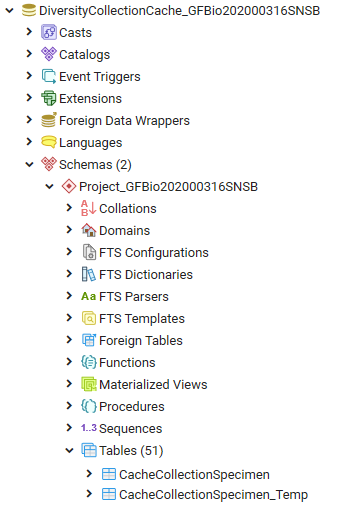
As Postgres accepts only UTF-8 without the Byte OrderMark (BOM) the exported
csv file must be converted into UTF-8 without BOM. For this purpose
there are scripts provided for every Windows-SQL Server instance
(/database/exchange/bcpconv_INSTANCE). These scripts accept the UTF-16LE
file that should be converted as an argument in dependence of the name
of the instance, e.g. for INSTANCE 'devel':
/database/exchange/bcpconv_devel
DiversityCollectionCache_Test/Project_GFBio202000316SNSB/CacheCollectionSpecimen.csv
The scripts are designed as shown below (for INSTANCE 'devel'):
#!/bin/bash iconv -f UTF16LE -t UTF-8 /database/exchange/devel/\$1 \|sed \'1s/\^\\xEF\\xBB\\xBF//\' \| tr -d \'\\r\\000\'
AS a first step
iconv converts
the file from UTF-16LE to UTF-8.
AS next step
sed removes
the Byte Order Mark (BOM).
AS final step
tr removes
NULL characters.
Import with COPY
The script above is used as source for the import in Postgres using the
psql COPY command
as shown in the example below (for INSTANCE 'devel').
COPY \"Project_GFBio202000316SNSB\".\"CacheCollectionSpecimen_Temp\" FROM PROGRAM \'bash /database/exchange/bcpconv_devel DiversityCollectionCache_Test/Project_GFBio202000316SNSB/CacheCollectionSpecimen.csv\' with delimiter E\'\\t\' csv;
The options set the tab sign as delimiter: with delimiter E\'\\t\' and csv as format of the file: csv .
Within the csv file empty fields are taken as NULL-values and quotes
empty strings "" are taken as empty string. All strings must be
included in quotation marks ("...") and quotation marks (") within
the strings must be replaced by 2 quotation marks ("") - see example
below. This conversion is performed in the view described above.
any\"string → \"any\"\"string\"
Bash conversion and Import with COPY relate to
[ 5 ]
in the overview image above. The COPY command is followed by a test for
the existance of the created file.
Backup of the data from the main table
Before removing the old data from the main table, these data are stored
in a backup table (see below and
[ 6 ]
in the overview image above).
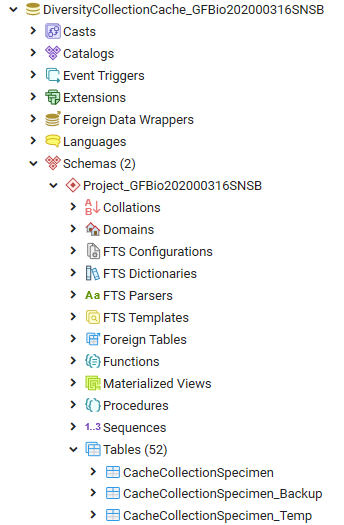
Removing data from the main table
After a backup was created and the new data are ready for import, the
main table is prepared and as first step the old data are removed (see
[ 7 ]
in the overview image above).
Getting the primary key of the main table
To enable a fast entry of the data, the primary key must be removed.
There the definition of this key must be stored for recreation after the
import (see below and
[ 8 ]
in the overview image above).
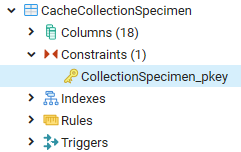
Removing the primary key from the main table
After the definition of the primary key has been extracted from the
table, the primary key is removed (see below and
[ 9 ]
in the overview image above).
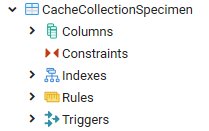
Inserting data from the intermediate storage into the main table and clean up
After the data and the primary key has been removed, the new data are
transferred from the temporary table into the main table (see
[ 10 ]
in the overview image above) and the number is compared to the number in
the temporary table to ensure the correct transfer.
In case of a failure the old data will be restored from the backup table
(see
[ 11 ]
in the overview image above).
After the data have been imported the primary key is restored (see
[ 12 ]
in the overview image above). Finally the intermediate table and the
backup table (see
[ 13 ]
in the overview image above) and the csv file (see
[ 14 ]
in the overview image above) are removed.
Troubleshooting
if the call of the copy statement on postgres side fail, in step [ 5 ], check if the fileshare is correcly mounted and accessible by postgres.
Calling the mount command in the Postgres-Server should show the correcly mounted share:
# sudo mount | grep '/database/exchange'
//devel/postgres on /database/exchange/devel type cifs (ro,relatime,vers=3.1.1,cache=strict,upcall_target=app,username=SomeUserName,uid=0,noforceuid,gid=0,noforcegid,addr=192.168.0.88,file_mode=0755,dir_mode=0755,soft,nounix,serverino,mapposix,reparse=nfs,nativesocket,symlink=native,rsize=4194304,wsize=4194304,bsize=1048576,echo_interval=60,actimeo=1,closetimeo=1)
and check if the files and folders written by SQL-Server are visible in this mount.
The file ‘Outfile.txt’ is written in the subfolder of the Schema and contains usefull progress-, error-messages and debug information if something fails.
Cache Database
Details of BCP Export
Step 1: procBpcInitExport
CREATE PROCEDURE [dbo].[procBcpInitExport]
	@TargetPath varchar(200),
	@Schema varchar(200),
	@ProtocolFileName varchar(200)
WITH EXECUTE AS 'cmdshell'
AS
DECLARE @RC int;
BEGIN
	SET NOCOUNT ON;

	DECLARE @SQL nvarchar(500);
	DECLARE @BcpCmd varchar(500);
	DECLARE @ToFile varchar(200);
	DECLARE @CheckDatabase varchar(200);
	DECLARE @DatabaseName varchar(200);

	-- Retrieve database name
	SET @DatabaseName = (SELECT DB_NAME());
	SET @SQL = N'SELECT @CheckDatabase = [CATALOG_NAME] FROM [INFORMATION_SCHEMA].[SCHEMATA] WHERE [SCHEMA_NAME]=@Schema;';
	EXECUTE sp_executesql @SQL, N'@Schema varchar(200), @CheckDatabase varchar(200) OUTPUT', @Schema=@Schema, @CheckDatabase=@CheckDatabase OUTPUT;
	IF @DatabaseName <> @CheckDatabase
	BEGIN
		SET @RC = 2;
		RETURN @RC;
	END
	SET @RC = 1;

	-- Normalize target path
	SET @TargetPath = RTRIM(@TargetPath);
	IF ('\' <> RIGHT(@TargetPath, 1))
		SET @TargetPath = @TargetPath + '\';
	SET @DatabaseName = (SELECT [CATALOG_NAME] FROM [INFORMATION_SCHEMA].[SCHEMATA] WHERE [SCHEMA_NAME]=@Schema);
	SET @ToFile = ' >> ' + @TargetPath + @DatabaseName + '\' + @ProtocolFileName;

	-- Create subdirectories
	SET @BcpCmd = 'md ' + @TargetPath + @DatabaseName;
	EXEC xp_cmdshell @BcpCmd

	SET @BcpCmd = 'md ' + @TargetPath + @DatabaseName + '\' + @Schema;
	EXEC xp_cmdshell @BcpCmd

	SET @BcpCmd = 'md ' + @TargetPath + @DatabaseName + '\dbo';
	EXEC xp_cmdshell @BcpCmd

	-- Create protocol file
	SET @BcpCmd = 'echo User: ' + (SELECT CONVERT(varchar, ORIGINAL_LOGIN())) + ', Start: ' +(SELECT CONVERT(varchar, SYSDATETIME())) + ' > '+ @TargetPath + @DatabaseName + '\' + @ProtocolFileName;
	EXEC xp_cmdshell @BcpCmd

	SET @BcpCmd = 'echo Proxy account: >> '+ @TargetPath + @DatabaseName + '\' + @ProtocolFileName;
	EXEC xp_cmdshell @BcpCmd

	SET @BcpCmd = 'whoami >> '+ @TargetPath + @DatabaseName + '\' + @ProtocolFileName;
	EXEC xp_cmdshell @BcpCmd

	SET @RC = 0;
END
RETURN @RC
Parameters of the procedure
- @TargetPath: The directory where the output will be created, e.g.
U:\postgres.
- @Schema: The schema of the current project within the database, e.g.
Project_BFLtestcoll.
- @ProtocolFileName: The file containing the output, e.g.
Outfile.txt.
Parameters set within the procedure
- @DatabaseName: The name of the current database - corresponds to the subdirectory where
the output will be created
Check database
The first step checks if the database corresponds to current schema and database to avoid sqlinjection:
SELECT [CATALOG_NAME]
FROM [INFORMATION_SCHEMA].[SCHEMATA]
WHERE [SCHEMA_NAME]='Project_BFLtestcoll';
If the check fails the procedure will return the error code 2
Fix path
The next step fixes a possible miswritten path of the target
SET @TargetPath = RTRIM(@TargetPath);
	IF ('\' <> RIGHT(@TargetPath, 1))
		SET @TargetPath = @TargetPath + '\';
Set target
This step sets the syntax to the target file
SET @ToFile = ' >> ' + @TargetPath + @DatabaseName + '\' + @ProtocolFileName;
Creating directories
Creating one main and 2 subdirectories
SET @BcpCmd = 'md ' + @TargetPath + @DatabaseName;
EXEC xp_cmdshell @BcpCmd

SET @BcpCmd = 'md ' + @TargetPath + @DatabaseName + '\' + @Schema;
EXEC xp_cmdshell @BcpCmd

SET @BcpCmd = 'md ' + @TargetPath + @DatabaseName + '\dbo';
EXEC xp_cmdshell @BcpCmd
Creating the protocol file
SET @BcpCmd = 'echo User: ' + (SELECT CONVERT(varchar, ORIGINAL_LOGIN())) + ', Start: ' +(SELECT CONVERT(varchar, SYSDATETIME())) + ' > '+ @TargetPath + @DatabaseName + '\' + @ProtocolFileName;
EXEC xp_cmdshell @BcpCmd
Writing the name of the service into the protocol file
SET @BcpCmd = 'whoami >> '+ @TargetPath + @DatabaseName + '\' + @ProtocolFileName;
EXEC xp_cmdshell @BcpCmd
EXEC xp_cmdshell 'whoami'
→ nt service\mssqlserver
Step 2: procBcpViewCreate
Creating a view that maps the content of the table that should be exported within the schema. The view adapts the output according to values needed for postgres, e.g. string values will the enclosed with ".
Step 3: procBcpExort
Cache Database
Transfer Via BCP Setup
Setup for the transfer via bcp
There are several preconditions to the export via bcp.
bcp
The export relies on the external
bcp
software that must have been installed on the database server.To test if
you have bcp installed, start the command lind and type bcp. If bcp is
installed you get a result like shown below.
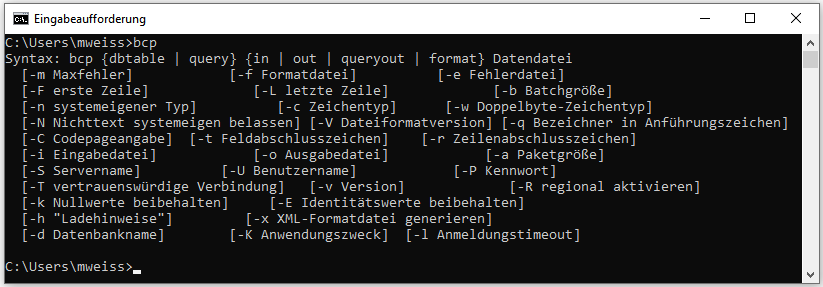
SQL-Server
The transfer via bcp is not possible with SQL-Server Express editions.
To use this option you need at least SQL-Server Standard edition.
To enable the transfer the XP-cmd shell must be enabled on the
SQL-Server. Choose Facets from the context menu as shown below.
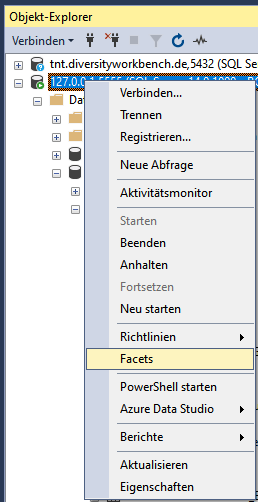
In the window that will open change XPCmdShellEnabled to True as shown
below.
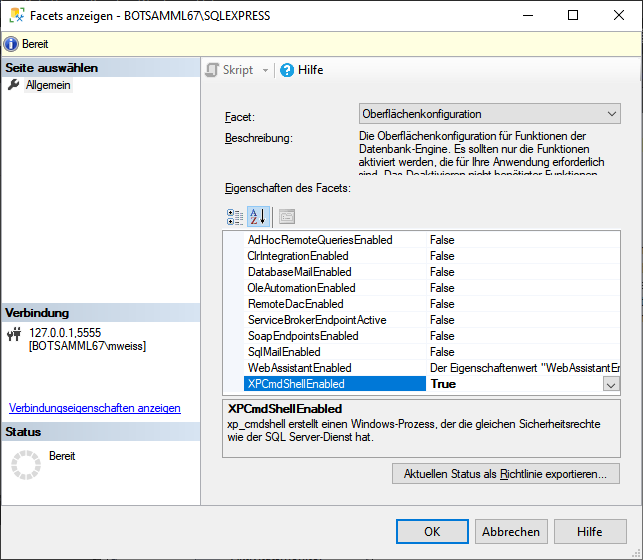
Login cmdshell
The update script for the cache database will create a login cmdshell
used for the transfer of the data (see below). This login will get a
random password and connecting to the server is denied. This login is
needed to execute the transfer procedures (see below) and should not be
changed. The login is set to disabled as shown below.
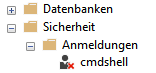
Stored procedures
Furthermore 4 procedures and a table for the export of the data in a
shared directory on the Postgres server are created (see below).
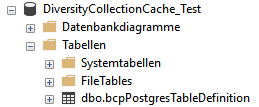
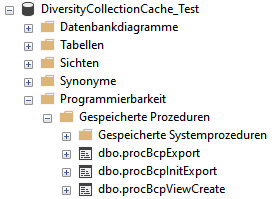
Login PostgresBulkExport
You have to create a Windows login (e.g. PostgresBulkExport) on the
server with full access to the shared directory and set this account as
the server proxy:
Open Windows Administrative Tools -
 Computer Management -
 System-Tools -
 Local Users and Groups
left klick on folder Users and select New User...
In the window that will open enter the details for the user and create
the user (e.g. PostgresBulkExport) and click ** OK** to
create the user.
In the File Explorer select the shared folder where the files from the
export will be stored.
From the context menu of the shared folder (e.g.
u:\\postgres) select Properties
In the Tab security click on button Edit…
In the window that will open click on button Add…
Type or select the User (e.g. PostgresBulkExport) and click OK
Select the new user in the list and in Permissons check Full Controll at
Allow
Leave with Button OK
Close Window with Button OK
Go through the corresponding steps for the share (e.g.
u:) to ensure access.
As an alternative you may use SQL to great the Login:
CREATE LOGIN \[DOMAIN\\LOGIN\] FROM WINDOWS;
where DOMAIN is the domain for the windows server and LOGIN is the name
of the windows user.
exec sp_xp_cmdshell_proxy_account \'DOMAIN\\LOGIN\',\'[?password?]\';
where DOMAIN is the domain for the windows server, LOGIN is the name of
the windows user and PASSWORD is the password for the
login.
After the user is created and the permissions are set, set this user as
cmdshell proxy (see below)
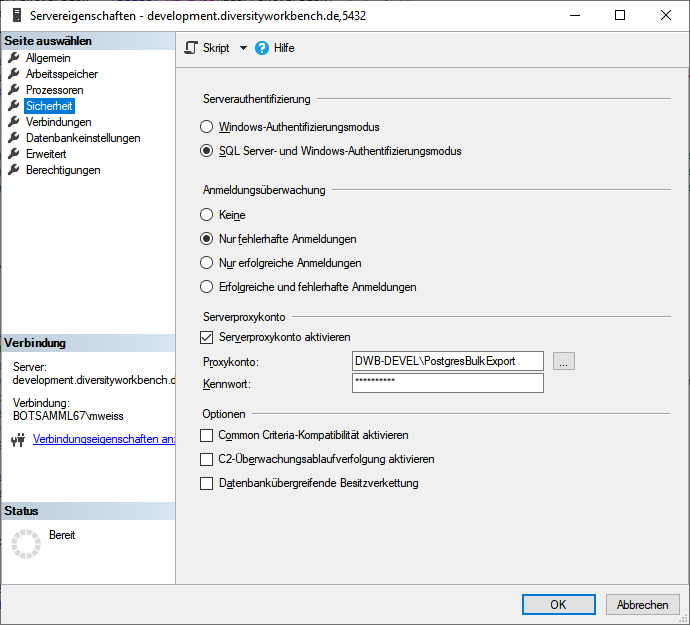
creat a new login:
- Open Sql Server Managment Studio
\
- select Security \
- select Logins \
- in the context menu select New Login …
- in the window that will open, click on the Search... button
- Type in object name (e.g.: PostgresBulkExport)\
- click on the Button Check Names (name gets expanded with domain name)\
- click button OK twice to leave the window and create the new login
in the context menu select Properties and include the login in the
users of the cache database (see below)
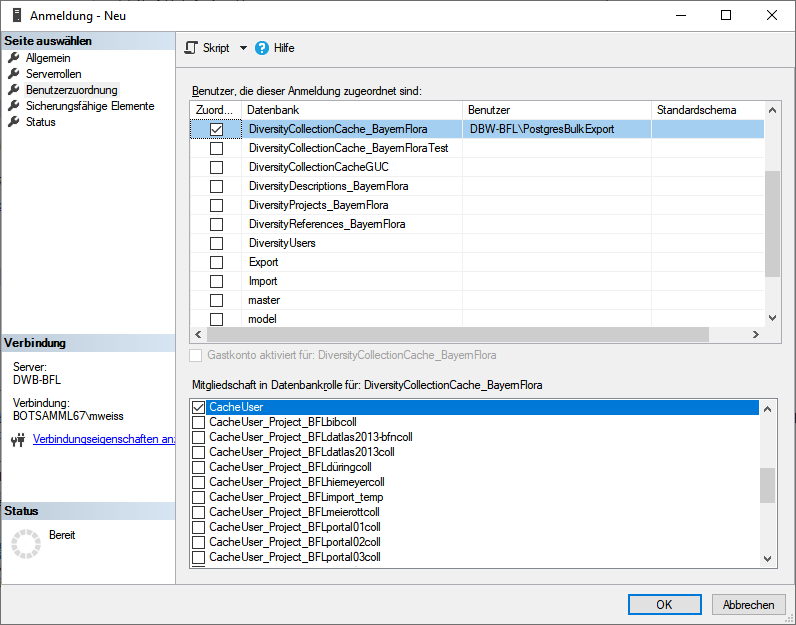
On the database server add this user as new login and add it to the
cache database. This login must be in the database role CacheUser to be
able to read the data that should be exported (see below).

Login PostgresTransfer
Another login (e.g. PostgresTransfer) on the Windows server is needed
with read only access to the shared directory to read the exported data
and import them into the Postgres database. This login is used by the
Postgres server to access the shared directory. It does not need to have
interactive login permissions.
Shared directory on Windows-server
On the Windows side the program needs an accessible shared directory in
which sub-directories will be created and into which the files will be
exported. This directory is made accessible (shared folder) to
CIFS/SMB with read
only access for the login used for the data transfer (e.g.
PostgresTransfer). This shared directory is mounted on the Postgres
server using
CIFS
(/database/exchange/INSTANCE). The INSTANCE is an identifier/server-name
for the windows server. If more windows server deliver data to one
postgres server these INSTANCE acronyms need to be unique for each
windows server.
On the Windows-server this directory is as available as "postgres".
The directory will be mounted depending on the INSTANCE under the path
/database/exchange/INSTANCE. The corresponding
fstab entries for the INSTANCEs
'bfl and 'devel' are:
/etc/fstab:
//bfl/postgres /database/exchange/bfl cifsro,username=PostgresTransfer,password=[[?password?]]
//DeveloperDB/postgres /database/exchange/devel cifsro,username=PostgresTransfer,password=[[?password?]]
| command |
meaning |
| [?Instance?]/postgres |
is the UNC path to the shared folder |
| /database/exchange/[?Instance?] |
is local path on the postgres server where to mount the shared folder |
| PostgresTransfer |
is the windows user name to access the shared folder |
| ?password? |
is the password for the windows user to access the shared folder |
These mounts are needed for every Windows-server resp. SQL-Server
instance. Instead of fstab you
may use systemd for mounting.
Bugfixing and errorhandling
If you get the following error:
An error occurred during the execution of xp_cmdshell. A call to \'LogonUserW\' failed with error code: \'1326\'.
This means normally, that the passwort is wrong, but could also be a
policy problem.
First recrate the proxy user with the correct password:
use \[Master\];
-- Erase Proxy user:
exec sp_xp_cmdshell_proxy_account Null;
go

-- create proxy user:
exec sp_xp_cmdshell_proxy_account \'[?domain?]\\PostgresBulkExport\',\'[?your password for PostgresBulkExport?]\';\
go
And if this does not work, change the policy:
Add proxy user in the group to run as batch job:
Open the Local Security Policy

Log on as a batch job
Add user or group ...
Type user in object name field (e.g. PostgresBulkExport)
Leave Local Security Policy editor by clicking Button OK twice
For further information see
https://www.databasejournal.com/features/mssql/xpcmdshell-for-non-system-admin-individuals.html
NOT FOR PRODUCTION!
Setup of a small test routine.
Remove cmdshell account after your tests and recreate it with the
CacheDB-update-scripts from DiversityCollection (Replace [?marked
values?] with the values of your environment):
USE \[master\];
CREATE LOGIN \[cmdshell\] WITH PASSWORD = \'[?your password for cmdshell?]\',
CHECK_POLICY=OFF;
CREATE USER \[cmdshell\] FOR LOGIN \[cmdshell\];
GRANT EXEC ON xp_cmdshell TO \[cmdshell\];\

-- setup proxy
CREATE LOGIN \[[?domain?]\\PostgresBulkExport\] FROM WINDOWS;
exec sp_xp_cmdshell_proxy_account\
\'[?domain?]\\PostgresBulkExport\',\'[?your password for PostgresBulkExport?]\';\

USE \[[?DiversityCollection cache database?]\];
CREATE USER \[cmdshell\] FOR LOGIN \[cmdshell\];

-- allow execution to non privileged users/roles
grant execute on \[dbo\].\[procCmdShelltest\] to \[CacheUser\];
grant execute on \[dbo\].\[procCmdShelltest\] to \[[?domain?]\\AutoCacheTransfer\];


-- recreate Proxy User:

exec sp_xp_cmdshell_proxy_account Null;
go

-- create proxy user:
exec sp_xp_cmdshell_proxy_account '[?domain?]\\PostgresBulkExport\',\'[?your password for PostgresBulkExport?]\';
go

-- Make a test:
create PROCEDURE \[dbo\].\[procCmdShelltest\]
with execute as \'cmdshell\'
AS
SELECT user_name();  \-- should always return \'cmdshell\'
exec xp_cmdshell \'dir\';
go

execute \[dbo\].\[procCmdShelltest\];
go

-- Should return two result sets
-- \'cmdshell\'
-- and the filelisting of the current folder


-- Check Proxy user:
-- The proxy credential will be called ##xp_cmdshell_proxy_account##.

select credential_identity from sys.credentials where name = '##xp_cmdshell_proxy_account##\';

-- should be the assigned windows user, e.g. [?domain?]\\PostgresBulkExport
Settings for the bulk transfer
To enable the bulk transfer via bcp enter the path of the directory
on the Postgres server, the mount point
 of the postgres server and the
bashfile as shown below.
of the postgres server and the
bashfile as shown below.
To use the batch transfer for a project, click in the checkbox as shown
below.
The image for the transfer will change from to
. Now the data of every table within the
project will be transferred via bcp. To return to the standard transfer,
just deselect the checkbox.
Role pg_execute_server_program
The user  executing the transfer must be
in the role
executing the transfer must be
in the role  pg_execute_server_program.
Cache Database Restrictions
Restrictions for the data transfer into the cache database
The restrictions of the published data are defined in the
main database via projects
, data withholding
and embargos
 .
.
In the cache database further restrictions
can be set for every project and include
The collectors may be
anonymized. For the localisation
systems it is possible to restrict the precision of the coordinates. To
set these restrictions, click on the
button. A window as shown below will open.
Restrict the localisation systems
, the  site properties, the taxonomic
groups , the material
categories , the
analysis
site properties, the taxonomic
groups , the material
categories , the
analysis  and by moving the
entries between the Not published
and Published list. For an overview
see a short tutorial
.
and by moving the
entries between the Not published
and Published list. For an overview
see a short tutorial
.
Specimen
A filter for the specimen can be added in the first tab by the creation of a restriction applied on the specimen within a project as shown below and explained in the video .
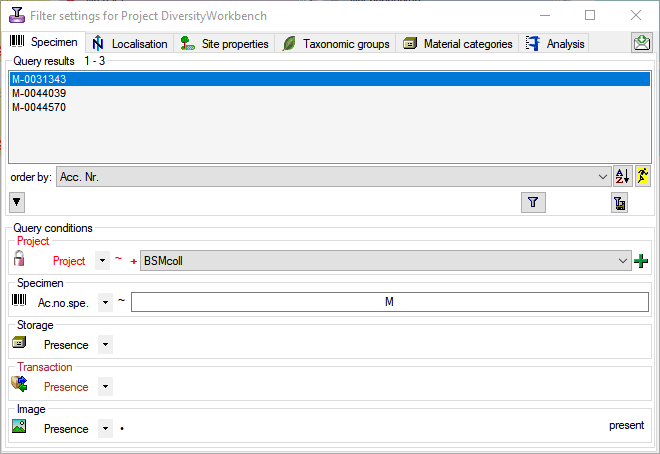
Define the filter with the options described below. Test the restiction with the filter button and save it with the  button. The restrictions will be converted into a SQL statement as shown below that will be applied in the filter for the transfer (see below). With the delete button you can remove the filter.

- order by: The values that should be displayed in the result list.
- /: Hide resp. show the area for the restriction.
- : Start query according to the Query conditions
- : Convert the Query conditions into a restriction
- Project: Select projects that should be included in the restriction
- + or |: If projects should be combined with AND resp. OR
- : Add projects to the list for the restriction as shown below:

- : Remove project from the list
- Specimen Accession number: Filter for the accession number of the specimen
- Storage: If a specimen part should be present
 Transaction: If a transaction should be present
- Image: If a specimen image should be present
Cache Database
Postgres
Administration of the databases
To create a Postgres cache database, you must be connected with a server running
Postgres (Version 12.0 or above). To connect to a server, click on the
button and enter the connection parameters. If no cache database has been created so far you get
a message that no database is available and will be connected to the default database postgres.\
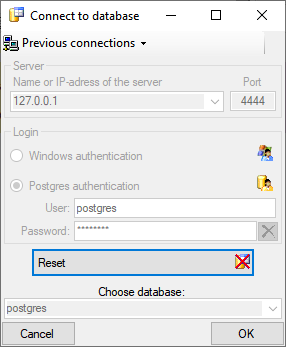
Click on the button to create a new cache database (see below). To create a database you must be in the group CacheAdmin as explained in chapter Logins.
You will be asked for the name of the database and a short description.

After the database was created, you have to update the database to the current version. Click on the Update
button to open a window listing all needed scripts. To run these scripts just click on the
Start update button. After the update the database is ready to take your data. Subsequent
updates may become necessary with new versions of the database. For an introduction see a short tutorial
.
To remove the current database from the server, just click on the button.
In the image on the right you see a screenshot from the tool pgAdmin. You may use this tool
to inspect your data and administrate the database independent from DiversityCollection. Please keep in mind, that any
changes you insert on this level may disable your database from being used by DiversityCollection as a sink for your cache
data. The data are organized in  schemata, with public as the default
schema. Here you find  functions for marking the database as a module of the Diversity
Workbench and the version of the database. The function highresolutionimagepath translates local image paths into paths for
high resolution images. To use this function it must be adapted to your local server settings. The tables in this schema
are  TaxonSynonymy where the data derived from DiversityTaxonNames are stored and
ScientificTerm where the data derived from DiversityScientificTerms are stored. For every project a
separate schema is created (here Project_BFLsorbusmmcoll). The project schemata contain 2
functions for the ID of the project and the version. The data are stored in the
tables while the packages in their greater part are realized as
 views and functions extracting and converting the data from the
tables according to their requirements.
Add Database
To add a new database on the server, click on the
button. A window will open where you can
enter the name for the new database.
Rename Postgres databases
To rename the current database, click on the
 button. A window will open where you can
enter the new name for the database. Click OK to change the name.
button. A window will open where you can
enter the new name for the database. Click OK to change the name.
Delete Postgres databases
To delete the current database just click on the
button. You will get a message if you are sure
where you have to click the YES button to delete the current database.
Server activity
For admins you may check the server activiy with a click on the  Server activity button. A window as shown below will open where in case of problems you may end certain processes on the server.

Role administration
For admins you may the roles on the server with a click on the Role administration button. A window as shown below will open where you can edit the roles on the server with CacheAdmin as the default role for all activities like data transfer etc..
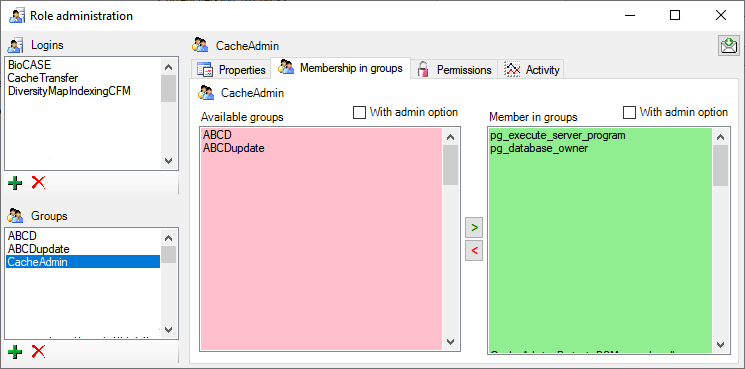
Subsections of Postgres
Cache Database Postgres
Copy & Replace DB
Copy Postgres databases
To copy a Postgres database, click on
the  button. A window
will appear where you can copy the database including the data or as an
empty database with the same tables etc. as the original database.
button. A window
will appear where you can copy the database including the data or as an
empty database with the same tables etc. as the original database.
The option including the data only needs the name for the new database
(see below).

To create an empty copy, you have to give the directory where two needed
programs (pg_dump.exe and psql.exe) are located. If these are missing,
you have to install Postgres
first.
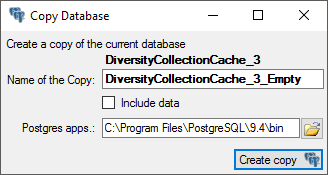
If you create an empty copy, a window will appear two times (see
below) where you have to enter the password for accessing the database.

Replace Postgres databases
see chapter 
Rename Postgres databases
To rename the current database, click on the
button. A window will open where you can
enter the new name for the database. Click OK to change the name..
Delete Postgres databases
To delete the current database just click on the
button. You will get a message if you are sure
where you have to click the YES button to delete the current database.
Cache Database Postgres
Replace DB
Replace Postgres databases
To replace a database with another, click on the
button. A window as below will
appear. After you selected the database, which should be replaced, the
software will compare the two databases and list differences (see
below). If differences are found and you still want to replace the
database, click on the [ Enable incongruent
replacement ] button, to allow this.
Then click no the Replace button. The
database that should be replaced will be deleted and the current
database will get the name of the replaced database.
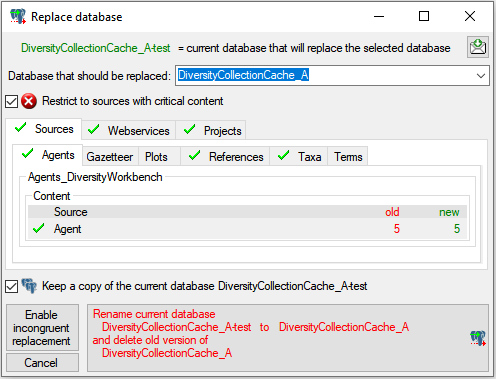
The option Restrict to sources with critical
content will restrict the output of
the test to the main table as well as tables with content regarded as
critical for a replacement. If you deselect this option, all tables will
be listed as shown below.
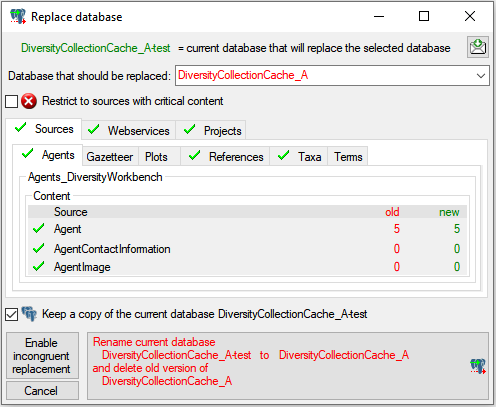
If the number of datasets in a table corresponds in both databases,
this table is regarded as congruent and marked with a
(see above). If content is new, this will be marked with a
and not regarded as critical. On the other hand
missing content will be regarded as critical and marked with a
(see below).
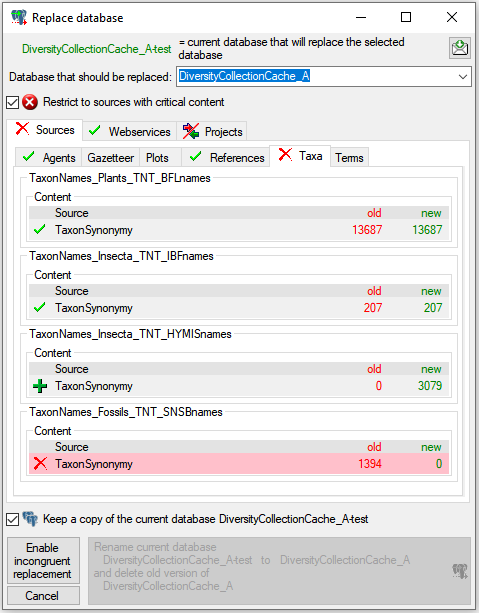
If the number of datasets differ between tables, but are not missing
in eiter, this will be regarded as not critical and marked with
 (see below).
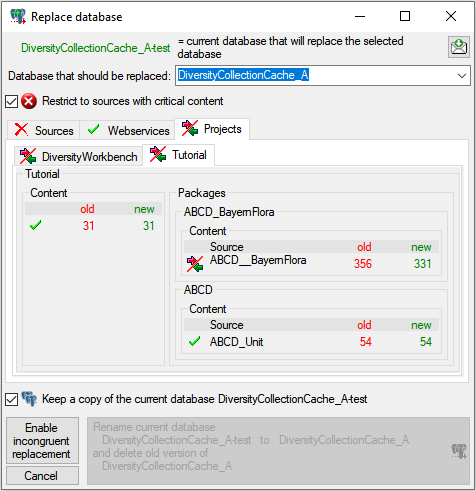
Further states for comparision of the tables are:
- Update when any part needs an update to the
current version.
- Error when a part is missing as a
whole.
With the option Keep a
copy of the current database a copy
of the original database will be kept.
Cache Database
Packages
Administration of the Packages
The formatting of the data according to the specifications of
webservices etc. is done with packages. There is a growing list of
packages provided with the software. For new packages either turn to the
developers or create a package of your own. The packages are realised as
view, functions etc. reading the data in the tables without any changes
to the data. They therefore can be inserted and removed without any
effects on the original data. The naming of the objects within a package
follow the schema [Name of the package]_... as shown in the images
below. For an introduction see a short tutorial
.
To administrate the packages installed within one project, click on
the button. A window as shown below will open
listing all available packages.
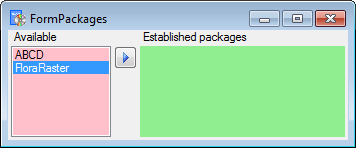
Click on the button to establish the selected
package. To ensure the current version of the package, click on the
Update to vers. ... button (see below).

A window will open where all the needed scripts will be listed. For
packages keeping the data in their own tables like ABCD it may be
necessary to adapt the timeout for database commands. Click on the
button and enter an appropriate value. For large
amounts of data the value 0 is recommended, which means infinite. To
remove a package use the delete button and the
 button to get information about the package.
Data inspection
To inspect the data provided by the package, click on the
button. A window as shown below will open
listing all package related objects. In the case of ABCD BioCASe is
depending on the schema public (see below). For every object (table,
view, column, ... ) the description is shown in the lower part of the
window. With a click on the button you can generate a description of
all objects in the package.
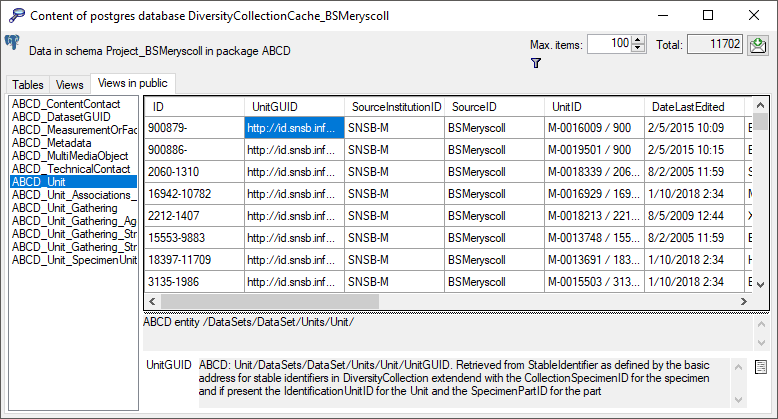
Description
With a click on the button you can generate a
description of all objects in the package (see below).
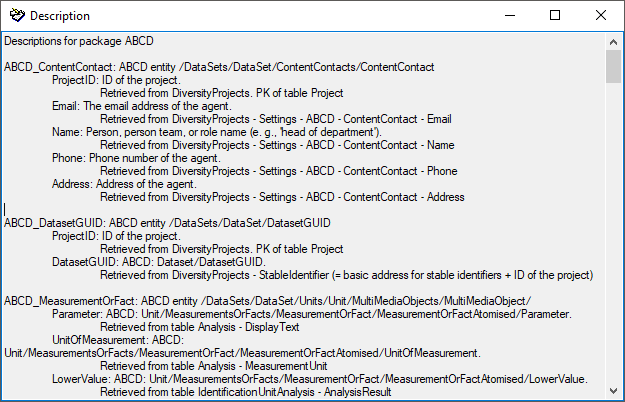
The package ABCD creates additional views in
the schema public as  BioCASE is unable to handle
schemata. Therefore the package ABCD can only be installed for one
project (= schema) in a database. Some packages provide
add-ons to adapt them to special
specifications.
BioCASE is unable to handle
schemata. Therefore the package ABCD can only be installed for one
project (= schema) in a database. Some packages provide
add-ons to adapt them to special
specifications.
Export
To export the content of a package, click on the
button. A window as shown below will open listing
the main views of the package. You can export the data as XML (creating
a directory with one xml file for every view) or as
 SQLite database (creating a SQLite database
containing the tables).
SQLite database (creating a SQLite database
containing the tables).
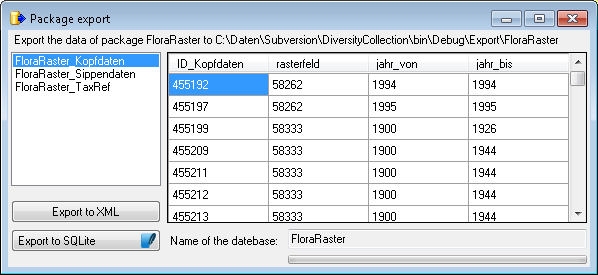
Data transfer
A package (e.g. ABCD) may contain e.g.
materialized views. These need an update after the data have been
transferred to the Postgres database. Click on the
 Transfer data button to update these
views or perform other necessary steps after the data have been
transferred. A window as shown below will open, listing the transfer
steps for the package.
Transfer data button to update these
views or perform other necessary steps after the data have been
transferred. A window as shown below will open, listing the transfer
steps for the package.
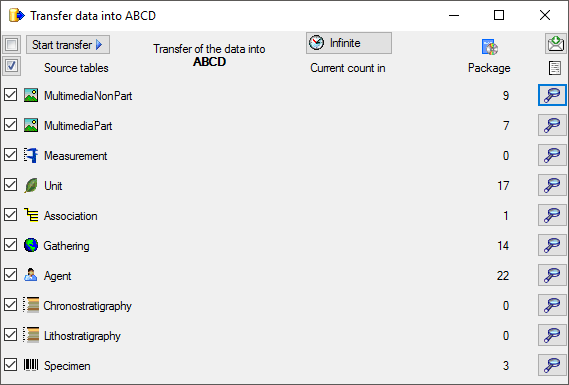
Choose the steps that should be transferred and click on the Start transfer button to transfer the data resp. update
the materialized views.
Subsections of Packages
Cache Database
ABCD
Mapping for the ABCD package
-
ABCD_ContentContact: ABCD entity /DataSets/DataSet/ContentContacts/ContentContact
-
ProjectID: ID of the project.
Retrieved from DiversityProjects. PK of table Project
-
Email: ABCD 2.06 entity /DataSets/DataSet/ContentContacts/ContentContact/Email. The email address of the agent.
Retrieved from DiversityProjects - ProjectAgent - linked via URL to the source in table AgentContactInformation with data retrieved from DiversityAgents - Column Telephone
-
Name: ABCD 2.06 entity /DataSets/DataSet/ContentContacts/ContentContact/Name. The name of the agent.
Retrieved from DiversityProjects - ProjectAgent - linked via URL to the source in table Agent with data retrieved from DiversityAgents -
-
Columns GivenName and InheritedName for persons resp. GivenName for other types
-
Phone: ABCD 2.06 entity /DataSets/DataSet/ContentContacts/ContentContact/Phone. The phone address of the agent.
Retrieved from DiversityProjects - ProjectAgent - linked via URL to the source in table AgentContactInformation with data retrieved from DiversityAgents - Column Email
-
Address: ABCD 2.06 entity /DataSets/DataSet/ContentContacts/ContentContact/Address. The address address of the agent.
Retrieved from DiversityProjects - ProjectAgent - linked via URL to the source in table AgentContactInformation with data retrieved from DiversityAgents - Column Address
-
ABCD_DatasetGUID: ABCD entity /DataSets/DataSet/DatasetGUID
- ProjectID: ID of the project.
Retrieved from DiversityProjects. PK of table Project
- DatasetGUID: ABCD: Dataset/DatasetGUID.
Retrieved from DiversityProjects - StableIdentifier (= basic address for stable identifiers + ID of the project)
-
ABCD_EFG_UnitStratigraphicDetermination_Chronostratigraphy:
- ChronostratigraphicName: ABCD EFG: /EarthScienceSpecimen/UnitStratigraphicDetermination/ChronostratigraphicAttributions/ChronostratigraphicAttribution/ChronostratigraphicName .
Retrieved from column DisplayText in table CacheCollectionEventProperty for Property Chronostratigraphy
-
ABCD_EFG_UnitStratigraphicDetermination_Lithostratigraphy:
LithostratigraphicName: ABCD EFG: /EarthScienceSpecimen/UnitStratigraphicDetermination/LithostratigraphicAttributions/LithostratigraphicAttribution/LithostratigraphicName .
Retrieved from column DisplayText in table CacheCollectionEventProperty for Property Lithostratigraphy
-
ABCD_MeasurementOrFact: ABCD entity /DataSets/DataSet/Units/Unit/MultiMediaObjects/MultiMediaObject/
- Parameter: ABCD: Unit/MeasurementsOrFacts/MeasurementOrFact/MeasurementOrFactAtomised/Parameter.
Retrieved from table Analysis - DisplayText
- UnitOfMeasurement: ABCD: Unit/MeasurementsOrFacts/MeasurementOrFact/MeasurementOrFactAtomised/UnitOfMeasurement.
Retrieved from table Analysis - MeasurementUnit
- LowerValue: ABCD: Unit/MeasurementsOrFacts/MeasurementOrFact/MeasurementOrFactAtomised/LowerValue.
Retrieved from table IdentificationUnitAnalysis - AnalysisResult
- MeasurementDateTime: ABCD: Unit/MeasurementsOrFacts/MeasurementOrFact/MeasurementOrFactAtomised/MeasurementDateTime.
Retrieved from table IdentificationUnitAnalysis - AnalysisDate
- MeasuredBy: ABCD: Unit/MeasurementsOrFacts/MeasurementOrFact/MeasurementOrFactAtomised/MeasuredBy.
Retrieved from table IdentificationUnitAnalysis - ResponsibleName
- AnalysisNumber:
Retrieved from table IdentificationUnitAnalysis - AnalysisNumber
-
ABCD_MetaData: View on original ABCD_Metadata due to case sensitiv naming
-
ABCD_Metadata: ABCD entity /DataSets/DataSet/Metadata
- Description_Representation_Details: ABCD: Dataset/Metadata/Description/Representation/Details.
Retrieved from DiversityProjects - Project - PublicDescription
- Description_Representation_Title: ABCD: Dataset/Metadata/Description/Representation/Title.
Retrieved from DiversityProjects - Settings - ABCD - Dataset - Title
- Description_Representation_URI: ABCD: Dataset/Metadata/Description/Representation/URI.
Retrieved from DiversityProjects - Settings - ABCD - Dataset - URI
- RevisionData_DateModified: ABCD: Dataset/Metadata/RevisionData/DateModified.
Retrieved from the first level SQL-Server cache database for DiversityCollection corresponding to the date and time of the last transfer into the cache database (ProjectPublished.LastUpdatedWhen)
- Owner_EmailAddress: ABCD: Dataset/Metadata/Owners/Owner/EmailAddress.
Retrieved from DiversityProjects - Settings - ABCD - Owner - Email
- Owner_LogoURI: ABCD: Dataset/Metadata/Owners/Owner/LogoURI.
Retrieved from DiversityProjects - Settings - ABCD - Owner - LogoURI
- IPRStatements_Copyright_URI: ABCD: Dataset/Metadata/IPRStatements/Copyrights/Copyright/URI.
Retrieved from DiversityProjects - Settings - ABCD - Copyright - URI
- IPRStatements_Disclaimer_Text: ABCD: Dataset/Metadata/IPRStatements/Disclaimers/Disclaimer/Text.
Retrieved from DiversityProjects - Settings - ABCD - Disclaimers - Text
- IPRStatements_Disclaimer_URI: ABCD: Dataset/Metadata/IPRStatements/Disclaimers/Disclaimer/URI.
Retrieved from DiversityProjects - Settings - ABCD - Disclaimers - URI
- IPRStatements_License_Text: ABCD: Dataset/Metadata/IPRStatements/Licenses/License/Text.
Retrieved from DiversityProjects - Settings - ABCD - Disclaimers - Text
- IPRStatements_License_URI: ABCD: Dataset/Metadata/IPRStatements/Licenses/License/URI.
Retrieved from DiversityProjects - Settings - ABCD - Disclaimers - URI
- IPRStatements_TermsOfUse_Text: ABCD: Dataset/Metadata/IPRStatements/TermsOfUseStatements/TermsOfUse/Text.
Retrieved from DiversityProjects - Settings - ABCD - TermsOfUse - Text
- Owner_Organisation_Name_Text: ABCD: Dataset/Metadata/Owners/Owner/Organisation/Name/Representation/Text.
Retrieved from DiversityProjects - Settings - ABCD - Owner - OrganisationName
- Owner_Organisation_Name_Abbreviation: ABCD: Dataset/Metadata/Owners/Owner/Organisation/Name/Representation/Abbreviation.
Retrieved from DiversityProjects - Settings - ABCD - Owner - OrganisationAbbrev
- Owner_Address: ABCD: Dataset/Metadata/Owners/Owner/Addresses/Address.
Retrieved from DiversityProjects - Settings - ABCD - Owner - Address
- Owner_Telephone_Number: ABCD: Dataset/Metadata/Owners/Owner/TelephoneNumbers/TelephoneNumber/Number.
Retrieved from DiversityProjects - Settings - ABCD - Owner - Telephone
- IPRStatements_IPRDeclaration_Text: ABCD: Dataset/Metadata/IPRStatements/IPRDeclarations/IPRDeclaration/Text.
Retrieved from DiversityProjects - Settings - ABCD - IPR - Text
- IPRStatements_IPRDeclaration_Details: ABCD: Dataset/Metadata/IPRStatements/IPRDeclarations/IPRDeclaration/Details.
Retrieved from DiversityProjects - Settings - ABCD - IPR - Details
- IPRStatements_IPRDeclaration_URI: ABCD: Dataset/Metadata/IPRStatements/IPRDeclarations/IPRDeclaration/URI.
Retrieved from DiversityProjects - Settings - ABCD - IPR - URI
- IPRStatements_Copyright_Text: ABCD: Dataset/Metadata/IPRStatements/Copyrights/Copyright/Text.
Retrieved from DiversityProjects - Settings - ABCD - Copyright - Text
- IPRStatements_Copyright_Details: ABCD: Dataset/Metadata/IPRStatements/Copyrights/Copyright/Details.
Retrieved from DiversityProjects - Settings - ABCD - Copyright - Details
- IPRStatements_License_Details: ABCD: Dataset/Metadata/IPRStatements/Licenses/License/Details.
Retrieved from DiversityProjects - Settings - ABCD - Disclaimers - Details
- IPRStatements_TermsOfUse_Details: ABCD: Dataset/Metadata/IPRStatements/TermsOfUseStatements/TermsOfUse/Details.
Retrieved from DiversityProjects - Settings - ABCD - TermsOfUse - Details
- IPRStatements_TermsOfUse_URI: ABCD: Dataset/Metadata/IPRStatements/TermsOfUseStatements/TermsOfUse/URI.
Retrieved from DiversityProjects - Settings - ABCD - TermsOfUse - URI
- IPRStatements_Disclaimer_Details: ABCD: Dataset/Metadata/IPRStatements/Disclaimers/Disclaimer/Details.
Retrieved from DiversityProjects - Settings - ABCD - Disclaimers - Details
- IPRStatements_Acknowledgement_Text: ABCD: Dataset/Metadata/IPRStatements/Acknowledgements/Acknowledgement/Text.
Retrieved from DiversityProjects - Settings - ABCD - Acknowledgements - Text
- IPRStatements_Acknowledgement_Details: ABCD: Dataset/Metadata/IPRStatements/Acknowledgements/Acknowledgement/Details.
Retrieved from DiversityProjects - Settings - ABCD - Acknowledgements - Details
- IPRStatements_Acknowledgement_URI: ABCD: Dataset/Metadata/IPRStatements/Acknowledgements/Acknowledgement/URI.
Retrieved from DiversityProjects - Settings - ABCD - Acknowledgements - URI
- IPRStatements_Citation_Text: ABCD: Dataset/Metadata/IPRStatements/Citations/Citation/Text.
Retrieved from DiversityProjects:
First dataset in table ProjectReference where type = ‘BioCASe (GFBio)’.
Authors from table ProjectAgent with type = ‘Author’ according to their sequence. If none are found ‘Anonymous’.
Current year. Content of column ProjectTitle in table Project.
Marker ‘[Dataset]’.
‘Version: ’ + date of transfer into the ABCD tables as year + month + day: yyyymmdd.
If available publishers: ‘Data Publisher: ’ + Agents with role ‘Publisher’ from table ProjectAgent. URI from table ProjectReference if present.
If entry in table ProjectReference is missing taken from Settings - ABCD - Citations - Text
- IPRStatements_Citation_Details: ABCD: Dataset/Metadata/IPRStatements/Citations/Citation/Details.
Retrieved from DiversityProjects - Settings - ABCD - Citations - Details
- IPRStatements_Citation_URI: ABCD: Dataset/Metadata/IPRStatements/Citations/Citation/URI.
Retrieved from DiversityProjects - Settings - ABCD - Citations - URI
- DatasetGUID: ABCD: Dataset/DatasetGUID.
Retrieved from DiversityProjects - StableIdentifier (= basic address for stable identifiers + ID of the project)
-
ABCD_MultiMediaObject: ABCD entity /DataSets/DataSet/Units/Unit/MultiMediaObjects/MultiMediaObject/
- fileUri: ABCD: Unit/MultiMediaObjects/MultiMediaObject/FileURI.
Retrieved from table CollectionSpecimenImage - URI
- fileFormat: ABCD: Unit/MultiMediaObjects/MultiMediaObject/Format.
Retrieved from table CollectionSpecimenImage - URI - extension
- DisplayOrder:
Retrieved from table CollectionSpecimenImage - DisplayOrder converted to 8 digit text with leading 0
- ProductURI: ABCD: Unit/MultiMediaObjects/MultiMediaObject/ProductURI.
Retrieved from table CollectionSpecimenImage - URI. For projects where a high resolution image is available, the path of the high resolution image
- IPR_License_Text: ABCD: Unit/MultiMediaObjects/MultiMediaObject/IPR/Licenses/License/Text.
Retrieved from table CollectionSpecimenImage - LicenseType
- IPR_License_Details: ABCD: Unit/MultiMediaObjects/MultiMediaObject/IPR/Licenses/License/Details.
Retrieved from table CollectionSpecimenImage - LicenseNotes
- IPR_License_URI: ABCD: Unit/MultiMediaObjects/MultiMediaObject/IPR/Licenses/License/Details.
Retrieved from table CollectionSpecimenImage - LicenseURI
- CreatorAgent: ABCD: Unit/MultiMediaObjects/MultiMediaObject/Creator.
Retrieved from table CollectionSpecimenImage - CreatorAgent
- IPR_Copyright_Text: ABCD: Unit/MultiMediaObjects/Copyrights/Copyright/Text.
Retrieved from table CollectionSpecimenImage - CopyrightStatement with inserted ©
- IPR_TermsOfUse_Text: ABCD: Unit/MultiMediaObjects/TermsOfUseStatements/TermsOfUse/Text.
Retrieved from DiversityProjects - Settings - ABCD - TermsOfUse - Text
-
ABCD_TechnicalContact: ABCD entity /DataSets/DataSet/TechnicalContacts/TechnicalContact
-
ProjectID: ID of the project.
Retrieved from DiversityProjects. PK of table Project
-
Email: ABCD 2.06 entity /DataSets/DataSet/TechnicalContacts/TechnicalContact/Email. The email address of the agent.
Retrieved from DiversityProjects - ProjectAgent - linked via URL to the source in table AgentContactInformation with data retrieved from DiversityAgents - Column Telephone
-
Name: ABCD 2.06 entity /DataSets/DataSet/TechnicalContacts/TechnicalContact/Name. The name of the agent.
Retrieved from DiversityProjects - ProjectAgent - linked via URL to the source in table Agent with data retrieved from DiversityAgents -
Columns GivenName and InheritedName for persons resp. GivenName for other types
-
Phone: ABCD 2.06 entity /DataSets/DataSet/TechnicalContacts/TechnicalContact/Phone. The phone of the agent.
Retrieved from DiversityProjects - ProjectAgent - linked via URL to the source in table AgentContactInformation with data retrieved from DiversityAgents - Column Email
-
Address: ABCD 2.06 entity /DataSets/DataSet/TechnicalContacts/TechnicalContact/Address. The address of the agent.
Retrieved from DiversityProjects - ProjectAgent - linked via URL to the source in table AgentContactInformation with data retrieved from DiversityAgents - Column Address
-
ABCD_Unit:
-
ABCD_Unit_Associations_UnitAssociation: ABCD entity /DataSets/DataSet/Units/Unit/Associations/UnitAssociation
- AssociatedUnitID: ABCD: Unit/Associations/UnitAssociation/AssociatedUnitID.
Retrieved from DiversityCollection: AccessionNumber of the associated specimen if present, otherwise the CollectionSpecimenID + ’ / ’ + IdentificationUnitID of the Unit + only if a part is present ’ / ’ + AccessionNumber of the part if present otherwise SpecimenPartID
- SourceInstitutionCode: ABCD: Unit/Associations/UnitAssociation/AssociatedUnitSourceInstitutionCode.
Retrieved from DiversityProjects - Settings - ABCD - Source - InstitutionID
- SourceName: ABCD: Unit/Associations/UnitAssociation/AssociatedUnitSourceName.
Retrieved from DiversityProjects, column Project in table Project
- AssociationType: ABCD: Unit/Associations/UnitAssociation/AssociationType.
Retrieved from DiversityCollection, column RelationType in table IdentificationUnit
AssociationType_Language: ABCD: Unit/Associations/UnitAssociation/AssociationType.
Retrieved from View = en
- Comment: ABCD: Unit/Associations/UnitAssociation/Comment.
Retrieved from DiversityCollection, column RelationType + ’ on ’ + LastIdentificationCache from table IdentificationUnit from the related unit
- Comment_Language: ABCD: Unit/Associations/UnitAssociation/Comment.
Retrieved from View = en
- IdentificationUnitID:
Retrieved from DiversityCollection, column IdentificationUnitID from table IdentificationUnit
- UnitID: ABCD: Unit/Associations/UnitAssociation/AssociatedUnitID.
Retrieved from DiversityCollection, CollectionSpecimenID of specimen + ‘-’ + IdentificationUnitID of unit + ‘-’ + SpecimenPartID of part if part is present
- KindOfUnit:
Retrieved from DiversityCollection, column MaterialCategory in table CollectionSpecimenPart
- SpecimenPartID:
Retrieved from DiversityCollection, column SpecimenPartID in table CollectionSpecimenPart
- CollectionSpecimenID:
Retrieved from DiversityCollection, column CollectionSpecimenID in table CollectionSpecimen
-
ABCD_Unit_Gathering: ABCD entity /DataSets/DataSet/Units/Unit/Gathering
Country_Name: ABCD: Unit/Gathering/Country/Name.
Retrieved from column CountryCache in table CollectionEvent
- ISO3166Code: ABCD: Unit/Gathering/Country/ISO3166Code.
Retrieved from DiversityGazetteer according to column CountryCache in table CollectionEvent
- DateTime_ISODateTimeBegin: ABCD: Unit/Gathering/DateTime/ISODateTimeBegin.
Retrieved from columns CollectionYear, CollectionMonth and CollectionDay in table CollectionEvent
- LocalityText: ABCD: Unit/Gathering/LocalityText.
Retrieved from column LocalityDescription in table CollectionEvent
- SiteCoordinateSets_CoordinatesLatLong_LatitudeDecimal: ABCD: Unit/Gathering/SiteCoordinateSets/SiteCoordinates/CoordinatesLatLong/LatitudeDecimal.
Retrieved from column AverageLatitudeCache in table CollectionEventLocalisation depending on the sequence defined for the project
- SiteCoordinateSets_CoordinatesLatLong_LongitudeDecimal: ABCD: Unit/Gathering/SiteCoordinateSets/SiteCoordinates/CoordinatesLatLong/LongitudeDecimal.
Retrieved from column AverageLongitudeCache in table CollectionEventLocalisation depending on the sequence defined for the project
- IdentificationUnitID:
Retrieved from column IdentificationUnitID in table IdentificationUnit
- SiteCoordinateSets_CoordinatesLatLong_SpatialDatum: ABCD: Unit/Gathering/SiteCoordinateSets/SiteCoordinates/CoordinatesLatLong/SpatialDatum.
Retrieved from View = WGS84
-
ABCD_Unit_Gathering_Agents: ABCD entity /DataSets/DataSet/Units/Unit/Gathering
- GatheringAgent_AgentText: ABCD: Unit/Gathering/Agents/GatheringAgent/AgentText.
Retrieved from columns CollectorsName + if present ’ (no. ’ + CollectorsNumber + ‘)’ in table CollectionAgent
- CollectionSpecimenID:
Retrieved from column CollectionSpecimenID in table CollectionAgent
-
ABCD_Unit_Gathering_Stratigraphy_ChronostratigraphicTerm: ABCD entity /DataSets/DataSet/Units/Unit/Gathering
- Term: ABCD: Unit/Gathering/Stratigraphy/ChronostratigraphicTerms/ChronostratigraphicTerm.
Retrieved from column DisplayText in table CacheCollectionEventProperty for Property Chronostratigraphy
-
ABCD_Unit_Gathering_Stratigraphy_LithostratigraphicTerm: ABCD entity /DataSets/DataSet/Units/Unit/Gathering
- Term: ABCD: Unit/Gathering/Stratigraphy/LithostratigraphicTerms/LithostratigraphicTerm.
Retrieved from column DisplayText in table CacheCollectionEventProperty for Property Lithostratigraphy
-
ABCD_Unit_Identification_Extension_EFG: ABCD entity /DataSets/DataSet/Units/Unit/
-
ABCD_Unit_SpecimenUnit: ABCD search type within an identification unit
- NomenclaturalTypeDesignation_TypifiedName_FullScientificName: ABCD: /DataSets/DataSet/Units/Unit/SpecimenUnit/NomenclaturalTypeDesignations/NomenclaturalTypeDesignation/TypifiedName/FullScientificNameString.
Retrieved from TaxonomicName in table Identification
- NomenclaturalTypeDesignation_TypeStatus: ABCD: /DataSets/DataSet/Units/Unit/SpecimenUnit/NomenclaturalTypeDesignations/NomenclaturalTypeDesignation/TypeStatus.
Retrieved from column TypeStatus in table Identification
- Preparation_PreparationType: ABCD: /DataSets/DataSet/Units/Unit/SpecimenUnit/Preparations/Preparation/PreparationType.
Retrieved from column MaterialCategory in table CollectionSpecimenPart and translated according to GBIF definitions resp. no treatment for observations
Cache Database Packages
Add Ons
Administration of the Add-Ons for Packages
For certain packages there are add-ons available to adapt a package to
the special specifications of e.g. a project. To add an add-on, click
on the  button as shown below. A window as
shown below will open listing all available add-ons.
button as shown below. A window as
shown below will open listing all available add-ons.
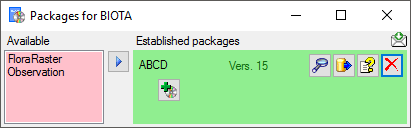
After the add-on has been added, you need to update it to the current
version of the add on with a click on the Update to vers. ...
button (see below). A window will open where all
the needed scripts will be listed. Some add-ons are exclusive, meaning
that no further add-ons can be added and further updates of the package
are organized via the add-on as shown below. To remove an add-on you
have to remove the package with a click on the
button. With a click on the button to get
information about the add-on.
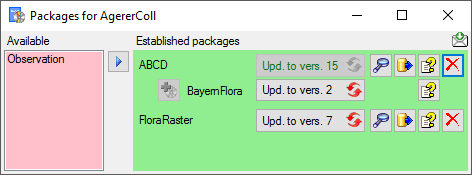
An Add-on defines a version of the package it is compatible with.
Add-ons can not be removed as they perform canges in the package. To
remove an Add-on, remove the package and reinstall it. If a package
containing an Add-on needs an update you have to remove the package as
well and reinstall it.
Diversity Collection
BioCASE
To publish your data on portals like GBIF data
can be provided in the ABCD
standard using
BioCASe
for mapping your data (see below). Use the
ABCD package to convert the data into a format prepared for BioCASe.
Configure the database and map the
fields according to the examples.

For details about the BioCASe software please see the provided
documentation.
DiversityCollection transfers the data for every project in a separate
schema. As BioCASe so far is unable to handle schemata in Postgres
additional views for the package ABCD are created in the schema public
and you need to provide a single database for every project.
Step by Step
To provide the data for BioCASe you need to transfer the data from
DiversityCollection together with all auxiliary sources (Taxa,
References, Gazetteer) depending on your data from the
SQL-Server database to the
SQL-Server cache database and from there to
the Postgres cache database. In the
Postgres database you need the package ABCD
for mapping your data to BioCASe.
The metadata for ABCD are taken from the project data in the module
DiversityProjects to which the data in DiversityCollection are linked
to. The metadata include links to DiversityAgents within
DiversityProjects. That means that to receive all needed data in the
project you must ensure that the agent data used within the project have
been transferred to the Cache database as well. If addresses of the
agents are needed, these must be unlocked. For further information see
the manuals within DiversityProjects and DiversityAgents. The table
below shows the source for several ABCD nodes.
| Database |
Table |
Column |
ABCD |
Node |
| DiversityAgents |
Agent |
|
|
|
| DiversityAgents |
AgentContactInformation |
Email |
|
|
| DiversityAgents |
AgentContactInformation |
Address |
|
|
| DiversityProjects |
Project |
|
|
|
These metadata are defined as Settings as
shown below as children of the setting ABCD. The following ABCD topics
are taken from the settings in DiversityProjects:
- TaxonomicGroup
- Dataset including GUID, Coverage, Version, Creators, Icon, Dates
etc.
- TechnicalContact
- ContentContact
- OtherProvider
- Source
- Owner
- IPR
- Copyright
- TermsOfUse
- Disclaimers
- Acknowledgements
- Citations (if Reference is missing - see below)
- RecordBasis
- RecordURI
- KindOfUnit
- HigherTaxonRank
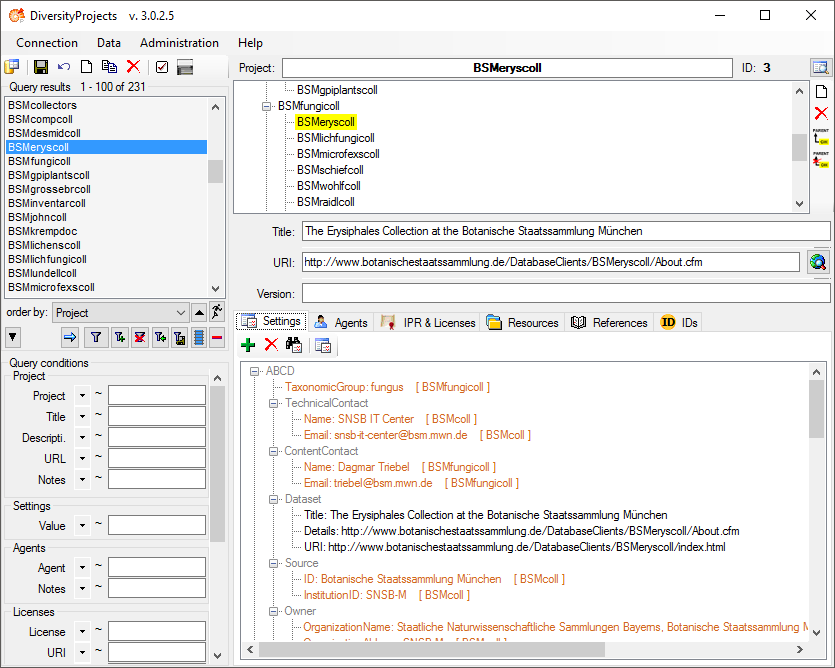
For further information about the configuration of the settings in
DiversityProjects, please see the manual for this module.
The DatasetGUID in ABCD is taken from the stable identifier defined in
the module DiversityProjects for the database in combination with the ID
of the project. To set the stable identifier choose Administration -
Stable identifier from the menu in DiversityProjects
and enter the basic path (e.g. see below). This stable identifier can
only be set once. After it is set you will get a message as shown below.
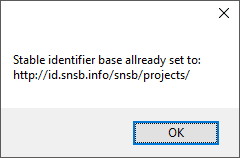
The license information for ABCD are taken from the first entry in the
 IPR & Licenses section in DiversityProjects
(see below) where the first entry is the one entered first.
IPR & Licenses section in DiversityProjects
(see below) where the first entry is the one entered first.
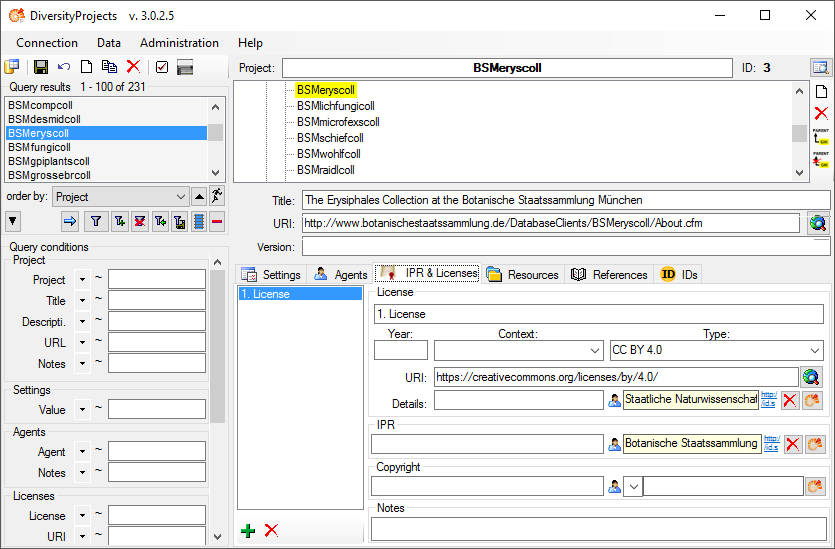
Metadata - Citation text
The citation for the project follows the form [<Authors>].]
[<Title>][. [Dataset]. Data Publisher:]
[<Data_center_name>]. [<URI>].
The Authors are taken from the
Agents section (see below) where all agents with the role
Author are included according to their sequence in the list
and separated by ;.
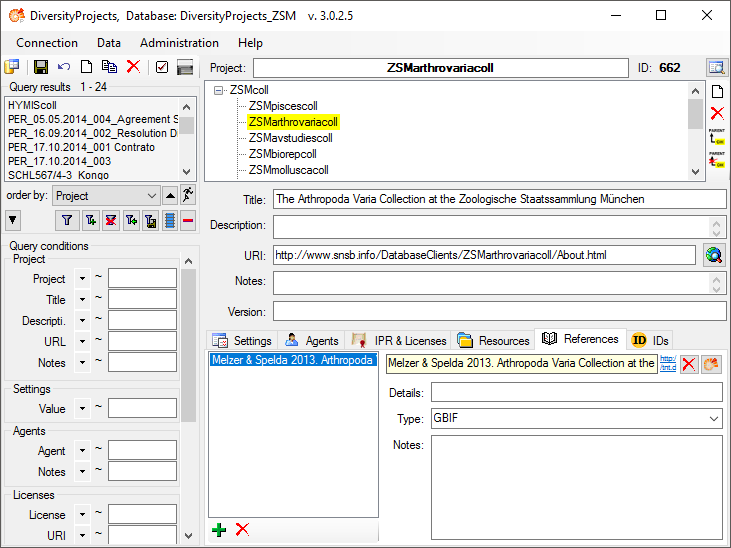
The [<Publication_year>] is the year of the publication i.e.the current year. The [ <Title>] corresponds to the[Title] of the project. The [<Data_center_name>] istaken from the Agents section.
Here the first agent with the role Publisher is used. The
[<URI>] is taken from the field URI of the citation with the
type BioCASe (GFBio) in the  Citations & References section (see below).
Gathering - IsoCode
The IsoType for a country is taken from corresponding information in the
module DiversityGazetteer. To ensure these information is available in
the cache database, insert a source for a gazetteer project containing
this information (see below).
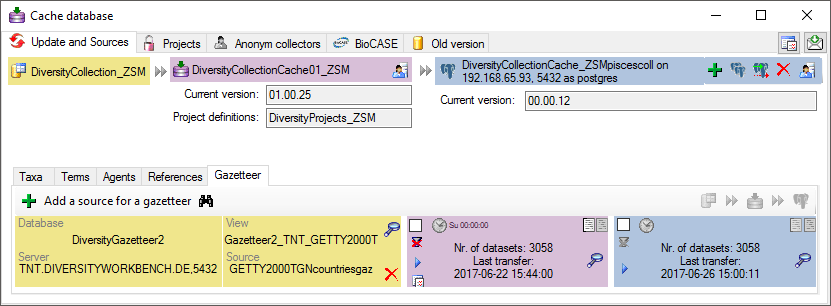
Identification
The ABCD schema provided with this software is NOT including information
from the module DiversityTaxonNames, so sources for Taxa are not needed
by default. If for your own needs you decide to add additional data for
the identifications from the module DivesityTaxonNames, ensure that the
data corresponding to the names in your identifications are transferred
from DiversityTaxonNames (see below).

Postgres database
The package ABCD providing the objects for mapping your data for BioCASE
contains objects in the schema public. Therefore you need one database
for every project you want to provide for BioCASE and the sources
mentioned above have to be transferred in each of these databases.
Transfer
To provide the data for BioCASE you need to transfer all auxiliary
sources as described above (Taxa, References, Gazetteer) depending on
your data and the project data themselves from the SQL-Server databases
to the SQL-Server cache database
and from there to the Postgres cache
database . The package itself needs a
further transfer step
if data have been changed after the creation of the package as the parts
of the data in the Postgres database are imported into tables or
materialized views according to the specifications of ABCD.

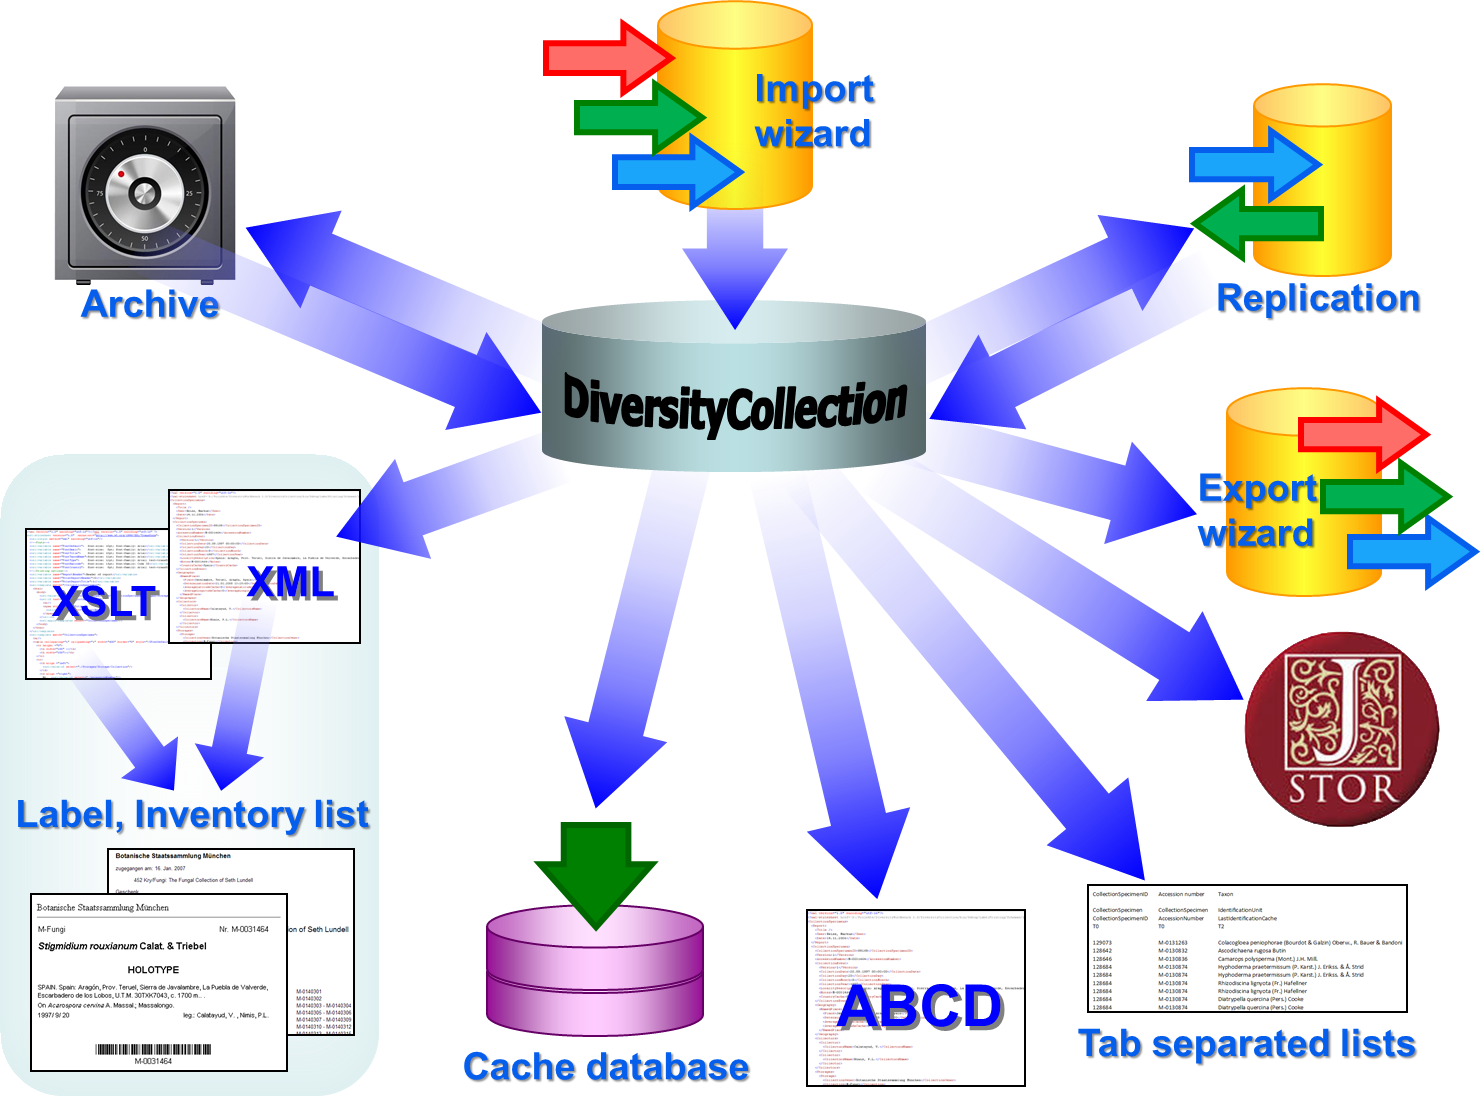


 Create archive... from the menu. A window as shown below will open.
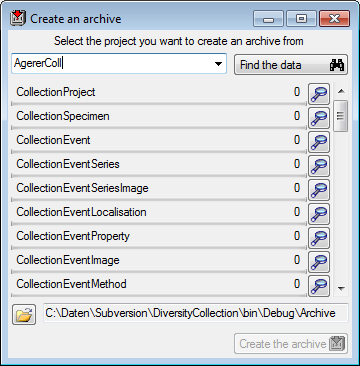
 button. The data related
with the project will be imported into temporary tables to allow you to
inspect them in advance of the creation of the archive (use the
button. The data related
with the project will be imported into temporary tables to allow you to
inspect them in advance of the creation of the archive (use the  Reset
database... from the menu. A window as shown below will open listing
all tables and the number of data within these tables. Click on the
Reset database
Reset
database... from the menu. A window as shown below will open listing
all tables and the number of data within these tables. Click on the
Reset database 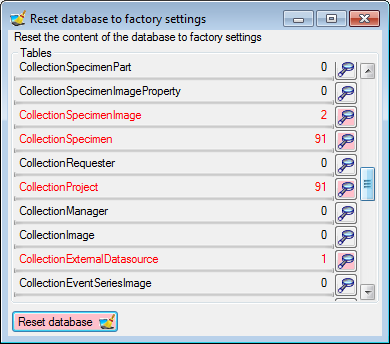
 Restore archive... from the menu. A
window as shown below will open listing the tables in the database. To
restore an archive click on the Choose archive directory
Restore archive... from the menu. A
window as shown below will open listing the tables in the database. To
restore an archive click on the Choose archive directory  button to import the data from the XML files
into temporary tables.
button to import the data from the XML files
into temporary tables.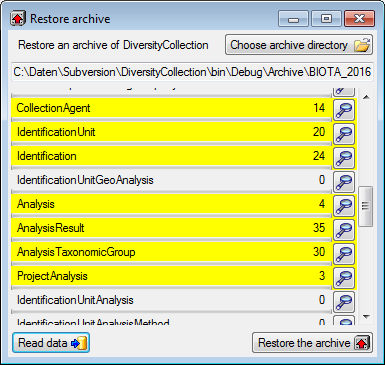
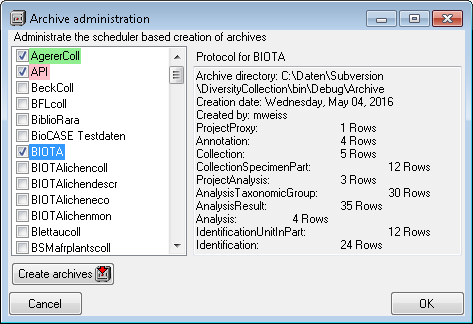
 Next to the data, the archive files contain a xsd description of the
tables. To create xsd schemata independent of the content, select Data - Archive- Create schema from the menu. A windows as shown below will open
with the list of all tables where the main tables of the database are
preselected.
Next to the data, the archive files contain a xsd description of the
tables. To create xsd schemata independent of the content, select Data - Archive- Create schema from the menu. A windows as shown below will open
with the list of all tables where the main tables of the database are
preselected.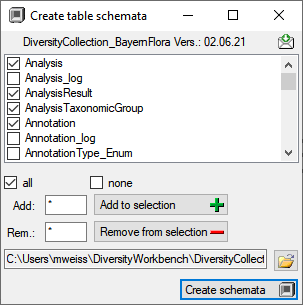
 using the Export function for
 .
. .
. Bavarikon


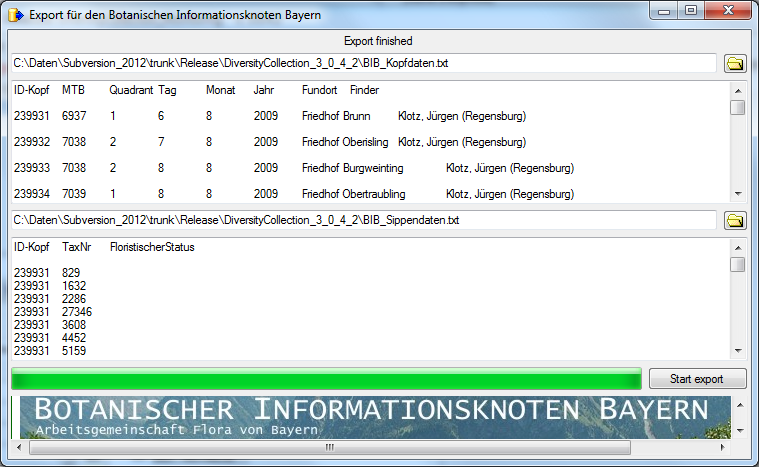

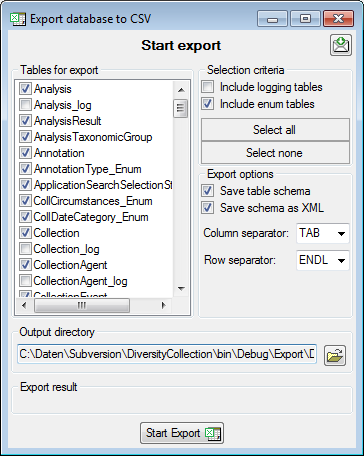
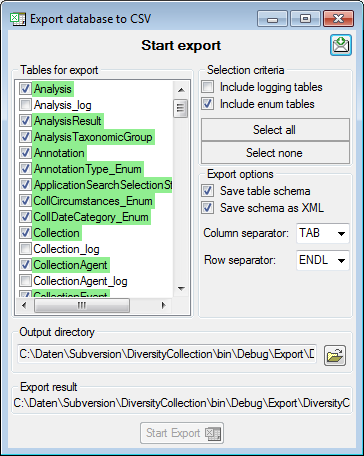
 Cut out parts,
 Replace text and apply Calculations
Σ or Filters
Replace text and apply Calculations
Σ or Filters
 buttons to add or remove
values from the list or the
buttons to add or remove
values from the list or the  Export content into file or
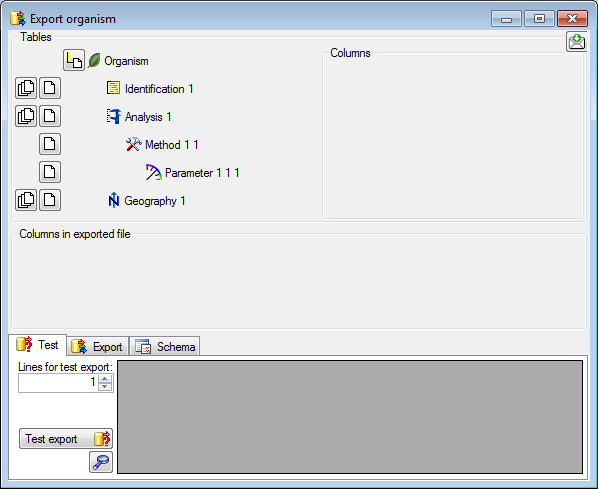
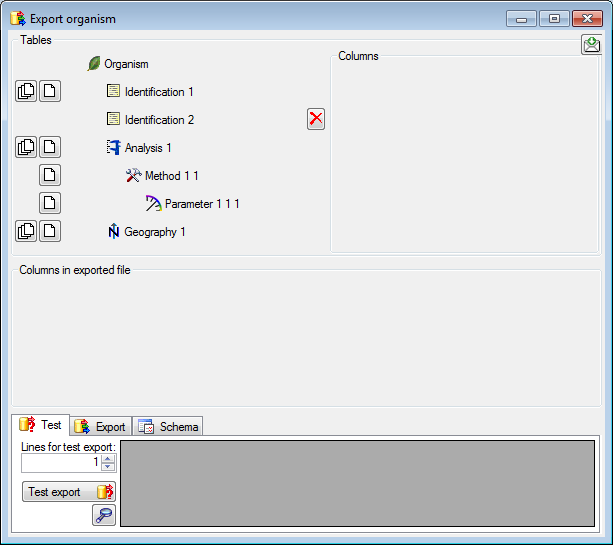
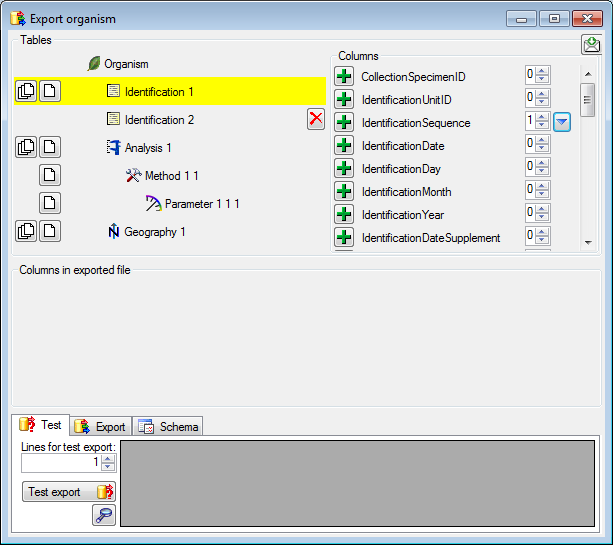


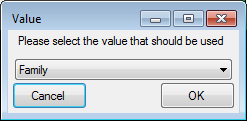
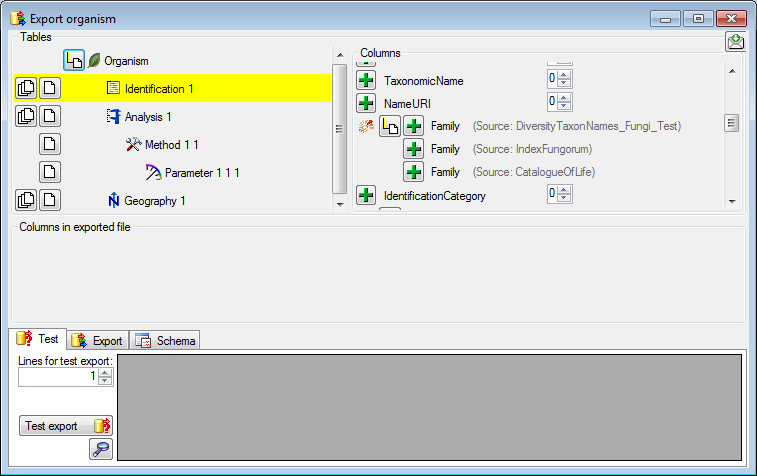
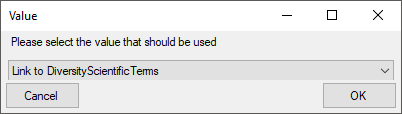
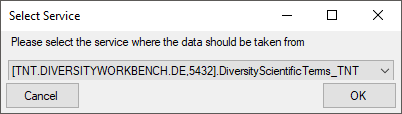
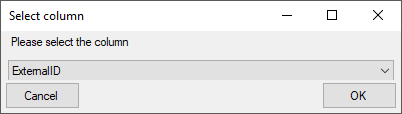


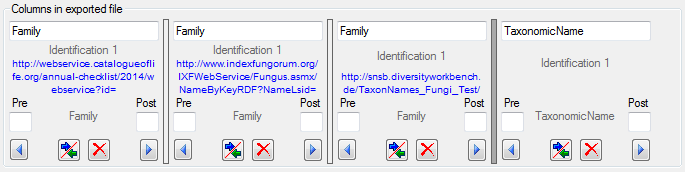

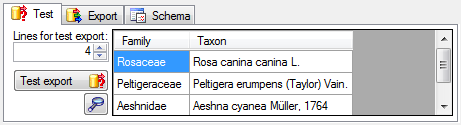
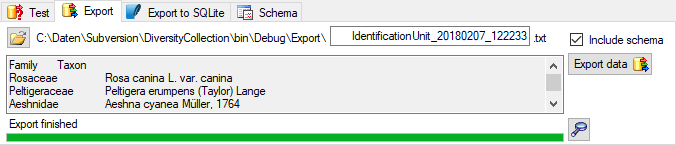

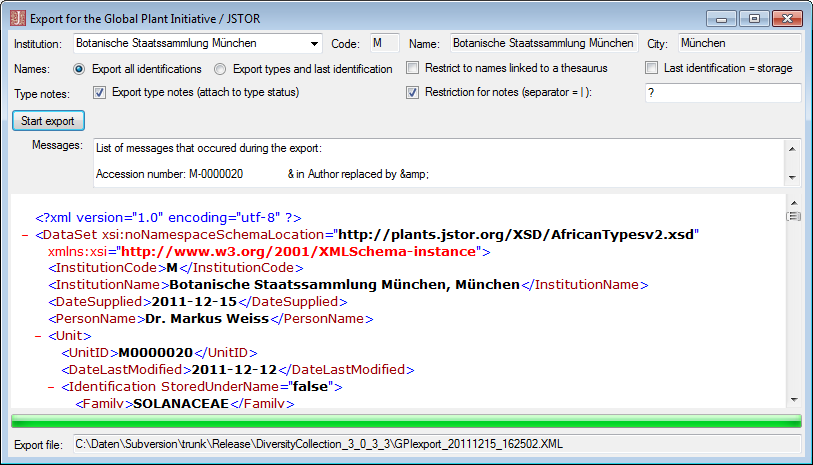
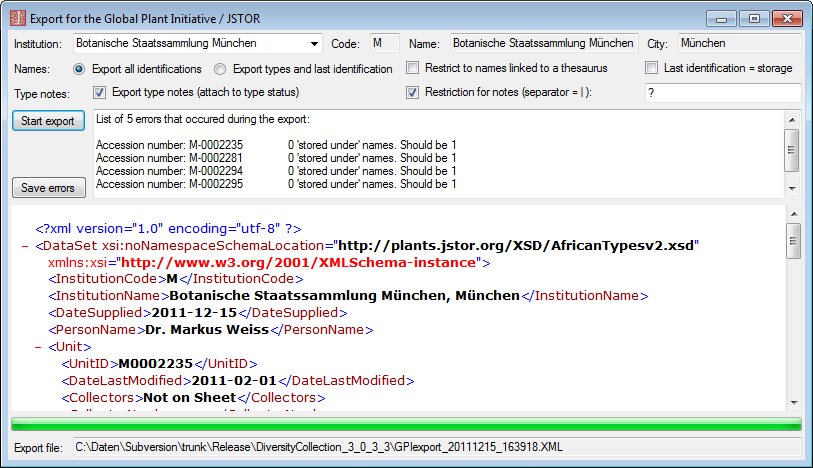

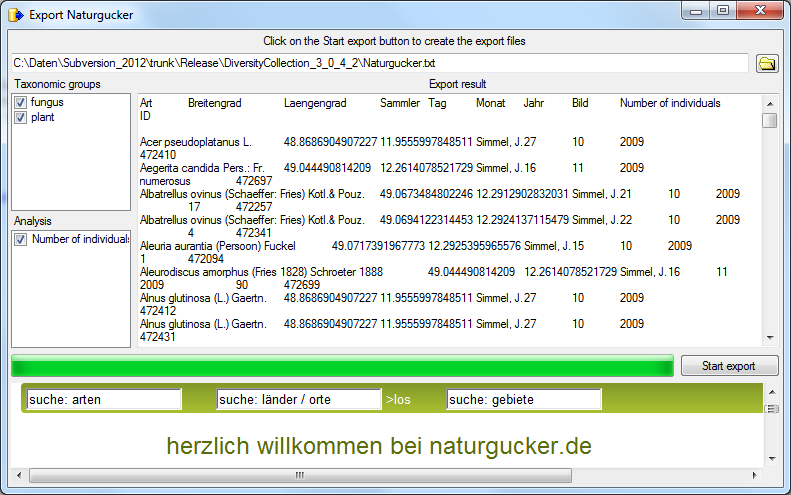

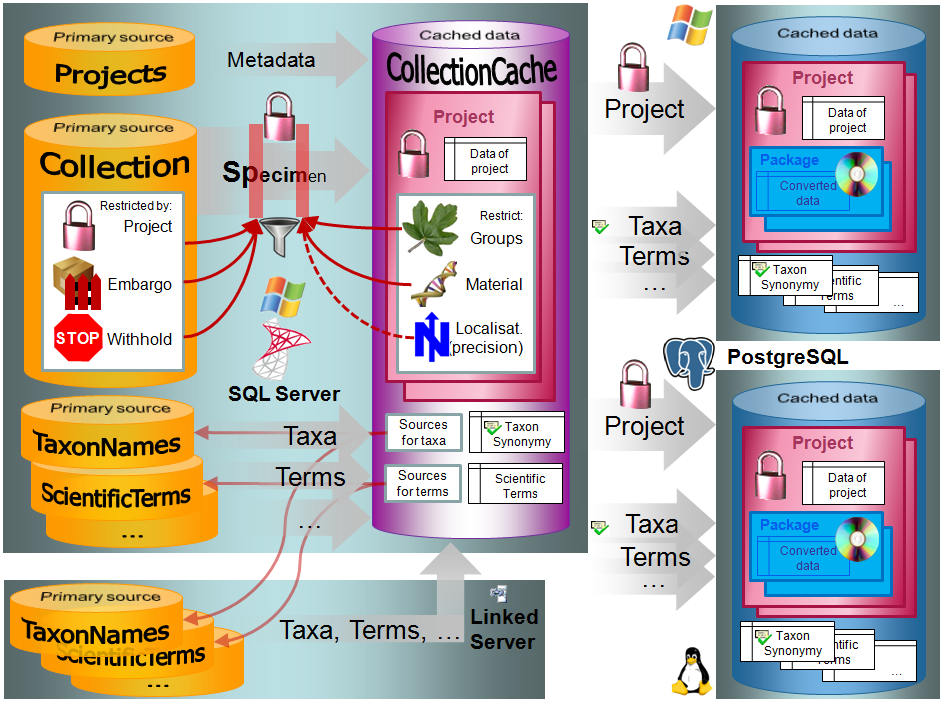
 and synonyms are
transferred into the cache database and may be retrieved from the local
server or a
and synonyms are
transferred into the cache database and may be retrieved from the local
server or a 


 GFBio to open a window as shown below. Enter
the login data (User + Password) and the Key of the project.
To retrieve the data, click on the Connect
GFBio to open a window as shown below. Enter
the login data (User + Password) and the Key of the project.
To retrieve the data, click on the Connect  button. The software will retrieve the data provided for the project, as
shown below. Information concerning agents will be taken from the
selected DiversityAgents database, and the project selected within this
database. The GFBio portal does not enforce roles for all the agents
entered. If you want to add a role for agents where no role has been given
in the GFBio portal, you may choose a default.
button. The software will retrieve the data provided for the project, as
shown below. Information concerning agents will be taken from the
selected DiversityAgents database, and the project selected within this
database. The GFBio portal does not enforce roles for all the agents
entered. If you want to add a role for agents where no role has been given
in the GFBio portal, you may choose a default.

 DiversityAgents, but are valid for any other module as well.
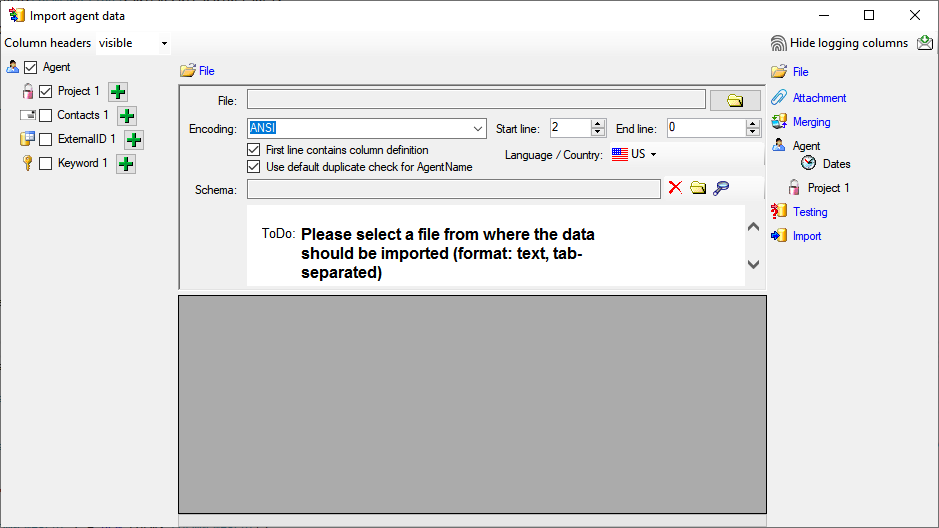
 Record all SQL statements.
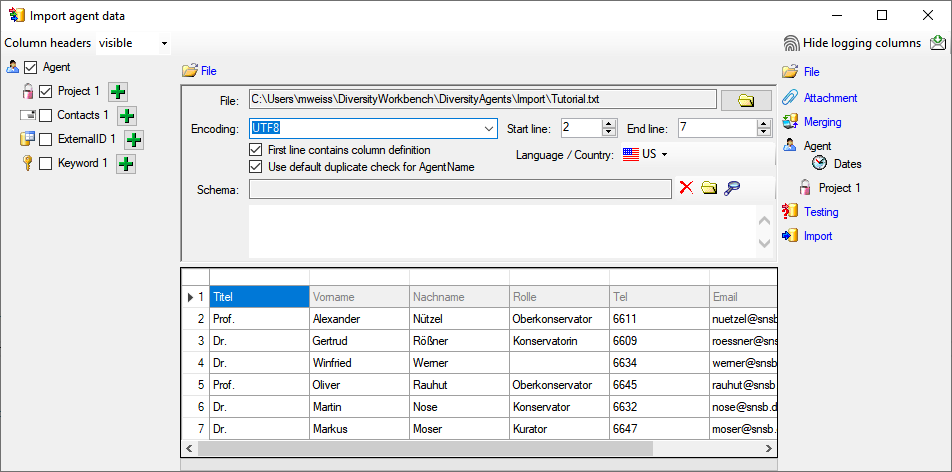
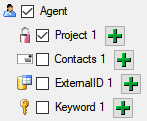
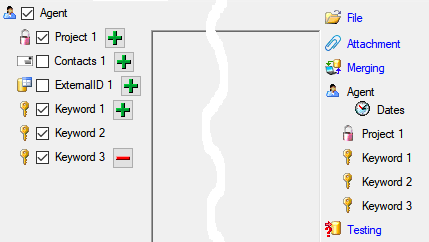
 include logging columns button in the header line. This will include additional substeps for every step containing the
logging columns (see below). If you do not import these data, they will
be automatically filled by default values like the current time and
user.
include logging columns button in the header line. This will include additional substeps for every step containing the
logging columns (see below). If you do not import these data, they will
be automatically filled by default values like the current time and
user.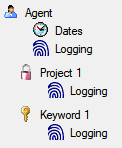
 Attach
them to data in the database. Select the import step
Attach
them to data in the database. Select the import step
 Import as new data or one of the
columns the attachment columns offered like SeriesCode in the table
Series in the example below.
Import as new data or one of the
columns the attachment columns offered like SeriesCode in the table
Series in the example below.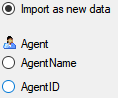

 Merge them with data in the
database. Select the import step
Merge them with data in the
database. Select the import step  Insert,
  Merge,
 Update and
  Key columns (see below). If no matching data are
found in the database, the data from the file will be imported.
Otherwise the data will be updated.
Key columns (see below). If no matching data are
found in the database, the data from the file will be imported.
Otherwise the data will be updated.
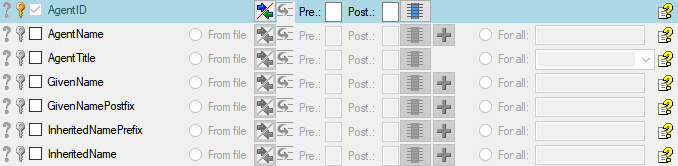
 = If data will be imported depends on the content of decisive
columns, so at least one must be selected.
= If data will be imported depends on the content of decisive
columns, so at least one must be selected. = You have
to select a value from the provided list
= You have
to select a value from the provided list = You have to enter
a value used for all datasets
= You have to enter
a value used for all datasets - To test if all requirements for the import are met use the
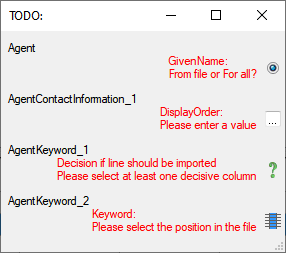
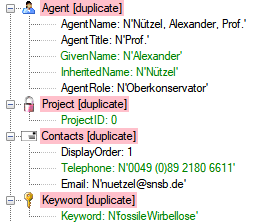


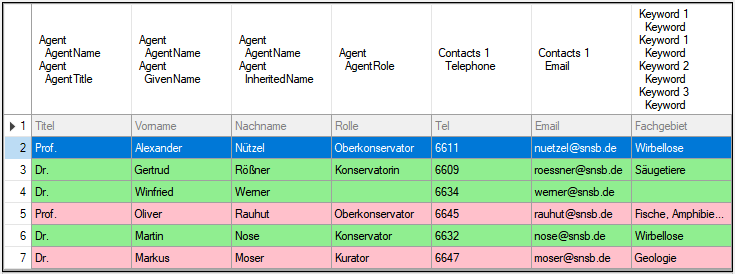
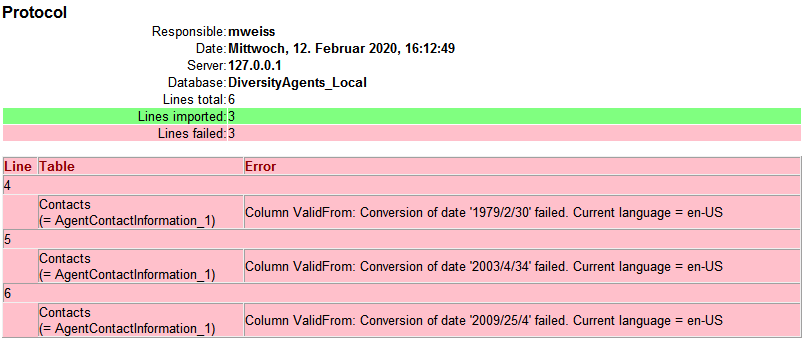

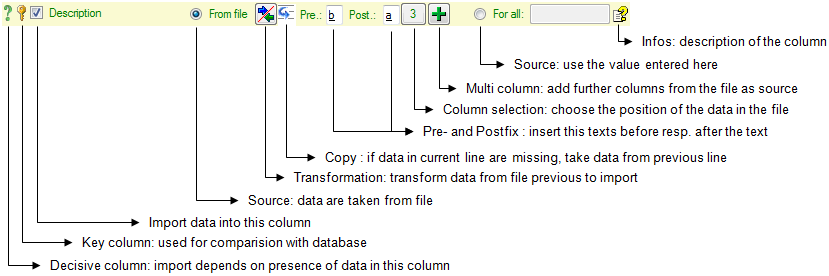


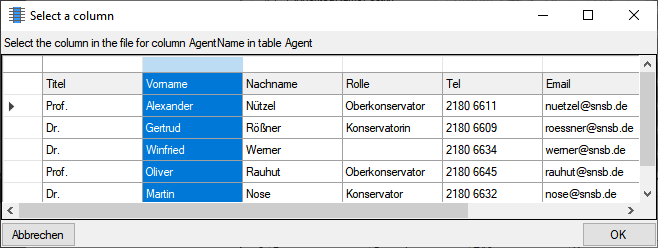

 Copy line option to fill in
missing data as shown below where the blue
values are copied into empty fields during the
import. Click on the
Copy line option to fill in
missing data as shown below where the blue
values are copied into empty fields during the
import. Click on the 
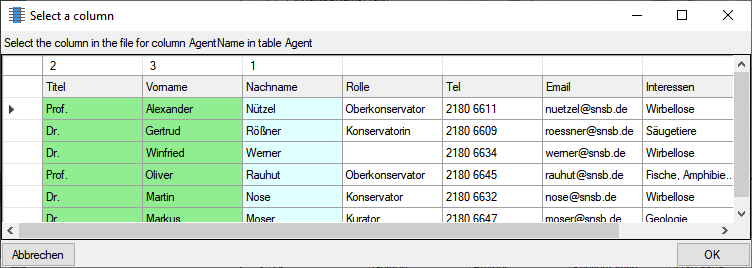

 import Specimen ... from the menu. A window
as shown below will open. This will lead you through the import of the
data. The window is separated in 3 areas. On the left side, you see a
list of possible data related import steps according to the type of data
you choose for the import. On the right side you see the list of
currently selected import steps. In the middle part the details of the
selected import steps are shown.
import Specimen ... from the menu. A window
as shown below will open. This will lead you through the import of the
data. The window is separated in 3 areas. On the left side, you see a
list of possible data related import steps according to the type of data
you choose for the import. On the right side you see the list of
currently selected import steps. In the middle part the details of the
selected import steps are shown.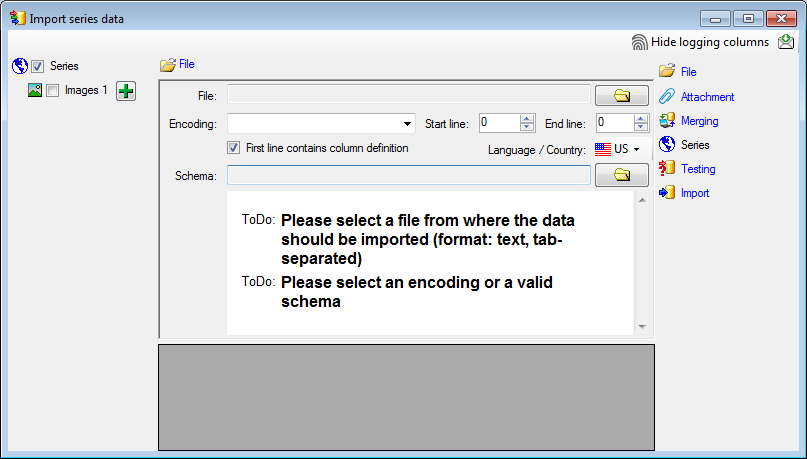
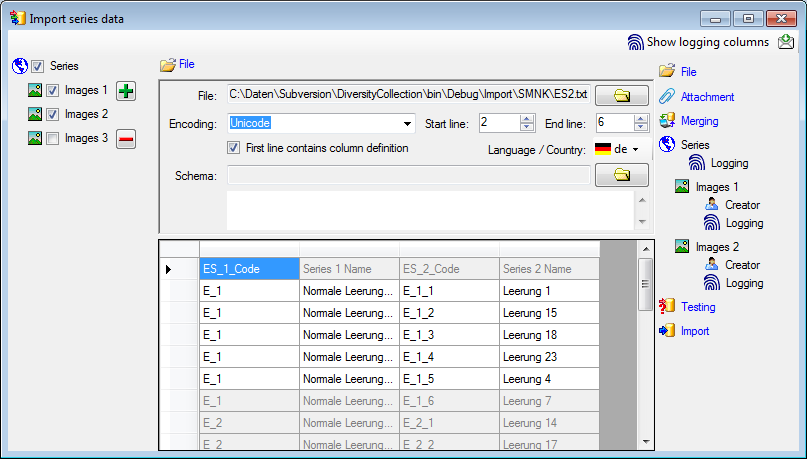
 button in the header line.
This will include a additional substeps for every step containing the
logging columns (see below). If you do not import these data, they will
be automatically filled by default values like the current time and
user.
button in the header line.
This will include a additional substeps for every step containing the
logging columns (see below). If you do not import these data, they will
be automatically filled by default values like the current time and
user.
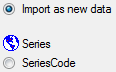


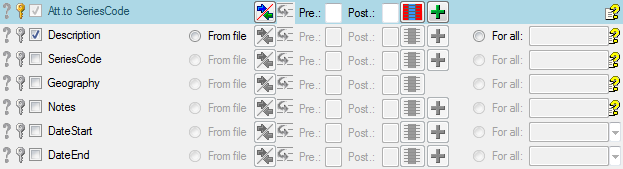
 = You have
to select a value from the provided list
= You have
to select a value from the provided list = You have to enter
a value used for all datasets
= You have to enter
a value used for all datasets Testing step. You can use a certain line in
the file for you test and than click on the Test data in line:
button. If there are still unmet requirements, these will be listed in a
window as shown below.
Testing step. You can use a certain line in
the file for you test and than click on the Test data in line:
button. If there are still unmet requirements, these will be listed in a
window as shown below.
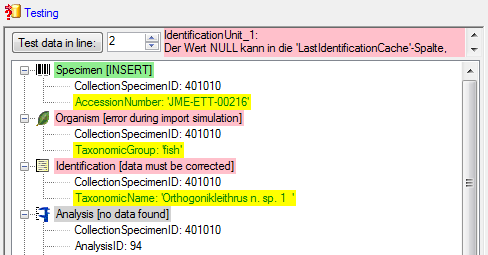
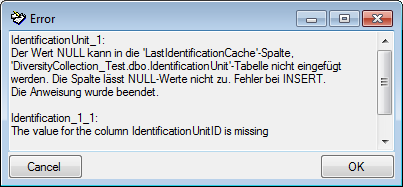

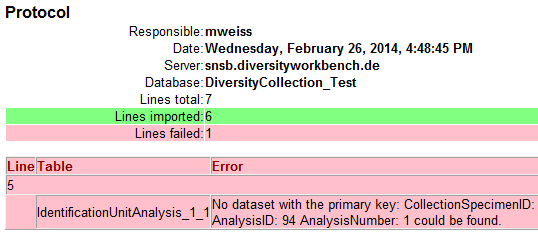
 Replicator or Administrator.
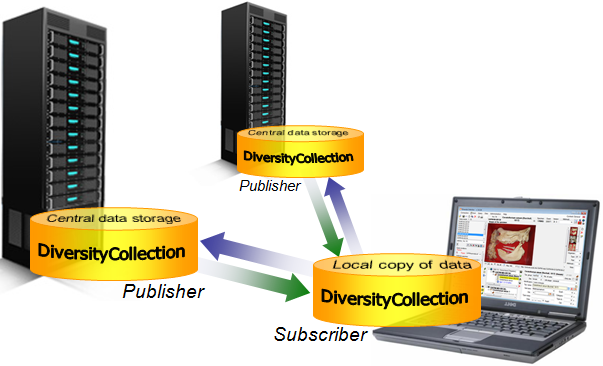
 Add Publisher from the menu. A window will
open where you choose the publisher. After the publisher is set, you
may transfer data between your local database (subscriber) and the
publisher. This function is only available for administrators.
Add Publisher from the menu. A window will
open where you choose the publisher. After the publisher is set, you
may transfer data between your local database (subscriber) and the
publisher. This function is only available for administrators.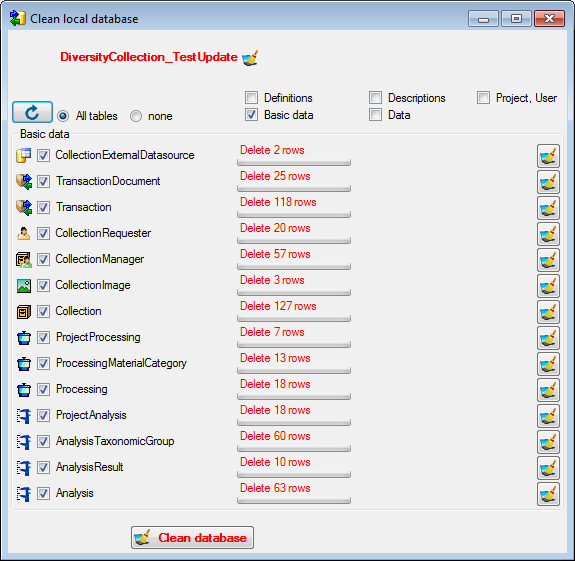
 Download from the menu (where Publisher
is the name of the publishing database on the publishing server). A form
will open as shown below. Choose the project of the data and the data
ranges (see above) which you wish to download. Click on the
Download from the menu (where Publisher
is the name of the publishing database on the publishing server). A form
will open as shown below. Choose the project of the data and the data
ranges (see above) which you wish to download. Click on the 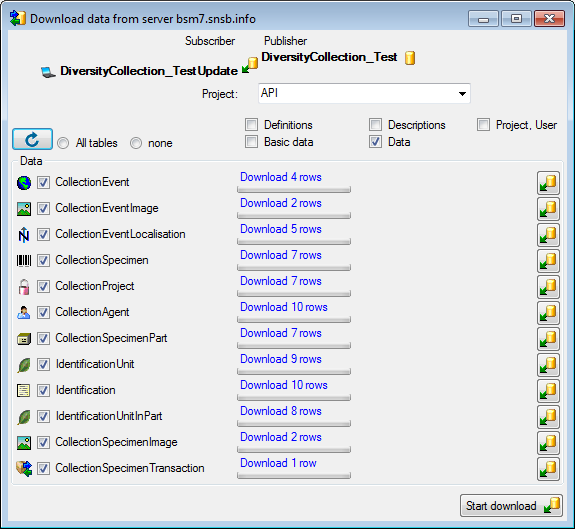
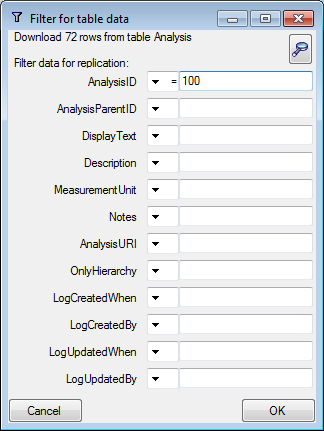
 .
. Upload** from the menu ([Publisher] is the name of the publishing
database on the publishing server). As described for the download,
choose the data ranges and click on the
Upload** from the menu ([Publisher] is the name of the publishing
database on the publishing server). As described for the download,
choose the data ranges and click on the  Tools ... from the menu (Publisher is the name of the publishing
database on the publishing server). A window will open as shown below.
Tools ... from the menu (Publisher is the name of the publishing
database on the publishing server). A window will open as shown below.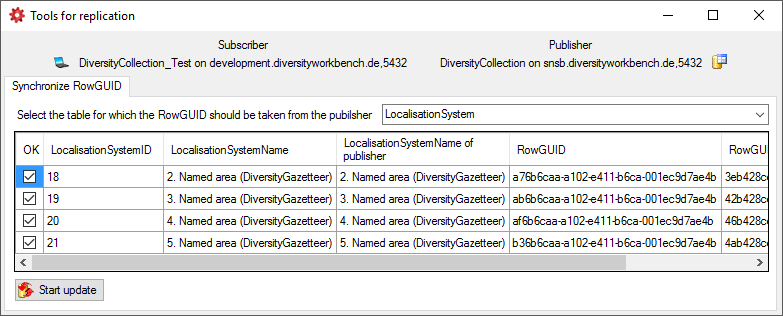


 button you can copy the current URL to all
projects in the list.
button you can copy the current URL to all
projects in the list.