Diversity Collection
Maintenance
Event Coordinates
Add Coordinates
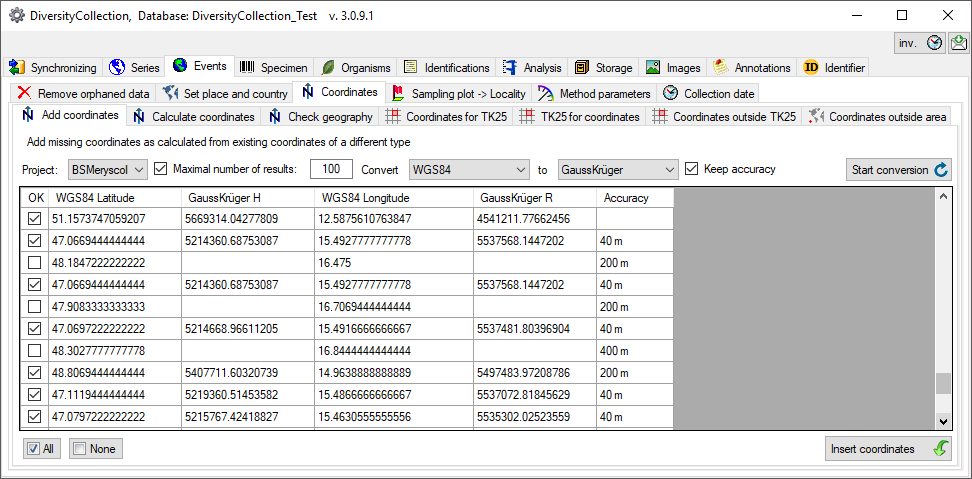
If your data contain coordinates you can add additional coordinates in a
different system for those dataset, where entries of the additional
coordinate system are missing. E.g. you can add WGS84 coordinates on the
basis of Gauss Krueger coordinates. In the  Add coordinates tab choose the project you want to update and an
optional upper limit of the datasets. Then select the source coordinates
and the coordinate system these should be converted into. Click on the
Start conversion
Add coordinates tab choose the project you want to update and an
optional upper limit of the datasets. Then select the source coordinates
and the coordinate system these should be converted into. Click on the
Start conversion  button to start the
conversion. If a conversion is not possible, the fields for the target
system will be empty as shown below. The option
button to start the
conversion. If a conversion is not possible, the fields for the target
system will be empty as shown below. The option  Keep accuracy ensures that the accuracy if present in the original
data will be copied into the new generated coordinates. Click the
Insert coordinates
Keep accuracy ensures that the accuracy if present in the original
data will be copied into the new generated coordinates. Click the
Insert coordinates  button to insert the new
coordinates into you datasets.
button to insert the new
coordinates into you datasets.
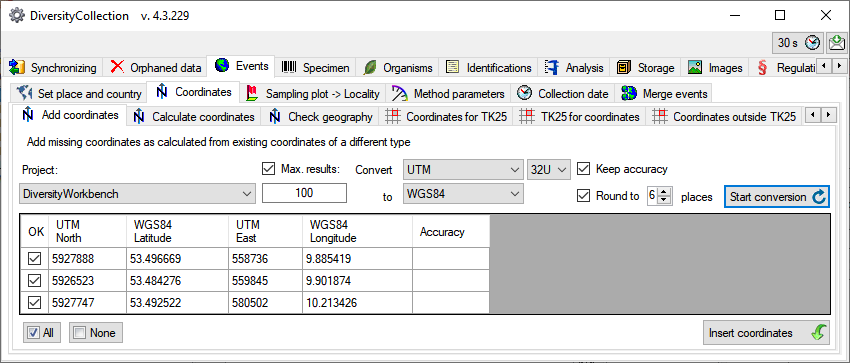
Add WGS84 Coordinates for UTM
For adding WGS84 coordinates on the basis of existing  UTM entries, you
may have to specify the grid zone if this is missing in the data. By
default the resulting WGS84 coordinates are rounded to 6 places
corresponding to an accuracy of 1 m. In case you want to avoid the
rounding of the calculated values, uncheck the
Round to option (see below). By default the accuracy of the original
data is kept. If you uncheck the Keep
accuracy option the software will calculate an approximate value
according to the given data.
UTM entries, you
may have to specify the grid zone if this is missing in the data. By
default the resulting WGS84 coordinates are rounded to 6 places
corresponding to an accuracy of 1 m. In case you want to avoid the
rounding of the calculated values, uncheck the
Round to option (see below). By default the accuracy of the original
data is kept. If you uncheck the Keep
accuracy option the software will calculate an approximate value
according to the given data.
Check the video for an overview regarding UTM: 
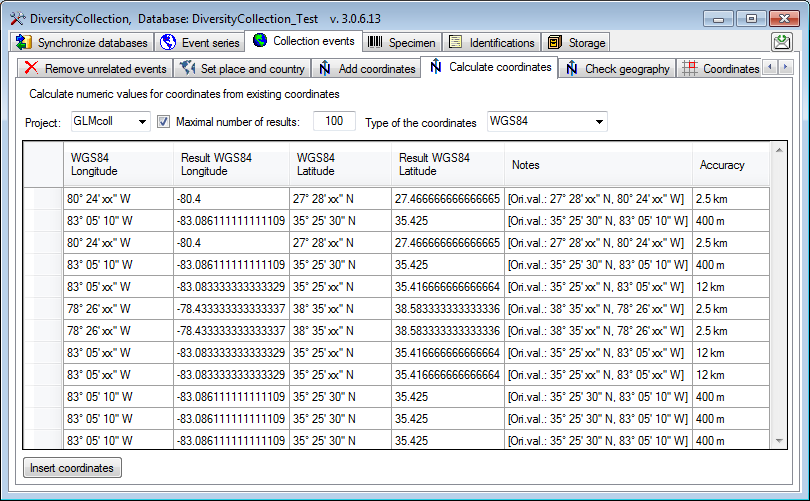
Calculate Coordinates
If your data contain coordinates e.g. written as non numeric entries
like 59°21’W 10°12’S you can try to calculate numeric values from these
entries (see below). Select the project, the maximal number that should
be parsed and the type (currently only WGS84). Then start the conversion
with a click on the start calculation
button. Click the
Insert
coordinates button to insert the new coordinates into your
datasets.
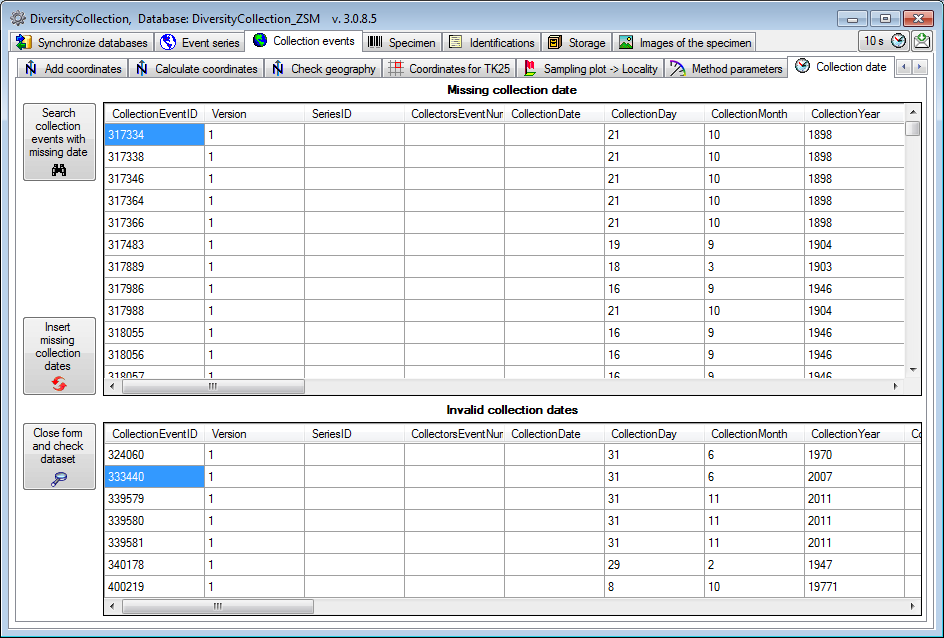
Check Coordinates
If your data contain coordinates these may be inconsistent between the 3
places the coordinates are stored. To fix these inconsistencies use the
functions showed in the image below and a short tutorial
.
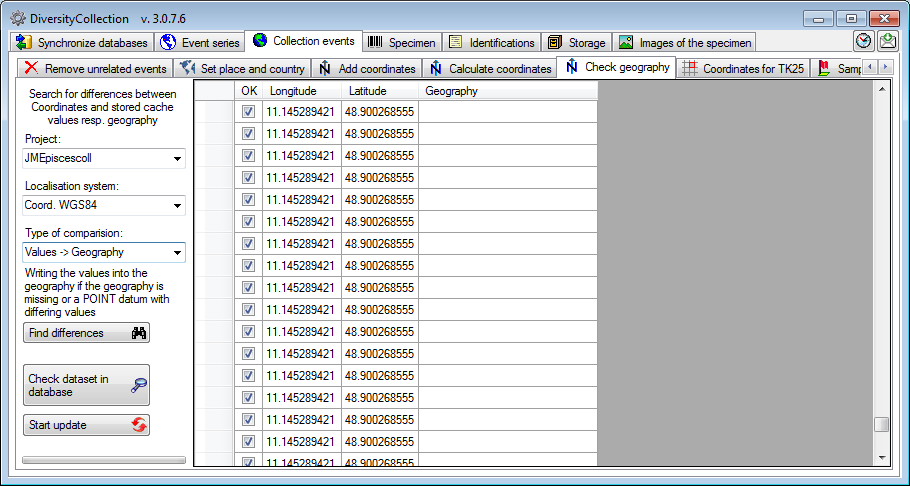
For comparision of the cache values you may try to use numeric values as base for the comparision.
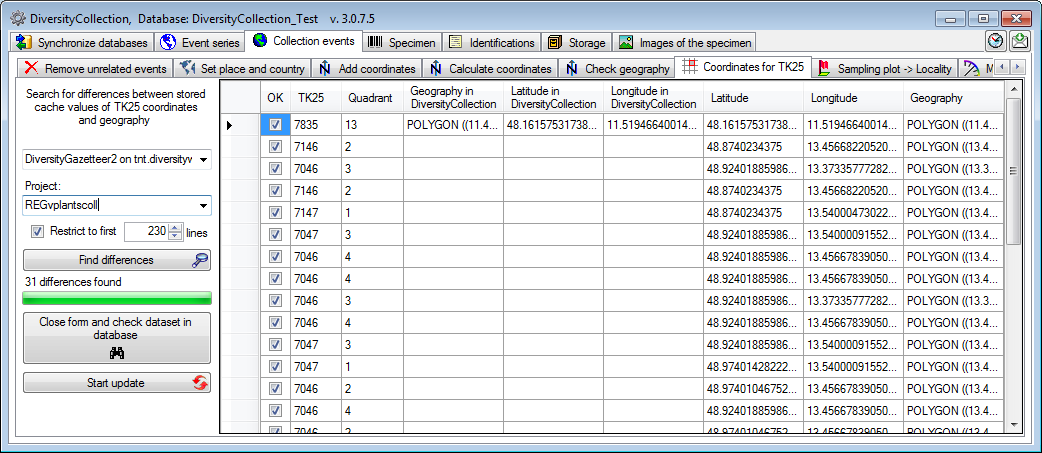
Add Coordinates for TK25 entries
If your data contain TK25 (= MTB) entries you can try to retrieve the
coordinates and geography for these entries from data in the module
DiversityGazetteer (see below). If the source database is located on a
different server, select the source from the list (for adding source
databases see chapter Connections). As the retrieval
of the geographical data is rather time consuming, you may restrict the
number datasets tested. Choose a project and click on the Find
differences  button to search for coordinates.
Click the Start update
button to search for coordinates.
Click the Start update  button to update the
TK25 entries with the found coordinates.
button to update the
TK25 entries with the found coordinates.
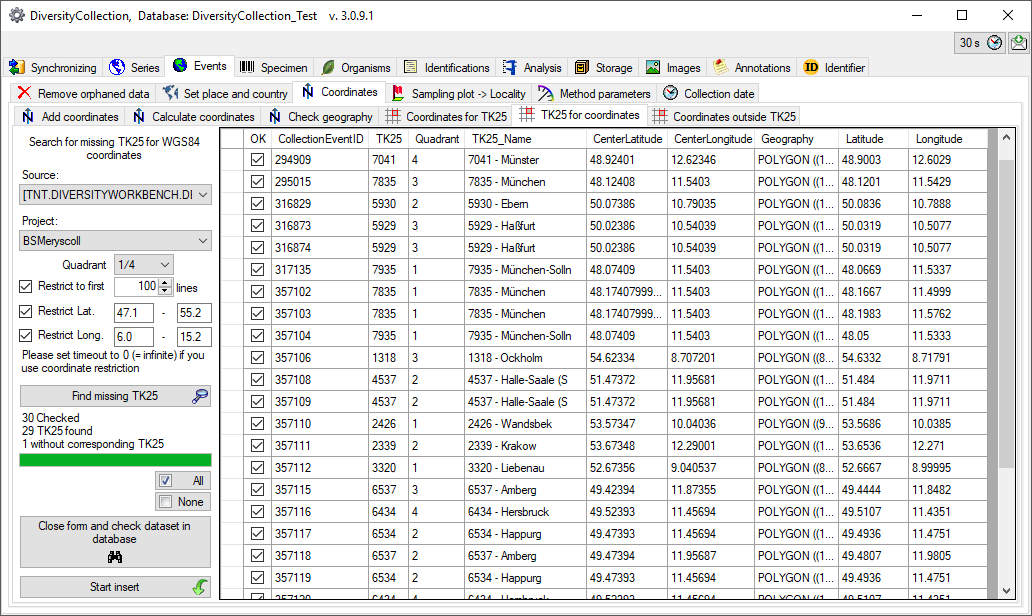
Add TK25 entries for WGS84 coordinates
If your data contain WGS84 coordinates you can try to retrieve TK25 (=
MTB) entries for these entries from data in the module
DiversityGazetteer (see below). Select the source for the geographical
information. If the source database is located on a different server and
not connected via a linked server, select the source
from the list (for adding source databases see chapter
Connections). As the retrieval of the geographical
data is rather time consuming, you may restrict the number datasets
tested. By default the range for the search is restricted (Lat.: 47.1 -
55.2 and Long.: 6.0 - 15.2) to avoid the inclusion of coordinates where
no TK25 information is expected. Choose a project and click on the
Find missing TK25 button to search for
coordinates. If you want to check a single dataset in the main form,
mark this dataset and click on the button Close form and check dataset
in database  . Click the Start insert
button to insert the TK25 entries for the found
coordinates.
. Click the Start insert
button to insert the TK25 entries for the found
coordinates.
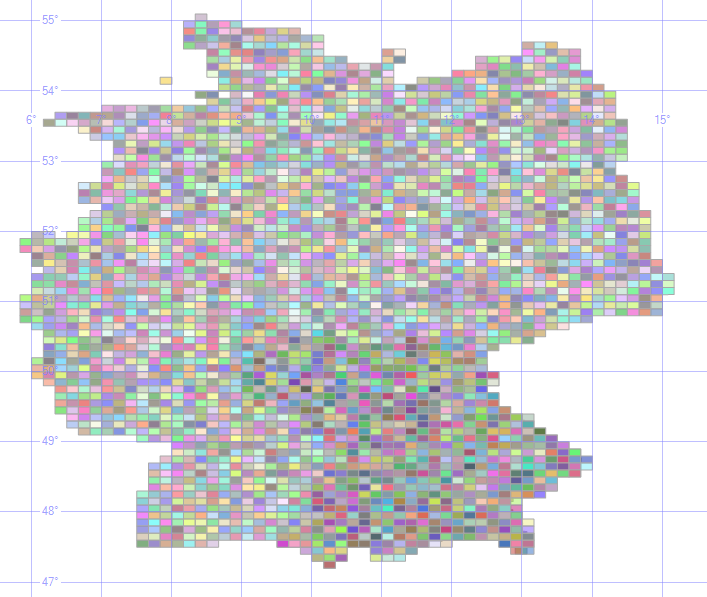
A precondition for the above described handling of the TK25 datasets is
the availablity of the corresponding data in the Gazetteer database. The
current range is shown in the image below.
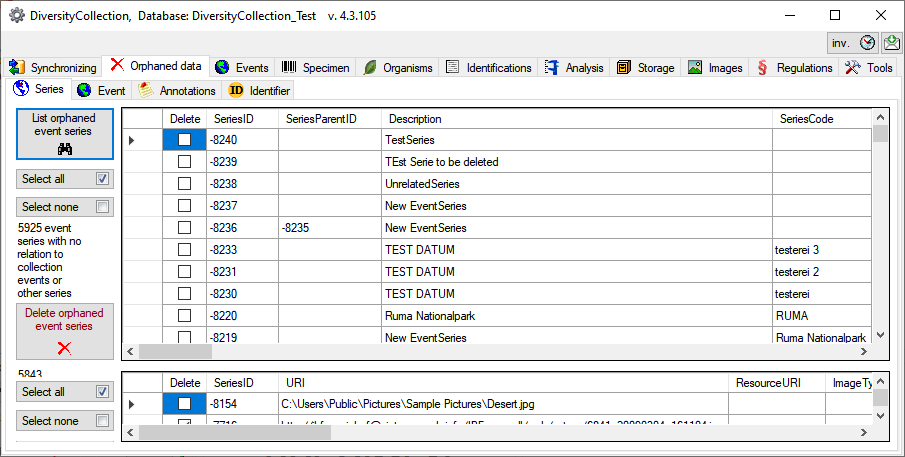
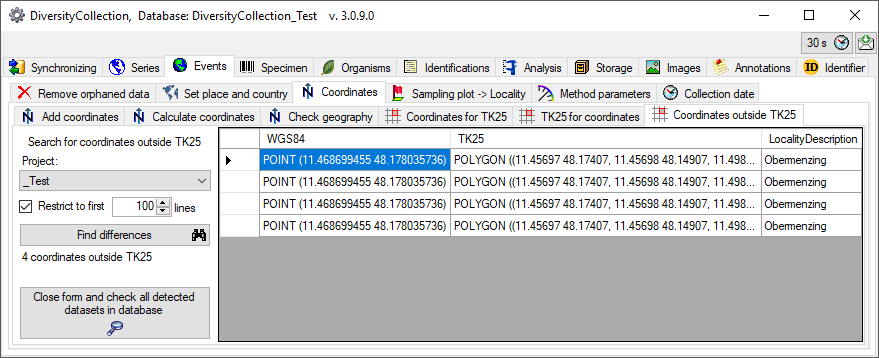
Coordinates outside TK25
If your data contain WGS84 coordinates outside TK25 (= MTB) entries
these can be detected in the Coordinates ouside TK25 part. Choose the
project and click on the Find differences
button. All entries with coordinates outside a TK25 entry for the same
event will be listed (see below). Click on the Close form and check
all detected datasets in main form button to
close the form and list the detected datasets in the main form.
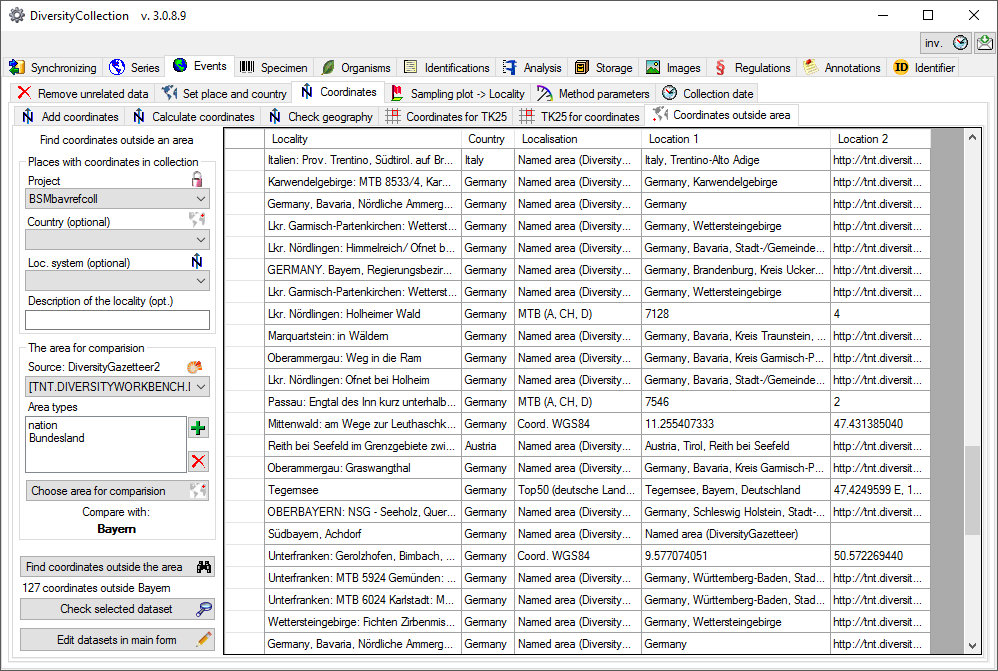
Find coordinates outside an area
If your data contain coordinates these may be positioned  outside an area
e.g. due to swapping latitude and longitude. You can detect these errors
by comparing all coordinates within a project with an area as provided
by DiversityGazetteer. In the maintenance form choose
outside an area
e.g. due to swapping latitude and longitude. You can detect these errors
by comparing all coordinates within a project with an area as provided
by DiversityGazetteer. In the maintenance form choose
 Events -
Coordinates - Coordinates outside area. You
may restrict the search with the
Events -
Coordinates - Coordinates outside area. You
may restrict the search with the  country, the
localisation sytem and the description of
the locality (please use wildcards like %). The areas
for comparison are provided by DiversityGazetteer. Choose one of the
sources for areas. With the
country, the
localisation sytem and the description of
the locality (please use wildcards like %). The areas
for comparison are provided by DiversityGazetteer. Choose one of the
sources for areas. With the  and
and
 buttons you can edit the list of area types from
which the area is selected. Click on the Choose area for comparison
button to select the area the coordinates
should be compared with. A window will open where you can select among
the areas provided by the DiversityGazetteer database you selected as a
source. Finally click on the Find coordinates outside the area
button. All corresponding localisations will be
listed as shown in the image below. To inspect a single dataset, select
it in the list and click on the Check selected dataset
button. To edit the data in the main form, click on
the Edit datasets in main form
buttons you can edit the list of area types from
which the area is selected. Click on the Choose area for comparison
button to select the area the coordinates
should be compared with. A window will open where you can select among
the areas provided by the DiversityGazetteer database you selected as a
source. Finally click on the Find coordinates outside the area
button. All corresponding localisations will be
listed as shown in the image below. To inspect a single dataset, select
it in the list and click on the Check selected dataset
button. To edit the data in the main form, click on
the Edit datasets in main form  button. If you
mark some datasets in the list, the selection in the main form will be
restricted to these. Otherwise all datasets from the list will be shown.
For an introduction see a short tutorial
.
button. If you
mark some datasets in the list, the selection in the main form will be
restricted to these. Otherwise all datasets from the list will be shown.
For an introduction see a short tutorial
.
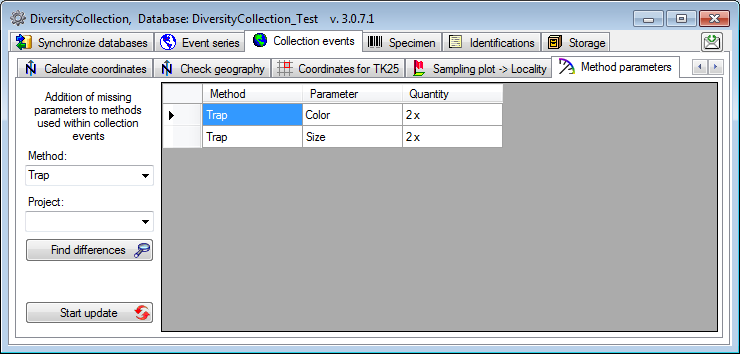
Maintenance
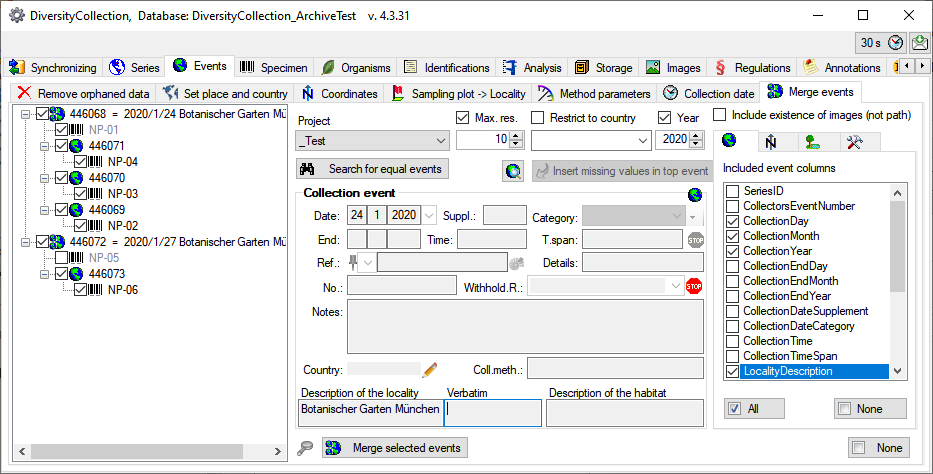
Event Merge
Searching
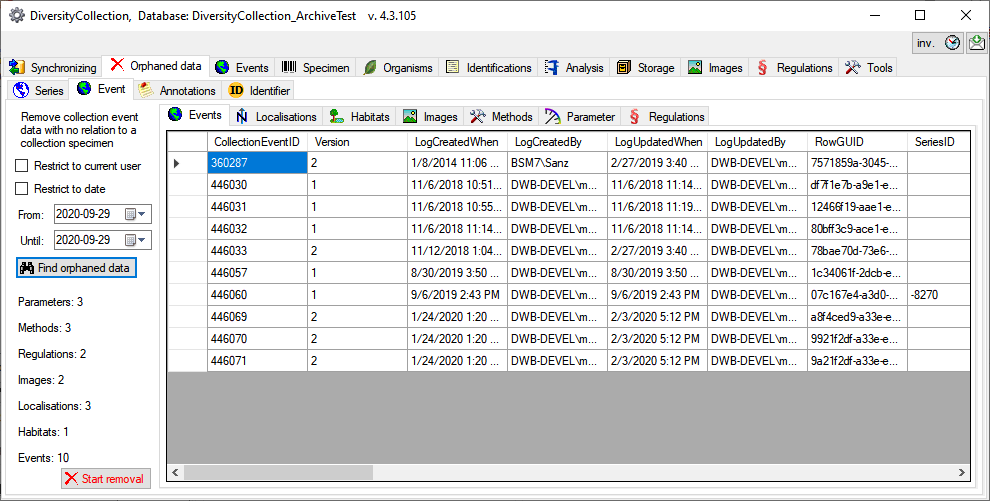
If collection events with equal data should be merged, select the tab
Events -  Merge
events as shown below. You may choose a project, a year, a country and
the maximal number of results to restrict the search. By default all
columns of the table CollectionEvent and
additional information from the tables
CollectionEventLocalisation and
Merge
events as shown below. You may choose a project, a year, a country and
the maximal number of results to restrict the search. By default all
columns of the table CollectionEvent and
additional information from the tables
CollectionEventLocalisation and  CollectionEventProperty as well as the exisitence of
 methods and images are included. To find
similar events with different entries in certain parts, you can deselect
those parts where there is no match in the data. To start the query
select a project and click on the Search for equal
events button. In the tree on the left, the result of the query
will be displayed (see below). The events are sorted by their ID with
the lowest values as top events of the
groups.
methods and images are included. To find
similar events with different entries in certain parts, you can deselect
those parts where there is no match in the data. To start the query
select a project and click on the Search for equal
events button. In the tree on the left, the result of the query
will be displayed (see below). The events are sorted by their ID with
the lowest values as top events of the
groups.
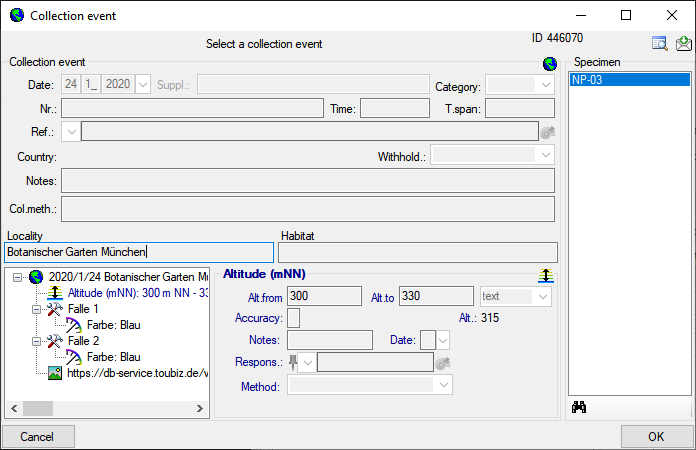
Details
Click on an event to see the details  for the event. For a complete
inspection of the data of an event, click on any
event node in the
tree and then on the button to open a
separate window showing the details for the event including depending
data (see below). You may open as many of these inspection windows as
needed. The content will be displayed according to the time of display.
For inspection of the top event you therefore have to close and reopen
the window after a transfer of missing data as described below.
for the event. For a complete
inspection of the data of an event, click on any
event node in the
tree and then on the button to open a
separate window showing the details for the event including depending
data (see below). You may open as many of these inspection windows as
needed. The content will be displayed according to the time of display.
For inspection of the top event you therefore have to close and reopen
the window after a transfer of missing data as described below.
Merge event data
The target of the merge is always the top
node of a group. To transfer missing data from events linked to the top
event, select a depending event and click on
the  insert missing values in top event button. This will copy all
missing data of the selected event in the top event. Finally select
those events that should be merged and click on the merge
selected events button.
insert missing values in top event button. This will copy all
missing data of the selected event in the top event. Finally select
those events that should be merged and click on the merge
selected events button.


 Collection date section
(see below). Use the
Collection date section
(see below). Use the