Subsections of Cache Database
Cache Database Basic steps
Basic steps for publication of data via the cache database
1 - Create the cache database
To create a cache database as shown in the chapter Creation of thecache databasee you need to be a system
administrator (s. Login administration).
After this step the cache database should be available and you can
create a Postgres database as final target of your data. To grant access
to the cache database for other users, see chapter Login administrationof the cache databases.
2 - Create a Postgres database
The final formatting of the data e.g. for publication via webservice are
performed in a Postgres database. If no server providing  Postgres is
available, you may install Postgres on your local machine (see
https://www.postgresql.org/ for further information). The creation and
administration of a Postgres database is described in chapter
Administration of the Postgres cache
databasess. To grant access to the Postgres
cache database for other users, see chapter Login administration of thecache databases.
Postgres is
available, you may install Postgres on your local machine (see
https://www.postgresql.org/ for further information). The creation and
administration of a Postgres database is described in chapter
Administration of the Postgres cache
databasess. To grant access to the Postgres
cache database for other users, see chapter Login administration of thecache databases.
3 - Insert sources for taxonomic names, collection specimen, references etc.
This step is optional and depends upon the availability of a source for
e.g. taxonomic names. You may either use sources from your local server
or the public available sources provided by tnt.diversityworkbench.de
(turn to http://www.snsb.info for further information). The needed
settings are described in chapter Sources from othermodules.
4 - Insert a project
The data published in the cache database are organized according to the
projects. Add a  project as shown in chapter Projects
in the cache database. Check the Mapping
of IDs in the source database and make
sure that the data within this project are not withheld from publication
and that the ranges you want to publish are set properly (see chapter
Restrictions for the datatransfer into the cache
database).
project as shown in chapter Projects
in the cache database. Check the Mapping
of IDs in the source database and make
sure that the data within this project are not withheld from publication
and that the ranges you want to publish are set properly (see chapter
Restrictions for the datatransfer into the cache
database).
5 - Transfer the data
The final  transfer of the data is described in chapter Sources forother modules and chapter Transfer of the
data.
transfer of the data is described in chapter Sources forother modules and chapter Transfer of the
data.
6 - Publish or export the data
To  export the data or prepare them for publication according to the
specifications of webservices etc. the data frequently need to be
formatted. This is done with
export the data or prepare them for publication according to the
specifications of webservices etc. the data frequently need to be
formatted. This is done with  packages as described in chapter
Administration of the Packages.
packages as described in chapter
Administration of the Packages.
Cache Database
Create the cache database
To create a cache database you need to be a system administrator (s.
Login administration). To create the cache
database, choose  Data → Cache database
… from the menu. If so far no cache database exists, you will be
asked if a new one should be generated. After the generation of the
cache database a window as shown below will open.
Data → Cache database
… from the menu. If so far no cache database exists, you will be
asked if a new one should be generated. After the generation of the
cache database a window as shown below will open.

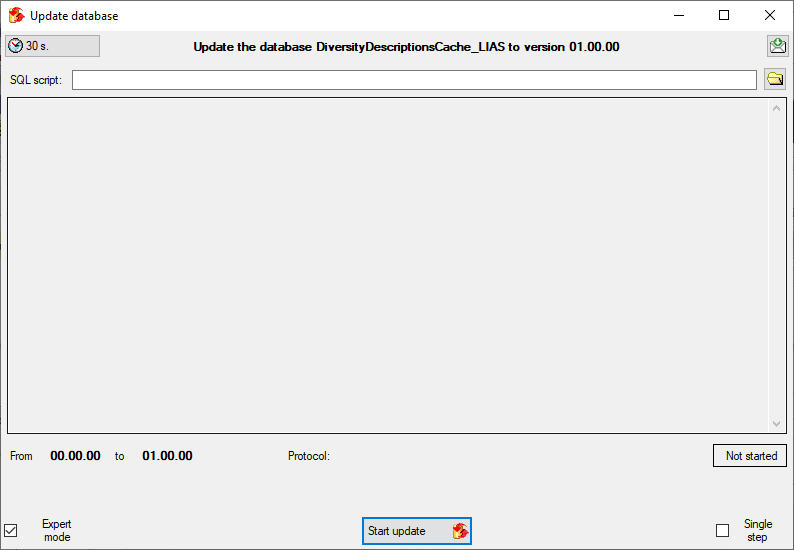
Click on the Update  button to update
the database to the latest version. A window as shown below will open.
Click on Start update to execute all
the scripts needed for the latest version of the database.
button to update
the database to the latest version. A window as shown below will open.
Click on Start update to execute all
the scripts needed for the latest version of the database.
To grant access to the cache database for other users, see chapter
Login administration of the cache databases.
You should now close an re-open the cache database window. During
transfer to the cache database the project metadata are read from a
local Diversity Projects database, if in DiversityDescriptions the
project is linked to it. By default the name of this “project
definitions” database is assumed to be “DiversityProjects” and the same
postfix as the DiversityDescriptions database. If this assumption is not
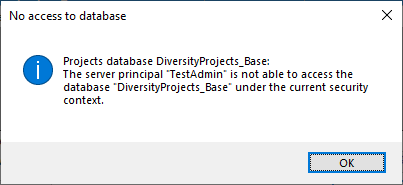
fulfilled, you will find the button Please check
function ProjectsDatabase (see image below).

After clicking the button, a message window might inform you about
Projects databases you cannot access due to insufficient access rights
(see image below).
After closing the message window you find all accessible projects
database located on the same database server as your
DiversityDescriptions database (see image below). In columns “Fitting
projects” and “Non fitting projects” you see the number of projects with
fitting rsp. not fitting links to the lsited DiversityProjects database.
Click on the database you want ti use for the cache transfer. If not
fitting projects are present, the button  may be
used to see more details.
may be
used to see more details.
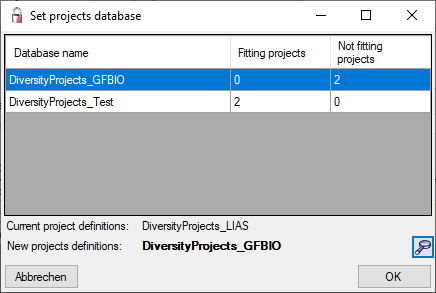
After selecting a database click on button OK.
If there are non fitting links in your projects database, you will find
the button Check missing links for ProjectsDatabase (see image
below). Click this button to view the details. Afterward you will have
get the projects selection window as shown above.

You may now continue with the Administration of the Postgres cachedatabases or insert Sources from other
modules. Anyway, close and re-open the cache
database window before you insert Projects in the cachedatabase.
Cache Database
Id Mapping
Mapping of IDs for the data transfer into the cache database
In the Diversity Descriptions database the main
tables Description,
Descriptor and
CategoricalState have a
numeric “id” as key, which is set by the MS SQL server when the dataset
ist crated. All relations between the tables are set by using these
unique values. For various reasons those internal IDs are not seen as
suitable for all purposes of the cache database. Therefore a mapping of
the internal IDs is performed before the transfer of data to the cache
database.
Default mapping
The default mapping of the IDs is mainly oriented on the way the states
and characters are identified in the widely spread DELTA standard:
- Descriptors are numbered starting with “1” in ascending order and
transferred into the cache database table CacheCharacter. The
order is determined by the descriptor parameter “display_order” and
the alphabetical order. The original “id” is stored as “CharID” in the
target table, the descriptor number as “CID”.
- CategoricalStates are numbered for each character starting with
“1” in ascending order and transferred into the cache database table
CacheState. The order is determined by the categorical state
parameter “display_order” and the alphabetical order. The original
“id” is stored as “StateID” in the target table, the categorical state
number as “CS”.
- Since the categorical state numbers (“CS”) are not unique, each state
is identified, e.g. in a description item, by the character and state
number (“CID”, “CS”).
- Descriptions are numbered starting with “1” in ascending order and
transferred into the cache database table CacheItem. The order is
determined by the alphabetical order. The original “id” is stored as
“ItemID” in the target table, the description number as “IID”. As an
alternative the “IID” may be derived from the field “alternate_id” of
the “Description” table (see following section).
The mapping data are stored related to the project in the tables
CacheMappingDescriptor,
CacheMappingState and
CacheMappingDescription
of the original database.
Mapping adjustment
To set the mapping adjustments, click on the
button (see below).

A window as shown below will open.
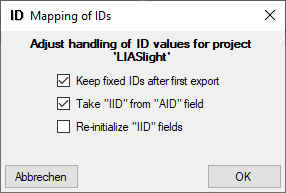
If no option is selected, the default mapping algorithm described
above will be performed for every transfer to the cache database. Any
changes, e.g. insertion of a descriptor or re-arrangement of categorical
states, will affect the “CID”, “CS” and “IID” of the cache database.
If option Keep fixed IDs after first export is selected, the default
mapping algorithm described above will be performed only for the first
transfer to the cache database. Any changes, e.g. insertion of a
descriptor or re-arrangement of categorical states, will NOT affect
the “CID”, “CS” and “IID” of the cache database. New elements will get a
number higher than the last one present. If an element is deleted, this
will result in “missing” numbers in the cache database. Pure
re-arrangements will have no effect.
The last option Take “IID” from “AID” field only affects the
description mapping. By default the descriptions are numbered in
alphabetical order. If this option is chosen, it is tried to use the
field “alternate_id” (“AID” in the GUI) as item number. Preconditions
are that the “AID” is a pure number and that the values are unique. If
the “AID” is not supplied or an alpha-numeric string or if the number is
already occupied, a new ascending value will be set. By using this
option a foreign numbering scheme may be used for the cache database.
When selecting this option you might want select Re-initialize “IID”
fields to build the description mapping at the next cache transfer.
Cache Database
Infrastructure
Infrastructure for the cache database
For the administration of the data that are published via the cache
database, certain tables as shown below are used. These are either
placed in the schema dbo or a schema named according to the
published project, e.g. Project_Test for a project with the name
“Test”. Additionally some basic data are stored in dedicated tables of
the main DiversityDescriptions database.
Tables in the main database
In the main DiversityDescriptions database there is a number of tables
holding the cache database name, information about datawithholding and mapping
information of the IDs. This information
is needed to restore the cache database in case of loss. For the
database diagram take a look at the database section of
this manual.
Central tables in the cache database
There are a number of tables placed in the schema dbo that are
accessible by all projects.
Published project tables
The central published project tables contain the information about the
projects that are published together with the target (Postgres)
databases and the packages including optional add-ons into which they
had been transferred. This information is used to ensure a recovery in
case of a loss of the targets.
Source tables
To access sources from other modules (e.g. DiversityReferences) there
are tables for the storage of the principal access to the modules and a
number of tables containing the data (depending on the module).
Access tables
These tables contain the principal access like the name of the view
defined to access the data. The example below lists the tables defined
for the module DiversityReferences, but there are corresponding tables
for every module accessed by the cache database.
Data tables
These tables contain the data provided by the module and therefore
depend on the module. The example below lists the tables defined for the
module DiversityReferences, but there are corresponding tables for every
module accessed by the cache database. Since data from various source
databases may be acumulated in the cache database, in general all the
data tables include the BaseURL as part of their keys to ensure
unambiguousness.
To access the data in the source database for the module views are
generated by the client. The name of these views are composed according
to the name of the database and the project to ensure a unique name.
Furthermore letters are appended to identify subordinated tables. These
are stored in the table “<module>Source” and are used by the client
for a transfer of the data from the module database into the tables in
the cache database. The example below lists the view names for the
module DiversityReferences. In this example the source database
“DiversityReferences_Test” and project “DALI” result in the main table
name. By appending “_R” the view name for subordinated table
“ReferenceRelator” is built. This gives the views
References_Test_DALI and References_Test_DALI_R.
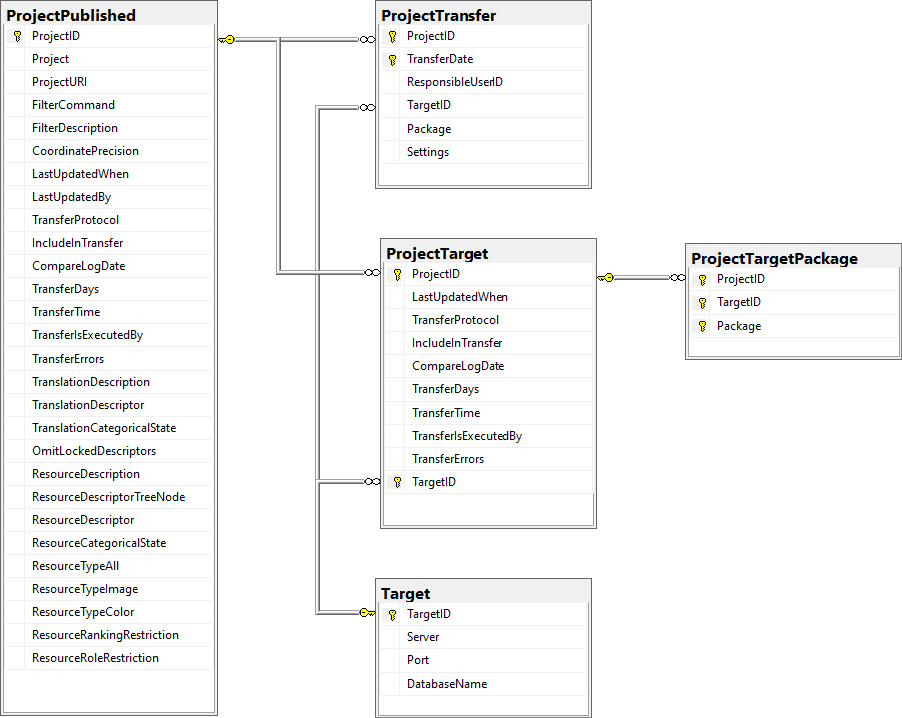
Project tables in the cache database
These tables contain the data of the projects with every project having
its own schema. The tables correspond to the tables in the main database
of the module with according the following assignment. In the third
columns the views of the cache database are listed to access the
DiversityDescriptions data. The view access besides the main tables
listed in the second table column and the ID mapping tables. For the
summary data (CacheDescription) additionally subordinated tables,
e.g. Modifier, are accessed to resolve relations in
DiversityDescriptions as simple character strings.
| Table in cache database |
Tables in DiversityDescriptions |
Views in cache database |
| CacheCharacter |
Descriptor |
ViewCacheCharacter |
| CacheCharacterTree |
DescriptorTree |
ViewCacheCharacterTree |
| CacheCharacterTreeNode |
DescriptorTreeNode |
ViewCacheCharacterTreeNode |
| CacheDescription |
CategoricalSummaryData,
QuantitativeSummaryData,
TextDescriptorData,
MolecularSequenceData,
DescriptorStatusData |
ViewCacheCategorical,
ViewCacheQuantitative,
ViewCacheText,
ViewCacheSequence,
ViewCacheStatusData |
| CacheItem |
Description |
ViewCacheItem |
| CacheResource |
Resource,
ResourceVariant |
ViewCacheResourceCharacter,
ViewCacheResourceCharacterTreeNode,
ViewCacheResourceItem,
ViewCacheResourceState |
| CacheScope |
DescriptionScope |
ViewCacheScope |
| CacheState |
CategoricalState |
ViewCacheState,
ViewCacheMeasure |
| CacheTranslation |
Translation |
ViewCacheTranslationCharacter,
ViewCacheTranslationState,
ViewCacheTranslationItem |
Besides the tables mentioned above, the auxilliary tables
ProjectLockedDescriptor and ProjectLockedScope contain the
descriptor IDs and scope types that shall be excluded from the transfer
to the cache database. The auxilliary tables
ProjectPublishedTranslation and ProjectPublishedDescriptorTree
contain language codes of translations (columns label, wording and
detail of source tables Descriptor, CategoricalState and Description)
and the descriptor tree IDs that shall be included in the cache database
transfer. Together with the extended query parameter, which are stored
in the columns FilterCommand and FilterParameter of the table
ProjectPublished, they build the transferrestrictions of the cache database.
Finally, in table CacheMetadata some data from the DiversityProjects
database are stored.
The main tables CacheItem, CacheCharacter and CacheState
have a numeric key (ItemID, CharID and StateID), which is identical to
the unique key in the main database. However, in the cache database the
main adress attributes are IID, CID and CS. CID and SD are in principle
the descriptor and categorical state sequence numbers, where the mapping
algorith guarantees unique ascending values. In this adressing schema a
single state is identified by the combination of CID and CS.
Additionally in table CacheState the recommended statistical
measures of quantitative descriptors are inclueded, where the measure
code (e.g. “Min”, “Max” or “Mean”) is inserted in CS. In table
CacheDescription, which holds the single descriptor or data status
values, the CID and CS are specified for a specific categorical state.
For quantitative data in CS the measurement type is identified by the
measure code. For text and molecular sequence data CS is supplied with
the fixed texts “TE” and “MS”. In case of descriptor status data CS is
set NULL. Instead the data status code is inserted in column Status.
Project procedures for the data transfer into the project tables
For every project table there is a set of procedures that transfers the
data from the main database into the cache table. The names of these
procedures are procPublish + the name of the target table without
“Cache” e.g. procPublishCharacter for the transfer of the data into
the table CacheCharacter. The first steps of the data transfer
perform an update the ID mapping tables in the main database. This is
done in the procedures procPublishMappingItem,
procPublishCharacter and procPublishState, which call dedicated
procedures in the DiversityDescriptions database. As mentioned above,
the original IDs (ItemID, CharID and StateID) are stored together
resulting mapped IDs (IID, CID and CS) in the cache database tables. To
view the mapping information, the views CacheMappingItem,
CacheMappingCharacter and CacheMappingState select the
appropriate values from the cache tables.
List of tables mentioned above
Table ProjectPublished
The projects published via the cache database (Details about the
projects are defined in DiversityProjects)
| ProjectID |
int |
ID of the project to which the specimen
belongs (Projects are defined in DiversityProjects) |
NO |
| Project |
nvarchar (255) |
The name or title of the project as shown in
a user interface (Projects are defined in DiversityProjects) |
YES |
| ProjectURI |
varchar (255) |
The URI of the project, e.g. as provided by
the module DiversityProjects. |
YES |
| FilterCommand |
varchar (MAX) |
The SQL command to select description IDs to
be transferred to the cache database. |
YES |
| FilterDescription |
nvarchar (MAX) |
The XML description of the filter command to
transferred description IDs. |
YES |
| CoordinatePrecision |
tinyint |
Optional reduction of the precision of the
coordinates within the project |
YES |
| LastUpdatedWhen |
datetime |
The date of the last update of the project
data
Default value: getdate() |
YES |
| LastUpdatedBy |
nvarchar (50) |
The user reponsible for the last
update.
Default value: suser_sname() |
YES |
| TransferProtocol |
nvarchar (MAX) |
The protocol created during the transfer of
the data |
YES |
| IncludeInTransfer |
bit |
If the project should be included in a
schedule based data transfer |
YES |
| CompareLogDate |
bit |
If the log dates of the transferred data
should be compared to decide if data are transferred
Default value: (0) |
YES |
| TransferDays |
varchar (7) |
The days the transfer should be done, coded
as integer values with Sunday = 0 up to Saturday = 6
Default value: '0' |
YES |
| TransferTime |
time |
The time when the transfer should be
executed
Default value: '00:00:00.00' |
YES |
| TransferIsExecutedBy |
nvarchar (500) |
If any transfer of the data is active |
YES |
| TransferErrors |
nvarchar (MAX) |
Errors that occurred during the data
transfers |
YES |
| TranslationDescription |
bit |
If the description item translation should be
included in the data transfer
Default value: (1) |
NO |
| TranslationDescriptor |
bit |
If the descriptor translation should be
included in the data transfer
Default value: (1) |
NO |
| TranslationCategoricalState |
bit |
If the categorical state translation should
be included in the data transfer
Default value: (1) |
NO |
| OmitLockedDescriptors |
bit |
If the locked descriptors and their states
shall be omitted in the data transfer
Default value: (0) |
NO |
| ResourceDescription |
bit |
If the description item resources should be
included in the data transfer
Default value: (0) |
NO |
| ResourceDescriptorTreeNode |
bit |
If the descriptor tree node resources should
be included in the data transfer
Default value: (0) |
NO |
| ResourceDescriptor |
bit |
If the descriptor resources should be
included in the data transfer
Default value: (0) |
NO |
| ResourceCategoricalState |
bit |
If the categorical state resources should be
included in the data transfer
Default value: (0) |
NO |
| ResourceTypeAll |
bit |
If all resource types should be included in
the data transfer
Default value: (0) |
NO |
| ResourceTypeImage |
bit |
If the resource type "image" should be
included in the data transfer
Default value: (0) |
NO |
| ResourceTypeColor |
bit |
If the resource type "color" should be
included in the data transfer
Default value: (0) |
NO |
| ResourceRankingRestriction |
tinyint |
The minimum resource ranking (0-10) that
should be included in the data transfer
Default value: (0) |
NO |
| ResourceRoleRestriction |
varchar (255) |
The resource roles that should be included in
the data transfer
Default value: NULL |
YES |
Table ProjectTarget
The targets of the projects, i.e. the Postgres databases
| ProjectID |
int |
ID of the project to which the specimen
belongs (Projects are defined in DiversityProjects) |
NO |
| LastUpdatedWhen |
datetime |
The date of the last update of the project
data |
YES |
| TransferProtocol |
nvarchar (MAX) |
The protocol created during the transfer of
the data |
YES |
| IncludeInTransfer |
bit |
If the project should be included in a
schedule based data transfer
Default value: (1) |
YES |
| CompareLogDate |
bit |
If the log dates of the transferred data
should be compared to decide if data are transferred
Default value: (0) |
YES |
| TransferDays |
varchar (7) |
The days the transfer should be done, coded
as integer values with Sunday = 0 up to Saturday = 6
Default value: (0) |
YES |
| TransferTime |
time |
The time when the transfer should be
executed
Default value: '00:00:00.00' |
YES |
| TransferIsExecutedBy |
nvarchar (500) |
If any transfer of the data is active |
YES |
| TransferErrors |
nvarchar (MAX) |
Errors that occurred during the data
transfers |
YES |
| TargetID |
int |
The ID of the server, relates to table
Target |
NO |
Table ProjectTargetPackage
Packages for projects as documented in the table Package in the Postgres
database
| Column |
Data type |
Description |
Nullable |
| ProjectID |
int |
Refers to ProjectID in table ProjectTarget |
NO |
| TargetID |
int |
Referes to TargetID in table ProjectTarget |
NO |
| Package |
nvarchar (50) |
Package installed for this project target |
NO |
Table ProjectTransfer
The transfers of data of a project
| ProjectID |
int |
ID of the project, part of PK |
NO |
| TransferDate |
datetime |
Date of the transfer. Part of PK
Default value: getdate() |
NO |
| ResponsibleUserID |
int |
The ID of the user as stored in table
UserProxy of the source database, responsible for the transfer
Default value: (-1) |
YES |
| TargetID |
int |
If the transfer regards a postgres database,
the ID of the target (= Postgres database) as stored in table
Target |
YES |
| Package |
nvarchar (50) |
If the transfer regards a package, the name
of the package, otherwise empty |
YES |
| Settings |
nvarchar (MAX) |
The versions, number of transfered data etc.
of the objects concerned by the transfer [format: JSON] |
YES |
Table ReferenceRelator
| Column |
Data type |
Description |
Nullable |
| BaseURL |
varchar (500) |
- |
NO |
| RefID |
int |
- |
NO |
| Role |
nvarchar (3) |
- |
NO |
| Sequence |
int |
- |
NO |
| Name |
nvarchar (255) |
- |
NO |
| AgentURI |
varchar (255) |
- |
YES |
| SortLabel |
nvarchar (255) |
- |
YES |
| Address |
nvarchar (1000) |
- |
YES |
| SourceView |
nvarchar (128) |
- |
NO |
Table ReferenceTitle
| BaseURL |
varchar (500) |
- |
NO |
| RefType |
nvarchar (10) |
- |
NO |
| RefID |
int |
- |
NO |
| ProjectID |
int |
- |
YES |
| RefDescription_Cache |
nvarchar (255) |
- |
NO |
| Title |
nvarchar (4000) |
- |
NO |
| DateYear |
smallint |
- |
YES |
| DateMonth |
smallint |
- |
YES |
| DateDay |
smallint |
- |
YES |
| DateSuppl |
nvarchar (255) |
- |
NO |
| SourceTitle |
nvarchar (4000) |
- |
NO |
| SeriesTitle |
nvarchar (255) |
- |
NO |
| Periodical |
nvarchar (255) |
- |
NO |
| Volume |
nvarchar (255) |
- |
NO |
| Issue |
nvarchar (255) |
- |
NO |
| Pages |
nvarchar (255) |
- |
NO |
| Publisher |
nvarchar (255) |
- |
NO |
| PublPlace |
nvarchar (255) |
- |
NO |
| Edition |
smallint |
- |
YES |
| DateYear2 |
smallint |
- |
YES |
| DateMonth2 |
smallint |
- |
YES |
| DateDay2 |
smallint |
- |
YES |
| DateSuppl2 |
nvarchar (255) |
- |
NO |
| ISSN_ISBN |
nvarchar (18) |
- |
NO |
| Miscellaneous1 |
nvarchar (255) |
- |
NO |
| Miscellaneous2 |
nvarchar (255) |
- |
NO |
| Miscellaneous3 |
nvarchar (255) |
- |
NO |
| UserDef1 |
nvarchar (4000) |
- |
NO |
| UserDef2 |
nvarchar (4000) |
- |
NO |
| UserDef3 |
nvarchar (4000) |
- |
NO |
| UserDef4 |
nvarchar (4000) |
- |
NO |
| UserDef5 |
nvarchar (4000) |
- |
NO |
| WebLinks |
nvarchar (4000) |
- |
NO |
| LinkToPDF |
nvarchar (4000) |
- |
NO |
| LinkToFullText |
nvarchar (4000) |
- |
NO |
| RelatedLinks |
nvarchar (4000) |
- |
NO |
| LinkToImages |
nvarchar (4000) |
- |
NO |
| SourceRefID |
int |
- |
YES |
| Language |
nvarchar (25) |
- |
NO |
| ReplaceWithRefID |
int |
- |
YES |
| CitationText |
nvarchar (1000) |
- |
NO |
| CitationFrom |
nvarchar (255) |
- |
NO |
| LogInsertedWhen |
smalldatetime |
-
Default value: getdate() |
YES |
| SourceView |
nvarchar (128) |
- |
NO |
| ReferenceURI |
varchar (500) |
- |
YES |
| AuthorsCache |
varchar (1000) |
- |
YES |
Table ReferenceTitleSource
| SourceView |
nvarchar (128) |
the name of the view retrieving the data from
the database |
NO |
| Source |
nvarchar (500) |
- |
YES |
| SourceID |
int |
- |
YES |
| LinkedServerName |
nvarchar (500) |
If the source is located on a linked server,
the name of the linked server |
YES |
| DatabaseName |
nvarchar (50) |
The name of the database where the data are
taken from |
YES |
| Subsets |
nvarchar (500) |
Subsets of a source: The names of the tables
included in the transfer separted by "|" |
YES |
| TransferProtocol |
nvarchar (MAX) |
The protocol created during the transfer of
the data |
YES |
| IncludeInTransfer |
bit |
If the source should be included in a
schedule based data transfer |
YES |
| CompareLogDate |
bit |
If the log dates of the transferred data
should be compared to decide if data are transferred
Default value: (0) |
YES |
| TransferDays |
varchar (7) |
The days the transfer should be done, coded
as integer values with Sunday = 0 up to Saturday = 6
Default value: '0' |
YES |
| TransferTime |
time |
The time when the transfer should be
executed
Default value: '00:00:00.00' |
YES |
| TransferIsExecutedBy |
nvarchar (500) |
If any transfer of the data is active |
YES |
| TransferErrors |
nvarchar (MAX) |
Errors that occurred during the data
transfers |
YES |
| LastUpdatedWhen |
datetime |
The date of the last update of the data
Default value: getdate() |
YES |
| LastCheckedWhen |
datetime |
The date and time when the last check for the
need of an update of the content occurred |
YES |
| Version |
int |
-
Default value: (0) |
YES |
Table ReferenceTitleSourceTarget
The targets of the projects, i.e. the Postgres databases
| SourceView |
nvarchar (128) |
SourceView as defined in table
ReferenceSource |
NO |
| Target |
nvarchar (255) |
The targets of the projects, i.e. the
Postgres databases where the data should be transferred to |
NO |
| LastUpdatedWhen |
datetime |
The date of the last update of the project
data
Default value: getdate() |
YES |
| TransferProtocol |
nvarchar (MAX) |
The protocol created during the transfer of
the data |
YES |
| IncludeInTransfer |
bit |
If the project should be included in a
schedule based data transfer
Default value: (1) |
YES |
| CompareLogDate |
bit |
If the log dates of the transferred data
should be compared to decide if data are transferred
Default value: (0) |
YES |
| TransferDays |
varchar (7) |
The days the transfer should be done, coded
as integer values with Sunday = 0 up to Saturday = 6
Default value: (0) |
YES |
| TransferTime |
time |
The time when the transfer should be
executed
Default value: '00:00:00.00' |
YES |
| TransferIsExecutedBy |
nvarchar (500) |
If any transfer of the data is active |
YES |
| TransferErrors |
nvarchar (MAX) |
Errors that occurred during the data
transfers |
YES |
| LastCheckedWhen |
datetime |
The date and time when the last check for the
need of an update of the content occurred |
YES |
Table ReferenceTitleSourceView
| BaseURL |
varchar (500) |
- |
NO |
| RefID |
int |
- |
NO |
| SourceView |
nvarchar (128) |
The name of the source view of the data |
NO |
| LogInsertedWhen |
smalldatetime |
Date and time when record was first entered
(typed or imported) into this system.
Default value: getdate() |
YES |
Table Target
The postgres databases as targets for the data
| Column |
Data type |
Description |
Nullable |
| TargetID |
int |
ID of the target on a postgres server, PK |
NO |
| Server |
nvarchar (255) |
Name of IP of the Server |
NO |
| Port |
smallint |
Port for accessing the server |
NO |
| DatabaseName |
nvarchar (255) |
The name of the database |
NO |
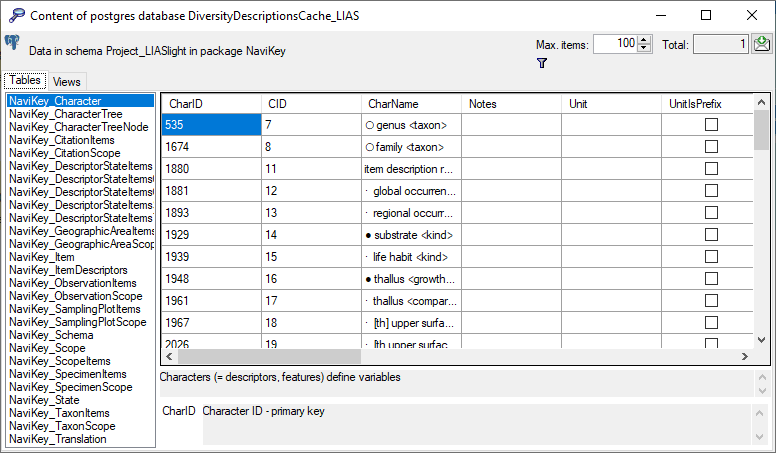
Table CacheCharacter
Character (= descriptors, features) define variables
| CharID |
int |
Database-internal ID of this record (primary
key) |
NO |
| CID |
smallint |
A positive number defining the sequence in
which characters are displayed |
NO |
| CharName |
nvarchar (255) |
Short label (or name) of character |
NO |
| Notes |
nvarchar (MAX) |
Additional detail text explaining or
commenting on the character definition |
YES |
| CharWording |
nvarchar (255) |
Optional separate wording for natural
language generation (CharName will be used if this is missing)
Default value: NULL |
YES |
| Unit |
nvarchar (255) |
A measurement unit (mm, inch, kg, °C, m/s
etc.) or dimensionless scaling factor
Default value: NULL |
YES |
| UnitIsPrefix |
tinyint |
Set to 1 if the measurement unit precedes the
value
Default value: '0' |
NO |
| Subclass |
nvarchar (255) |
The four character subclasses of SDD are all
combined here in one entity and distinguished by this attribute
("categorical", "quantitative", "text" or "sequence")
Default value: 'categorical' |
NO |
| Mandatory |
tinyint |
Is the scoring of this descriptor mandatory
(required) in each item?
Default value: '0' |
NO |
| Exclusive |
tinyint |
Applicable to categorical charactors only. If
usually exclusive = 1, then by default the user interface allows only
entering one state. Nevertheless, multiple states in the data are
valid.
Default value: '0' |
NO |
| ValuesAreInteger |
tinyint |
Set to 1 if the values are integer
Default value: '0' |
NO |
| Reliability |
tinyint |
How reliable and consistent are repeated
measurements or scorings of the character by different observers and on
different objects? (0-10)
Default value: '5' |
NO |
| Availability |
tinyint |
How available is the character or concept for
identification? (0-10)
Default value: '5' |
NO |
| SequenceType |
nvarchar (255) |
Type of molecular sequence, "Nucleotide" or
"Protein". The value "Nucleotide" covers RNA and DNA sequences
Default value: 'Nucleotide' |
NO |
| SymbolLength |
tinyint |
The number of letters in each symbol.
Nucleotides are always codes with 1-letter symbols, but proteins may use
1 or 3-letter codes (e.g. A or Ala for alanine)
Default value: '1' |
NO |
| GapSymbol |
nvarchar (3) |
A string identifying the "gap" symbol used in
aligned sequences. The gap symbol must always be symbol_length
long
Default value: NULL |
YES |
| NumStates |
smallint |
A positive number specifying the number of
states for this character
Default value: '0' |
NO |
| StateCollection |
nvarchar (255) |
Handling of multiple values: OrSet/AndSet:
unordered set combined with or/and, OrSeq/AndSeq: ordered sequence
combined with or/and, WithSeq: example is “green with brown”, Between:
an example is “oval to elliptic”
Default value: 'OrSet' |
NO |
| Order |
int |
Display order
Default value: (0) |
NO |
Table CacheCharacterTree
The descriptor trees
| Column |
Data type |
Description |
Nullable |
| CharTreeID |
int |
Database-internal ID of this record (primary key) |
NO |
| CharTreeName |
nvarchar (255) |
Descriptor tree name |
NO |
Table CacheCharacterTreeNode
The character tree nodes
| CharTreeNodeID |
int |
Database-internal ID of this record (primary
key) |
NO |
| CharTreeID |
int |
Reference to the character tree to which the
node belongs (foreign key) |
NO |
| ParentTreeNodeID |
int |
Reference to the superior character tree node
- NULL if the tree node is on top level (foreign key)
Default value: NULL |
YES |
| CharTreeNodeName |
nvarchar (255) |
Character tree node name - NULL if node
references a character
Default value: NULL |
YES |
| CID |
smallint |
Reference to the character to which the node
belongs - NULL if the tree node is no leaf (foreign key)
Default value: NULL |
YES |
| Order |
int |
Display order
Default value: (0) |
NO |
Table CacheDescription
The description data in the database
| DescrID |
int |
Database-internal ID of this record (primary
key) |
NO |
| IID |
int |
Reference to the description item to which
the data belong |
NO |
| CID |
smallint |
Reference to the character to which the data
belong |
NO |
| CS |
varchar (18) |
Reference to the state to which the data
belong. Null if data status is specified
Default value: NULL |
YES |
| Status |
varchar (16) |
Data status of the character as 16 letter
code. Null if CS is specified
Default value: NULL |
YES |
| Modifier |
nvarchar (255) |
Modifier value of description item. Relevant
for categorical and quantitative charaters
Default value: NULL |
YES |
| Frequency |
nvarchar (255) |
Frequency value of description item. Relevant
for categorical charaters
Default value: NULL |
YES |
| X |
float |
Numeric value of description item. Relevant
for quantitative charaters |
YES |
| TXT |
nvarchar (MAX) |
Text value of description item. Relevant for
text and molecular sequence charaters |
YES |
| Notes |
nvarchar (MAX) |
Additional text explaining or commenting on
the description item. Relevant for all charaters |
YES |
Table CacheItem
The description item in the database
| ItemID |
int |
Database-internal ID of this record (primary
key) |
NO |
| IID |
int |
A positive number defining the sequence in
which items are displayed |
NO |
| ItemName |
nvarchar (255) |
Short label (or name) of description
item |
NO |
| Notes |
nvarchar (MAX) |
Additional detail text explaining or
commenting on the description item definition |
YES |
| ItemWording |
nvarchar (255) |
Optional separate wording for natural
language generation (ItemName will be used if this is missing)
Default value: NULL |
YES |
| Column |
Data type |
Description |
Nullable |
| ProjectID |
int |
- |
NO |
| ProjectTitle |
nvarchar (400) |
- |
YES |
| ProjectTitleCode |
nvarchar (254) |
- |
YES |
| StableIdentifier |
nvarchar (500) |
- |
YES |
| TechnicalContactName |
nvarchar (254) |
- |
YES |
| TechnicalContactEmail |
nvarchar (254) |
- |
YES |
| TechnicalContactPhone |
nvarchar (254) |
- |
YES |
| TechnicalContactAddress |
nvarchar (254) |
- |
YES |
| ContentContactName |
nvarchar (254) |
- |
YES |
| ContentContactEmail |
nvarchar (254) |
- |
YES |
| ContentContactPhone |
nvarchar (254) |
- |
YES |
| ContentContactAddress |
nvarchar (254) |
- |
YES |
| OtherProviderUDDI |
nvarchar (254) |
- |
YES |
| DatasetTitle |
nvarchar (254) |
- |
YES |
| DatasetDetails |
nvarchar (MAX) |
- |
YES |
| DatasetCoverage |
nvarchar (254) |
- |
YES |
| DatasetURI |
nvarchar (254) |
- |
YES |
| DatasetIconURI |
nvarchar (254) |
- |
YES |
| DatasetVersionMajor |
nvarchar (254) |
- |
YES |
| DatasetCreators |
nvarchar (254) |
- |
YES |
| DatasetContributors |
nvarchar (254) |
- |
YES |
| DatasetGUID |
nvarchar (254) |
- |
YES |
| DateCreated |
nvarchar (254) |
- |
YES |
| DateModified |
nvarchar (254) |
- |
YES |
| SourceID |
nvarchar (254) |
- |
YES |
| SourceInstitutionID |
nvarchar (254) |
- |
YES |
| OwnerOrganizationName |
nvarchar (254) |
- |
YES |
| OwnerOrganizationAbbrev |
nvarchar (254) |
- |
YES |
| OwnerContactPerson |
nvarchar (254) |
- |
YES |
| OwnerContactRole |
nvarchar (254) |
- |
YES |
| OwnerAddress |
nvarchar (254) |
- |
YES |
| OwnerTelephone |
nvarchar (254) |
- |
YES |
| OwnerEmail |
nvarchar (254) |
- |
YES |
| OwnerURI |
nvarchar (254) |
- |
YES |
| OwnerLogoURI |
nvarchar (254) |
- |
YES |
| IPRText |
nvarchar (254) |
- |
YES |
| IPRDetails |
nvarchar (254) |
- |
YES |
| IPRURI |
nvarchar (254) |
- |
YES |
| CopyrightText |
nvarchar (254) |
- |
YES |
| CopyrightDetails |
nvarchar (254) |
- |
YES |
| CopyrightURI |
nvarchar (254) |
- |
YES |
| TermsOfUseText |
nvarchar (500) |
- |
YES |
| TermsOfUseDetails |
nvarchar (254) |
- |
YES |
| TermsOfUseURI |
nvarchar (254) |
- |
YES |
| DisclaimersText |
nvarchar (254) |
- |
YES |
| DisclaimersDetails |
nvarchar (254) |
- |
YES |
| DisclaimersURI |
nvarchar (254) |
- |
YES |
| LicenseText |
nvarchar (254) |
- |
YES |
| LicensesDetails |
nvarchar (254) |
- |
YES |
| LicenseURI |
nvarchar (254) |
- |
YES |
| AcknowledgementsText |
nvarchar (254) |
- |
YES |
| AcknowledgementsDetails |
nvarchar (254) |
- |
YES |
| AcknowledgementsURI |
nvarchar (254) |
- |
YES |
| CitationsText |
nvarchar (254) |
- |
YES |
| CitationsDetails |
nvarchar (254) |
- |
YES |
| CitationsURI |
nvarchar (254) |
- |
YES |
| RecordBasis |
nvarchar (254) |
- |
YES |
| KindOfUnit |
nvarchar (254) |
- |
YES |
| HigherTaxonRank |
nvarchar (254) |
- |
YES |
| TaxonomicGroup |
nvarchar (254) |
- |
YES |
| BaseURL |
varchar (254) |
- |
YES |
| RecordURI |
nvarchar (500) |
- |
YES |
| ProjectLanguageCode |
nvarchar (3) |
- |
YES |
Table CacheResource
The available resources
| ResourceID |
int |
Database-internal ID of this record (primary
key) |
NO |
| EntityID |
int |
Database-internal ID of the referenced
record |
NO |
| TargetTable |
nvarchar (255) |
Name of the target table: "State",
"Chararcter", "CharacterTreeNode" or "Item" (primary key) |
NO |
| ResourceName |
nvarchar (255) |
Short label (or name) of resource |
NO |
| Ranking |
smallint |
Ranking of the resource; range: 0 to 10
Default value: NULL |
YES |
| Role |
nvarchar (255) |
Role of the resource ("unknown"=role not
known or not specified; "diagnostic"=optimized for identification;
"iconic"=icon/thumbnail, needs text; "normative"=defines a resource
object; "primary"=display always, informative without text;
"secondary"=display only on request) |
NO |
| IPRText |
nvarchar (255) |
The license text of the resource
Default value: NULL |
YES |
| IPRURI |
nvarchar (255) |
The license URI of the resource
Default value: NULL |
YES |
| MimeType |
nvarchar (255) |
The type of the resource as MIME type like
"image/jpeg"; color as "color/hexrgb"
Default value: NULL |
YES |
| URL |
nvarchar (500) |
The URL of the resource
Default value: NULL |
YES |
| Order |
int |
Display order
Default value: (0) |
NO |
Table CacheScope
The scope of the description
| ScopeId |
int |
Database-internal ID of this record (primary
key) |
NO |
| IID |
int |
Reference to the description item to which
these data belong |
NO |
| ScopeType |
nvarchar (255) |
Scope type ("GeographicArea", "Citation",
"Observation", "Specimen", "TaxonName", "OtherConcept", "Stage", "Part"
or "Sex") |
NO |
| ScopeName |
nvarchar (255) |
Short label (or name) of scope |
NO |
| DwbURI |
nvarchar (500) |
Reference to DiversityWorkbench
component
Default value: NULL |
YES |
Table CacheState
The states available for characters
| StateID |
int |
Database-internal ID of this record (primary
key) |
NO |
| CID |
smallint |
Reference to the character to which the state
belongs (foreign key) |
NO |
| CS |
varchar (18) |
A short string identifying the states in
relation to its character |
NO |
| StateName |
nvarchar (255) |
Short label (or name) of state |
NO |
| Notes |
nvarchar (MAX) |
Additional detail text explaining or
commenting on the state definition |
YES |
| StateWording |
nvarchar (255) |
Optional separate wording for natural
language generation (StateName will be used if this is missing)
Default value: NULL |
YES |
| MinValue |
float |
Applicable to quantitative characters only;
in support of a plausibility check for values. Example: for tree height
this could be 0, i.e. only positive values allowed
Default value: '-1e308' |
NO |
| MaxValue |
float |
Applicable to quantitative characters only;
in support of a plausibility check for values. Example: for tree height
this could be 99
Default value: '1e308' |
NO |
| Order |
int |
Display order
Default value: (0) |
NO |
Table CacheTranslation
The available translations
| Column |
Data type |
Description |
Nullable |
| TranslationID |
int |
Database-internal ID of this record (primary key) |
NO |
| EntityID |
int |
Database-internal ID of the referenced record |
NO |
| LanguageCode |
nvarchar (3) |
Three-character language code of the translation |
NO |
| SourceColumn |
nvarchar (255) |
Name of the original table column |
NO |
| TargetTable |
nvarchar (255) |
Name of the target table: “State”, “Character” or “Item” |
NO |
| Text |
nvarchar (MAX) |
Translated text |
YES |
Table ProjectLockedDescriptor
The descriptors (=characters) that shall not be published
| Column |
Data type |
Description |
Nullable |
| DescriptorID |
int |
Database-internal descriptor ID of descriptive data that shall no be published (primary key) |
NO |
Table ProjectLockedScope
The scope types that shall not be published
| Column |
Data type |
Description |
Nullable |
| ScopeType |
nvarchar (255) |
Scope types that shall not be pulished (primary key) |
NO |
Table ProjectPublishedDescriptorTree
The descriptor tree IDs that shall be published
| Column |
Data type |
Description |
Nullable |
| DescriptorTreeID |
int |
IDs of descriptor trees that shall be published (primary key) |
NO |
Table ProjectPublishedTranslation
The translation languages that shall be published
| Column |
Data type |
Description |
Nullable |
| LanguageCode |
nvarchar (3) |
Three-letter language codes of translations that shall be published (primary key) |
NO |
Cache Database
Logins
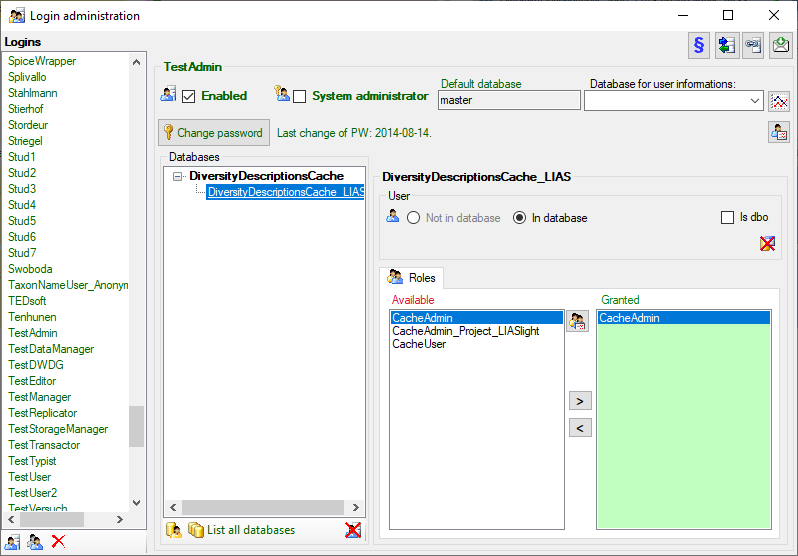
Cache database - User administration
There are two roles in the cache database with a general access to the
data: CacheAdmin (for the administration and transfer of the data) and
CacheUser (with read only access). The data in the cache databases are
organized in projects. Therefore for every project you find one
additional role: CacheAdmin_Project_… with the right to transfer of
the corresponding project to the SQL-Server cache database. You find the
project specific roles in the SQL-Server cache database, in the Postgres
database only CachAdmin and CacheUser are available.
To administrate the logins in the SQL-Server
database, go to the  Update and Sources tab
and click on the
Update and Sources tab
and click on the  button of the cache database to open a window as shown below. To
administrate the access for other logins, you have to be a System
administator. For further details please see the chapter about the
login administration for the main database.
button of the cache database to open a window as shown below. To
administrate the access for other logins, you have to be a System
administator. For further details please see the chapter about the
login administration for the main database.
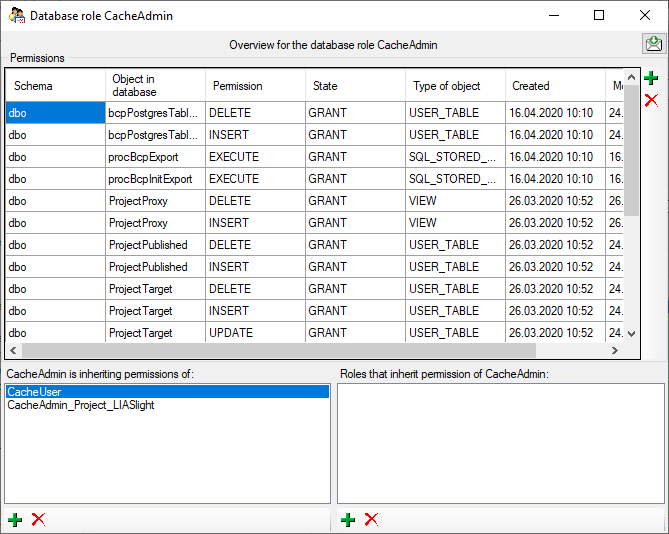
To view the access rights of a selected role click on the
 button to open a window as shown below.
Postgres database
To handle the logins and user groups on the Postgres database server, go
to the Update and Sources tab and click on
the button of the postgres database. A window as shown below will
open, where you can create and delete logins and groups. For the logins
you can change their membership in groups and their properties (see
below). On the left you find 2 lists, with the upper list containing the
logins and the list below with the groups resp. roles. For the logins
you can set the general properties as shown below. The login postgres is
created with the installation of the database and is the login for the
administration of the database including the updates etc. For details
about predefined properties like “Is
superuser”, please turn to the Postgresdocumentation.
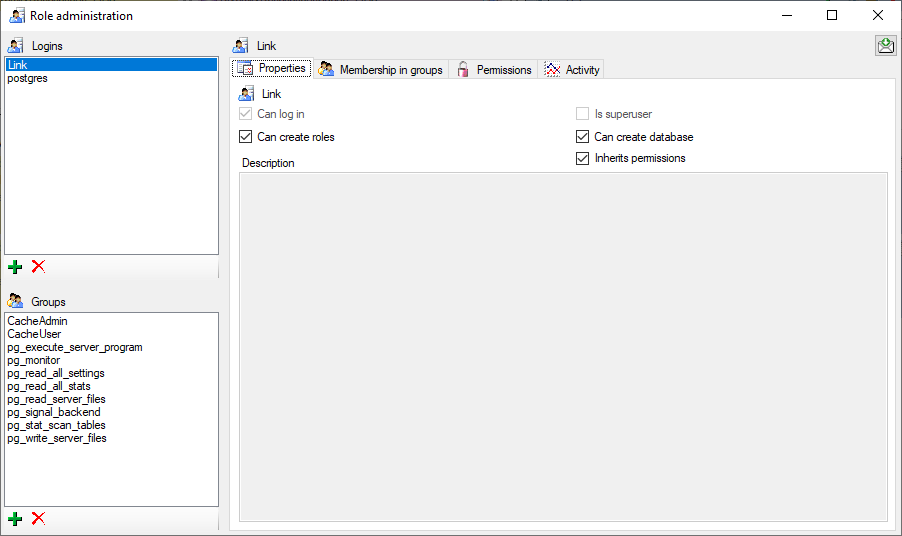
In the Membership in groups area you can define the groups in which
the login is a member (see below).
For the groups you can change their membership in other groups and their
permissions (see below).
Cache Database
Packages
Administration of the Packages
The formatting of the data according to the specifications of
webservices etc. is done with packages. There is a growing list of
packages provided with the software. For new packages either turn to the
developers or create a package of your own. The packages are realised as
tables, view, functions etc. reading the data in the tables without any
changes to the data. They therefore can be inserted and removed without
any effects on the original data. The naming of the objects within a
package follow the schema [Name of the package]_… as shown in the
images below.
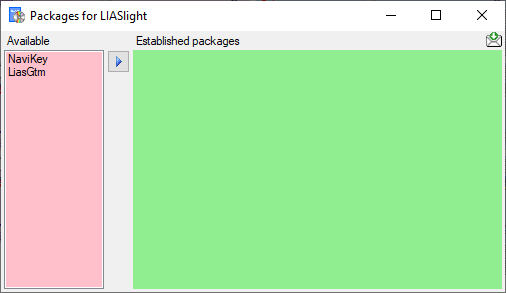
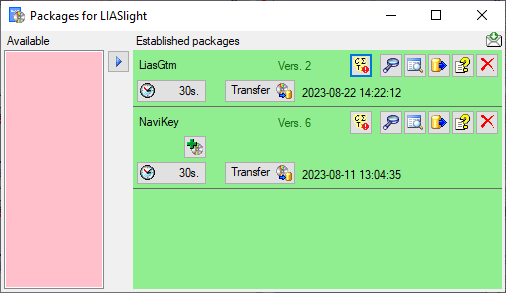
To administrate the packages installed within one project, click on the
button (see above). A window as shown below will
open listing all available packages.
Click on the button to establish the selected
package. To ensure the current version of the package, click on the
Update to vers. … button (see below).
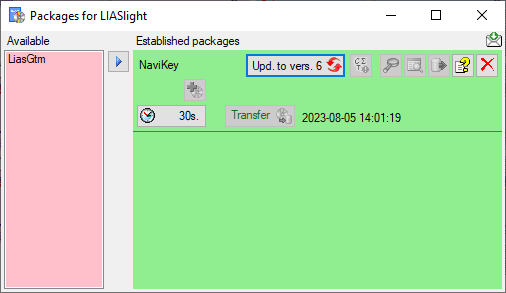
A window will open where all the needed scripts will be listed. For
packages keeping the data in their own tables like NaviKey it may be
necessary to adapt the timeout for database commands. Click on the
 button and enter an appropriate value. For large
amounts of data the value 0 is recommended, which means infinite.
button and enter an appropriate value. For large
amounts of data the value 0 is recommended, which means infinite.
With button  you may select locked characters
to restrict the exported data for the current package. This option might
be useful, if for a certain target, some characters make no sense. E.g.
for the NaviKey application information like the “data record revision”
is irrelevant. For other targets it may be published, because it is no
secret information.
you may select locked characters
to restrict the exported data for the current package. This option might
be useful, if for a certain target, some characters make no sense. E.g.
for the NaviKey application information like the “data record revision”
is irrelevant. For other targets it may be published, because it is no
secret information.
To remove a package use the  delete button and the
 button to get information about the package. For
some packages the button
button to get information about the package. For
some packages the button  indicates that
modified data may be published by using an
Add-On (see below).
indicates that
modified data may be published by using an
Add-On (see below).
A package (e.g. NaviKey) may contain e.g. tables
or materialized views. These need an update after the data have been
transferred to the Postgres database. Click on the
 Transfer button to update the
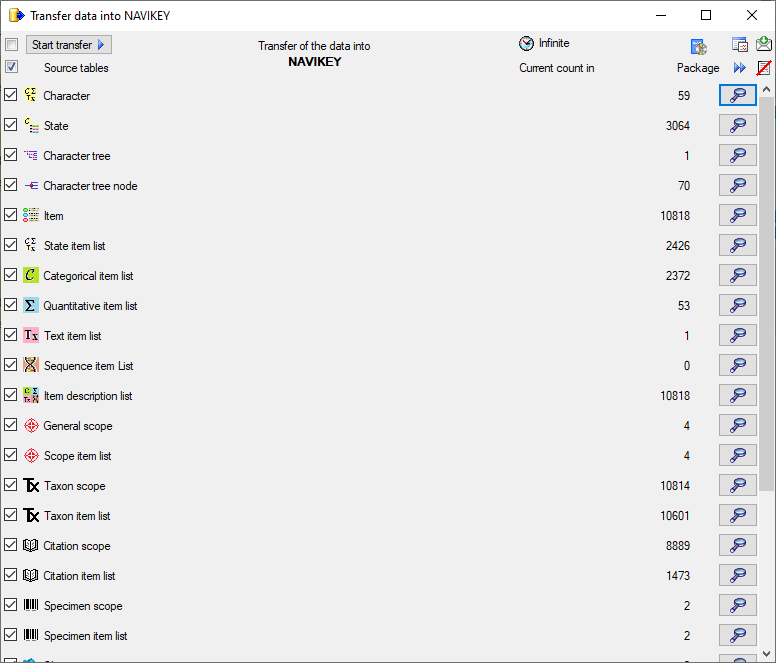
package data. A window as shown below will open, listing the transfer
steps for the package. Choose the steps that should be transferred and
click on the Start transfer button to transfer
the data.
Transfer button to update the
package data. A window as shown below will open, listing the transfer
steps for the package. Choose the steps that should be transferred and
click on the Start transfer button to transfer
the data.
After closing the transfer window you may inspect the data provided by
the package by click on the  button of the
package. Some packages or add-ons may install depend schemas in the
database. In this case you will get a window to select the schema for
display.
button of the
package. Some packages or add-ons may install depend schemas in the
database. In this case you will get a window to select the schema for
display.

A window as shown below will open listing all package related objects.
For every object (table, view, column, … ) the description is shown in
the lower part of the window.
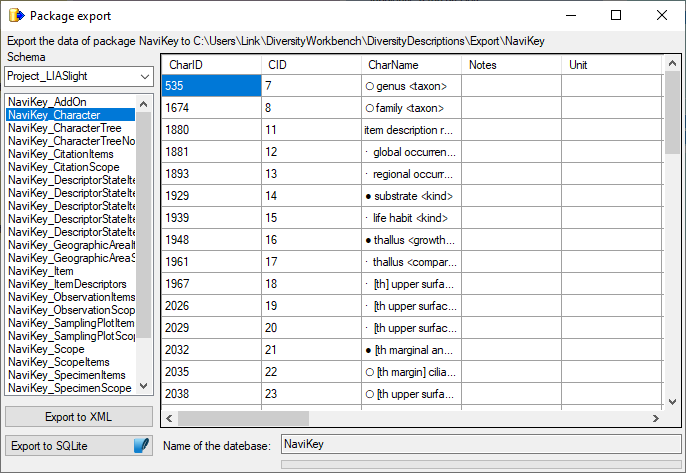
To export the contents of a package, click on the
button. A window as shown below will open listing the main views of the
package. You can export the data as XML (creating a directory with one
xml file for every view) or as  SQLite database
(creating a SQLite database containing the tables).
SQLite database
(creating a SQLite database containing the tables).
Cache Database
Packages Add On
Administration of the Add-Ons for Packages
For certain packages there are add-ons available to adapt a package to
the special specifications of e.g. a project. To add an add-on, click on
the button as shown below. A window as
shown below will open listing all available add-ons.
A window as shown below will open listing all available add-ons.
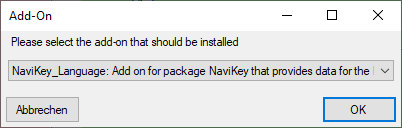
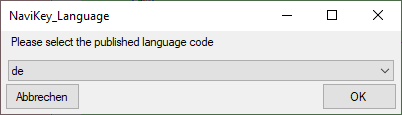
Certain add-ons require the selection of an add-on parameter. E.g. the
Navikey_Language add-on requires the selection of the published
translation language code. In this cases an additional selection window
will be shown (see image below). Remark: Selecting the add-on
parameter and therefore the installation of the add-on might require
that data have been trasferred to the Postgres database before!
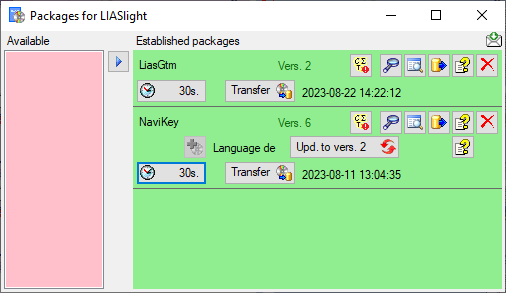
After the add-on has been added, you need to update it to the current
version of the add on with a click on the Upd. to vers. …
button (see below). A window will open where all
the needed scripts will be listed. Some add-ons are exclusive, meaning
that no further add-ons can be added and further updates of the package
are organized via the add-on as shown below. To remove an add-on you
have to remove the package with a click on the
button.
An Add-on defines a version of the package it is compatible with.
Add-ons can not be removed as they perform changes in the package. To
remove an add-on, remove the package and reinstall it. If a package
containing an Add-on needs an update you have to remove the package as
well and reinstall it.
With a click on the first button besides the
package you can generate a description of all objects in the package
(see below).
With a click on the second button besides the
add-on you can view its description (see below).
Cache Database Postgres
Administration of the Postgres cache databases
To
create a Postgres cache database, you must be connected with a server
running .
To connect to a server, click on the  button and enter the connection parameters. If no cache database has
been created so far, you will get a message that no database is
available, otherwise you may select the database as shown below.
button and enter the connection parameters. If no cache database has
been created so far, you will get a message that no database is
available, otherwise you may select the database as shown below.

After entering valid login data to the Postgres server, at least the
 button will be available (see image below).
Click on the button to
create a new cache database (see below). You will be asked for the name
of the database and a short description. button will be available (see image below).
Click on the button to
create a new cache database (see below). You will be asked for the name
of the database and a short description.

After the database was created, you have to update the database to the
current version. Click on the Update  button to open a window listing
all needed scripts. To run these scripts just click on the Start
update
button. After the update the database is ready to take your data.
Subsequent updates may become necessary with new versions of the
database. To remove the current database from the server, just click on
the button to open a window listing
all needed scripts. To run these scripts just click on the Start
update
button. After the update the database is ready to take your data.
Subsequent updates may become necessary with new versions of the
database. To remove the current database from the server, just click on
the  button. button.
In the image on the right you see a screenshot from the tool pgAdmin 4 . You may use this tool to
inspect your data and administrate the database independent from
DiversityDescriptions. Please keep in mind, that any changes you insert
on this level may disable your database from being used by
DiversityDescriptions as a sink for your cache data. The data are
organized in  schemas, with schemas, with  public as the default schema. Here you find public as the default schema. Here you find
 functions for marking the
database as a module of the Diversity Workbench and the version of the
database. The tables in this schema are e.g. functions for marking the
database as a module of the Diversity Workbench and the version of the
database. The tables in this schema are e.g.  TaxonSynonymy where the data derived from
DiversityTaxonNames are stored and
ReferenceTitle where the data derived from DiversityReferences are
stored. For every project a separate schema is created (here Project_LIASlight). The project schemas
contain 2 functions for the ID
of the project and the version. The data are stored in the tables while the packages in their greater part are
realized as TaxonSynonymy where the data derived from
DiversityTaxonNames are stored and
ReferenceTitle where the data derived from DiversityReferences are
stored. For every project a separate schema is created (here Project_LIASlight). The project schemas
contain 2 functions for the ID
of the project and the version. The data are stored in the tables while the packages in their greater part are
realized as  views and functions extracting and converting
the data from the tables according to their requirements. views and functions extracting and converting
the data from the tables according to their requirements.
If you connect to a Postgres database for the very first time, you must
use an account with sufficient rights to create databases, e.g.
"postgres". After performing the first database update the role
"CacheAdmin" is available, which has sufficient rights for any cache
database operation. To create new logins and grant access to the
Postgres cache database for other users, see chapter Login administration of the cache
databases . |
 |
Cache Database
Postgres Database
Infrastructure for the postgres database
At the PostgreSQL server the tables are either placed in the schema
public or a schema named according to the published project. In
general the tables in postgres have the same strucure as in the
Microsoft SQL cache database, so the transfer to postgres is mainly a
pure copy of their contents. Only some data types are subtituted by
their equivalents in postgres. Therefore you may refer to the cachedatabase documentation concerning
these tables. Some additional tables, views or even schemas and
appropriate transfer functions may be introduced by the
packages and their
add-ons.
In schema public the support functions diversityworkbenchmodule
and version provide the module name “DiversityDescriptionsCache” and
the postgres database version (e.g. “01.00.01”) as strings to support
processing and the database update. In the published project schemas
the support functions projectid and version provide the
corresponding integer values.
All schemas, functions, tables and views are owned by role
CacheAdmin. The additional role CacheUser grants read access to
all elements rsp. execution rights to the support functions.
Source tables
The data tables of the source modules (e.g. DiversityReferences) are
transfered as copies to the schema public. I.e. the access tables
ending with “Source”, “SourceTarget” and “SourceView”, which serve
administrative purposes, are omitted. In the example for the module
DiversityReferences, shown in the databaseinfrastructure page, only the tables
ReferenceTitle and
ReferenceRelator
are tranferred to postgres.
Project tables
The project tables in postgres are simple copies of the cache database
tables. They are placed in a schema named according to the published
project, e.g. Project_Test for a project with the name “Test”. For
details refer to the cache database
documentation:
The view ProjectLanguage provides access to the
ProjectLanguageCode stored in table CacheMetadata. The view
TranlationLanguage provides access to the LanguageCode of
available translations stored in table CacheTranslation.
Packages and Add-Ons
The formatting of the data according to the specifications of
webservices etc. is done with packages. The packages are realized as
tables, views, functions etc. reading the data in the tables without any
changes to the data. They therefore can be inserted and removed without
any effects on the original data. The naming of the objects within a
package follow the schema [Name of the package]_… . Each package
provides a database command file to create the required objects.
Transfer of data is done by calling dedicated transfer functions.
For certain packages there are add-ons available to adapt a package to
the special specifications of e.g. a project. Each add-on provides a
database command file to create the required objects. The traditional
way of realizing an add-on is to modify some transfer functions of the
package. Therefore only one of those add-ons can be installed for a
package. A more flexible approach of handling add-ons is to build a
dedicated add-on transfer function and store its name in the
administration table. For package transfer there a transger step is
defined that reads all associated add-ons from the database and calls
their transfer functions in a defined order. With this approach
insertion of multiple compatible add-ons may be realized.
For the administration of packages and add-ons four tables are used in
the postgres database:
In table Package each installed package, its version and description
are stored. After data transfer to a package transfer date and time are
stored there, too. Add-on data like its version are stored in table
PackageAddOn. Some add-ons may require a parameter that has to be
selected during installation and ist stored in table column
Parameter. If the “non-traditional” approach of realizing add-ons
using dedicated transfer functions is used, this table provides optional
support columns.
The table PackagePublicTable offers support, if a package or add-on
needs to provide data in the schema public. A traditional way to
realize this feature is to mark the package as “using schema public”. As
a consequence the package can only be created in one project of the
whole database. When the package is removed, all objects in schemad
public with the prefix “[Name of the package]_” are dropped.
An alternative is that a package or add-on inserts the public table name
in PackagePublicTable. Furthermore the public table must have a
column where the source schema name is included. If the package is
removed, all entries of the public table with matching package name and
source schema will be deleted. If the public table is empty, the table
itself will be dropped. An example is package NaviKey that enters
all published schemas in the table NaviKey_Schema. This table is
used by the REST service to provide data to the application
DiversityNaviKey.
The table PackageSchema offers support, if a package or add-on needs
to provide data in dependent schemas. For example the add-on
NaviKey_Translations provides access to all available translated
data of the package NaviKey. Therefore for each available language
code a dependent schema named [language code]_Project_[Name of the
project] (e.g. de_Project_LIASlight for the german translation) is
created with views to the data in the master schema. Each dependent
schema is inserted in table PackageSchema (and the public table
NaviKey_Schema for the REST service). When the package is removed, all
dependent schemas will be dropped, too.
Available Packages and Add-Ons
Currently the following packages and add-ons are available:
| Package |
Add-On |
Description |
| LiasGtm |
- |
Tables and views on the data for geographic
visualization of LIAS trait data (https://liasgtm.lias.net/gtm.php) |
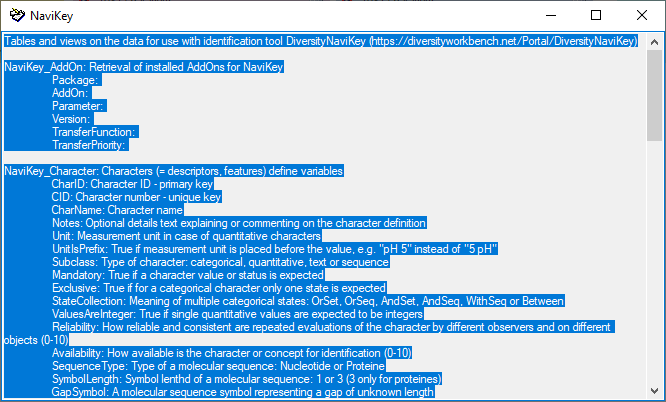
| NaviKey |
- |
Tables and views on the data for use with
identification tool DiversityNaviKey
(https://diversityworkbench.net/Portal/DiversityNaviKey) |
| NaviKey |
NaviKey_Wording |
Add on for package NaviKey that provides data for the
DiversityNaviKey application
(https://diversityworkbench.net/Portal/DiversityNaviKey):
(1) For characters/descriptors, categorical states and description items
the wording text is provided instead of the original names. |
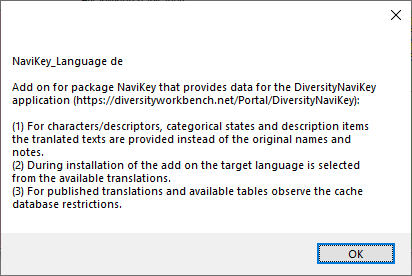
| NaviKey |
NaviKey_Language |
Add on for package NaviKey that provides data for the
DiversityNaviKey application
(https://diversityworkbench.net/Portal/DiversityNaviKey):
(1) For characters/descriptors, categorical states and description items
the tranlated texts are provided instead of the original names and
notes.
(2) During installation of the add on the target language is selected
from the available translations.
(3) For published translations and available tables observe the cache
database restrictions. |
| NaviKey |
NaviKey_Translations |
Add on for package NaviKey that provides data for the
DiversityNaviKey application
(https://diversityworkbench.net/Portal/DiversityNaviKey):
(1) For characters/descriptors, categorical states and description items
the tranlated texts are provided instead of the original names.
(2) For each available language a schema is created where the data can
be accessed.
(3) The dependent schemas are registered in tables PackageSchema and the
public NaviKey_Schema.
(4) For published translations and available tables observethe cache
database restrictions. |
Tables for Packages and Add-Ons
Table Package
| Column |
Data type |
Description |
Nullable |
| Package |
character varying(50) |
The name of the package |
NO |
| Version |
integer |
The version of the package |
YES |
| Description |
text |
Description of the package |
YES |
| URL |
character varying(500) |
A link to a website with further informations about the package |
YES |
| LogLastTransfer |
timestamp without time zone |
- |
YES |
Table PackageAddOn
| Column |
Data type |
Description |
Nullable |
| Package |
character varying(50) |
The name of the package |
NO |
| AddOn |
character varying(50) |
The name of the package add-on |
NO |
| Parameter |
character varying(50) |
An optional parameter to configure the package add-on |
YES |
| Version |
integer |
The version of the package add-on |
YES |
| TransferFunction |
character varying(50) |
An optional transfer function the package add-on; NULL for exclusive packages |
YES |
| TransferPriority |
integer |
The transfer priority of the package add-on; 0 for exclusive packages |
YES |
Table PackageLockedCharacter
Stores for each schema the CIDs that shall not included in the
package.
| Column |
Data type |
Description |
Nullable |
| Package |
character varying(50) |
The name of the package |
NO |
| CID |
smallint |
The CID that shall not be included in the package |
NO |
Table PackagePublicTable
Stores tables in schema public where data of the package are inserted.
Data in this table are inserted by the package and/or Add-Ons.
| Column |
Data type |
Description |
Nullable |
| Package |
character varying(50) |
The name of the package |
NO |
| Table |
character varying(128) |
The dependent table name in schema public of the package where data of the package are inserted |
NO |
| ControllingSchemaColumn |
character varying(128) |
The column name of dependent table where the controling schema name is stored |
YES |
Table PackageSchema
Stores dependent schemas where data of the package are inserted. Data in
this table are inserted by the package and/or Add-Ons.
| Column |
Data type |
Description |
Nullable |
| Package |
character varying(50) |
The name of the package |
NO |
| Schema |
character varying(128) |
The dependent schema name of the package where data of the package are inserted |
NO |
Cache Database Projects
Projects in the cache database
The data transferred into the
cache database are always transferred according to a project they
belong to. Choose Data → Cache database
… from the menu and select the tab
Projects. If no projects were added so far the window will appear like
shown below.
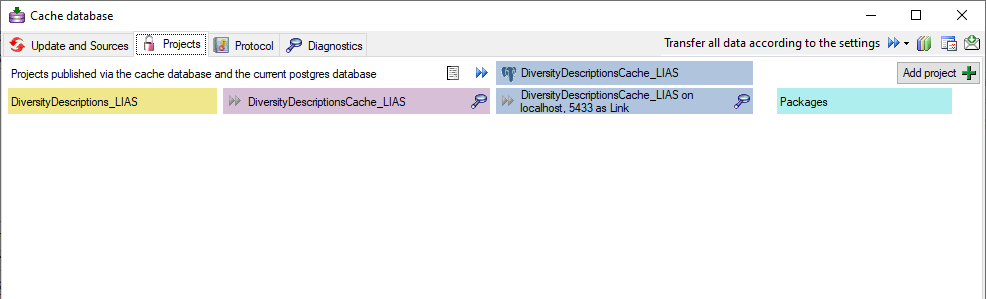
To add a new project for the transfer into the cache database, click on
the Add project  button. In the area below a
new entry as shown below will appear. The area on the right shows the
number of datasets in the project in the source database together with
the date of the last update. To ensure the separation of the data
between the projects, DiversityDescriptions creates a separate schema
for every project named Project_[name of the project] together with
needed roles, tables etc..
button. In the area below a
new entry as shown below will appear. The area on the right shows the
number of datasets in the project in the source database together with
the date of the last update. To ensure the separation of the data
between the projects, DiversityDescriptions creates a separate schema
for every project named Project_[name of the project] together with
needed roles, tables etc..

Before transferring data you have to update the project schema to the
latest version, indicated by the appearance of an update button
. Click on the button to open a window as
shown below. Click on the Start update
button to update the schema to the latest version. For adding a project
and performing the database update you need to be a system administrator
(s. Login administration).
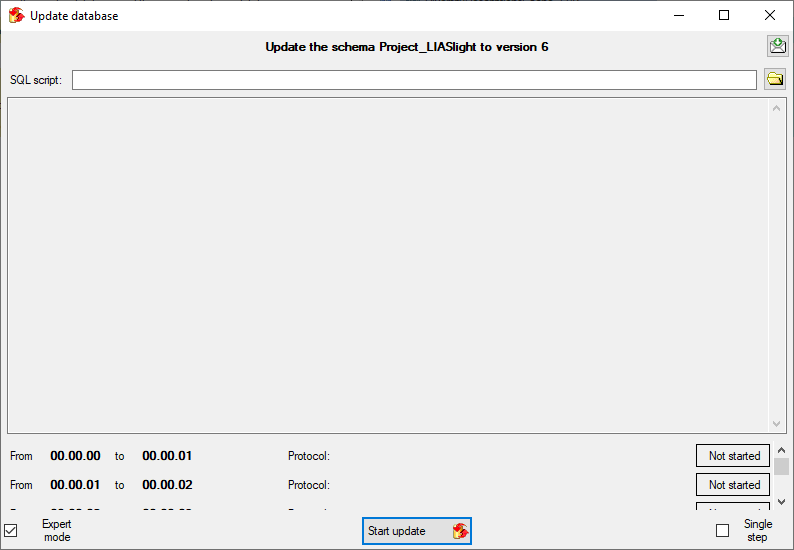
After the update the database is ready to transfer data into.
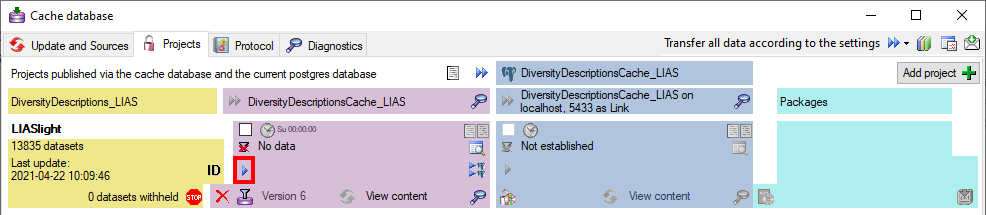
But before starting the cache transfer you should take a look on the
ID mapping, data withholding and data restrictions. The
first two items are stored in the descriptions database, the latter in
the cache database.
With the ID mapping you can determine how
description items, descriptors and categorical states shall be
identified in the cach database and how changes are handled in
subsequent cache transfers. Click on the  button
to edit the ID mapping behaviour for the data of the project (see
below).
button
to edit the ID mapping behaviour for the data of the project (see
below).
If any descriptors are marked with the data status Data withheld, you
have the options to exclude the whole description the export, to hide
only the marked descriptor data or to export the whole dataset. Click on
the  button to edit the data withholding
behaviour for the data of the project (see below).
button to edit the data withholding
behaviour for the data of the project (see below).
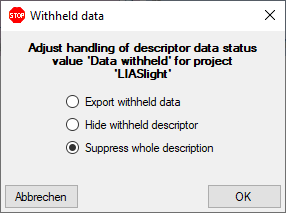
Besides the restrictions in the source database, you can set further
data restrictions for this transfer.
Click on the  button and choose
the data restrictions for the cache transfer (see below).
button and choose
the data restrictions for the cache transfer (see below).
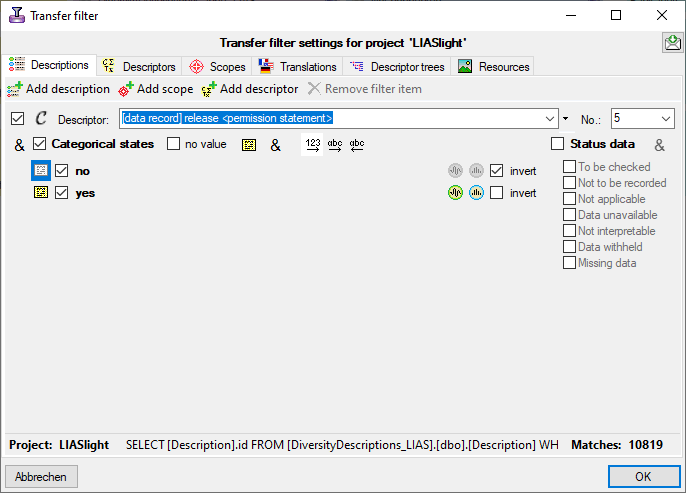
To transfer the data you have 3 options as described in the
Transfer chapter.
Afterwards the number and date of the transferred data are visible as
shown below.

To inspect the transferred data use the View content
button. A window as shown below will open where
all tables containing the data of the project are listed.

Click on the  button to filter the content. A
window as shown below will open. Choose the column for the filter, the
operator (e.g. = ) and the filter value (see below).
button to filter the content. A
window as shown below will open. Choose the column for the filter, the
operator (e.g. = ) and the filter value (see below).
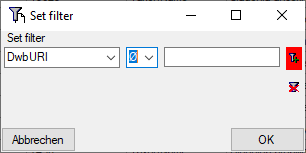
Now click on the  button to add the filter
criteria to the table filter. You may add as many criteria as needed
(see below). With the
button to add the filter
criteria to the table filter. You may add as many criteria as needed
(see below). With the  button you can
clear the filter..
button you can
clear the filter..
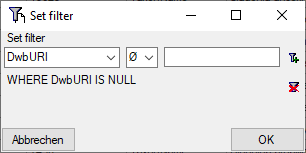
Before you can transfer the data into the Postgresdatabase, you have to connect
 to the Postgres database and click on the
 button to establish the project and run
necessary updates . After the project is
established and up to date, use the button to
transfer the data in the Postgres area (see below).
button to establish the project and run
necessary updates . After the project is
established and up to date, use the button to
transfer the data in the Postgres area (see below).

If a project is exported into another Postgres database on the same
server, these databases will be listed underneath the Postgres block
(see image below). For an overview of all target Postgres databases
click on the  button.

If the target is placed on the current server, the text will appear in
black instead of grey (see below). Packages, if administered, will be
listed in the table as well.

In some cases, when a cache database has been deleted on the current
Postgres server, there might still be some administrative information
left. In this case the target is shown in red and you have the option to
delete the administrative data for that target (see below).

In the Postgres database you can
install packages
to adapt the data to any needed format.
Cache Database Restrictions
Restrictions for the data transfer into the cache database
The restrictions of the published data are
defined in the  main database via
projects and data
withholding . In the
cache database further restrictions can be set
for every project. You may set a filter on description data to restrict
the
main database via
projects and data
withholding . In the
cache database further restrictions can be set
for every project. You may set a filter on description data to restrict
the  Descriptions, select the
 Descriptors, the
  Scopes and the
  Translations that are
transferred.
Translations that are
transferred.
To set the restrictions, click on
the button (see below).
A window as shown in the following sections will open.
Descriptions tab
The Descriptions filter works the same way as
the Extended query. Use buttons
 Add description,
 Add scope or
 Add descriptor to insert filter items
for description, scope or descriptor criteria and set the filter
conditions. With button Remove filter item
you may remove the currently selected filter item. In the lower right
corner Matches: shows you the current count of description items
that match the adjusted filter criteria. In the lower center part the
resulting SQL filter is shown.
Add descriptor to insert filter items
for description, scope or descriptor criteria and set the filter
conditions. With button Remove filter item
you may remove the currently selected filter item. In the lower right
corner Matches: shows you the current count of description items
that match the adjusted filter criteria. In the lower center part the
resulting SQL filter is shown.
Descriptors tab
With the Descriptors filter you can select the
descriptors for which summary data shall be transferred. Use button the
arrow buttons << ,
< , > and >> for moving the entries between the Not published and Published list. Click button
Transfer existing to move all descriptors that
are used within the database to the Published list. With button
Transfer from tree you may move all descriptors
connected to the selected Descriptor tree to the Published list. Option Show
sequence numbers includes the descriptor sequence numbers in the
lists. If you do not only want to suppress the descriptive data but also
want to hide the descriptors and their state from the cache database,
select the option Omit descriptors.
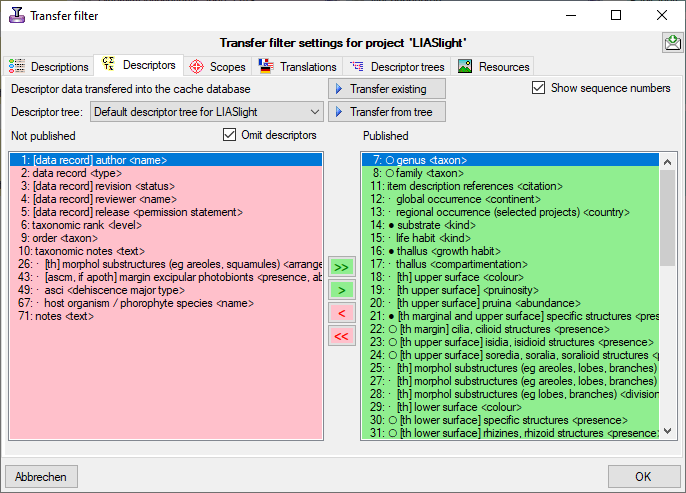
Note: With this option you may keep the selected descriptors
completely away from the cache database. If you want to suppress certain
descriptors only for selected targets, there is an additional
possibility to control the export based on the
Packages (refer to “locked characters”).
Scopes tab
With the Scope filter you can select the scope
type for description scopes that shall be transferred. Use button the
arrow buttons << ,
< , > and >> for moving the entries between the Not published and Published list. Click button
Transfer existing to move all scope types that
are used within the database to the Published list.
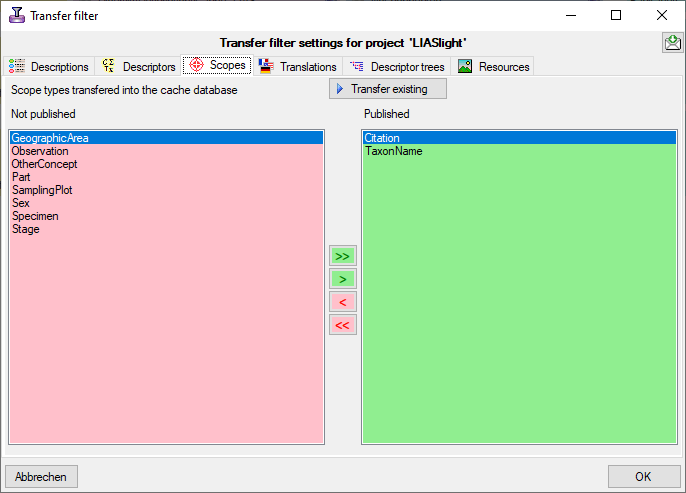
Translations tab
With the Translation filter you can
select the translation languages for description items, descriptors and
categorical states that shall be transferred. Use button the arrow
buttons << , <
, > and >> for moving the entries between the Not published and Published list. Click button
Transfer existing to move all translation
languages that are present within the database to the Published list. Use the check
boxes Descriptions, Descriptors and States to select the
tables where translations shall be published. By default, i.e. without
explicit adjustment no tranlations will be transferred to the cache
database.
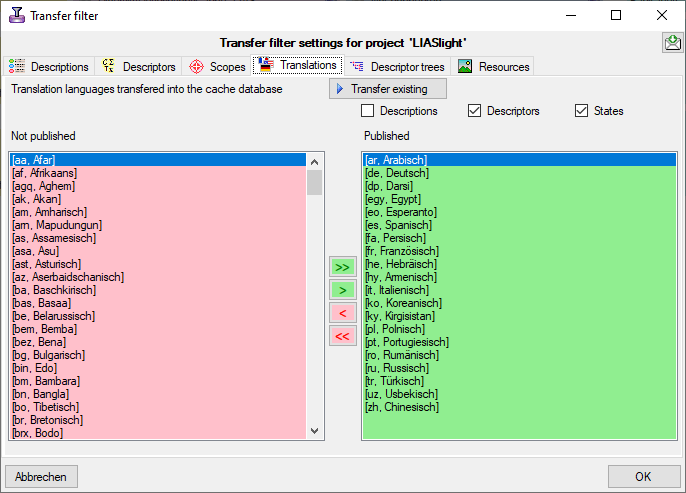
Descriptor trees tab
With the  Descriptor tee filter you can
select the descriptor trees that shall be transferred. Use button the
arrow buttons << ,
< , > and >> for moving the entries between the Not published and Published list. By default,
i.e. without explicit adjustment no descriptor trees will be transferred
to the cache database.
Descriptor tee filter you can
select the descriptor trees that shall be transferred. Use button the
arrow buttons << ,
< , > and >> for moving the entries between the Not published and Published list. By default,
i.e. without explicit adjustment no descriptor trees will be transferred
to the cache database.
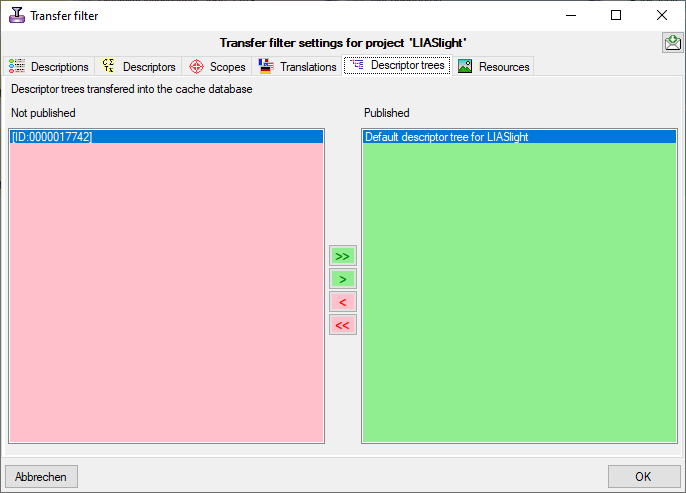
Resources tab
With the  Resources filter you can select the
resource links that shall be transferred. You have to select at least
the Entity types and the Resource types that shall be published.
By default, i.e. without explicit adjustment no resources will be
transferred to the cache database.
Resources filter you can select the
resource links that shall be transferred. You have to select at least
the Entity types and the Resource types that shall be published.
By default, i.e. without explicit adjustment no resources will be
transferred to the cache database.
If you select Publish all from section Resource types, all
available resources that either are URLs (starting with “http://” or
“https://”) or color codes (starting with “color://#”) are included in
the transfer. This general restriction ignores resources that are
located on your local machine and therefore not generally reachable. If
you select the explicit types Images or Colors, the resource
variant types must be set correctly, e.g. “image/jpeg”. This can be done
for an individual resource in the corresponding edit panel by retrieving
the media data from the source. A more comfortable way to get those data
for a large amount of resources is to use the database
maintenance tool.
With the check boxes Restrict role you may select role values that
shall be transferred. With Restrict ranking you may select the
minimum ranking value of published resources. If you select the value
“0”, the ranking values will be ignored, i.e. even unranked resources
will be published.

Cache Database Sources
Sources from other modules
To provide details from other modules like DiversityTaxonNames,
DiversityCollection, DiversityReferences etc. in the cached data, this
information is transferred into the cache database together with
the data from DiversityDescriptions database. Use the
button to add a source for the data you need.
You may include data from a local or a linked database. The data for the
cache database are provided via views that will be created for you. With
the  button you can list the sources used in the
projects to get a hint of what may be needed. The tables and view for
the sources are placed in the schema dbo in the
SQL-Server cache database and public in the
Postgres cache databases. In case a new
version for the source is available you get a notation like Needs recreation to
version 2 . In this case you must remove the source with a click
on the button and use the
button to recreate the source. For the inclusion
of sources from services like Catalogue of Life see the chapter
Sources from webservices.
button you can list the sources used in the
projects to get a hint of what may be needed. The tables and view for
the sources are placed in the schema dbo in the
SQL-Server cache database and public in the
Postgres cache databases. In case a new
version for the source is available you get a notation like Needs recreation to
version 2 . In this case you must remove the source with a click
on the button and use the
button to recreate the source. For the inclusion
of sources from services like Catalogue of Life see the chapter
Sources from webservices.
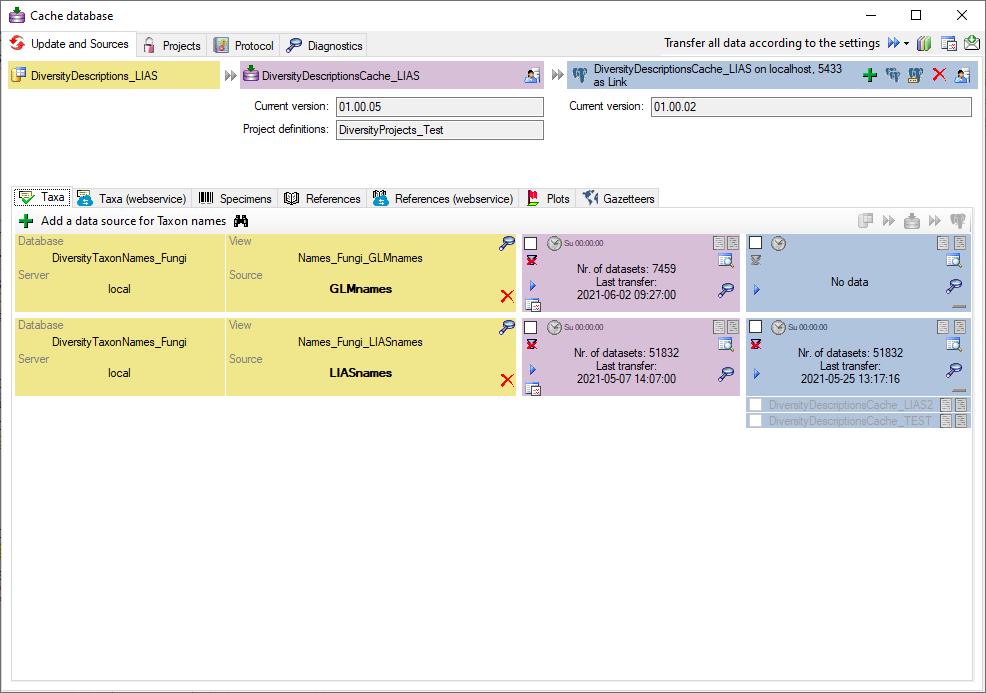
Subsets
The sources of some module provide additional subsets to the main data.
To select the subsets that should be transferred to the cache database,
click on the  button. In the upcoming dialog
(see the example for DiversityTaxonNames below) select those subsets you
want to transfer in addition to the basic name list.
button. In the upcoming dialog
(see the example for DiversityTaxonNames below) select those subsets you
want to transfer in addition to the basic name list.
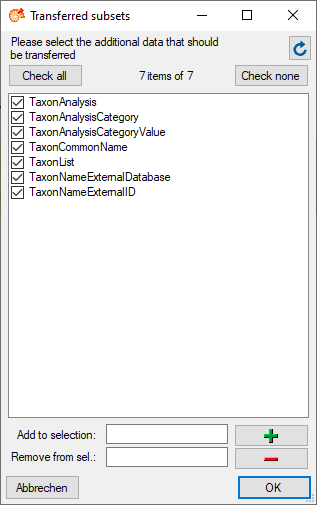
Transfer
Single manual transfer
To transfer the data of a single source into the
cache database use the button and the
buttons to inspect the content.
To transfer the data into the Postgres database, you have to
connect with a database first. Use the button
to transfer the data from the cache database into the
Postgres database. The  button will
transfer the data of all sources in the list into the cache database
(see below).
button will
transfer the data of all sources in the list into the cache database
(see below).
Scheduled transfer
To transfer the data of all sources into the
** **
cache database and all available
Postgres databases, use
the scheduled transfer as backgroundprocess. With this transfer all available
Postgres databases will be included in the data transfer. These targets
are indicated underneath the Postgres block (see image below).

If the target is placed on the current server, the text will appear in
black as shown below.

Removal
With the button you can remove the sources
together with the views (see above).
Orphaned data
In some cases, e.g. if a datasource is removed from the
cache database and there is no active connection to the
Postgres database, the corresponding data will stay in the
postgres database. These orphaned data might disturb subsequent data
transfers, if they overlap with the remaining data. Their source view
and number of datasets are shown in section “Source views not present in
the SQL-Server database” (see below). Click on button
to delete the orphaned data.

Cache Database Transfer
Transfer of the data
To transfer the data you have 3 options:
- Single transfer : Transfer data of a single
project
- Bulk transfer : Transfer data of all
projects and sources selected for the schedule based transfer
With the resp.
button you can decide if the data should
be checked for updates. If this option is active (
) the program will compare the contents and
decide if a transfer is needed. If a transfer is needed, this will be
indicated with a red border of the transfer button
 . If you transferred only a part
of the data this will be indicated by a thin red border for the current
session
. If you transferred only a part
of the data this will be indicated by a thin red border for the current
session  . The context menu of
the button View
differences will show the accession numbers of the datasets with
changes after the last transfer (see below).
. The context menu of
the button View
differences will show the accession numbers of the datasets with
changes after the last transfer (see below).
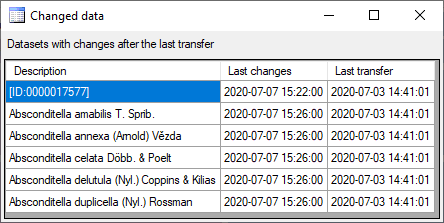
Competing transfer
If a  competing transfer is active for the same step, this will be
indicated as shown below. While this transfer is active, any further
transfer for this step will be blocked.
competing transfer is active for the same step, this will be
indicated as shown below. While this transfer is active, any further
transfer for this step will be blocked.

If this competing transfer is due to e.g. a crash and is not active any
more, you have to get rid of the block to preceed with the transfer of
the date. To do so you have to reset the status of the transfer. Check
the scheduler  as shown
below. This will activate the button.
as shown
below. This will activate the button.
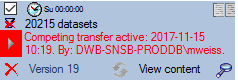
Now click on the button to open the window for
setting the scheduler options as shown below.
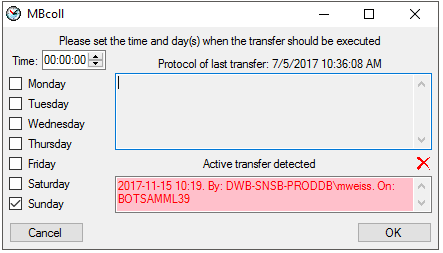
To finally remove the block by the Active
transfer, click on the button. This
will remove the block and you can preceed with the transfer of the data.
Single transfer
To transfer the data for a certain project, click on the
button in the Cache- or Postgres data range (see
below).
A window as shown below will open, where all data ranges for the
transfer will be listed. With the button you can set the timeout for
the transfer of the data where 0 means infinite and is recommended for
large amounts of data. With the  button you can
switch on resp. of the generation of a report. Click on the Start
transfer button to start the transfer.
button you can
switch on resp. of the generation of a report. Click on the Start
transfer button to start the transfer.
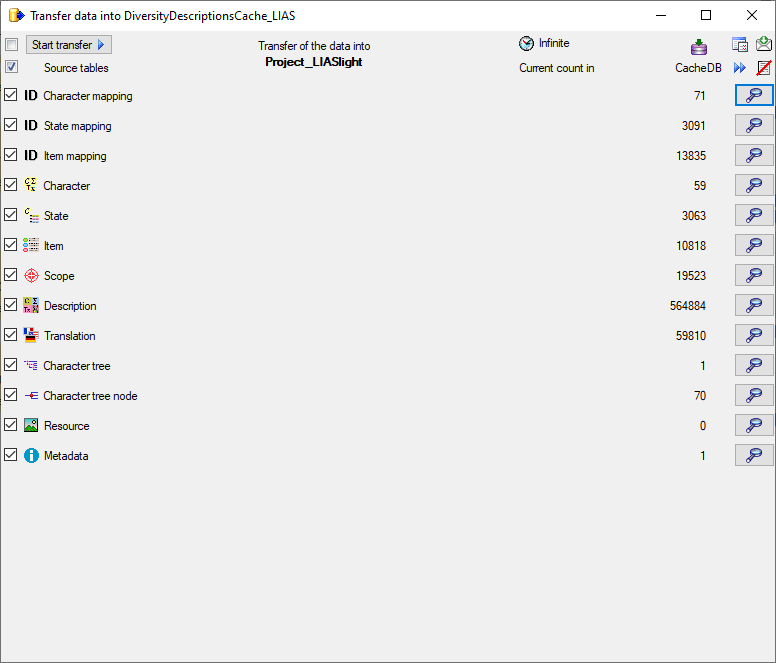
After the data are transferred, the number and data are visible as shown
below.
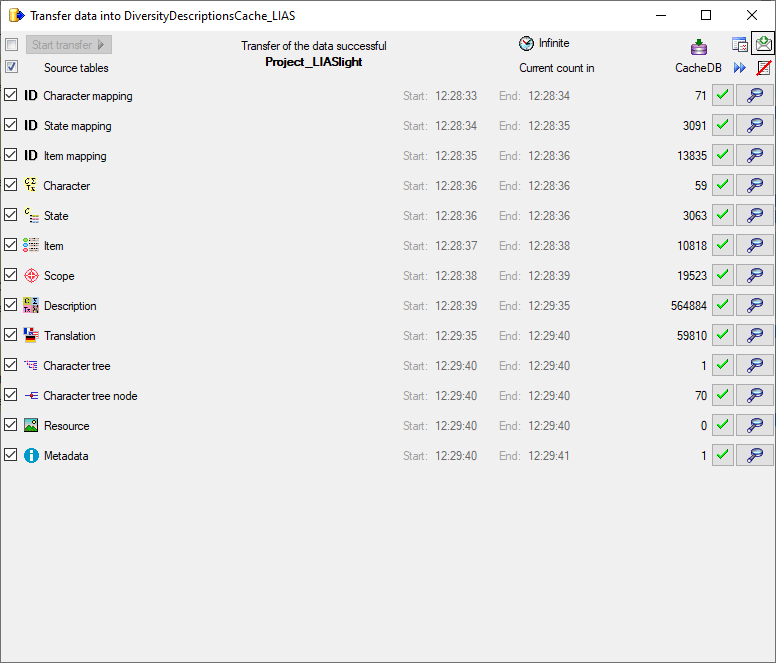
After the data are transferred successful transfers as indicated by
 an error by
  . The reason for the
failure is shown if you click on the button. For
the transfer to the Postgres database the number in the source and the
target will be listed as shown below indicating deviating numbers of the
data. For the detection of certain errors it may help to activate the
logging as described in the chapter TransferSettings. To inspect the first 100
lines of the transferred data click on the
button.
. The reason for the
failure is shown if you click on the button. For
the transfer to the Postgres database the number in the source and the
target will be listed as shown below indicating deviating numbers of the
data. For the detection of certain errors it may help to activate the
logging as described in the chapter TransferSettings. To inspect the first 100
lines of the transferred data click on the
button.
Bulk transfer
To transfer the data for all projects selected for the schedule based
transfer, click on the button in the cache- or Postgres data range (see
below).
|
|
|
|
|
| DiversityDescriptions_local |
|
DiversityDescriptionsCache_local |
|
DiversityDescriptionsCache_2 on 127.0.0.1, 5555 as postgres |
Together with the transfer of the data, reports will be generated and
stored in the reports directory. Click on the  button in the Timer area to open this directory. To inspect data in the
default schemas (dbo for SQL-Server
button in the Timer area to open this directory. To inspect data in the
default schemas (dbo for SQL-Server  and
public for Postgres ) outside the project
schemata, use the buttons shown in the image
above.
and
public for Postgres ) outside the project
schemata, use the buttons shown in the image
above.
Transfer as background process
Transfer data from database to cache database and all Postgres databases
To transfer the data as a background process use the following
arguments:
- CacheTransfer
- Server of the SQL-server database
- Port of SQL-server
- Database with the source data
- Server for Postgres cache database
- Port for Postgres server
- Name of the Postgres cache database
- Name of Postgres user
- Password of Postgres user
For example:
C:\DiversityWorkbench\DiversityDescriptions> DiversityDescriptions.exe
CacheTransfer snsb.diversityworkbench.de 5432 DiversityDescriptions
127.0.0.1 5555 DiversityDescriptionsCache PostgresUser
myPostgresPassword
The application will transfer the data according to the
settings, generate a protocol as
described above and quit automatically after the transfer of the data.
The user starting the process needs a Windows authentication with access
to the SQL-Server database and proper rights to transfer the data. The
sources and projects within DiversityCollection will be transferred
according to the settings
(inclusion, filter, days and time). The transfer will be documented in
report files. Click on the button to access
these files. For a simulation of this transfer click on the Transfer all data according to the
settings button at the top of the
form. This will ignore the time restrictions as defined in the settings
and will start an immediate transfer of all selected data.
To generate transfer reports and document every step performed by the
software during the transfer of the data use a different first argument:
- CacheTransferWithLogging
- …
C:\DiversityWorkbench\DiversityDescriptions> DiversityDescriptions.exe
CacheTransferWithLogging snsb.diversityworkbench.de 5432
DiversityDescriptions 127.0.0.1 5555 DiversityDescriptionsCache
PostgresUser myPostgresPassword
To transfer only the data from the main database into the cache database
use a different first argument:
To transfer only the data from the cache database into the postgres
database use a different first argument:
The remaining arguments correspond to the list above. The generated
report files are located in the directory …/ReportsCacheDB and the
single steps are witten into the file DiversityCollectionError.log.
History
For every transfer of the data along the pipeline, the settings (e.g.
version of the databases) the number of transferred data and additional
information are stored. Click on the  button
in the respective part to get a list of all previous transfers together
with these data (see below).
button
in the respective part to get a list of all previous transfers together
with these data (see below).
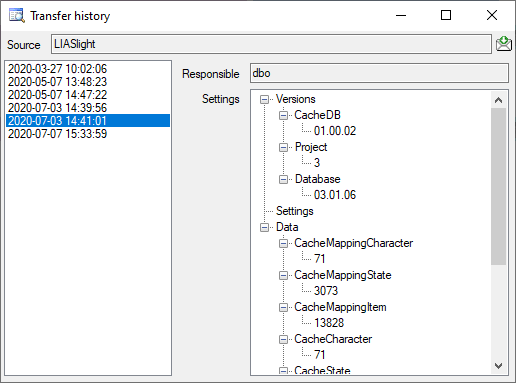
Cache Database
Transfer Protocol
Protocol of the transfers in the cache database
The protocol of any transfer is written into the error log of the
application. To examine the messages of the transfers within the cache
database you may for every single step click on the
button in the transfer window in case an error
occurred. In the main window the protocol for all transfers is shown in
the  Protocol part. Choose Data ->
Cache database … from the menu and select the tab
Protocol. A window will appear like shown
below.
Protocol part. Choose Data ->
Cache database … from the menu and select the tab
Protocol. A window will appear like shown
below.
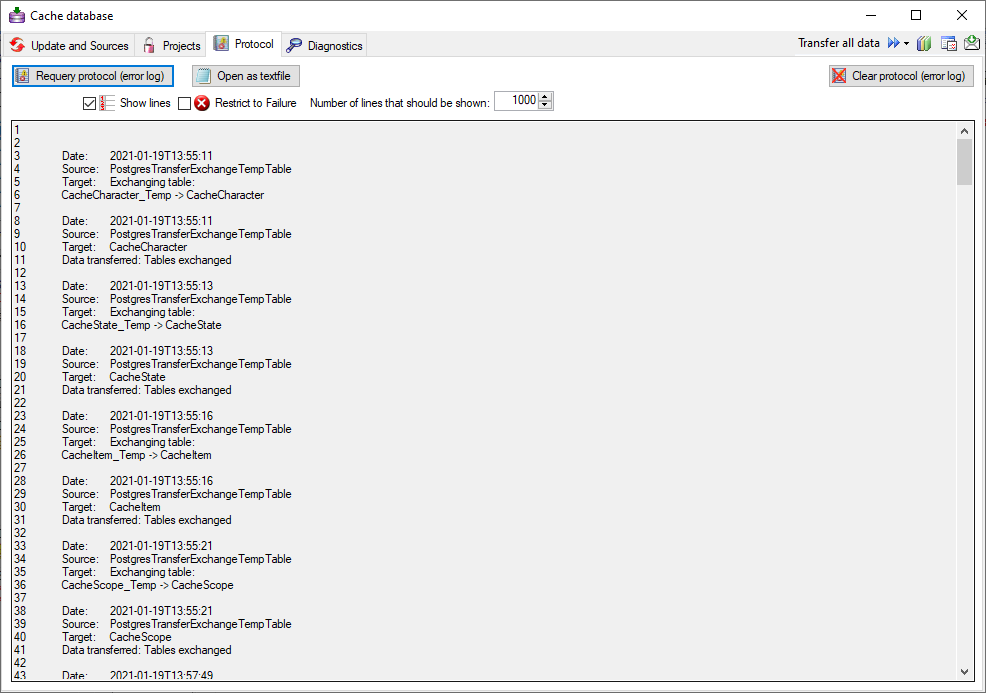
A click on the button Requery protocol (error
log) requeries resp. shows the protocol. The option
 Show lines will show the line numbers of the
protocol and the option Restrict to Failure
will restrict the output to failures and errors stored in the protocol.
By default both options are seleted and the number of lines is
restricted to 1000. In case of longer protocols change the number of
lines for the output. The button
Show lines will show the line numbers of the
protocol and the option Restrict to Failure
will restrict the output to failures and errors stored in the protocol.
By default both options are seleted and the number of lines is
restricted to 1000. In case of longer protocols change the number of
lines for the output. The button  Open as
textfile will show the protocol in the default editor of your
computer. The button
Open as
textfile will show the protocol in the default editor of your
computer. The button  Clear protocol
(error log) will clear the protocol.
Clear protocol
(error log) will clear the protocol.
Cache Database Transfer Settings
Settings for the transfer of the projects in the cache database
To edit the general settings for the transfer, click on the
button in the main form. A window as shown
below will open. Here you can set the timeout
for the transfer in minutes. The value 0 means that no time limit is set
and the program should try infinite to transfer the data. Furthermore
you can set the parameters for the transfer of the data in chunks. If
the amount of data is above a certain threshold, it is faster to divide
the data into smaller chunks. The threshold for transfer into the
cache database and into the
Postgres database can be set as shown below,
together with the maximal size of the chunks. To return to the default
vales click the button Set default values.
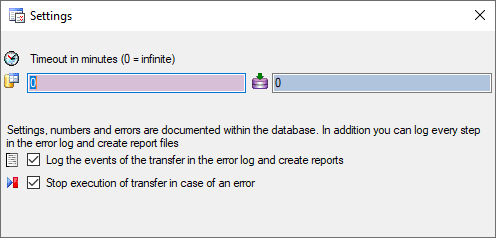
Logging
For the detection of certain errors it may help to log the events of the
transfer by activating the logging: 
 →
. The logging is set per
application, not per database. So to detect errors in a transfer started
by a scheduler on a server, you have to activate the logging in the
application started by the server.
→
. The logging is set per
application, not per database. So to detect errors in a transfer started
by a scheduler on a server, you have to activate the logging in the
application started by the server.
Scheduled transfer
The scheduled transfer is meant to be launched on a server on a regular
basis, e.g. once a week, once a day, every hour etc.. The transfer of
the data via the scheduled transfer will take place according to the
settings. This means the program will check if the next planned time for
a data transfer is passed and only than start to transfer the data. To
include a source in the schedule, check the
selector for the scheduler. To set the time and days scheduled for a
transfer, click on the button. A window as
shown below will open where you can select the time and the day(s) of
the week when the transfer should be executed.
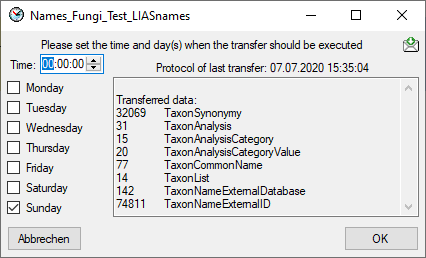
The planned points in time are shown in the form as shown below.

The protocol of the last transfer can be seen as in the window above or
if you click on the button. If an error
occurred this can be inspected with a click no the
 button.
If another transfer on the same source has been started, no further
transfer will be started. In the program this competing transfer is
shown as below.

You can remove this block with a click on the <
button. In opening window (see below) click on the
button. This will as well remove error
messages from previous transfers.
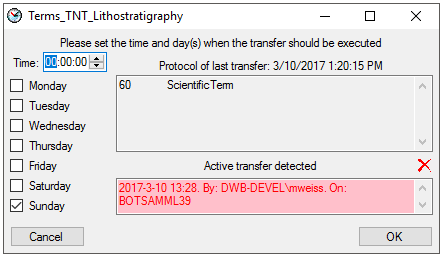
A further option for restriction of the transfers is the comparison of
the date when the last transfer has been executed. Click on the
button to change it to
. In this state the program will compare the
dates of the transfers and execute the transfer only if new data are
available.
Cache Database Webservices
Sources from webservices
To provide details for datasets linked to webservices like Catalogueof Life etc. in the cached data,
this information can be transferred into the cache database together with
the data from the DiversityCollection database. Use the
button to add the webservice you need.
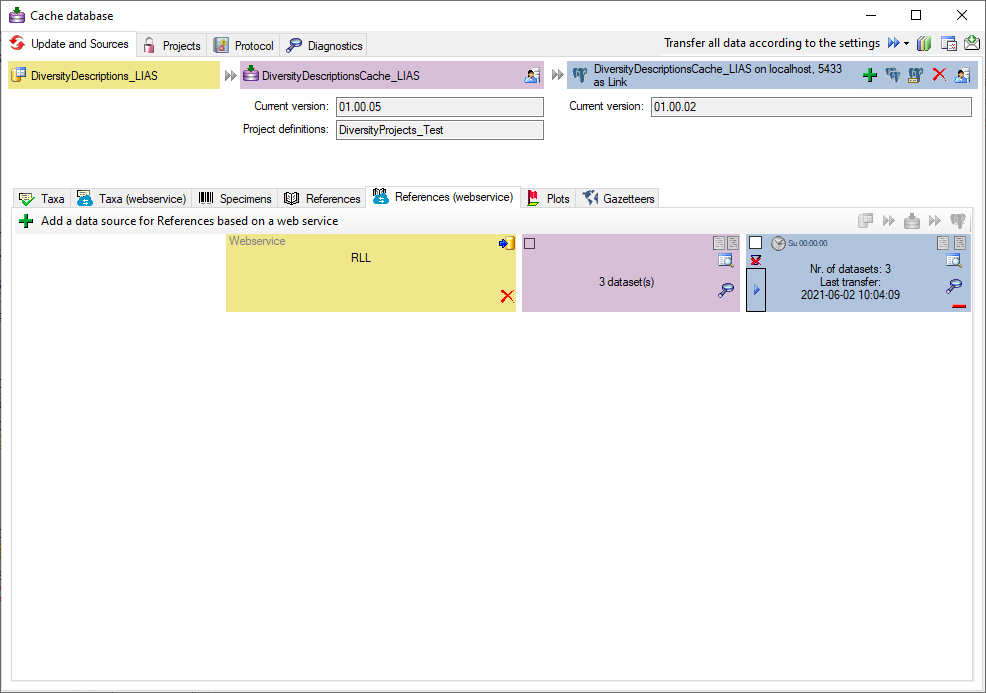
Transfer
To transfer the data of a webservice into the
cache database use the  button. A
window a shown below will open where you must select all
projects related to the webservice you
selected. You must transfer the projects into the
cache database before transferring the webservice data! Only
entries found within these projects will be transferred.
button. A
window a shown below will open where you must select all
projects related to the webservice you
selected. You must transfer the projects into the
cache database before transferring the webservice data! Only
entries found within these projects will be transferred.
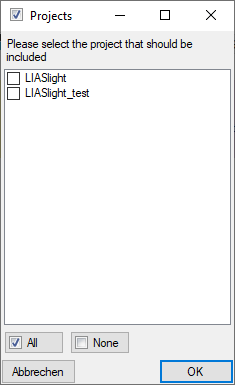
Use the
buttons to inspect the content. Names that are already present will not
be transferred again. So if you need these values to be updated you have
to remove it (see below) and add it again. Links that refer to lists of
names instead of single names will not be inserted. These links will be
stored in the Errorlog to enable their inspection.
To transfer the data into the Postgres database, you have to
connect with a database first. Use the button
to transfer the data from the ** ** cache database into the
Postgres database and the buttons to
inspect the content.
Removal
With the button you can remove the sources
together with the views (see above).
Subsections of Export
Export CSV
Export CSV
Notes:
- The Export CSV function provides a direct copy of selected
database table as tabulator separated text file. If you want to
generate flles that give a strutured overview of descriptors or
description data, you should prefer the Export … Lists or the
Export Wizard (coming soon).
- The Export CSV function requires the “Bulk Copy” tool, which is
part of a local Microsoft SQL Server installation. If it is not
available on your computer, you will get an error message after
opening the window. Search for
the “bcp-utility”
to get information about a free download and installation of the “Bulk
Copy” tool.
To export the tables of the database in the a tabulator, comma or
semicolon separated format, choose Data →
Export →  Export CSV … from the menu. A window
as shown below will open where you can select the tables to be exported
in sections Selection criteria and in the Tables for export.
Export CSV … from the menu. A window
as shown below will open where you can select the tables to be exported
in sections Selection criteria and in the Tables for export.
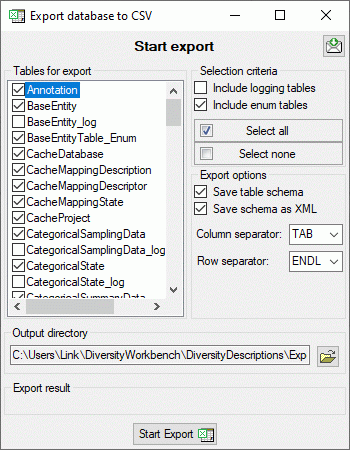
To start the export click on the Start export  button. By default the data will be exported into a directory
<resources
directory>\Export\<database_name>. Click
on the
button. By default the data will be exported into a directory
<resources
directory>\Export\<database_name>. Click
on the  button to
select a different target directory before starting export.
button to
select a different target directory before starting export.
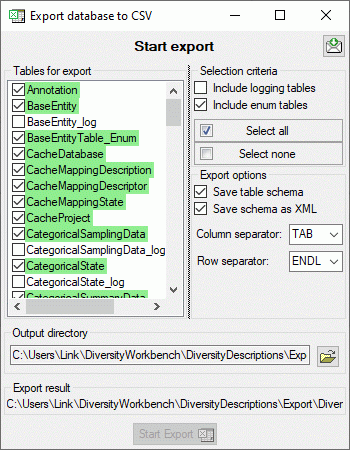
After export the tables are marked with green backgound, if table schema and data were
exported successfully. If only the data were exported, this is marked
with yellow background, if nothing was
exported, the background is red. A detailled
export report can be viewd by a click on the export result file
name.
Export Questionnaires
Export questionnaires
With this form you can export description data from the database to HTML
forms. You can open the generated HTML files, edit the data in the form
and re-import the changes by using the import questionairedata function. Choose Data ->
Export →  Export questionnaires … from the menu to open the window for the
export.
Export questionnaires … from the menu to open the window for the
export.
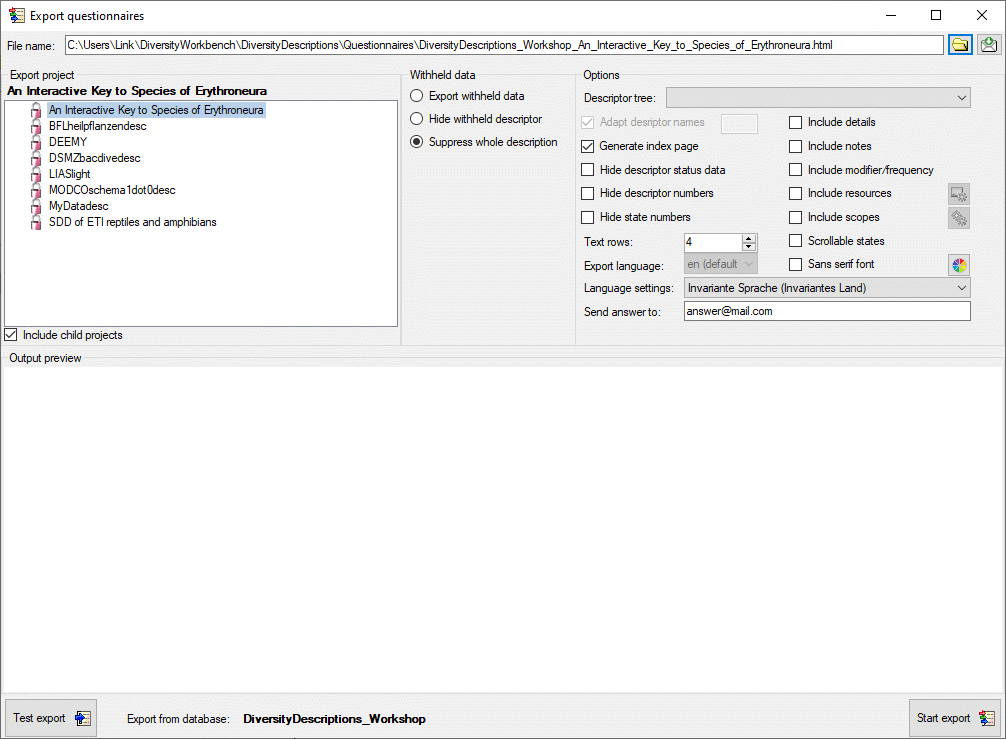
In the Export project section all projects of the database are shown
as a tree. Select here the project that shall be exported. In case of
hierarchically organized projects the subordinated projects will be
included for export, if the Include child projects option is
checked. You may pass a description list to the form by starting a query
in mode “Edit descriptions”. If all descriptions in the list belong to
the same project, you have the option to select single descriptions for
export. In this case the Export project section shows the
button to switch to the list view (see below).
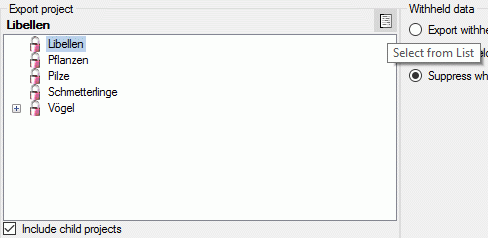
In the Expot descriptions section you find all description titles
that have been passed to the export form (see below). You may select all
entries by clicking the  all button,
deselect all entries by clicking the none
button or toggle your selection by clicking the
all button,
deselect all entries by clicking the none
button or toggle your selection by clicking the
 swap button. By clicking the button
you will return to the Export project view.
swap button. By clicking the button
you will return to the Export project view.
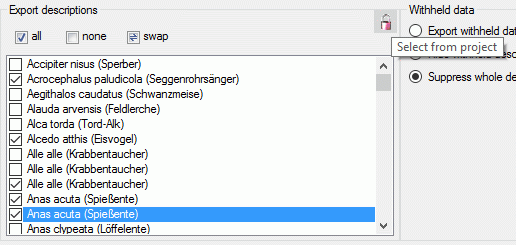
The Withheld data section allows control over export of datasets
that contain entries with data status “Data withheld”. Option Supress
whole description (default) excludes all descriptions form export
where at least on descriptor is marked with “Data withheld”. Option
Hide withheld descriptor excludes only the corresponding descriptor
data from the description. Option Export withheld data does not
exclude any data from export.
Options
The Options section allows the selection of a Descriptor tree to
determine the sequence and selection of descriptors for output. If a
structured descriptor tree is selected, the first level descriptor tree
nodes will be inserted as headers to structure the document. If option
Adapt descriptor names is checked, the descriptor names will be
prefixed with the headers from the derscriptor tree. In this case you
may specify a string to connect the names in the texrt box at the right
of the option. If Generate index page is checked, an alphabetically
sorted index with links to the individual description pages will be
generated.
You may Hide descriptor status data in the generated forms.
Furthermore output of the ordinal numbers for descriptors rsp.
categorical states may be suppressed by using the options Hide
descriptor numbers rsp. Hide state numbers. With options
Include notes and Include modifier/frequency you can control if
notes and modifier or frequency values shall be included in the
generated questionaires. With Include details a text field for
editing the item details will be inserted.
By default a font type with serifes is used for the HTML output, select
Sans serif font for an alternative. The colors of several HTML
elements may be adapted to the personal preferences by clicking on
button  . With Text rows you can adjust the size
of text boxex used for text and molecular sequence descriptors. Option
Scrollable states generates an alternative layout for categorical
descriptors, where the state values are arranged in scroll boxes.
. With Text rows you can adjust the size
of text boxex used for text and molecular sequence descriptors. Option
Scrollable states generates an alternative layout for categorical
descriptors, where the state values are arranged in scroll boxes.
Check Include resources to include images for descriptions,
descriptors, categorical states and descriptor tree nodes in the
questionnaire. In the generated HTML questionnaire the images will be
zoomed by a dedicated factor, when the mouse cursor is moved over it.
The zoom factors may be adjusted by clicking on button
 . If you check the option Insert
fields for new resources, the specified number of input fields for
entering new description resources (name and URL) will be inserted in
the forms (see image below on the left).
. If you check the option Insert
fields for new resources, the specified number of input fields for
entering new description resources (name and URL) will be inserted in
the forms (see image below on the left).


Check Include scopes to include a section for scope data in the
questionnare. The scope values of the types “Sex”, “Stage”, “Part” and
“Other scopes”, which may be administered in the Edit
project section, are included as check boxes. For the
other (general) scope types input boxes will be generated, where new
values may be entered or existing values can be edited. If a scope value
is linked to a database entry, e.g. of a DiversityTaxonNames database,
it cannot be modified. In this case only a fixed text with the reference
to the target database will be inserted in the questionnaire.
By clicking on button  you may open an
option window where you can change this default behaviour. You may
adjust for which scope types an input box for a new scope value shall be
inserted or if scopes that cannot be modified shall be displayed (see
image above on the right).
you may open an
option window where you can change this default behaviour. You may
adjust for which scope types an input box for a new scope value shall be
inserted or if scopes that cannot be modified shall be displayed (see
image above on the right).
See below an example of a questionnaire where imput fields for a new
description resource and all general scope types are present..
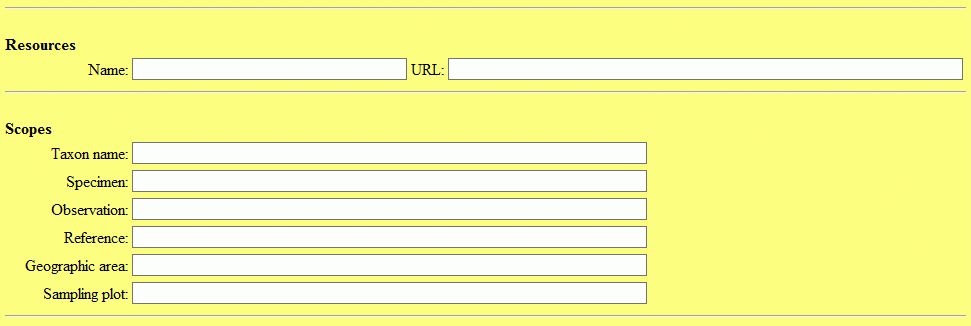
If for the selected projects translations are stored in the database,
you may chose the Export language. If for any element no translation
in the chosen export language is present, automatically the original
text will be used. With field Language settings you can control the
presentation of floating point values in the output, in field Send
answer to you may enter the mail address to return the results.
Test
To check the export, click on the Test export
 button. In the Output preview section an empty form for entering a
new item will be displayed (see picture below). The file name is
generated as <resources
directory>\Questionnaires\<Database
name>_<Project>.txt. This default setting may be changed by
editing the File name or by navigating at the target location by
pressing the button
besides the file name. Button
button. In the Output preview section an empty form for entering a
new item will be displayed (see picture below). The file name is
generated as <resources
directory>\Questionnaires\<Database
name>_<Project>.txt. This default setting may be changed by
editing the File name or by navigating at the target location by
pressing the button
besides the file name. Button  opens the form in
an external web browser.
opens the form in
an external web browser.
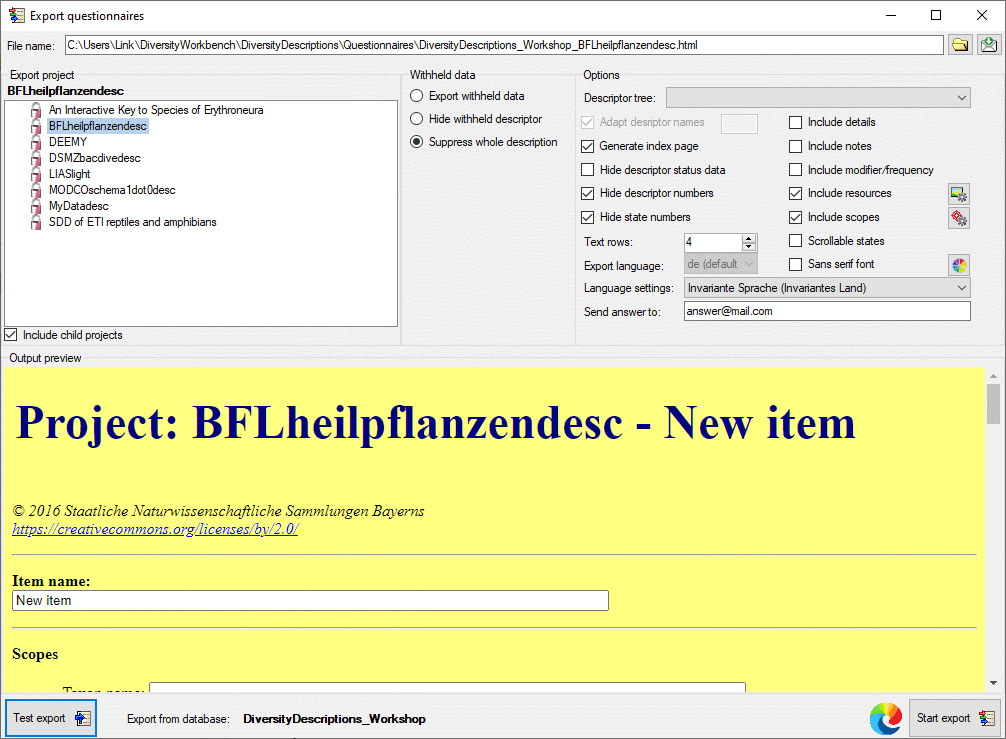
Since the generated form can be opened with any modern web broswer, you
may distribute it to easily collect item data by people that do not have
access to the Diversity Descriptions database. Even if the form is
published as a web page, the collected data stay completele local in the
user’s web browser and are not uploaded to any server. To get the data
into the database, they must be “downloaded” form the form and sent back
to a database editor for import (see item Send reply below).
Export
Before starting the export, the export file name should be checked. The
file name is generated as <resources
directory>\Questionaires\<Database
name>_<Project>.html. This default setting may be changed by
editing the File name or by navigating at the target location by
pressing the button
besides the file name text box. During export a number of HTML files
will be generated. The document for entering a new item has the
specified file name. For entries present in the database the description
id is appended. Furthermore an index file with postfix “_Index” will be
generated, where you may navigated to each exported questionnaire.
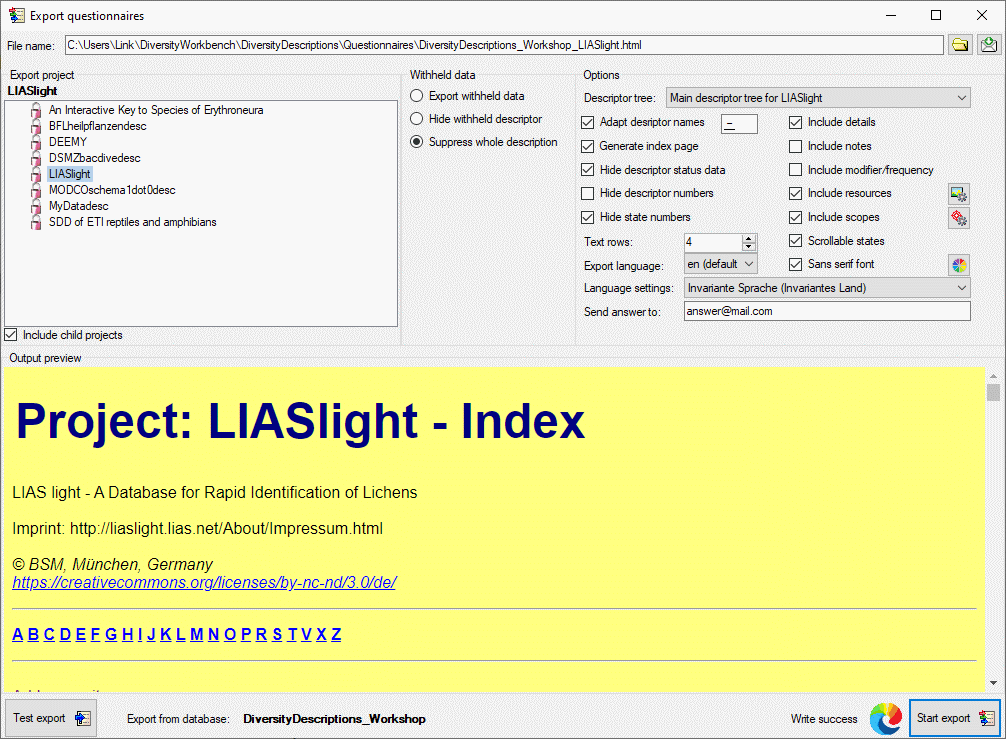
To generate the HTML files press the Start export
button. During export the icon of the button changes to
and you may abort processing by clicking the
button. Button opens the form visible in the
Output preview section in an external web browser (see image above).
Send reply
When you opened a HTML form in the web browser and modified data, you
may download them as a text file for databaseimport. At the bottom of the HTML form click
the button Download revised description (see image below). Data
collection is completely done in the user’s local web browser, nothing
is uploaded to a server. Since data collection is done using javascript,
please take care that the script is not blocked by the web browser.
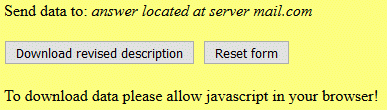
List Export
List export
There are several exports for tabulator-separated text files:
 Export descriptors
list: Export descriptor data as tabulator
separated text file.
Export descriptors
list: Export descriptor data as tabulator
separated text file.
Export descriptions
list: Export description data as
tabulator separated text file.
Export sample data
list: Export sample data as tabulator
separated text file.
Export resource data
list: Export resource data as tabulator
separated text file for data review and possible re-import of modified
data.
Export translations
list: Export translations as tabulator
separated text file for data review and possible re-import of modified
data.
Subsections of List Export
Export
Descriptions List
With this form you can export description data from the database to a
tabulator separated text file. Choose Data →
Export →  Export lists ->
Descriptions list … from the menu to open the
window for the export.
Export lists ->
Descriptions list … from the menu to open the
window for the export.
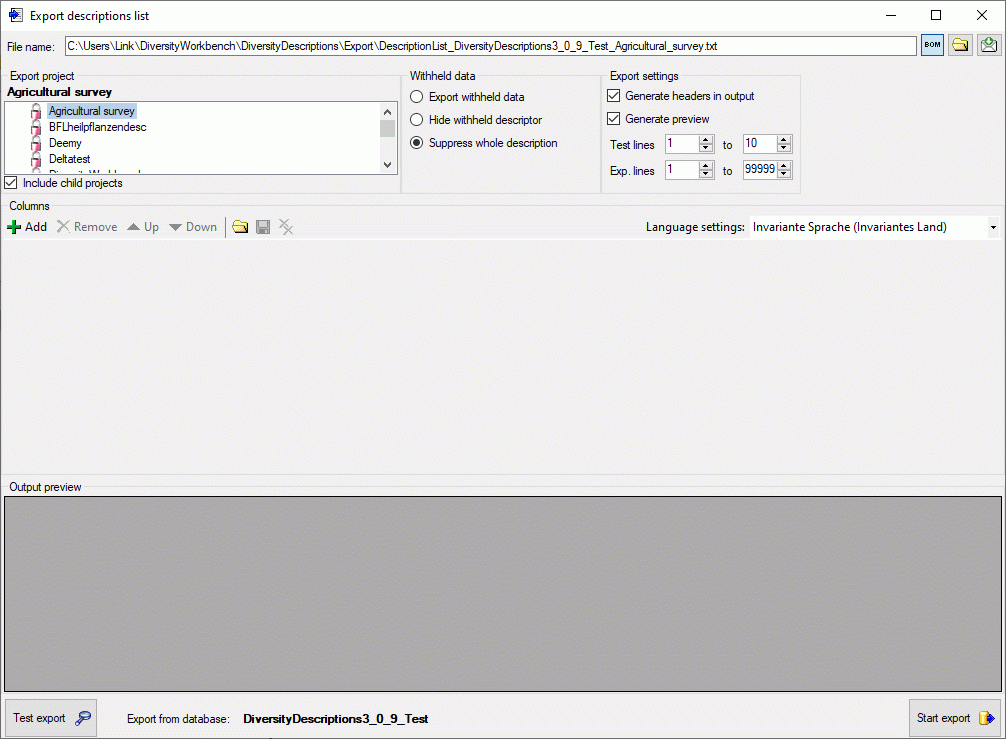
In the Export project section all projects of the database are shown
as a tree. Select here the project that shall be exported. In case of
hierarchically organized projects the subordinated projects will be
included for export, if the Include child projects option is
checked. You may pass a description list to the form by starting a query
in mode “Edit descriptions”. If all descriptions in the list belong to
the same project, you have the option to select single descriptions for
export. In this case the Export project section shows the
button to switch to the list view (see below).
In the Export descriptions section you find all description titles
that have been passed to the export form (see below). You may select all
entries by clicking the all button,
deselect all entries by clicking the none
button or toggle your selection by clicking the
swap button. By clicking the button
you will return to the Export project view.
The Withheld data section allows control over export of datasets
that contain entries with data status “Data withheld”. Option Supress
whole description (default) excludes all descriptions form export
where at least on descriptor is marked with “Data withheld”. Option
Hide withheld descriptor excludes only the corresponding descriptor
data from the description. Option Export withheld data does not
exclude any data from export.
The Export settings allows the inclusion of a header line in the
output by checking the option Generate headers in output.
Additionally the lines displayed in the Test output section may be
selected by specifying the first and last line number in Test lines
[start] to [end]. For the generated output you may adjust the
lines that shall be exported in Exp. lines [start] to [end]. For
the end line a maximum value of 99999
may be entered, which means export of the whole data beginning from the
start line.
Columns
To generate a list output, you have to determine the data columns that
shall be present in the descriptions list. To include a new column press
the Add button in the tool strip of the
Columns section. A control representing a single output column will
be added at the end of the column list (see picture below).
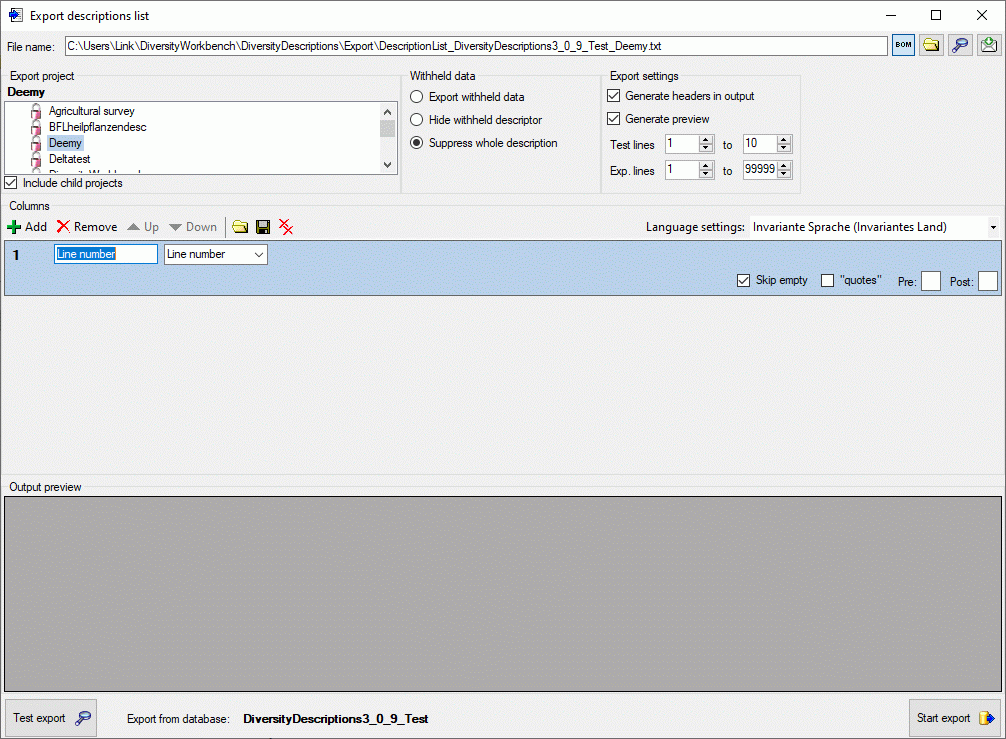
The Columns control shows the column number, a text box for the
column header (title) and the source selector (see below).
As source you may select one of the following values:
|
|
| **Line number ** |
Number of the data line in the output file |
| Description |
Description data, e.g. name of the description entry |
| Description scope |
Description scope data, e.g. taxon, specimen or sex |
| Descriptor value |
Value(s) of a certain descriptor |
| Descriptor status |
Data status of a certain descriptor |
Depending on the selected data source one or more additional selection
boxes will appear in the description column control. The target (see
picture below left) selects the field from the database that shall be
inserted. If you select “Description scope” as data source, a selection
box for filtering will be inserted to determine the scope category (see
picture below right).
If you select “Descriptor value” or “Descriptor status” as data source,
a selection box for the descriptor will be inserted (see picture below).
The descriptor can be selected from an alphabetical list or from the
descriptor tree by clicking . In case of
“Descriptor value” the target selection box entries depend on the
descriptor type. For categorical descriptors you may select “Name”,
“Abbreviation”, “Detail”, “Wording”, “ID” or “Notes” of the categorical
ssummary data. For quantitative descriptors you may select the “Value”
or “Notes” of a specific statistical measure (separate selection box).
For text and sequence descriptors you may select the “Text” or “Notes”.
Categorical descriptors offer an additional special target type called
“<Binary columns>”. If you select this value, an additional selection
window will appear, where you can select either “<all>” or a specific
categorical state. If a specific categorical state is selected, a column
will be inserted in the outptu, that contains either “1” if the state is
present or “0” otherwise. If you select “<all>”, a column for each
categorical state will be inserted that contains the binary presence
sign. An examble is shown in the picture below (column 6).
As long as you did not enter a value for the column header, a reasonable
suggestion depending on the selected values will be inserted. You may
enter a different column header, then the background color changes to
light yellow to indicate that it will not
be updated automatically anymore (see picture below, column 3).
Double-click on the header to open a separate edit window.
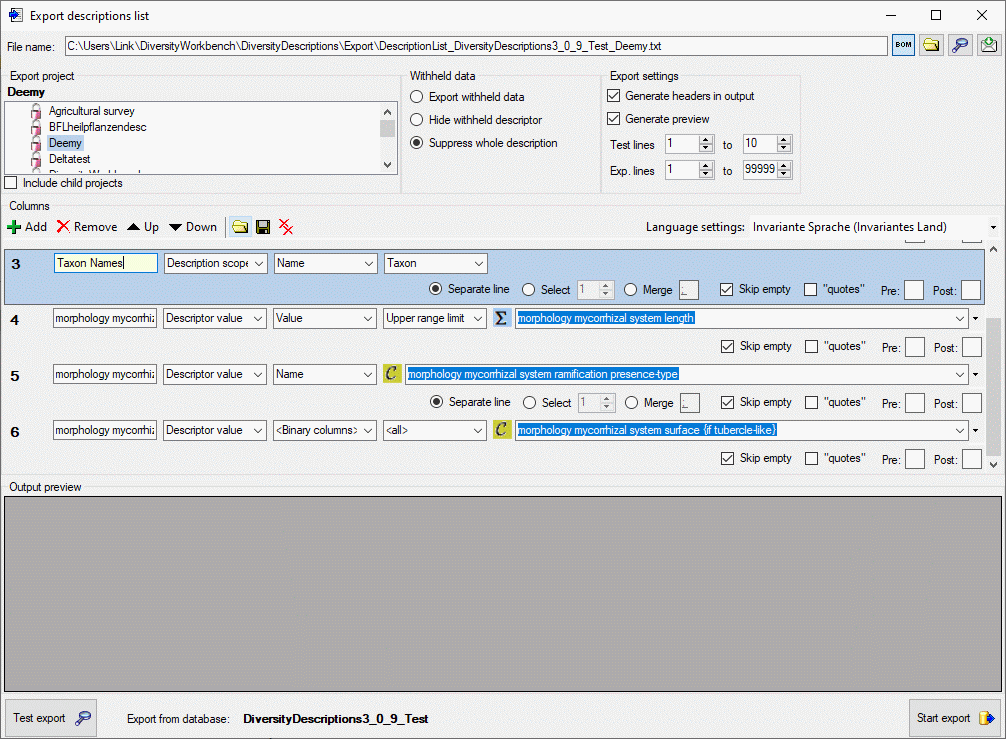
Output formatting is controlled with check box “quotes” that
includes the whole output text in quotes and text boxes Pre: and
Post:, which allow inclusion of the values in prefix and postfix
strings (default is “). By selecting the check box Skip empty a
blank output will be inserted instead of the specified prefix and
postfix strings, if no value is present. If for a column multiple values
may be present, e.g. in case of categorical descriptors several
categorical states might be present, there is the choice of insterting
additional lines for multiple values (Separate line), selecting a
single value (Select) or merging the values to a single output
string (Merge). For option Select you have specify if the first,
second or other values shall be selected. For option Merge you may
specify a separator string that shall be inserted between two values
(default is ; ). To open a separate edit
window for the Pre:, Post: or Merge strings, e.g. because a
longer value shall be entered, double-click on the correspondent text
box.
Any selected column may be shifted to another position using the
 Up and
  Down buttons or
deleted with the Remove button of the tool
strip. With button
Down buttons or
deleted with the Remove button of the tool
strip. With button  you may delete all
columns. The complete export schema may be saved into an XML file using
the button
you may delete all
columns. The complete export schema may be saved into an XML file using
the button  , which opens a dialog window to enter
the file name and location. By default the schema file name is generated
as:
, which opens a dialog window to enter
the file name and location. By default the schema file name is generated
as:
<resources
directory>\ExportSchema\DescriptionList_<Database
name>_<Project>.xml
The XML schema file includes information concerning the database, the
project, handling of withheld data and the output columns. By pressing
the button in the Columns section, a schema
file can be opened. If the schema does not meet the active database,
especially descriptor dependent columns might be erroneous because of
unknown values. This is indicated by a red
background color (see picture below).
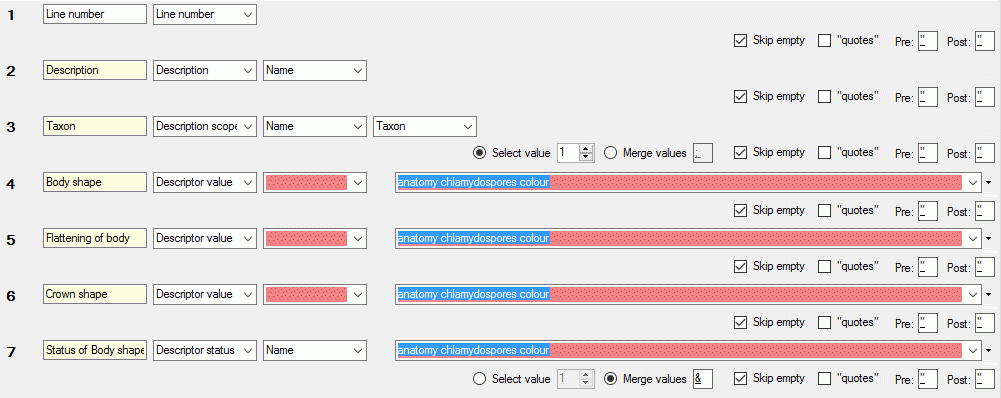
Export
Before starting the export, the export file name should be checked. The
file name is generated as <resources
directory>\Export\DescriptionList_<Database
name>_<Project>.txt. This default setting may be changed by
editing the File name or by navigating at the target location by
pressing the button
besides the file name. If you uncheck the option Generate preview,
no output preview will be generated for the export. To generate an
output without BOM, release the  button.
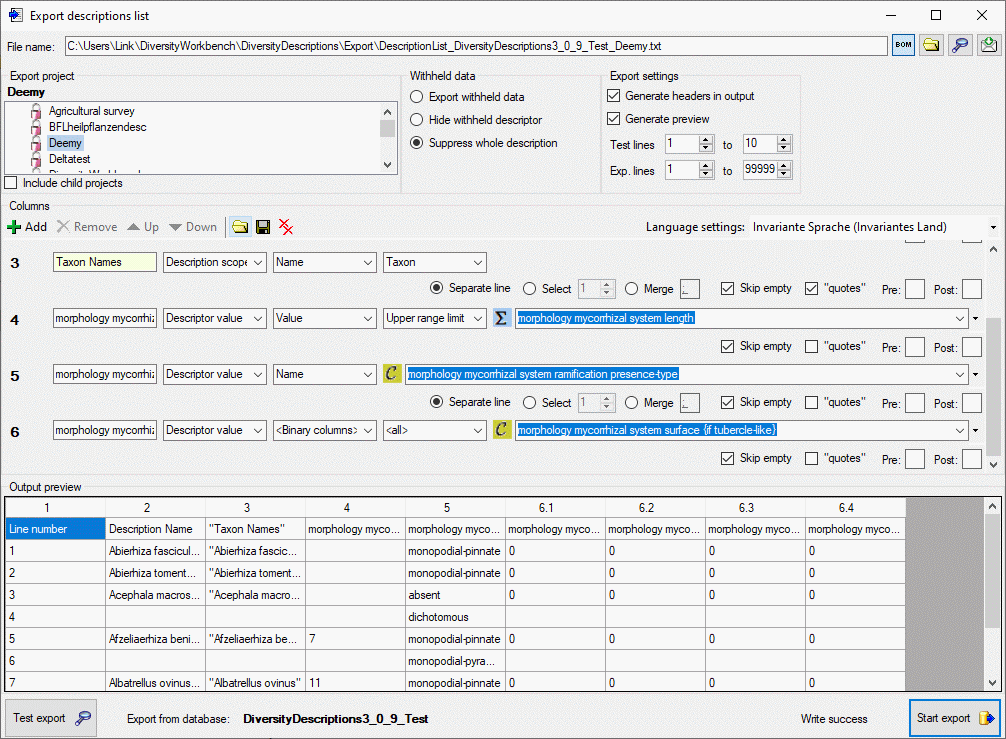
To check the export, click on the Test export
button. By
changing the selected Language settings: you may adapt the output of
floating point numbers or date and time fields to your needs. In the
Output preview grid view the lines specified in the Export
settings (Test lines [start] to [end]) will be displayed (see
picture above). To generate the table file press the Start export
button.
During test and export the icon of the button changes to
and you may abort processing by clicking the
button.
Export
Descriptors List
With this form you can export descriptor data from the database to an
tabulator separated text file. Choose Data →
Export → Export lists ->
Descriptors list … from the menu to open the
window for the export.
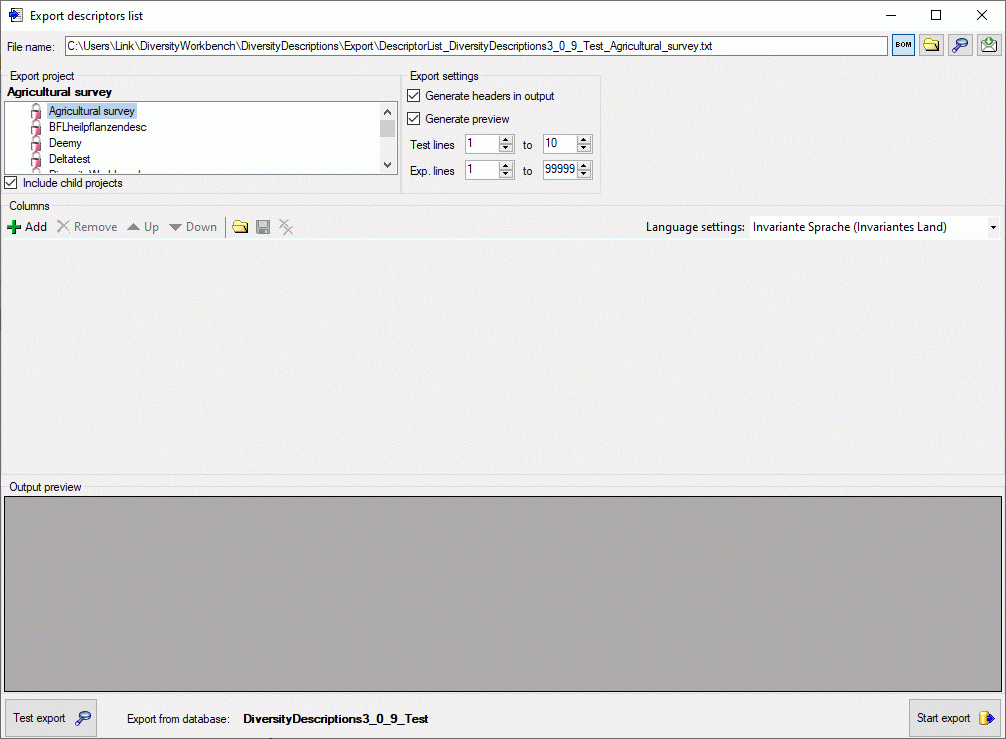
In the Export project section all projects of the database are shown
as a tree. Select here the project that shall be exported. In case of
hierarchically organized projects the subordinated projects will be
included for export, if the Include child projects option is
checked.
The Export settings allows the inclusion of a header line in the
output by checking the option Generate headers in output.
Additionally the lines displayed in the Test output section may be
selected by specifying the first and last line number in Test lines
[start] to [end]. For the generated output you may adjust the
lines that shall be exported in Exp. lines [start] to [end]. For
the end line a maximum value of 99999
may be entered, which means export of the whole data beginning from the
start line.
Columns
To generate a list output, you have to determine the data columns that
shall be present in the descriptors list. To include a new column press
the Add button in the tool strip of the
Columns section. A control representing a single output column will
be added at the end of the column list (see picture below).
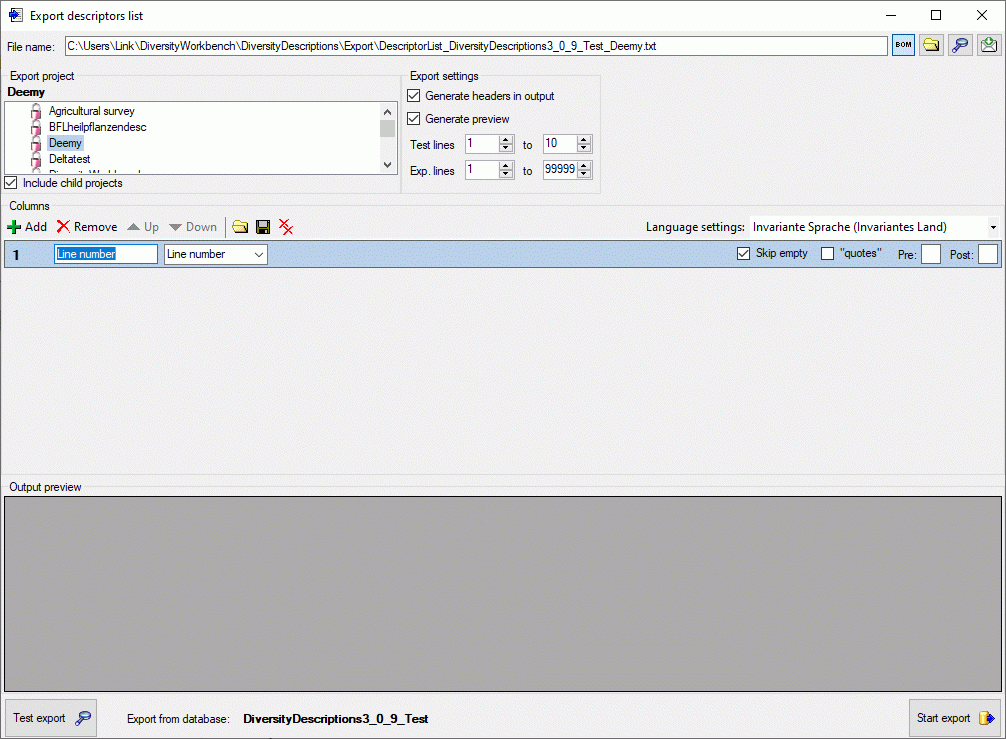
The Columns control shows the column number, a text box for the
column header (title) and the source selector (see below).

As source you may select one of the following values:
|
|
| **Line number ** |
Number of the data line in the output file |
| Descriptor |
Descriptor data, e.g. name of the descriptor |
| Descriptor tree |
Assigned descriptor tree(s) |
| Categorical state |
Categorical state(s) of a certain descriptor |
Depending on the selected data source one or more additional selection
boxes will appear in the descriptor column control. The target (see
picture below) selects the filed from the database that shall be
inserted.
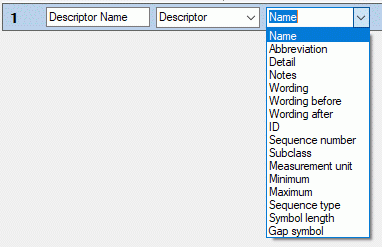
As long as you did not enter a value for the column header, a reasonable
suggestion depending on the selected values will be inserted. You may
enter a different column header, then the background color changes to
light yellow to indicate that it will not
be updated automatically anymore (see picture below, column 4).
Double-click on the header to open a separate edit window.

Output formatting is controlled with check box “quotes” that
includes the whole output text in quotes and text boxes Pre: and
Post:, which allow inclusion of the values in prefix and postfix
strings. By selecting the check box Skip empty a blank output will
be inserted instead of the specified prefix and postfix strings or
quotes, if no value is present. If for a column multiple values may be
present, e.g. in case of categorical descriptors where several
categorical states might be present, there is the choice of inserting
additional lines for multiple values (Separate line), selecting a
single value (Select) or merging the values to a single output
string (Merge). For option Select you have specify if the first,
second or other values shall be selected. For option Merge you may
specify a separator string that shall be inserted between two values
(default is ; ). To open a separate edit
window for the Pre, Post or Merge values strings, e.g.
because a longer value shall be entered, double-click on the
correspondent text box.
Any selected column may be shifted to another position using the
Up and Down buttons or
deleted with the Remove button of the tool
strip. With button you may delete all
columns. The complete export schema may be saved into an XML file using
the button , which opens a dialog window to enter
the file name and location. By default the schema file name is generated
as:
<resources
directory>\ExportSchema\DescriptiorList_<Database
name>_<Project>.xml
The XML schema file includes information concerning the database, the
project and the output columns. By pressing the
button in the Columns section, a schema file can be opened.
Export
Before starting the export, the export file name should be checked. The
file name is generated as <resources
directory>\Export\DescriptorList_<Database
name>_<Project>.txt. This default setting may be changed by
editing the File name or by navigating at the target location by
pressing the button
besides the file name. If you uncheck the option Generate preview,
no output preview will be generated for the export. To generate an
output without BOM, release the button.
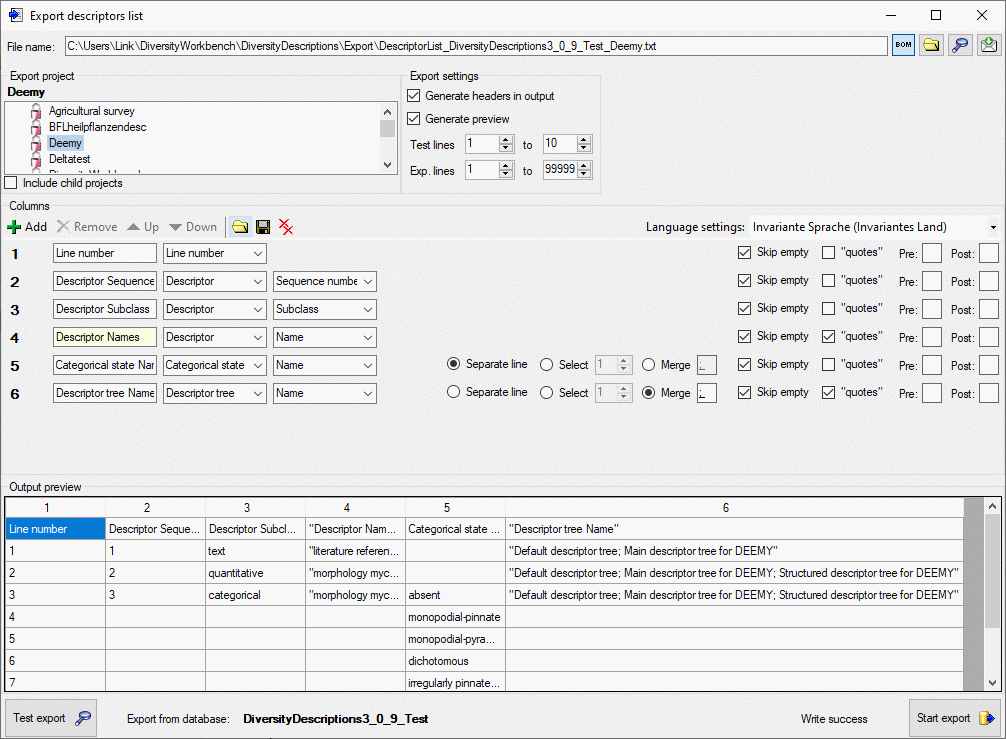
To check the export, click on the Test export
button. By
changing the selected Language settings: you may adapt the output of
floating point numbers or date and time fields to your needs. In the
Output preview grid view the lines specified in the Export
settings (Test lines [start] to [end]) will be displayed (see
picture above). To generate the table file press the Start export
button.
During test and export the icon of the button changes to
and you may abort processing by clicking the
button.
Export
Resource List
Export resource data list
With this form you can export the resource data (see tables
Resource and
ResourceVariant) from the
database to a tabulator separated text file. Since the output includes
the database keys, you may correct the data, e.g. by using a spreadsheet
program and re-import the changes by using the importwizard. Choose Data →
Export → Export lists ->
Resource data list … from the menu to open the
window for the export.
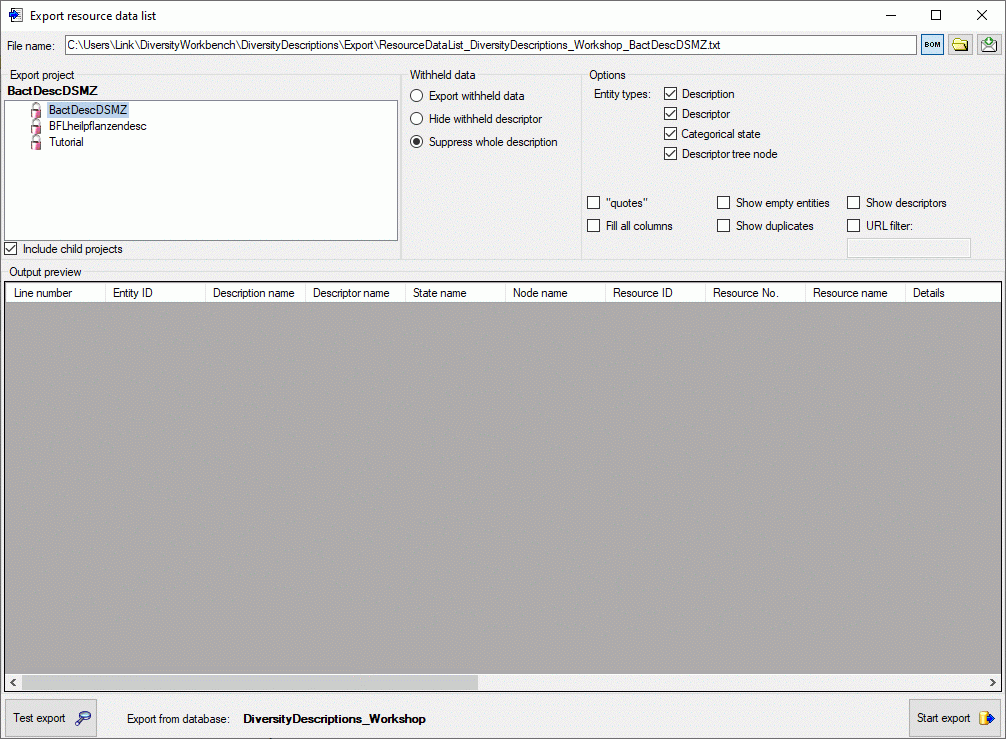
In the Export project section all projects of the database are shown
as a tree. Select here the project that shall be exported. In case of
hierarchically organized projects the subordinated projects will be
included for export, if the Include child projects option is
checked.
The Withheld data section allows control over export of datasets
that contain entries with data status “Data withheld”. Option Supress
whole description (default) excludes all descriptions form export
where at least on descriptor is marked with “Data withheld”. Option
Hide withheld descriptor excludes only the corresponding descriptor
data from the description. Option Export withheld data does not
exclude any data from export.
The Options section allows the selection of the Entity types for
output (“Description”, “Descriptor”, “Categorical state” and “Descriptor
tree node”). To include all export data in quotes, check option
“quotes”. If option Fill all columns is checked, resource
variant data that are inherited from the row above will be explicitely
repeated in the actual row. To include all data rows that do not have
resources select option Show empty entities. If you select Show
descriptors, the descriptor titles will be inserted for categorical
states. By checking option Show duplicates only you may list
resource links that are referenced by more than one entity of the same
type.
You may restrict the resource data list to resource links that include a
specified substring by selecting the URL filter option and entering
the required string in the text field below.
Export
Before starting the export, the export file name should be checked. The
file name is generated as <resources
directory>\Export\ResourceDataList_<Database
name>_<Project>.txt. This default setting may be changed by
editing the File name or by navigating at the target location by
pressing the button
besides the file name. To generate an output without BOM, release the
button.
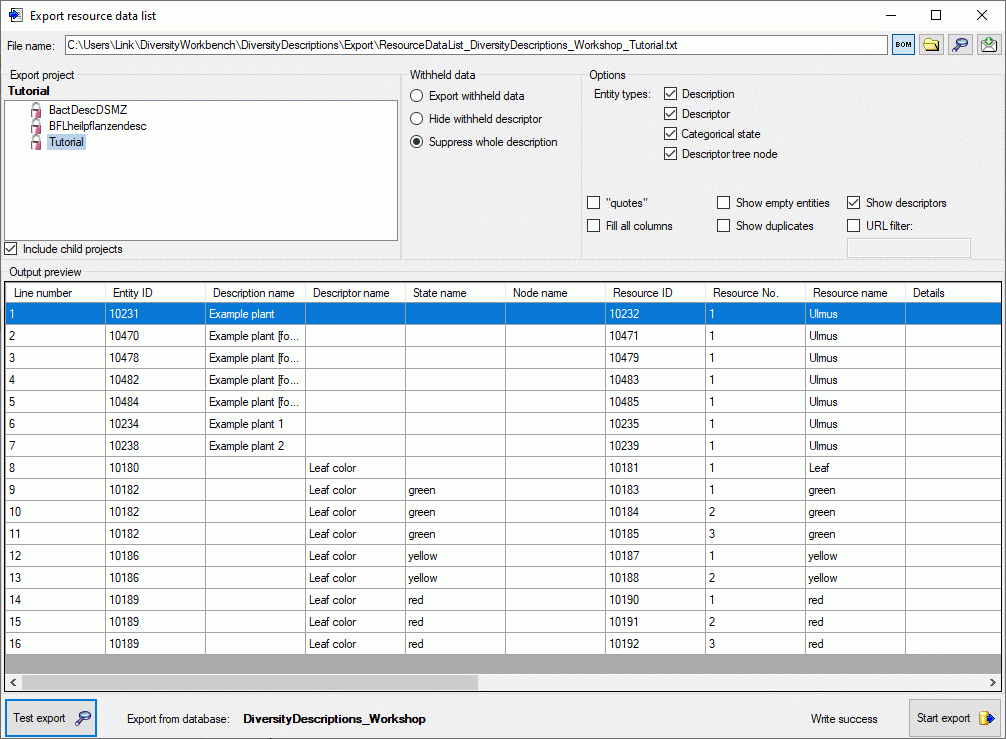
To check the export, click on the Test export
button. In
the Output preview data grid the first few lines will be displayed
(see picture above). To generate the table file press the Start export
button.
During test and export the icon of the button changes to
and you may abort processing by clicking the
button.
Re-import
The review output includes all database keys that can be sufficiently
used to identify the affected data row. When the modified data shall be
re-imported, the internal keys must be available to the import wizard.
This can easily be done by creating a new import session and using the
option  Generate mapping … in form
Import sessions.
Generate mapping … in form
Import sessions.
Export
Samples List
Export Sample Data List
With this form you can export sample data from the database to a
tabulator separated text file. Choose Data →
Export → Export lists ->
 Sample data list … from the menu to open the
window for the export.
Sample data list … from the menu to open the
window for the export.
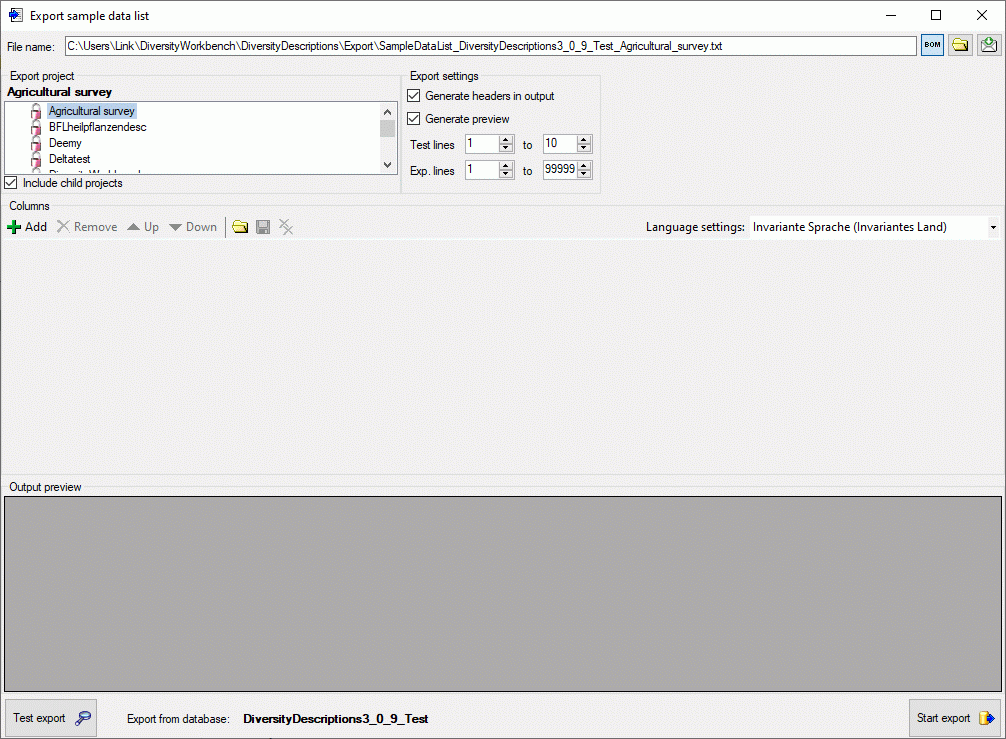
In the Export project section all projects of the database are shown
as a tree. Select here the project that shall be exported. In case of
hierarchically organized projects the subordinated projects will be
included for export, if the Include child projects option is
checked.
The Export settings allows the inclusion of a header line in the
output by checking the option Generate headers in output.
Additionally the lines displayed in the Test output section may be
selected by specifying the first and last line number in Test lines
[start] to [end]. For the generated output you may adjust the
lines that shall be exported in Exp. lines [start] to [end]. For
the end line a maximum value of 99999
may be entered, which means export of the whole data beginning from the
start line.
Columns
To generate a list output, you have to determine the data columns that
shall be present in the descriptions list. To include a new column press
the Add button in the tool strip of the
Columns section. A control representing a single output column will
be added at the end of the column list (see picture below).
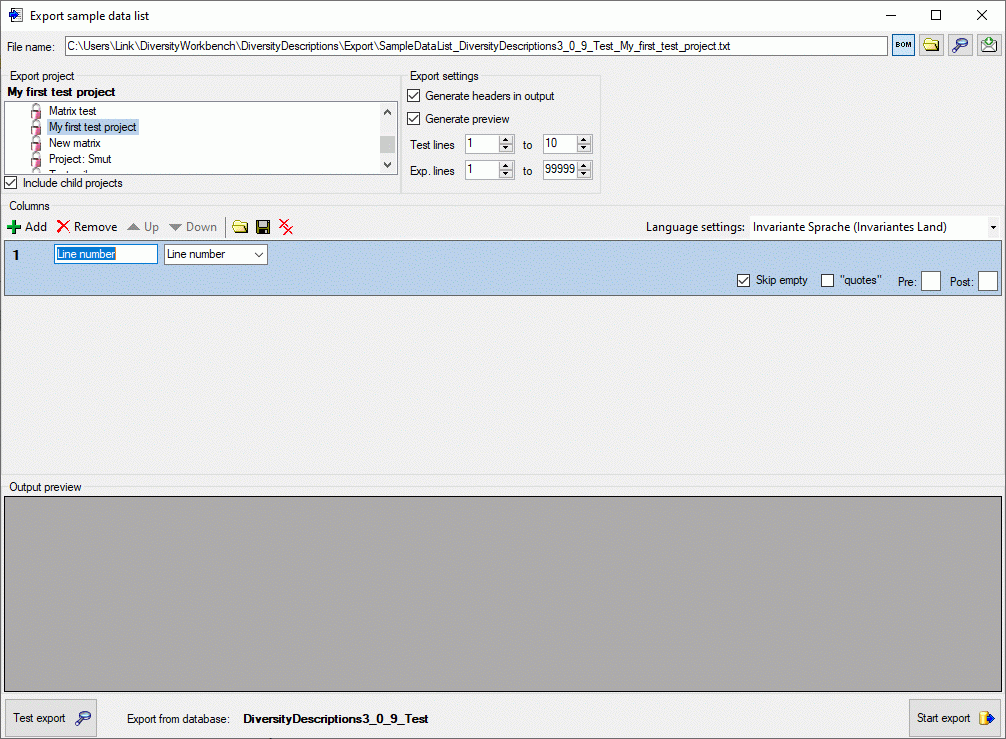
The Columns control shows the column number, a text box for the
column header (title) and the source selector (see below).
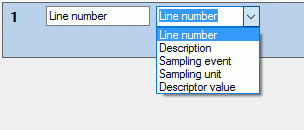
As source you may select one of the following values:
|
|
| **Line number ** |
Number of the data line in the output file |
| Description |
Description data, e.g. name of the description entry |
| Sampling event |
Sampling event data, e.g. name, detail or start date |
| Sampling unit |
Sampling unit data, e.g. ID, specimen or specimen URI |
| Descriptor value |
Sample value(s) of a certain descriptor |
Depending on the selected data source one or more additional selection
boxes will appear in the description column control. The target (see
pictures below) selects the field from the database that shall be
inserted..
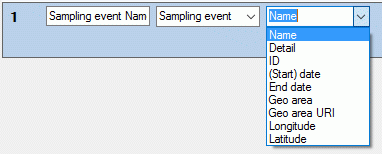
If you select “Descriptor value” as data source, a selection box for the
descriptor will be inserted (see picture below). The descriptor can be
selected from an alphabetical list or from the descriptor tree by
clicking . The target selection box entries
depend on the descriptor type. For categroical descriptors you may
select “Name”, “Abbreviation”, “Detail” or “ID” of the categorical
sampling data, for quantitative descriptors you may select the “Value”
or “Notes”, for text and sequence descriptors you may select the “Text”
or “Notes”.
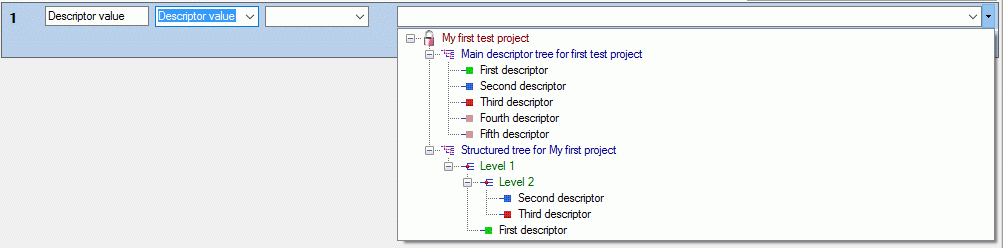
As long as you did not enter a value for the column header, a reasonable
suggestion depending on the selected values will be inserted. You may
enter a different column header, then the background color changes to
light yellow to indicate that it will not
be updated automatically anymore (see picture below, column 3).
Double-click on the header to open a separate edit window.

Output formatting is controlled with check box “quotes” that
includes the whole output text in quotes and text boxes Pre: and
Post:, which allow inclusion of the values in prefix and postfix
strings (default is “). By selecting the check box Skip empty a
blank output will be inserted instead of the specified prefix and
postfix strings, if no value is present. If for a column multiple values
may be present, e.g. in case of categorical descriptors several
categorical states might be present, there is the choice of inserting
additional lines for multiple values (Separate line), selecting a
single value (Select) or merging the values to a single output
string (Merge). For option Select you have specify if the first,
second or other values shall be selected. For option Merge you may
specify a separator string that shall be inserted between two values
(default is ; ). To open a separate edit
window for the Pre:, Post: or Merge strings, e.g. because a
longer value shall be entered, double-click on the correspondent text
box.
Any selected column may be shifted to another position using the
Up and Down buttons or
deleted with the Remove button of the tool
strip. With button you may delete all
columns. The complete export schema may be saved into an XML file using
the button and a dialog window will be opened. By
default the schema file name is generated as:
<resources
directory>\ExportSchema\SampleDataList_<Database
name>_<Project>.xml
The XML schema file includes information concerning the database, the
project, handling of withheld data and the output columns. By pressing
the button in the Columns section, a schema
file can be opened. If the schema does not meet the active database,
especially descriptor dependent columns might be erroneous because of
unknown values. This is indicated by a red
background color (see picture below).
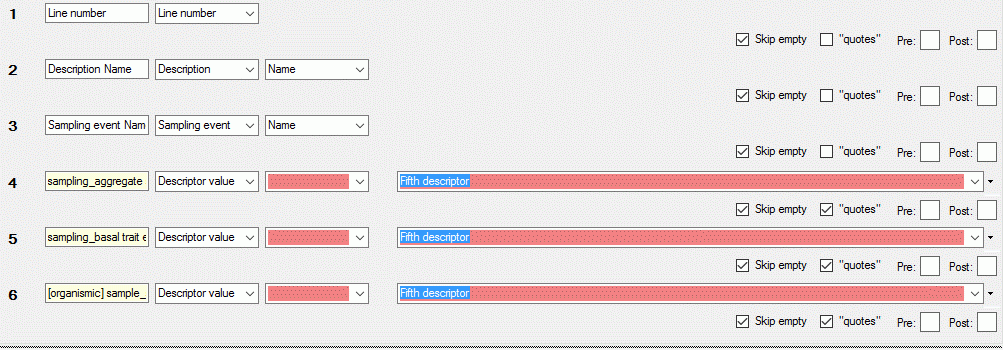
Export
Before starting the export, the export file name should be checked. The
file name is generated as <resources
directory>\Export\SampleDataList_<Database
name>_<Project>.txt. This default setting may be changed by
editing the File name or by navigating at the target location by
pressing the button
besides the file name. If you uncheck the option Generate preview,
no output preview will be generated for the export. To generate an
output without BOM, release the button.
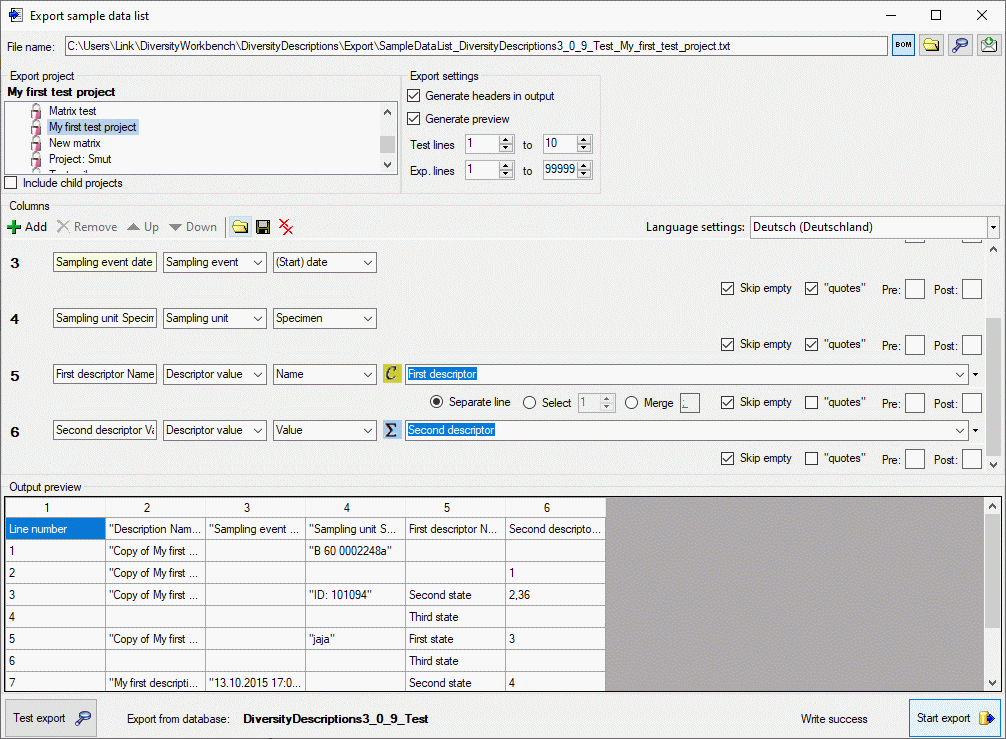
To check the export, click on the Test export
button. By
changing the selected Language settings: you may adapt the output of
floating point numbers or date and time fields to your needs. In the
Output preview grid view the lines specified in the Export
settings (Test lines [start] to [end]) will be displayed (see
picture above). To generate the table file press the Start export
button.
During test and export the icon of the button changes to
and you may abort processing by clicking the
button.
Export
Translation List
Export translations list
With this form you can export the translations (see table
Translation) from the database
to a tabulator separated text file. Since the output includes the
database keys, you may correct the data, e.g. by using a spreadsheet
program and re-import the changes by using the importwizard. Choose Data →
Export → Export lists ->
Translations list … from the menu to
open the window for the export.
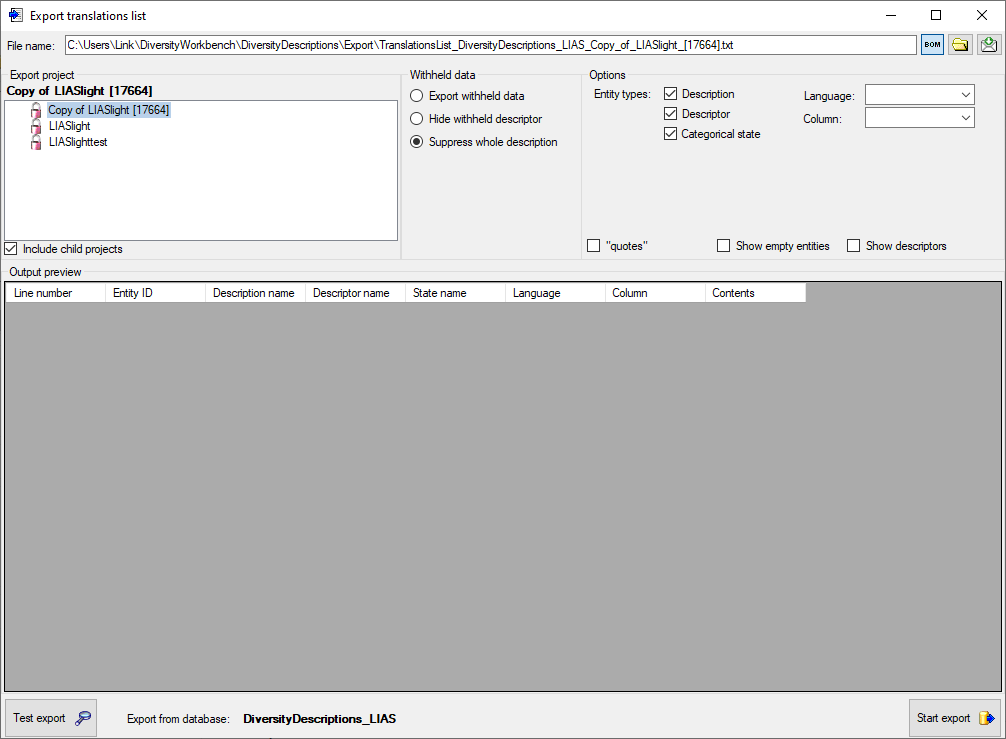
In the Export project section all projects of the database are shown
as a tree. Select here the project that shall be exported. In case of
hierarchically organized projects the subordinated projects will be
included for export, if the Include child projects option is
checked.
The Withheld data section allows control over export of datasets
that contain entries with data status “Data withheld”. Option Supress
whole description (default) excludes all descriptions form export
where at least on descriptor is marked with “Data withheld”. Option
Hide withheld descriptor excludes only the corresponding descriptor
data from the description. Option Export withheld data does not
exclude any data from export.
The Options section allows the selection of the Entity types for
output (“Description”, “Descriptor” and “Categorical state”). To include
all export data in quotes, check option “quotes”. To include all
data rows that do not have translations select option Show empty
entities. If you select Show descriptors, the descriptor titles
will be inserted for categorical states.
You may restrict the translations list to a certain Language or to a
certain data Column by selecting a value in the mentioned combo
boxes. The column value “wording” will output the translations of the
wording columns for descriptions, descriptors and categorical states.
Additionally translations of the columns “wording_before” and
“wording_after” for descriptors will be exported.
Export
Before starting the export, the export file name should be checked. The
file name is generated as <resources
directory>\Export\TranslationsList_<Database
name>_<Project>.txt. This default setting may be changed by
editing the File name or by navigating at the target location by
pressing the button
besides the file name. To generate an output without BOM, release the
button.
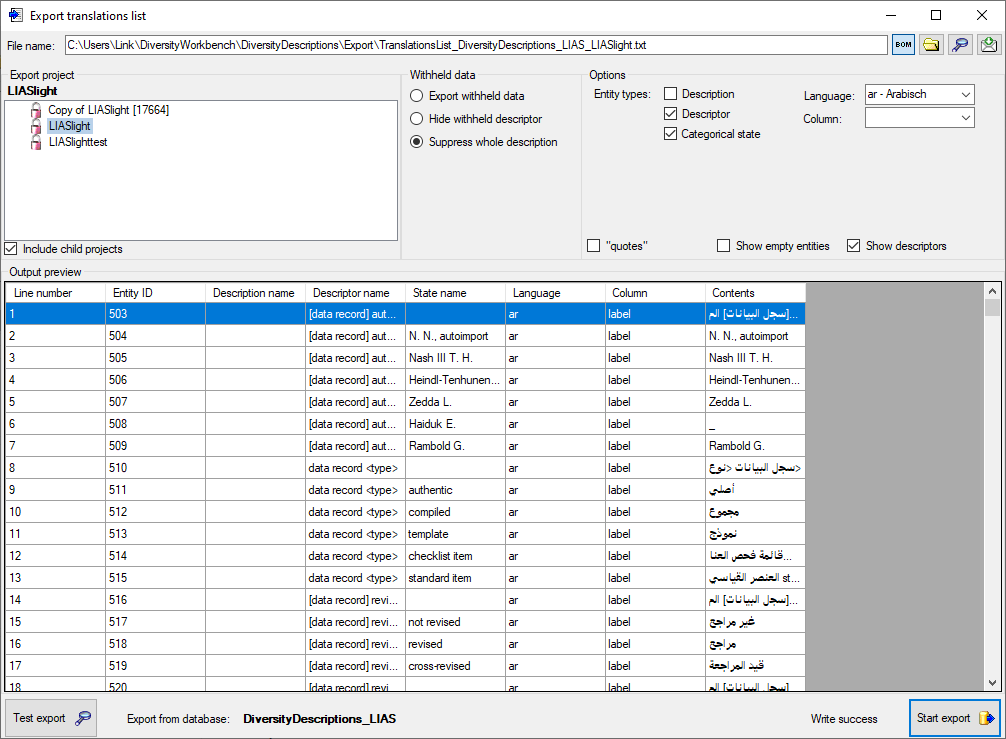
To check the export, click on the Test export
button. In
the Output preview data grid the first few lines will be displayed
(see picture above). To generate the table file press the Start export
button.
During test and export the icon of the button changes to
and you may abort processing by clicking the
button.
Re-import
The review output includes all database keys that can be sufficiently
used to identify the affected data row. When the modified data shall be
re-imported, the internal keys must be available to the import wizard.
This can easily be done by creating a new import session and using the
option Generate mapping … in form
Import sessions.
Please be aware that table
Translation has a numeric key
that is not directly accessible for the import wizard. If you want to
update an exsisting translation, the correct entry must be identified by
the alternate key consisting of “object_id”, “language_code” and
“column_id”, which correspond to the generated output table columns
“Entity ID”, “Language” and “Column” (see image above). In the import
wizard these three columns must therefore be marked as “key columns”
(see image below).

If you generate an output for several entity types, e.g. “Descriptor”
and “Categorical states” as shown in the example above, you will have to
insert a filter condition in the import wizard. E.g. if you want to
re-import descriptor translations, select the outptut column “Contents”
for the “contents” table column and mark it as decisive column. Insert a
filter to output column “State name” for equal “empty” (see image below)
to ignore lines with a categorical state.
Matrix Export Wizard
Matrix export wizard for tab separated lists
With this form you can export the descriptor and description data from
the database to a tabulator separated text file. The output includes the
database keys. Furthermore you have the option to create rsp. update
import mapping data and generate an matrix import schema. Therefore you
may correct the data, e.g. by using a spreadsheet program and re-import
the changes by using the matrix import wizard.
Choose Data → Export ->
 Matrix wizard … from the menu to open the
window for the export.
Matrix wizard … from the menu to open the
window for the export.
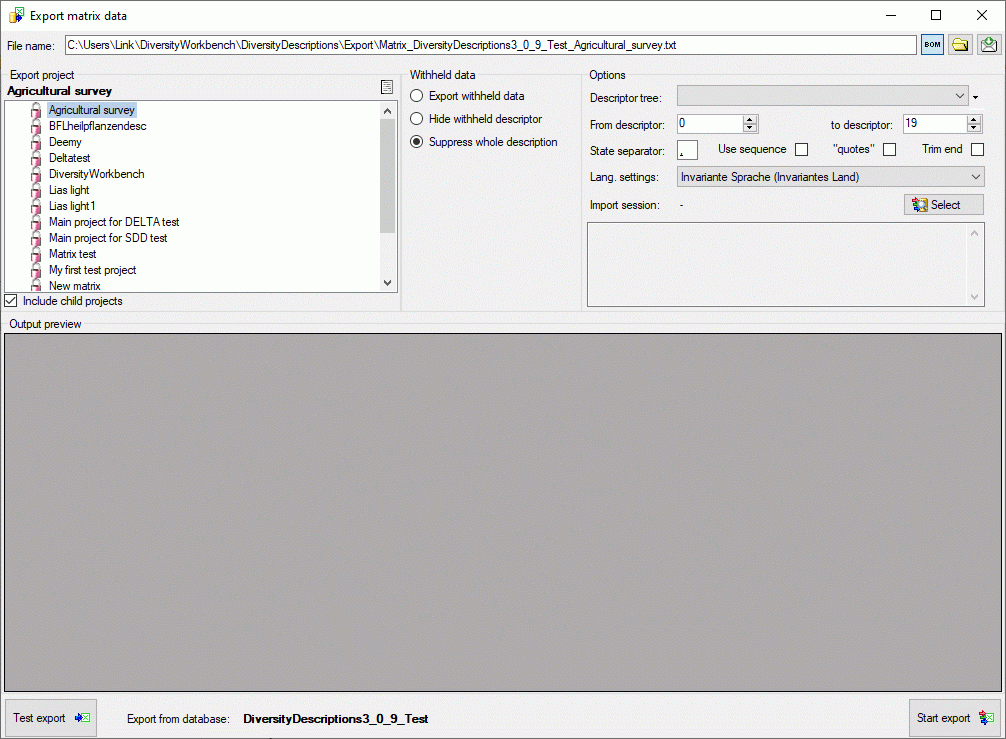
In the Export project section all projects of the database are shown
as a tree. Select here the project that shall be exported. In case of
hierarchically organized projects the subordinated projects will be
included for export, if the Include child projects option is
checked. You may pass a description list to the form by starting a query
in mode “Edit descriptions”. Now you have the option to select single
descriptions for export. In this case the Export project section
shows the button to switch to the list view (see
below).
In the Export descriptions section you find all description titles
that have been passed to the export form (see below). You may select all
entries by clicking the all button,
deselect all entries by clicking the none
button or toggle your selection by clicking the
swap button. By clicking the button
you will return to the Export project view.
The Withheld data section allows control over export of datasets
that contain entries with data status “Data withheld”. Option Supress
whole description (default) excludes all descriptions form export
where at least on descriptor is marked with “Data withheld”. Option
Hide withheld descriptor excludes only the corresponding descriptor
data from the description. Option Export withheld data does not
exclude any data from export.
The Options section allows the selection of the Descriptor tree:
and descriptor sequence number bounds (From descriptor: and to
descriptor:) for restriction of output table columns.
If you select option Use sequence, the descriptor state sequence
numbers will be inserted into the output table instead of the state
names. These sequence numbers will be inserted into the selected import
session (see below) for a later re-import of the data. If you export the
descriptive data to edit them with a spreadsheet tool, e.g. Microsoft
Excel, you have to identify the active categorical states by their
sequence number.
To include all exported data in quotes, check option “quotes”.
Select Trim end to remove white characters (e.g. blank or word wrap) at
the end of texts. By specifying the State separator: (default , ) you determine how multiple categorical state
values will be concatenated in the table cells. By changing the selected
Lang. settings: you may adapt the output of floating point numbers
or date and time fields to your needs.
Import session
The section Import session: is relevant if you want to edit the
description data in a separate spreadsheet programme and re-import the
edited data using the Matrix Import Wizard. To select an import session
cick on button  Select and a window as
shown below will be opened. You may either select an existing import
session, which will be updated with the exported data, or create a new
one.
Select and a window as
shown below will be opened. You may either select an existing import
session, which will be updated with the exported data, or create a new
one.
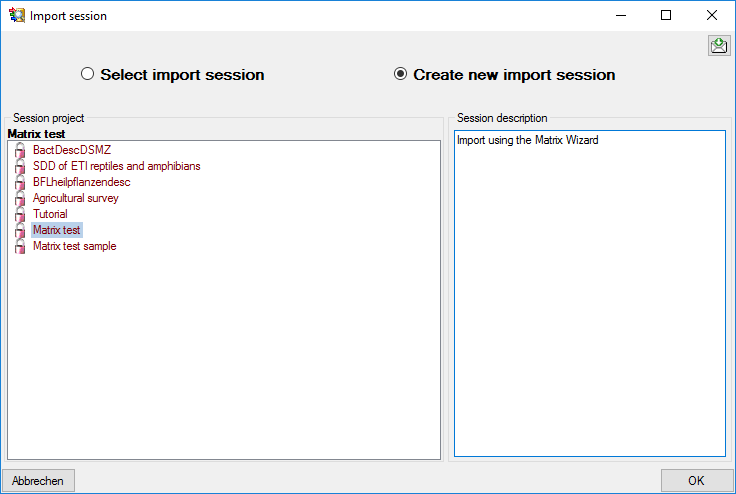
During generation of the matrix data file the relevant data for
re-import will be stored in the selected import session. Additionally an
xml import schema file will be generated as <resources
directory>\Export\Matrix_<Database
name>_<Project>_Schema.xml. If you do not require the data for
re-import, simply do not select an import session or click on button
 to cancel an existing selection.
Export
Before starting the export, the export file name should be checked. The
file name is generated as <resources
directory>\Export\Matrix_<Database
name>_<Project>.txt. This default setting may be changed by
editing the File name or by navigating at the target location by
pressing the  button
besides the file name. To generate an output without BOM, release the
button.
button
besides the file name. To generate an output without BOM, release the
button.
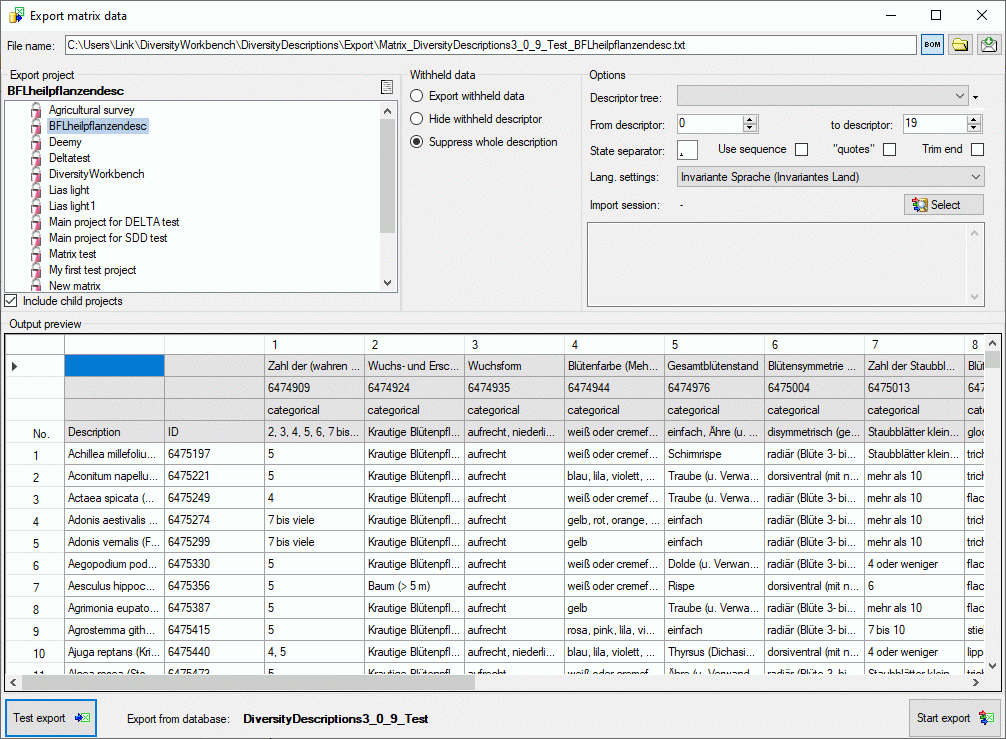
To check the export, click on the Test export
 button.
In the Output preview data grid the first few lines will be
displayed (see picture above). To generate the table file press the
Start export
button.
In the Output preview data grid the first few lines will be
displayed (see picture above). To generate the table file press the
Start export
 button. During test and export the icon of the button changes to
and you may abort processing by clicking the
button.
button. During test and export the icon of the button changes to
and you may abort processing by clicking the
button.
Subsections of File Operations
Check EML
Check EML file
With this form you can check if an XML file is compliant to the EML2.1.1 or EML
2.2.0 schema. Choose Data ->
 File operations ->
 Check EML file … from the menu. After
opening the window shown below the schema files will be automatically
loaded. You may select the schema that shall be used with combo box
Schema version (see image below). Starting with
DiversityDescriptions v. 4.3.5 the EML export will be done using EML
2.2.0.
Check EML file … from the menu. After
opening the window shown below the schema files will be automatically
loaded. You may select the schema that shall be used with combo box
Schema version (see image below). Starting with
DiversityDescriptions v. 4.3.5 the EML export will be done using EML
2.2.0.
In the window click on the
button to select the
file you want to check. The check results will be diplayed in the center
part of the window. By clicking the reload button  you can start a new check (see image below).
Check SDD
Check SDD file
With this form you can check if an XML file is compliant to the SDD 1.1rev 5 schema. Choose Data ->
File operations ->
 Check SDD file … from the menu. After
opening the window shown below the schema files will be automatically
loaded.
Check SDD file … from the menu. After
opening the window shown below the schema files will be automatically
loaded.
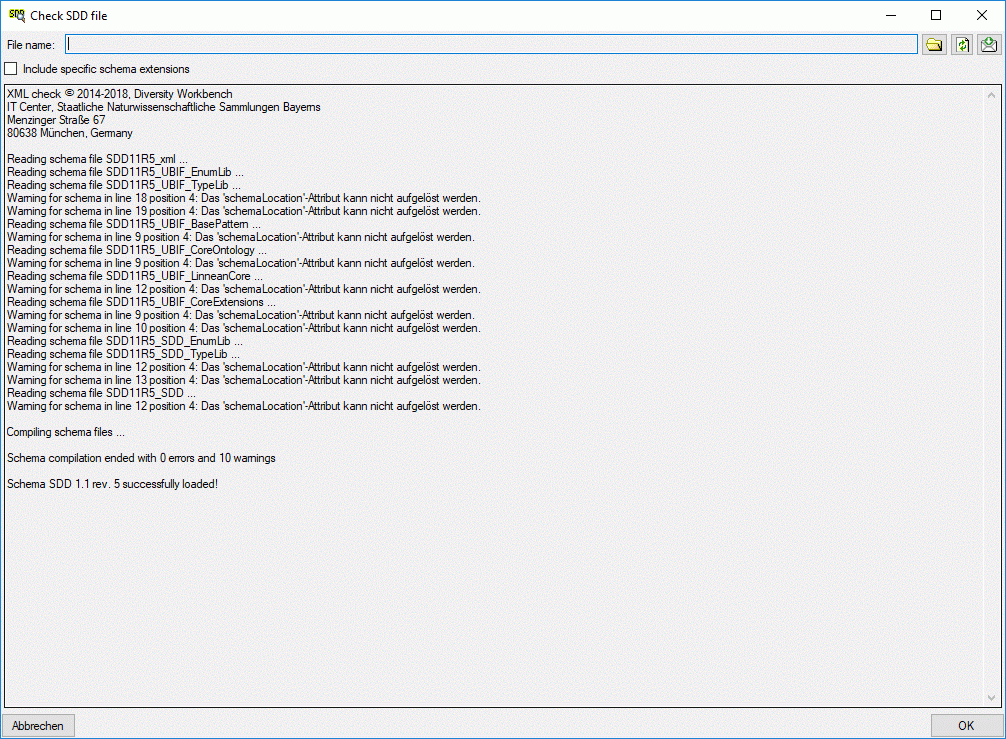
In the window click on the
button to select the
file you want to check. The check results will be diplayed in the center
part of the window. If you generated a SDD file using
Diversity Descriptions with deactivated Comptible option, the check
result may show warnings for elements with missing schema information.
You may check the option Include specific schema extensions, then
the Diversity Descriptions specific schema definitions will be included.
By clicking the reload button or selecting
another file you can start a new check (see image below).
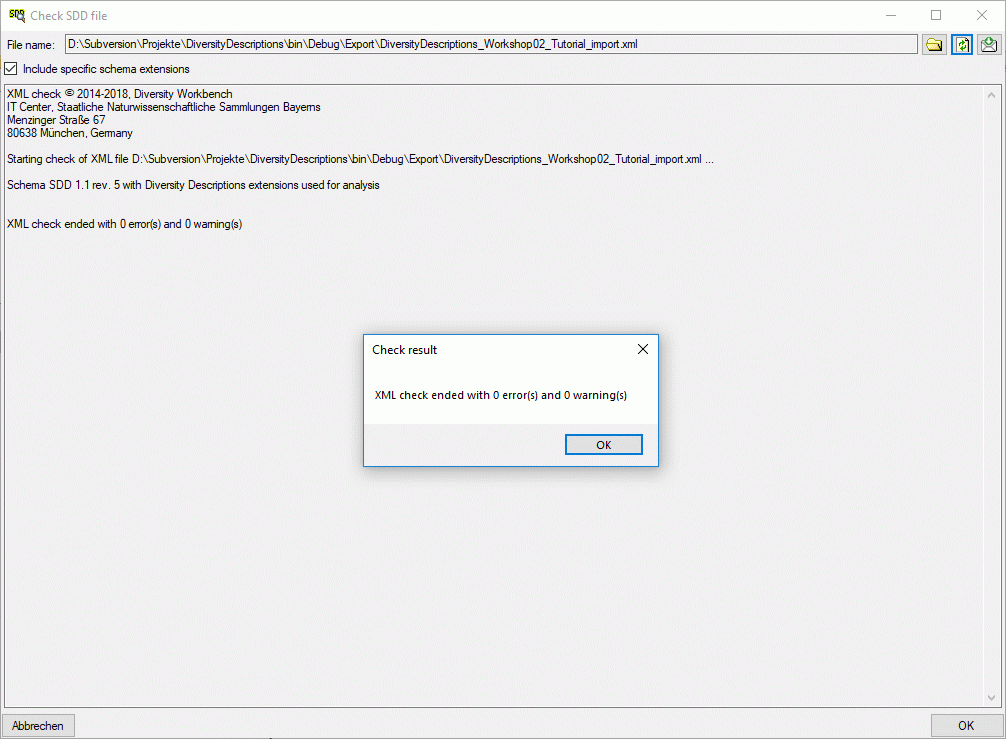
Convert DELTA
Convert DELTA file to SDD or EML
With this form you can directly convert data from a file in DELTA format
into an XML file according schema SDD 1.1 rev5. No connection
to a database is needed for the conversion. Choose Data ->
File operations ->
 Convert data file →
  DELTA to SDD … from the menu to open the window. In the window click
on the button to
select the file with the data you want to convert. If the Multi-file
option is selected before pressing the
button, a folder
selection window opens to select the folder where the DELTA files are
located. For muti-file processing currently the files “chars”, “items”,
“specs” and “extra” are evaluated. If during analysis any problem
occurs, you may click on the button to reload the
file and re-initialize the window.
DELTA to SDD … from the menu to open the window. In the window click
on the button to
select the file with the data you want to convert. If the Multi-file
option is selected before pressing the
button, a folder
selection window opens to select the folder where the DELTA files are
located. For muti-file processing currently the files “chars”, “items”,
“specs” and “extra” are evaluated. If during analysis any problem
occurs, you may click on the button to reload the
file and re-initialize the window.

The contents of the file will be shown in the upper part of the File
tree tab page. If special characters are not displayed corretly, try a
different Encoding setting, e.g. “ANSI”, and reload the document
using the button.
The Insert “variable” state controls the handling of the DELTA state
“V” for categorical summary data. If possible, a categorical state
“variable” is inserted to the descriptor data and set in the summary
data, when the state “V” is present in the description data.
If the Check strings for illegal characters option is checked, all
string literals that shall be exported from database are scanned for
illegal non-printable characters and matches are replaced by a double
exclamation mark ("‼"). Activating this option may increase the analysis
processing time.
In the file tree you may deselect entries that shall not be converted.
Use that option very carefully, because if you deselect entries that are
being referenced by other parts of the input tree, e.g. descriptors
referenced by descriptions, the analysis step might become erronous!
If during reading of the files expressions cannot be interpreted,
suspicious entries are maked with yellow background
(warning) in the file tree. When you move the mouse curser over
the marked entries, you get additional information as tool tip or the
tree node text itself tells the problem (see example below).

Analysis
To analyse the data in the file click on the Analyse data
 button. During
the analysis the program checks the dependencies between the different
parts of the data and builds up an analysis tree in the lower part of
the window. The analysis tree contains all data in a suitable format for
the final step. During data analysis the icon of the button changes to
and you may abort processing by clicking the
button.
button. During
the analysis the program checks the dependencies between the different
parts of the data and builds up an analysis tree in the lower part of
the window. The analysis tree contains all data in a suitable format for
the final step. During data analysis the icon of the button changes to
and you may abort processing by clicking the
button.
In the Analysis settings section (see image below) you set the
document’s Language. You man change the display and sorting of the
entries in the Language combo box from “<code> - <description>”
to “<description> - <code>” (and back) by clicking the button
 . If you need language codes that are not included
in the list, click the
. If you need language codes that are not included
in the list, click the  edit button. For more details
see Edit language codes.
edit button. For more details
see Edit language codes.
The Insert “variable” state controls the handling of the DELTA state
“V” for categorical summary data. If possible, a categorical state
“variable” is inserted to the descriptor data and set in the summary
data, when the state “V” is present in the description data.
If the Check strings for illegal characters option is checked, all
string literals that shall be exported from database are scanned for
illegal non-printable characters and matches are replaced by a double
exclamation mark ("‼"). Activating this option may increase the analysis
processing time.
In DELTA text in angle bracket (<text>) usually denotes comments,
which are by default imported into the “Details” fields of the database.
In the lower parts of the Analysis settings you may adjust a
different handling for description, descriptor and categorical state
items.
- For DELTA comments in descriptions you may Move comments to
details (default) or Keep comments in description titles.
- For DELTA comments in descriptors you may Move comments to
details (default), Move comments to notes or Keep comments in
descriptor titles.
- For DELTA comments in categorical states you may Move comments
to details (default) or Keep comments in categorical state
titles.
After changing one of these settings click on the Analyse data
button to make
the changes effective.

After analysis a message window informs you if any warnings or errors
occured. You can find detailled error and warning information at the
file and/or analysis trees by entries with red text
(error) or yellow background
(warning). When you move the mouse curser over the marked
entries, you get additional information as bubble help or the tree node
text itself tells the problem (see example below). By clicking on the
status text besides the progress bar, you can open an analysis protocol
(see below, right).
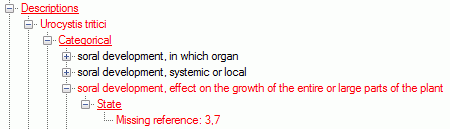
If an analysis error occured, you are not able to proceed. You will
first have to correct the problem, e.g. by excluding the erronous
descriptor in the example above (after reloading the file). If a warning
occured, it might not cause further problems, but you should take a
closer look if the converted data will be correct.
Write data
Pressing the Generate file
 button in the
Write SDD group box opens a window to select the target XML file. By
default the target file has the same name as the DELTA file, followed by
the extension “.xml”. The Comptible option controls generation of
files with most possible compatibility to the SDD standard. On the other
hand some data might not be present in the generated file, if this
option is activated.
button in the
Write SDD group box opens a window to select the target XML file. By
default the target file has the same name as the DELTA file, followed by
the extension “.xml”. The Comptible option controls generation of
files with most possible compatibility to the SDD standard. On the other
hand some data might not be present in the generated file, if this
option is activated.
As an additional option you may generate file according the EMLschema,
which consists of a data table (tabulator separated text file) and an
XML file that contains the metadata including column descriptions. Click
on the Generate file
 button in the
Write EML group box. The generated file names will have the endings
"_EML_DataTable.txt" and "_EML_Metadata.xml".
button in the
Write EML group box. The generated file names will have the endings
"_EML_DataTable.txt" and "_EML_Metadata.xml".
Pressing the drop down button  EML
settings in the Write EML group box opens the EML writer options.
You can chose to include a special sign for empty column values or set
the columns values in quotes (see left image below). Furthermore you may
shose the column separator (tab stop rsp. comma) an decide if multiple
categorical states shall be inserted as separate data columns. If you
already generated EML files, the used settings will be automatically
saved and you may restore them using the option
EML
settings in the Write EML group box opens the EML writer options.
You can chose to include a special sign for empty column values or set
the columns values in quotes (see left image below). Furthermore you may
shose the column separator (tab stop rsp. comma) an decide if multiple
categorical states shall be inserted as separate data columns. If you
already generated EML files, the used settings will be automatically
saved and you may restore them using the option
 Load last write settings. Finally click
button EML settings to close the option
panel.
Load last write settings. Finally click
button EML settings to close the option
panel.
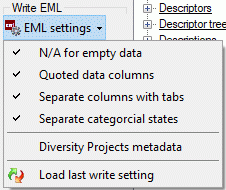
Handling of special DELTA states
In the DELTA format the special states “-” (not applicable), “U”
(unknown) and “V” (variable) are available for categorical and
quantitative characters. These states are treated in the folloging
manner during import:
- “-” (not applicable)
The data status “Not applicable” is set.
- “U” (unknown)
The data status “Data unavailable” is set.
- “V” (variable)
The data status “Not interpreterable” is set.
Convert SDD
Convert SDD file to DELTA or EML
With this form you can directly convert data from a file in XML file
according schema SDD 1.1 rev5 into a DELTA
file. No connection to a database is needed for the conversion. Choose
Data → File operations ->
Convert data file →  SDD
to DELTA … from the menu to open the window. In the window click on
the button to select
the file with the data you want to convert. If during analysis any
problem occurs, you may click on the button to
reload the file and re-initialize the window.
SDD
to DELTA … from the menu to open the window. In the window click on
the button to select
the file with the data you want to convert. If during analysis any
problem occurs, you may click on the button to
reload the file and re-initialize the window.
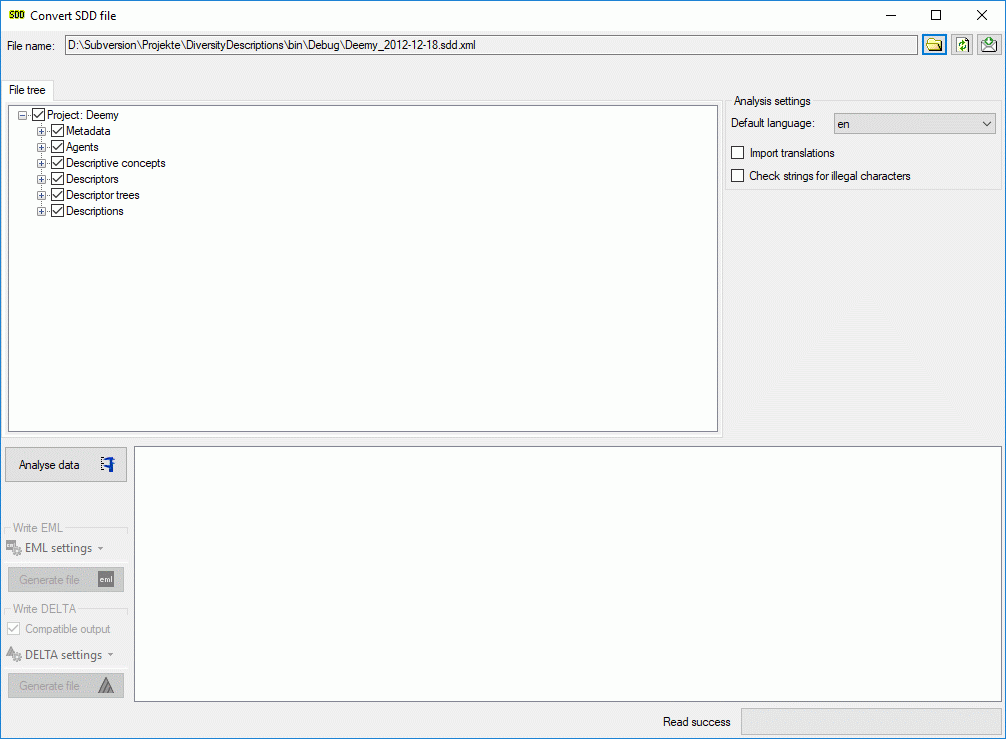
The contents of the file will be shown in the upper part of the File
tree tab page. In the Analysis settings part you find the
documents’ default language. If additional laguages are contained in the
document, you may select one of them as the new language of the DELTA
file. By checking Import translations you select all additional
document languages for the analysis step. This option is automatically
pre-selected if more than one language has been found in the file. In
the bottom part of the window you find the actual processing state.
In the file tree you may deselect entries that shall not be imported
into the database. Use that option very carefully, because if you
deselect entries that are being referenced by other parts of the input
tree, e.g. descriptors referenced by descriptions, the analysis step
might become erronous!
Analysis
To analyse the data in the file click on the Analyse data
button. During
the analysis the program checks the dependencies between the different
parts of the data and builds up an analysis tree in the lower part of
the window. The analysis tree contains all data in a suitable format for
the final step. During data analysis the icon of the button changes to
and you may abort processing by clicking the
button.
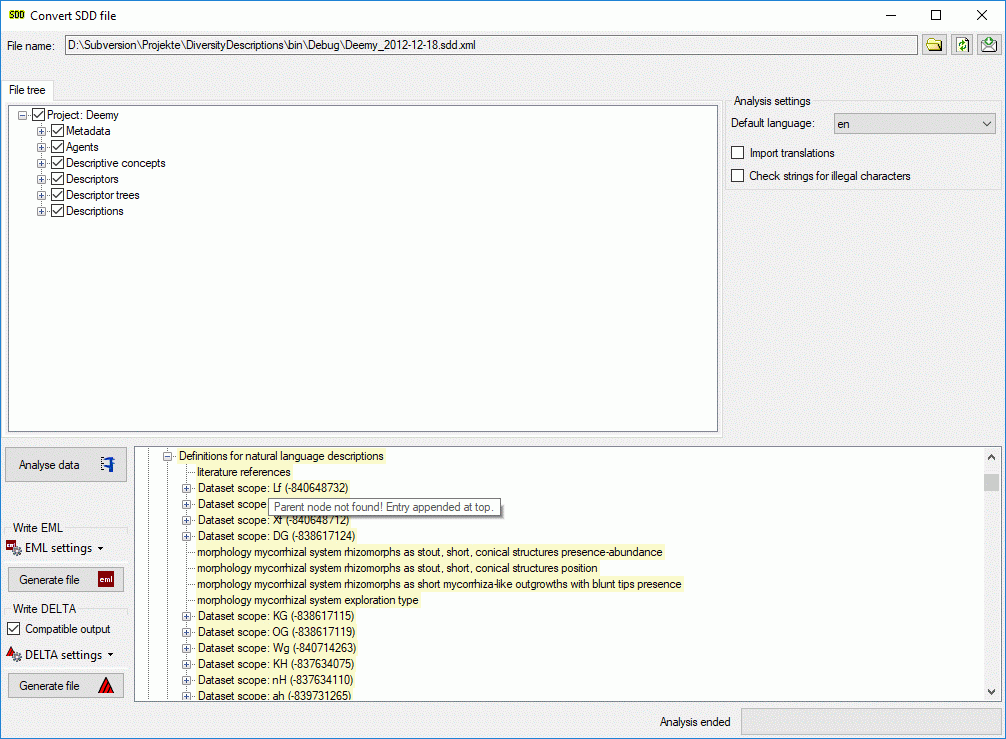
After analysis a message window informs you if any warnings or errors
occured. You can find detailled error and warning information at the
file and/or analysis trees by entries with red text
(error) or yellow background
(warning). When you move the mouse curser over the marked
entries, you get additional information as tool tip or the tree node
text itself tells the problem (see examples below). By clicking on the
status text besides the progress bar, you can open an analysis protocol
(see below, right).
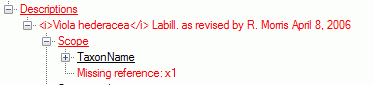
If an analysis error occured, you are not able to proceed. You will
first have to correct the problem, e.g. by excluding the erronous
descriptor in the example above (after reloading the file). If a warning
occured, it might not cause further problems, but you should take a
closer look if the converted data will be correct.
Write data
Pressing the Generate file
 button in the
Write Delta group box opens a window to select the target delta
file. By default the target file has the same name as the SDD file,
followed by the extension “.dat”. The Comptible option controls
generation of files with most possible compatibility to the DELTA
standard. On the other hand some data might not be present in the
generated file, if this option is activated.
button in the
Write Delta group box opens a window to select the target delta
file. By default the target file has the same name as the SDD file,
followed by the extension “.dat”. The Comptible option controls
generation of files with most possible compatibility to the DELTA
standard. On the other hand some data might not be present in the
generated file, if this option is activated.
As an additional option you may generate file according the EMLschema,
which consists of a data table (tabulator separated text file) and an
XML file that contains the metadata including column descriptions. Click
on the Generate file
button in the
Write EML group box. The generated file names will have the endings
"_EML_DataTable.txt" and "_EML_Metadata.xml".
Pressing the drop down button  DELTA
settings in the Write DELTA group box opens the DELTA writer
options. You can chose to include some detail text and notes in the
DELTA output (see left image below). For descriptions, descriptors or
categorical states the details will be appended as DELTA comments
(included in angle brackets “< … >”) to the respective titles. The
notes will be appended as DELTA comments of the corresponding summary
data. If you already generated DELTA files, the used settings will be
automatically saved and you may restore them using the option
Load last write settings. Finally click
button DELTA settings to close the
option panel.
DELTA
settings in the Write DELTA group box opens the DELTA writer
options. You can chose to include some detail text and notes in the
DELTA output (see left image below). For descriptions, descriptors or
categorical states the details will be appended as DELTA comments
(included in angle brackets “< … >”) to the respective titles. The
notes will be appended as DELTA comments of the corresponding summary
data. If you already generated DELTA files, the used settings will be
automatically saved and you may restore them using the option
Load last write settings. Finally click
button DELTA settings to close the
option panel.
Pressing the drop down button EML
settings in the Write EML group box opens the EML writer options.
You can chose to include a special sign for empty column values or set
the columns values in quotes (see right image above). Furthermore you
may shose the column separator (tab stop rsp. comma) an decide if
multiple categorical states shall be inserted as separate data columns.
If you already generated EML files, the used settings will be
automatically saved and you may restore them using the option
Load last write settings. Finally click
button EML settings to close the option
panel.
Handling of special sequence data
While SDD can handle molecular sequence data, for DELTA export these
data will be exported as text data. To preserve the sequence specific
descriptor data, they will be inserted into the text character as a
special comment with the format, e.g. “#6. Sequence descriptor
<[SequenceCharacter][ST:N][SL:1][GS:-][/SequenceCharacter]>/”.
If the analysis tree includes sample data, they will be included as
items at the end of the DELTA file. The naming of those spetial items
will be <description name> - <event name> - Unit <number>.
Sampling event data will not be included in the DELTA file.
Subsections of Import
Matrix Wizard
Matrix import wizard for tab separated lists
The table oriented import wizard works fine if you have separate lists
for descriptor and description data. Usually this type of tables is
generated by an export of data from a database. A typical example for
that cases is described in the import wizardtutorial. If no dedicated application for
collecting description data is available, most commonly a spreadsheet
program like MS Excel or Open Office Calc is used to collect the
description data. Typically the table columns represent a single
character (=descriptor) and the table rows represent the items
(=description or sample data). Importing data from such a “matrix” into
Diversity Descriptions with the table oriented import wizard usually
requires a lot of manual adaptions. Therefore the specialized “Matrix
Wizard” was designed to import the most important descriptor and
description data in a single import step.
As usual you should create a new project and install a descriptor tree
to collect the dedicated descriptors. Then choose Data →
 Import →
  Import
wizard →
Import
wizard →  Matrix wizard … from the menu. As
know from the import wizard, a window to create or select a import
session will be shown.
Matrix wizard … from the menu. As
know from the import wizard, a window to create or select a import
session will be shown.
After selecting or creating an import session a window as shown below
will open that will lead you through the import of the data.
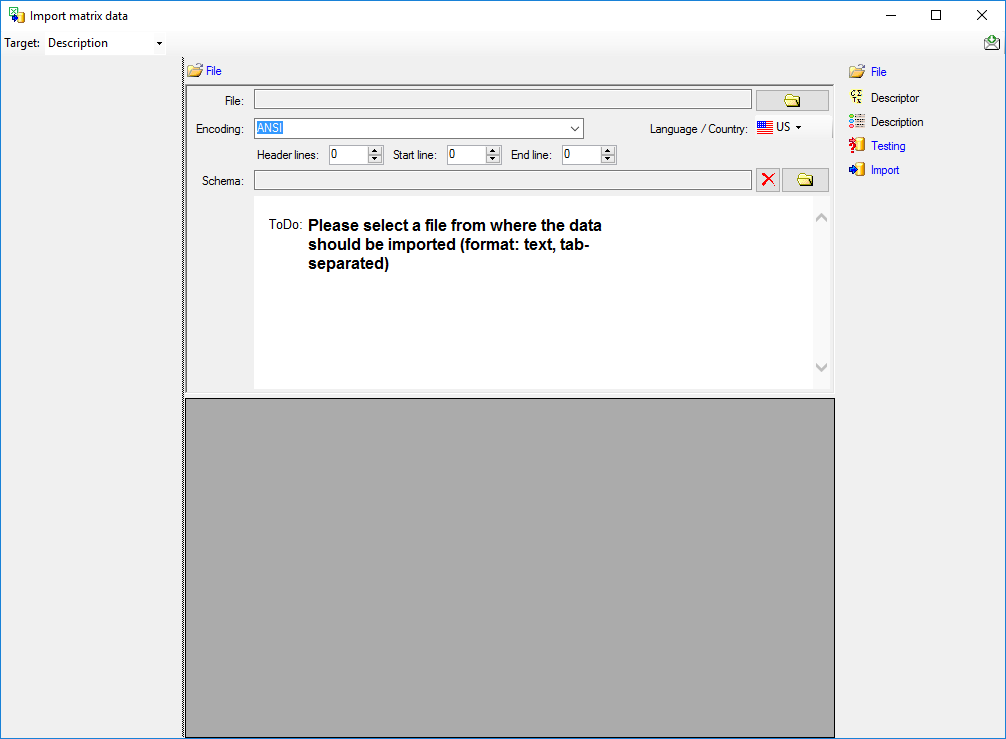
With the selection box Target: you may select which data shall be
imported:
Remark: Example files and XML schemas to import summary or sample
data using the matrix wizard are provided in the tutorialfiles or may be downloaded from the
Diversity Descriptions example file
repository.
Find the example data in folders “Biomass as description” and “Biomass
as sample”
Subsections of Matrix Wizard
Matrix Wizard Description
Matrix import wizard for description data
After selecting Target: Description a window as shown below will be
displayed. The window is separated in three areas. On the left side you
see the descriptor settings for the actual file column (presently not
visible). On the right side you see the list of available import steps.
In the middle part the details of the selected import steps are shown.
Choosing the File
As a first step, choose the File from where the data
should be imported. The currently supported format is tab-separated
text. Then choose the Encoding of the file, e.g. Unicode. The
Header lines specifies the number of header
lines, usually at least the first line which typically contains
the descriptor names (see image below). The Start line and End
line will automatically be set according to your data. You may change
these to restrict the data lines, i.e. the descriptions/items that shall
be imported. The not imported
parts in the file are indicated with a gray background. If your
data contains e.g. date information or floating point values where
notations differ between countries (e.g. 3.14 - 3,13), choose the
Language / Country to ensure a correct interpretation of your data.
Finally you can select a prepared Schema (see sections Testing and
Import below) for the import.
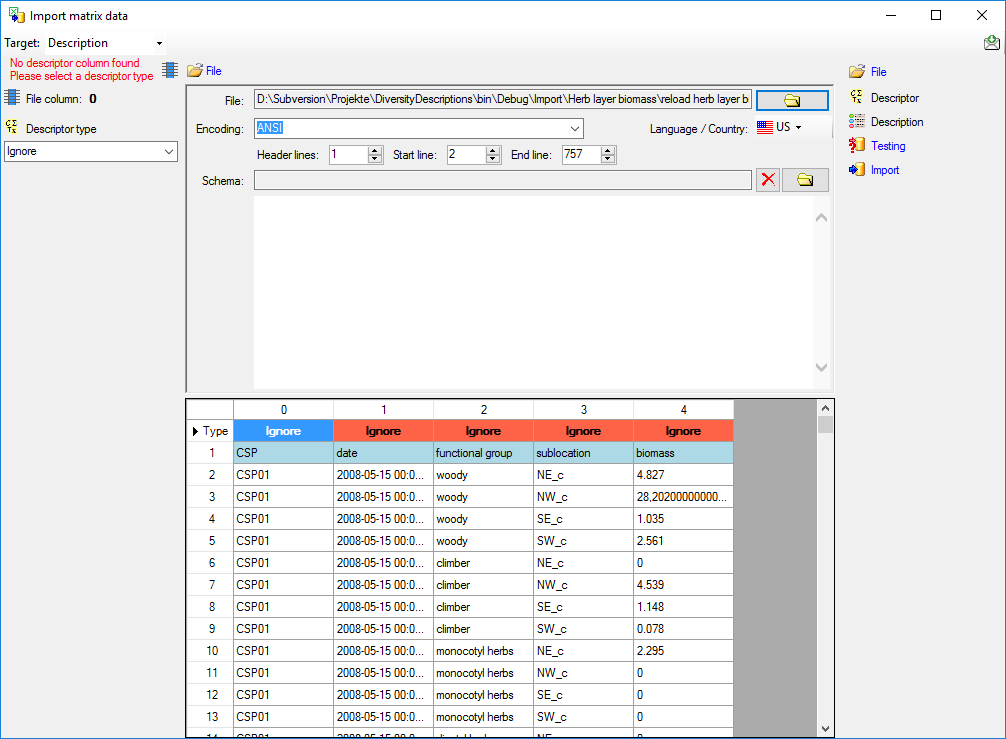
Choosing the descriptor types
In the first line of the file section the descriptor type of the file
columns are displayed. The value Ignore
indicates that the column shall not be imported. To adjust the
descriptor type, select a cell in the file column and chose a
Descriptor type in the left section of the
panel (see image below). Available descriptor types are Categorical,
Quantitative, Text and Sequence.
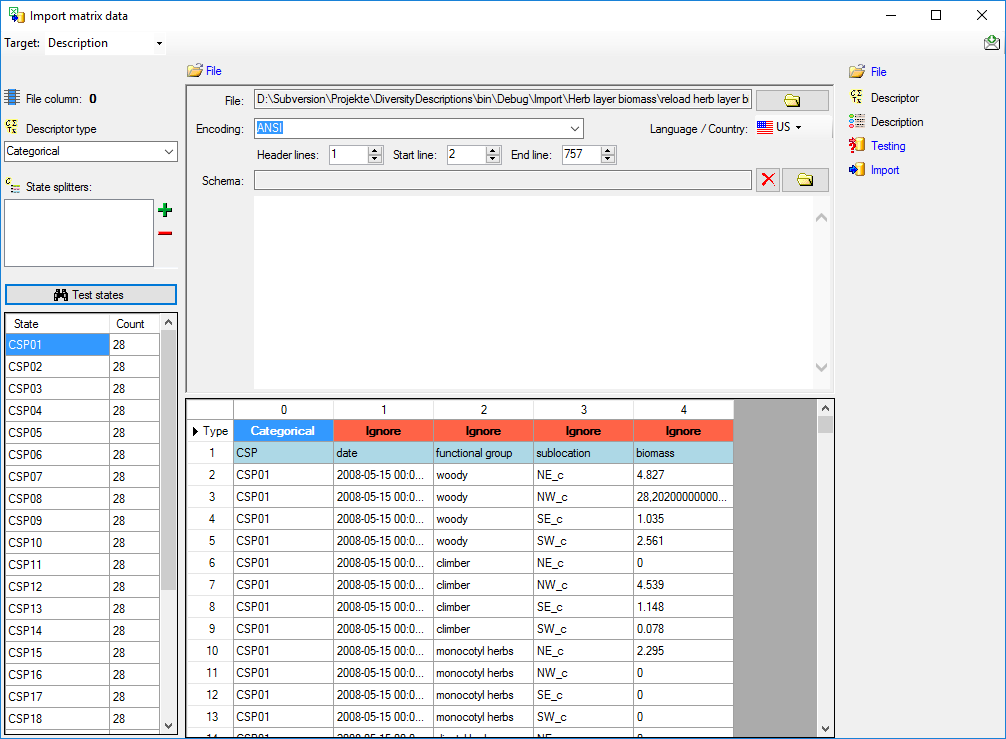
For categorical descriptors you may specify  State splitters, if one item has more than one categorical state. To
add a splitter click on the add button, to remove it use
the
State splitters, if one item has more than one categorical state. To
add a splitter click on the add button, to remove it use
the  button. By clicking the
Test states button you get a list of
categorical states found in the file between start line and end line and
the number of occurrences (field Count, see image above). With this
function you may test the effect of the state splitters.
button. By clicking the
Test states button you get a list of
categorical states found in the file between start line and end line and
the number of occurrences (field Count, see image above). With this
function you may test the effect of the state splitters.
For quantitative descriptors you have to specify the
 Statistical measure that shall be used for
the imported values. By clicking the Test
values button you get a list of values in the file between start line
and the line number in the file (see image above).
Statistical measure that shall be used for
the imported values. By clicking the Test
values button you get a list of values in the file between start line
and the line number in the file (see image above).
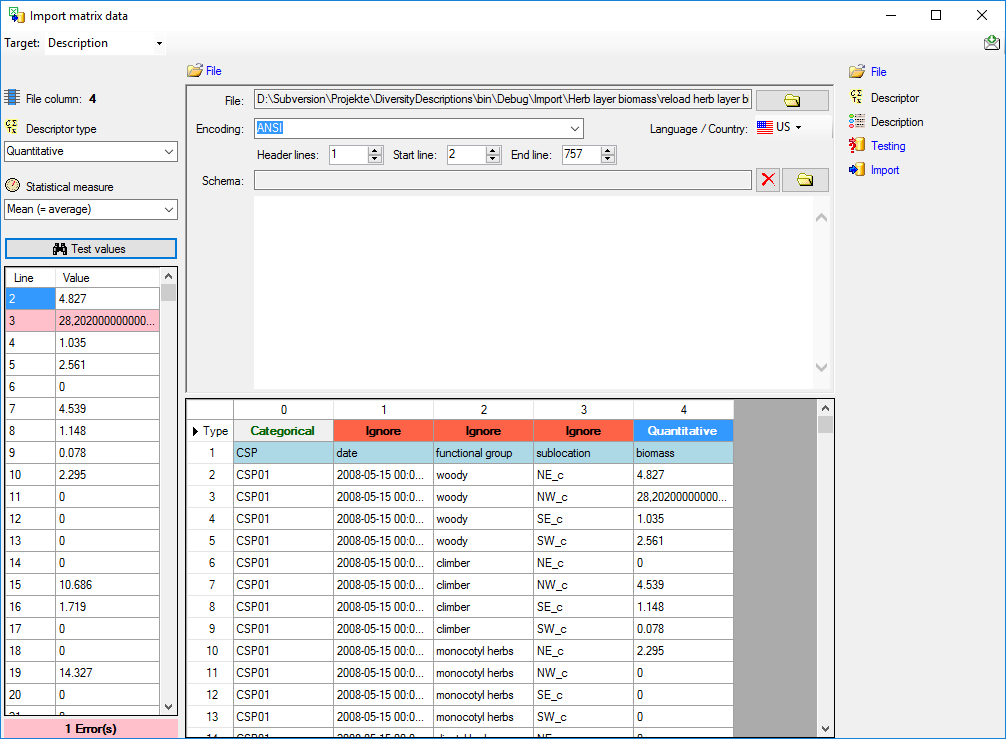
If a value cannot be interpreted as a number, it is marked with a light red background colour. You may edit the
erroneous values in the test result panel (see below).
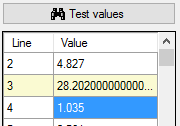
For text and sequence descriptors no additional adjustments are
possible. As long as no descriptor columns have been defined, a reminder
is visible on top of the left section:
- Please select a descriptor type
 = At least
for one file column a descriptor type is needed.
= At least
for one file column a descriptor type is needed.
In our example column 1 (date) will be adjusted as text descriptor and
columns 2 (functional group) and 3 (sublocation) as categorical
descriptors.
Table data
To set the source for the data columns, select the step of a table
listed underneath the File step. Be aware that for the
Descriptor table not the file columns will be
selected but the file rows in the header lines. In the image below you
see an example of the descriptor data columns, where the values for id
and label are taken from the first line in the file. Additionally the
descriptors will be assigned to the descriptor tree “Descriptor tree for
matrix”.

Remark: Although descriptortree_id is a numeric value in the
database, the externally visible descriptor tree name is expected here.
Since this name is unambigious, the corresponding id will be determined
during import.
The option Address index allows the selection of the column number
(for descriptor) rsp. the line number (for description) as value. See
below an example for the Description table data
columns. For id the line number has been selected to get an unambigious
address value. The label has been composed of the line number, three
data columns and some fixed text parts. Finally all description data are
assigned to the project “Matrix text”.

Remark: Although project_id is a numeric value in the database, the
externally visible project name is expected here. Since this name is
unambigious, the corresponding id will be determined during import.
A reminder in the header line will show you what actions are still
needed to import the data into the table:
- Please select at least one decisive column
 =
If data will be imported depends on the content of decisive colums, so
at least one must be selected.
=
If data will be imported depends on the content of decisive colums, so
at least one must be selected.
- Please select the position in the file =
The position in the file must be given if the data for a column should
be taken from the file.
- From file or For all
 = For every you have
to decide whether the data are taken from the file or a value is
entered for all
= For every you have
to decide whether the data are taken from the file or a value is
entered for all
- Please select a value from the list = You have
to select a value from the provided list
The handling of the columns is almost the same as described in the
chapter columns of the table oriented
import wizard.
Testing
To test if all requirements for the import are met use the
 Testing step. You can navigate to a certain
data cell by using the Column: and Line: controls. As an
alternative select the data cell ent click on button
. Finally click on the Test data button. If
there are still unmet requirements, these will be listed in a window as
shown below. In the window below you can see the following test actions:
Testing step. You can navigate to a certain
data cell by using the Column: and Line: controls. As an
alternative select the data cell ent click on button
. Finally click on the Test data button. If
there are still unmet requirements, these will be listed in a window as
shown below. In the window below you can see the following test actions:
- Insert of a quantitative descriptor “biomass”
- Insert of a descriptor tree node (assignemnt to tree “Matrix test
tree”)
- Insert of a recommended statistical measure (measure “Mean”) for the
descriptor tree node
- Insert of description “Biomass 3 [CSP01 woody NW_c]” for project
“Matrix test”
- Insert of a statistical measure for “Mean” with value 28.2020000…
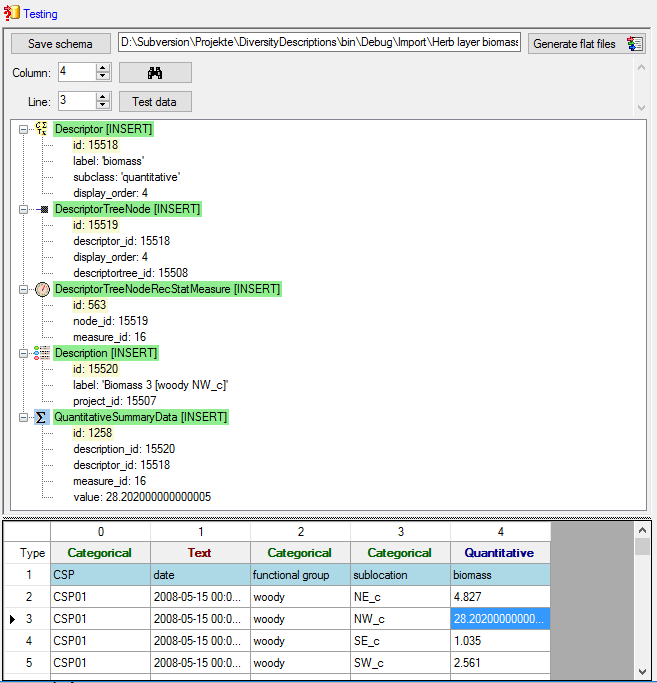
You may save the schema file by a click on button Save schema. If
you click on button Generate flat files
according to your adjustments data and matching schema files for the
table oriented import wizards will be generated. This option may be
used, if you want to import additional data, e.g. a descriptor’s
measurement unit, that are not supported by the matrix wizard. Since all
mapping relevant data are stored in the selected import session, you may
import the basic descriptor and description data using the matrix wizard
and append additional data with the table oriented import wizards. In
this case the generated flat data and schema files might be useful to
have a defined starting point.
Import
With the last step you can finally start to import the data into the
database. If you want to repeat the import with the same settings and
data of the same structure, you can save a schema of the current
settings (see below).
|
|
|
|
| Schedule for matrix import of tab-separated text files into DiversityDescriptions |
|
|
|
| Target within DiversityDescriptions: Description |
|
|
|
| Schedule version: |
1 |
Database version: |
03.00.17 |
| Lines: |
2 - 757 |
Header lines: |
1 |
| Encoding: |
ANSI |
Language: |
US |
Tables
Descriptor
(Descriptor)
Merge handling:
Merge
| Column in table |
? |
Copy |
Pre |
Post |
File pos. |
Value |
Source |
| id |
? |
|
|
|
1 |
|
File |
| label |
|
|
|
|
1 |
|
File |
| descriptortree_id |
|
|
|
|
|
Descriptor tree for matrix |
Interface |
Description
(Description)
Merge handling:
Merge
| Column in table |
? |
Copy |
Pre |
Post |
File pos. |
Value |
Source |
| id |
? |
|
|
|
|
|
Index |
| label |
|
|
Biomass |
|
|
|
Index |
| + |
|
|
[ |
|
0 |
|
File |
| + |
|
|
|
|
2 |
|
File |
| + |
|
|
|
] |
3 |
|
File |
| project_id |
|
|
|
|
|
Matrix test |
Interface |
Descriptor
columns
File pos.
Descriptor type
Additional data
0
Categorical
Splitters
1
Text
2
Categorical
Splitters
3
Categorical
Splitters
4
Quantitative
File cells that could not be imported will be marked with a red
background while imported lines are marked green. If you want to save
lines that produce errors during the import in a separate file, use the
Save failed lines option. The protocol of the import will contain all
settings acording to the used schema and an overview containing the
number of inserted, updated, unchanged and failed lines (see below).
Protocol
|
|
|
| Responsible: |
Link |
(DB-User: Workshop) |
| Date: |
Donnerstag, 20. April 2017, 15:53:24 |
|
| Server: |
training.diversityworkbench.de |
|
| Database: |
DiversityDescriptions_Workshop |
|
| Descriptor columns total: |
5 |
|
| Descriptors imported: |
5 |
|
| Import lines total: |
756 |
|
| Descriptions imported: |
756 |
|
| Cells imported: |
3780 |
|
Matrix Wizard Sample
Matrix import wizard for sample data
After selecting Target: Sampling event a window as shown below will
be displayed. The window is separated in 3 areas. On the left side you
see the descriptor settings for the actual file column (presently not
visible). On the right side you see the list of available import steps.
In the middle part the details of the selected import steps are shown.
Choosing the File
As a first step, choose the File from where the data
should be imported. The currently supported format is tab-separated
text. Then choose the Encoding of the file, e.g. Unicode. The
Header lines specifies the number of header
lines, usually at least the first line which typically contains
the descriptor names (see image below). The Start line and End
line will automatically be set according to your data. You may change
these to restrict the data lines, i.e. the descriptions/items that shall
be imported. The not imported
parts in the file are indicated with a gray background. If your
data contains e.g. date information or floating point values where
notations differ between countries (e.g. 3.14 - 3,13), choose the
Language / Country to ensure a correct interpretation of your data.
Finally you can select a prepared Schema (see sections Testing and
Import below) for the import.
Choosing the descriptor types
Choosing of the descriptor types is done in exactly the same way as
described in section Matrix wizard for descriptiondata.
Table data
To set the source for the data columns, select the step of a table
listed underneath the File step. Be aware that for the
Descriptor table not the file columns will be
selected but the file rows in the header lines. In the image below you
see an example of the descriptor data columns, where the values for id
and label are taken from the first line in the file. Additionally the
descriptors will be assigned to the descriptor tree “Descriptor tree for
matrix”.

Remark: Although descriptortree_id is a numeric value in the
database, the externally visible descriptor tree name is expected here.
Since this name is unambigious, the corresponding id will be determined
during import.
The option Address index allows the selection of the column number
(for descriptor) rsp. the line number (for description or sampling
event) as value. See below an example for the
Description table data columns. For id and label the For all:
alue “++ New description ++” was selected to create a single description
entry where all sample data are attached. Finally the description is
assigned to the project “Matrix text sample”.

Remark: Although project_id is a numeric value in the database, the
externally visible project name is expected here. Since this name is
unambigious, the corresponding id will be determined during import.
Finally the source for the Sampling event
table data columns must be selected. For id and label the file column 0
has been selected (see image below).

A reminder in the header line will show you what actions are still
needed to import the data into the table:
- Please select at least one decisive column =
If data will be imported depends on the content of decisive colums, so
at least one must be selected.
- Please select the position in the file =
The position in the file must be given if the data for a column should
be taken from the file.
- From file or For all = For every you have
to decide whether the data are taken from the file or a value is
entered for all
- Please select a value from the list = You have
to select a value from the provided list
The handling of the columns is almost the same as described in the
chapter columns of the table oriented
import wizard.
Testing
To test if all requirements for the import are met use the
Testing step. You can navigate to a certain
data cell by using the Column: and Line: controls. As an
alternative select the data cell ent click on button
. Finally click on the Test data button. If
there are still unmet requirements, these will be listed in a window as
shown below. In the window below you can see the following test actions:
- Insert of a quantitative descriptor “Channel 2 VLT Us1G”
- Insert of a descriptor tree node (assignemnt to tree “Tree for
matrix test sample”)
- Insert of a recommended statistical measure (measure “Mean”) for the
descriptor tree node
- Insert of description “++ New description ++” for project “Matrix
test sample”
- Insert of a sampling event “30.01.2014 22:00” for description “++
New description ++”
- Insert of a sampling unit with id 199 for sampling event “30.01.2014
22:00”
- Insert of a quantitative value -22.72 to sampling unit 199
You may save the schema file by a click on button Save schema. If
you click on button Generate flat files
according to your adjustments data and matching schema files for the
table oriented import wizards will be generated. This option may be
used, if you want to import additional data, e.g. a descriptor’s
measurement unit, that are not supported by the matrix wizard. Since all
mapping relevant data are stored in the selected import session, you may
import the basic descriptor and description data using the matrix wizard
and append additional data with the table oriented import wizards. In
this case the generated flat data and schema files might be useful to
have a defined starting point.
Import
With the last step you can finally start to import the data into the
database. If you want to repeat the import with the same settings and
data of the same structure, you can save a schema of the current
settings (see below).
|
|
|
|
| Schedule for matrix import of tab-separated text files into DiversityDescriptions |
|
|
|
| Target within DiversityDescriptions: SamplingEvent |
|
|
|
| Schedule version: |
1 |
Database version: |
03.00.17 |
| Lines: |
5 - 151 |
Header lines: |
4 |
| Encoding: |
ANSI |
Language: |
US |
Tables
Descriptor
(Descriptor)
Merge handling: Merge
| Column in table |
? |
Copy |
Pre |
Post |
File pos. |
Value |
Source |
| id |
? |
|
|
|
1 |
|
File |
| label |
|
|
Channel |
|
1 |
|
File |
| + |
|
|
|
|
2 |
|
File |
| + |
|
|
|
|
3 |
|
File |
| descriptortree_id |
|
|
|
|
|
Tree for matrix test sample |
Interface |
Description
(Description)
Merge handling: Merge
| Column in table |
? |
Copy |
Pre |
Post |
File pos. |
Value |
Source |
| id |
? |
|
|
|
|
++ New description ++ |
Interface |
| label |
|
|
|
|
|
++ New description ++ |
Interface |
| project_id |
|
|
|
|
|
Matrix test sample |
Interface |
SamplingEvent
(SamplingEvent)
Merge handling: Merge
| Column in table |
? |
Copy |
Pre |
Post |
File pos. |
Value |
Source |
| id |
? |
|
|
|
0 |
|
File |
| label |
|
|
|
|
0 |
|
File |
Descriptor
columns
| 2 |
Quantitative |
|
| 3 |
Quantitative |
|
| 4 |
Quantitative |
|
| 5 |
Quantitative |
|
| 6 |
Quantitative |
|
| 7 |
Quantitative |
|
| 8 |
Quantitative |
|
| 9 |
Quantitative |
|
| 10 |
Quantitative |
|
| 11 |
Quantitative |
|
| 12 |
Quantitative |
|
| 13 |
Quantitative |
|
| 14 |
Quantitative |
|
| 15 |
Quantitative |
|
| 16 |
Quantitative |
|
| 17 |
Quantitative |
|
| 18 |
Quantitative |
|
| 19 |
Quantitative |
|
| 20 |
Quantitative |
|
| 21 |
Quantitative |
|
| 22 |
Quantitative |
|
| 23 |
Quantitative |
|
| 24 |
Quantitative |
|
| 25 |
Quantitative |
|
| 26 |
Quantitative |
|
| 27 |
Quantitative |
|
| 28 |
Quantitative |
|
| 29 |
Quantitative |
|
| 30 |
Quantitative |
|
| 31 |
Quantitative |
|
| 32 |
Quantitative |
|
| 33 |
Quantitative |
|
| 34 |
Quantitative |
|
| 35 |
Quantitative |
|
| 36 |
Quantitative |
|
| 37 |
Quantitative |
|
| 38 |
Quantitative |
|
| 39 |
Quantitative |
|
| 40 |
Quantitative |
|
| 41 |
Quantitative |
|
| 42 |
Quantitative |
|
| 43 |
Quantitative |
|
| 44 |
Quantitative |
|
| 45 |
Quantitative |
|
File cells that could not be imported will be marked with a red
background while imported lines are marked green. If you want to save
lines that produce errors during the import in a separate file, use the
Save failed lines option. The protocol of the import will contain all
settings acording to the used schema and an overview containing the
number of inserted, updated, unchanged and failed lines (see below).
Protocol
|
|
|
| Responsible: |
Link |
(DB-User: Workshop) |
| Date: |
Donnerstag, 20. April 2017, 16:17:42 |
|
| Server: |
training.diversityworkbench.de |
|
| Database: |
DiversityDescriptions_Workshop |
|
| Descriptor columns total: |
44 |
|
| Descriptors imported: |
44 |
|
| Import lines total: |
147 |
|
| Descriptions imported: |
1 |
|
| Samples imported: |
147 |
|
| Cells imported: |
6348 |
|
| Cells failed: |
120 |
|
Wizard
Import wizard for tab separated lists
With this import routines, you can import data from text files (as
tab-separated lists) into the database. For a comprehensive real-life
example that shows many features of the import wizard take a look at the
import wizard tutorial.
Choose Data → Import
-> Import wizard and then the type of data
that should be imported, e.g. Import descriptors
… from the menu. If you did not use the import wizard before, the
following window is shown to create a new import session.
Import wizard and then the type of data
that should be imported, e.g. Import descriptors
… from the menu. If you did not use the import wizard before, the
following window is shown to create a new import session.
In section Session project the projects with write access are listed
for selection. In section Session description you should enter a
detailled text description. If already an import session is present in
the database, the window below will be shown where you may select the
session. You may select one of the offered sessions or create a new one
by selecting Create new import session.
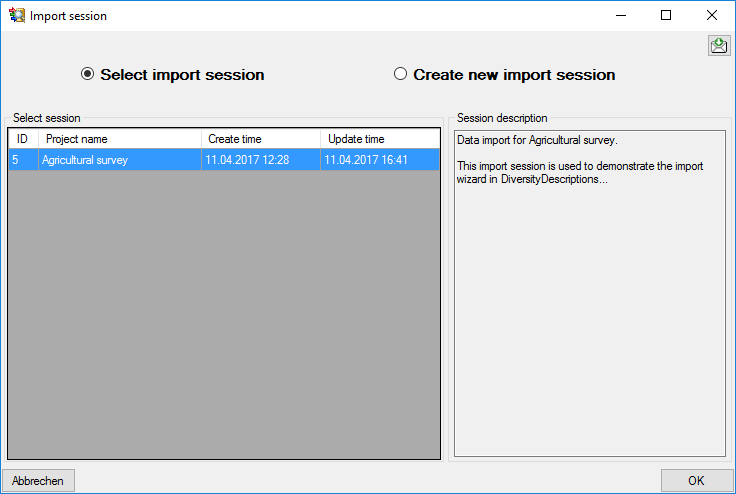
After selecting or creating an import session a window as shown below
will open that will lead you through the import of the data. The window
is separated in 3 areas. On the left side you see a list of possible
data related import steps according to the type of data you choosed for
the import. On the right side you see the list of currently selected
import steps. In the middle part the details of the selected import
steps are shown.
Choosing the File
As a first step, choose the File from where the data
should be imported. The currently supported format is tab-separated text. Then choose the Encoding
of the file, e.g. Unicode. The Start line and End line will
automatically be set according to your data. You may change these to
restrict the data lines that should be imported. The not imported parts in
the file are indicated as shown below with a gray background. If the
First line contains the column definition
this line will not be imported as well. If your data contains e.g. date
information or floating point values, where notations differ between
countries (e.g. 3.14 - 3,14), choose the Language / Country to
ensure a correct interpretation of your data. Finally you can select a
prepared Schema (see chapter Schema below) for the import.
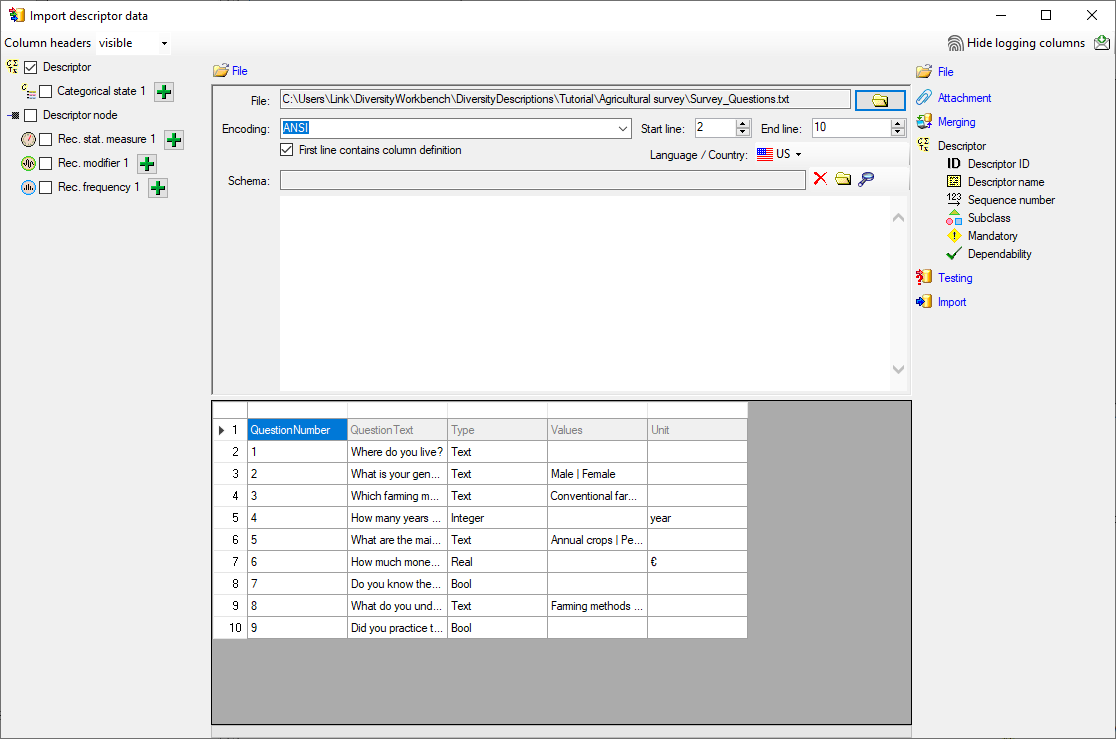
Choosing the data ranges
In the selection list on the left side of the window (see below) all
possible import steps for the data are listed according to the type of
data you want to import.
Certain tables can be imported in parallel. To add parallels click on
the add button (see below). To remove parallels, use the
button. Only selected ranges will appear in the
list of the steps on the right (see below).
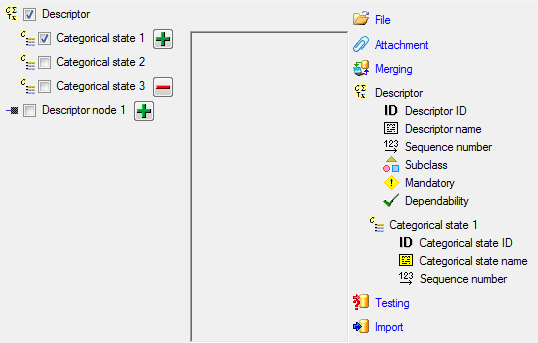
To import information of logging columns like who created and changed
the data, click on  button in the header line.
This will include an additional substeps for every step containing the
logging columns (see below). If you do not import these data, they will
be automatically filled by default values like the current time and
user.
button in the header line.
This will include an additional substeps for every step containing the
logging columns (see below). If you do not import these data, they will
be automatically filled by default values like the current time and
user.
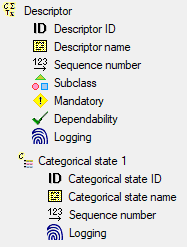
Attaching data
You can either import your data as new data or
 Attach them to data in
the database. Select the import step Attachment from the
list. All tables that are selected and contain columns at which you can
attach data are listed (see below). Either choose the first option
Import as new data or one of the columns
the attachment columns offered like “id” in the table “Descriptor” in
the example below.
Attach them to data in
the database. Select the import step Attachment from the
list. All tables that are selected and contain columns at which you can
attach data are listed (see below). Either choose the first option
Import as new data or one of the columns
the attachment columns offered like “id” in the table “Descriptor” in
the example below.
If you select a column for attachment, this column will be marked with a
blue backgroud (see below and chapter Table data).

Merging data
You can either import your data as new data or
 Merge them wih data in the database. Select the import step
Merge from the list. For every ?class=inlineimgtable you can choose between
Merge them wih data in the database. Select the import step
Merge from the list. For every ?class=inlineimgtable you can choose between
 Insert,
  Merge,
  Update and
Attach (see below).
Update and
Attach (see below).
The Insert option will import the data
from the file independent of existing data in the database.
The Merge option will compare the data
from the file with those in the database according to the
 Key columns (see below). If no matching data are
found in the database, the data from the file will be imported,
otherwise the data will be updated..
Key columns (see below). If no matching data are
found in the database, the data from the file will be imported,
otherwise the data will be updated..
The Update option will compare the data
from the file with those in the database according to the
Key columns. Only matching data found in the
database will be updated.
The Attach option will compare the data from
the file with those in the database according to the
Key columns. The found data will not be changed, but used as a
reference data in depending tables.

Table data
To set the source for the columns in the file, select the step of a
table listed underneath the Merge step. Some columns may be grouped
below the table name as shown for the
Descriptor table.

Click on one of the subordinated column groups and in the central part
of the window the data columns avaialble for importing will be listed in
the central part of the window. In the example shown below the column is
used to attach the new data to data in the database.

All columns that have not been grouped beneath the table may be accessed
by selecting the table ste itself. In the example shown below table
Descriptor was selected to supply the
“data_entry_note” column for import.
A reminder in the header line will show you what actions are still
needed to import the data into the table:
- Please select at least one column = No
column has been selected so far.
- Please select at least one decisive column =
If data will be imported depends on the content of decisive colums, so
at least one must be selected.
- Please select the position in the file =
The position in the file must be given if the data for a column should
be taken from the file.
- Please select at least one column for comparision
= For all merge types other than insert columns for comparision with
data in the database are needed.
- From file or For all = For every you have
to decide whether the data are taken from the file or a value is
entered for all
- Please select a value from the list = You have
to select a value from the provided list
- Please enter a value
 = You have to enter a
value used for all datasets
= You have to enter a
value used for all datasets
The handling of the columns in described in the chapter
columns.
Testing
To test if all requirements for the import are met use the
Testing step. You can use a certain line in
the file for you test and than click on the Test data in line:
button. If there are still unmet requirements, these will be listed in a
window as shown below.
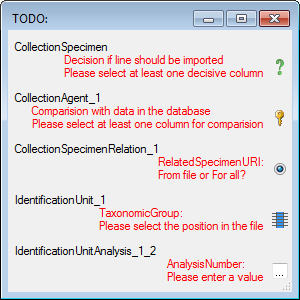
If finally all requirements are met, the testing function will try to
write the data into the database and display you any errors that
occurred as shown below. All datasets marked with a red backgroud, produced some
error.
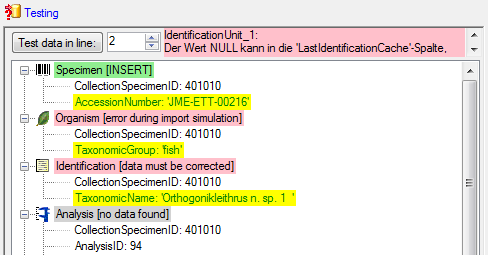
To see the list of all errors, double click in the error list window in the header
line (see below).
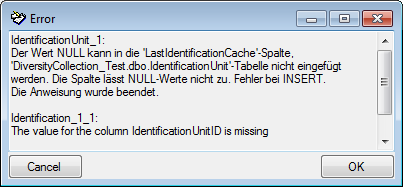
If finally no errors are left, your data are ready for import. The
colors in the table nodes in the tree indicate the handling of the
datasets: INSERT, MERGE, UPDATE, No difference. Attach, No data. The colors of the
table colums indicate whether a colums is decisive , a key column or an attachment column.
If you suspect, that the import file contains data allready present in
the database, you may test this an extract only the missing lines in a
new file. Choose the attachment column (see chapter Attaching data) and
click on the button Check for allready present data. The data
allready present in the database will be marked red (see below). Click
on the button Save missing data a text file to
store the data not present in the database in a new file for the
import.
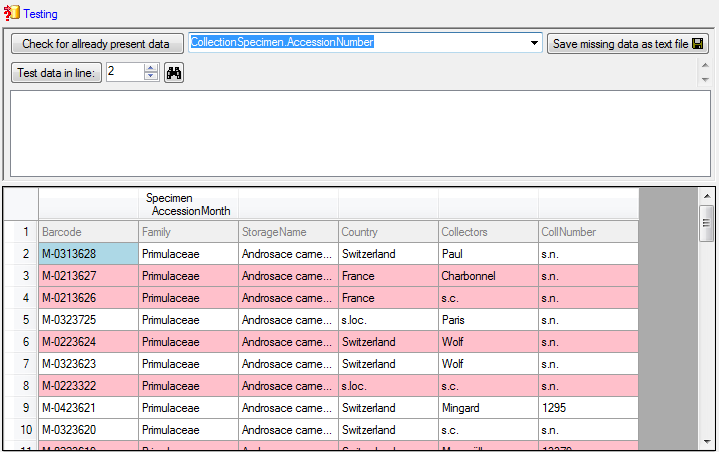
If you happen to get a file with a content as shown below, you may have
seleted the wrong encoding or the encoding is incompatible. Please try
to save the original file as UTF8 and select this encoding for the
import.
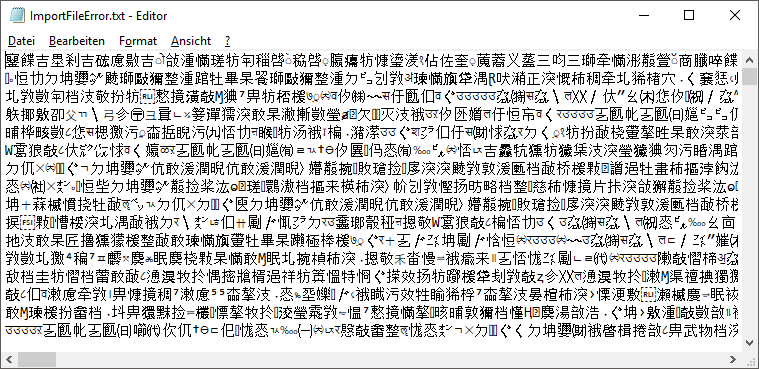
Import
With the last step you can finally start to import the data into the
database. If you want to repeat the import with the same settings and
data of the same structure, you can save a schema of the current
settings (see below).
|
|
|
|
| Schedule for import of tab-separated text files into DiversityCollection |
|
|
|
| Target within DiversityCollection: Specimen |
|
|
|
| Schedule version: |
1 |
Database version: |
02.05.41 |
| Lines: |
2 - 3215 |
First line contains column definition: |
? |
| Encoding: |
Unicode |
Language: |
de |
Tables
CollectionSpecimen
(CollectionSpecimen)
Parent: CollectionEvent
Merge handling:
Insert
| Column in table |
? |
Key |
Copy |
Pre |
Post |
File pos. |
Transformations |
Value |
Source |
Table |
| CollectionSpecimenID |
|
|
|
|
|
|
|
|
Database |
|
| AccessionNumber |
? |
? |
|
|
|
0 |
|
|
File |
|
IdentificationUnit_1
(IdentificationUnit)
Parent: CollectionSpecimen
Merge handling:
Merge
| Column in table |
? |
Key |
Copy |
Pre |
Post |
File pos. |
Transformations |
Value |
Source |
Table |
| CollectionSpecimenID |
|
|
|
|
|
|
|
|
Database |
|
| IdentificationUnitID |
|
|
|
|
|
|
|
|
Database |
|
| LastIdentificationCache |
|
? |
|
|
|
2 |
|
|
File |
|
| + |
|
|
|
|
|
3 |
|
|
File |
|
| + |
|
|
|
|
|
4 |
|
|
File |
|
| + |
|
|
|
|
|
5 |
|
|
File |
|
| TaxonomicGroup |
? |
|
|
|
|
|
|
fish |
Interface |
|
IdentificationUnitAnalysis_1_1
(IdentificationUnitAnalysis)
Parent: IdentificationUnit_1
Merge handling:
Update
| Column in table |
? |
Key |
Copy |
Pre |
Post |
File pos. |
Transformations |
Value |
Source |
Table |
| CollectionSpecimenID |
|
|
|
|
|
|
|
|
Database |
|
| IdentificationUnitID |
|
|
|
|
|
|
|
|
Database |
|
| AnalysisID |
|
|
|
|
|
|
|
94 |
Interface |
|
| AnalysisNumber |
|
|
|
|
|
|
|
1 |
Interface |
|
| AnalysisResult |
? |
? |
|
|
|
39 |
|
|
File |
|
Lines that could not be imported will be marked with a red background
while imported lines are marked green (see below).
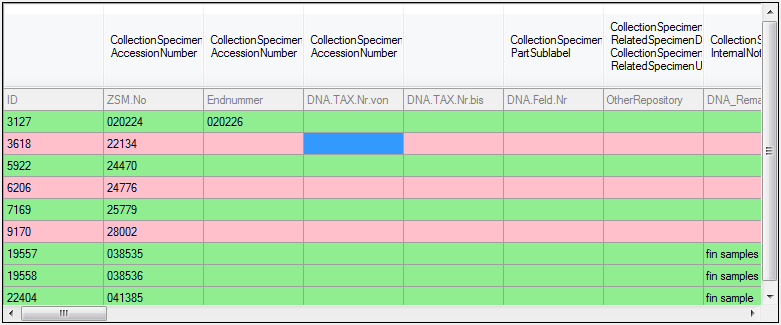
If you want to save lines that produce errors during the import in a
separate file, use the Save failed lines option. The protocol of the
import will contain all settings acording to the used schema and an
overview containing the number of inserted, updated, unchanged and
failed lines (see below).
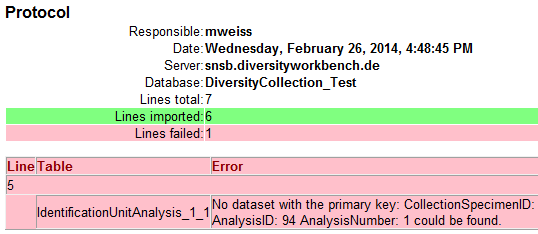
Description
A description of the schema may be included in the schema itself or with
a click on the button
generated as a separate file. This file will be located in a separate
directory Description to avoid confusion with import schemas. An example
for a description file is shown below, containing common settings, the
treatment of the file columns and interface settings as defined in the
schema.
|
|
|
|
| Schedule for import of tab-separated text files into DiversityCollection |
|
|
|
| Target within DiversityCollection: Specimen |
|
|
|
| Schedule version: |
1 |
Database version: |
02.05.52 |
| Lines: |
2 - 5 |
First line contains column definition: |
? |
| Encoding: |
Unicode |
Language: |
de |
| Description: |
Import Schema fuer Literaturdaten (Bayernflora) aus Dörr & Lippert mit MTB Daten und max. 4 Sammlern |
|
|
File columns
|
Merge handling of table |
|
|
|
Column usage |
|
|
|
|
Insert |
Merge |
Update |
Attach |
Decisive |
Key |
|
|
| 0 |
ID |
|
CollectionSpecimen. |
ExternalIdentifier |
1 |
|
| 1 |
originalname |
|
Identification_1_2. |
TaxonomicName |
Ophioglossum
vulgatum |
|
| 2 |
nameautor |
|
Identification_1_1. |
TaxonomicName |
Ophioglossum
vulgatum L. |
|
| 3 |
taxnr |
|
Identification_1_1. |
NameURI |
3949 |
|
|
|
|
Prefix: |
http://tnt.diversityworkbench.de/TaxonNames_Plants/ |
| 4 |
mtb |
|
CollectionEventLocalisation_6. |
Location1 |
8423 |
|
| 5 |
qu |
|
CollectionEventLocalisation_6. |
Location2 |
2 |
|
| 6 |
unschärfe |
|
CollectionEventLocalisation_6. |
LocationAccuracy |
|
|
| 7 |
jahr_von |
|
CollectionEvent. |
CollectionYear |
1902 |
|
| 8 |
jahr_bis |
|
CollectionEvent. |
CollectionDateSupplement |
|
|
|
|
|
Prefix: |
bis? |
| 9 |
status |
|
IdentificationUnitAnalysis_1_1. |
AnalysisResult |
|
|
| 10 |
verwaltungseinheit |
not
imported |
| 11 |
fundort |
not
imported |
| 12 |
finder |
not
imported |
| 13 |
ID_collector1 |
|
CollectionAgent_1. |
CollectorsAgentURI |
43708 |
|
|
|
|
Prefix: |
http://snsb.diversityworkbench.de/Agents_BayernFlora/ |
| 14 |
ID_collector2 |
|
CollectionAgent_2. |
CollectorsAgentURI |
|
|
|
|
|
Prefix: |
http://snsb.diversityworkbench.de/Agents_BayernFlora/ |
| 15 |
ID_collector3 |
|
CollectionAgent_3. |
CollectorsAgentURI |
|
|
|
|
|
Prefix: |
http://snsb.diversityworkbench.de/Agents_BayernFlora/ |
| 16 |
ID_collector4 |
|
CollectionAgent_4. |
CollectorsAgentURI |
|
|
|
|
|
Prefix: |
http://snsb.diversityworkbench.de/Agents_BayernFlora/ |
| 17 |
primärquelle |
not
imported |
| 18 |
ID_primärquelle |
|
Annotation_1. |
ReferenceURI |
|
|
|
|
|
Prefix: |
http://id.snsb.info/references/ |
| 19 |
primärquelle_seiten |
not
imported |
| 20 |
bestand |
|
IdentificationUnitAnalysis_1_2. |
AnalysisResult |
|
|
| 21 |
sonstiges |
|
CollectionSpecimen. |
OriginalNotes |
|
|
| 22 |
höhe |
|
CollectionEventLocalisation_7. |
Location1 |
|
|
| 23 |
herbar1 |
not
imported |
| 24 |
herbar2 |
not
imported |
| 25 |
herbar3 |
not
imported |
| 26 |
ID_herbar1 |
|
CollectionSpecimenRelation_1. |
RelatedSpecimenCollectionID |
|
|
| 27 |
ID_herbar2 |
not
imported |
| 28 |
ID_herbar3 |
not
imported |
| 29 |
det |
not
imported |
| 30 |
ID_det |
not
imported |
| 31 |
rev |
not
imported |
| 32 |
ID_rev |
not
imported |
| 33 |
datenquelle |
not
imported |
| 34 |
ID_datenquelle |
|
CollectionSpecimen. |
ReferenceURI |
135 |
|
|
|
|
Prefix: |
http://id.snsb.info/references/ |
| 35 |
project1 |
not
imported |
| 36 |
project2 |
|
CollectionSpecimen. |
AdditionalNotes |
O |
Beobachtung |
|
|
|
Transformations: |
| Reglar
express.: |
| O |
? |
Beobachtung |
|
| Reglar
express.: |
| H |
? |
Herbarauswertung |
|
| Reglar
express.: |
| L |
? |
Literaturauswertung |
|
|
Interface
settings
| Table |
Table alias |
Column |
Value |
| Annotation |
Annotation_1 |
AnnotationType |
Reference |
|
Annotation_1 |
Annotation |
Literaturauswertung: nach Dörr & Lippert (2004) |
|
Annotation_1 |
ReferenceDisplayText |
Annotation |
| CollectionAgent |
CollectionAgent_1 |
CollectorsName |
Collector1 |
|
CollectionAgent_2 |
CollectorsName |
Collector2 |
|
CollectionAgent_3 |
CollectorsName |
Collector3 |
|
CollectionAgent_4 |
CollectorsName |
Collector4 |
| CollectionEvent |
|
CountryCache |
Germany |
| CollectionProject |
CollectionProject_1 |
ProjectID |
37 |
|
CollectionProject_2 |
ProjectID |
149 |
| CollectionSpecimen |
|
ReferenceTitle |
Reference |
| CollectionSpecimenRelation |
CollectionSpecimenRelation_1 |
RelatedSpecimenURI |
|
|
CollectionSpecimenRelation_1 |
RelatedSpecimenDisplayText |
|
|
CollectionSpecimenRelation_1 |
Notes |
Herbarauswertung: nach Dörr & Lippert (2004) |
| Identification |
Identification_1_1 |
IdentificationSequence |
2 |
|
Identification_1_2 |
IdentificationSequence |
1 |
|
Identification_1_2 |
Notes |
Originalname aus Dörr & Lippert (2004) |
| IdentificationUnit |
IdentificationUnit_1 |
LastIdentificationCache |
plant |
|
IdentificationUnit_1 |
TaxonomicGroup |
plant |
| IdentificationUnitAnalysis |
IdentificationUnitAnalysis_1_1 |
AnalysisID |
2 |
|
IdentificationUnitAnalysis_1_1 |
AnalysisNumber |
1 |
|
IdentificationUnitAnalysis_1_2 |
AnalysisID |
4 |
|
IdentificationUnitAnalysis_1_2 |
AnalysisNumber |
2 |
Subsections of Wizard
Import Wizard
Advanced Tutorial
Tutorial for advanced functions
The second part of the import wizard tutorial is dedicated to some
advanced functions of the import wizard. When data are imported from the
file formats DELTA or SDD, no import mapping information is stored,
because all logical references are completely satisfied within the data
files. The starting point of this tutorial, which was taken from a real
life example, is a database imported from a DELTA file. For the datasets
a lot of pictures are available on a web server. A web application reads
the data from the original database (where the DELTA file was generated)
and gets the information about available pictures from a second database
to display both in a browser. From the original databases several tables
were extracted and now the pictures shall be appended to the imported
data.
Overview of the data tables and necessary import
steps
Step 1 - Preparations: Data import from DELTA file and new import
session
Step 2 - Import of categorical state
mapping
Step 3 - Import of descriptor
mapping
Step 4 - Import of description
mapping
Step 5 - Import of resouces for
descriptors
Step 6 - Import of resouces for categorical
states
Step 7 - Import of resouces for
descriptions
Step 8 - Import of resouce
variant
Subsections of Advanced Tutorial
Wizard Advanced Tutorial Step 1
Step 1 - Preparations: Data import from DELTA file and new import session
Choose Data → Import ->
Import
DELTA … (see Import DELTA file) from the menu and
import the DELTA file to project “Deemy” (see below). If the original
database contains special characters, e.g. the German letters “ä”, “ö”
or “ü”, it is recommended to specify the export character set “Unicode”
or “UTF” if the application allows that. If the character set “ANSI” or
“ASCII” was used, you may try the corresponding encoding setting to get
a satifactory import result. The option “Accept comma as decimal
separator” was checked, because the export has been done on a German
computer system, where a value like “3.14” is exported as “3,14”.

Close the window above and choose Data → Import
-> Wizard →
Organize session … from the menu. A window as shown below will open,
click the  New button to create a new import
session. Select project “Deemy” and enter a session description. Finally
click button Save to store the data (see
below).
New button to create a new import
session. Select project “Deemy” and enter a session description. Finally
click button Save to store the data (see
below).
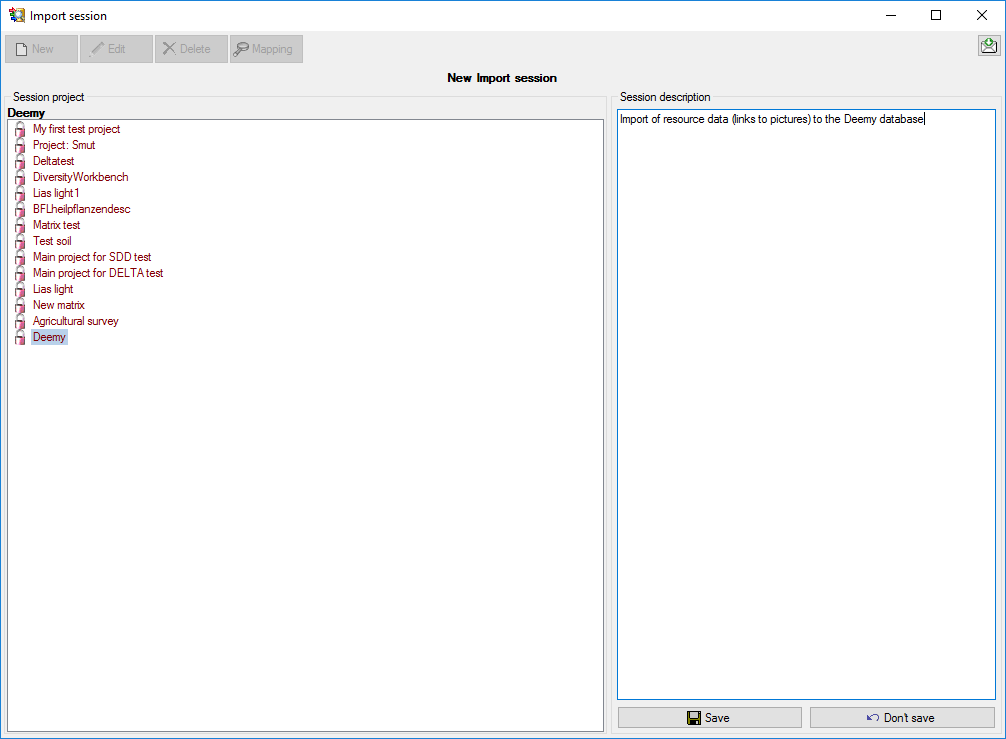
When you now click on button Mapping you can
see that no mapping data are available (see below).
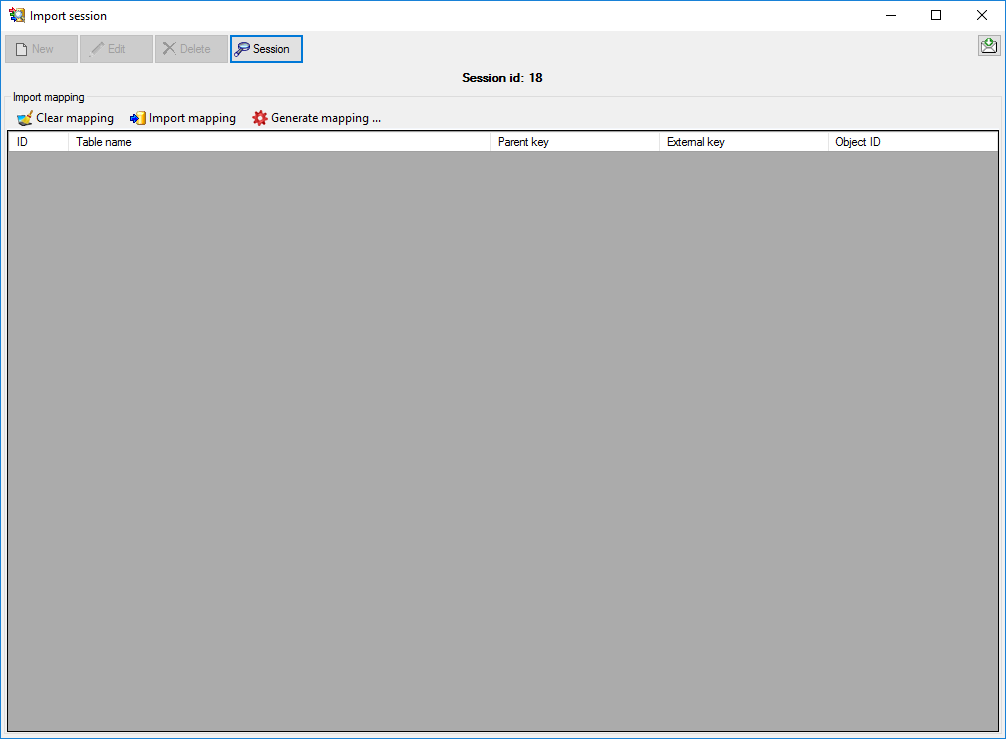
Next: Step 2 - Import of categorical state
mapping
Wizard Advanced Tutorial Step 2
Step 2 - Import categorical state mapping
In the Import session form choose Import
mapping → Descriptor … from the menu. A
window as shown below opens that will lead you through the import of the
descriptor mapping data.
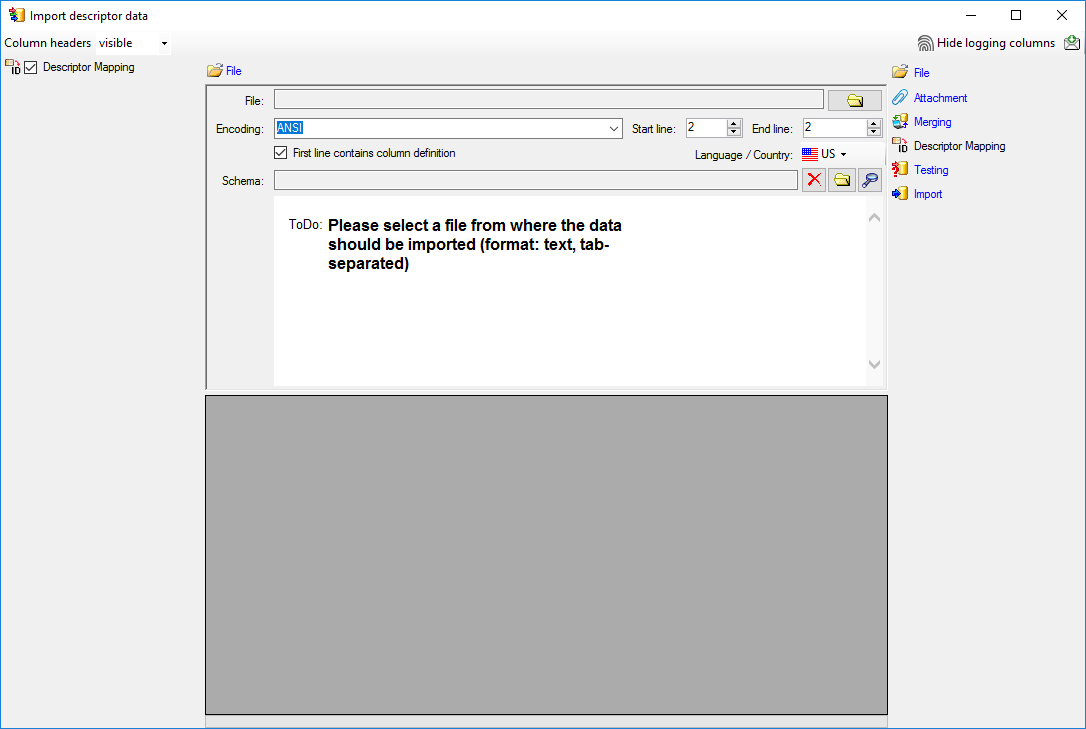
The only available import step  Descriptor
Mapping is already selected at the left side of the window. Now choose
the File from where the data should be
imported. Open file “Deemy_CHAR.txt”. The chosen encoding ANSI of
the file is sufficient. The file column “CharName” contains the
descriptor names and file column “CID” the external ID needed for the
import of the categorical state mapping import (see below).
Descriptor
Mapping is already selected at the left side of the window. Now choose
the File from where the data should be
imported. Open file “Deemy_CHAR.txt”. The chosen encoding ANSI of
the file is sufficient. The file column “CharName” contains the
descriptor names and file column “CID” the external ID needed for the
import of the categorical state mapping import (see below).
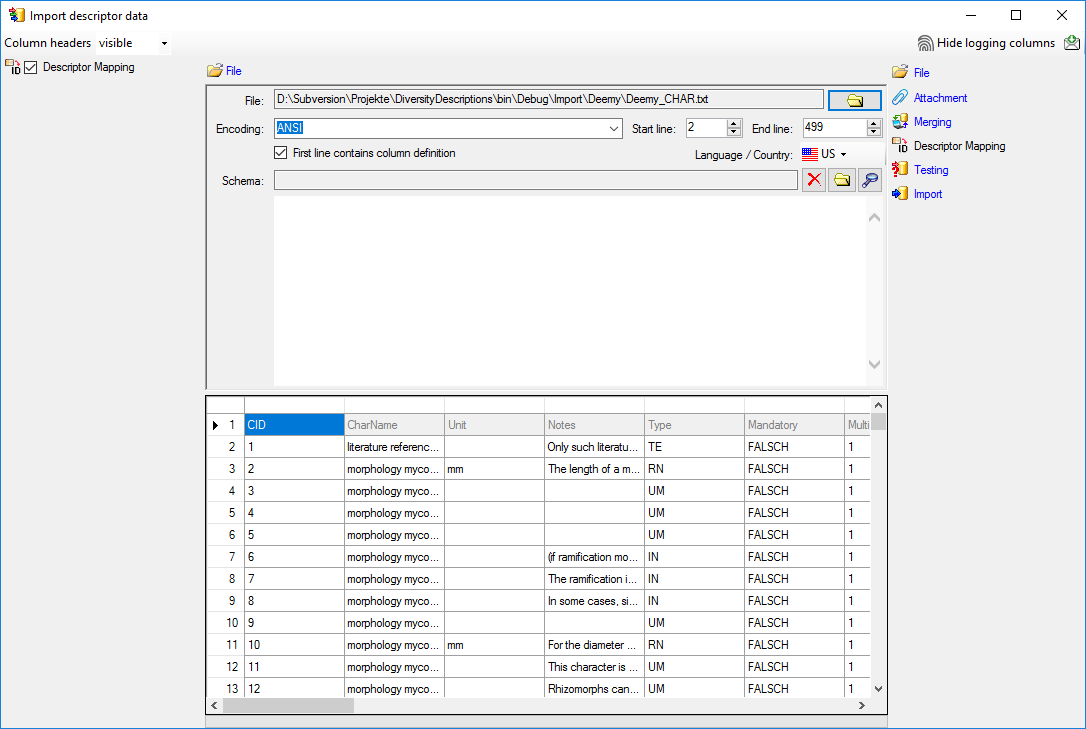
In the step table at the right side you find the import step
Descriptor Mapping. Click on it and in the
center window the assignemt data for the internal “object_id” and the
“external_key” are displayed. In column “object_id” click on
to make this the decisive column, further click
on  From file to select the column
“CharName” as data source. Now click on the In column “external_key”
click on From file to select the
column “CID” as data source. After that the columns should look as shown
below.
From file to select the column
“CharName” as data source. Now click on the In column “external_key”
click on From file to select the
column “CID” as data source. After that the columns should look as shown
below.

Remark: In the import wizards for the import mapping “object_id” allways
represents the internal ID of the database. The matching database entry
is searched by comparing the label of the database entry to the selected
file column. If there are several descriptors (or descriptions) with
identical names, the import will generate errors. For categorical states
a special handling is available if the state names are not unique.
Testing
To test if all requirements for the import are met use the
Testing step.
You can use a certain line in the file for your test and than click on
the Test data in line: button. If there are still unmet
requirements, these will be listed in a window. In our example no error
occured and the test for the first data line is shown below.
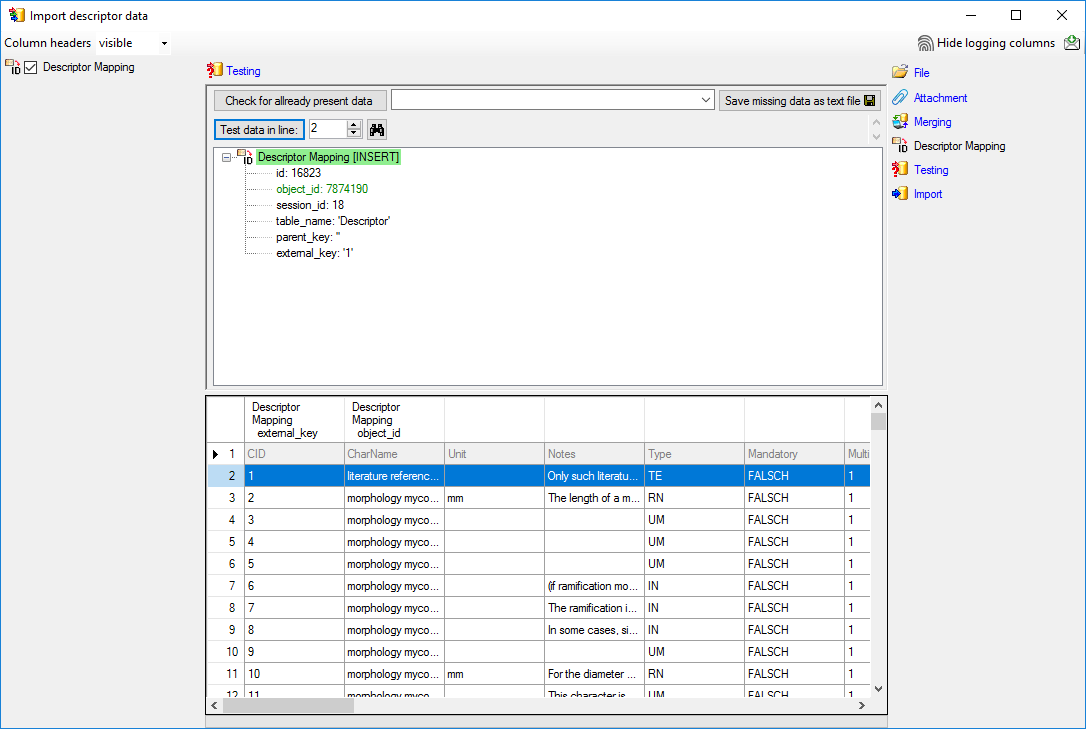
Import
With the last step you can start to import the data into the database.
If you want to repeat the import with the same settings and data of the
same structure, you can save a schema of the current settings (see
below).
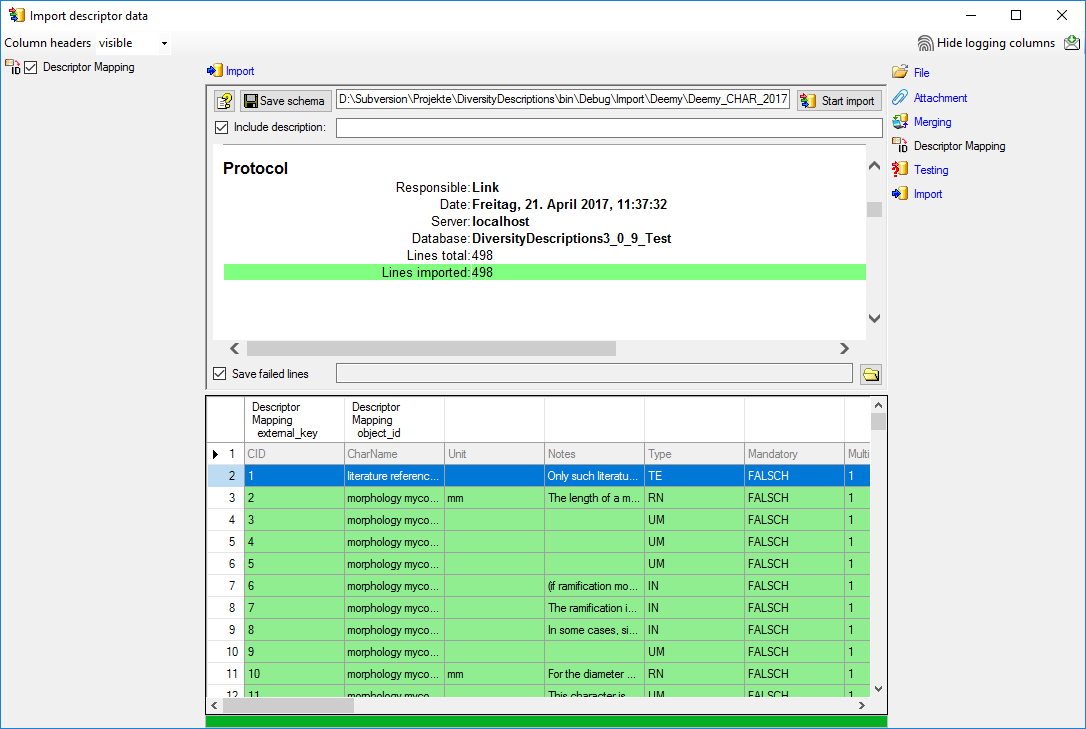
Append categorical state mapping
Close the import form for descriptors. In the Import session form
choose Import mapping ->
Categorical state … from the menu and open
file “Deemy_CS.txt” (see below).
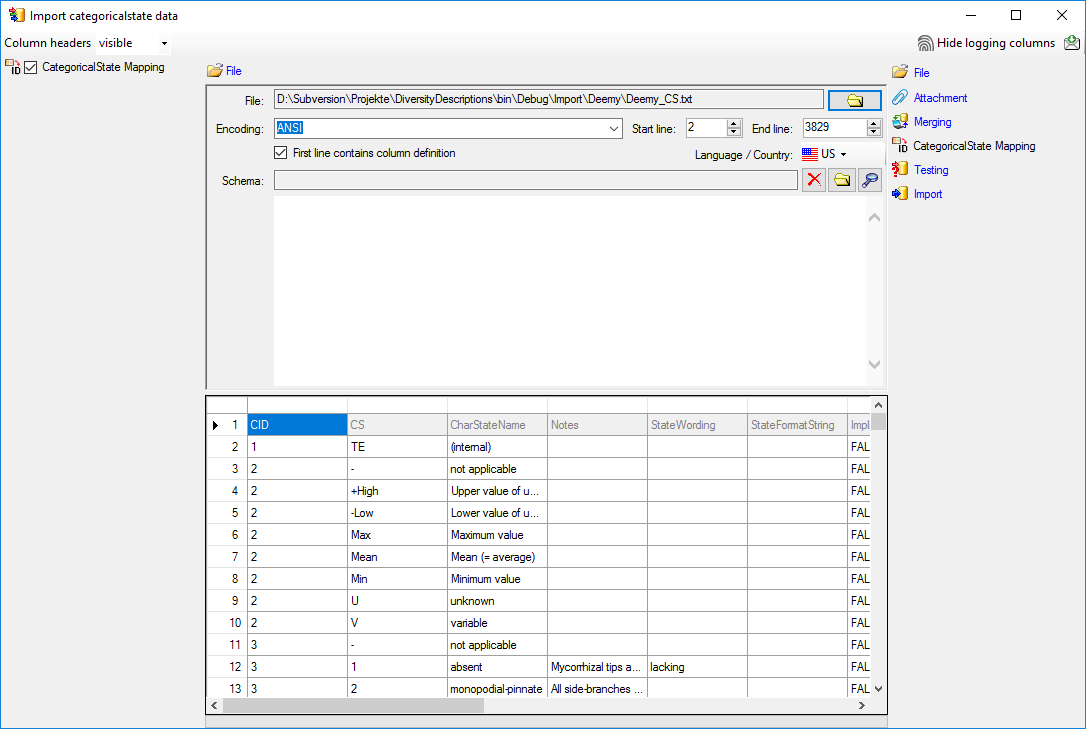
The only available import step
CategoricalState Mapping is already selected at the left side of the
window. In the step table at the right side you find the import step
CategoricalState Mapping, too. Click on it
and in the center window the assignemt data for the internal
“object_id”, the “parent_key” and the “external_key” are displayed. In
column “object_id” click on to make this the
decisive column, further click on From
file to select the column “CharStateName” as data source. In column
“parent_key” you have to specify the parent of the categorical state,
i.e. the external descriptor ID. Therefore click on
From file to select the column “CID”
as data source. In column “external_key” click on
From file to select the column
“StateID” as data source. After that the columns should look as shown
below.

In the source database of this example not only the categorical states
as known in DiversityDescriptions are present, but also some “pseudo
states” that represent statistical measures of quantitative descriptors
or the data status value “not applicable”. The real categorical states
can be recognized by a numeric value in file column “CS”. In any case
the import wizard check if a categorical state with the label specified
in file column “CharStateName” exists in the database. Therefore let’s
do a first test for some selected file lines.
Testing
To test if all requirements for the import are met use the
Testing step.
You can use a certain line in the file for your test and than click on
the Test data in line: button. If there are still unmet
requirements, these will be listed in a window. Perform the import test
for file lines 2, 13 and 12 (see below).
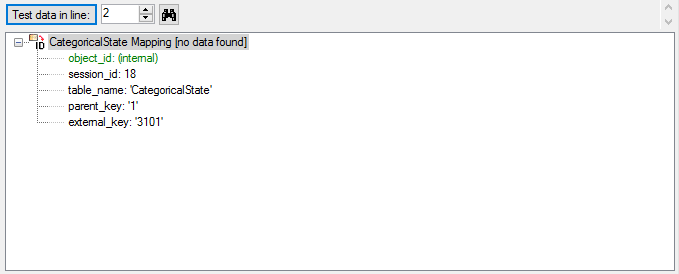
The file line 2 refers to parent “CID=1”, which belongs to a text
descriptor. The pseudo state “(internal)” was not found as a categorical
state in the database, therefore not import is performend for the file
line.
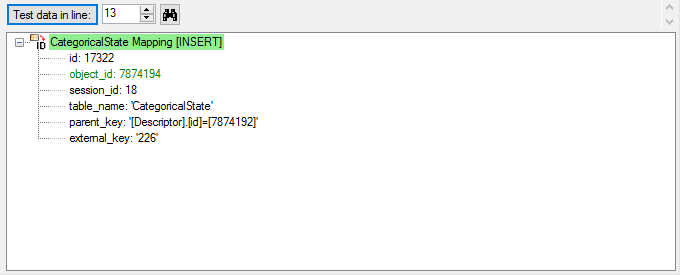
The file line 13 refers to parent “CID=3”, which belongs to a
categorical descriptor. The categorical state “monopodial-pinnate” was
found exactly once in the database, therefore the import test was
successful.
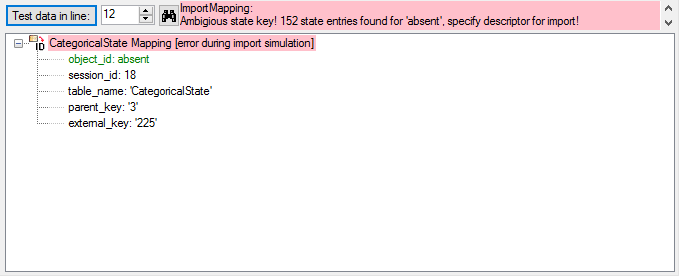
The file line 12 refers to parent “CID=3”, which belongs to a
categorical descriptor. But the categorical state “absent” was found 152
time in the database. Therefore it was not possible to find the correct
categorical state. But the error message already gives a hint how to
solve the problem: To get an unambigious match, additionally the
(external) descriptor ID must be specified.
Select the import step CategoricalState
Mapping and click on the add button at the end of line
“object_id”. Select file column “CID”, which contains the reference to
the descriptor and enter the separator character | (pipe symbol) in field Pre.: of the new
line. Additionally click on button  in the first
line of “object_id”. In the transformation window insert one replacement
(button ): Replace <br> by <br
/> . This transformation is neccessary, because the formatting
tag “<br>” will be converted to the standardized format “<br />
during export from the original database and import from DELTA. You can
check that transformation by the test functions for lines 1860 and 3555.
After that the column should look as shown below.
in the first
line of “object_id”. In the transformation window insert one replacement
(button ): Replace <br> by <br
/> . This transformation is neccessary, because the formatting
tag “<br>” will be converted to the standardized format “<br />
during export from the original database and import from DELTA. You can
check that transformation by the test functions for lines 1860 and 3555.
After that the column should look as shown below.

The import test with file line 12 now gives a positive result as shown
below..
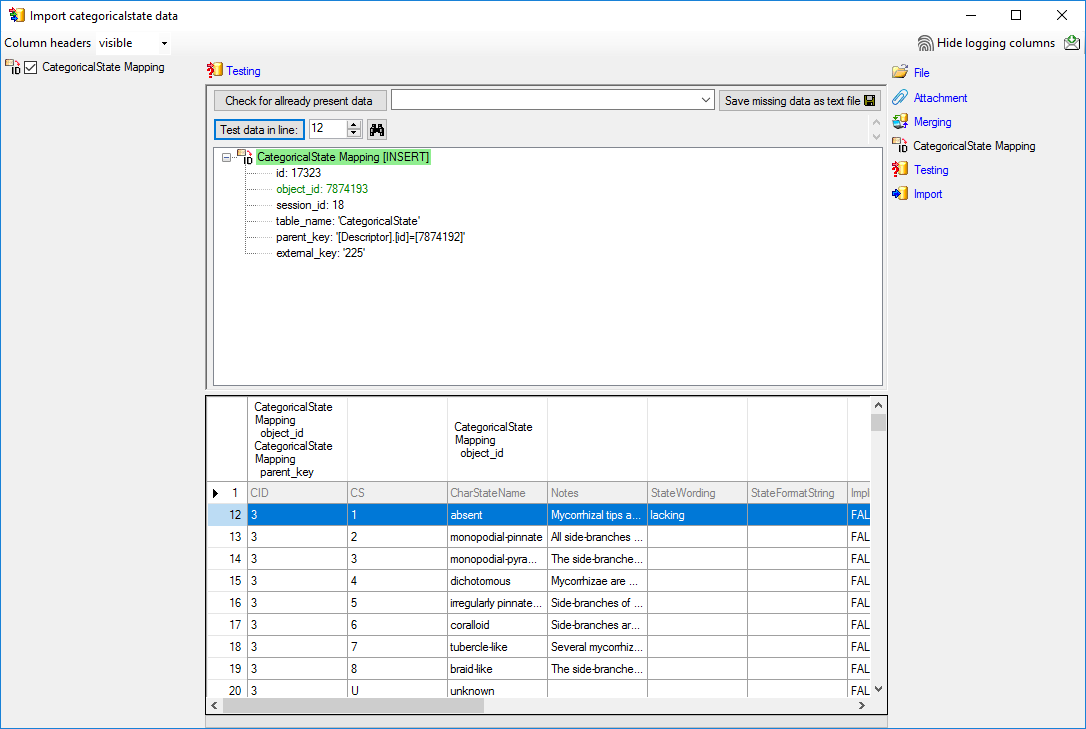
Import
With the last step you can start to import the data into the database.
If you want to repeat the import with the same settings and data of the
same structure, you can save a schema of the current settings. The
imported data lines are marked green (see below).
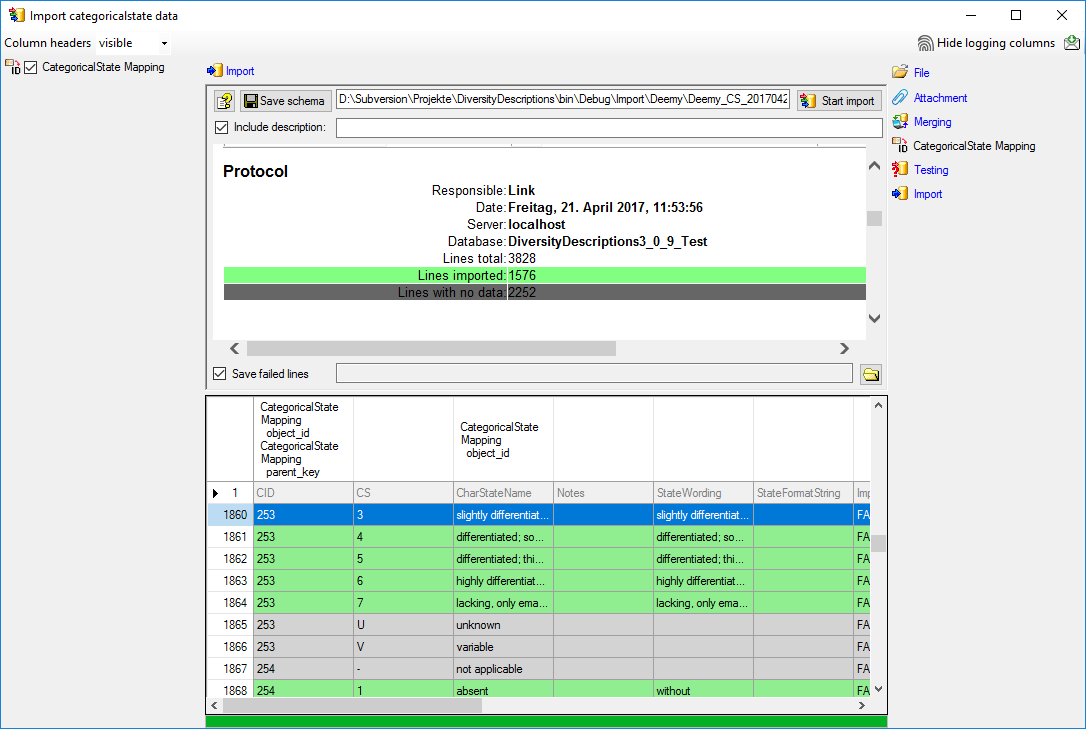
Next: Step 3 - Import of descriptor
mapping
Wizard Advanced Tutorial Step 3
Step 3 - Import of descriptor mapping
Close the import form for the categorical state mapping. In the Import
session form choose  Clear mapping ->
Descriptor from the menu (see below) and answer
the followind question with “Yes”. This mapping is based on data column
“CID” and was needed in the previous step to append the categorical
state mapping data. For the picture import the descriptor mapping based
on data column “CharID” is required.
Clear mapping ->
Descriptor from the menu (see below) and answer
the followind question with “Yes”. This mapping is based on data column
“CID” and was needed in the previous step to append the categorical
state mapping data. For the picture import the descriptor mapping based
on data column “CharID” is required.
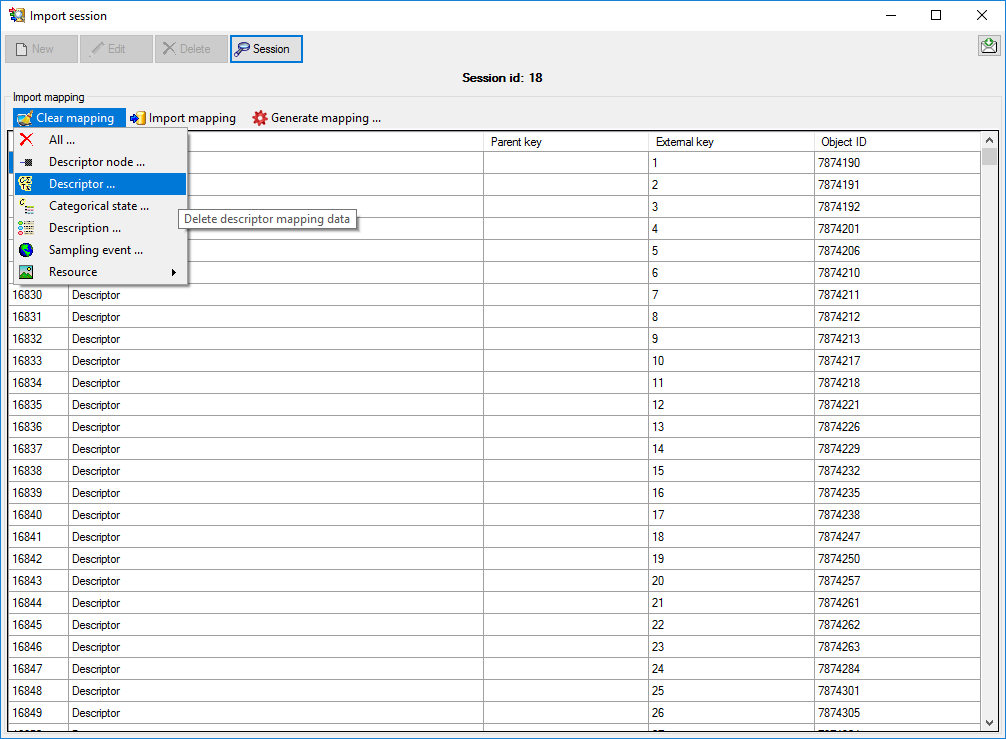
In the Import session form choose Import
mapping → Descriptor … from the menu and open
file “Deemy_CHAR.txt”. The file column “CharName” contains the
descriptor names and file column “CharID” the foreign ID (see below).
In the step table at the right side you find the import step
Descriptor Mapping. Click on it and in the
center window the assignemt data for the internal “object_id” and the
“external_key” are displayed. In column “object_id” click on
to make this the decisive column, further click
on From file to select the column
“CharName” as data source. Now click on the In column “external_key”
click on From file to select the
column “CharID” as data source. After that the columns should look as
shown below.

Testing
To test if all requirements for the import are met use the
Testing step.
You can use a certain line in the file for your test and than click on
the Test data in line: button. If there are still unmet
requirements, these will be listed in a window. In our example no error
occured and the test for the first data line is shown below.
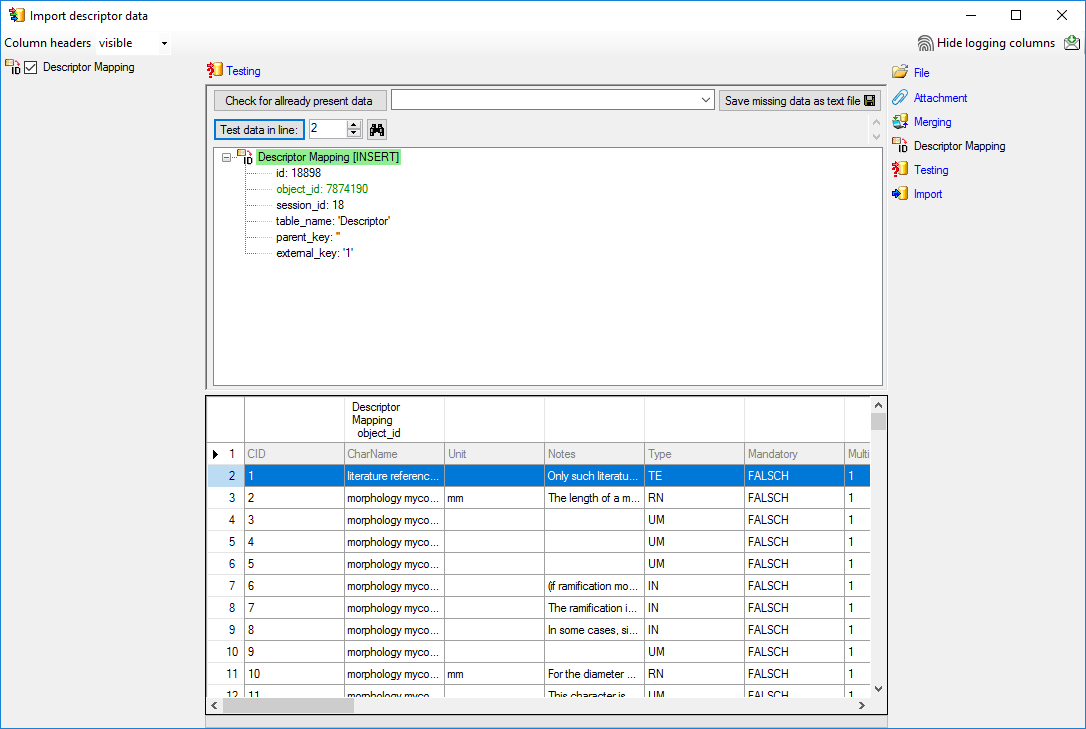
Import
With the last step you can start to import the data into the database.
If you want to repeat the import with the same settings and data of the
same structure, you can save a schema of the current settings (see
below).
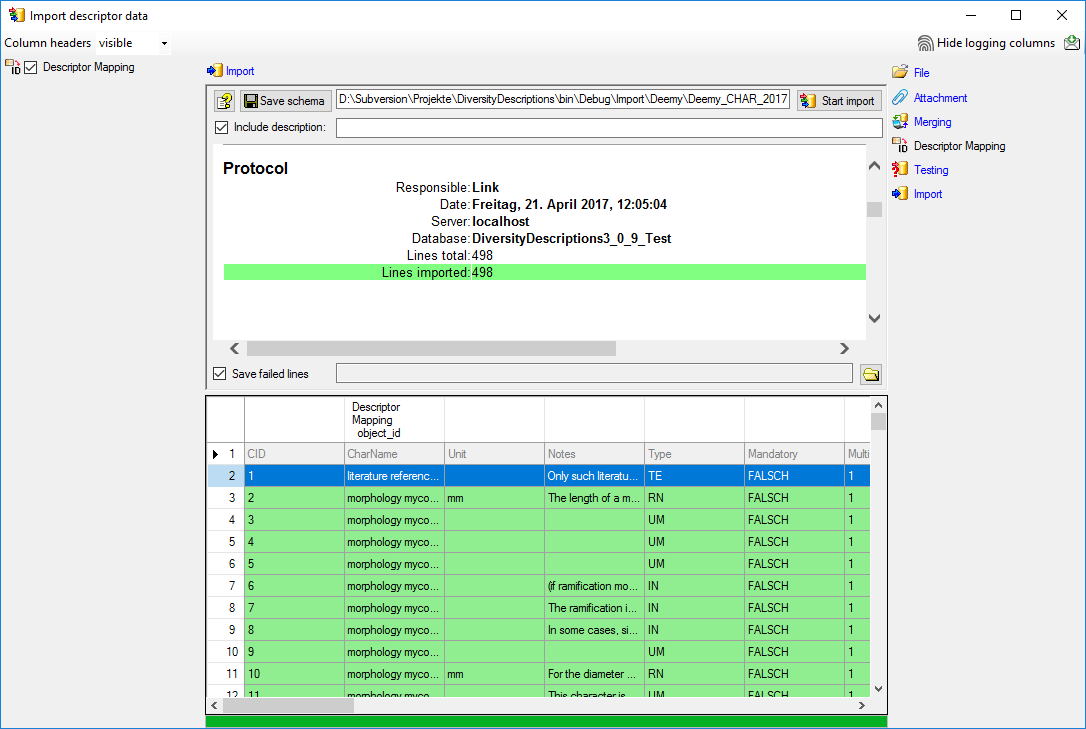
Next: Step 4 - Import of description
mapping
Wizard Advanced Tutorial Step 4
Step 4 - Import description mapping
Close the import form for descriptors. In the Import session form
choose Import mapping →
Description … from the menu and open file “Deemy_ITEM.txt” (see
below).
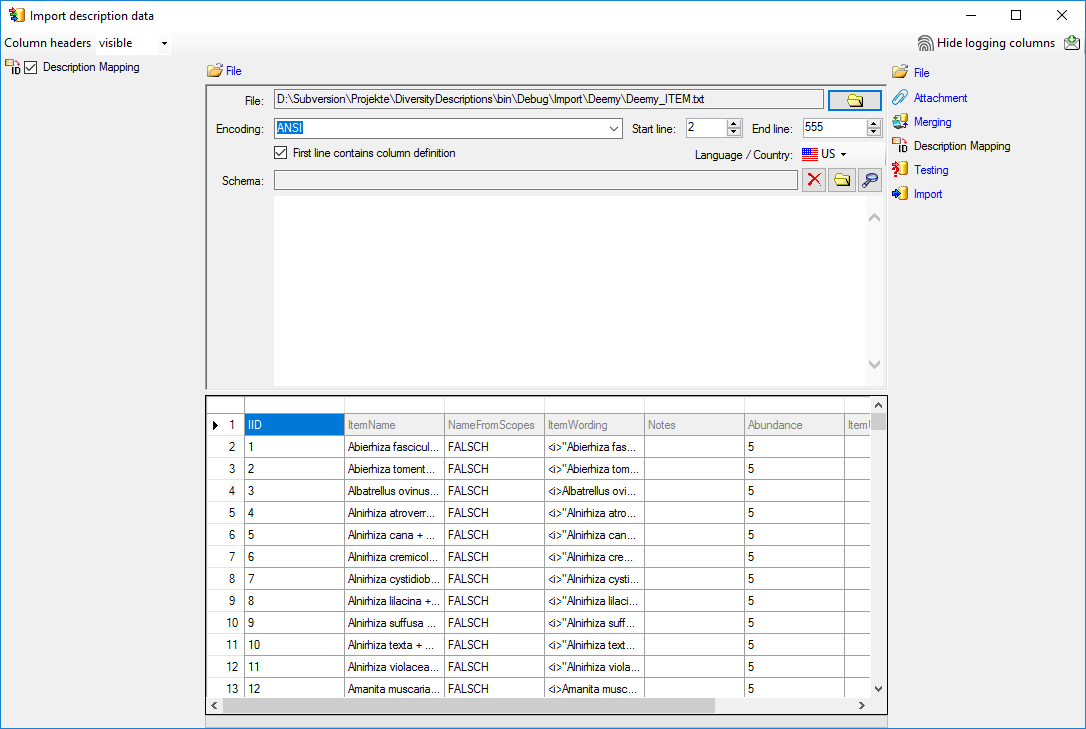
The only available import step Description
Mapping is already selected at the left side of the window. In the
step table at the right side you find the import step
Description Mapping, too. Click on it and in
the center window the assignemt data for the internal “object_id” and
the “external_key” are displayed. In column “object_id” click on
to make this the decisive column, further click
on From file to select the column
“ItemName” as data source. In column “external_key” click on
From file to select the column
“ItemID” as data source. After that the columns should look as shown
below.

Testing
To test if all requirements for the import are met use the
Testing step.
You can use a certain line in the file for your test and then click on
the Test data in line: button. If there are still unmet
requirements, these will be listed in a window. In our example no error
occured and the test for the first data line is shown below.
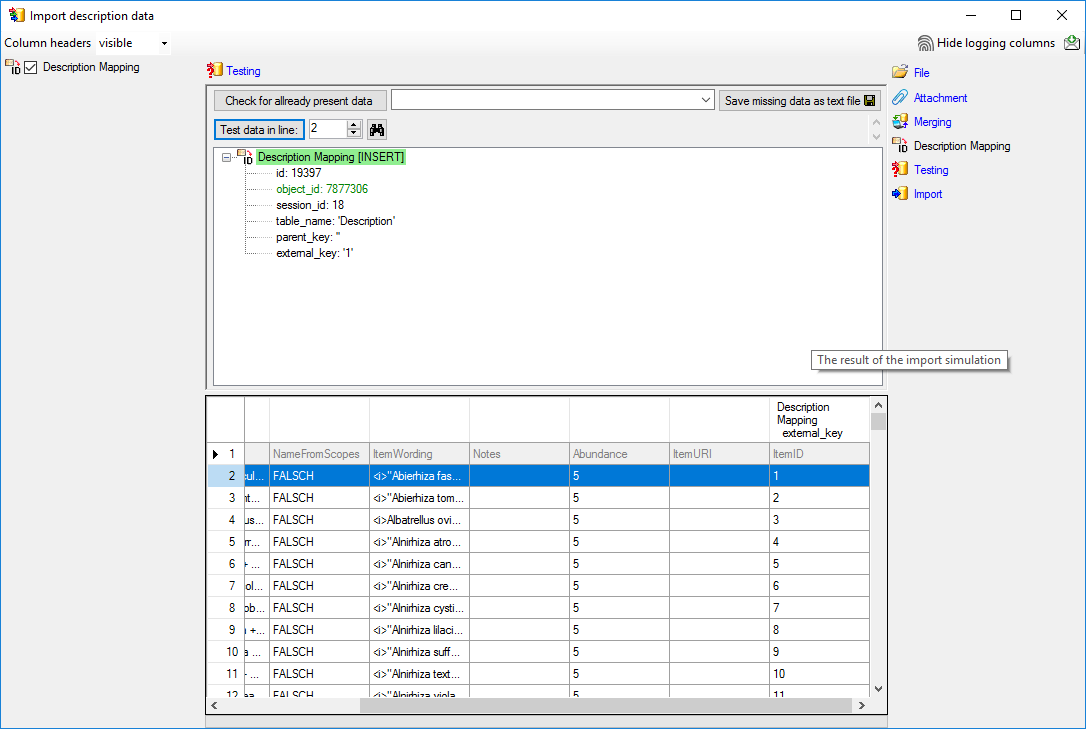
Import
With the last step you can start to import the data into the database.
If you want to repeat the import with the same settings and data of the
same structure, you can save a schema of the current settings. The
imported data lines are marked green (see below).
The failed lines are in this example caused by duplicate item names
twice in the database. This problem can be fixed by renaming the
ambigious entries in the database and the import file, e.g. to
“Alnirhiza cystidiobrunnea + Alnus 1” and “Alnirhiza cystidiobrunnea +
Alnus 2” rsp. “Lactarius omphaliformis Romagn. + Alnus 1” and “Lactarius
omphaliformis Romagn. + Alnus 2”.
Next: Step 5 - Import of resources for
descriptors
Wizard Advanced Tutorial Step 5
Step 5 - Import of resources for descriptors
Close the import wizard for the mapping data and the import session
window. Now choose Data → Import -> Wizard
-> Import resources →  Descriptor resources … from the menu. A window as shown below will
open to select an import session. Select the session for project
“Deemy”.
Descriptor resources … from the menu. A window as shown below will
open to select an import session. Select the session for project
“Deemy”.
After clicking [OK] the following window opens that will lead you
through the import of the descriptor resource data. Open file
“Deemy_RSC.txt” (see below).
Selecting the data ranges
In the selection list on the left side of the window all possible import
steps for the data are listed according to the type of data you want to
import. The step Descriptor is already
selected, additionally check the step
Descriptor resource (see below).
We attach the descriptor resource values to the descriptors, therefore
we will not change anything in the descriptor but will attach data. In
import step Attachment at the right
side select Descriptor
id (see below).
Select the import step Merge from the list.
For Descriptor we select the
Attach option because this tables shall not
be changed, for the other step Insert
should already be selected, because a new entry has to be inserted (see
below).

In the step table at the right side you find the import steps
Descriptor and
Descriptor resource and below them the data groups of the import
steps. Deselect every column from import step
Descriptor except “id”. Mark the “id” column as
Key column for comparison during attachment and click on
From file to select the column
“CharID” as data source. The “id” column of import step
Descriptor now looks as shown below.

In the import step Descriptor resource
click on Resource ID and in the center window the
assignemt data for the resource id (“id”) are displayed. Click on
to make this the decisive column, further click
on From file to select the column
“Resource” as data source. After that the column should look as shown
below.

Click on  Resource name. The center window
shows the data column “label”. Click on
From file in the “label” line to select file column “Resource”. After
the resource number the value in data column “Caption” shall be
inserted, included in brackets, if it is present. Click on the
button at the end of line “label” and select column
“Caption”. Enter ( (blank and opening
bracket) in field Pre.: and ) in
field Post.: of the new line. After that the column should look as
shown below.
Resource name. The center window
shows the data column “label”. Click on
From file in the “label” line to select file column “Resource”. After
the resource number the value in data column “Caption” shall be
inserted, included in brackets, if it is present. Click on the
button at the end of line “label” and select column
“Caption”. Enter ( (blank and opening
bracket) in field Pre.: and ) in
field Post.: of the new line. After that the column should look as
shown below.

Finally click on  Sequence number. In the
center window select the data column “display_order”, click on
From file and select file column
“DisplayOrder” (see below).
Sequence number. In the
center window select the data column “display_order”, click on
From file and select file column
“DisplayOrder” (see below).

Testing
To test if all requirements for the import are met use the
Testing step.
The test for the first data line is shown below.
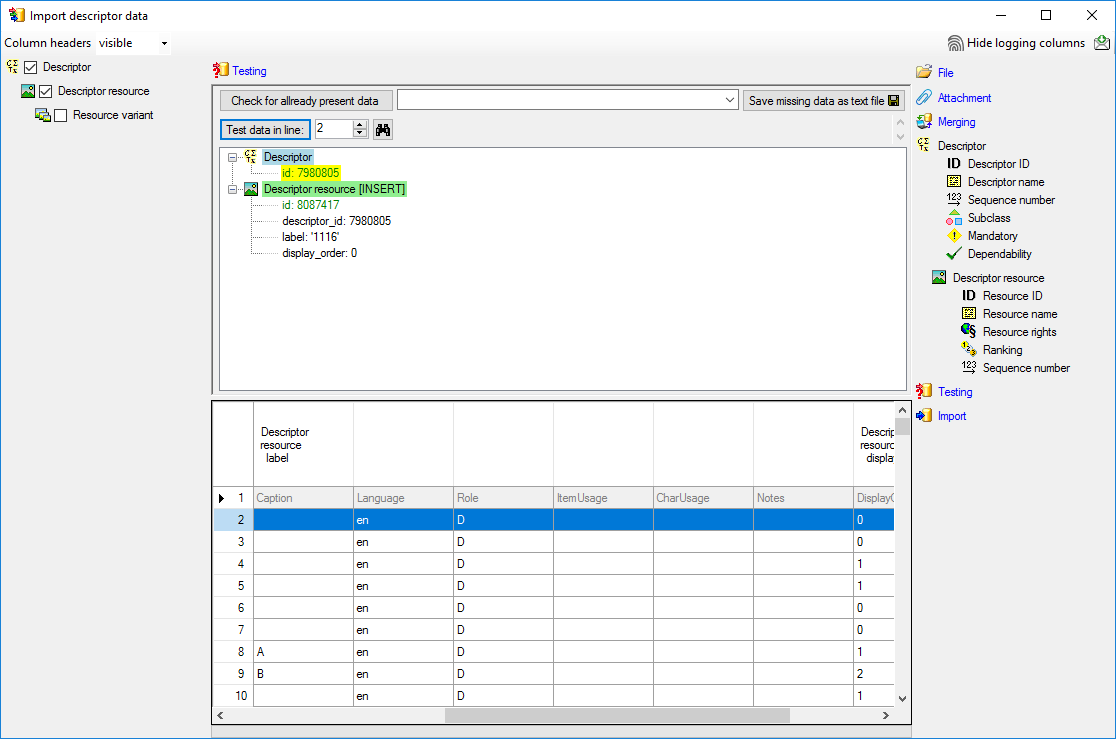
Import
With the last step you can start to import the data into the database.
If you want to repeat the import with the same settings and data of the
same structure, you can save a schema of the current settings. There are
86 lines that were not imported due to duplicate entries (see below).
The failed lines are caused by duplicate entries, i.e. the resource was
already imported for the descriptor.
Next: Step 6 - Import of resources for categorical
states
Wizard Advanced Tutorial Step 6
Step 6 - Import of resources for categorical states
Close the import wizard for the descriptor resources. Now choose Data
-> Import -> Wizard →
Import resources →  State resources … from
the menu, select the session for project “Deemy”. The following window
opens that will lead you through the import of the categorical state
resource data. Open file “Deemy_RSC.txt” (see below).
State resources … from
the menu, select the session for project “Deemy”. The following window
opens that will lead you through the import of the categorical state
resource data. Open file “Deemy_RSC.txt” (see below).
Selecting the data ranges
In the selection list on the left side of the window all possible import
steps for the data are listed according to the type of data you want to
import. Deselect the step Descriptor, it is
not needed since the categorical states have been assigned unambiguous
external IDs in step 3. Check
the steps Categorical state and
State resource (see below).
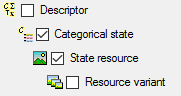
We attach the state resource values to the categorical states, therefore
we will not change anything in the categorical state but will attach
data. In import step Attachment at the right
side select Categorial state
id (see below).
Select the import step Merge from the list.
For Categorical state we select the
Attach option because this tables shall not
be changed, for the other step Insert
should already be selected, because a new entry has to be inserted (see
below).

In the step table at the right side you find the import steps
Categorical state and
State resource and below them the data
groups of the import steps. Deselect every column from import step
Categorical state except “id”. Mark the
“id” column as Key column for comparison during
attachment and click on From file to
select the column “StateID” as data source. The “id” column of import
step Categorical state now looks as shown
below.

In the import step State resource click on
Resource ID and in the center window the
assignemt data for the resource id (“id”) are displayed. Click on
to make this the decisive column, further click
on From file to select the column
“Resource” as data source. After that the column should look as shown
below.
Click on Resource name. The center window
shows the data column “label”. Click on
From file in the “label” line to select file column “Resource”. After
the resource number the value in data column “Caption” shall be
inserted, included in brackets, if it is present. Click on the
button at the end of line “label” and select column
“Caption”. Enter ( (blank and opening
bracket) in field Pre.: and ) in
field Post.: of the new line. After that the column should look as
shown below.
Finally click on Sequence number. In the
center window select the data column “display_order”, click on
From file and select file column
“DisplayOrder” (see below).
Testing
To test if all requirements for the import are met use the
Testing step.
The test for the second data line is shown below.
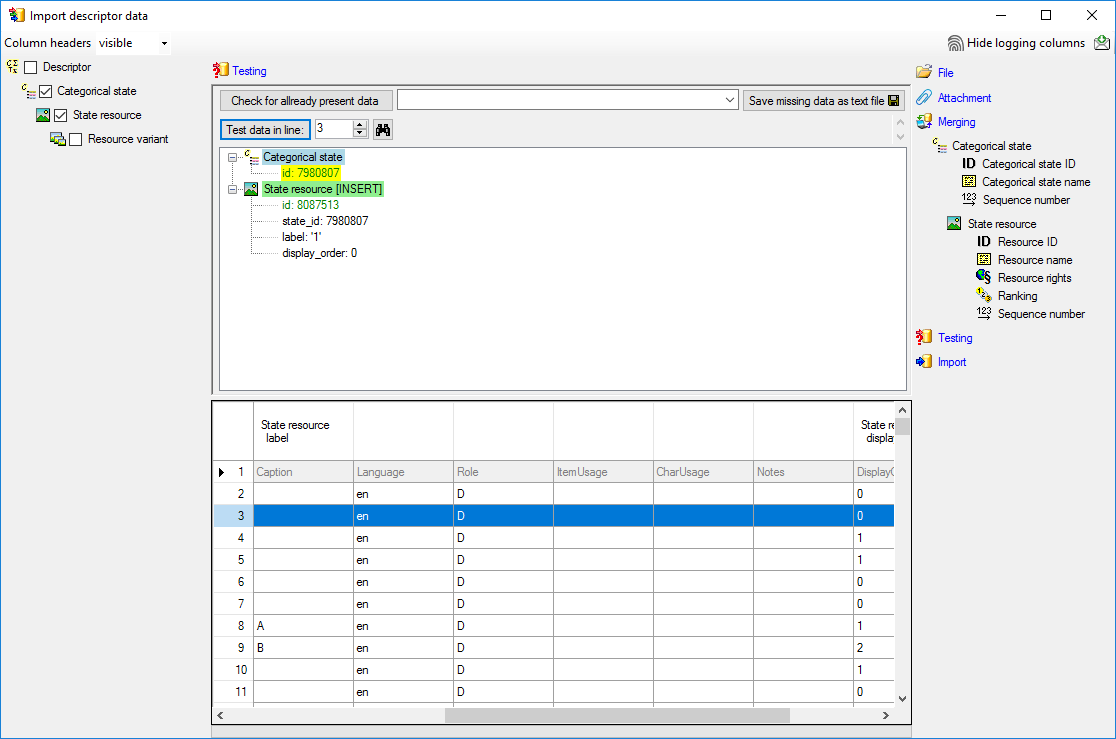
Import
With the last step you can start to import the data into the database.
If you want to repeat the import with the same settings and data of the
same structure, you can save a schema of the current settings. There are
561 lines that were not imported due to duplicate entries (see below).
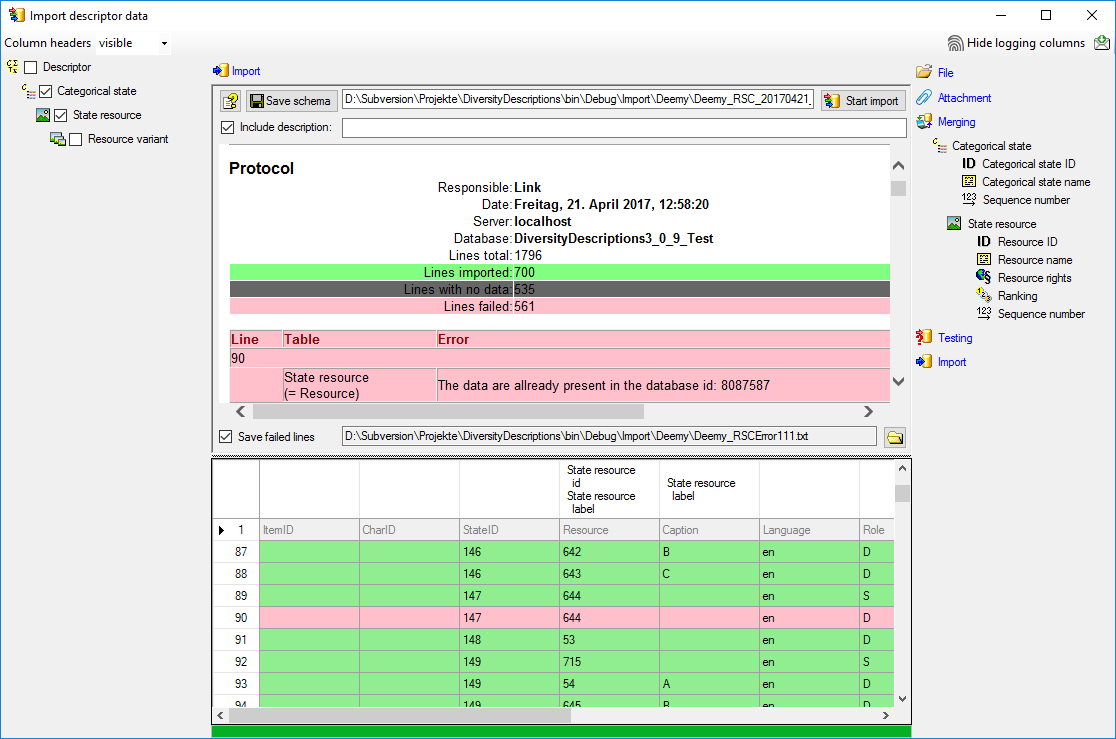
The failed lines are caused by duplicate entries, i.e. the resource was
already imported for the categorical state.
Next: Step 7 - Import of resources for
descriptions
Wizard Advanced Tutorial Step 7
Step 7 - Import of resources for descriptions
Close the import wizard for the state resources. Now choose Data ->
Import -> Wizard →
Import resources →  Description resources …
from the menu, select the session for project “Deemy”. The following
window opens that will lead you through the import of the categorical
state resource data. Open file “Deemy_RSC.txt” (see below).
Description resources …
from the menu, select the session for project “Deemy”. The following
window opens that will lead you through the import of the categorical
state resource data. Open file “Deemy_RSC.txt” (see below).
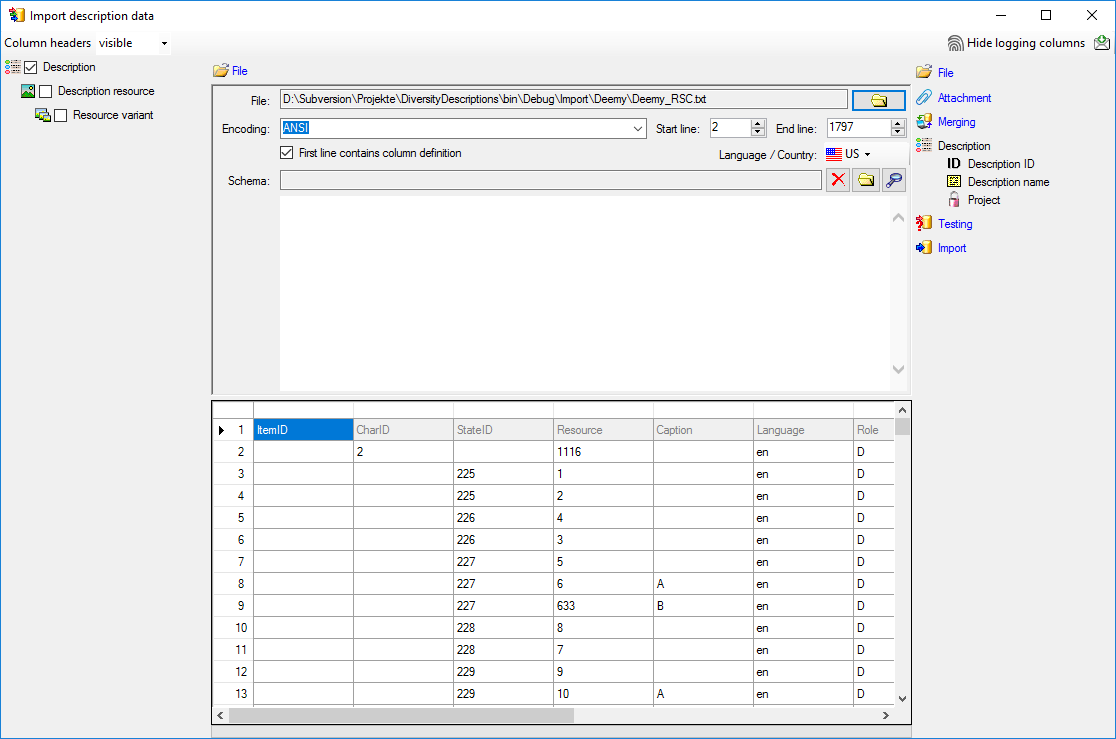
Selecting the data ranges
In the selection list on the left side of the window all possible import
steps for the data are listed according to the type of data you want to
import. Step Description is already selected.
Aditionally check step Description
resource (see below).
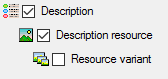
We attach the description resource values to the descriptions, therefore
we will not change anything in the description but will attach data. In
import step Attachment at the right
side select Description
id (see below).
Select the import step Merge from the list.
For Description we select the
Attach option because this tables shall not
be changed, for the other step Insert
should already be selected, because a new entry has to be inserted (see
below).

In the step table at the right side you find the import steps
Description and
Description resource and below them the data groups of the import
steps. Deselect every column from import step
Description except “id”. Mark the “id” column as
Key column for comparison during attachment and click on
From file to select the column
“ItemID” as data source. The “id” column of import step
Description now looks as shown below.

In the import step Description resource
clickon Resource ID and in the center window the
assignment data for the resource id (“id”) are displayed. Click on
to make this the decisive column, further click
on From file to select the column
“Resource” as data source. After that the column should look as shown
below.
Click on Resource name. The center window
shows the data column “label”. Click on
From file in the “label” line to select file column “Resource”. After
the resource number the value in data column “Caption” shall be
inserted, included in brackets, if it is present. Click on the
button at the end of line “label” and select column
“Caption”. Enter ( (blank and opening
bracket) in field Pre.: and ) in
field Post.: of the new line. After that the column should look as
shown below.
Finally click on Sequence number. In the
center window select the data column “display_order”, click on
From file and select file column
“DisplayOrder” (see below).
Testing
To test if all requirements for the import are met use the
Testing step.
The test for the data line 717 is shown below.
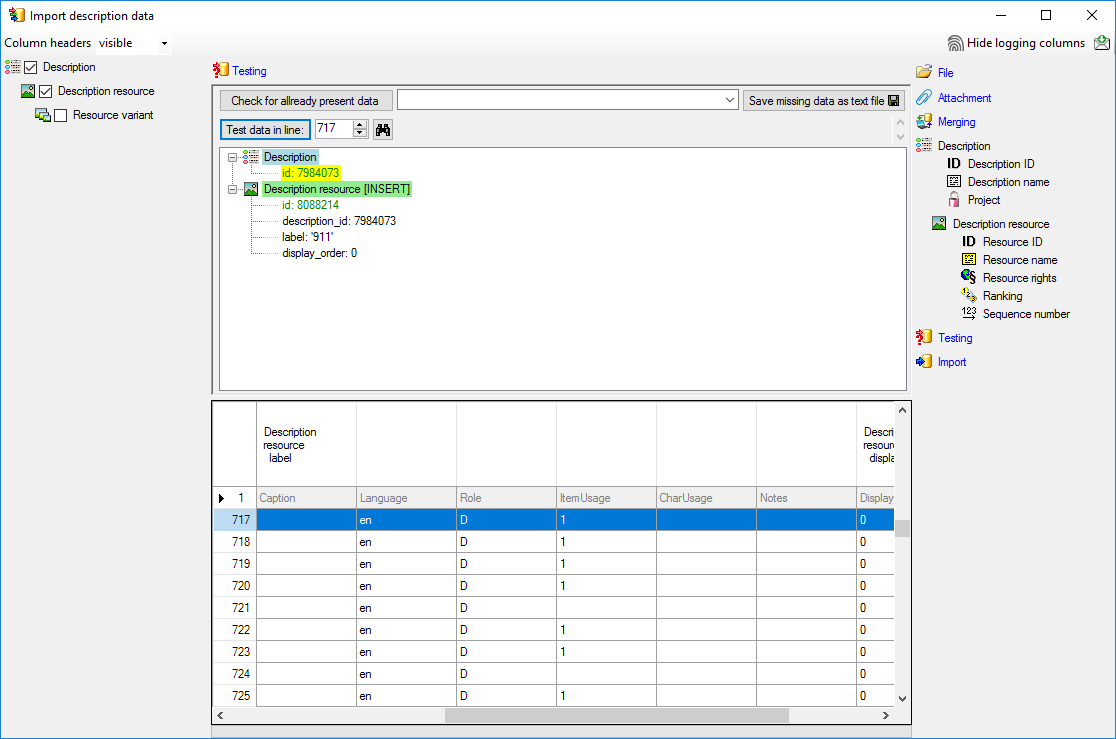
Import
With the last step you can start to import the data into the database.
If you want to repeat the import with the same settings and data of the
same structure, you can save a schema of the current settings. There are
177 lines that were not imported due to duplicate entries (see below).
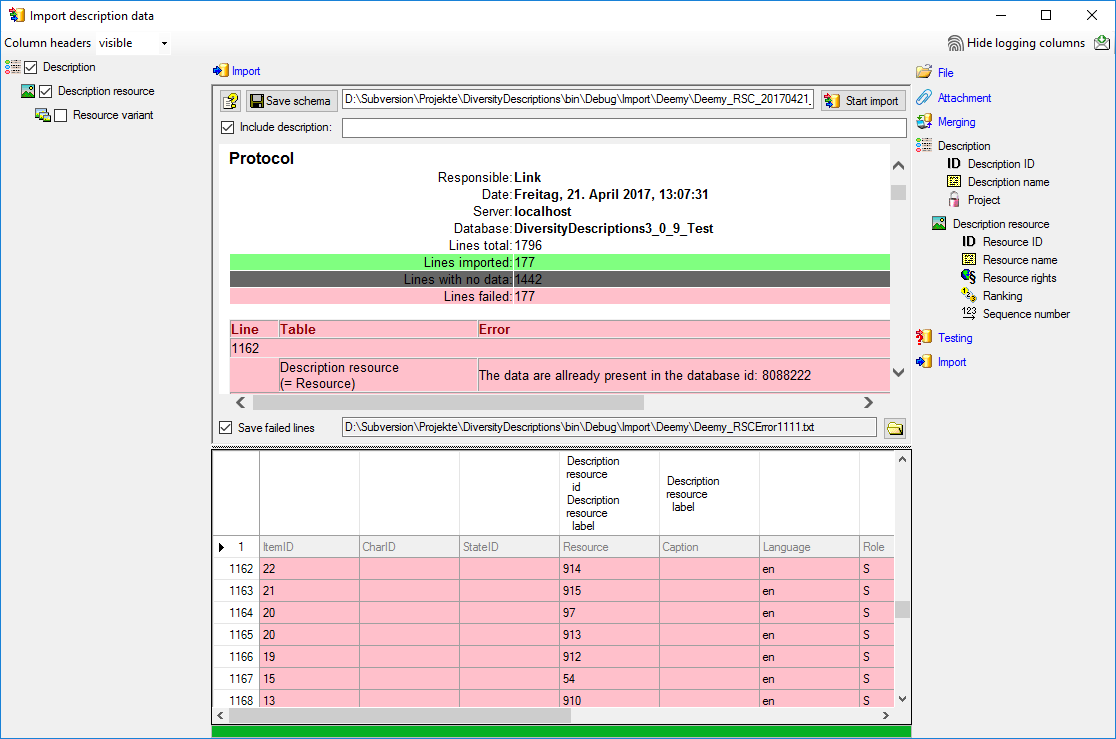
The failed lines are caused by duplicate entries, i.e. the resource was
already imported for the description.
Next: Step 8 - Import of resource
variants
Wizard Advanced Tutorial Step 8
Step 8 - Import of resource variants
The import wizards used in step 5 up to step 7 allow appending a
resource variant to one resource. Those wizards can be used most
efficiently if the data that are needed for the resource table and the
resource variant are located at the same file. In our example there is
the complication that the direction of the resource reference is in the
opposite direction than in the original database. In
DiversityDescription a resource references e.g. a descriptor and one or
more resource variants reference the resource. In the original database
several entities, e.g. descriptors or states, may reference the same
picture.
During the import of the resources we used the picture number as the
external key of the resources. Together with their parent key, e.g. a
descriptor ID, this gives unambiguous entries although the external
resource ID alone is ambiguous. Now we want to create a resource
variant, containing the URL of the picture, for each resource entry with
the same external resource ID.
Since this “multiple” import is no standard feature of the import
wizard, the following description shows a work-around: During the import
the first resource entry with a matching “Resource ID” that is not
referenced by any Resource variant will be available for data update and
appending of a new resource variant. A repeated import with the same
setting will find the next resource entry and so on until all ambigious
resource entries are processed.
Close the import wizard for the description resources. Now choose Data
-> Import -> Wizard →
Import resources →  Resource variants
… from the menu, select the session for project “Deemy”. The
following window opens that will lead you through the import of the
categorical state resource data. Open file “Deemy_IMG.txt” (see below).
Resource variants
… from the menu, select the session for project “Deemy”. The
following window opens that will lead you through the import of the
categorical state resource data. Open file “Deemy_IMG.txt” (see below).
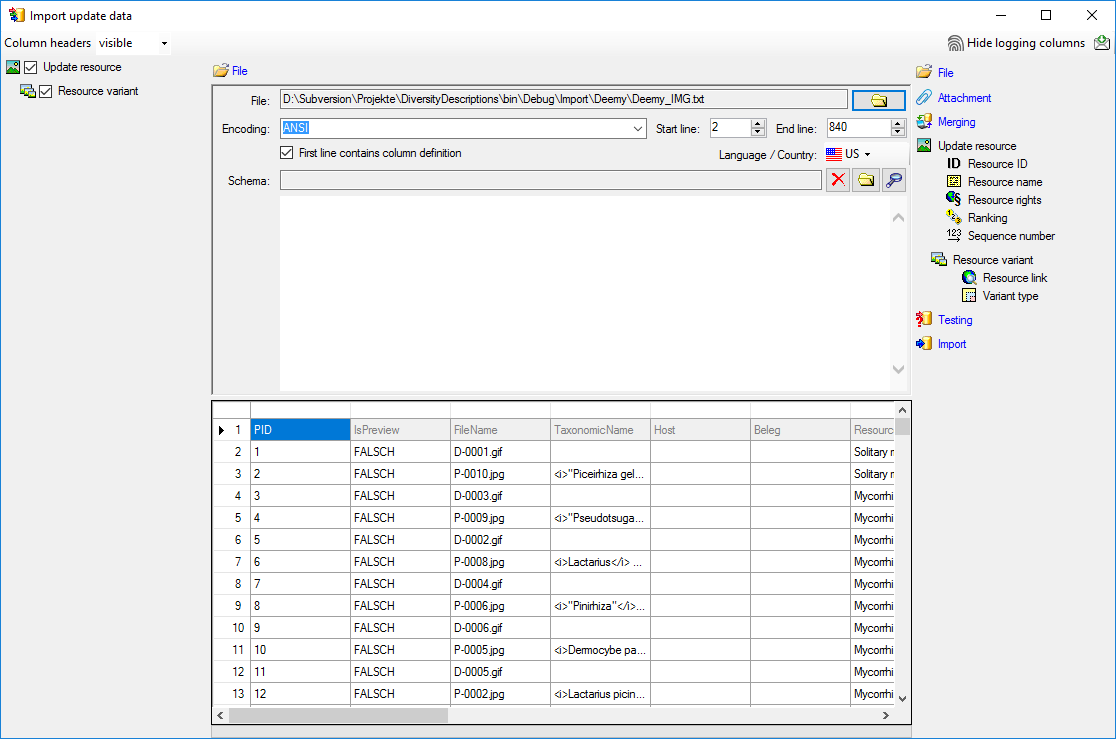
Selecting the data ranges
In the selection list on the left side of the window all possible import
steps for the data are listed according to the type of data you want to
import. The available steps Update resource
and Resource variant are already
selected.
We want to update some fields of the resource table with values form the
data file attach the resource variant to the resource. In import step
Attachment at the right
side select Update resource
id (see below). Note: With this import
wizard only update of resources is supported.
Select the import step Merge from the list.
For Update resource we keep the
Merge option because this table shall be
updated, for the other step Insert
should already be selected, because a new entry has to be inserted (see
below).

In the import step Update resource click
on Resource ID and in the center window the
assignment data for the resource id (“id”) are displayed. Click on
to make this the decisive column. Mark the “id”
column as Key column for comparison during
attachment and click on From file to
select the column “PID” as data source. After that the column should
look as shown below.

Click on Resource name. The center window
shows the data column “label” and “detail”. Deselect the “label” entry
and select “detail”. Click on From
file to select the column “SourceTitle” as data source and enter Source: in field Pre.: (double-click in
the field to open a separate edit window). Now click on the
button at the end of line “detail”, select file
column “Volume” and enter , vol. in
field Pre.:. Repeat the last step for file columns “Pages” (, p. ) and “ReferenceNotes” (, notes: ). After that the column should look as
shown below.

Click on  Resource rights and in the center
window the assignment data for the resource rights are displayed. Select
“rights_text”. Click on From file to
select the column “Author” as data source and enter © (Alt+0169 and a blank) in field Pre.:.
Now click on the add button at the end of line
“rights_text”, select file column “DateYear” and enter , in field Pre.:. After that the column
should look as shown below.
Resource rights and in the center
window the assignment data for the resource rights are displayed. Select
“rights_text”. Click on From file to
select the column “Author” as data source and enter © (Alt+0169 and a blank) in field Pre.:.
Now click on the add button at the end of line
“rights_text”, select file column “DateYear” and enter , in field Pre.:. After that the column
should look as shown below.

In the import step Resource variant
click on  Resource link. The center window
shows the data column “url”. Click on to make
this the decisive column and on From
file in the “url” line to select file column “FileName”. Double-click
on the text box after Pre.: to open a separate edit window. Here
enter the web address of the picture server where the files are located
and confirm with “OK”. After that the column should look as shown
below.
Resource link. The center window
shows the data column “url”. Click on to make
this the decisive column and on From
file in the “url” line to select file column “FileName”. Double-click
on the text box after Pre.: to open a separate edit window. Here
enter the web address of the picture server where the files are located
and confirm with “OK”. After that the column should look as shown
below.

Click on  Variant type. In the center window
select the data column “variant_id”, click on
For all: and select the value “good
quality” (see below).
Variant type. In the center window
select the data column “variant_id”, click on
For all: and select the value “good
quality” (see below).

Click on the import step Resource
variant to find some ungrouped fields. In the center window select the
data column “pixel_width”, click on
From file and select the value “WidthD”. Now select the data column
“pixel_height”, click on From file
and select the value “HeightD”. Finally select the data column
“mime_type”, click on From file and
select the value “FileName”. Click on button to
define a transformation. In the transformation window click on the
 cut transformation, enter Position: 2, click on to enter
splitter character . (period) to extract
the file extension. Now click on
cut transformation, enter Position: 2, click on to enter
splitter character . (period) to extract
the file extension. Now click on  to insert a
translation table and to insert the values
contained in the file column. “gif” shall be converted to image/gif, “jpg” will become image/jpeg (see below).
to insert a
translation table and to insert the values
contained in the file column. “gif” shall be converted to image/gif, “jpg” will become image/jpeg (see below).
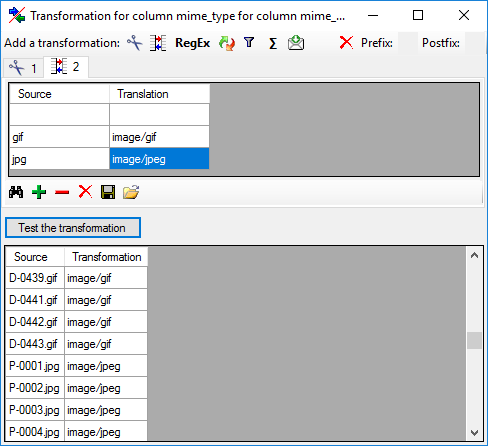
After that the columns should look as shown below.

Testing
To test if all requirements for the import are met use the
Testing step.
The test for the first data line is shown below.

Import
With the last step you can start to import the data into the database.
If you want to repeat the import with the same settings and data of the
same structure, you can save a schema of the current settings. As
mentioned in the introduction, the import step has to be repeated until
no more resource variant is imported. At the first run 789 lines were
imported (see below).
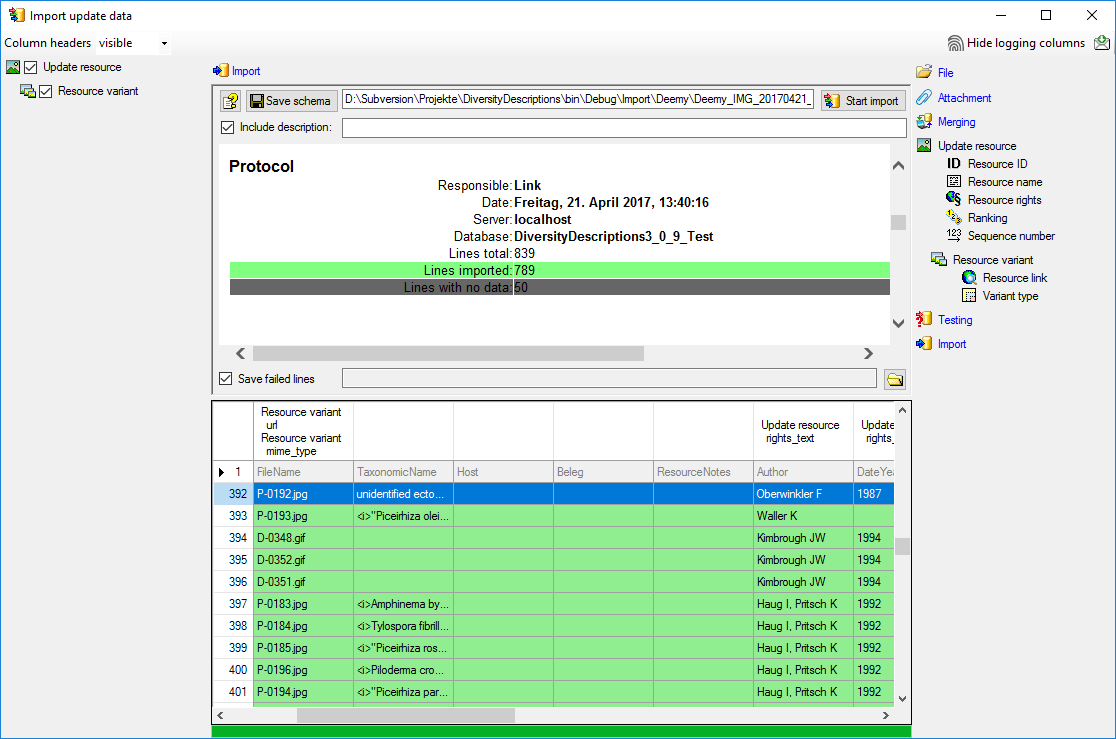
At the second run, started by another click on
Start import, 152 lines were imported
(see below).

Finally, at the seventh run no further line is imported (see below).

Wizard Advanced Tutorial Step Overview
Overview of the data tables and necessary import steps
From the original database several tables have been extracted that
contain the descriptor names, categorical state names and description
names, together with their internal IDs in the foreign database.
Additionally there is a table that assigns picture IDs to the IDs of
descriptors, categorical states and descriptions. The last table
connects the picture IDs to file names. In DiversityDescriptions
resources are represented by the tablese “Resource”, which holds some
general information and is linked to descriptors, categorical states or
descriptions. Table “Resource variant” holds the URL of the resources
and each table row is assigned to one entry in table “Resource”.
Find below a part of the table “Deemy_RSC.txt”, which corresponds quite
well to the table “Resource” in DiversityDescriptions. It references
either to a description (“ItemID”), a descriptor (“CharID”) or a
categorical state (“StateID”).
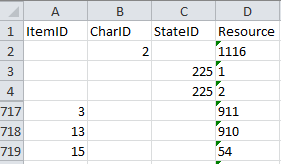
The value in column “Resource” corresponds to column “PID” of the table
“Deemy_IMG.txt” (see below), where the picture file name is specified.
Since all pictures are accessible over a URL containing that file name,
this table can be used for import to data table “Resource variant” in
DiversityDescriptions.
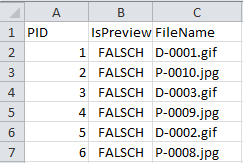
To import the picture data, first the data in table “Deemy_RSC.txt” must
be appended to the existing descriptors, categorical states and
descriptions. Then the data from table “Deemy_IMG.txt” must be appended
to the resource entries. Since the basic data are imported from a DELTA
file, no mapping information have been stored, which are needed to
append the resource data. Therefore at first the mapping information
must be imported from three additional tables.
Mapping data
To allow appending of resource data to the existing database objects, we
first must create the mapping information of the external IDs of the
foreign database to the actual IDs in DiversityDescriptions. Find below
the table “Deemy_Char.txt”, which contains the descriptor name
(“CharName”), the internal “CharID” and an external “CID”.
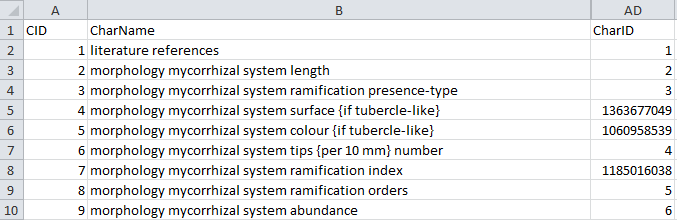
For the picture import each descriptor must be mapped to its “CharID”,
which can be done by a special mapping import available in the Import
session form. When we now take a look at the “Deemy_CS.txt” (see
below), which contains the categorical state data, we discover a
problem: The categorical states contain the required “StateID”, but they
are connected to their descriptors by the value “CID”, not “CharID”.
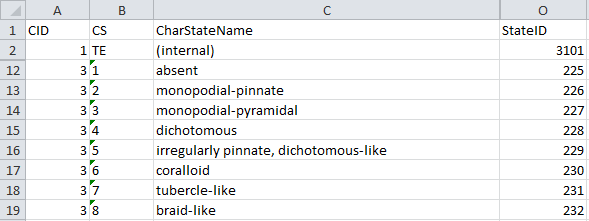
This problem can be solved by importing the descriptor mapping twice:
First the descriptor mapping is imported by using the “CID” and the
categorical states are appended to the descriptors. Then the descriptor
mapping is cleared and imported again, this time using the final value
from column “CharID”.
The last table is “Deemy_Item.txt”, which contains the mapping
information for the descriptions. Here the data column “ItemID” must be
mapped to the descriptions (see below).
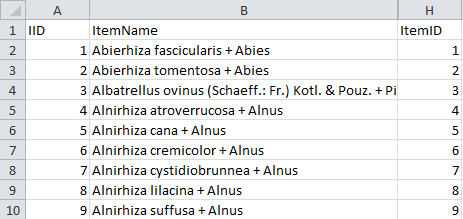
Next: Step 1 - Preparations: Data import from DELTA file and new
import session
Import DELTA
Import DELTA file
Remark:
- To import data from a DELTA file at least TerminologyEditor rights are
neccessary.
With this form you can import data from a file in
DELTA format into the database.
Choose Data → Import ->
Import
DELTA … from the menu to open the window for the import. In the
window click on the
button to select the file with the data you want to import. If the
Multi-file option is selected before pressing the
button, a folder
selection window opens to select the folder where the DELTA files are
located. For muti-file processing currently the files “chars”, “items”,
“specs” and “extra” are evaluated. If during analysis or import any
problems occur, you may click on the button to
reload the file and re-initialize the window.
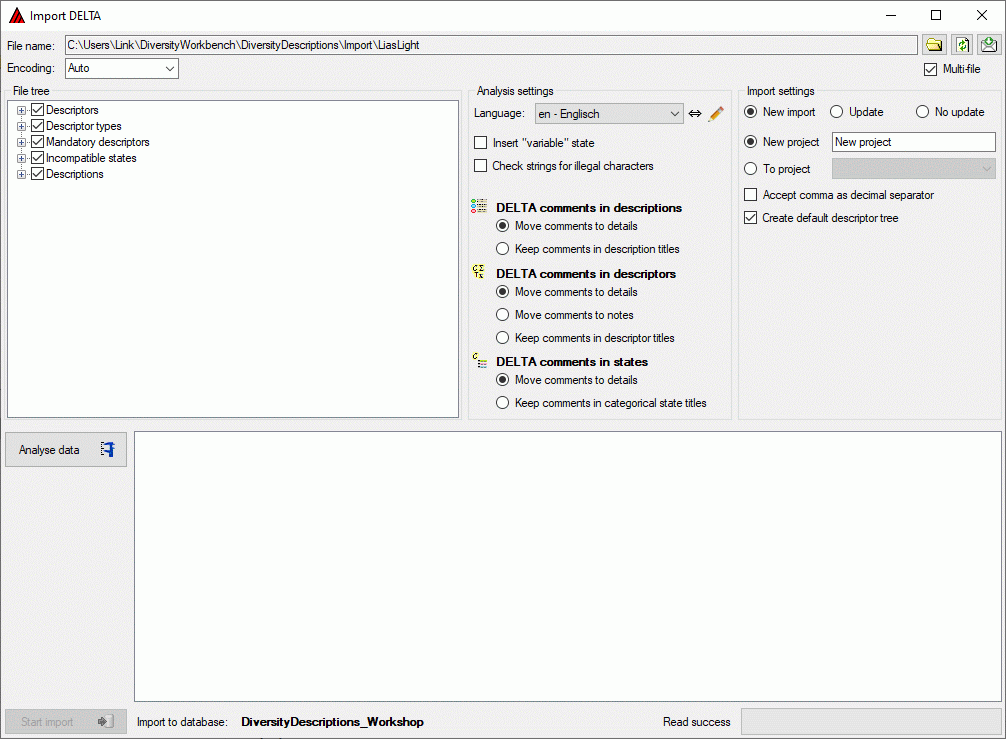
The contents of the file will be shown in the upper part of the File
tree section. If special characters are not displayed corretly, try a
different Encoding setting, e.g. “ANSI”, and reload the document
using the button. In the bottom part of the
window you find the import database and the actual processing state.
In the file tree you may deselect entries that shall not be imported
into the database. Use that option very carefully, because if you
deselect entries that are being referenced by other parts of the input
tree, e.g. descriptors referenced by descriptions, the analysis or
import step might become erronous!
If during reading of the files expressions cannot be interpreted,
suspicious entries are maked with yellow background
(warning) in the file tree. When you move the mouse curser over
the marked entries, you get additional information as tool tip or the
tree node text itself tells the problem (see example below).
Analysis
To analyse the data in the file click on the Analyse data
button. During
the analysis the program checks the dependencies between the different
parts of the data and builds up an analysis tree in the lower part of
the window. The analysis tree contains all data in a suitable format for
the final import step. During data analysis the icon of the button
changes to and you may abort processing by clicking
the button.
In the Analysis settings section (see image below) you set the
document’s Language. You man change the display and sorting of the
entries in the Language combo box from “<code> - <description>”
to “<description> - <code>” (and back) by clicking the button
. If you need language codes that are not included
in the list, click the edit button. For more details
see Edit language codes.
The Insert “variable” state controls the handling of the DELTA state
“V” for categorical summary data. If possible, a categorical state
“variable” is inserted to the descriptor data and set in the summary
data, when the state “V” is present in the description data.
If the Check strings for illegal characters option is checked, all
string literals that shall be exported from database are scanned for
illegal non-printable characters and matches are replaced by a double
exclamation mark ("‼"). Activating this option may increase the analysis
processing time.
In DELTA text in angle bracket (<text>) usually denotes comments,
which are by default imported into the “Details” fields of the database.
In the lower parts of the Analysis settings you may adjust a
different handling for description, descriptor and categorical state
items.
- For DELTA comments in descriptions you may Move comments to
details (default) or Keep comments in description titles.
- For DELTA comments in descriptors you may Move comments to
details (default), Move comments to notes or Keep comments in
descriptor titles.
- For DELTA comments in categorical states you may Move comments
to details (default) or Keep comments in categorical state
titles.
After changing one of these settings click on the Analyse data
button to make
the changes effective.
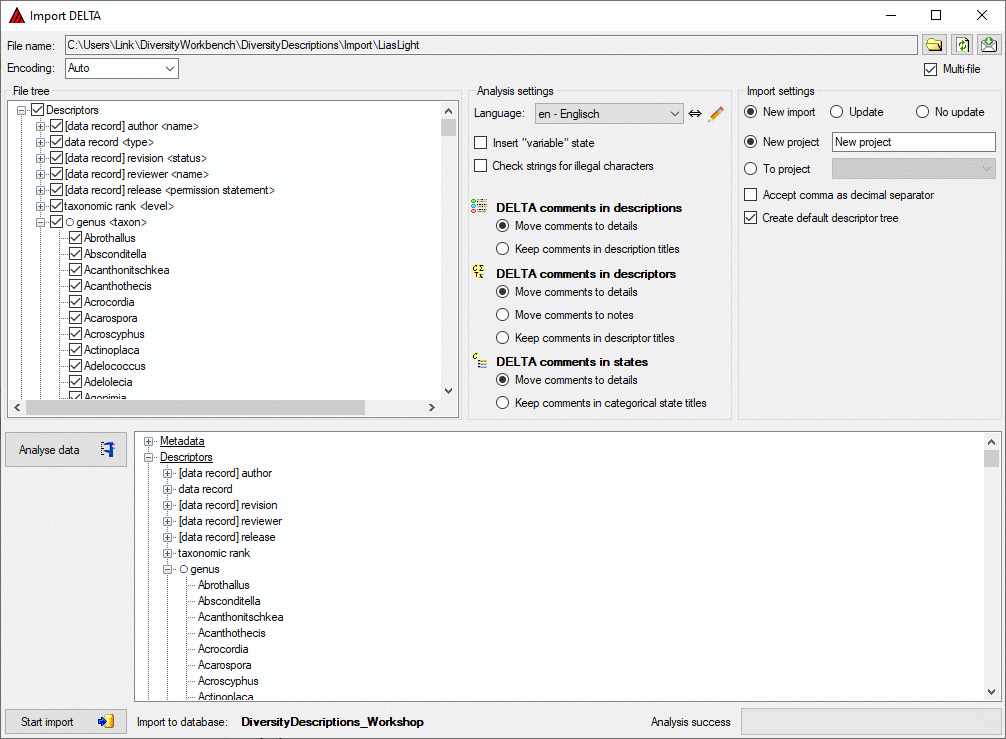
After analysis a message window informs you if any warnings or errors
occured. You can find detailled error and warning information at the
file and/or analysis trees by entries with red text
(error) or yellow background
(warning). When you move the mouse curser over the marked
entries, you get additional information as bubble help or the tree node
text itself tells the problem (see example below). By clicking on the
status text besides the progress bar, you can open an analysis protocol
(see below, right).
If an analysis error occured, you are not able to proceed. You will
first have to correct the problem, e.g. by excluding the erronous
descriptor in the example above (after reloading the file). If a warning
occured, it might not cause problems during import, but you should take
a closer look if the imported data will be correct.
Import
If you want to import new data to a project you have two import options:
- New import - import new data and save mapping information to an
import session.
For descriptors, categorical states and descriptions the mapping
information from the DELTA import will be storen in an import session. Therefore by a subsequent import run
updated information, e.g. a modified label or detail information can
be done (see section “Update” below).
- No update - import new data without saving of mapping
information.
This option might be faster, but you will not be able to update the
titles or to import additional translations from a DELTA file.
Before starting the import, you should take a look at the import
settings:
- New project - import data to a new project.
The project name is specified in the text box right from this radio
button.
This option is only available if at least ProjectManager rights are
available.
- To project - import data to an existing project.
The combo box at the right shows all projects where write access is
possible.
If only TerminologyEditor rights are availabe, no changes in the
existing project (e.g. detail or copyright) will be done.
- Accept comma as decimal separator shall help to overcome problems
with localization of some programs that create DELTA files.
If this option is checked, a floating point value like “1,0” (e.g.
used in german localizations) instead of “1.0” will be accepted as
“1”.
- Create default descriptor tree creates a default descriptor tree
and assigns all imported descriptors to that tree.
Additionally the statistical measures “Minimum”, “Lower limit”,
“Mean”, “Upper limit” and “Maximum” are set as recommended for all
quantitative descriptors.
This option is useful to avoid unassigned descriptors if the import
file does not specify any descriptor tree assignments.
To start the import click on the Start import
button. Now the
data from the analysis tree are written into a local database cache and
finally stored into the database.
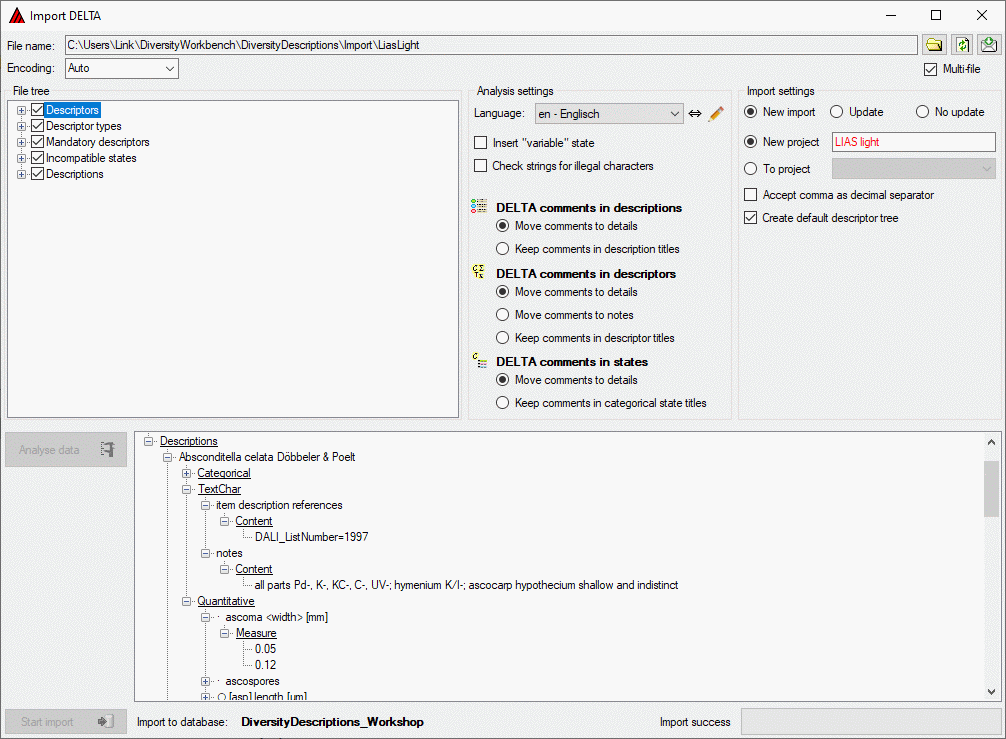
After import a message window inform you if any warnings or errors
occured. You can find detailled error and warning information at the
file and/or analysis trees by entries with red text
(error) or yellow background
(warning). When you move the mouse curser over the marked
entries, you get additional information as bubble help or the tree node
text itself tells the problem. By clicking on the status text besides
the progress bar, you can open an import protocol (see below).

Handling of special DELTA states
In the DELTA format the special states “-” (not applicable), “U”
(unknown) and “V” (variable) are available for categorical and
quantitative characters. These states are treated in the folloging
manner during import:
- “-” (not applicable)
The data status “Not applicable” is set.
- “U” (unknown)
The data status “Data unavailable” is set.
- “V” (variable)
The data status “Not interpreterable” is set.
Update
If you imported new data using option New import, a new import
session with the following data will be created:
- Descriptor keys - the “character number” that is used in DELTA to
identify a dedicated character.
- Categorical state keys - the “state number” that is used in DELTA,
together with the “character number”, to identify a dedicated
chategorical state.
- Description keys - the item position in the item list. Since in
DELTA there are no explicit item numbers, the position within the item
list is taken for this key. If you want to update the items using the
DELTA import, you must be sure that the item list has exactly the same sequence as for the first
import!
For those entities you may update the columns “label”, “detail” and
“data_entry_notes” (only for descriptors). To achive this, you must
specify the same Language in the Analysis settings as adjusted
as project language. If you specify a different Default language,
the data will be imported as translations for the columns “label” rsp.
“detail” (see image below). For descriptor column “data_entry_notes”
translations are not supported.
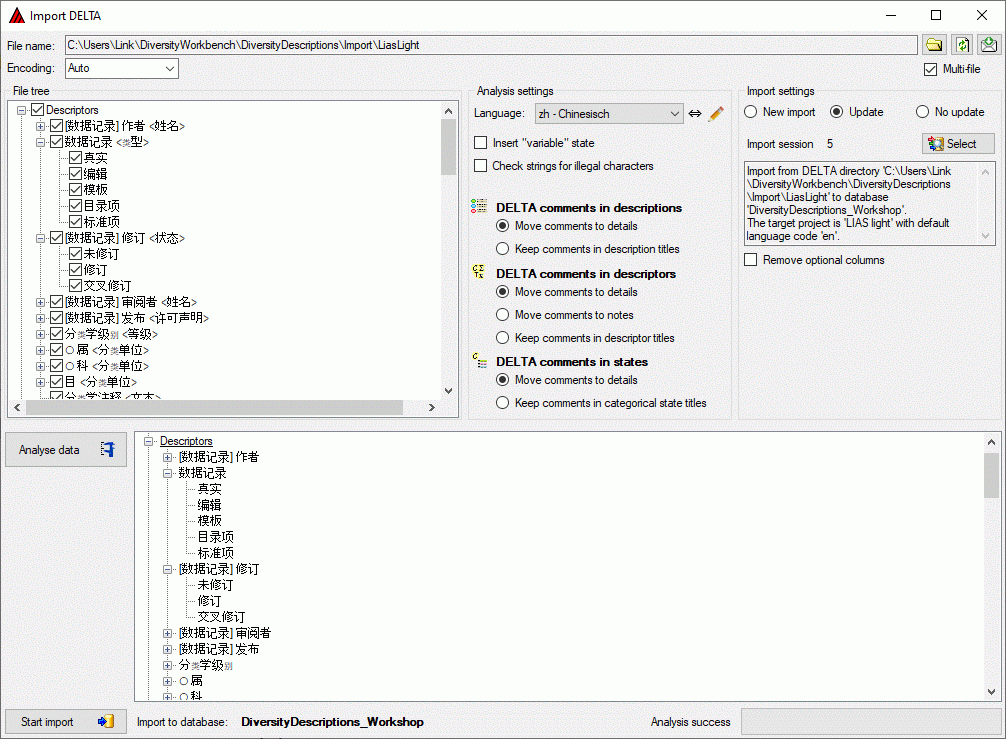
Preparation
By changing the Analysis settings and a clicking the Analyse data
button you may
modify the handling of DELTA comments. E.g. if you used the default
settings during a past import, a DELTA character “data record <type>”
was imported as descriptor “data record” and “type” was written into the
columns “detail”. In the Analysis settings you may now select option
Keep comments in descriptor titles to update the descriptor title to
“data record <type>".
Import settings
Before starting the import, you should take a look at the import
options:
- Update - perform an update import.
- Import session - click on button
Select to select the correct import session.
In the text box below that option the automatically generated
descriptive text of the import session is displayed.
- Remove optional columns - clear optional columns if no contents is
present.
If during update import for an optional column (“detail” rsp.
“data_entry_note”) no data are present, by default an existing entry
in the database will not be removed. Check this option to clear the
data.
Start the import click on the Start import
button. Now the
data from the analysis tree are written into a local database cache and
finally stored into the database.
Import Questionnaires
Import questionnaire data
With this form you can import response data generated by an HTML
questionnaire (see Export questionnaires).
Choose Data → Import ->
 Import questionnaire data … from
the menu to open the window for the import. In the window click on the
button to select the
text file with the data you want to import. If during analysis or import
any problem occurs, you may click on the button
to reload the file and re-initialize the window.
Import questionnaire data … from
the menu to open the window for the import. In the window click on the
button to select the
text file with the data you want to import. If during analysis or import
any problem occurs, you may click on the button
to reload the file and re-initialize the window.
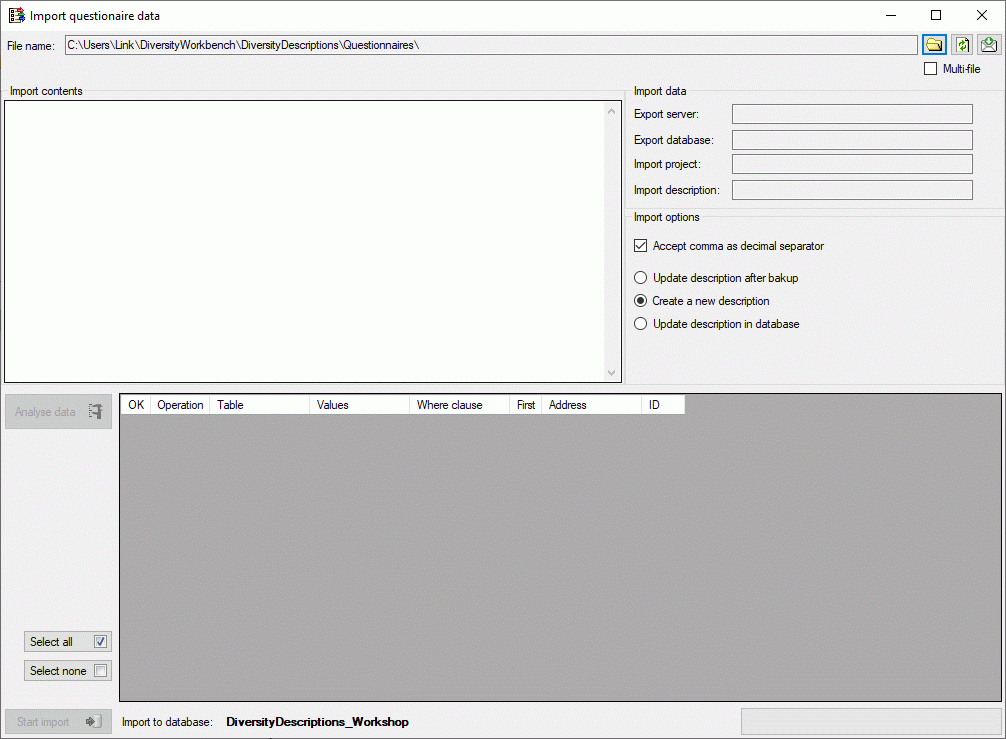
The contents of the file will be shown in the upper part of the Import
contents section. You may edit the contents or even enter the whole
data by copy - paste. In the Import data part you find the basic
dataset parameters Export server, Export database, Import
project and Import description (see image below). If there is a
mismatch, e.g. because the questionnaire was generated from a different
database than your import database, an appropriate error will be
reported.
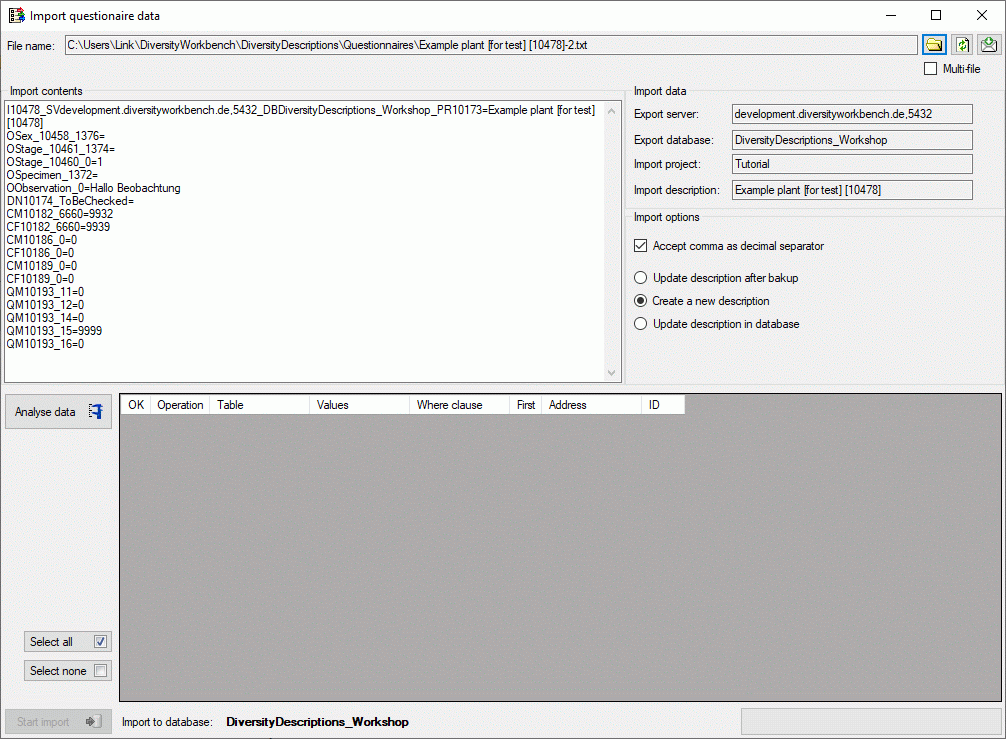
Analysis
To analyse the data in the file click on the Analyse data
button. During
the analysis the program compares the reported data to the entries in
the database and presents the planned database operations in the lower
part of the window (see image below). By checking Accept comma as
decimal separator in the Import options section you can overcome
problems with localization of the computer where the questionnaire was
filled in. If this option is checked, a floating point value like “1,0”
(e.g. used in german localizations) instead of “1.0” will be accepted as
“1”.
After analysis a message window informs you about errors or ignored
input lines. By clicking on the status text besides the progress bar,
you can open an analysis protocol (see below).
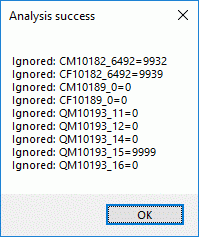
If an analysis error occured, you are not able to proceed. If ignored
lines are reported, this fact is usually uncritical. Most of them
concern “modifier” or “frequency” values (prefix CM, CF or QM) where the
questionnaire reports the actual values, not only the differences.
Import
Before starting the import, you should take a look at the remaining
Import options:
- Update description after backup
Create a backup of the original description data and then update the
original description in the database. If this option is chosen, you
may enter a Postfix that will be appended at the backup
description name. Additionally you may select the option Include
data and time to append these data at the backup name, too (see
image below).
- Create a new description (only option for new descriptions)
Make a copy of the original description data and then updatde the copy
in the database.
- Update description in database
The original description in the database will be updated.
If the description entries in your database are referenced by other
applications, you should update the original database entry, i.e. use
the first or third option. The reason is that references from other
databases usually use the description id, which will be different for
the copied description. To ensure that the questionnaire data are
correct, you can import them useing the option Create a new
description, verify the imported data and finally import them to the
original description using option Update description in database.
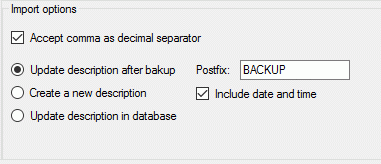
Before performing the import you may include or exclude single database
operations by setting or removing the check mark in column “OK”. You may
select or deselect all operations by clicking the buttons Select all
rsp. Select none. Please be aware that deselecting single operation
might lead to unexpected results.
To start the import click on the Start import
button (see image
below).
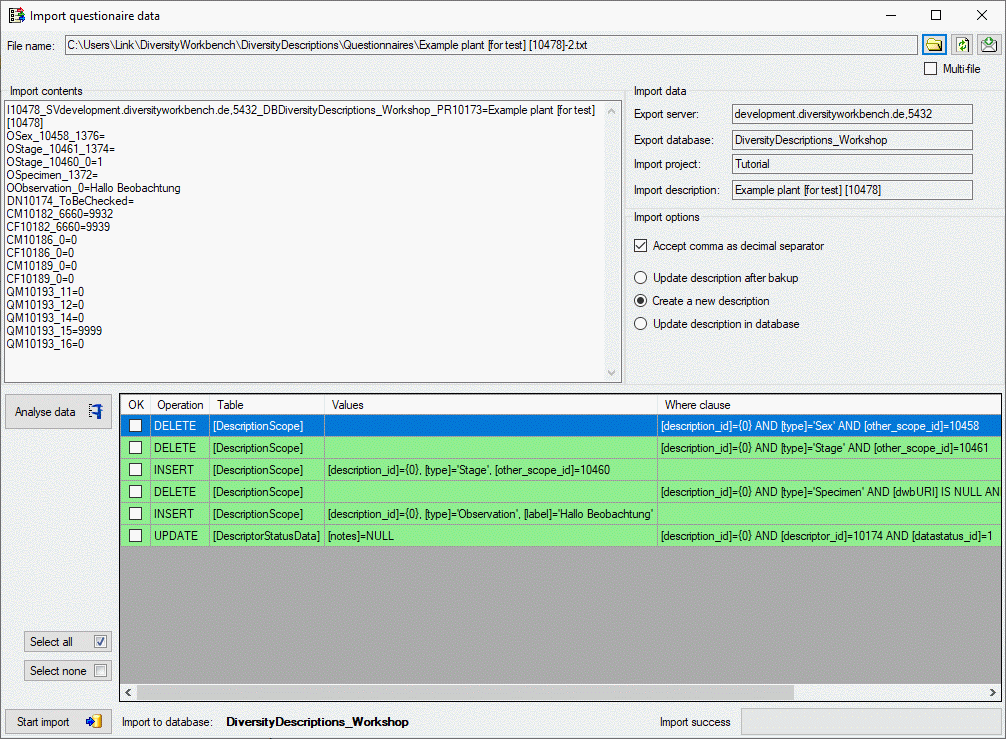
After import a message window inform you if any occured. Sucessful
database operations are shown with green
background, unsuccessful operations with red
background. When you move the mouse curser over the red entries,
you get additional information as bubble help. By clicking on the status
text besides the progress bar, you can open an import protocol (see
below).
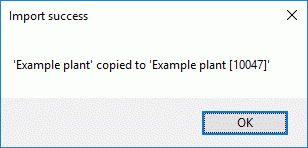
Batch import
If you want to import several questionaire result files, there is the
comfortable option to do a batch import. When you select the option
Multi-file, the window changes as shown below. For batch import you only
have the option to create a new description that will be updated with
the questionnaire data.
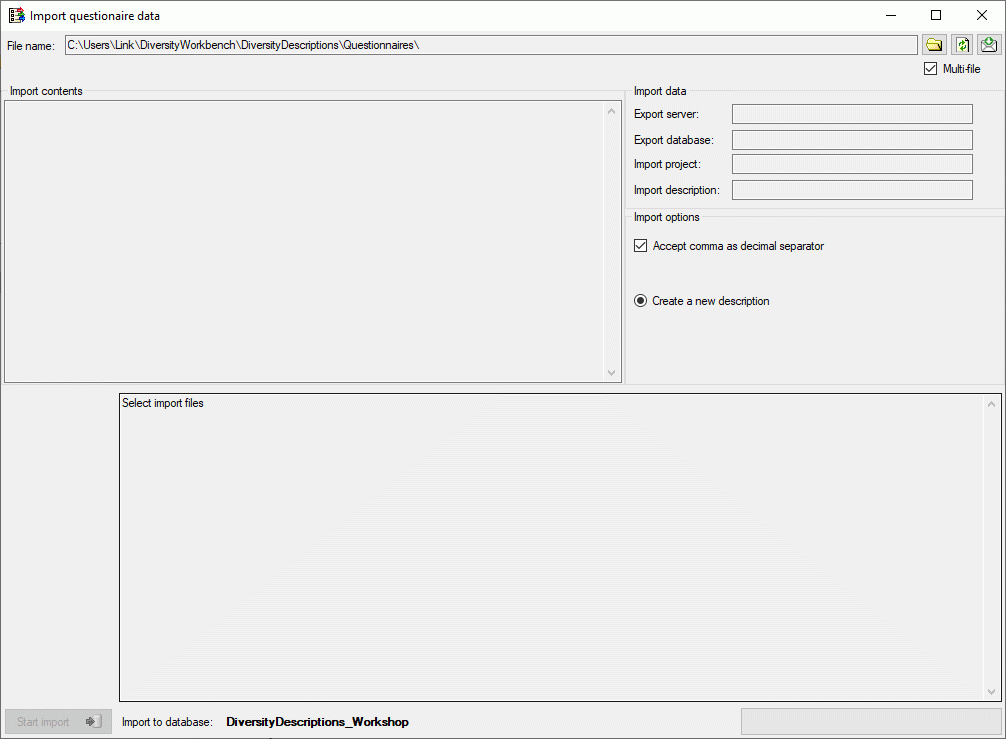
Click on the button
and select all text files you want to import. In the lower part of the
window the selected files will belisted (see image below).

After checking the remaining Import options click on the Start
import button to
start the import. In the lower part of the window you find the
processing result for each selected file (see image below).
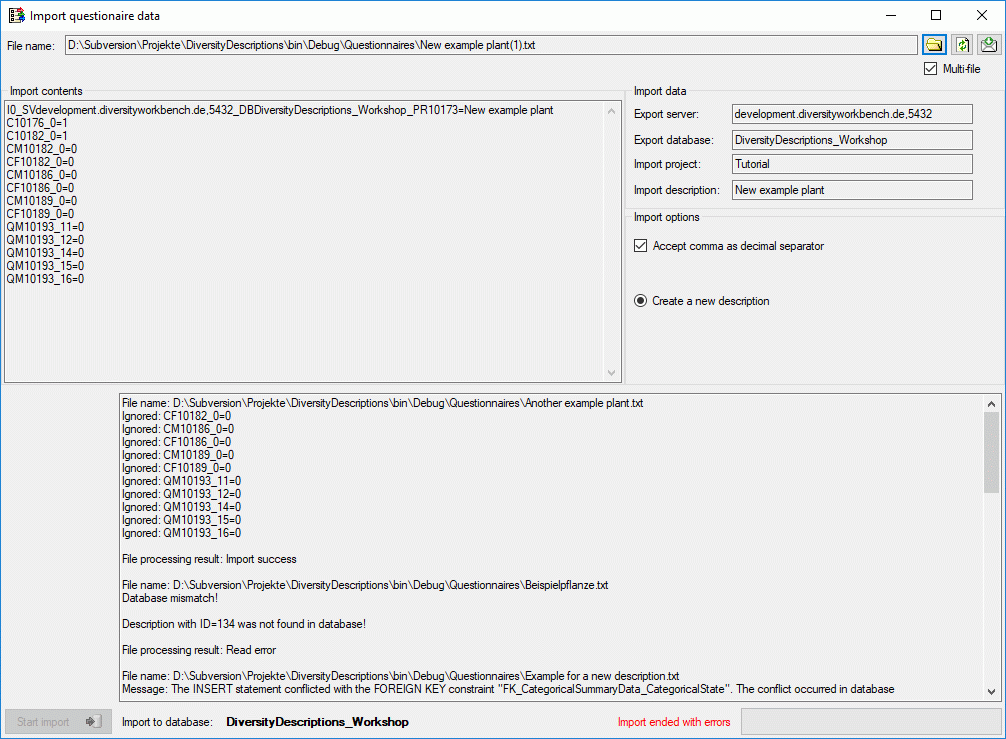
Import SDD
Import SDD file
Remarks:
- To import data from an SDD file at least TerminologyEditor rights are
neccessary.
- Currently SDD statements concerning natural laguage descriptions and
identification keys are not evaluated.
With this form you can import data from an XML file according schema
SDD 1.1 rev 5 into the database.
You may download an example SDD file with from the Diversity
Descriptions example file
repository. Choose
Data → Import →  Import SDD
… from the menu to open the window for the import. In the window
click on the button to
select the file with the data you want to import. If during analysis or
import any problems occur, you may click on the
button to reload the file and re-initialize the window.
Import SDD
… from the menu to open the window for the import. In the window
click on the button to
select the file with the data you want to import. If during analysis or
import any problems occur, you may click on the
button to reload the file and re-initialize the window.
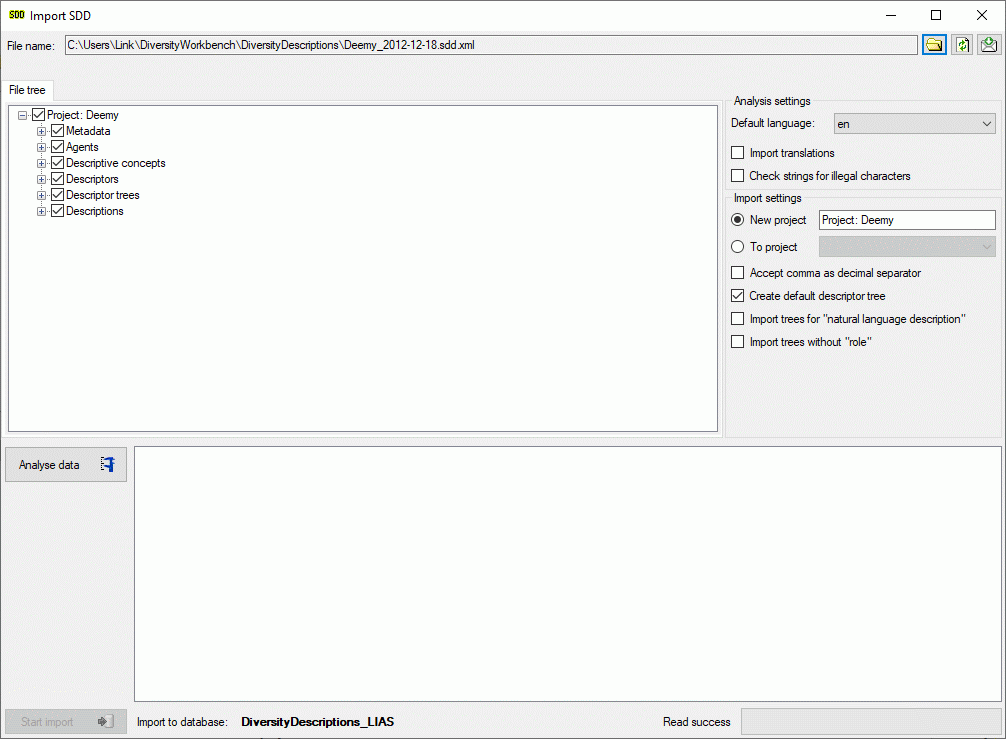
The contents of the file will be shown in the upper part of the File
tree tab page. In the Analysis settings part you find the
document’s Default language. If additional laguages are contained in
the document, you may select one of them as the new default language of
the database. By checking Import translations you select all
additional document languages for the import. This option is
automatically pre-selected if more than one language has been found in
the file. In the bottom part of the window you find the import database
and the actual processing state.
If the Check strings for illegal characters option is checked, all
string literals that shall be exported from database are scanned for
illegal non-printable characters and matches are replaced by a double
exclamation mark ("‼"). Activating this option may increase the analysis
processing time.
In the file tree you may deselect entries that shall not be imported
into the database. Use that option very carefully, because if you
deselect entries that are being referenced by other parts of the input
tree, e.g. descriptors referenced by descriptions, the analysis or
import step might become erronous!
Analysis
To analyse the data in the file click on the Analyse data
button. During
the analysis the program checks the dependencies between the different
parts of the data and builds up an analysis tree in the lower part of
the window. The analysis tree contains all data in a suitable format for
the final import step. During data analysis the icon of the button
changes to and you may abort processing by clicking
the button.
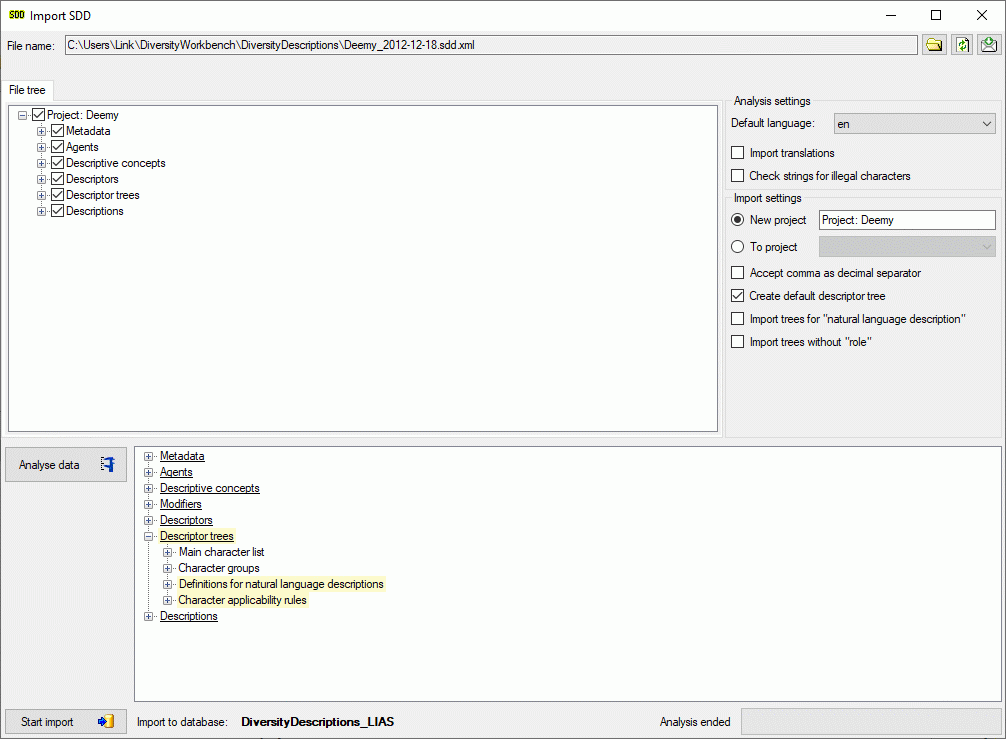
After analysis a message window informs you if any warnings or errors
occured. You can find detailled error and warning information at the
file and/or analysis trees by entries with red text
(error) or yellow background
(warning). When you move the mouse curser over the marked
entries, you get additional information as tool tip or the tree node
text itself tells the problem (see examples below). By clicking on the
status text besides the progress bar, you can open an analysis protocol
(see below, right).
If an analysis error occured, you are not able to proceed. You will
first have to correct the problem, e.g. by excluding the erronous
descriptor in the example above (after reloading the file). If a warning
occured, it might not cause problems during import, but you should take
a closer look if the imported data will be correct.
Import
Before starting the import, you should take a look at the import
options:
- New project - import data to a new project.
The project name is specified in the text box right from this radio
button.
This option is only available if at least ProjectManager rights are
available.
- To project - import data to an existing project.
The combo box at the right shows all projects where write access is
possible.
If only TerminologyEditor rights are availabe, no changes in the
existing project (e.g. detail or copyright) will be done.
- Accept comma as decimal separator shall help to overcome problems
with localization of some programs that create SDD files.
If this option is checked, a floating point value like “1,0” (e.g.
used in german localizations) instead of “1.0” will be accepted as
“1”.
- Create default descriptor tree creates a default descriptor tree
and assigns all imported descriptors to that tree.
Additionally the statistical measures “Minimum”, “Lower limit”,
“Mean”, “Upper limit” and “Maximum” are set as recommended for all
quantitative descriptors.
This option is useful to avoid unassigned descriptors if the import
file does not specify any descriptor tree assignments.
- Import trees for natural language descriptions - currently natural
language descriptions are ignored.
- Import trees without “role” - usually those trees only contain
descriptor dependency information.
To start the import click on the Start import
button. Now the
data from the analysis tree are written into a local database cache and
finally stored into the database.
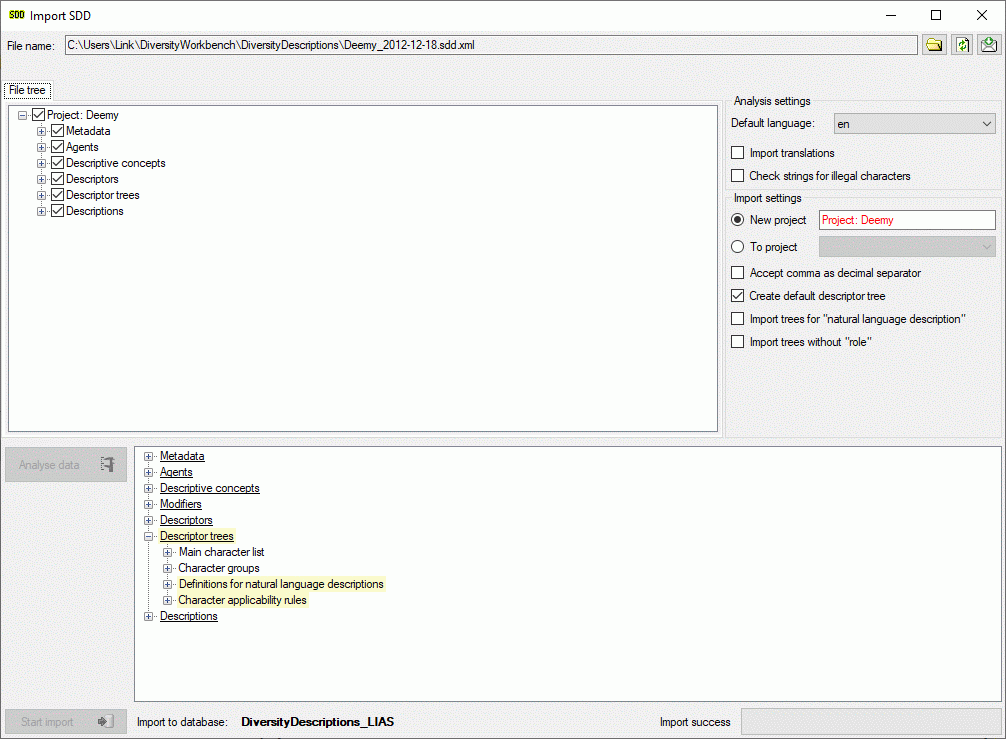
After import a message window inform you if any warnings or errors
occured. You can find detailled error and warning information at the
file and/or analysis trees by entries with red text
(error) or yellow background
(warning). When you move the mouse curser over the marked
entries, you get additional information as bubble help or the tree node
text itself tells the problem. By clicking on the status text besides
the progress bar, you can open an import protocol (see below).
Import Sessions
Import sessions
Usually the information required for an import into
DiversityDescriptions is spread over at least two files, e.g.
“terminology” (descriptors/categorical states) and “items” (descriptions
data), where the elements of the terminology are referenced to build the
item descriptions. Between these files references are usually built
using e.g. a descriptor number and/or the categorical state name. Within
the DiversityDescriptions database relations are built using
automatically generated numbers (“id”). To allow a mapping between the
internally generated keys and the external keys, the “Import sessions”
are used.
When you start the import wizard you are asked to select rsp. create a
new import session. To ge an overview of the present import session or
to create, edit and delete import sessiong select Data ->
Import -> Wizard ->
Organize sessions … and a window as
shown below will be shown.
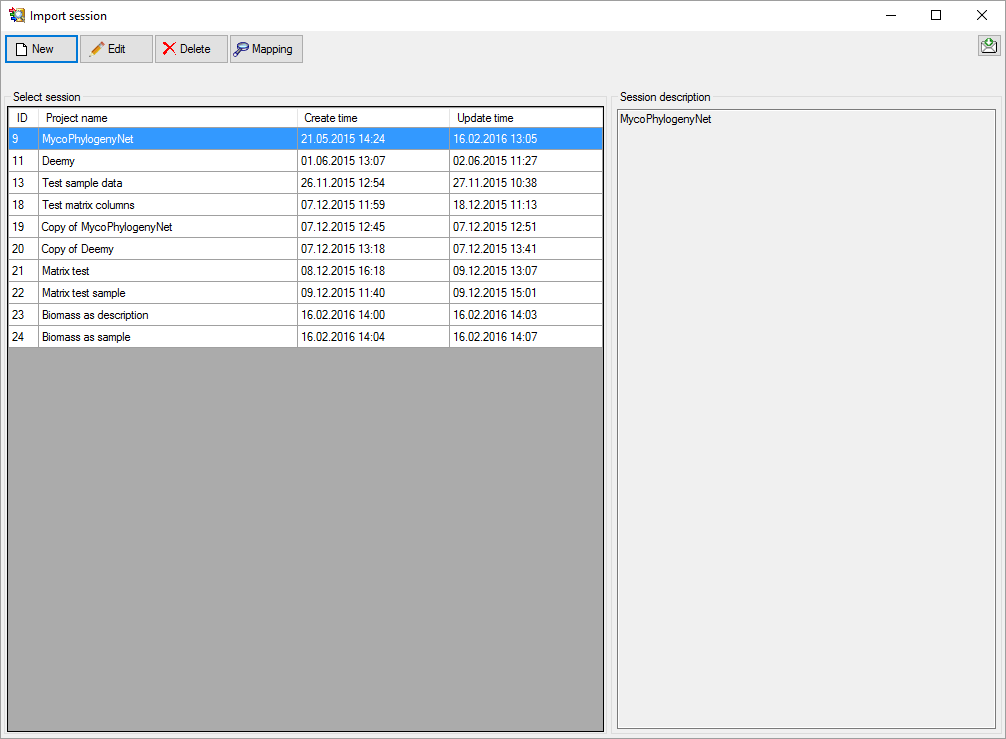
Click buttoem New and a window as shown below
will be shown. Select the project of the import session and enter a
description text. So save the new import session click
Save ,to ignore the changes click button
Don’t save. A similar window can be opened by
selecting an existing import session and clicking  Edit.
Edit.
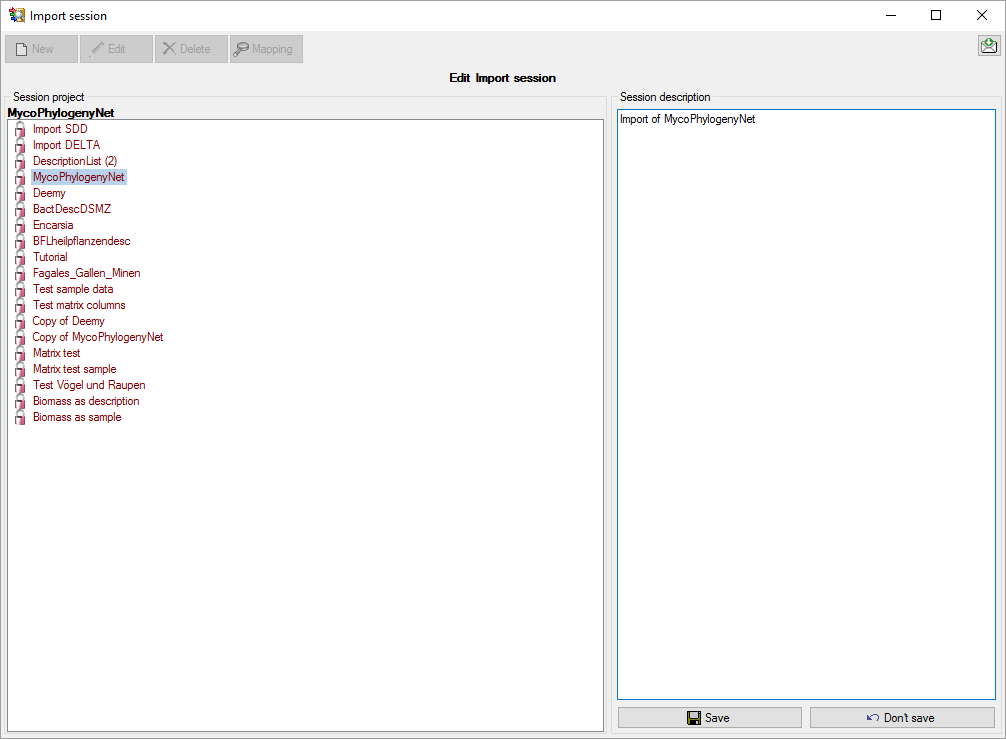
To delete an import session, select it and click the
Delete button. If import mapping data are
present for the import session, an additional window will be shown that
informs you about the number of mappings that will be implicitelx
deleted and you have the chance to cancel the delete process (see
below).
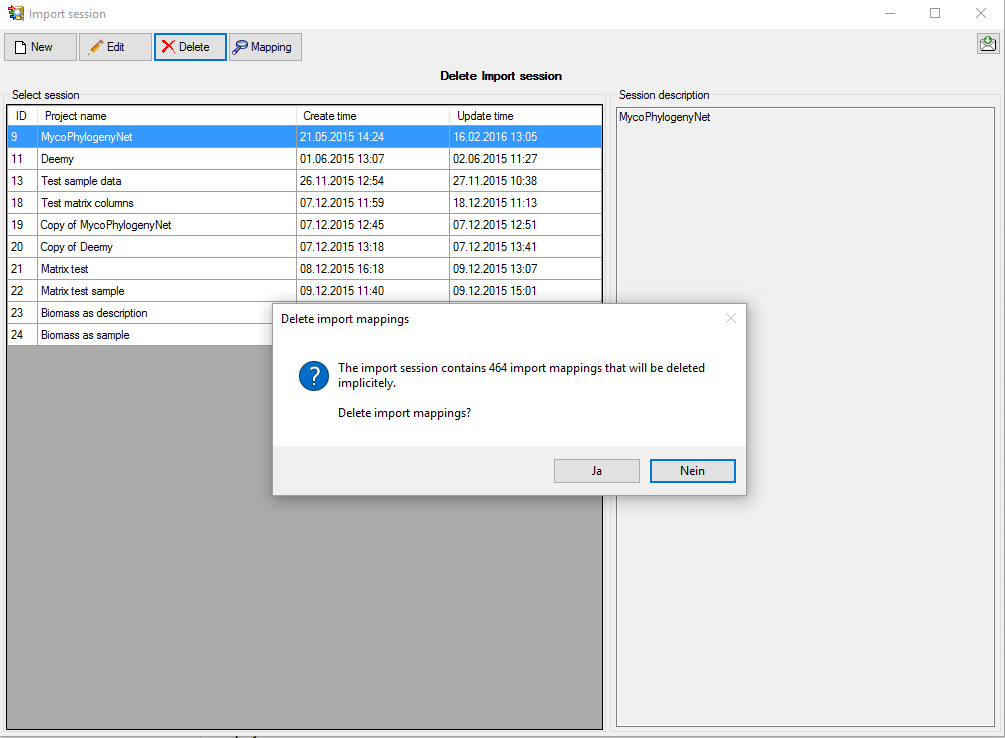
Import mapping
To view the mapping information that has been stored for an import
session, select it and click the Mapping
button. If import mapping data are present for the import session, a
table with the database “Table name”, an optional “Parent key”, e.g. the
descriptor id in case of categorical states, the “External key” used for
import and the database interal key, the “Object ID”, is displayed (see
below). To go back to the session overview, click the
Session button.
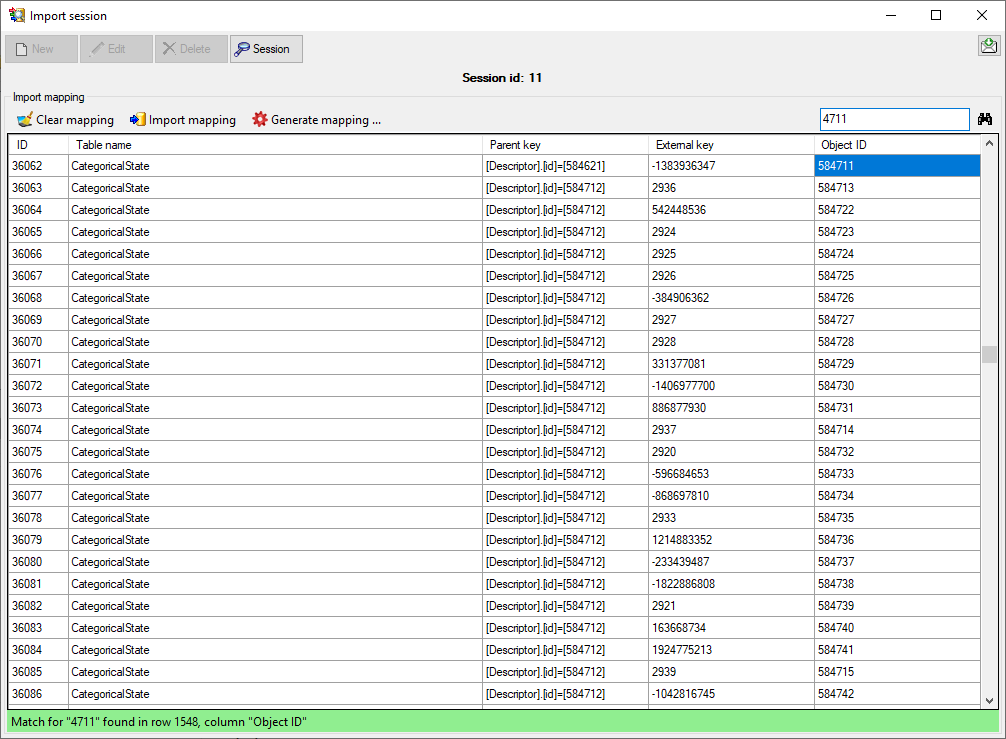
You may search for specific strings in the mapping table by entering the
search string in the upper right text box and clicking
the button. Menu item
Clear mapping allows clearing of
mapping information for selected tables or all tables. With menu item
Import mapping an import wizard can be opened
to read the mapping information from tab-separated files. A detailled
example for using the mapping import is shown in Import wizard -
tutorial for advanced functions.
If you want to import list data that include the internal database keys,
you can generate mapping data that make these internal keys available
for import by klicking menu item Generate
mapping …. All mappings of the selected import session will be
deleted and the internal keys (“Object ID”) of descriptors, categorical
states, descriptions and their resources will be inserted as external
keys. By using this function you can re-import rsp. update data that
have been generated with the form Export resource
data list and modified with an external
program.
Import Wizard
The data imported may be transformed e.g. to adapt them to a format
demanded by the database. Click on the button
to open a window as shown below.
Here you can enter 4 types of transformation that should be applied to
your data. Cut out parts,
Translate contents from the file, RegEx
apply regular expressions or Replace text in the
data from the file. All transformations will be applied in the sequence
they had been entered. Finally, if a prefix and/or a postfix are
defined, these will be added after the transformation. To remove a
transformation, select it and click on the
button.
Cut
With the cut transformation you can restrict the
data taken from the file to a part of the text in the file. This is done
by splitters and the position after splitting. In the example below, the
month of a date should be extracted from the information. To achieve
this, the splitter ‘.’ is added and than the position set to 2. You can
change the direction of the sequence with the button
 Seq starting at the first position and
 starting at the last position. Click on
the button Test the transformation to see the result of your
transformation.
starting at the last position. Click on
the button Test the transformation to see the result of your
transformation.
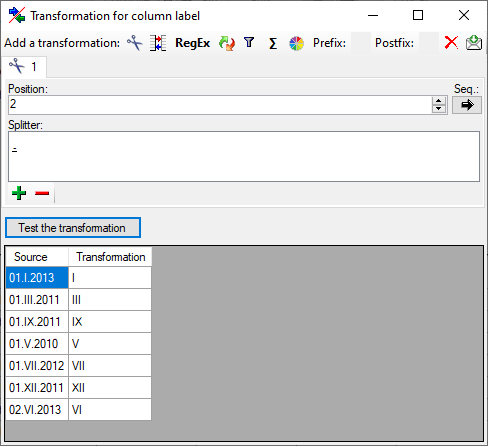
Translate
The translate transformation translates
values from the file into values entered by the user. In the example
above, the values of the month cut out from the date string should be
translated from roman into numeric notation. To do this click on the
button to add a translation transformation
(see below). To list all different values present in the data, click on
the button. A list as shown below will be created.
You may as well use the and
buttons to add or remove values from the list or the
button to clear the list. Than enter the
translations as shown below. Use the save button to
save entries and the Test the transformation button to see the
result.
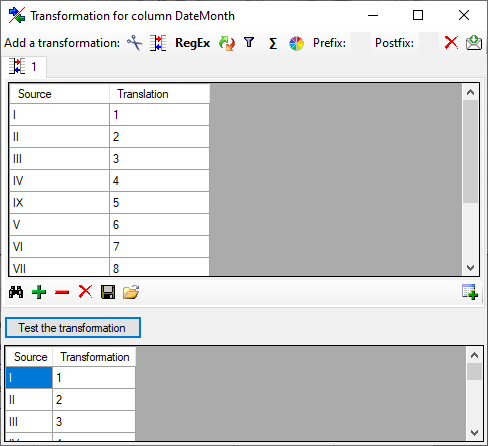
To load a predefined list for the transformation use the
button. A window as shown below will open.
Choose the encoding of the data in you translation source, if the first
line contains the column definition and click on the button to open a
file. Click OK to use the values from the file for the translation.
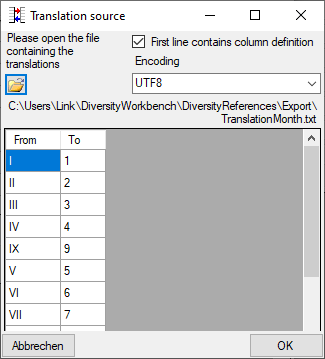
To load a database table for the transformation use the
 button (see main translation window above). A
window as shown below will open, where you may select a database table
for the translation. Choose the table and the columns for the
translation. Click OK to use the values from the table for the
translation. Only unique values from the table will be used to ensure an
unequivocal translation.
button (see main translation window above). A
window as shown below will open, where you may select a database table
for the translation. Choose the table and the columns for the
translation. Click OK to use the values from the table for the
translation. Only unique values from the table will be used to ensure an
unequivocal translation.
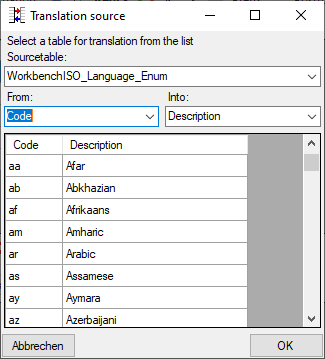
The values of the database table will be listed underneath as shown
below. For the translation will only be regarded if the manual list does
not contain the corresponding table. That means that content in the
manual table will overwrite corresponding content in the database table.
To remove the database table use the delete button.
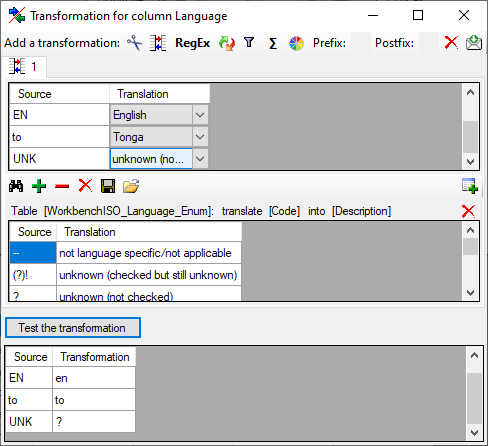
Regular expression
The transformation using regular expressions will transform the values
according to the entered Regular expression and Replace by
vales. For more details please see documentations about regular
expressions.
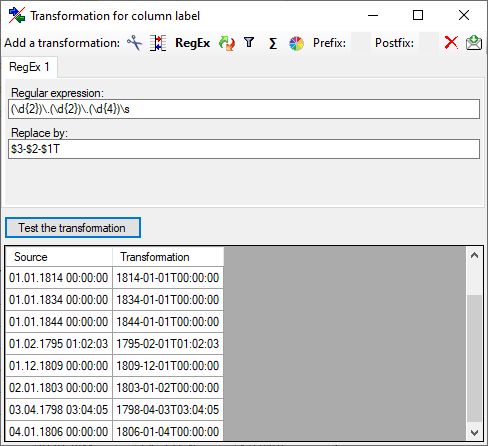
Replacement
The replacement transformation replaces any text in the data by a text
specified by the user. In the example shown below, the text “.” is
replaced by “-".
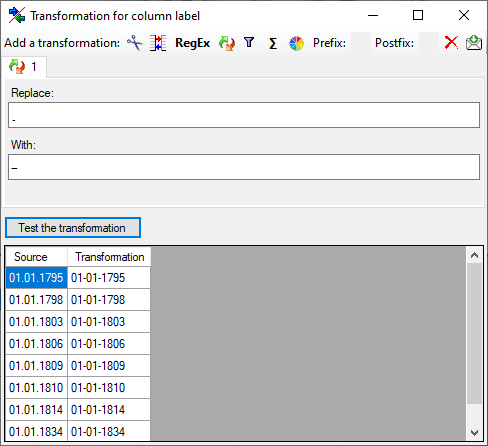
Calculation
The  calculation transformation performs a calculation on numeric value,
dependent on an optional condition. In the example below, 2 calculations
were applied to convert 2-digit values into 4 digit years.
calculation transformation performs a calculation on numeric value,
dependent on an optional condition. In the example below, 2 calculations
were applied to convert 2-digit values into 4 digit years.
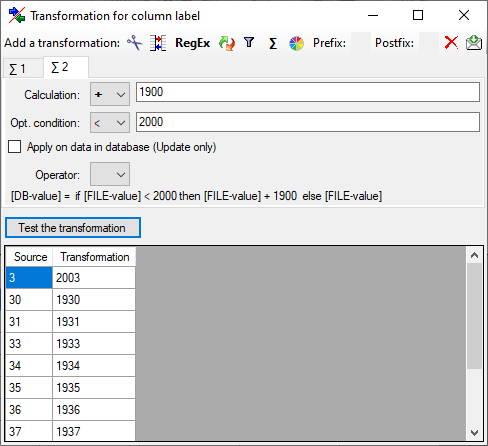
Filter
The filter transformation compares the values from the file with a value
entered by the user. As a result you can either
Import content of column in file or
Import a fixed value. To select
another column that should be compared, click on the
button and choose a column from the file in
the window that will open. If the column that should be compared is not
the column of the transformation, the number of the column will be shown
instead of the symbol. To add further filter
conditions use the add button. For the combination of
the conditions you can choose among AND and OR.
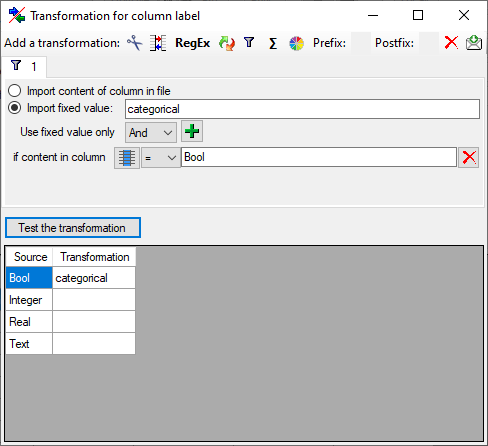
Color
The color transformation offers the transformation of color values
between the three formats HEX values (#rrggbb), decimal value triples
(rrr, ggg, bbb) and (negative) integer numbers.
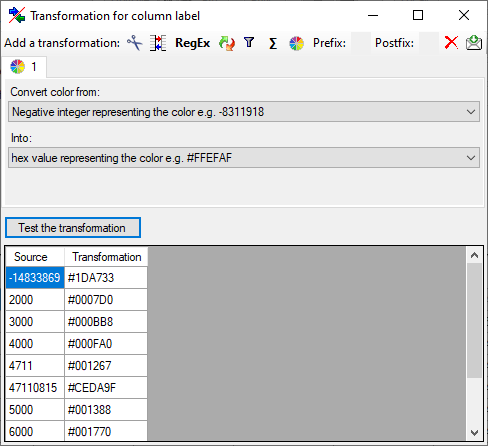
Wizard Tutorial
Import wizard - tutorial
This tutorial demostrates the import of descriptors and descriptions
from two tabulator separated files into the database. The original data
were stored in an MS-Excel sheet with data from an agricultural survey.
The first table contains a list of questions and data like expected type
of the answer, possible values and the measurement unit in case of
numeric values (see image below).

The second table contains the answers of three individuals that are
identified by a numeric value (see image below).
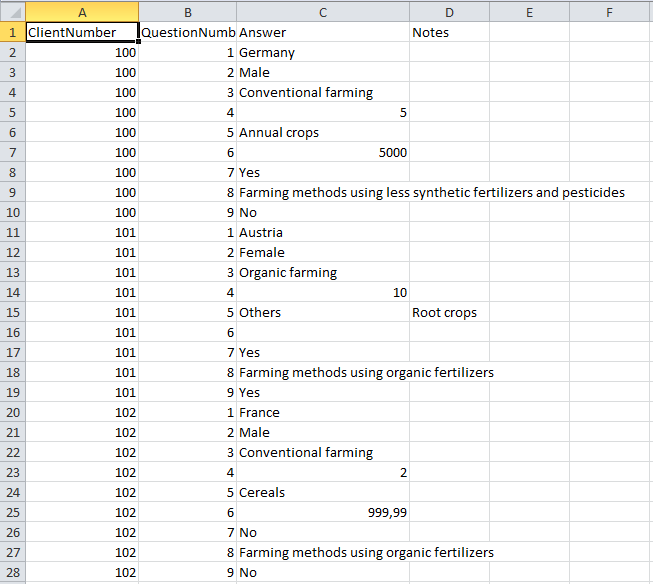
By using the option “Save as unicode text” the tables can easily be
exported as tabulator separated text files (“Survey_Questions.txt” and
“Survey_Answers.txt”). The import is done in seven steps and
demonstrates various features of the import wizard. The tabulator
separated text files and import schemas are available in the tutorialfiles in folder “Agricultural survey” or
may be downloaded from the Diversity Descriptions example filerepository.
Step 1 - Preparations: New project and descriptor
tree
Step 2 - Import of descriptors
Step 3 - Insert recommended values of
descriptors
Step 4 - Import of categorical states for boolean
data
Step 5 - Import of categorical states and update of
descriptor
Step 6 - Import of descriptions
Step 7 - Import of description
data
Epilogue
See the second part of the import wizard
tutorial to learn more about some
advanced functions of the import wizard.
Subsections of Tutorial
Wizard Tutorial Step 1
Step 1 - Preparations: New project and descriptor tree
Choose Edit → Projects from the menu and create a new project by
clicking the button. Now click on button
to enter the project name “Agricultural survey”.
After entering the name the project will automatically be saved and the
display will be updated (see below).
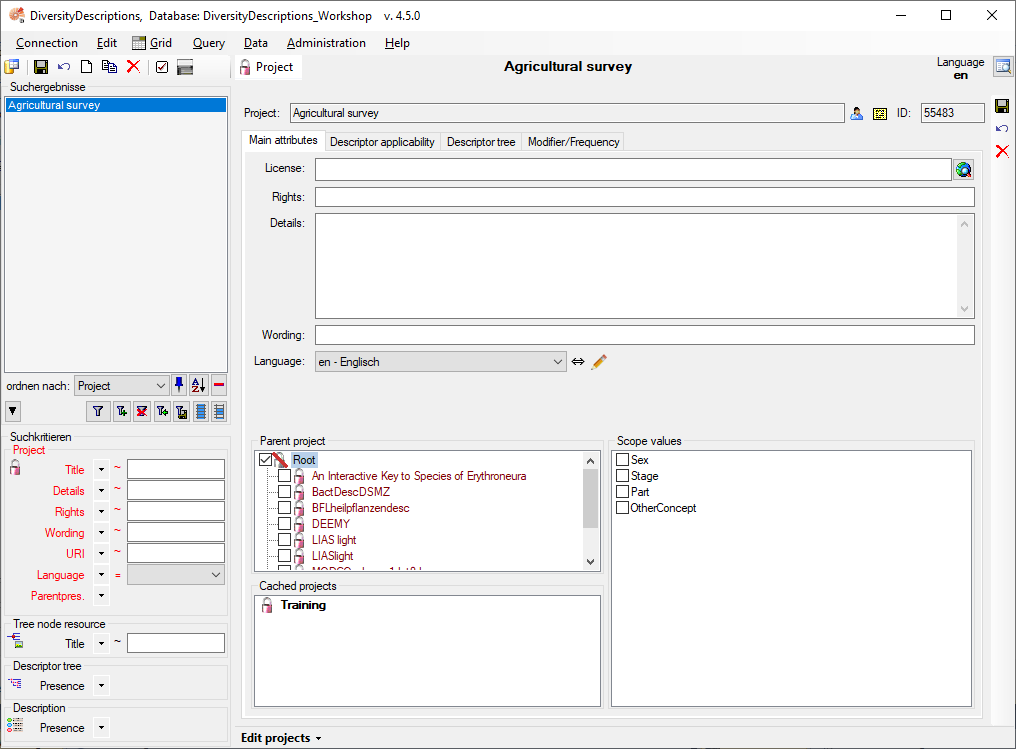
Change to tab “Descriptor tree”, mark project “Agricultural survey”
in section “Descriptor tree” and press button
to insert a new tree. Change the tree name to “Main tree for
Agricultural survey” and click button to save all
changes (see below).

Next: Step 2 - Import of
descriptors
Wizard Tutorial Step 2
Step 2 - Import of descriptors
Choose Data → Import -> Import wizard ->
Import descriptors … from the menu. A window as
shown below will open to create a new import session. Select project
“MycoPhylogenyNet” and enter a session description.
After clicking [OK] the following window opens that will lead you
through the import of the descriptor data. The window is separated in
three areas. On the left side, you see a list of possible data related
import steps according to the type of data you choosed for the import.
On the right side you see the list of currently selected import steps.
In the center part the details of the selected import step are shown.
Choosing the File
As a first step, choose the File from where the data should be
imported. Open file “Survey_Questions.txt”. The preselected encoding
ANSI should be sufficient for our test file. The file column
“QuestionText” contains the descriptor names that shall be imported. In
file column “QuestionNumber” there is a unique number assigned to each
descriptor that will be used by other data tables to reference a certain
descriptor. “Type” might give a hint for the descriptor type
(categorical, quantitative or text) and “DisplayOrder” may be used to
determine the sequence number of the descriptor.
Selecting the data ranges
In the selection list on the left side of the window all possible import
steps for the data are listed according to the type of data you want to
import.
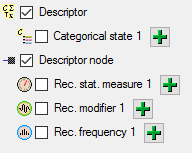
The step Descriptor is already selected and
cannot be de-selected, additionally we select
 Descriptor node, because we want to
assign each imported descriptor to a descriptor tree (see above). In the
step table at the right side you find the import step
Descriptor and below the most important data
groups of the import step. Click on Descriptor ID
and in the center window the assignemt data for the descriptor id (“id”)
are displayed. Click on to make this the
decisive column, further click on From
file to select the column “QuestionNumber” as data source. After that
the column should look as shown below.
Descriptor node, because we want to
assign each imported descriptor to a descriptor tree (see above). In the
step table at the right side you find the import step
Descriptor and below the most important data
groups of the import step. Click on Descriptor ID
and in the center window the assignemt data for the descriptor id (“id”)
are displayed. Click on to make this the
decisive column, further click on From
file to select the column “QuestionNumber” as data source. After that
the column should look as shown below.

Remark: The Descriptor ID is a number that is
generated automatically from the database when a new descriptor is
created. Anyway in the data file there is a field “QuestionNumber” that
is linked to a certein descriptor and used in other tables to reference
a certain descriptor. The mapping from the “QuestionNumber” values to
the internally generated Descriptor ID values
will be stored in a separate import mapping table for the actual import
session. In the later import steps this mapping table will allow to find
the correct descriptor assigned to a certain “QuestionNumber”.
Now the descriptor name must be selected, therefore click on
Descriptor name. The center window shows three
data columns: “label”, “abbreviation” and “detail”. Click on
From file in the “label” line to
select file column “QuestionText” (see below).

Next click on Sequence number. In the center
window select the data column “display_order”, click on
From file and select file column
“QuestionNumber”. (see below).

As already mentioned before the file column “Type” contains information
that can be used to determine the descriptor type. Therefore click on
 Subclass, select the “subclass” line, click on
From file and select the file column
“Type”. Now click on button to open the
transformation window. As only transformation step select
to insert a translation table and
to list the values contained in the file column.
“Bool” shall be converted to “Categorical descriptor”, “Integer” and
“Real” will become “Quantitative descriptor” and the rest “Text
descriptor” (see below).
Subclass, select the “subclass” line, click on
From file and select the file column
“Type”. Now click on button to open the
transformation window. As only transformation step select
to insert a translation table and
to list the values contained in the file column.
“Bool” shall be converted to “Categorical descriptor”, “Integer” and
“Real” will become “Quantitative descriptor” and the rest “Text
descriptor” (see below).
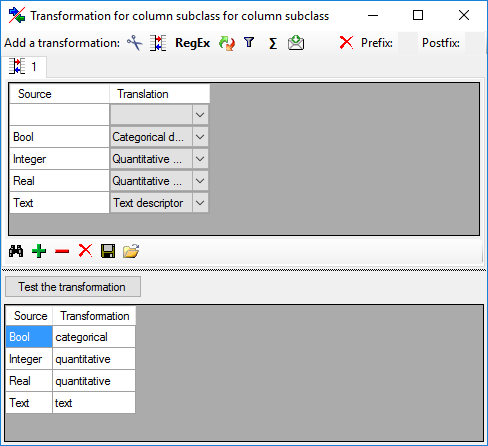
The file rows that contain entries in column “Values” seem to specify
categorical descriptors but are simply inserted as text characters. We
will correct those values when we import the categorical states in a
later step. The “subclass” data column now looks as shown below.

The descriptor step at the right displays the most important data
columns grouped in separate steps. Anyway, there are several additional
data columns available that can be accessed by clicking on the
Descriptor step itself. Here we select data
column “measurement_unit”, choose file column “Unit” (see below).
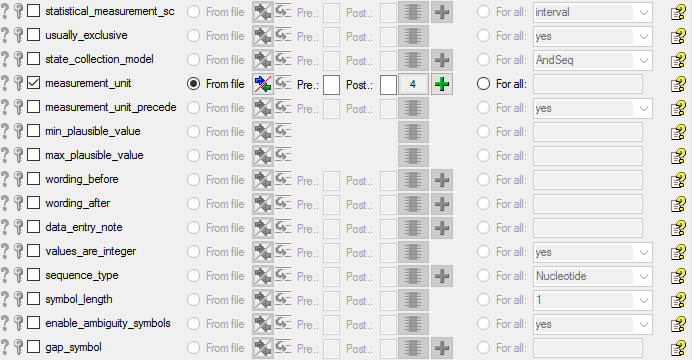
To do the assignment of the imported descriptors to the descriptor tree
that was created in the preparation step, select
Descriptor node ID from step Descriptor
node and supply it exactly the samy way as the
Descriptor ID. (Don’t forget to click on to
make it the decision column.) Furthermore supply the
Sequence number in the same way as described
above.
Finally select import step Descriptor tree,
select data column “descriptortree_id”, choose
For all: and select entry “Main tree
for Agricultural survey” from the drop down (see below). With this
adjustment every imported descriptor will automatically be assigned to
that descriptor tree.

Remark: Although descriptortree_id is a numeric value in the
database, the externally visible descriptor tree name is expected here.
Since this name is unambigious, the corresponding id will be determined
during import.
Testing
To test if all requirements for the import are met use the
Testing step.
You can use a certain line in the file for your test and than click on
the Test data in line: button. If there are still unmet
requirements, these will be listed in a window. In our example no error
occured and the test for the first data line is shown below.
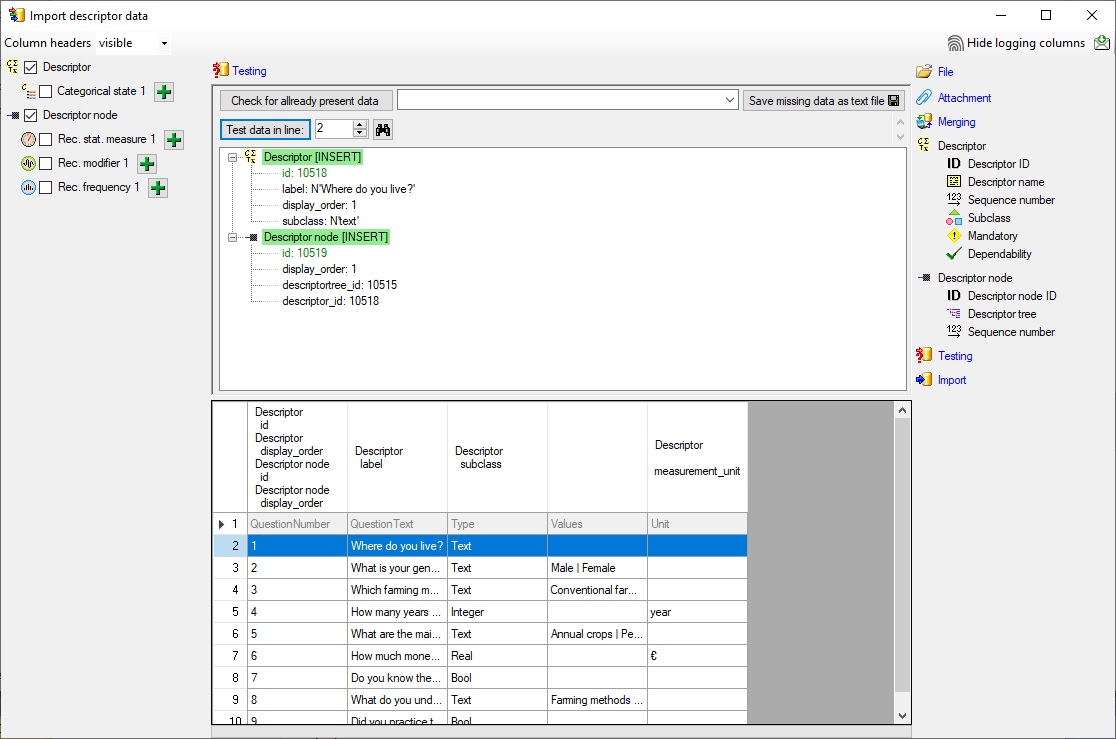
You can see that in table “Descriptor” for data column “id” a new value
325050 is generated - remember that from file column “ParamID” the value
1 was selected. The mapping of the external value (1) to the internal
value (325050) in table “Descriptor” will be stored in the
“ImportMapping” table of the actual import session. I.e. if in a
subsequent import step for the same session a “Descriptor.id=1” is
specified in the import schema, it will automatically be translated to
the internal “Descriptor.id=325050”. Anyway, usually you do not have to
take care about this automatic translation. This example shall only
demonstrate the meaning of the import sessions.
Remark: Since testing works with transaction rollback, the “id” values
shown in the test window are different from the values resulting from a
real import.
As a second example data line 4 with “DataType=Integer” was selected to
demonstrate that the descriptor subtype is correctly set to
“quantitative” (see below).
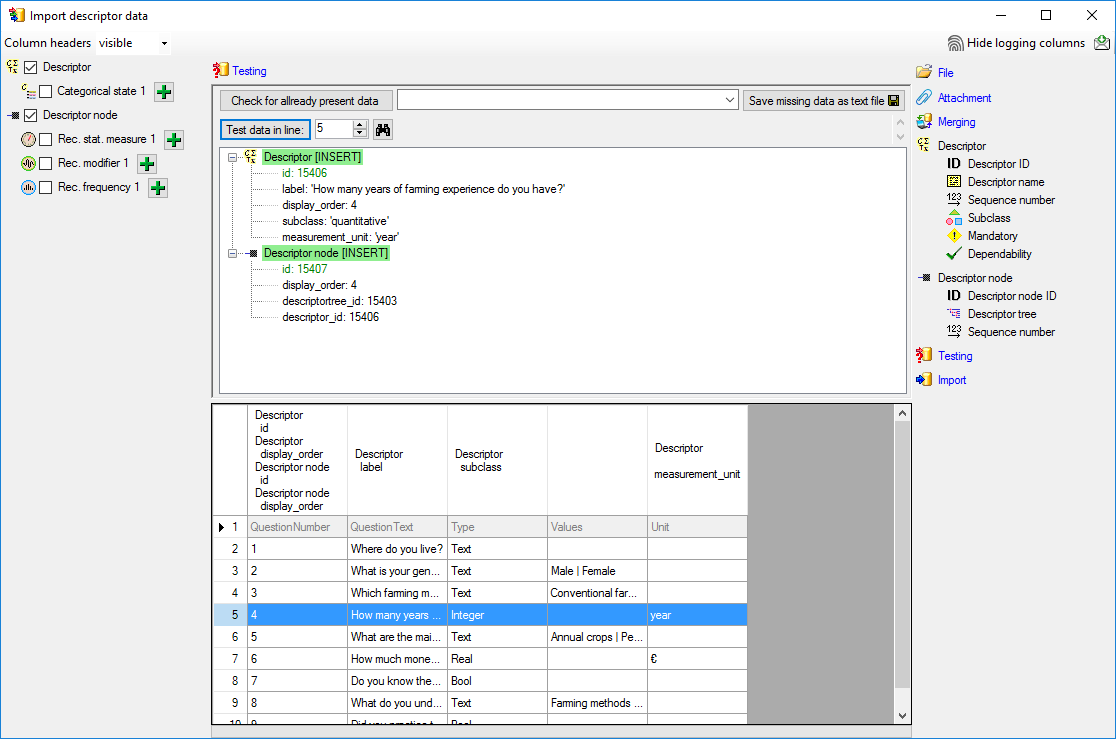
Import
With the last step you can start to import the data into the database.
If you want to repeat the import with the same settings and data of the
same structure, you can save a schema of the current settings (see
below).
|
|
|
|
| Schedule for import of tab-separated text files into DiversityDescriptions |
|
|
|
| Target within DiversityDescriptions: Descriptor |
|
|
|
| Schedule version: |
1 |
Database version: |
03.00.17 |
| Lines: |
2 - 10 |
First line contains column definition: |
✔ |
| Encoding: |
ANSI |
Language: |
US |
Tables
Descriptor
(Descriptor)
Merge handling:
Insert
| id |
? |
|
|
|
|
0 |
|
|
File |
|
| label |
|
|
|
|
|
1 |
|
|
File |
|
| display_order |
|
|
|
|
|
0 |
|
|
File |
|
| subclass |
|
|
|
|
|
2 |
| Translate |
Into |
|
|
| Bool |
categorical |
| Integer |
quantitative |
| Real |
quantitative |
| Text |
text |
|
|
|
File |
|
| measurement_unit |
|
|
|
|
|
4 |
|
|
File |
|
DescriptorTreeNode
(DescriptorTreeNode)
Parent: Descriptor
Merge handling:
Insert
| Column in table |
? |
Key |
Copy |
Pre |
Post |
File pos. |
Transformations |
Value |
Source |
Table |
| id |
? |
|
|
|
|
0 |
|
|
File |
|
| display_order |
|
|
|
|
|
0 |
|
|
File |
|
| descriptortree_id |
|
|
|
|
|
|
|
Main tree for Agricultural survey |
Interface |
|
| descriptor_id |
|
|
|
|
|
|
|
|
ParentTable |
|
Lines that could not be imported will be marked with a red background
while imported lines are marked green.
If you want to save lines that produce errors during the import in a
separate file, use the “Save failed lines” option. The protocol of the
import will contain all settings acording to the used schema and an
overview containing the number of inserted, updated, unchanged and
failed lines (see below).

Next: Step 3 - Insert recommended values of
descriptors
Wizard Tutorial Step 3
Step 3 - Insert recommended values of descriptors
Now we have imported the descriptors and assigned them to a descriptor
tree. Since we have several quantitative descriptors, we should at least
assign one recommended statistical measure to these descriptors. In this
step we will additionally insert recommended modifier and frequency
vales. If your database does not yet include modifier and frequency
values, you might like to interrupt here and insert them according
chapter Edit projects - Modifier/Frequencytab of this manual.
Finally we want to set the “values_are_integer” flag for the descriptor,
that is specified as “Integer” in the file column “Type”. We could have
done this during the previous import step, but here we can demonstrate
the update existing data sets with the import wizard.
In the selection list on the left side of the window select
Rec. stat. measure 1,
 Rec. modifier 1 and
 Rec. frequency 1 (see below).
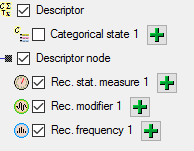
In this step we attach the recommended values to all descriptor nodes,
therefore we will not change anything in the descriptor or descriptor
node but will attach data. In import step Attachment at the right
side select id (see below).
Select the import step Merge from the list.
For Descriptor we select the
Update option because the
“values_are_integer” column shall be updated. For
Descriptor node we select the
Attach option because this tables shall not
be changed. For all other steps Insert
should already be selected, because new entries have to be inserted (see
below).

Deselect every column from import steps
Descriptor and Descriptor node except
“id”. Mark the “id” columns as Key column for
comparison during attachment. The “id” column of import step
Descriptor now looks as shown below.

The “id” column of import step Descriptor
node now looks as shown below.

Selecting the values
In the step table at the right side click on the import step
Rec. stat. measure 1 and in the center
window the assignemt data for the statistical measure (“measure_id”) are
displayed. Click on to make this the decisive
column, further click on For all: and
select entry “Central or typical value (human estimate)” from the drop
down (see below).

Select values for Rec. modifier 1 and
Rec. frequency 1 in the same way, the
actually selected modifier and frequency values do not matter for this
tutorial (see below).


Remark: Although measure_id, modifier_id and frequency_id are
numeric values in the database, the externally visible names are
expected here. Since this names are unambigious, the corresponding ids
will be determined during import.
If you want to insert more than one recommended value of a type, click
on button of the import step at the left side of the
window. Select the new inserted step and supply the “measure_id”,
“modifier_id” or “frequency_id” as described above.
Now we will enter the update of the “values_are_integer” data column.
Select the import step Descriptor and
select the “values_are_integer” line. Click on
From file and select the file column
“Type”. Now click on button to open the
transformation window. As only transformation step select
to insert a translation table and
to insert the values contained in the file column.
For “Integer” the data column value shall be set to “yes” as shown
below.
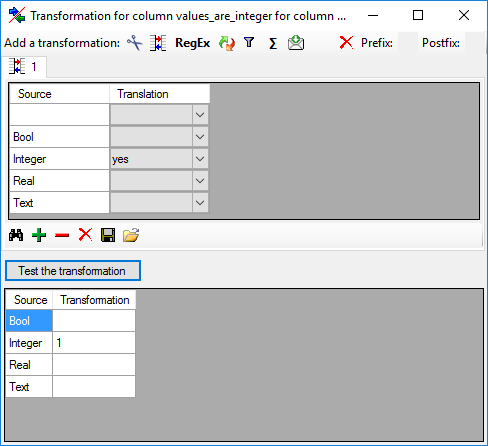
The “values_are_integer” column of import step
Descriptor now looks as show below.

Testing
To test if all requirements for the import are met use the
Testing step.
You can use a certain line in the file for your test and than click on
the Test data in line: button. If there are still unmet
requirements, these will be listed in a window. In our example no error
occured and the test for the fifth data line is shown below.
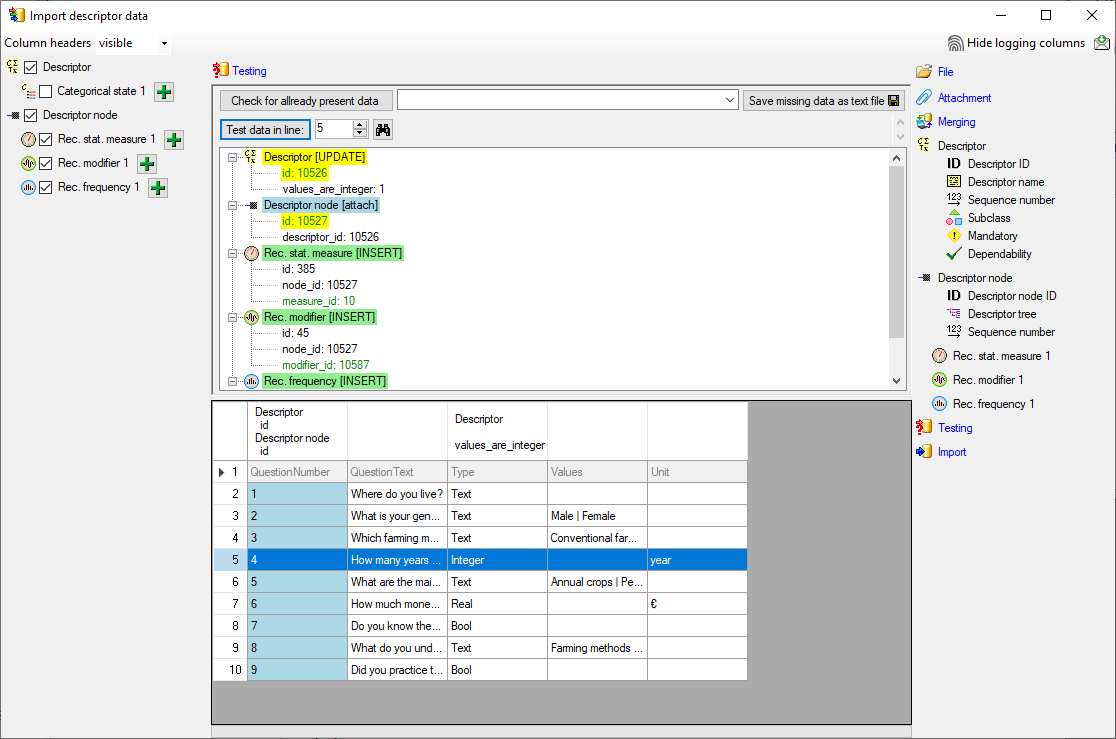
Import
With the last step you can start to import the data into the database.
If you want to repeat the import with the same settings and data of the
same structure, you can save a schema of the current settings. The
imported data lines are marked green (see below).

Next: Step 4 - Import of categorical states for boolean
data
Wizard Tutorial Step 4
Step 4 - Import of categorical states for boolean data
Now we want to import categorical states for the descriptors specified
as “Bool” in the table. In the selection list on the left side of the
window deselect Descriptor node,
Rec. stat. measure 1,
Rec. modifier 1 and
Rec. frequency 1. Select
Categorical state 1, click on the
button to insert a second categorical state and
select it, too (see below).
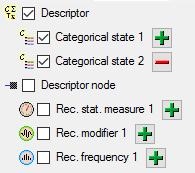
In this step we attach two categorical states named “Yes” and “No” at
those descriptors that are marked as “Bool” in file column “Type”. The
state values are not present in the “Survey_Questions.txt” file, but in
the “Survey_answers.txt” files we can see the values. In import step
Attach at the right
side we select id (see below). It
indicates that we do not want to insert new descriptors but attach data
to an existing descriptor.
Select the import step Merge from the list.
For Descriptor we select the
Attach option because this table shall not be
changed, for Categorical state 1 we select
Insert, because a new entry shall be
inserted (see below).

Deselect every column from import step
Descriptor except “id”. Mark the “id” column as
Key column for comparison during attachment (see below).
Inserting the categorical states
In the import step Categorical state 1
click on Categorical state ID and in the center
window the assignemt data for the categorical state id (“id”) are
displayed. Click on to make this the decisive
column, further click on From file to
select the column “Type” as data source. Now click on button
to define a transformation. In the
tranformation window click on to select a filter,
then select Import fixed value and
enter the value Yes. Now click on the
button choose column “Type” from the file and
enter compare value Bool (see below).

This filter has the following effect: If file column “Type” contains
value “Bool”, the value Yes is
provided for import, otherwise the file row will be ignored. The column
now looks as shown below.
Remark: The Categorical state ID is a number that
is generated automatically from the database when a new categorical
state is created. At first sight it seems confusing that we select a
string for this numeric key. The point is that in the file with the
description data the corresponding catogorical state is idenified by
exactly this categorical state name. Since we select this categorical
state name for the Categorical state ID, the
mapping between these two values will be stored in a separate import
mapping table for the actual import session. In the later import steps
this mapping table will allow to find the correct categorical state.

In the import step Categorical state 1
click on Categorical state name and in the
center window the assignemt data for the categorical state name
(“label”), its abbreviation and detailled description (“abbreviation”
and “details”) are displayed. Select “label” and click on
For all: and enter the value Yes. The column now looks as shown below.

Finally we supply the Sequence number. Select
For all: with 1 (see below).

In the import step Categorical state 2
click on Categorical state ID and in the center
window the assignemt data for the categorical state id (“id”) are
displayed. Click on to make this the decisive
column, further click on From file to
select the column “Type” as data source. Now click on button
to define a transformation. In the
tranformation window click on to select a filter,
then select Import fixed value and
enter the value No. Now click on the
button choose column “Type” from the file and
enter compare value Bool (see below).
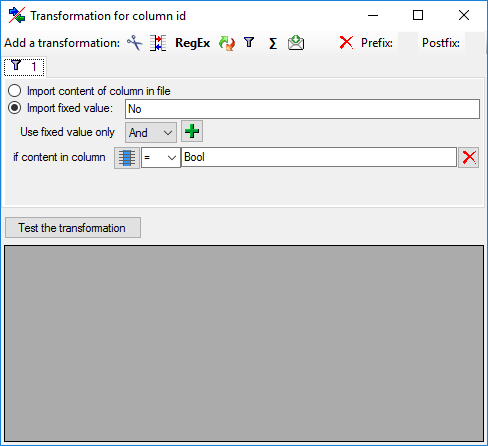
This filter has the following effect: If file column “DataType” contains
value “Bool”, the value No is
provided for import, otherwise the file row will be ignored. The column
now looks as shown below.
In the import step Categorical state 1
click on Categorical state name and in the
center window the assignemt data for the categorical state name
(“label”), its abbreviation and detailled description (“abbreviation”
and “details”) are displayed. Select “label” and click on
For all: and enter the value Yes. The column now looks as shown below.

Finally we supply the Sequence number. Select
For all: with “2” (see below).

Testing
To test if all requirements for the import are met use the
Testing step.
First the test for data line 2 is shown below, which is an example for a
non “Bool” descriptor.
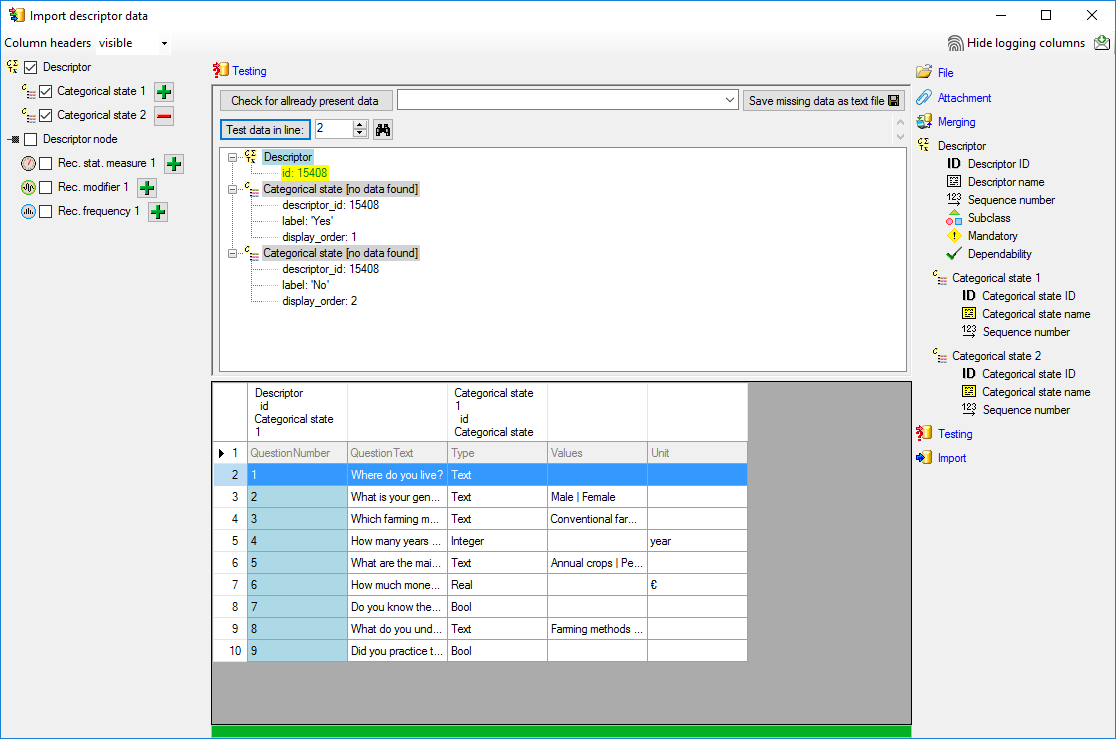
No data shall be inserted. Below the test result for data line 8, a
“Bool” descriptor, is shown.
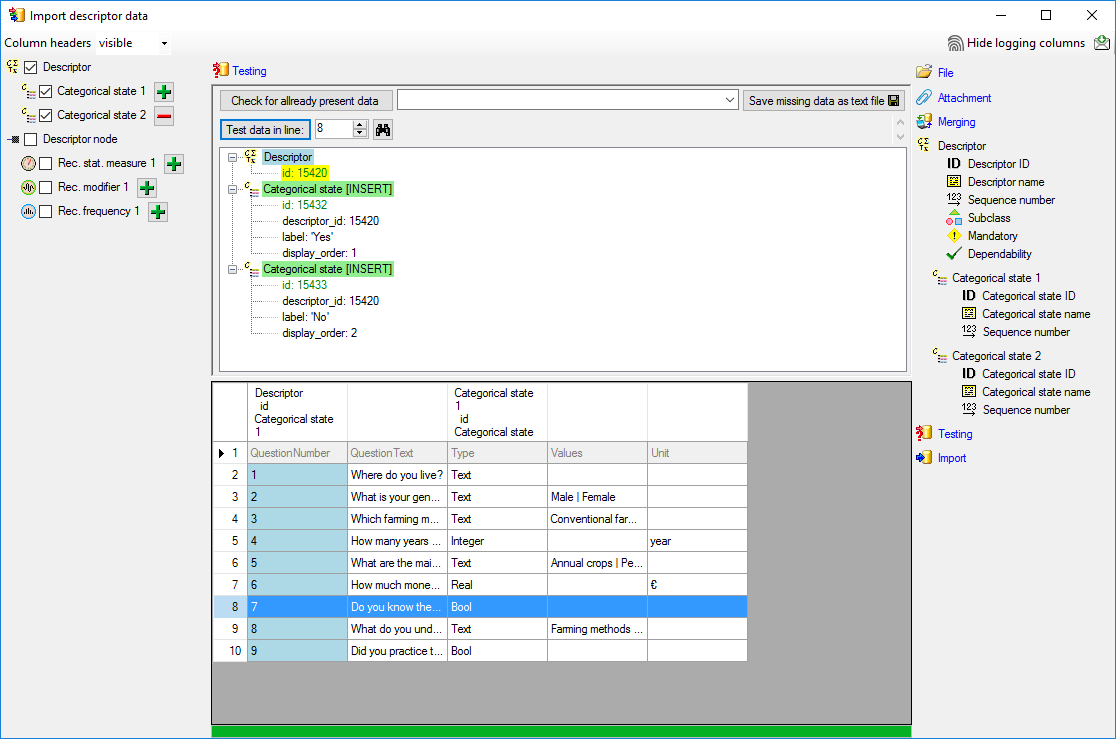
Import
With the last step you can start to import the data into the database.
If you want to repeat the import with the same settings and data of the
same structure, you can save a schema of the current settings. The
imported data lines are marked green, the
ignored data lines grey
(see below).
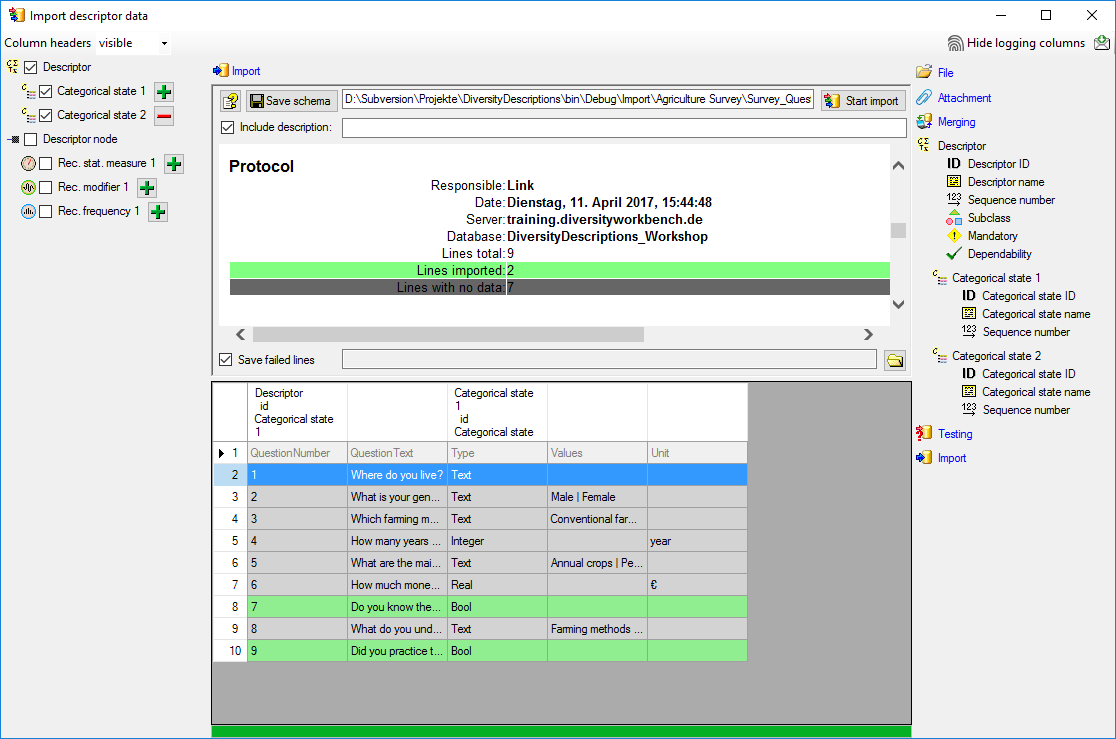
Next: Step 5 - Import of categorical states and update of
descriptor
Wizard Tutorial Step 5
Step 5 - Import of categorical states and update of descriptor data
Now we want to import the categorical states that are specified in file
column “Values” and set the subclass for those descriptors from “text”
to “categorical”. In the selection list on the left side of the window
 Descriptor,
Categorical state 1 and Categorical state
2 are still selected and Descriptor
node 1 is deselected (see below). Furthermore the descriptor id is
selected for attachment.
Descriptor,
Categorical state 1 and Categorical state
2 are still selected and Descriptor
node 1 is deselected (see below). Furthermore the descriptor id is
selected for attachment.
Since we want to change the descriptor data, we have to change the
import step Merge from the list.
For Descriptor we select the
Update option (see below).

In the import step Descriptor click on
Subclass, select file column “Values” and click
on button to open the transformations. By
clicking the delete button the transformations of
previous steps are removed. In the tranformation window click on
to select a filter, then select
Import a fixed value and enter the
value categorical. Now click on the
button choose column “Values” from the file
and select <not equal> blank (see below).
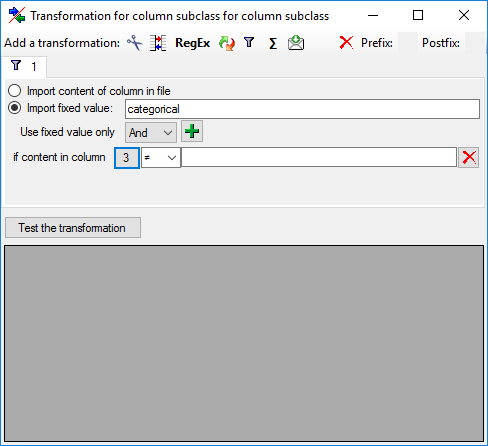
This filter will provide the value “categorical” for database column
“subclass” if file column “Values” is not empty. If “Value” is empty, no
value is provided and the “subclass” stays unchanged. The column now
looks as shown below.

Inserting the categorical states
A closer look on the “Values” file column shows that the states are
provided as a list of values separated by the pipe symbol and blanks ("
| “). To get the single state values, we have to split off a value at
the string " | “. This value will then be used for the
Categorical state ID and the
Categorical state name.
In the import step Categorical state 1
click on Categorical state ID and in the center
window the assignemt data for the categorical state id (“id”) are
displayed. Click on to make this the decisive
column, further click on From file to
select the column “Values” as data source. Now click on button
to define a transformation.
In the tranformation window click on the cut
transformation, enter Position: 1,
click on to enter splitter character | (blank, pipe, blank). By clicking on button
[Test the tranformation] you can check the transformation results
(see below).
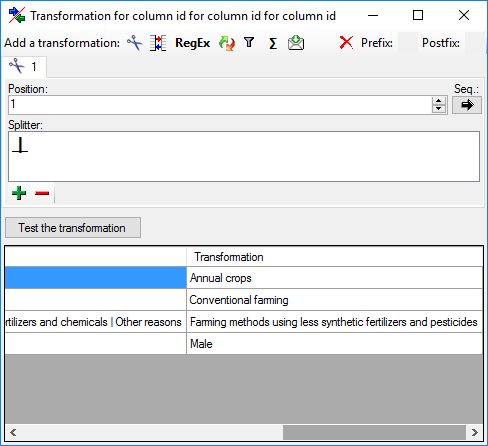
The column now looks as shown below.

Remark: The Categorical state ID is a number that
is generated automatically from the database when a new categorical
state is created. At first sight it seems confusing that we select a
string - the catigorical state name - for this numeric key. The point is
that in the file with the description data the corresponding catogorical
state is idenified by exactly this categorical state name. Since we
select this categorical state name for the
Categorical state ID, the mapping between these two values will be
stored in a separate import mapping table for the actual import session.
In the later import steps this mapping table will allow to find the
correct categorical state.
Now supply exactly the same filter settings for
Categorical state name but do not mark it as decisive column (see
below).

Finally we supply the Sequence number. Select
For all: with 1 (see below).
And now there is some “fun”:
The longest entry in column “Values” contains four entries separated by
pipes and blanks. Therefore click two more times on the
button of step
Categorical state 1 on the left side and select the new steps
Categorical state 3 and
Categorical state 4. For each of the
remaining steps supply the columns in the same way as for
Categorical state 1, but increase the
Position: value in the cut transformations and
the For all: value in Sequence number.
Testing
To test if all requirements for the import are met use the
Testing step.
The test for data line 9, where all eleven descriptor states are
present, is shown below.
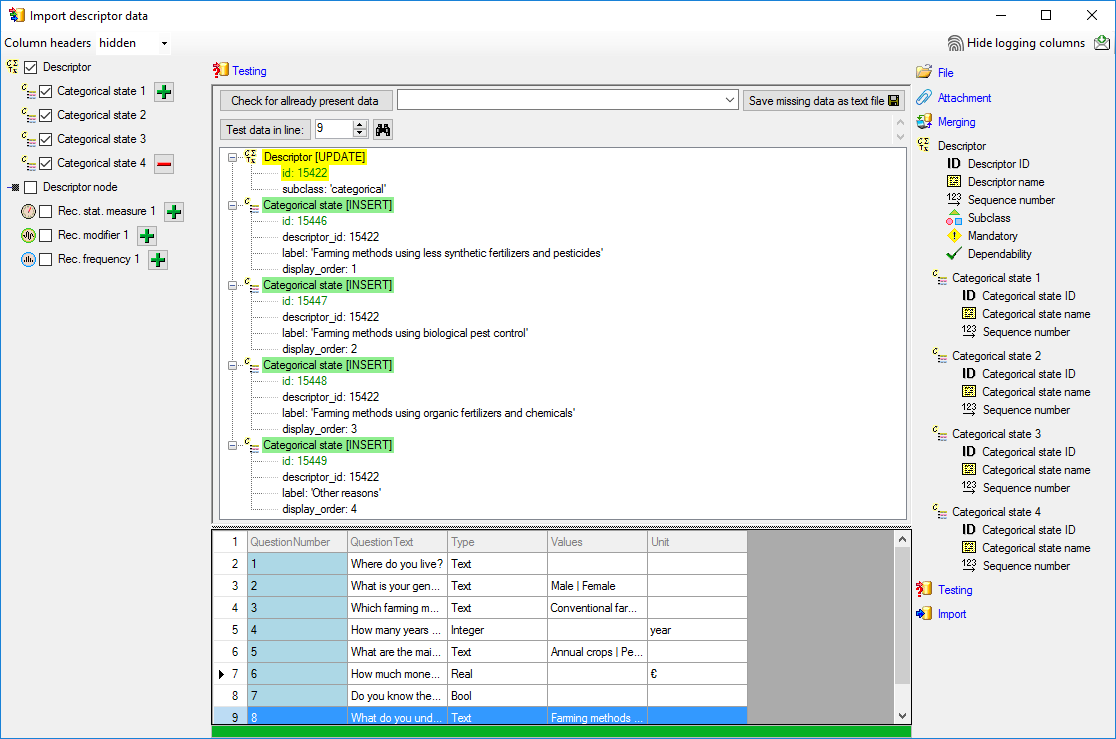
Import
With the last step you can start to import the data into the database.
If you want to repeat the import with the same settings and data of the
same structure, you can save a schema of the current settings. There
were 4 lines that contained descriptors (see below).

Next: Step 6 - Import of
descriptions
Wizard Tutorial Step 6
Step 6 - Import of descriptions
Choose Data → Import -> Wizard ->
Import descriptions … from the menu. A window
as shown below will open to select an import session. Select session for
project “MycoPhylogenyNet”.
After clicking [OK] the following window opens that will lead you
through the import of the description data.
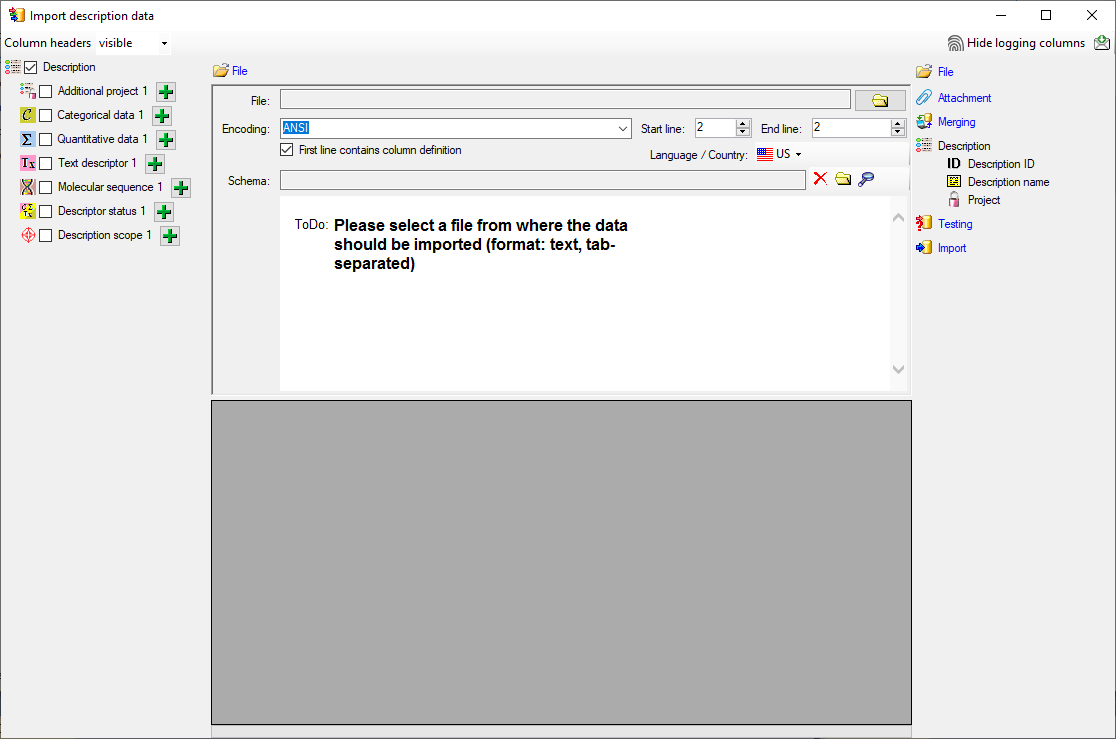
Choosing the File
Choose step File an open file
“Survey_Answers.txt”. The chosen encoding ANSI of the file should be
sufficiend. The file column “ClientNumber” contains the description
names that shall be imported. Since there are no other description
specific data, the same column will be used for the as unique ID to
identify each description.
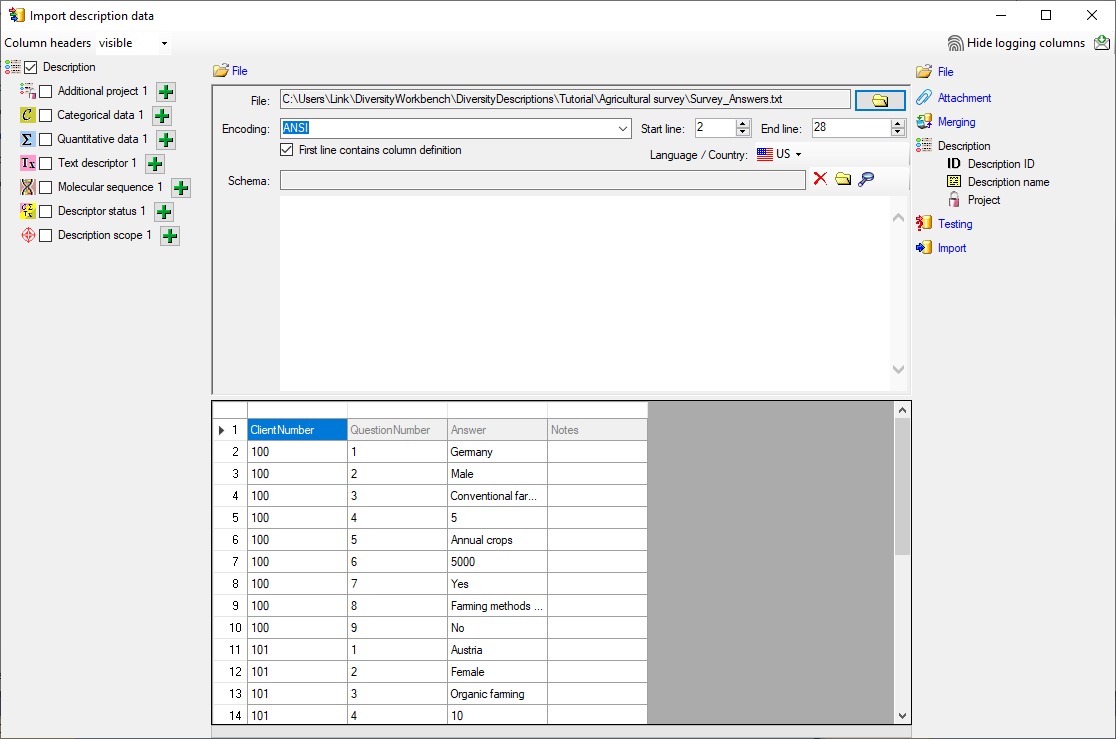
Selecting the data ranges
In the selection list on the left side of the window all possible import
steps for the data are listed according to the type of data you want to
import.
Since each description name rsp. ID occurs in several lines of the file,
subsequent tries to import the same description would cause errors, if
the standard merge handling Insert was
used. We have to change the import step Merge from the list.
For Description we select the
Merge option (see below).

The step Description is already selected
and cannot be de-selected (see above). In the step table at the right
side you find the import step Descriptor and
below the data groups of the import step. Click on
Description ID and in the center window the assignemt data for the
description id (“id”) are displayed. Click on
to make this the decisive column and on to allow the
merge comparison, further click on From
file to select the column “ClientNumber” as data source. After that
the column should look as shown below.

Now the description name must be selected, therefore click on
Description name. The center window shows two
data columns: “label” and “detail”. Click on
From file in the “label” line to
select file column “ClientNumber”. After that the columns should look as
shown below.

Finally select import step Project, select
data column “project_id”, choose For
all: and select entry “Agricultural survey” from the drop down (see
below). With this adjustment every imported description will
automatically be assigned to that project.

Remark: Although project_id is a numeric value in the database, the
externally visible project name is expected here. Since this name is
unambigious, the corresponding id will be determined during import.
Testing
To test if all requirements for the import are met use the
Testing step.
The test for the first data line is shown below.
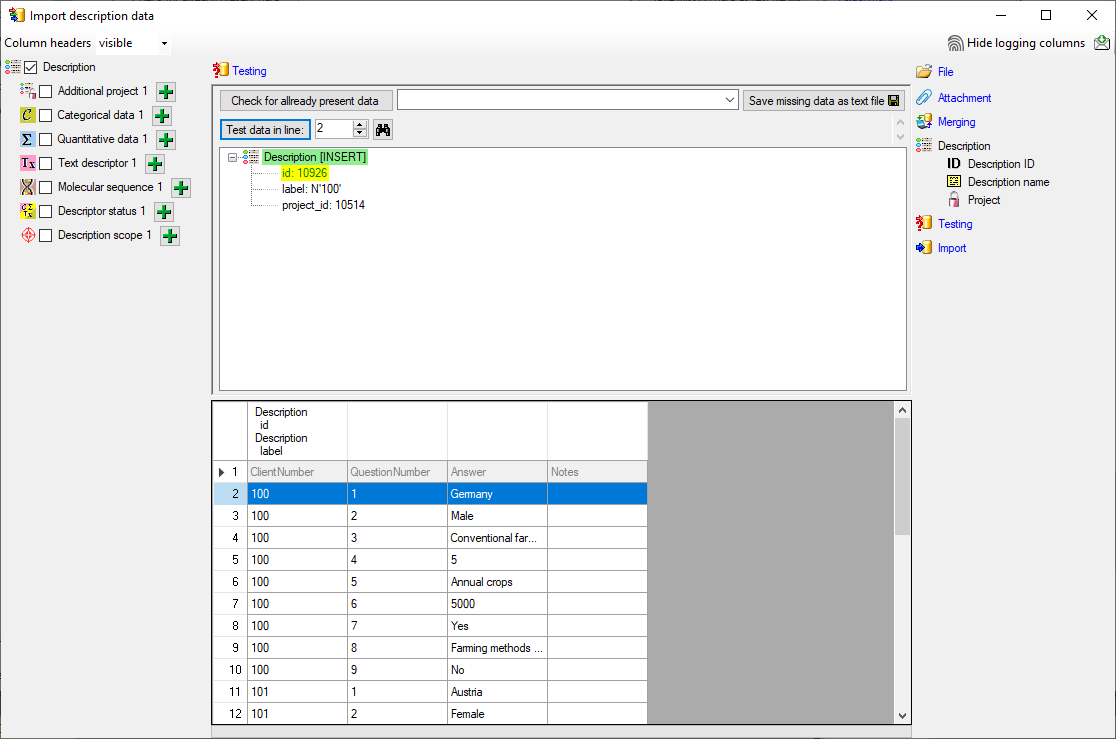
Import
With the last step you can start to import the data into the database.
If you want to repeat the import with the same settings and data of the
same structure, you can save a schema of the current settings. There
were three different descriptions (see below).

Next: Step 7 - Import of description
data
Wizard Tutorial Step 7
Step 7 - Import of description data
In this step we attach categorical, quantitative and text data to the
descriptions. In import step Attach at the right
side we select id (see below). It
indicates that we do not want to attach data to an existing description.
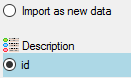
Select the import step Merging from the list.
For Description we select the
Attach option because this table shall not be
changed (see below).

Deselect every column from import step
Description except “id”. The “id” column was already marked as
Key column for comparison in the previous step.
Now the column looks as shown below.

Inserting text descriptor data
We will now include the text, quantitative, categorical and status data
step by step. First we will attach the text descriptor data. Select the
 Text descriptor 1 step at the left (see
below).
Text descriptor 1 step at the left (see
below).
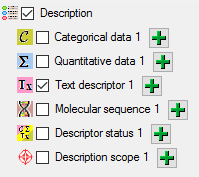
At the right side you find the import step
Text descriptor 1 and below the data groups of the import step. Click
on Descriptor ID and in the center window the
assignemt data for the referenced descriptor’s id (“descriptor_id”) are
displayed. Click on From file to
select the file column “QuestionNumber” as data source. After that the
column should look as shown below.

Now the description text must be selected, therefore click on
Text. The center window shows two data
columns: “content” and “notes”. In line “content” click on
to make it the decisive column, further on
From file to select file column
“Answer”. In line “notes” click on From
file to select file column “Notes”. After that the columns should look
as shown below.

Testing the text descriptor data import
To test if all requirements for the import are met use the
Testing step.
The test for the first data line is shown below.
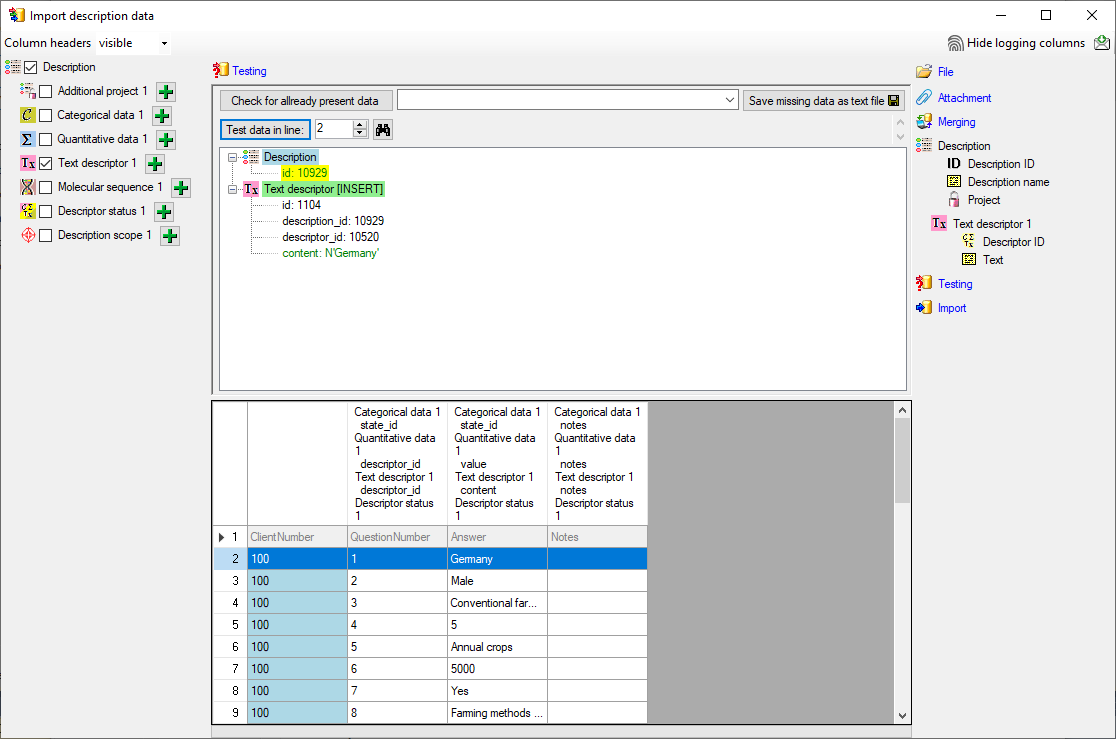
An additional test is done for the next data line. This line contains no
text data but a categorical state. You can see below that this line will
not be imported as text descriptor data, because the descriptor (given
by Descriptor ID) is automatically checked for
the correct type.
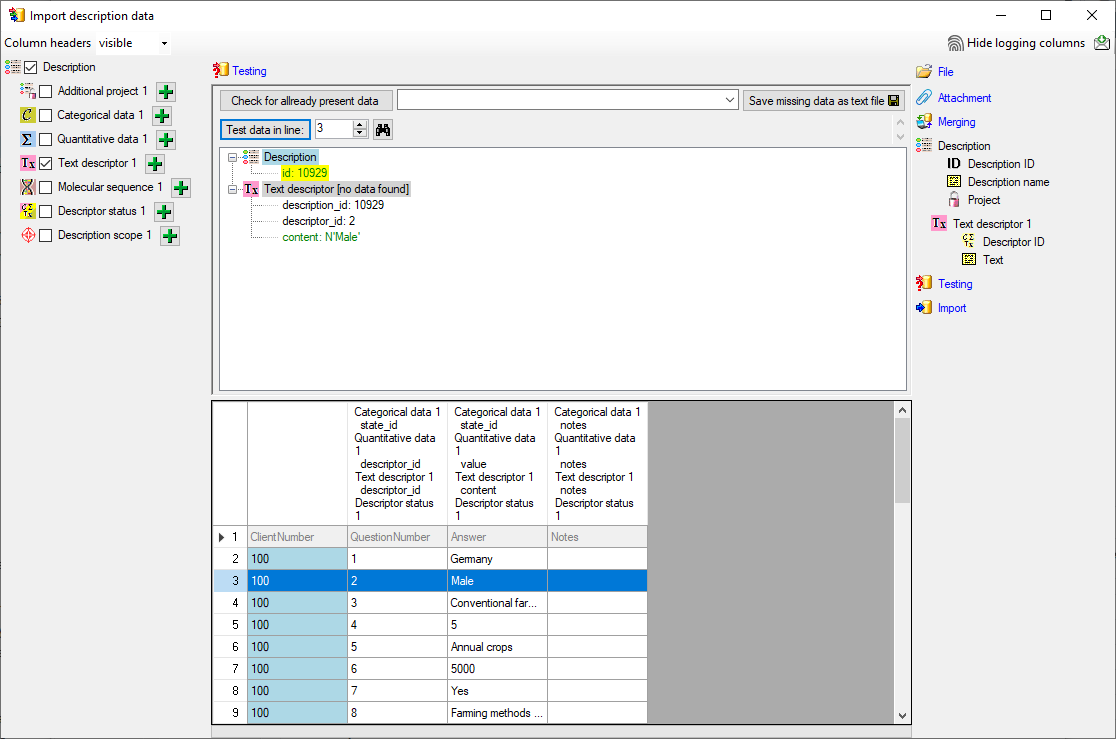
Inserting quantitative summary data
We will now include the quantitative summary data. Select the
 Quantitative data 1 step (see below).
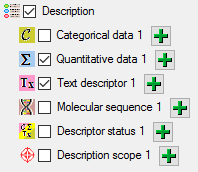
At the right side you find the import step
Quantitative data 1 and below the data groups of the import step.
Click on Descriptor ID and select the file
column “QuestionNumber” as data source.
Now the value must be selected, therefore click on
Value. The center window shows two data columns: “value” and
“notes”. In line “value” click on to make it
the decisive column, further on From
file to select file column “Answer”. In line “notes” click on
From file to select file column
“Notes”. After that the columns should look as shown below.

For quantitavie measures you must specify which statistical measure is
given by the value. We assume all imported values are mean values,
therefore click on the import step
Statistical measure and in the center window the assignemt data for
the statistical measure (“measure_id”) are displayed. Click on
For all: and select entry “Central or
typical value (human estimate)” from the drop down (see below).

Testing the quantitative summary data import
To test if all requirements for the import are met use the
Testing step.
The test for data line 25 with integer data is shown below.
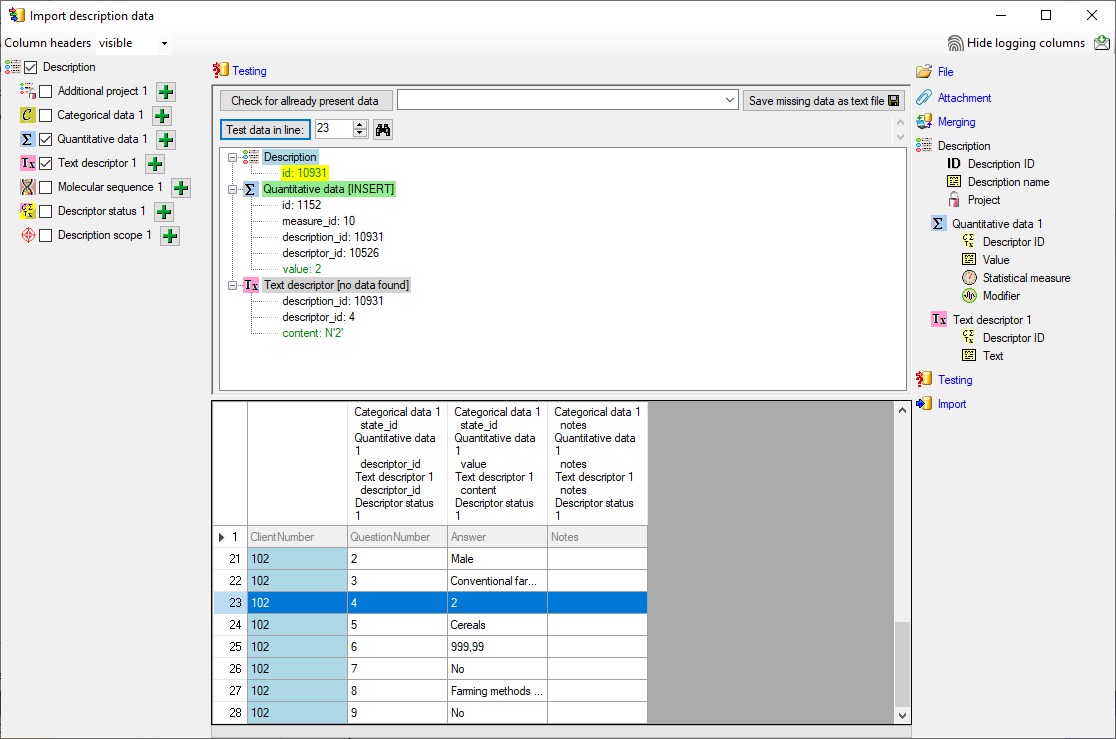
The test for data line 25, which contains real number fails (see
below).
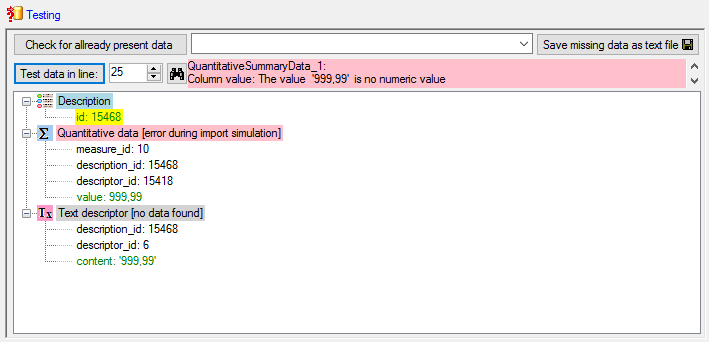
A closer look on the data in column “Answer” shows that the decimal
separator is a comma, because the table has been generated by a progam
using the German localization. The database expects a decimal point as
separator. To interpret the localized file values correctly, select the
step File and choose Language /
Country:  de (see below).
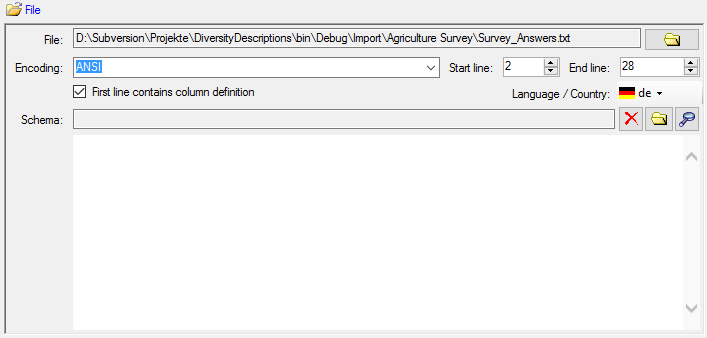
With this settings the test now works fine (see below).
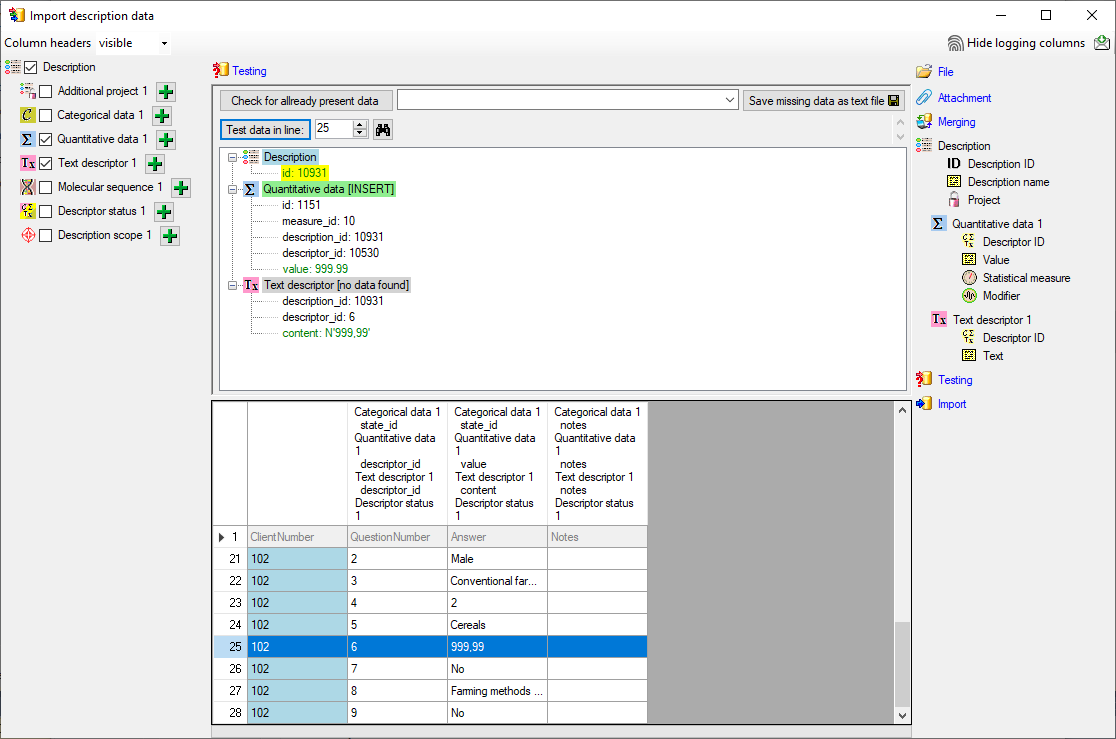
Inserting categorical summary data
Now we will include the categorical summary data. Select the
 Categorical data 1 step at the left (see
below).
Categorical data 1 step at the left (see
below).
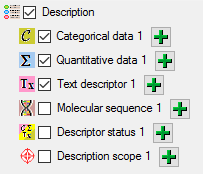
At the right side you find the import step
Categorical data 1 and below the data groups of the import step. Click
on Categorical state ID. The center window
shows the data column “state_id”. Click on to
make it the decisive column, further on
From file to select file column “Answer”. If you perform a quick
import test you will see that this setting works perfectly for data file
lines 3, 4 and 6, but fails for line 8 (see below).
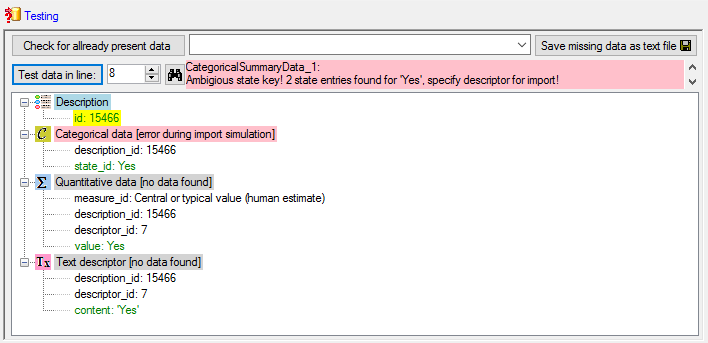
The reason is that we used the state name as external key for the
categorical state. For the descriptors 6 and 8, which both represent
boolean values, the states names are ambigious (“Yes” and “No” for both
descriptors), therefore the import wizard does not know which descriptor
shall be used. To overcome this ambiguity the
Categorical state ID step allows the additional specification of the
descriptor id. Select import step
Categorical state ID. In the center click on the
button at the end of line “state_id”. Select file column
“QuestionNumber”, which contains the reference to the descriptor and
enter the separator character | (pipe
symbol) in field Pre.: of the new line. After that the column should
look as shown below.

If you repeat the quick import test for line 8, it will now work.
Now click on Notes. The center window shows
the data column “notes”. Click on From
file to select file column “Notes”. After that the columns should look
as shown below.

Testing the categorical summary data import
To test if all requirements for the import are met use the
Testing step.
The test for data line 15 with categorical data and notes is shown
below.
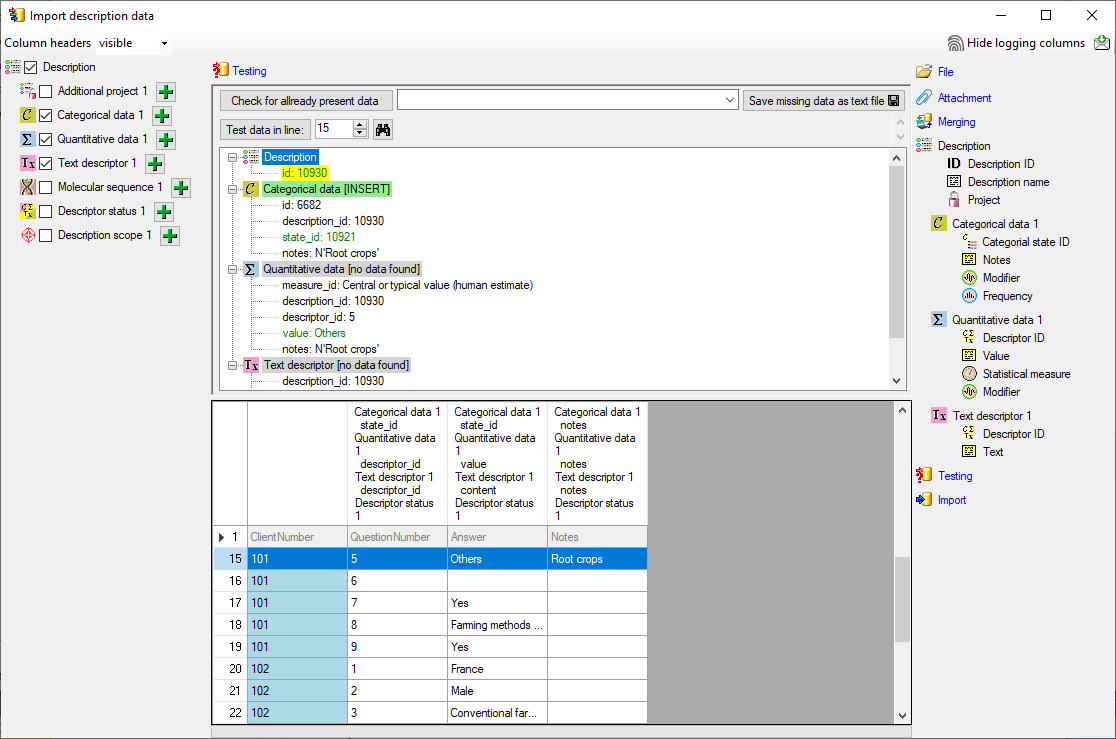
Inserting the descriptor status data
There is an empty lines in the file. For this line we want to set the
descriptor status “Data unavailable” to indicate that the descriptor
should be present in the description. Select the
 Descriptor status 1 step at the left (see
below).
Descriptor status 1 step at the left (see
below).
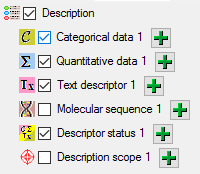
At the right side you find the import step
Descriptor status 1 and below the data groups of the import step.
Click on Descriptor ID and select the file
column “QuestionNumber” as data source. Furthermore click on
Notes and select the file column “Notes”.
Now click on  Data status. The center window
shows the data column “statusdata_id”. Click on
to make it the decisive column, further on
From file to select file column
“Answer”. Now click on button to define a
transformation. In the tranformation window click on
to select translation. In the translation
window click the button to list the values
contained in the file column. For the empty entry in the first line
select the translation value “Data unavailable” (see below). All data
entries will therefore be mapped to “empty”, i.e. no data status will be
set. Only if the data file line ist empty, the selected data status will
be inserted.
Data status. The center window
shows the data column “statusdata_id”. Click on
to make it the decisive column, further on
From file to select file column
“Answer”. Now click on button to define a
transformation. In the tranformation window click on
to select translation. In the translation
window click the button to list the values
contained in the file column. For the empty entry in the first line
select the translation value “Data unavailable” (see below). All data
entries will therefore be mapped to “empty”, i.e. no data status will be
set. Only if the data file line ist empty, the selected data status will
be inserted.
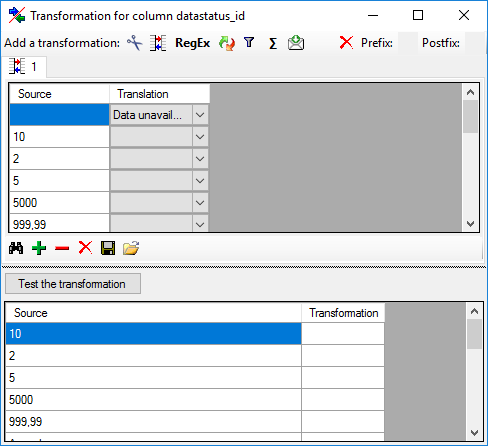
Testing the descriptor status data import
To test if all requirements for the import are met use the
Testing step.
The test for data line 16 is shown below.
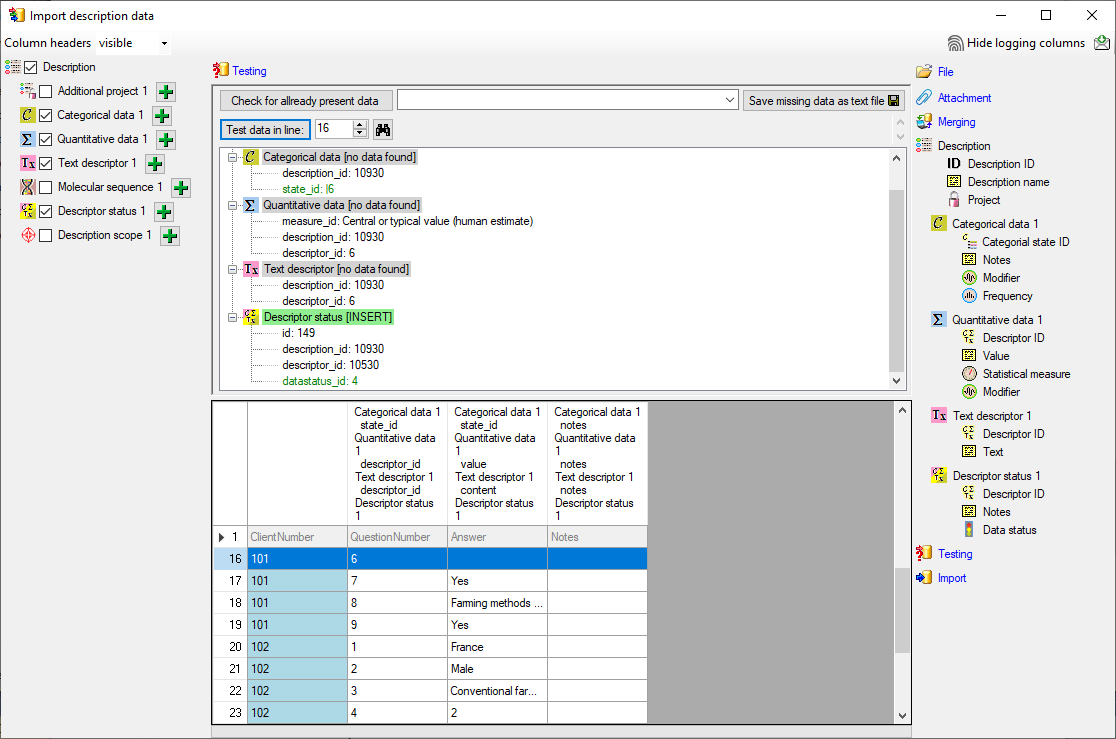
Import
With the last step you can start to import the data into the database.
If you want to repeat the import with the same settings and data of the
same structure, you can save a schema of the current settings. There
were 26 lines imported and one failed line (see below).
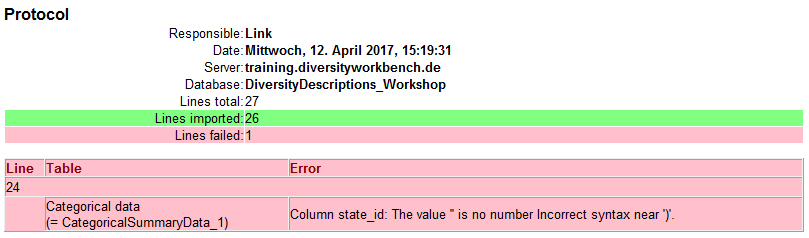
The erroneous lines are stored into separate text file (e.g.
“Survey_AnswersError.txt”) for a detailled analysis and a separate
import after error corrections. In our example the error is caused by
the undefined value “Cereals” in the “Answer” column of file line 24.
Next: Epilogue
Wizard Tutorial Step Epilogue
Epilogue
When you close the import wizard and start a query for descriptions of
project “Agricultural survey” you will find the three datasets and the
imported descriptor data (see image below).
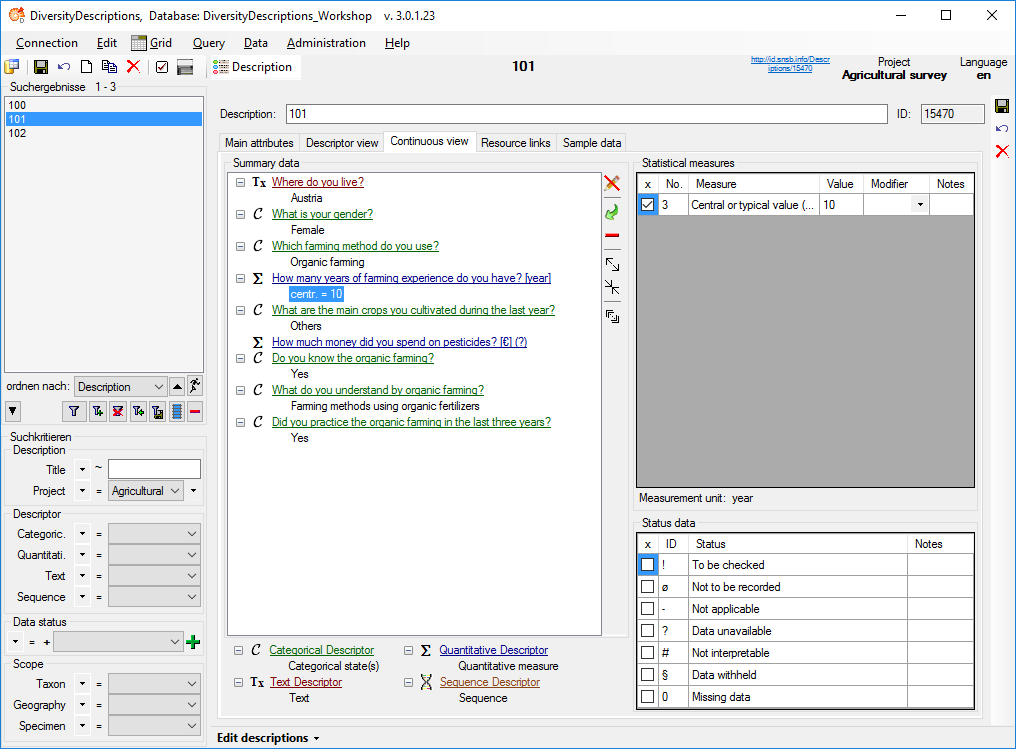
Finnally two more aspects of the imports wizard shall be discussed from
a retrospective view. The first one concerns the mapping of external and
internal keys and the role of the import session. The second one takes a
closer look on the role of the “ID” columns during import.
Mapping of external and internal keys
When opening the import wizard you have to select rsp. create an import
session. Imports into Diversity Descriptions usually require at least
two import operations, e.g. for descriptors and descriptions. The
description data reference descriptors or categorical states. Within the
database those relations are built based on numeric values that are
provided by the database during creation of the corresponding objects.
In the external data files the relations are usually built by numbers
coordinated by the user (“QuestionNumber”) or by the entity names.
The import session stores the external and internal key values in
separate database tables and therefore builds a bracket around the
different import operations. Each import session is assigned to one
project, but for each project several import sessions may be created.
The mapping data may be viewed by opening the menu item Data ->
Import -> Wizard ->
Organize sessions …, selecting the
session and clicking the button Mapping (see
image below).
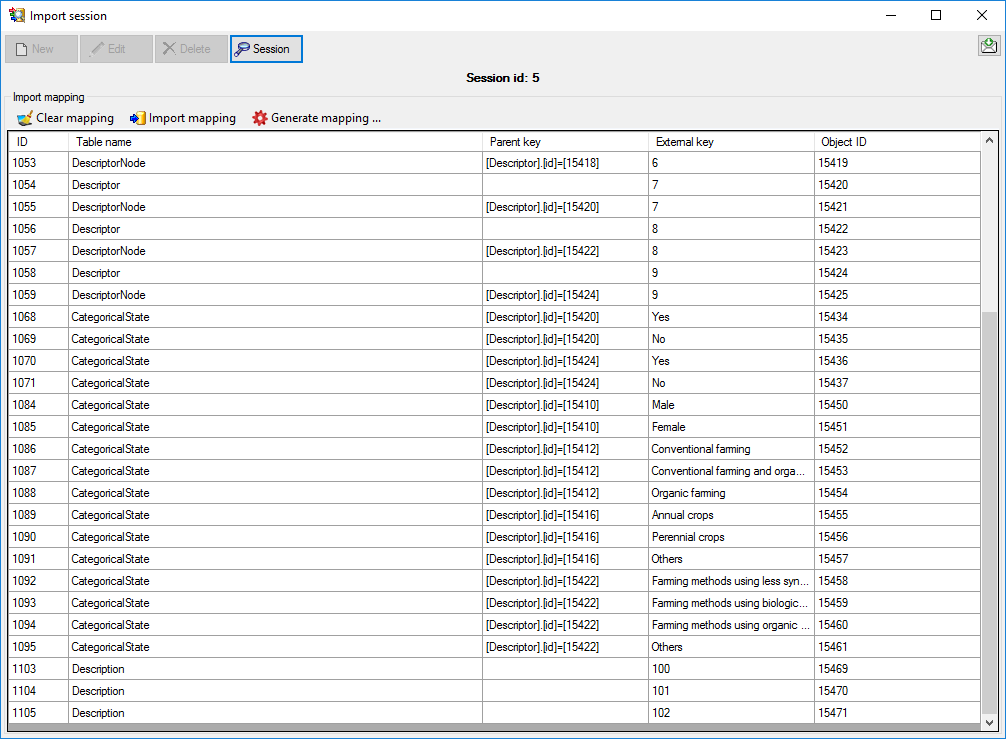
Selecting import columns for the “ID” fields
As an addition to the tutorial steps a closer look on the role of the
“ID” fields shall be taken. In principle the most important IDs during
import concern the Descriptor ID and the
Categorical state ID during descriptor import. To
decide which file column shall be used for that values during import, it
is important to know how these elements are referenced in the other
files.
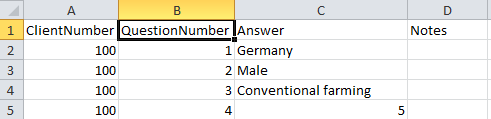
For the descriptor import, you should take a look at the description
data table (see above), which is part of the tutorial example. The
descriptor is referenced by column “QestionNumber”, which
matches homonymous column of the descriptor data table (see below).
Therefore the natural approach is to use this column as input for the
Descriptor ID during the descriptor import. Since
in most practical cases the descriptors will have a numbering column,
which is used in the referencing table. Surely more variety exists in
the way the categorical states are listed in the descriptor data file
and the way they are referenced by the description data file.

In the tutorial the first complication is that the possible states are
all concatenated, separated by a semicolon, into a single column of the
descriptor data file. This causes some effort in the transformation,
because the states have to be splitted into the single values. The
question is, what is the Categorical state ID?
The answer can be found in the upper table, because the state name is
explicitely mentioned in the description data file as reference. I.e.
for the descriptor import the state name must be used for the
Categorical state ID, too.
In Diversity Descriptions the categorical state names must be unique in
relation to their descriptor. But different descriptors may have states
with the same names. In our example this situation occures with the two
boolean descriptors (states “Yes” and “No”) and the state value
“Others”, wich is used by two descriptors. Therefore it is generally
recommended to specify the descriptor for the import of categorical
summary data as demonstrated in the tutorial.
Wizard Columns
Import wizard - Columns
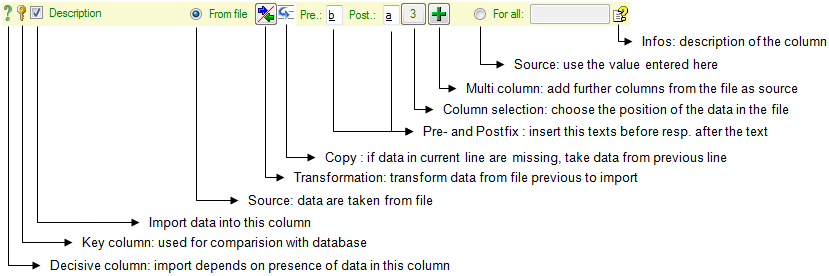
If the content of a file should be imported into a certain column of a
table, mark it with the checkbox.
Decisive columns
The import depends upon the data found in the file where certain columns
can be choosed as decisive, that means only those lines will be imported
where data are found in any of these
columns. To mark a column as decisive, click on the
icon at the beginning of the line (see below).

In the example shown below, the file column Organims 2 was marked as decisive.
Therefore only the two lines
containing content in this column will be imported.

Key columns
For the options Merge,
Update and
Attach the import compares the data from the file with those already
present in the database. This comparision is done via key columns.
To make a column a key column, click on the icon at
the beginning of the line. You can define as many key columns as you
need to ensure a valid comparision of the data.
Source
The data imported into the database can either be taken
From file or the same value that you
enter into the window or select from a list can be used
For all datasets. If you choose the
From file option, a window as shown below will pop up. Just click in
the column where the data for the column should be taken from and click
OK (see below).
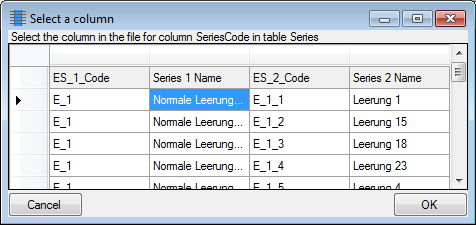
If you choose the For all option, you
can either enter text, select a value from a list or use a
checkbox for YES or NO.
The data imported may be transformed e.g. to adapt them to a format
demanded by the database. For further details please see the chapter
Transformation.
Copy
If data in the source file are missing in subsequent lines as shown
below,
you can use the  Copy line option to fill in
missing data as shown below where the blue
values are copied into empty fields during the import. Click on
the button to ensure that missing values are
filled in from previous lines.
Copy line option to fill in
missing data as shown below where the blue
values are copied into empty fields during the import. Click on
the button to ensure that missing values are
filled in from previous lines.
Prefix and Postfix
In addition to the transformation of the values from the file, you may
add a pre- and a postfix. These will be added after the transfromation
of the text. Double-click in the field to see or edit the content. The
pre- and a postfix values will only be used,
if the file contains data for the current
position.
For the datatype geography the pre- and postfixes will be automatically
set to enable the import. The preset values by default are set for
points as geographical units. You may change this to predefined types
like lines or areas. Click on the button at the
end of the line to open the information window. Here you can choose
among the types mentioned above (see below).
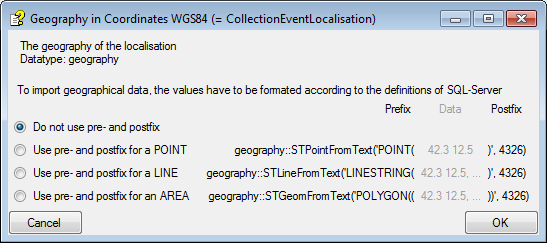
Column selection
If for any reason, a column that should take its content from the
imported file misses the position of the file or you want to change the
position click on the button. In case a
position ist present, this button will show the number of the column. A
window as shown below will pop up where you can select resp. change the
position in the file.
Multi column
The content of a column can be composed from the content of several
columns in the file. To add additional file columns, click on the
button. A window as shown below will pop up, showing
you the column selected so far, where the sequence is indicated in the
header line. The first
colum is marked with a blue background while the added columns are marked with
a green background (see below).
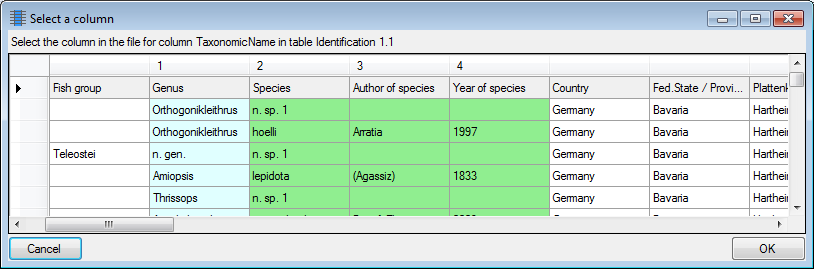
To remove a added column, use the button (see
below).

The button opens a window displaying the
informations about the column. For certain datatypes additional options
are included (see Pre- and Postfix).


 or uncheck it to suppress the BOM (image below).


