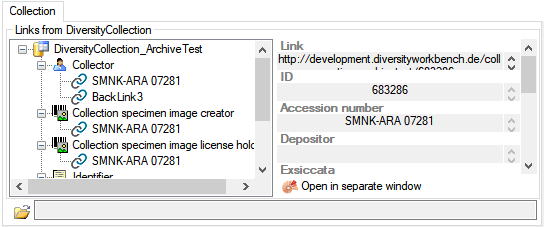
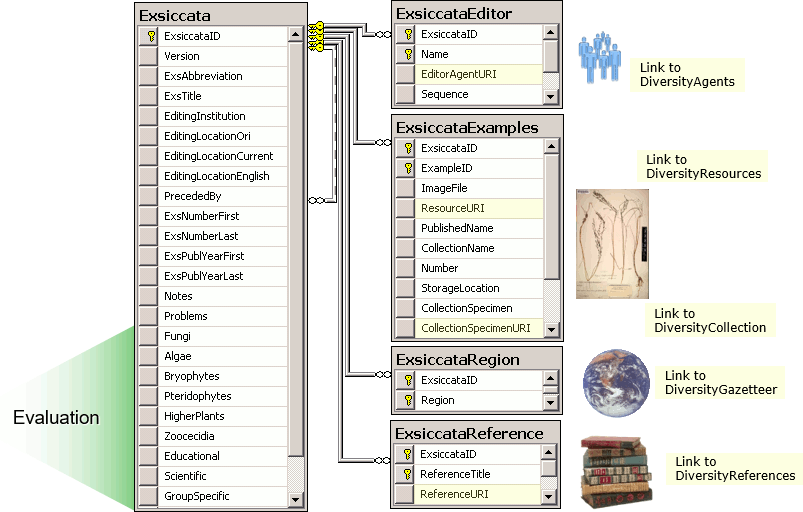
Diversity exsiccatae
Login Administration
To administrate the logins on the database server, their permissions and
roles respectively as well as access to projects choose
Administration - Database - Logins ... from the menu. A window
will open as shown below.
To set the website where information about details concerning the
General Data Protection
Regulation
are shown, click on the  button.
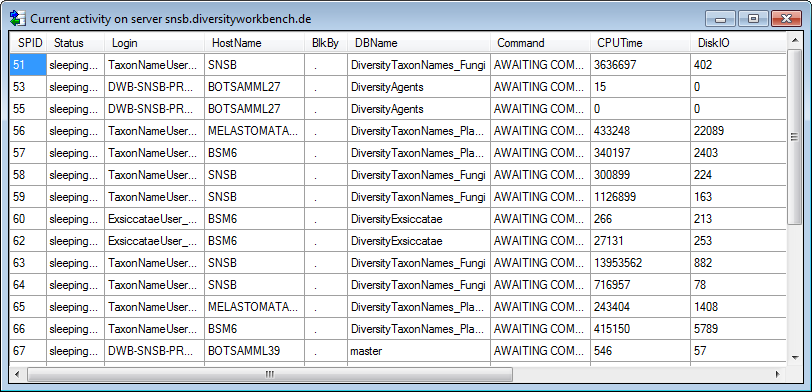
To see the current activity on the server click on the
 button. A window as shown below will open
listing all user related processes on the server.
button. A window as shown below will open
listing all user related processes on the server.
To administrate the linked servers, click on the
 button.
To send a feedback click on the  feedback button.
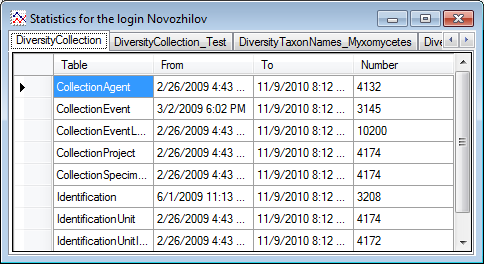
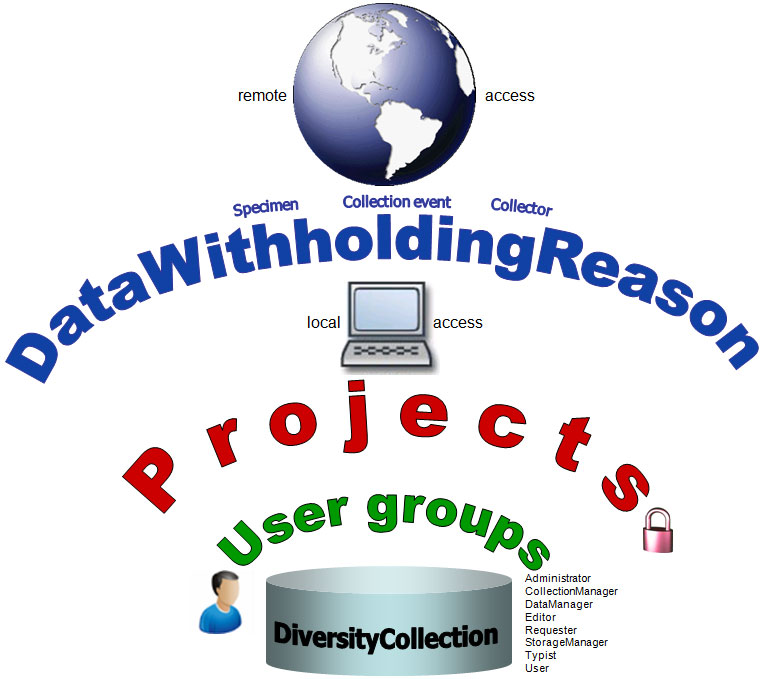
Statistics
To see the activity of a login click on the  button. A window will open as shown below listing all databases and
tables together with the time span (From - To) and the number of data
sets where any activity of the current login has been found.
button. A window will open as shown below listing all databases and
tables together with the time span (From - To) and the number of data
sets where any activity of the current login has been found.
Creation of login
To create a new login click on the  button. A
window will open as shown below. A login that should be able to create
new logins must to be a System administrator.
button. A
window will open as shown below. A login that should be able to create
new logins must to be a System administrator.
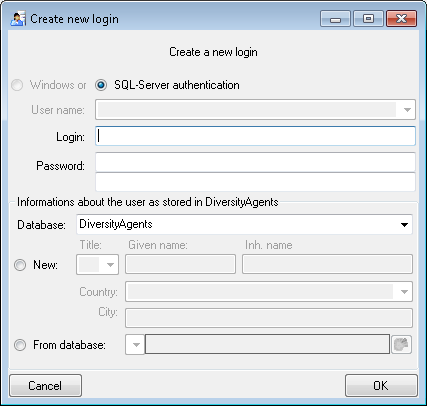
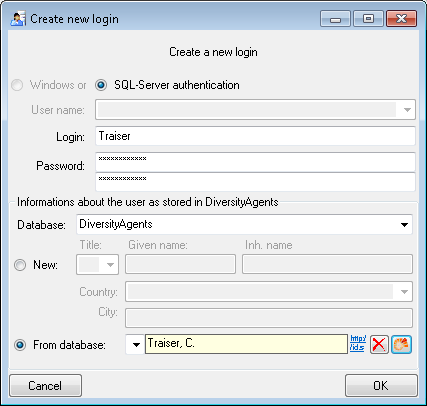
Here you can enter the name of the new login, the password and the
information about the user which will be stored in a DiversityAgents
database. You may either create a new entry in this database or select
an existing one: Click on the  DWB button
to search for a name in the database (see below).
DWB button
to search for a name in the database (see below).
Copy a login
To copy a login including all permissions etc. into a new login, select
the original login in the list and click on the
 button.
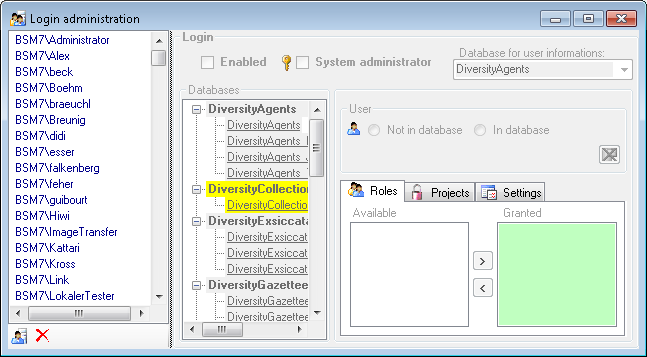
Edit a login
To edit the access for a login on the server select the login in the
list. If a login should be disabled , uncheck
the enabled checkbox (see below).

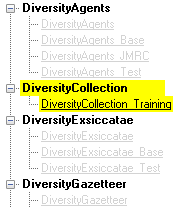
All databases on the server will be listed with the current database
showing a yellow background. The databases where the login has [no
access] will be listed in
[gray] while the databases accessible for a
login are black.
Access of a login to a database
To allow the access to a database select the database from the list and
choose database as shown below.

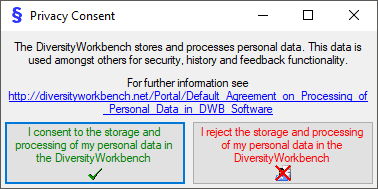
The state  and date of
the privacy consent according to the General Data Protection
Regulation
is shown in dependence of the selected database.
and date of
the privacy consent according to the General Data Protection
Regulation
is shown in dependence of the selected database.
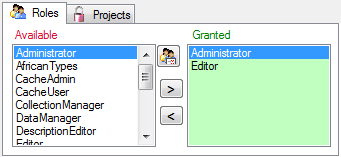
Roles of a login in a database
Use the > and < buttons to add or remove roles for the login
in the database (see below).
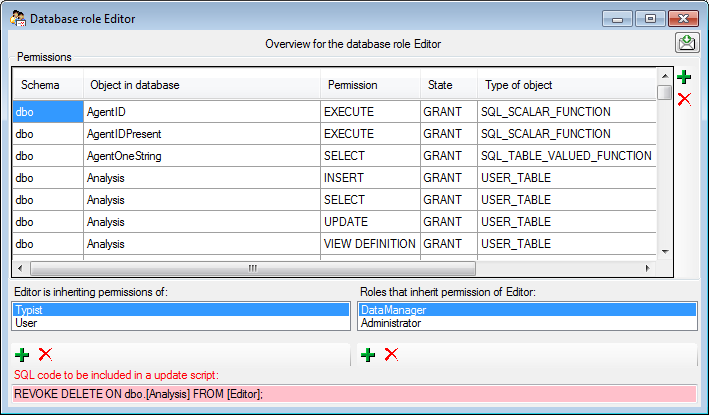
To see the detailed permissions of a role, select it in the list of
[Available] roles and click on the
 button. A window as shown below will open
listing all objects in the database the role has permissions for (see
below).
button. A window as shown below will open
listing all objects in the database the role has permissions for (see
below).
As a database owner you can edit the permissions and role memberships
with the  and
and  buttons. Please
keep in mind that any change of the permissions may cause serious
troubles and should only be used for testing and bug fixing. The final
setting of the permissions should be performed by a proper update script
of the database. For every action you will get the code that is to be
included in an update script (see below).
buttons. Please
keep in mind that any change of the permissions may cause serious
troubles and should only be used for testing and bug fixing. The final
setting of the permissions should be performed by a proper update script
of the database. For every action you will get the code that is to be
included in an update script (see below).
Projects for a login in a database
Depending on the database you can edit the list of projects accessible
for a login (see below). Projects are related to the module
DiversityProjects. To get additional information about a project select
it in the list and click on the
button.

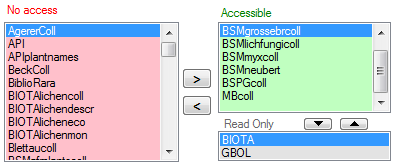
Starting with database version 02.05.35 next to the projects with full
access, a second list provides projects with [Read
Only] access (see image
below). Use the  and
and  buttons to
move projects between Accessible and Read Only. If a
project is set on [Read Only]
a user can still add annotations. Starting with
version 4.3.219 a project as a whole can be locked with the restriction
of access to read only. For more details see chapter Project
administration.
buttons to
move projects between Accessible and Read Only. If a
project is set on [Read Only]
a user can still add annotations. Starting with
version 4.3.219 a project as a whole can be locked with the restriction
of access to read only. For more details see chapter Project
administration.
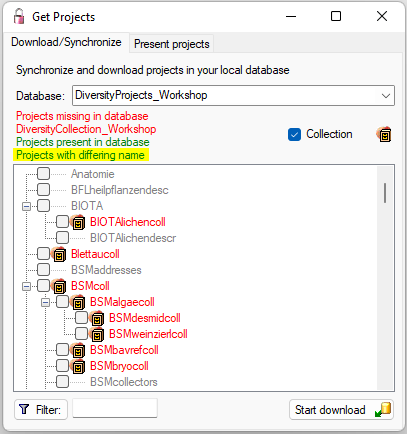
To load additional projects click on the Load projects
 button. A window will open as shown below.
Projects already in the database will be listed in
green, missing projects in red (see below). Check all projects you need in your database and
click the Start download button.
button. A window will open as shown below.
Projects already in the database will be listed in
green, missing projects in red (see below). Check all projects you need in your database and
click the Start download button.
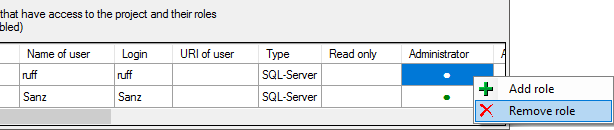
To see an overview of the users within a project select one of the
project in either list and click on the corresponding button
 . A window as shown below will open listing all
users and their roles with access to the selected project.
. A window as shown below will open listing all
users and their roles with access to the selected project.

To add or remove a role for a login, select the corresponding field and
choose or from the context
menu (see below).
Settings of a login in a database
Depending on the database you can edit the settings of a login as shown
below.
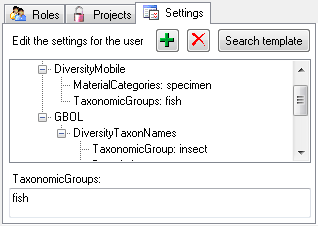
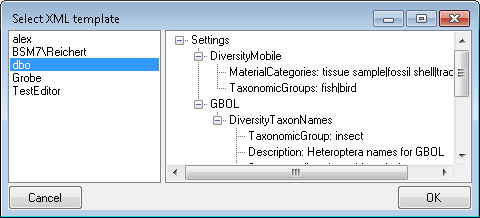
If you wish to use settings already defined for another login, click on
the Search template button. A window (see below) will open where you can
choose among the settings defined for logins in the database.
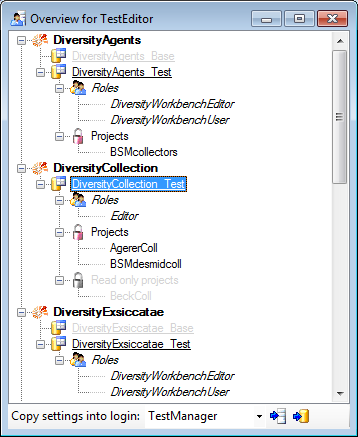
Overview for a login
If you want to see an overview of all permissions and project for a
login, click on the  button. A window as shown
below will open. It lists all modules
and their
button. A window as shown
below will open. It lists all modules
and their  databases, the
  roles,
  accessible projects and
 read only projects for a login.
To copy the permissions and projects of the current login to another
login, select the login where the settings should be copied to from the
list at the base of the window and click on the  button to copy the settings for all databases or the
 button to copy the settings of the selected
database into this login.
button to copy the settings of the selected
database into this login.
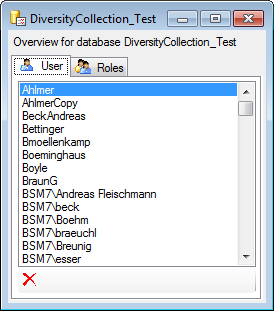
Overview for a database
If you see an overview of all user and roles in a database, click on the
 button. A window a shown below will open.
It lists all user, roles and
projects in the database.
button. A window a shown below will open.
It lists all user, roles and
projects in the database.
To remove a user, select it in the list and click on the
button.
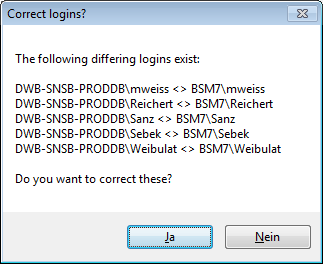
Correction of logins
If you select one of the databases, at the base a
 button may appear. This indicates that
there are windows logins listed where the name of the login does not
match the logins of the server. This may happen if e.g. a database was
moved from one server to another. To correct this, click on the button.
A list of deviating logins will be shown, that can be corrected
automatically.
button may appear. This indicates that
there are windows logins listed where the name of the login does not
match the logins of the server. This may happen if e.g. a database was
moved from one server to another. To correct this, click on the button.
A list of deviating logins will be shown, that can be corrected
automatically.
If logins with the same name but different server are found, one of them
has to be deleted to make the correction possible. You will get a list
where you can select those that should be removed.
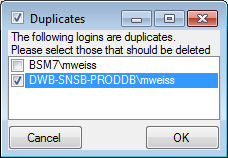
Select the duplicate logins that should be removed and click OK.
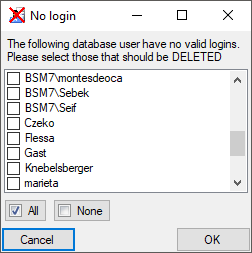
To find users within the database that have no valid login, click on the
 button. A window as shown below will open,
listing the users without a login. Select those that should be removed
and click OK. This will include a removal from the collection
managers.
button. A window as shown below will open,
listing the users without a login. Select those that should be removed
and click OK. This will include a removal from the collection
managers.

 DiversityExsiccatae.exe a generic editor.
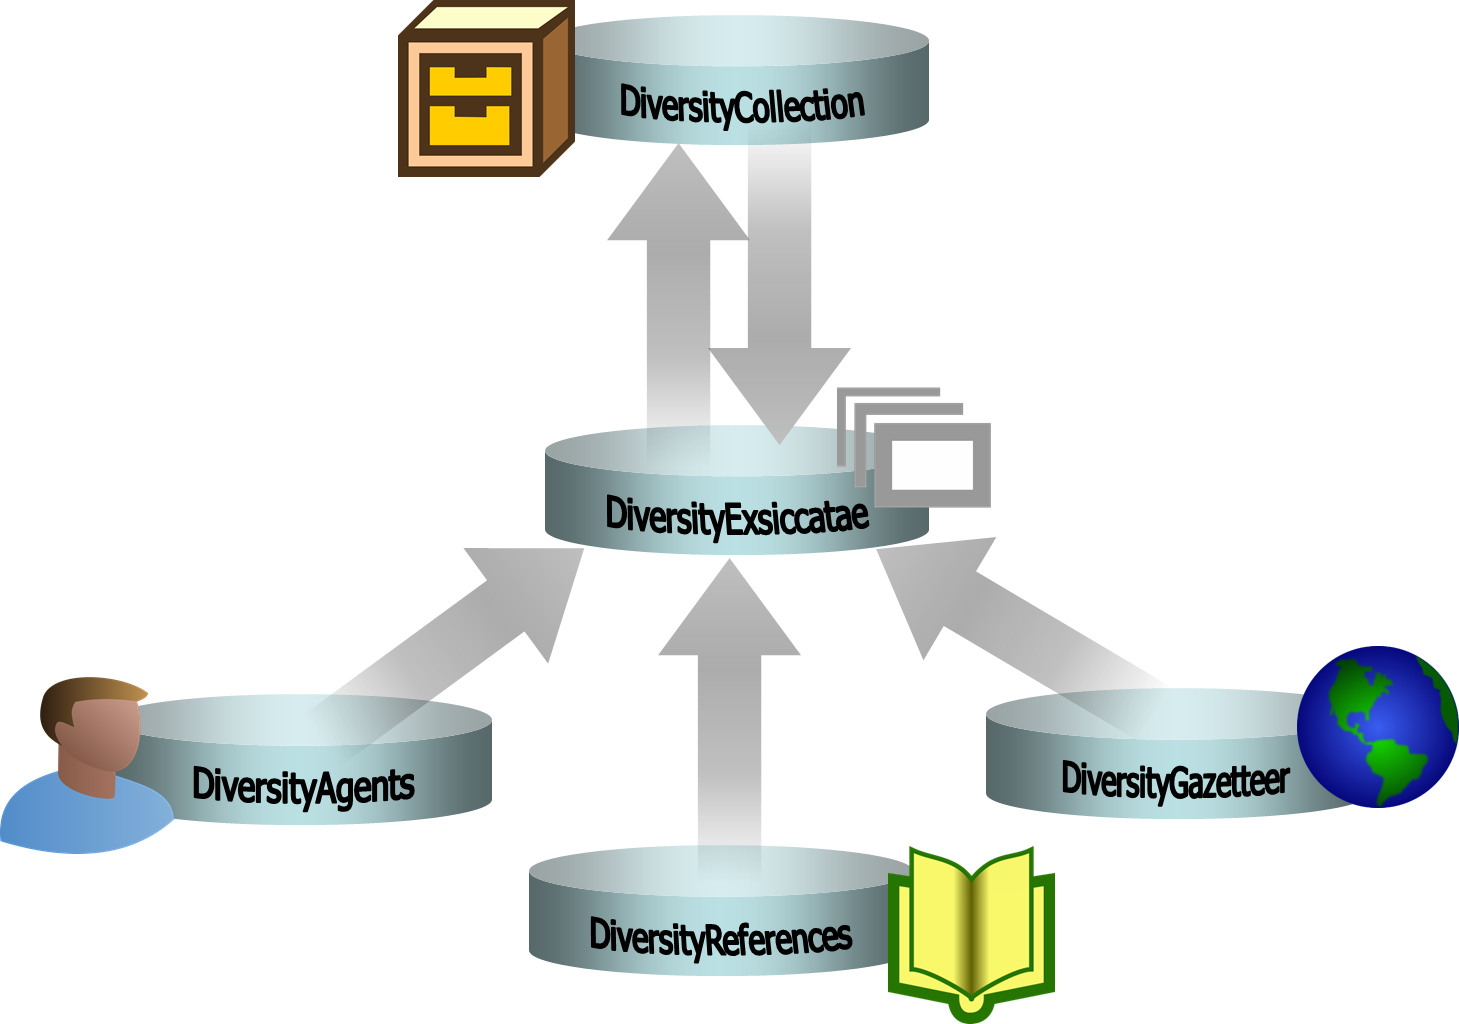
 Publication span
 References
 Examples
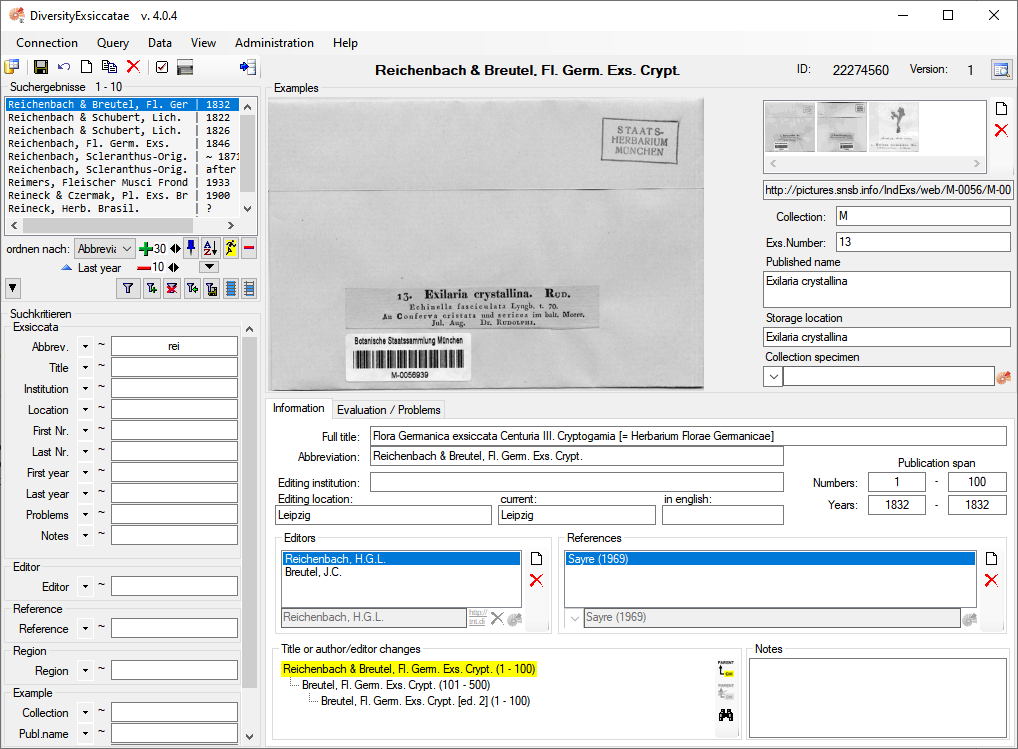

.svg?class=inlineimg) Bugfix - Using new verion for database update
Bugfix - Using new verion for database update


 Transfer previous settings: Transfer the settings for IP-Address and port of the server, name of the database, login etc. of a previous version of the client to the current version.
 Quit: Quit the application and stop all processes started by the application.


 Manual: Opens the online manual.
 Feedback history …: Opens a window for browsing former feedback.
 Edit feedback …: Opens a window for editing the feedbacks sent to the administrator (for admins only).
 Websites: Websites related to DiversityCollection.

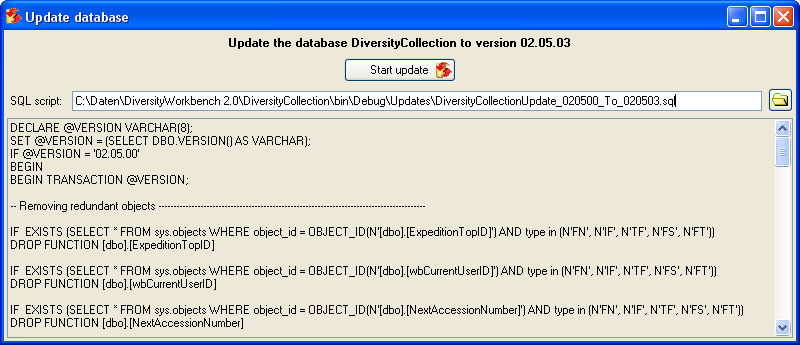
 Update database …: Update the database to the current version.

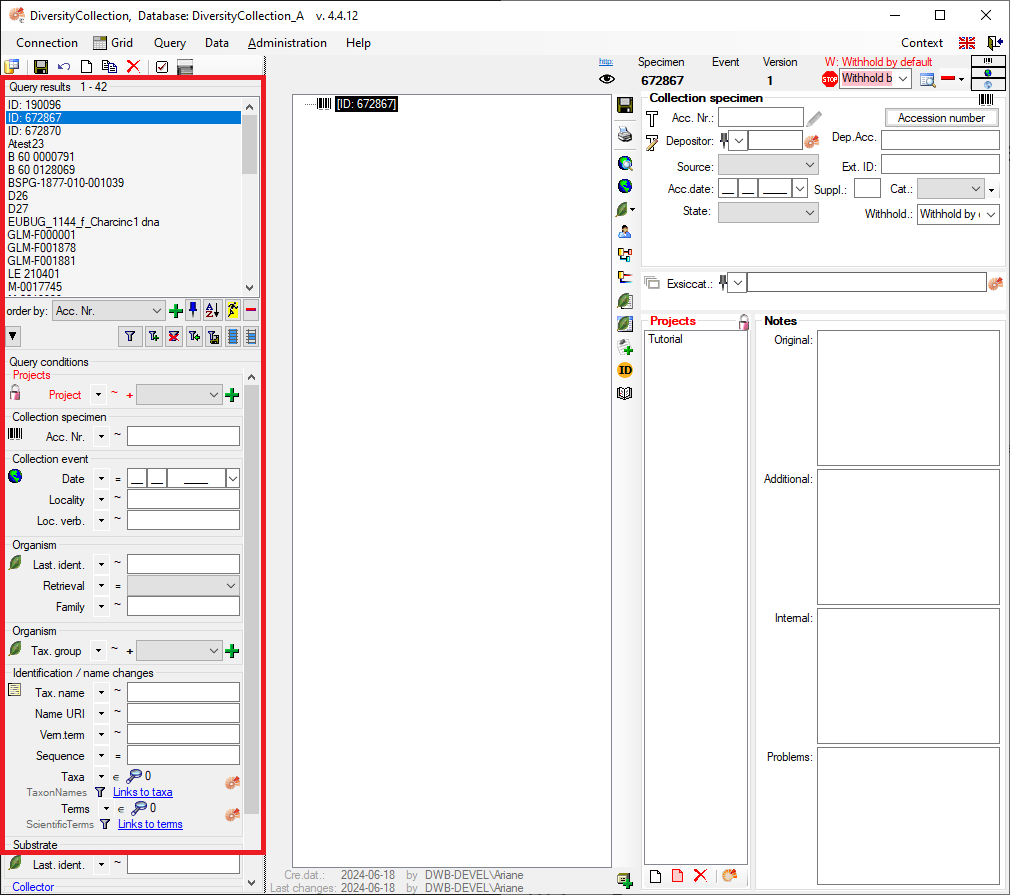
 - To save the changes in a dataset click on the
  - To propagate the changes in a dataset to linked modules click on the
  - To undo the changes a dataset click the
  - To create a new entry in the database, click on
the
- To create a new entry in the database, click on
the  - To copy a specimen, choose it from the list and click on the button
 - To options a dataset click on the button
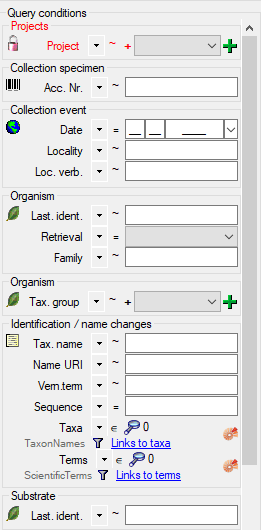
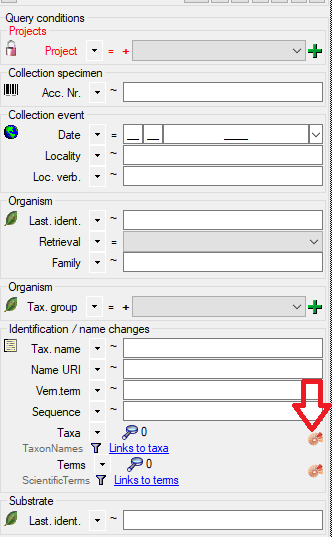
 - To change the arrangement of the query click on the
 button.

 entry in the list.
 button and select an image
file. A form will open, where you can search for an image.
button and select an image
file. A form will open, where you can search for an image.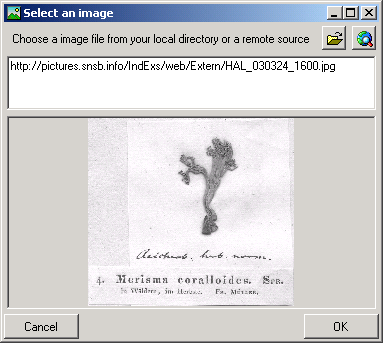
 button. To change the orientation of the
image use the appropriate buttons (
button. To change the orientation of the
image use the appropriate buttons (
 flip horizontal,
 flip
vertical,
flip
vertical,  rotate
right,
rotate
right,  rotate left).


 Editor… and
  Example…
 Set timeout … from the menu to
increase the default timeout from 5 seconds to a higher value, e.g. for
greater amounts of data.
Set timeout … from the menu to
increase the default timeout from 5 seconds to a higher value, e.g. for
greater amounts of data.  button. Once you have selected the
contents to change, select one of the modes of change that appear in the
upper left corner. The modes of change are:
button. Once you have selected the
contents to change, select one of the modes of change that appear in the
upper left corner. The modes of change are: Insert: Insert the given value at the beginning
of the content
Insert: Insert the given value at the beginning
of the content Append: Append the given value at the end of
the content
Append: Append the given value at the end of
the content Replace: Replace a string in the content with
the given value
Replace: Replace a string in the content with
the given value Clear: Remove the content
 button before you reset the filtering. If you close
the window all changes so far will be saved automatically. So if you do
not want to save your changes, click on the
button before you reset the filtering. If you close
the window all changes so far will be saved automatically. So if you do
not want to save your changes, click on the  button. The file will be automatically saved in
the client-folder.
button. The file will be automatically saved in
the client-folder.  button. The content of the log table can not be
changed, but is read only.
button. The content of the log table can not be
changed, but is read only. 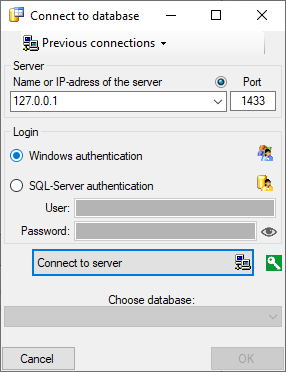
 .
. .
.
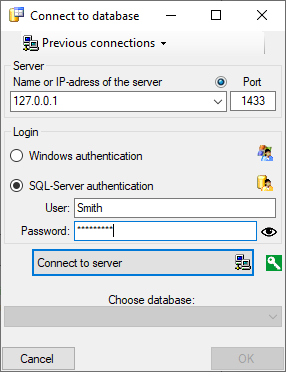
 next to the Connect to server button indicates an encrypted connection.
By clicking on the icon, you can switch to an unencrypted connection, indicated by the icon
next to the Connect to server button indicates an encrypted connection.
By clicking on the icon, you can switch to an unencrypted connection, indicated by the icon  .
.


 .
. .
. .
. , Problem
  , Reference

 .
.


 . To display
several columns in the result list, click on the
. To display
several columns in the result list, click on the  button.
To change the sorting of the added order column click on the
button.
To change the sorting of the added order column click on the


 Clear ErrorLog.