Diversity Gazetteer
Tutorial
Tutorial - first steps
This tutorial will guide you through the first basic steps in
DiversityGazetteers. After the installation, make
sure that you have access to the database. To start
the program, double click on the  DiversityGazetteers.exe in the directory where you placed the files of
DiversityGazetteers. The main window will open.
DiversityGazetteers.exe in the directory where you placed the files of
DiversityGazetteers. The main window will open.
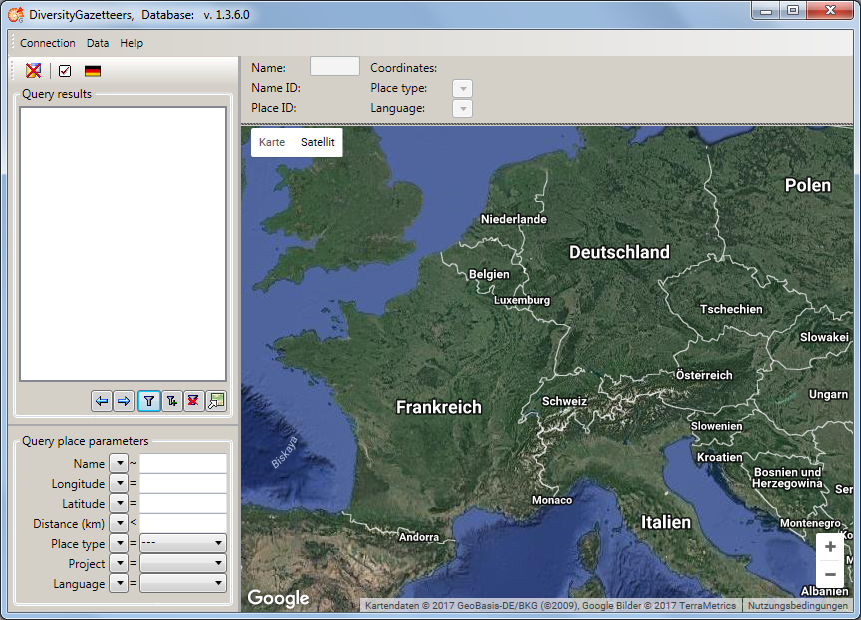
If you open this window for the first time, you have to connect to the
database. A window will open automatically where you can enter your
account information and choose the database (see image below, for
further informations see database access). If not,
click on the  button or choose Connection
→ Database… from the menu to open the Connection window.
button or choose Connection
→ Database… from the menu to open the Connection window.
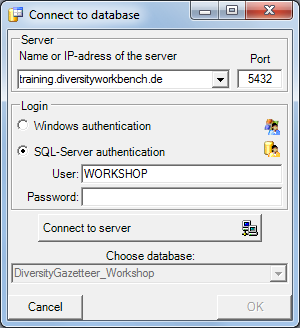
After having connected to the server and having chosen a database click
on the OK button to return to the main window. As indicated by the
 symbol in the tool bar, you are now connected
to the database. The tooltip of the database button will
show your current login informations.
symbol in the tool bar, you are now connected
to the database. The tooltip of the database button will
show your current login informations.
Subsections of Tutorial
Diversity Gazetteer
Tutorial Query
To search for data in the database, use the query section in the left
part of the window. To select the query conditions, click on the
 button in the top panel. A window as shown below
will open.
button in the top panel. A window as shown below
will open.
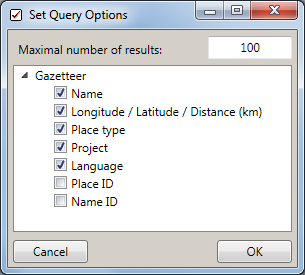
With the Maximal number of results you can limit the packet size
that should be retrieved from the server. For a slow connection to the
database server choose a low value (e.g. 100 as set by default).
Select the desired entries of
- Name
- Longitude / Latitude / Distance (km)
- Place type
- Project
- Language
- Place ID
- Name ID
Click OK to close the window. According to the example above your query
conditions will look like this:
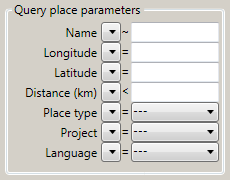
Operators: Press the  button to open the
operator dropdown list and choose an appropriate operator for your
query:
button to open the
operator dropdown list and choose an appropriate operator for your
query:
- “~”: Like - The search string is part of the item.
- “=”: Equal - The search string matches the item exactly.
- “<”: Less than - All results less than the search string.
- “>”: Greater than - All results greater than the search string.
Name: Enter the name of the place you are searching for in the
adjacent text box. The results are depending on the operator.
Longitude: Enter the longitude for the desired places. Only
numerical input allowed.
Latitude: Enter the latitude for the desired places. Only numerical
input allowed.
Distance: Enter the distance regarding longitude and latitude.
Depending on the operator all items will be displayed which are inside
or outside the distance. Only numerical input allowed.
Place type: Choose from a list of possible entries. Select the type
of place you are looking for. “—” means all kind of types.
Language: Choose from a list of possible entries. Select the
language which is assigned to the place. If there are no results, set
the language to “—” (all languages or no language assigned).
Project: Choose from a list of possible entries. Select your current
project. “—” means all projects.
Place ID: Enter the place ID for the desired places. Only integer
numbers allowed.
Name ID: Enter the name ID for the desired places. Only integer
numbers allowed.
After all query conditions are set, click on the  button to start the query. In the resultlist all places will be displayed which
matches your query and the selected maximal number of results.
button to start the query. In the resultlist all places will be displayed which
matches your query and the selected maximal number of results.
Diversity Gazetteer
Tutorial - query results
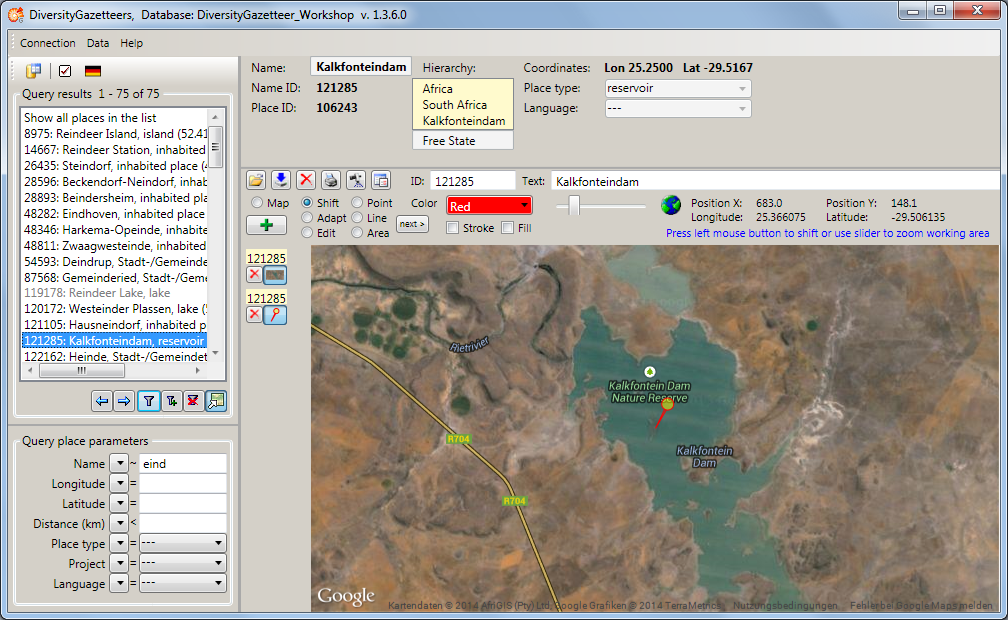
Pressing the button will display all places
in the list box which matches the query conditions and the selected
maximal number of results:
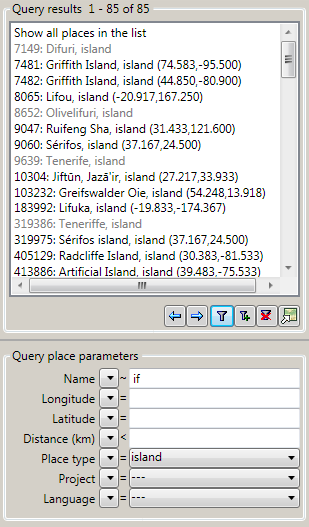
The entries consist of name ID, name, place type and coordinates (if
any). If no coordinates are available, the entry is shown in gray. In
case the entry describes a complex geography (e.g. a country polygon, a
river line string etc.), the coordinates represent the “envelope center”
of the shape.
The indices of the currently displayed database entries are shown in the
header of the list box, as well as the total number of entries. The
first line in the list box also contains the indices and may be used to
display all entries in total.
Pressing the  button will display the
next set of entries (according to maximal number of results). The
indices will change accordingly.
button will display the
next set of entries (according to maximal number of results). The
indices will change accordingly.
Pressing the  button will display the
previous set of entries (according to maximal number of results). The
indices will change accordingly.
button will display the
previous set of entries (according to maximal number of results). The
indices will change accordingly.
Pressing the  button will add the next set
of entries (according to maximal number of results) to the ones already
displayed in the list. The indices will change accordingly.
button will add the next set
of entries (according to maximal number of results) to the ones already
displayed in the list. The indices will change accordingly.
Pressing the  button will clear the list
box and the query conditions.
button will clear the list
box and the query conditions.
The  button is designed as a toggle
button, which has 2 states. Pressing the button will switch the GISEditor display mode between
“View” and “Edit”. If the mode is set to “Edit”, the button will appear
as
button is designed as a toggle
button, which has 2 states. Pressing the button will switch the GISEditor display mode between
“View” and “Edit”. If the mode is set to “Edit”, the button will appear
as  and the map window will be extended by
its control panel.
and the map window will be extended by
its control panel.
Diversity Gazetteer
Tutorial - show places
Tutorial - show places
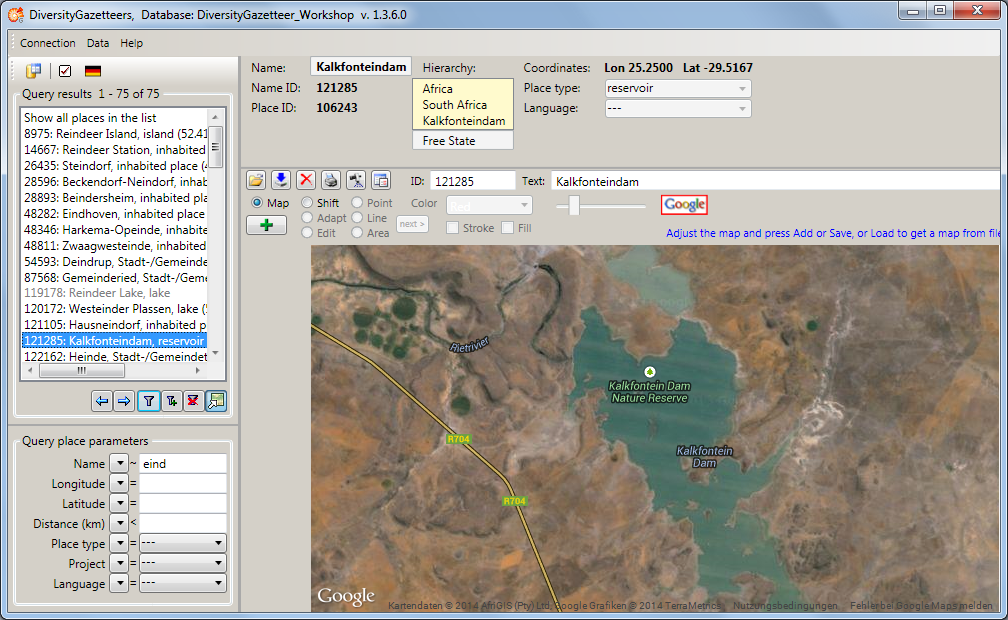
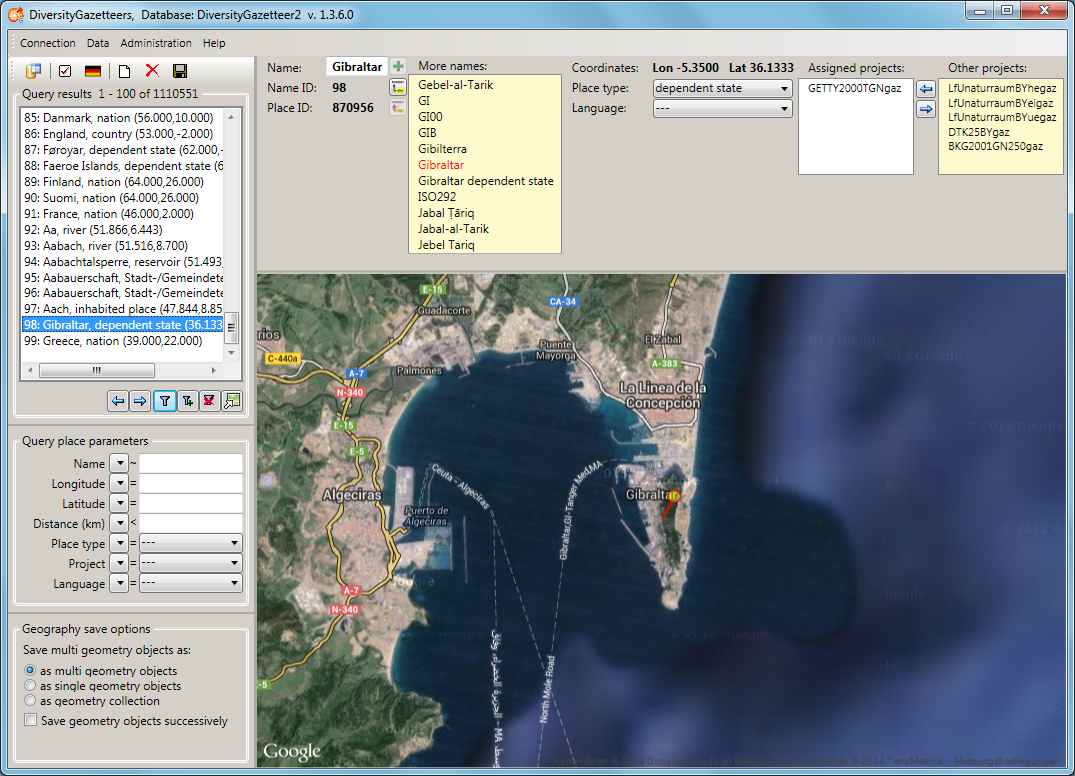
The results list box displays the current set of places found by the
database query. To show a certain place on the map, just double click at
the entry. Due to the coordinates of the place the map will be adjusted
to this area and build up. Depending on the internet connection and the
map server this can take some seconds. A message box will pop up to
advice the user to wait, until the map is complete:
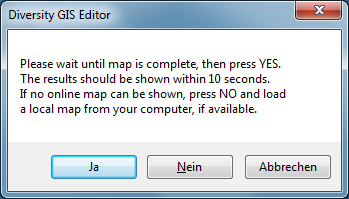
When all tiles of the background map are drawn, press OK to continue.
Then the online map will be scanned and the place will be shown on the
map. If the coordinates are single positions, markers will be set. If
the coordinates describe areas or line strings, the appropriate
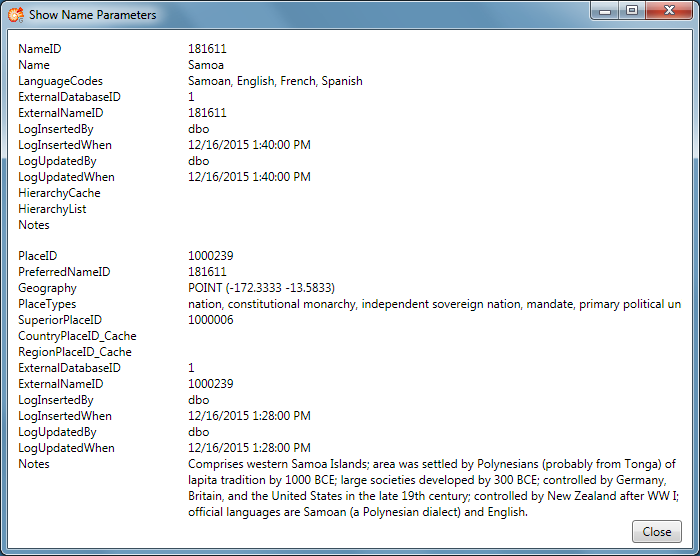
geometrical objects are drawn. The information area above the map lists
the details of the place (name ID, name, place ID, place type,
coordinates as well as more names and hierarchy, if available).
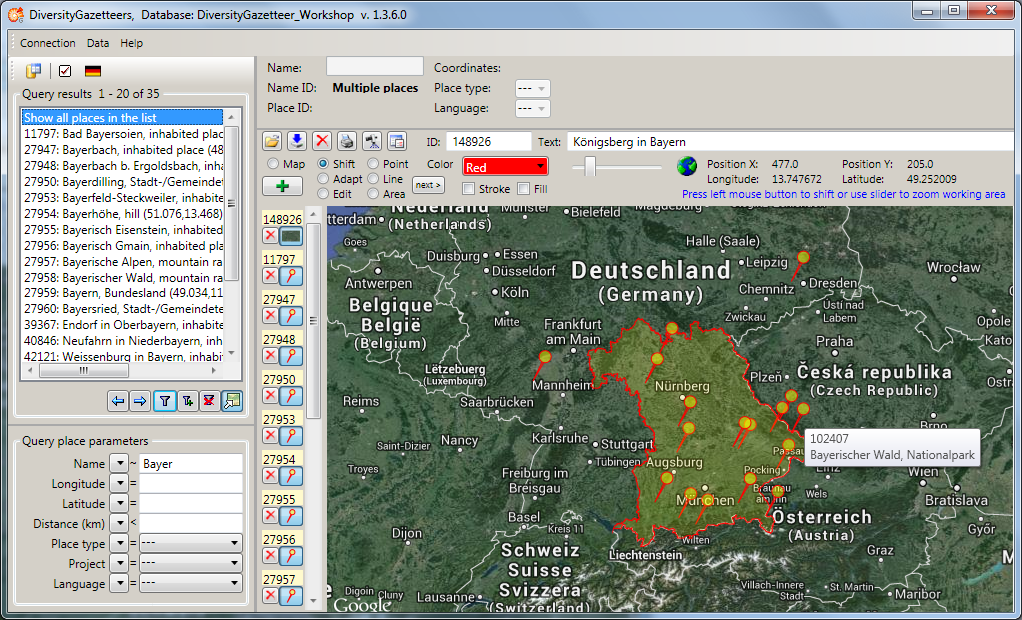
A double click at the first line shows all places currently listed in
the results box. The information area will not show specific details,
but moving the mouse over a place on the map displays the details in a
tool tip.
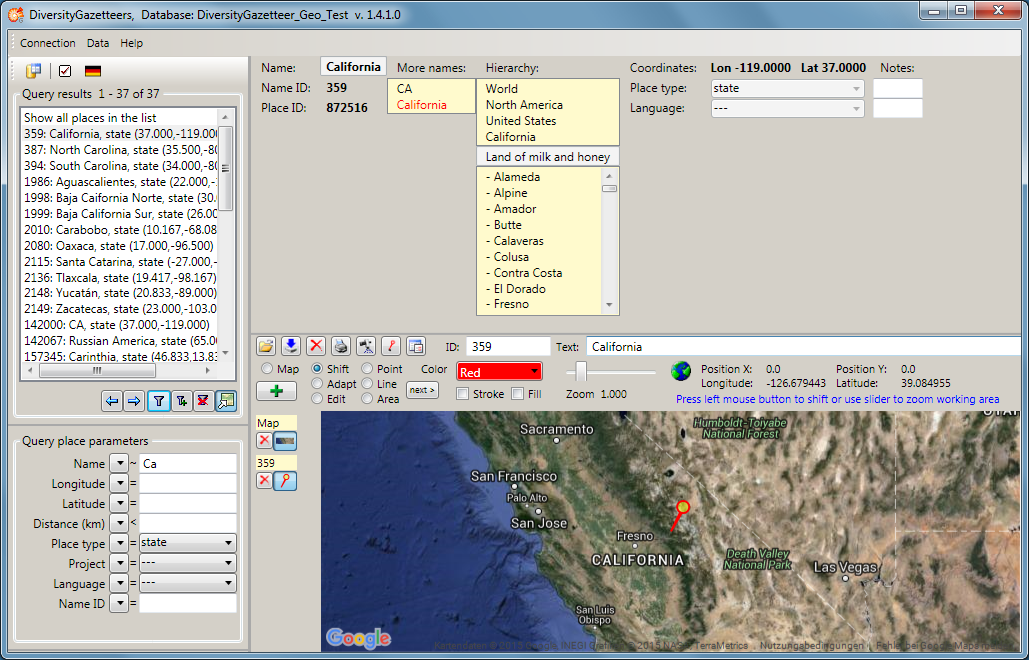
If a place hierachy has been defined, it is shown in the hierarchy list
box. Due to historical reasons there might also be a hierarchy text
entry for the place, which is displayed beneath the hierarchy, if it is
available. Below the place names are displayed, which are one level
under the current place in the hierarchy tree, if there are any. By
clicking on an entry of the upper or lower hierarchy list the current
place can can be switched to that one. If you have administrator
permissions, the hierarchy and the hierarchy text entry can be modified.
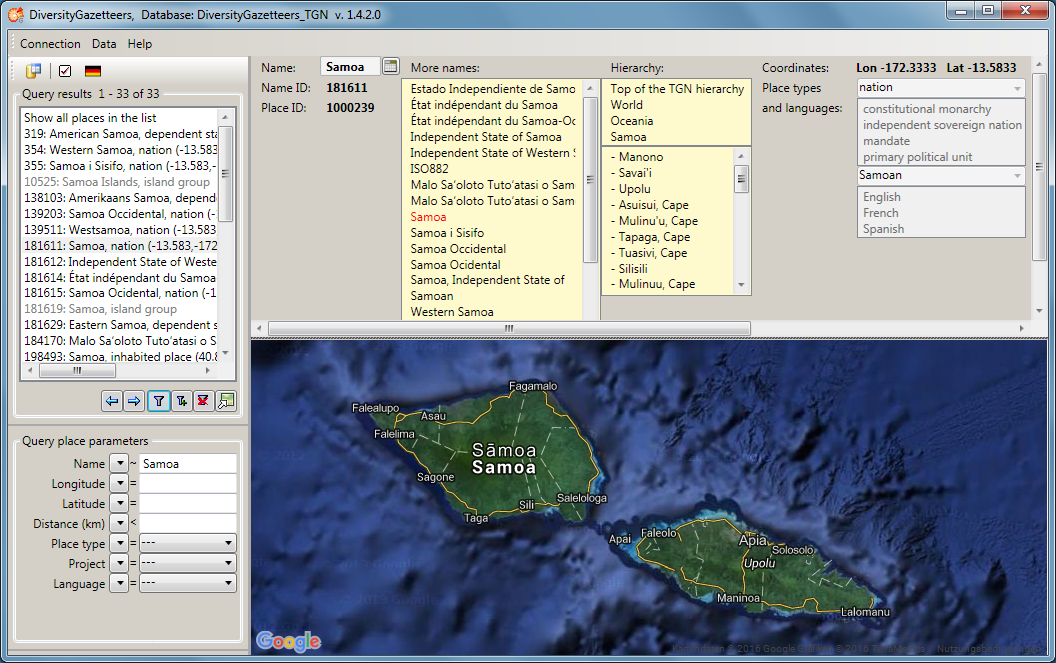
Since version 1.4.2.0 multiple languages and place types are supported
for a place name. If there is more than one language or place types
entry assigned, the additional ones are diplayed beneath the preferred
entry.
Press the  button to display all
parameters for a place name stored in the database at a glance in a
separate window.
button to display all
parameters for a place name stored in the database at a glance in a
separate window.
Diversity Gazetteer
Tutorial - edit places
If the user has administrator rights for the dataset, the  ,
,  and
and  items are displayed in the toolbar.
Additionally the
items are displayed in the toolbar.
Additionally the  ,
,  and
and  buttons will appear in the info
area.
buttons will appear in the info
area.
The user then may edit the name of the place using the text box. The
item turns to red  to notify the user that the changes need to
be saved by pressing this item before going to another place. The
assigned geographical objects may also be edited or changed using the
Edit mode of the GIS Editor
and saved by pressing the item. To add a
new place to the gazetteer, create a geo object within the GISEditor, enter a description and
subsequently press the item to put it into
the database. The user may delete a name entry by pressing the item. To add a new name for the current place
just type it into the Name text box and press the button aside. This button is only
enabled, if the name has been edited.
to notify the user that the changes need to
be saved by pressing this item before going to another place. The
assigned geographical objects may also be edited or changed using the
Edit mode of the GIS Editor
and saved by pressing the item. To add a
new place to the gazetteer, create a geo object within the GISEditor, enter a description and
subsequently press the item to put it into
the database. The user may delete a name entry by pressing the item. To add a new name for the current place
just type it into the Name text box and press the button aside. This button is only
enabled, if the name has been edited.
To create or change the places hierarchy select an entry and switch ON
the toggle button. Search
and select an entry using the query results list box to assign it as the
parent place for the one which is displayed in the info area. The tool
tip of the list box will change accordingly. As soon it has been
assigned the toggle button will switch OFF again. If no entry should be
assigned the button may be released by pressing it again. If the place
is part of the hierarchy the button is enabled and may be pressed
to remove the assignment of the parent for the current place. This will
cut off the upper part of the place’s hierarchy tree.
Appropriate message boxes will pop up for changing or editing the name
and hierarchy of a place to prevent changes by mistake. If there are
multiple places selected, these buttons will not be functional.
If there are more than one name entries for the current place, all names
are shown in a list box right of the selected name. The user may switch
to another name of the list by double clicking it. One of the name
entries may be assigned as the preferred name for the current place.
This can be done by left clicking it. A message box will be shown to
ensure that the assignment should be made. The preferred name then will
appear in red color in the list.
At the right side of the information area there are 2 list boxes. The
first shows the projects which are assigned to the current name, the
second shows the other projects which are not assigned. The
administrator may assign or remove projects to the name by selecting a
project and clicking on an appropriate arrow button to shift it to the
opposite box. Alternatively he may easily shift the project by double
clicking on it.
If the assignment of the projects has been changed, the button turns to red to notify the user that the changes need to
be saved before going to another place. Otherwise the changes will be
lost.

Diversity Gazetteer
Tutorial - add places
If the user has administrator rights for the database, the  symbol is shown in the tool bar. Then the user may
add new place entries to the database using the GISEditor. A background map and
geographical objects may be created or imported, e.g. from ArcView shape
files. These shapes are often very big and do not match the restrictions
of MS SQL Geography Objects as used in the database, so there are
several save options, which can help to avoid problems for the import:
symbol is shown in the tool bar. Then the user may
add new place entries to the database using the GISEditor. A background map and
geographical objects may be created or imported, e.g. from ArcView shape
files. These shapes are often very big and do not match the restrictions
of MS SQL Geography Objects as used in the database, so there are
several save options, which can help to avoid problems for the import:
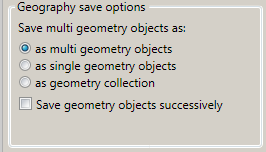
One major restriction of MS SQL Geography Objects is, that polygon lines
must not overlap. This is frequently the case on multiple polygons
within one geographical object, e.g. the outlines of neighbouring
countries. To avoid this, multiple polygons may be split up to single
polygons, which can be saved either as separate place entries (with the
drawback that the collection will be disbanded) or as one geographical
collection (which keeps the togetherness of the elements).
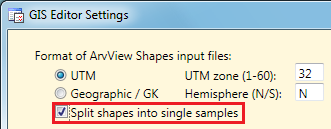
Big ArcView shapes often contain millions of coordinates, which may
cause out of memory errors when they are converted to a geographical
data object. This can be avoided by successively saving the samples of
the GIS editor to the database. Precondition for that is, that a big
shape file is split into single geographical objects (samples) already
when reading it by the GIS Editor. To do this the appropriate check box
of the GIS Editor Settings has
to be checked:
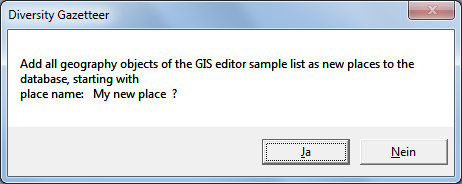
If you create a new place using the GIS Editor, be sure to enter a
description in the “Text” field before you add it to the sample list.
Clicking the symbol of the tool bar will save
the samples of the GIS Editor according to the save options and will use
the sample descriptions as the place names. If the samples are split
into multiple entries, an index is appended to the name.