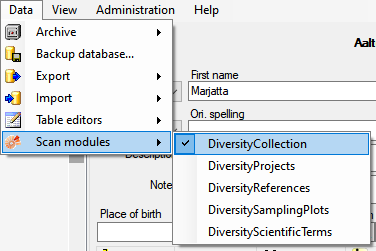
Subsections of Database
Installation
Diversity Workbench modules use Microsoft SQL-Server 2014 or above as database
engine. If you do not have a database server with DiversityAgents
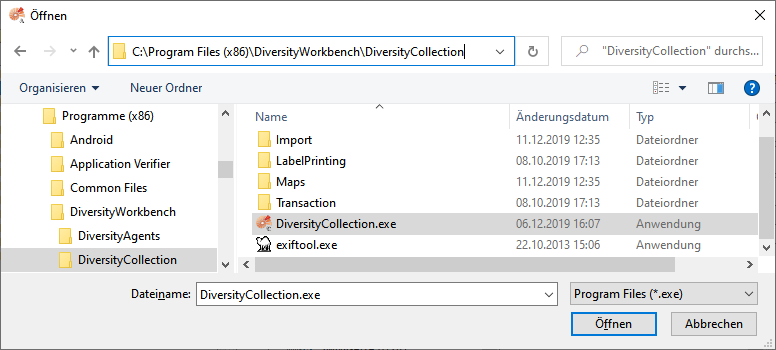
already available, you have to install the
database engine first. Download the free version of Microsoft SQL Server
Express 2016 or above from http://www.microsoft.com/downloads/.. Start
the program and follow the instructions for the installation.
Server configuration
To configure your server for remote access, launch the SQL Server
Configuration Manager (see image below).
If the tool is not available via the app menu but you have SqlServerManagmentStudio and SqlServer installed type [Win] + r to open the Run dialog, type the command SQLServerManager16.msc and press [Enter] to start the tool.
Then click on the "Protocols for SQLEXPRESS" node. Right click on
"TCP/IP" in the list of Protocols and choose "enable" for
TCP/IP.
Right click on the TCP/IP node and select, "Properties" to open a
window as shown below.
In the part IPALL clear out the value for "TCP Dynamic Ports".
Give a TCP-Port number to use when making remote connections, e.g.
"4321" as shown above. You have to restart the SQL Server Express
service before you can connect to your database.
If you use a database on a server, make sure that the firewall of the
server allows access via the port you set for the connections (see
below).
Start the Microsoft SQL Server Managment Studio and attach the database
as shown below. Choose the node "databases" and right-click on it to
open the context menu (see below). Then choose "attach" from the
context menu. A window will open where you can choose the file
DiversityAgents_Data.MDF from your database directory and attach it to
the database engine.
After the installation make shure to get the latest updates from
http://windowsupdate.microsoft.com/.
Database configuration
To configure your Database, use the Client as described in
Database configuration.
Project tables
The access to the data is managed via projects where each project of
DiversityReferences may be linked to a project from DiversityProjects.
Every entry of table “ReferenceTitle” is assigned to the related
projects by table “ReferenceProject”. DiversityReferences contains the
tables “UserProxy”, “ProjectUser” and “ProjectProxy” to allow an
independent administration of the basic functions related to projects
and users.
Index
Table ProjectProxy
The projects as stored in the module DiversityProjects
| Column |
Data type |
Description |
| ProjectID |
int |
ID of the project to which the specimen belongs (Projects are defined in DiversityProjects) |
| Project |
nvarchar (50) |
The name or title of the project as shown in a user interface (Projects are defined in DiversityProjects) |
| ProjectURI |
nvarchar (255) |
URI of a project in a remote module, e.g. refering to database DiversityProjects |
Table ProjectUser
The projects that a user can access
| LoginName |
nvarchar (50) |
A login name which the user uses for access
the DivesityWorkbench, Microsoft domains, etc.. |
| ProjectID |
int |
ID of the project to which the specimen
belongs (Projects are defined in DiversityProjects) |
| ReadOnly |
bit |
If the user has only read access to data of
this project
Default value: (0) |
Table UserProxy
The user as stored in the module DiversityAgents
| Column |
Data type |
Description |
| LoginName |
nvarchar (50) |
A login name which the user uses for access the DivesityWorkbench, Microsoft domains, etc.. |
| CombinedNameCache |
nvarchar (255) |
The short name of the user, e.g. P. Smith |
| AgentURI |
nvarchar (255) |
URI of a user in a remote module, e.g. refering to database DiversityAgents |
| Queries |
xml (MAX) |
Queries created by the user |
| ID |
int |
ID of the user |
| PrivacyConsent |
bit |
If the user consents the storage of his user name in the database |
| PrivacyConsentDate |
datetime |
The time and date when the user consented or refused the storage of his user name in the database |
Diversity References

The following objects are not included:
- Logging tables
- Enumeration tables
- System objects
- Objects marked as obsolete
- Previous versions of objects
TABLES
Table ReferenceAvailability
Availability and location of reference items in private or official filing system; e.g., book signatures or reprint article availability. Each responsible user may enter multiple filing codes.
| Column |
Data type |
Description |
Nullable |
Relation |
| RefID |
int |
Refers to the ID code of the main ReferenceTitle table (= foreign key) |
NO |
Refers to table ReferenceTitle |
| RecordID |
int |
Unique random ID (see trigger) to identify the availability record. (Technical note: to improve reliability of database replication, the primary key is formed in combination with the RefID. Note that FilingCode is optional and not suitable.)Default value: CONVERT([int],rand()*(2147483647.1),(0)) |
NO |
- |
| FilingCode |
nvarchar (255) |
Information about availability or location of a copy of the referenced publication: Filing code of reprint or book in private filing system, institutional catalogue code, signature, official call number, or shelf code in a library. //[RefMan 27: AV]Default value: '' |
NO |
- |
| ReprintStatus |
smallint |
Refers to filing system of responsible person. Reprint may be ‘Not in file’ (0), ‘On request (card to author)’ (1), ‘On request (internal order/copy marker)’ (2), ‘On request (interlibrary loan)’ (3), or ‘In file’ (4) //[RefMan 08: RP pro parte]Default value: (0) |
NO |
Refers to table Ref_AvailabilityReprintStatus_Enum |
| RequestDate |
datetime |
Only if ReprintStatus = ‘On request’ (1/2): The date on which the reprint was requested. //[RefMan 08: RP pro parte] |
YES |
- |
| Responsible |
int |
The person responsible for the availability/filing code information, and to which the reprint status/request date refers. //[RefMan: not supported] |
NO |
- |
| LogInsertedBy |
nvarchar (50) |
ID of the creator of this data setDefault value: [dbo].UserID |
YES |
- |
| LogInsertedWhen |
smalldatetime |
Date and time when the data were first entered (typed or imported) into this database.Default value: getdate() |
YES |
- |
| LogUpdatedBy |
nvarchar (50) |
ID of the person to update this data set lastDefault value: [dbo].UserID |
YES |
- |
| LogUpdatedWhen |
smalldatetime |
Date and time when the data were last updated.Default value: getdate() |
YES |
- |
Depending on:
- Ref_AvailabilityReprintStatus_Enum
- ReferenceTitle
trgInsReferenceAvailability
Table ReferenceDescriptor
Object names, event names, keywords, etc., providing indexing information for a resource.
| Column |
Data type |
Description |
Nullable |
Relation |
| RefID |
int |
ID of external resource to which the descriptor applies (foreign key) |
NO |
Refers to table ReferenceTitle |
| Language |
varchar (5) |
Language in which element content is expressed. Necessary even for numeric or date content (because expressed through string using language-specific conventions)Default value: ’en’ |
NO |
- |
| ElementID |
int |
ID of a descriptor element concept (foreign key)Default value: (0) |
NO |
Refers to table ReferenceDescriptorElement |
| Content |
nvarchar (255) |
A name, state, or value text for the descriptor element.Default value: '’ |
NO |
- |
| ContentURI |
varchar (255) |
The URI of a conceptual ontological resource considered equivalent with the content, especially URIs for taxon names or keywords from ontologies.Default value: '’ |
NO |
- |
| InstanceGrouping |
smallint |
Normally Null. If set, element relations are evaluated only within same-numbered instances. Example: 3 host-pathogen-pairs exist in one resource, each pair would get same instance number. Still, a place name set to instance=Null would apply to all.Default value: NULL |
YES |
- |
| ID |
int |
Internal system generated primary key. Note that multiple values for a descriptor concept may be added (e.g. keywords) |
NO |
- |
| LogInsertedBy |
nvarchar (50) |
ID of the creator of this data setDefault value: [dbo].UserID |
YES |
- |
| LogInsertedWhen |
smalldatetime |
Date and time when the data were first entered (typed or imported) into this database.Default value: getdate() |
YES |
- |
| LogUpdatedBy |
nvarchar (50) |
ID of the person to update this data set lastDefault value: [dbo].UserID |
YES |
- |
| LogUpdatedWhen |
smalldatetime |
Date and time when the data were last updated.Default value: getdate() |
YES |
- |
Depending on:
- ReferenceDescriptorElement
- ReferenceTitle
Table ReferenceDescriptorElement
Examples of descriptor elements (= concepts for variables) are keyword, taxon name, pathogen name, host name, or host feature. Association with ResourceCollections is defined in ReferenceDescriptorAssociation, relations in Res.DescriptorElementRelation.
| Column |
Data type |
Description |
Nullable |
Relation |
| ElementID |
int |
Numeric identifier (primary key). |
NO |
- |
| ElementAbbrev |
nvarchar (25) |
Short abbreviated name for descriptor element.Default value: '’ |
NO |
- |
| ElementLabel |
nvarchar (80) |
Concise English label of a descriptor element definition.Default value: '’ |
NO |
- |
| DisplayOrder |
int |
Order in which elements are displayed independently of a resource collection (for order within a collection see ReferenceDescriptorAssociation.DisplayOrder).Default value: (0) |
NO |
- |
| ElementDescription |
nvarchar (1000) |
A free-form text that may be displayed in user interfaces as explanatory text.Default value: '’ |
NO |
- |
| ElementURI |
varchar (255) |
The URI of a conceptual ontological resource considered equivalent with this descriptor element.Default value: '' |
NO |
- |
| InternalNotes |
nvarchar (1000) |
Internal notes and remarks. Although normally not published in public reports, this should not be used for truly confidential information.Default value: '' |
NO |
- |
| DisplayEnabled |
bit |
Whether this DescriptorElement is to be displayed in the user interface. |
NO |
- |
| LogInsertedBy |
nvarchar (50) |
ID of the creator of this data setDefault value: [dbo].UserID |
YES |
- |
| LogInsertedWhen |
smalldatetime |
Date and time when the data were first entered (typed or imported) into this database.Default value: getdate() |
YES |
- |
| LogUpdatedBy |
nvarchar (50) |
ID of the person to update this data set lastDefault value: [dbo].UserID |
YES |
- |
| LogUpdatedWhen |
smalldatetime |
Date and time when the data were last updated.Default value: getdate() |
YES |
- |
Table ReferenceDescriptorElementRelation
General relations between descriptor elements (applicable to all values present in ReferenceDescriptor)
| Column |
Data type |
Description |
Nullable |
Relation |
| FromElement |
int |
Starting point of relation (foreign key, part of primary key) |
NO |
Refers to table ReferenceDescriptorElement |
| RoleLabel |
nvarchar (25) |
Abbreviated label for relation in forward directionDefault value: '' |
NO |
- |
| ToElement |
int |
End point of relation (foreign key, part of primary key) |
NO |
Refers to table ReferenceDescriptorElement |
| RoleDescription |
nvarchar (1000) |
A free-form text that may be displayed in user interfaces as explanatory text.Default value: '' |
NO |
- |
| RoleURI |
varchar (255) |
The URI of a conceptual ontological resource considered equivalent with the role of this relation.Default value: '' |
NO |
- |
| InternalNotes |
nvarchar (1000) |
Internal notes and remarks. Although normally not published in public reports, this should not be used for truly confidential information.Default value: '' |
NO |
- |
| LogInsertedBy |
nvarchar (50) |
ID of the creator of this data setDefault value: [dbo].UserID |
YES |
- |
| LogInsertedWhen |
smalldatetime |
Date and time when the data were first entered (typed or imported) into this database.Default value: getdate() |
YES |
- |
| LogUpdatedBy |
nvarchar (50) |
ID of the person to update this data set lastDefault value: [dbo].UserID |
YES |
- |
| LogUpdatedWhen |
smalldatetime |
Date and time when the data were last updated.Default value: getdate() |
YES |
- |
Depending on:
- ReferenceDescriptorElement
Table ReferenceNote
Public reference abstracts/notes.
| Column |
Data type |
Description |
Nullable |
Relation |
| RefID |
int |
Refers to the ID code of the main ReferenceTitle table (= foreign key) |
NO |
Refers to table ReferenceTitle |
| Responsible |
int |
* The person responsible for the abstract information. Abstracts are copyright protected! Clearly state if the abstract was not written by you, but copied from the publication itself or a bibliographic database. //[RefMan: not supported]Default value: [dbo].wbCurrentUserID |
NO |
- |
| Language |
varchar (20) |
* Language of the abstract, as ISO 2 letter codes. //[RefMan : not supported!]Default value: ‘UNK’ |
NO |
- |
| Content |
nvarchar (4000) |
An abstract containing a short summary of the content of the article or book //[RefMan 25: N2] |
NO |
- |
| LogInsertedBy |
nvarchar (50) |
ID of the creator of this data setDefault value: [dbo].UserID |
YES |
- |
| LogInsertedWhen |
smalldatetime |
Date and time when the data were first entered (typed or imported) into this database.Default value: getdate() |
YES |
- |
| LogUpdatedBy |
nvarchar (50) |
ID of the person to update this data set lastDefault value: [dbo].UserID |
YES |
- |
| LogUpdatedWhen |
smalldatetime |
Date and time when the data were last updated.Default value: getdate() |
YES |
- |
Depending on:
Table ReferencePeriodical
Periodical (journal/magazine, etc.) titles.
| Column |
Data type |
Description |
Nullable |
Relation |
| Abbreviation |
nvarchar (255) |
Standardized abbreviation of periodical or journal. Use periods after the abbreviations //[RefMan 11: JA, JO] |
NO |
- |
| FullName |
nvarchar (255) |
Full, non-abbreviated name of periodical or journal //[RefMan 11: JF, JO]Default value: '' |
NO |
- |
| Notes |
nvarchar (4000) |
Notes, remarks, or comments regarding the journal/periodical as a whole, incl. “continued as (new title)” or notes about local availabilityDefault value: '' |
NO |
- |
| ImportedFrom |
nvarchar (255) |
If imported from another database: The name of the database system or provider; otherwise empty.Default value: '' |
NO |
- |
| PeriodicalID |
int |
- |
NO |
- |
| LogInsertedBy |
nvarchar (50) |
ID of the creator of this data setDefault value: [dbo].UserID |
YES |
- |
| LogInsertedWhen |
smalldatetime |
Date and time when the data were first entered (typed or imported) into this database.Default value: getdate() |
YES |
- |
| LogUpdatedBy |
nvarchar (50) |
ID of the person to update this data set lastDefault value: [dbo].UserID |
YES |
- |
| LogUpdatedWhen |
smalldatetime |
Date and time when the data were last updated.Default value: getdate() |
YES |
- |
trgInsReferencePeriodical
Table ReferencePeriodicalProject
| Column |
Data type |
Description |
Nullable |
Relation |
| Abbreviation |
nvarchar (255) |
Standardized abbreviation of periodical or journal, as defined in ReferencePeriodical entity (= foreign key). |
NO |
Refers to table ReferencePeriodical |
| ProjectID |
int |
ID of the project to which the periodical belongs (Projects are defined in DiversityProjects) |
NO |
Refers to table ProjectProxy |
| LogInsertedBy |
nvarchar (50) |
ID of the creator of this data setDefault value: [dbo].UserID |
YES |
- |
| LogInsertedWhen |
smalldatetime |
Date and time when the data were first entered (typed or imported) into this database.Default value: getdate() |
YES |
- |
| LogUpdatedBy |
nvarchar (50) |
ID of the person to update this data set lastDefault value: [dbo].UserID |
YES |
- |
| LogUpdatedWhen |
smalldatetime |
Date and time when the data were last updated.Default value: getdate() |
YES |
- |
Depending on:
- ProjectProxy
- ReferencePeriodical
Table ReferencePeriodicalSynonym
Periodical (journal/magazine, etc.) titles: thesaurus with synonyms -> valid name. Any entry in Periodical.Abbreviation and Periodical.FullName must also be added to the synonym table.
| Column |
Data type |
Description |
Nullable |
Relation |
| Synonym |
nvarchar (255) |
Alternative, synonymous names for the main record. Automatically translated into StdAbbrev if a thesaurus pick list is used in forms. //[RefMan 11: J1, J2] |
NO |
- |
| Abbreviation |
nvarchar (255) |
Standardized abbreviation of periodical or journal, as defined in ReferencePeriodical entity (= foreign key). |
NO |
Refers to table ReferencePeriodical |
| Source |
nvarchar (255) |
Source of the synonym/thesaurus name: ‘ABBR’ for standard abbreviation, ‘FULL’ for standard full name, else name or abbrev. of user who added a non-standard synonym (like PNAS for Proc. Nat. Acad. Sci.) |
NO |
- |
| LogInsertedBy |
nvarchar (50) |
ID of the creator of this data setDefault value: [dbo].UserID |
YES |
- |
| LogInsertedWhen |
smalldatetime |
Date and time when the data were first entered (typed or imported) into this database.Default value: getdate() |
YES |
- |
| LogUpdatedBy |
nvarchar (50) |
ID of the person to update this data set lastDefault value: [dbo].UserID |
YES |
- |
| LogUpdatedWhen |
smalldatetime |
Date and time when the data were last updated.Default value: getdate() |
YES |
- |
Depending on:
Table ReferencePrivateDescriptor
Object names, event names, keywords, etc., providing indexing information for a resource.
| Column |
Data type |
Description |
Nullable |
Relation |
| RefID |
int |
ID of external resource to which the descriptor applies (foreign key) |
NO |
Refers to table ReferenceTitle |
| PrivateTo |
int |
(UNUSED : using table ProvateDescriptor instead!)Either the UserID of the user who created this descriptor for private usage or null for a public descriptor Default value: [dbo].wbCurrentUserID |
NO |
- |
| Language |
varchar (5) |
Language in which element content is expressed. Necessary even for numeric or date content (because expressed through string using language-specific conventions)Default value: ’en’ |
NO |
- |
| ElementID |
int |
ID of a descriptor element concept (foreign key)Default value: (0) |
NO |
Refers to table ReferenceDescriptorElement |
| Content |
nvarchar (255) |
A name, state, or value text for the descriptor element.Default value: '’ |
NO |
- |
| ContentURI |
varchar (255) |
The URI of a conceptual ontological resource considered equivalent with the content, especially URIs for taxon names or keywords from ontologies.Default value: '' |
NO |
- |
| InstanceGrouping |
smallint |
Normally Null. If set, element relations are evaluated only within same-numbered instances. Example: 3 host-pathogen-pairs exist in one resource, each pair would get same instance number. Still, a place name set to instance=Null would apply to all.Default value: NULL |
YES |
- |
| ID |
int |
Internal system generated primary key. Note that multiple values for a descriptor concept may be added (e.g. keywords) |
NO |
- |
| LogInsertedBy |
nvarchar (50) |
ID of the creator of this data setDefault value: [dbo].UserID |
YES |
- |
| LogInsertedWhen |
smalldatetime |
Date and time when the data were first entered (typed or imported) into this database.Default value: getdate() |
YES |
- |
| LogUpdatedBy |
nvarchar (50) |
ID of the person to update this data set lastDefault value: [dbo].UserID |
YES |
- |
| LogUpdatedWhen |
smalldatetime |
Date and time when the data were last updated.Default value: getdate() |
YES |
- |
Depending on:
- ReferenceDescriptorElement
- ReferenceTitle
Table ReferencePrivateNote
User specific notes. Each user will only see the notes entered under the same responsible user name.
| Column |
Data type |
Description |
Nullable |
Relation |
| RefID |
int |
Refers to the ID code of the main ReferenceTitle table (= foreign key) |
NO |
Refers to table ReferenceTitle |
| PrivateTo |
int |
* The person responsible for the Notes. //[RefMan: not supported]Default value: [dbo].wbCurrentUserID |
NO |
- |
| Content |
nvarchar (4000) |
Internal notes regarding the reference title. Notes will normally be visible only under the same Responsible login name. //[RefMan 06: N1, AB] |
NO |
- |
| LogInsertedBy |
nvarchar (50) |
ID of the creator of this data setDefault value: [dbo].UserID |
YES |
- |
| LogInsertedWhen |
smalldatetime |
Date and time when the data were first entered (typed or imported) into this database.Default value: getdate() |
YES |
- |
| LogUpdatedBy |
nvarchar (50) |
ID of the person to update this data set lastDefault value: [dbo].UserID |
YES |
- |
| LogUpdatedWhen |
smalldatetime |
Date and time when the data were last updated.Default value: getdate() |
YES |
- |
Depending on:
Table ReferenceProject
The projects within which the Reference were placed
| Column |
Data type |
Description |
Nullable |
Relation |
| RefID |
int |
Refers to the ID of ReferenceTitle (= Foreign key and part of primary key) |
NO |
Refers to table ReferenceTitle |
| ProjectID |
int |
ID of the project to which the Reference belongs (Projects are defined in DiversityProjects) |
NO |
Refers to table ProjectProxy |
| LogInsertedBy |
nvarchar (50) |
ID of the creator of this data setDefault value: [dbo].UserID |
YES |
- |
| LogInsertedWhen |
smalldatetime |
Date and time when the data were first entered (typed or imported) into this database.Default value: getdate() |
YES |
- |
| LogUpdatedBy |
nvarchar (50) |
ID of the person to update this data set lastDefault value: [dbo].UserID |
YES |
- |
| LogUpdatedWhen |
smalldatetime |
Date and time when the data were last updated.Default value: getdate() |
YES |
- |
Depending on:
- ProjectProxy
- ReferenceTitle
Table ReferenceRelator
Reference authors, book editors, or series editors.
| Column |
Data type |
Description |
Nullable |
Relation |
| RefID |
int |
Refers to the ID code of the main ReferenceTitle table (= foreign key) |
NO |
Refers to table ReferenceTitle |
| Role |
nvarchar (3) |
Relator codes from MARC; Reference manager supports only aut = primary author, 2 = secondary author/editor, 3 = series editor. //[RefMan implicit] |
NO |
Refers to table Ref_RelatorRole_Enum |
| Sequence |
int |
The sequence of authors of the article. (Default based on system date/time; counter attrib. wouldn’t work with replication -> random sequence! Note: Au+RefID+Type is not necessarily unique. Two authors may have identical abbreviated names, e.g. spouses!)Default value: CONVERT([int],(99999)*(CONVERT([float],getdate(),(0))-(37200)),(0)) |
NO |
- |
| Name |
nvarchar (255) |
Author, editor, etc. Example: ‘Miller, W. I., Jr.’. Format: Last name, comma, first initial with period and blank, optional middle initial, and optional comma plus suffix (Jr./Sr./III./MD etc.) //[RefMan 04: A1/AU, 14: A2/ED, 24: A3; no ‘*’ allowed!] |
NO |
- |
| AgentURI |
varchar (255) |
The URI of the Agent, e.g. as stored within the module DiversityAgents |
YES |
- |
| SortLabel |
nvarchar (255) |
Name of the agent without special characters formatted to facilitate sorting |
YES |
- |
| Address |
nvarchar (1000) |
The address of the author, if available. Entered only in cases where it is of special relevance to one of the users of the database (or if imported from a database). //[RefMan 32: AD]Default value: '’ |
YES |
- |
| LogInsertedBy |
nvarchar (50) |
ID of the creator of this data setDefault value: [dbo].UserID |
YES |
- |
| LogInsertedWhen |
smalldatetime |
Date and time when the data were first entered (typed or imported) into this database.Default value: getdate() |
YES |
- |
| LogUpdatedBy |
nvarchar (50) |
ID of the person to update this data set lastDefault value: [dbo].UserID |
YES |
- |
| LogUpdatedWhen |
smalldatetime |
Date and time when the data were last updated.Default value: getdate() |
YES |
- |
Depending on:
- Ref_RelatorRole_Enum
- ReferenceTitle
trgInsReferenceRelator
Table ReferenceTitle
Main entity; compatible with Reference Manager™ v.9-11
| Column |
Data type |
Description |
Nullable |
Relation |
| RefType |
nvarchar (10) |
Type of literature reference, determines which fields are available for data entry. The value must come from the pick list provided. //[RefMan 01: TY]Default value: ‘JOUR’ |
NO |
Refers to table Ref_Type_Enum |
| RefID |
int |
Unique reference ID code for the reference record. Currently supporting only integer numbers. Note that RefMan in principle supports 20 char., but uses only integers. //[RefMan 02: ID]Default value: CONVERT([int],rand()*(2147483647.1),(0)) |
NO |
- |
| RefDescription_Cache |
nvarchar (255) |
* A short system generated text identifying the reference, usually authors, year, title. Example: ‘Smith. & Nao 1999. New Taxa.’ //[RefMan: not applicable]Default value: '’ |
NO |
- |
| Title |
nvarchar (MAX) |
The main (primary) title. Use normal capitalization, omit a period (’.’) at the end, and do not type a paragraph return (Enter) at the end of each line! //[RefMan 03: TI, T1, CT, BT only for BOOK & UNPB]Default value: '’ |
NO |
- |
| DateYear |
smallint |
Year of the publication date (primary date). Only numbers are allowed and the year must be entered with 4 digits (‘1998’, not ‘98’). //[RefMan 05: Y1,PY pro parte] |
YES |
- |
| DateMonth |
smallint |
Optional: The month of the publication date. [Note: in DateYear/Month/Day the information printed on the book or journal are entered, even if this is not the true date!] //[RefMan 05: Y1,PY pro parte] |
YES |
- |
| DateDay |
smallint |
Optional: The day of the publication date. [Note continued: if the true date is relevant, e.g. for the purpose of nomenclatural priority, it can be entered under DateSecondary.] //[RefMan 05: Y1,PY pro parte] |
YES |
- |
| DateSuppl |
nvarchar (255) |
Optional: A date supplement, like ‘approx.’, a season (‘Summer’), a quarter (‘1st Quarter’), or any other information regarding the publication date. //[RefMan 05: Y1,PY pro parte]Default value: '’ |
NO |
- |
| SourceTitle |
nvarchar (MAX) |
The book (secondary) title in cases where the reference is an article or chapter from a book. Use normal capitalization.//[RefMan 13: T2; BT for all types except BOOK & UNPB]Default value: '’ |
NO |
- |
| SeriesTitle |
nvarchar (255) |
The series title. Use normal capitalization, omit a period (’.’) at the end, and do not type a paragraph return (Enter) at the end of each line! //[RefMan 23: T3]Default value: '’ |
NO |
- |
| Periodical |
nvarchar (255) |
Journal/periodical in which the article appeared. Linked to the Abbreviation attribute of ReferencePeriodical. //[RefMan 11: JF, JO, JA]Default value: '’ |
NO |
- |
| Volume |
nvarchar (255) |
The volume (for periodicals or journals, excluding the issue number), report number, etc. //[RefMan 12: VL pro parte, comp. Edition!]Default value: '’ |
NO |
- |
| Issue |
nvarchar (255) |
The issue, if any. Useful also to enter a special designation for a supplement, for example for ‘xxx 45 (Suppl.)’ enter volume = 45 and issue = ‘Suppl.’. Do not put ‘()’ around the issue number. //[RefMan 15: IS]Default value: '’ |
NO |
- |
| Pages |
nvarchar (255) |
The page, table, or figure numbers for the reference, e.g. ‘23-41’, ‘341 pp.’, or ‘20, 22-24, 32’ (for non-consecutive pages). //[RefMan 09: SP + 10: EP]Default value: '’ |
NO |
- |
| Publisher |
nvarchar (255) |
The name of the publisher (publishing company or institution, including universities or scientific societies). //[RefMan 17: PB]Default value: '’ |
NO |
- |
| PublPlace |
nvarchar (255) |
The location where the item being referenced was published, such as a city and state. //[RefMan 16: CY, CP]Default value: '’ |
NO |
- |
| Edition |
smallint |
Number of the edition of a book. Use only positive integer numbers. //[RefMan 12: VL pro parte, compare Volume!] |
YES |
- |
| DateYear2 |
smallint |
Year of a secondary date, esp. the true publ. date where relevant for nomenclatural priority. Only numbers are allowed and the year must be entered with 4 digits (‘1998’, not ‘98’). //[RefMan 28: Y2 pro parte] |
YES |
- |
| DateMonth2 |
smallint |
Optional: The month of a secondary date. //[RefMan 28: Y2 pro parte] |
YES |
- |
| DateDay2 |
smallint |
Optional: The day of a secondary date. //[RefMan 28: Y2 pro parte] |
YES |
- |
| DateSuppl2 |
nvarchar (255) |
Optional: A date supplement a secondary date, like ‘approx.’, a season (‘Summer’), a quarter (‘1st Quarter’), or any other information regarding the secondary date. //[RefMan 28: Y2 pro parte]Default value: '’ |
NO |
- |
| ISSN_ISBN |
nvarchar (18) |
The ‘International Standard Serial Number’ or ‘International Standard Book Number’. Optional information; use is recommended only for publications that are otherwise difficult to order. //[RefMan 26: SN]Default value: '’ |
NO |
- |
| Miscellaneous1 |
nvarchar (255) |
Various reference type dependent information; e.g. the total number of volumes for books //[RefMan 29: M1]Default value: '’ |
NO |
- |
| Miscellaneous2 |
nvarchar (255) |
Various reference type dependent information //[RefMan 30: M2]Default value: '’ |
NO |
- |
| Miscellaneous3 |
nvarchar (255) |
Various reference type dependent information //[RefMan 31: M3]Default value: '’ |
NO |
- |
| UserDef1 |
nvarchar (MAX) |
User defined fields as entered in Reference Manager, only provided for import/export compatibility and not supported beyond that. //[RefMan 18: U1]Default value: '’ |
NO |
- |
| UserDef2 |
nvarchar (MAX) |
User defined fields as entered in Reference Manager, only provided for import/export compatibility and not supported beyond that. //[RefMan 19: U2]Default value: '’ |
NO |
- |
| UserDef3 |
nvarchar (MAX) |
User defined fields as entered in Reference Manager, only provided for import/export compatibility and not supported beyond that. //[RefMan 20: U3]Default value: '’ |
NO |
- |
| UserDef4 |
nvarchar (MAX) |
User defined fields as entered in Reference Manager, only provided for import/export compatibility and not supported beyond that. //[RefMan 21: U4]Default value: '’ |
NO |
- |
| UserDef5 |
nvarchar (MAX) |
User defined fields as entered in Reference Manager, only provided for import/export compatibility and not supported beyond that. //[RefMan 22: U5]Default value: '' |
NO |
- |
| WebLinks |
nvarchar (MAX) |
One or several URLs; use the semicolon as separator (http://www…). A URL may point to a local file (C:\graphic.gif; \servername\Data\x.doc) //[RefMan 33: UR]Default value: '' |
NO |
- |
| LinkToPDF |
nvarchar (MAX) |
One or several URLs; use the semicolon as separator (http://www…). A URL may point to a local file (C:\graphic.gif; \servername\Data\x.doc) //[RefMan 34: L1]Default value: '' |
NO |
- |
| LinkToFullText |
nvarchar (MAX) |
One or several URLs; use the semicolon as separator (http://www…). A URL may point to a local file (C:\graphic.gif; \servername\Data\x.doc) //[RefMan 35: L2]Default value: '' |
NO |
- |
| RelatedLinks |
nvarchar (MAX) |
One or several URLs; use the semicolon as separator (http://www…). A URL may point to a local file (C:\graphic.gif; \servername\Data\x.doc) //[RefMan 36: L3]Default value: '' |
NO |
- |
| LinkToImages |
nvarchar (MAX) |
One or several URLs; use the semicolon as separator (http://www…). A URL may point to a local file (C:\graphic.gif; \servername\Data\x.doc) //[RefMan 37: L4]Default value: '' |
NO |
- |
| SourceRefID |
int |
* Independent publication (e.g. an edited book) in which a dependent publication was published. Refers to the ID code of a reference already entered in this system. Provided as an alternative to ref. manager’s denormalized storage! |
YES |
- |
| Language |
nvarchar (25) |
* Language of the article/book, as ISO 2 letter codes. //[RefMan: not supported!]Default value: ‘UNK’ |
NO |
- |
| DuplicateCheck_Cache |
nvarchar (255) |
* A system generated string (typically Au. 1-4/Yr./Jour./Vol./first page) that is assumed to be unique. Use ‘DuplicateOverride’ to override if two reference titles are falsely identified as duplicates. //[RefMan: not applicable]Default value: '’ |
YES |
- |
| DuplicateOverride |
bit |
* A number to manually override automatic duplicate check, enter a number 1-255 if the system claims that non-duplicate entries are duplicates. //[RefMan: not applicable]Default value: (0) |
NO |
- |
| ReplaceWithRefID |
int |
* Old RefIDs are maintained to provide stable object links. Instead of direct deletes, users may select a reference to be the valid one, into which all related information (keywords, markers) is merged. |
YES |
- |
| Problem |
nvarchar (4000) |
* A problem that occurred during data editing within the application. Typically the entries here should later be deleted after help has been obtained. Do not enter scientific or bibliographic problems here; use Notes for such permanent problems!Default value: '' |
NO |
- |
| ProblemUpdatedBy |
int |
* Operator who entered the problem text |
YES |
- |
| ProblemUpdatedWhen |
datetime |
* Date and time when problem was recorded |
YES |
- |
| CitationText |
nvarchar (1000) |
* Full text of a citation that describes the current reference. Use if ref. is only known as a citation in the bibliography of another publication, or if imported from unstructure data source. Empty if reference is transcribed from original publication!Default value: '' |
NO |
- |
| CitationFrom |
nvarchar (255) |
* Description of publication, Only known as citation from bibliography of another publication given here (as ID code or author/year description); Empty if transcribed from original publication!Default value: '' |
NO |
- |
| ImportedFrom |
nvarchar (80) |
* If imported from a reference database (esp. a commercial one): The name of the database system or provider; otherwise empty. This information is important to prevent copyright violations!Default value: '' |
NO |
- |
| ImportedID |
nvarchar (50) |
* If imported from a reference database (esp. a commercial one): The ID identifying the record in that database; otherwise empty. Requires ImportedFrom //[RefMan: not supported!; Internal management attribute]Default value: '' |
NO |
- |
| PlausibilityCheckedBy |
int |
* Person responsible for a first plausibility or consistency check. User and Date are automatically filled if ‘Original check’ performed directly. //[RefMan: not applicable. Internal mgmt.attribute] |
YES |
- |
| PlausibilityCheckedWhen |
datetime |
* Date and time when plausibility/consistency was checked (i.e. data entry rules and spelling errors checked, no comparison with original publication) //[RefMan: not applicable. Internal mgmt.attribute] |
YES |
- |
| OriginalComparedBy |
int |
* Name of user responsible for comparison of ReferenceTitle record with original publication //[RefMan: not applicable. Internal mgmt.attribute] |
YES |
- |
| OriginalComparedWhen |
datetime |
* Date and time when entry was compared with the original publication (important esp. when ReferenceTitle was entered from secondary ReferenceTitle list) //[RefMan: not applicable. Internal mgmt.attribute] |
YES |
- |
| DateFrom_Cache |
datetime |
Calculated field, based on DateYear, DateMonth, DateDay, where missing information is replaced with earliest possible value (e.g. “1999” results in 1.1.1999) |
YES |
- |
| DateTo_Cache |
datetime |
Calculated field, based on DateYear, DateMonth, DateDay, where missing information is replaced with latest possible value (e.g. “1999” results in 31.12.1999) |
YES |
- |
| Date2From_Cache |
datetime |
Calculated field, based on Date2Year, Date2Month, Date2Day, where missing information is replaced with earliest possible value (e.g. “1999” results in 1.1.1999) |
YES |
- |
| Date2To_Cache |
datetime |
Calculated field, based on Date2Year, Date2Month, Date2Day, where missing information is replaced with latest possible value (e.g. “1999” results in 31.12.1999) |
YES |
- |
| Responsible |
int |
* Person responsible for entering this reference into the data collectionDefault value: (-1) |
NO |
- |
| SysRecordVersion |
int |
(Under trigger control; number automatically increased with every record update, enabling manual version tracking)Default value: (0) |
YES |
- |
| ParentRefID |
int |
Refers to the RefID of the superior reference |
YES |
- |
| LogInsertedBy |
nvarchar (50) |
ID of the creator of this data setDefault value: [dbo].UserID |
YES |
- |
| LogInsertedWhen |
smalldatetime |
Date and time when the data were first entered (typed or imported) into this database.Default value: getdate() |
YES |
- |
| LogUpdatedBy |
nvarchar (50) |
ID of the person to update this data set lastDefault value: [dbo].UserID |
YES |
- |
| LogUpdatedWhen |
smalldatetime |
Date and time when the data were last updated.Default value: getdate() |
YES |
- |
Depending on:
trgInsReferenceTitle
Diversity References enumeration tables
Enumeration tables
The following objects are not included:
- Logging tables
- System objects
- Objects marked as obsolete
- Previous versions of objects
Table
Table Ref_AvailabilityReprintStatus_Enum
Provides codes for ReferenceAvailability.ReprintStatus field
Dependent tables:
Table Ref_RelatorRole_Enum
Provides codes for creator or contributor roles like author, editor, photographer, advisor, etc. These roles are used in ReferenceRelator
Dependent tables:
Table Ref_Type_Enum
Reference type definitions. Which reference attributes are enabled and how they should be labeled? Currently only the usage of a type is defined here; the attribute labels are defined directly in the vba code.
Dependent tables:
Creation
To configure your Database, choose Administration →
 Database →
  Rename
database to change the name of the database according to your
requirements. During this renaming all processes in the database will be
terminated (you will get a warning if processes from other host are
active).
Rename
database to change the name of the database according to your
requirements. During this renaming all processes in the database will be
terminated (you will get a warning if processes from other host are
active).
Afterwards you should adapt the address that is published by the
database for access by other modules. Choose Administration →
Database → Set
published address from the menu. This will change the published
address to the name of the server where your database is located and an
identifier for you database, e.g.
http://xy.diversityworkbench.de/Collection/.
Configuration
To configure your Database, choose Administration →
Database → Rename
database to change the name of the database according to your
requirements. During this renaming all processes in the database will be
terminated (you will get a warning if processes from other host are
active).
Afterwards you should adapt the address that is published by the
database for access by other modules. Choose Administration →
Database → Set
published address from the menu. This will change the published
address to the name of the server where your database is located and an
identifier for you database, e.g.
http://xy.diversityworkbench.de/Collection/.
History
To inspect the history of a dataset click on the  history button. A form will open, showing all former
states of the data in the tables with the current dataset at the top.
The version is shown in the header of the
main.
history button. A form will open, showing all former
states of the data in the tables with the current dataset at the top.
The version is shown in the header of the
main.
The version will be set automatically. If a dataset is changed the
version will be increased if the last changes where done by a different
user or the last change is more than 24 hours ago (for further details
see topic Logging
).
For analysis of the succession of changes the log tables contain additional columns:
- Kind of change: This column is set by the trigger inserting data into the log table
- current version: This is the current state of the data in the table
- UPDATE: This is the state of the data before an update happened
- DELETE: This is the state of the data when the data have been deleted
- Date of change: The date and time of the changes. This column has the default value getdate() that means the current date an time is set when any data are inserted into the log table
- Responsible: The user reponsible for the changes. This column has the default value suser_sname() that means the current user is set when any data are inserted into the log table
- LogID: A unique ID of the logtable. This column is an identity that means it is set by the database when any data are inserted into the log table
Logging
Changes within the database will be documented for each dataset with the
time and the responsible user in the columns shown in the image below.
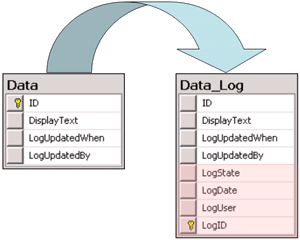
All main tables have a corresponding logging table. If you change or
delete a dataset the orignial dataset will be stored in this logging
table together with informations about who has done the changes and when
it happend. To see the data stored in the logging tables, click on the
button to open the history of a dataset.
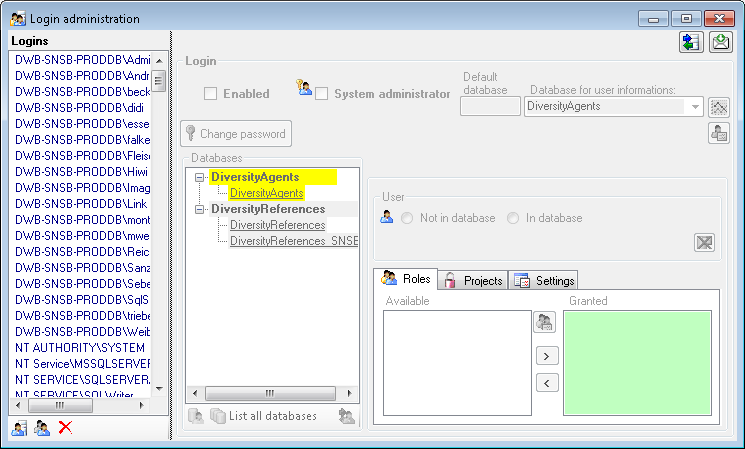
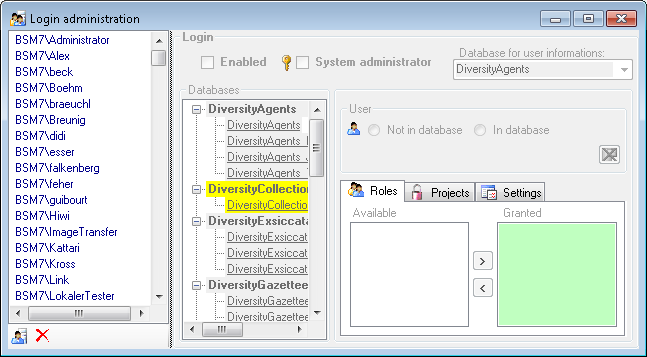
Login administration
To administrate the logins on the database server, their permissions and
roles respectively as well as access to projects choose
Administration - Database - Logins ... from the menu. A window
will open as shown below.
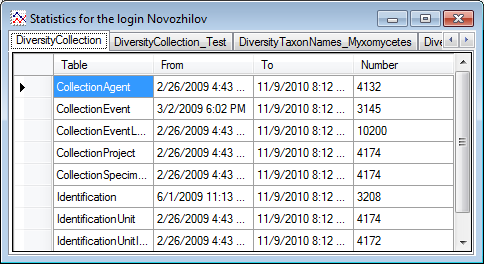
Statistics
To see the activity of a login click on the  button. A window will open as shown below listing all databases and
tables together with the timespan (From - To) and the number of data
sets where any activity of the current login has been found.
button. A window will open as shown below listing all databases and
tables together with the timespan (From - To) and the number of data
sets where any activity of the current login has been found.
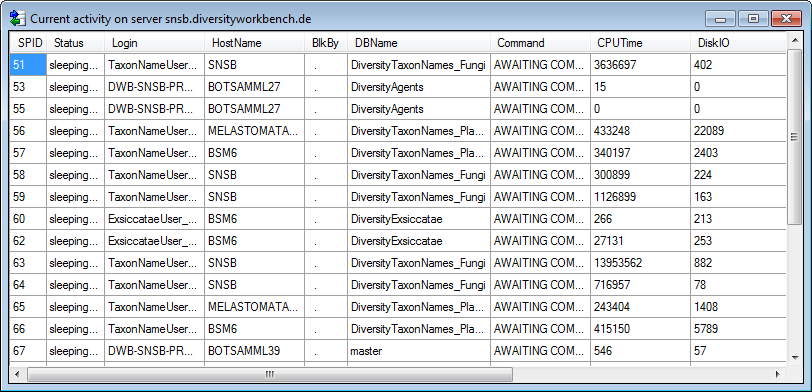
To see the current activity on the server click on the
 button. A window as shown below will open
listing all user related processes on the server.
button. A window as shown below will open
listing all user related processes on the server.
Creation of login
To create a new login click on the  button. A
window will open as shown below.
button. A
window will open as shown below.
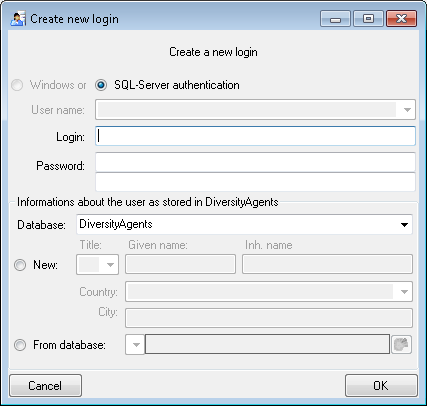
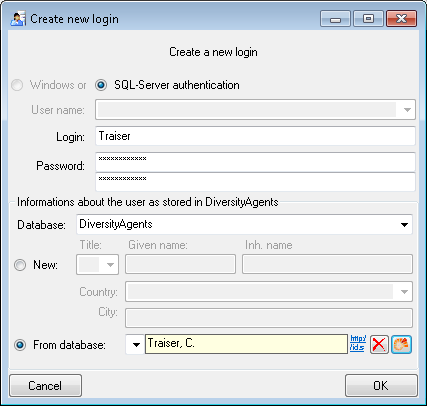
Here you can enter the name of the new login, the password and the
information about the user which will be stored in a DiversityAgents
database. You may either create a new entry in this database or select
an existing one: Click on the  DWB button
to search for a name in the database (see below).
DWB button
to search for a name in the database (see below).
Copy a login
To copy a login including all permissions etc. into a new login, select
the original login in the list and click on the
 button.
Edit a login
To edit the access for a login on the server select the login in the
list. If a login should be disabled  , uncheck
the enabled checkbox (see below).
, uncheck
the enabled checkbox (see below).

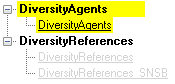
All databases on the server will be listed with the current database
showing a yellow background. The databases where the login has no
access will be listed in gray while the databases accessible for a
login are black.
Access of a login to a database
To allow the access to a database select the database from the list and
choose database as shown below.

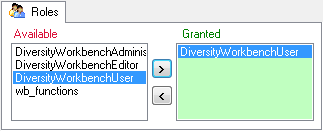
Roles of a login in a database
Use the > and < buttons to add or remove roles for the login
in the database (see below).
Projects for a login in a database
Depending on the database you can edit the list of projects accessible
for a login (see below).
There are 4 states of accessibility for projects
 Full access: The user can edit the
data
Full access: The user can edit the
data Read only access: The user can only
read the data
Read only access: The user can only
read the data Locked: The project is locked. Nobody
can change the data
Locked: The project is locked. Nobody
can change the data No access: The user has no access via a
project
No access: The user has no access via a
project
Projects are related to the module DiversityProjects. To get additional
information about a project select it in the the list and click on the
button.
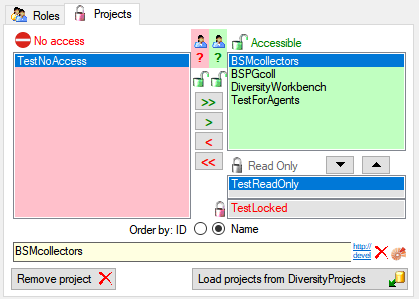
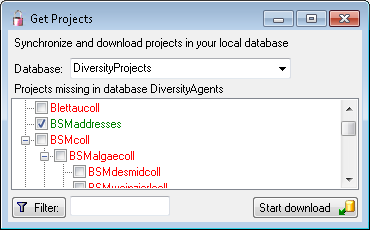
To load additional projects click on the Load projects
 button. A window will open as shown below.
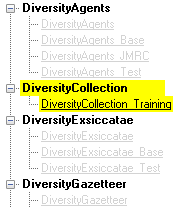
Projects already in the database will be listed in
green, missing projects in red (see below). Check all projects you need in your database and
click the Start download button.
button. A window will open as shown below.
Projects already in the database will be listed in
green, missing projects in red (see below). Check all projects you need in your database and
click the Start download button.
Overview for a login
If you see an overview of all permissions and project for a login, click
on the  button. A window a shown below will
open. It lists all modules and their
databases, the
button. A window a shown below will
open. It lists all modules and their
databases, the  roles,
accessible projects and
read only projects for a login.
roles,
accessible projects and
read only projects for a login.

To copy the permissions and projects of the current login to another
login, select the login where the settings should be copied to from the
list at the base of the window and click on the  button to copy the settings for all databases or the
 button to copy the settings of the selected
database into this login.
button to copy the settings of the selected
database into this login.
Overview for a database
If you see an overview of all user and roles in a database, click on the
 button. A window a shown below will open.
It lists all
button. A window a shown below will open.
It lists all  user and roles
in the database.
user and roles
in the database.
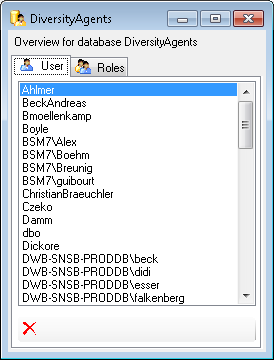
To remove a user, select it in the list and click on the
 button.
Correction of logins
If you select one of the databases, at the base a
 button may appear. This indicates, that
there are windows logins listed where the name of the login does not
match the logins of the server. This may happen if e.g. a database was
moved from one server to another. To correct this, click on the button.
A list of deviating logins will be shown, that can be corrected
automatically.
button may appear. This indicates, that
there are windows logins listed where the name of the login does not
match the logins of the server. This may happen if e.g. a database was
moved from one server to another. To correct this, click on the button.
A list of deviating logins will be shown, that can be corrected
automatically.
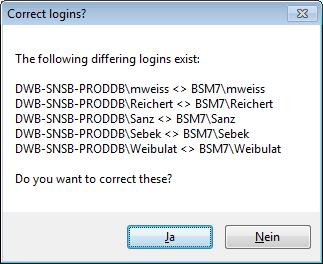
If logins with the same name but different server are found, one of them
has to be deleted to make the correction possible. You will get a list
where you can select those that should be removed.
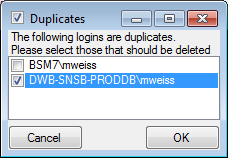
Select the duplicate logins that should be removed and click OK.
Linked server
Databases not available on the local server may be accessible via a
 linked server. Provided the option for
loading the connections is set, the program will
automatically try to connect to these databases. Otherwise you can
connect to these databases as described in chapter ModuleConnections. To
administrate the linked servers, choose Administration -
Linked servers ... from the menu. A form
(see below) will open where you can add linked servers and inspect the
content of the available databases.
linked server. Provided the option for
loading the connections is set, the program will
automatically try to connect to these databases. Otherwise you can
connect to these databases as described in chapter ModuleConnections. To
administrate the linked servers, choose Administration -
Linked servers ... from the menu. A form
(see below) will open where you can add linked servers and inspect the
content of the available databases.
Use the  resp. buttons to add
or remove a linked server. To add a linked server, you need the name of
the server and the port, e.g. tnt.diversityworkbench.de,
5432, the login associated with the
connection of the linked server e.g. TNT and the password for this login.
resp. buttons to add
or remove a linked server. To add a linked server, you need the name of
the server and the port, e.g. tnt.diversityworkbench.de,
5432, the login associated with the
connection of the linked server e.g. TNT and the password for this login.
Permissions
Please keep in mind, that any user accessing databases via the established linked server will get the permissions of the login you set for the linked server. In most cases a login with read only access is an appropriate choise.
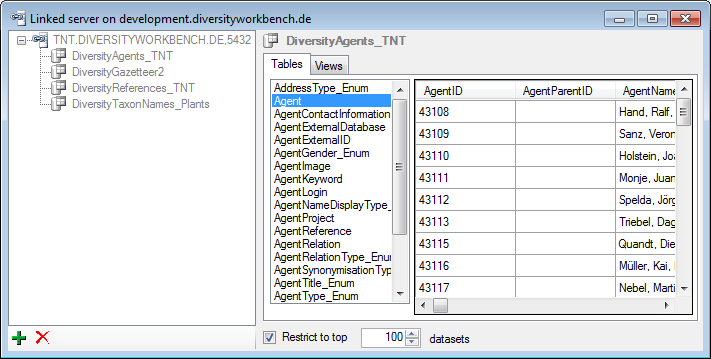
The available databases will be
listed as shown above. To inspect the content, select among the tables
or views listed in the right part as shown above. Linked servers have
certain restrictions for the availability of data, e.g. XML and
geography data are not available via a linked server. For a table or
view containing incompatible content you may encounter a corresponding
error mentioning the reason for the incompatibility.
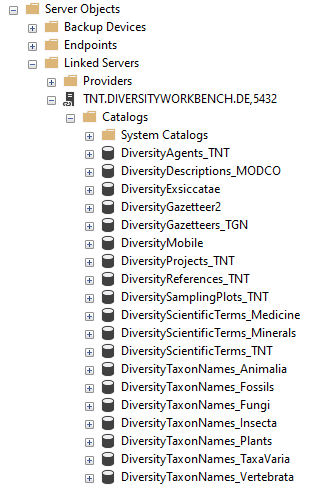
An expample for a linked server as provided for central databases is shown below (using the management studio for SQL-Server)
These are the tools to handle the basic parts of the database. These
tools are only available for the owner of the database and should be
handled with care as any changes in the database may disable
the connection of your client to the database. Before changing any parts
of the database it is recommended to backup the current state
of the database. To use these tools, choose Administation → Database
→  Database tools ... from the menu. A
window will open as shown below.
Database tools ... from the menu. A
window will open as shown below.
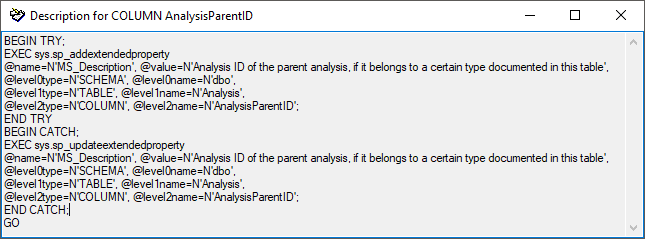
Description
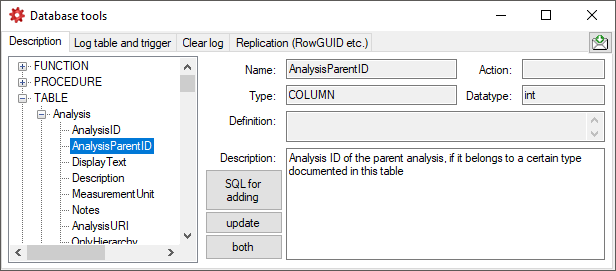
The Description section (see above) shows the basic definitions of
the objects in the database and enables you to enter a description for
these objects including tables and their columns, functions and their
parameter etc. With the buttons SQL for adding, update and
both you can generate SQL statements for the creation of the
descriptions in your database. Use the button both if you are not
sure if a description is already present as it will generate a SQL
statement working with existing and missing descriptions (see below).
The button  Fill Cache fills the
table CacheDescription where all descriptions are collected for easy
access.
Fill Cache fills the
table CacheDescription where all descriptions are collected for easy
access.
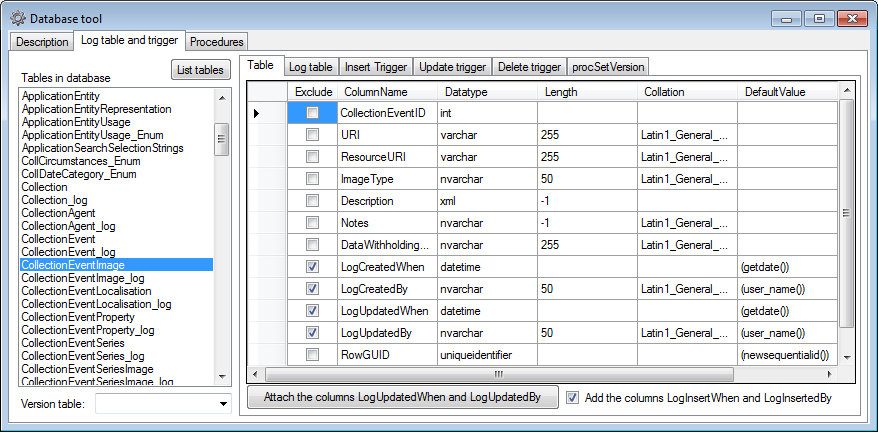
Log table and trigger
In the Log table and trigger section (see below) click on the List
tables button to see all tables within the database. The Table
section shows the basic definitions of a selected table. If columns for
logging the date and responsible user for inserting and updating the
data are missing, you can use the Attach ... button to attach these
columns to the table. Furthermore you may add a RowGUID to the table
as e.g. a preparation for a replication.
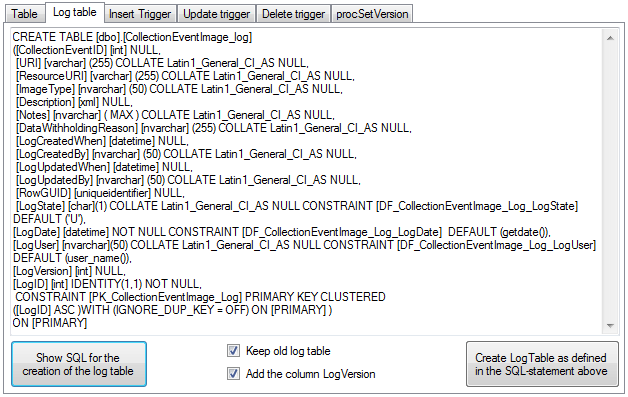
In the Log table section (see below) you can create a logging table
for the selected table in a format as used within the Diversity
Workbench. Click on the Show SQL ... button to show the
SQL-statement that will create the logging table. If an old logging
table should be kept, choose the Keep old log table option. If your
table should support the version setting from a main table, choose the
Add the column LogVersion option. To finally create the logging
table click on the Create LogTable ... button.
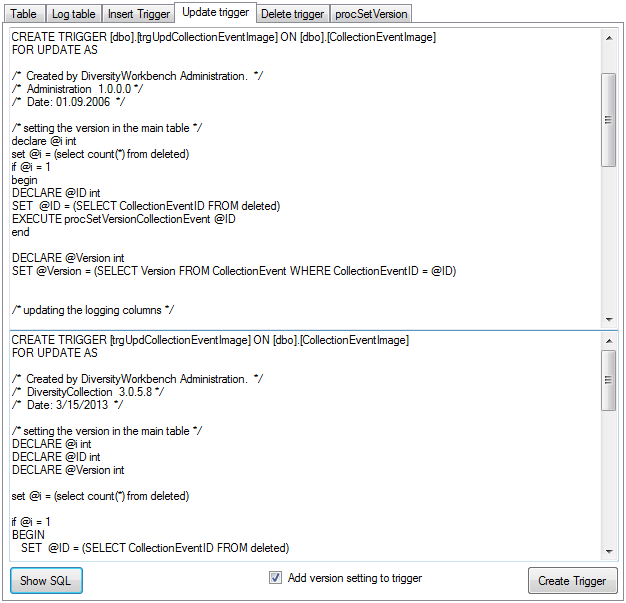
The triggers for insert, update and delete are created
in the according sections (see below). If an old trigger exists, its
definition will be shown in the upper part of the window. Click on the
Show SQL button to see the definition of the trigger according to
the current definition of the table in a format as used in the Diversity
Workbench. If a trigger should set the version in a main table, which
the current table is related to, choose the Add version setting to
trigger option. To enable this option you must select the version
table first. To finally create the trigger click on the Create
trigger button. The update and delete triggers will transfer the
original version of the data into the logging tables as defined above,
where you can inspect the history of the data sets.
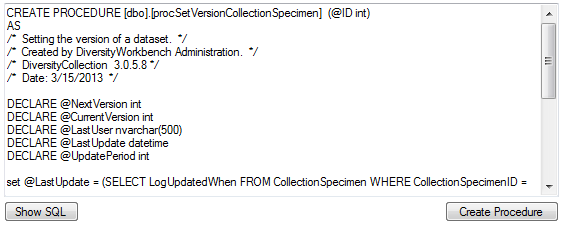
If so far no procedure for setting the version in a main table is
defined, you can create this procedure in the last section. Click on the
Show SQL button to see the definition and on the Create Procedure button
to create the procedure (see below).
Preparation for replication
If you want to use replication within you module, the tables need
certain columns and a log table. These preparations can be performed by
a script, generated in the section Replication (see below). Select the
tables you want to include in the process and create the script. This
script can than be included in an update of the database. Please ensure
that these changes are only be done by expert staff.

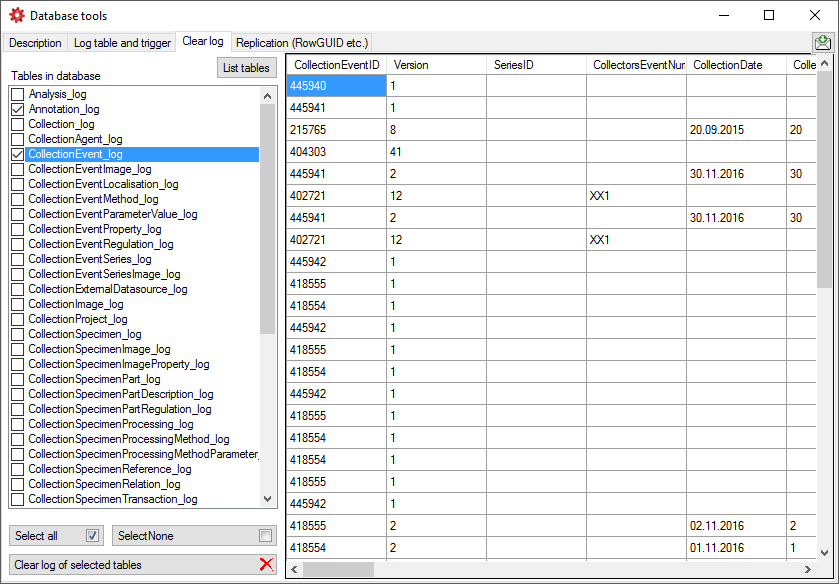
Clear logtables
If for any reason you want to clear the log tables of the database, this
can be done in the Clear log tab as shown below. Click on the List
tables button to list the log tables. Then select those that should be
cleared and click on the Clear log of selected tables
button (see below). Please keep in mind that
any restoration of data from the log is only possible as long as the
data can be retrieved from the log.
Data protection
To implement the  General Data Protection Regulation of the European
Union several steps have to be performed in a database:
General Data Protection Regulation of the European
Union several steps have to be performed in a database:
- Generate a skript using this tool (see below) to convert all tables
and insert objects according to the requirements:
- Add columns ID, PrivacyConsent and PrivacyConsentDate in table
UserProxy
- Grant update to PrivacyConsent and PrivacyConsentDate in table
UserProxy
- Create update trigger for UserProxy setting the
PrivacyConsentDate
- Create the function providing the ID of the user from UserProxy
- Create the function providing the name of the user from
UserProxy
- Create the function PrivacyConsentInfo providing common
information
- For every table:
- Insert users from a table into UserProxy (if missing so far)
- Insert users from the corresponding log table into UserProxy
(if missing so far)
- Change the constraints for the logging columns (User_Name()
→ UserID())
- Replace user name with ID in logging columns
- Replace user name with ID in logging columns of the log
table
- Adapt description of the logging columns
- Include the skript in an update of the database
- Check the database for update triggers, functions using e.g.
CURRENT_USER, USER_NAME, SUSER_SNAME etc. where user names must be
replaced with their IDs. Create a script performing these tasks and
include it into an update for the database
- Adapt the client to the now changed informations (e.g. query for
responsible etc.)
After these changes the only place where the name of a user is stored is
the table UserProxy together with the ID. Removing the name (see below)
will remove any information about the user leaving only a number linked
to the information within depending data.
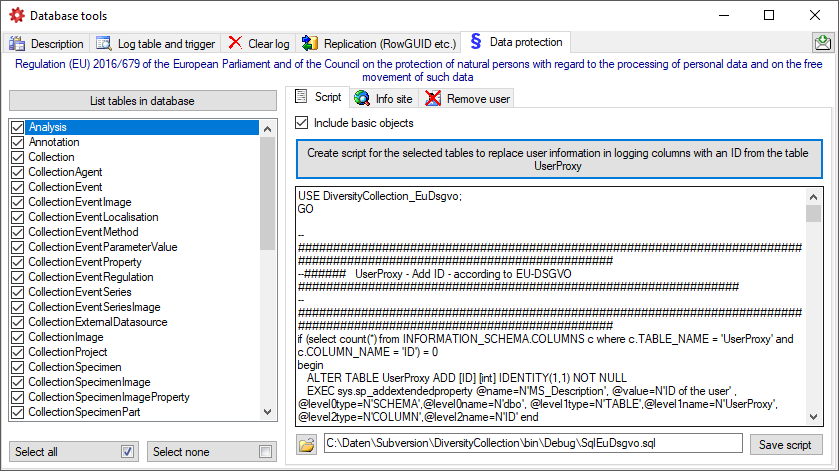
To generate a script for the objects and changes needed to implement the
General Data Protection
Regulation
use the Data protection tab as shown below. The
generated script will handle the standard objects (logging columns) but
not any additional circumstances within the database. For these you need
to inspect the database in detail and create a script to handle them on
your own.
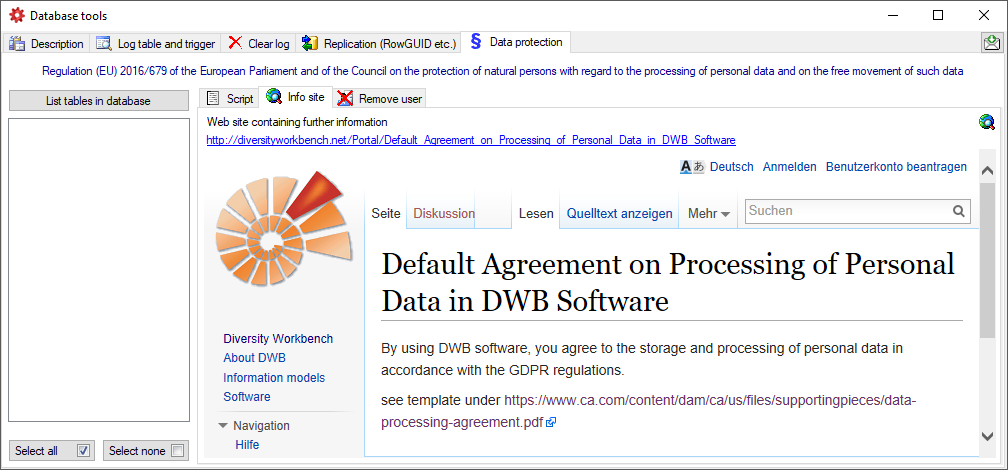
To set the website where detailed information about the handling of the
General Data Protection
Regulation
within the DiversityWorkbench resp. the current database is provided,
click on the  button on the
Info site tab. If unchanged, the default
site
for the DiversityWorkbench is set (see below).
button on the
Info site tab. If unchanged, the default
site
for the DiversityWorkbench is set (see below).
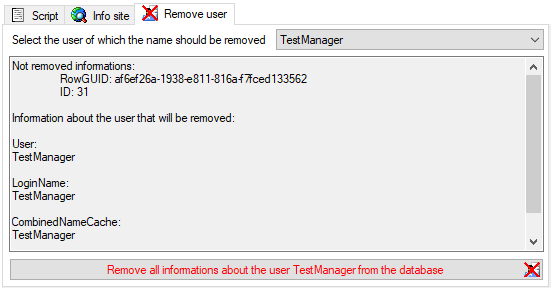
If for any reason a user wants his name to be removed from the database,
select the users name from the list as shown below and click on
the  button (see below).
Documentation
These are the tools to describe the parts of the database and create
documentations of the structure. To use these tools, choose
Administation - Database -
 Documentation… from the menu. A
window will open as shown below.
Documentation… from the menu. A
window will open as shown below.

Click on the List objects button to list the objects of
the database. With the  button
resp.
button
resp.  button you can select
resp. deselect the types in the type selection and the object in the
list.
button you can select
resp. deselect the types in the type selection and the object in the
list.
Select the objects that should be listed
all button resp. none button you can select resp. deselect the types in the type selection and the object in the list.
Select the objects that should be included in the documentation:
- Tables
- Views
- Roles
- Functions and procedures
- Context
… and exclude the objects that should not be included in the
documentation:
- Logging tables
- Enumeration tables
- Old versions of objects
- System objects
- Deprecated objects
The button Set default seletion will select all items in
the list without:
- System objects
- Older version of an object indicated by the number at the last
position
- Logging tables
- Enumeration tables
- Objects with a description starting with e.g. outdated, deprecated,
obsolete etc.
- HTML options:
- include index for objects
- include NULL / NOT NULL
- include relations and dependencies
- include Description
- exclude standard trigger
- exclude definition
- include permissions for *_Enum etc.
- exclude obsolete columns
- exclude columns starting or ending with the given strings
- include list of tables that are depending on a table
The buttons Add to seletion and
Remove from seletion  will use the
given strings with * as wildcard to add resp. remove items from the
selection.
will use the
given strings with * as wildcard to add resp. remove items from the
selection.
With the Context option you
can show or hide the context area for the html and media wiki tab as
shown above.
To create a documentation choose among the provided options and click on
the button Create ... documentation to create the
documentation in one of the available formats (HTML, MediaWiki,
JSP-Wiki).
Subsections of Documentation
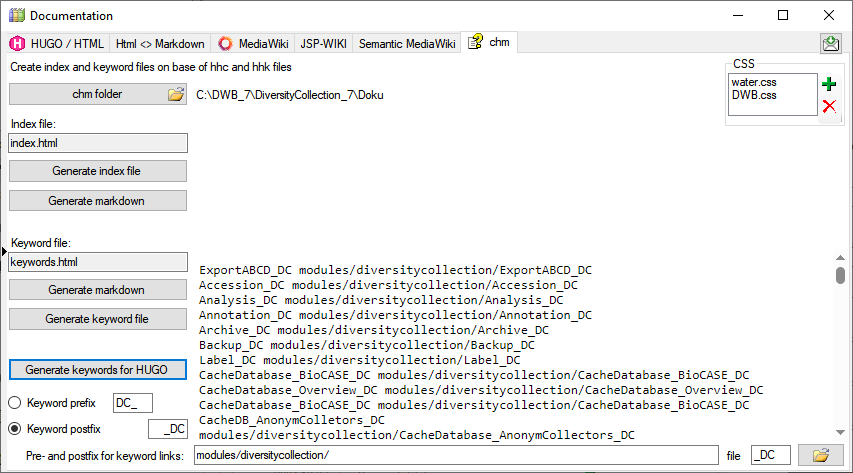
chm
With the chm tab you can generate index and keyword html files as well
as markdown files for a website generated out of the hhc and hhk files
of the HTML Help Workshop for the creation of chm manual as described in
the video
 .
.
The button Generate keywords for HUGO creates a text file keywords.txt containing the keywords needed for the HUGO manual in a simple format. A pre- or postfix is set for every module to avoid conflicts. Use the Open  button to open the file in a text editor.
HUGO
In the  HUGO / HTML tab you generate markdown files according to HUGO and the relearn theme.
The conversion and adaptions are explained in a short tutorial:
For enumeration tables the content can be exported as explained in a short tutorial:
Installation of HUGO
Update des Themes
um das Theme auf die letzte Version zu bringen kann man den Befehl
git submodule update --remote --merge themes/relearn
verwenden
Übersetzung des Bestands an html
- Übersetzung der *.html Seiten mit pandoc in *.md
- Aufbau einer Ordnerstruktur die dem Index der chm Datei entspricht
- Das Basisdokument der Ordner wird in die Ordner verschoben und in _index.md umbenannt
- Dort im Frontmatter steht der Titel der im Menü angezeigt wird, e.g.:
---
title: Installation
---
Überarbeitung der md Dateien
- Korrektur der Bildverweise
- Ordner mit den Bildern in den Ordner static kopieren
- von e.g.
 in 
- ACHTUNG - Case sensitiv. Namen müssen stimmen
- Icons gegebenenfalls freistellen für Darkmode
- Entfernung aller störenden Formatierungsangaben
- Entfernung der Kopfzeile (Überschrift wird von HUGO automatisch erzeugt)
- Korrektur der internen Verweise
- ändern von
[](http://media.snsb.info/Tutorials/dwb/Editing/OeffentlicheKontaktdaten.webm)
zu
[](http://media.snsb.info/Tutorials/dwb/Editing/OeffentlicheKontaktdaten.webm)
- ansonsten wird das Bild gezeigt statt das Video zu starten
- ändern von
zu e.g.
[Contact](editingdata/contact)
- Wenn als Basisadresse in hugo.toml etwas angegeben wurde, e.g.
baseURL = "http://www.diversityworkbench.de" dann muss diese auch für Verweise innerhalb der Files verwendet werden.
- e.g. Bildverweise

- Dateiverweise
[Anmelden](database)
- HUGO relearn erzeugt für Überschriften Anker die man ansteuern kann, e.g. kann man
### Table **AgentResource** über die Adresse database/database/#table-agentresource erreichen. Ein Index Eintrag dafür wäre e.g. [AgentResource](database/database/#table-agentresource). ACHTUNG - Case sensitiv: ### Table **AgentResource** wird in #table-agentresource übersetzt
- Kommentare starten mit # ohne folgendes Leerzeichen
Frontmatter
You can change the frontmatter to a default using the documentation tool
- Steht am Anfang der Datei und ist bei yaml durch
--- oben und unten abgegrenzt, e.g.
---
title: Login administration
linktitle: Logins
weight: 5
menuPre: img/Documentation.svg
alwaysopen: false
---
- Seiten die noch in Entwicklung sind kann man mit
draft: true im Frontmatter markieren. Diese werden dann nicht in die Ausgabe übernommen
- Der Titel wird mit
title: Login administration angegeben. Dieser erscheint dann auch in der Seite als Überschrift
- Der Text im Menü kann abweichend definiert werden mit
linktitle: Logins. Ansonsten erscheit der Titel im Menü
- Die Reihenfolge im Menü kann mit
weight: 5 angegeben werden. Ansonsten wird alphabetisch sortiert
- Ein Logo kann man mit `menuPre: img/LinkedServer.svg
- Wenn das Untermenue erst beim Anwählen geöffnet werden soll:
alwaysopen: false
Template files
Starting with a Dash: If the first line of your Markdown file starts with a dash (-), Hugo might misinterpret it as a YAML delimiter, leading to an error
Bilder
You can adapt the images to a default using the documentation tool
- Icons die e.g. in den Text integriert werden sollen, müssen folgedermassen eingebaut werden:

- Die Bilder am Anfang der Seite werde wie folgt eingebaut:

mit px wird das Bild mitgezoomt, bei vw bleibt es gleich gross
- noch nicht zu svg konvertierte Bilder die im Fliesstest erscheinen sollen werden wie folgt eingebunden:

- sonstige Bilder mit

mit der Angabe ...lightbox=false wird verhindert, dass ein Bild beim Anklicken mit der Maus geöffnet wird. Dies sollte bei Bildern die nicht nach svg konvertiert wurden und nicht im Fliesstext erscheinen nicht verwendet werden, damit der User bei kleinen Bildern diese in Originalauflösung betrachten kann. Unten 2 Beispiele


Für Bilder die aus der Quelle fontawesome kommen kann man hier suchen: fontawesome. Es funktionieren nicht alle die dort bereitstehen. Daher bitte testen!
Links innerhalb des Manuals
Für Links innerhalb des Manuals kann man shortcodes verwenden. Dafür entweder auf den Namen der Datei oder auf Links von Überschriften (ab ##) verwenden. Diese müssen innerhalb des Manuals eindeutig sein. Für Header als erstes Zeichen # dann Überschrift und alles lower case und Leerzeichen werden durch - ersetzt. Beispiel:
## Main form of diversityexsiccatae
wird zu sofern es sich in der gleichen Datei befindet:
2 x { und % relref "#main-form-of-diversityexsiccatae" % und 2 x }
Für Links ausserhalb der Datei werden Verweise unter Einschluss des Dateinamens verwendet:
Verweis auf ein Kapitel innerhalb einer Datei
2 x { und % relref "diversityexsiccatae#main-form-of-diversityexsiccatae" % und 2 x }
bzw. nur auf die Datei
2 x { und % relref "diversityexsiccatae" % und 2 x }
Leerzeichen zwischen 2 x { und % und % und 2 x } entfernen
Links auf das Manual
Von ausserhalb kann e.g. eine Überschrift mit
https://www.diversityworkbench.demodules/diversityexsiccatae/index.html#main-form-of-diversityexsiccatae
aufgerufen werden. Diese können direkt aus dem Manual kopiert werden.
Logo
- hierfür das Logo in den Ordner static kopieren
- im Ordner layouts einen Ordner partials anlegen
- dort eine Datei logo.html anlegen
- in dieser auf das Logo verweisen e.g.:
<h4><b>DiversityAgents</b></h4>
<img src="/DA_4D.svg">
- in static - layouts - partials die Datei menu-footer.html anlegen und anpassen
favicon
Im Ordner static den Ordner images anlegen
Datei favicon.ico in der Ordner static/images kopieren
Einschliessen von Dateien
Das Verzeichnis templates enthält Dateien die in andere Dateien über eine shortcode eingeschlossen werden können, e.g.:
2 x { und % include file="templates/template_workbench.md" % und 2 x }
Diese Dateien dürfen kein frontmatter enthalten. Shortcodes müssen überprüft werden, da diese in der Regel nicht ausgewertet werden.
ER-Diagramm
dieses kann als Mermaid eingebaut werden, e.g.
graph LR;
    A[Agent] --> B[AgentContact<br/>Kontaktdaten der Agents]
    A --> C[AgentReference]
    A --> D[AgentIdentifier]
    A --> E[AgentResource]
    A --> F[AgentExternalID]
    G[AgentExternalDatabase] --> F[AgentExternalID]
soll das Diagramm zoombar sein wird die Version 5.23 des Themes benoetigt. Ausserdem kann der Parameter nur für die Shortcode Version angegeben werden, nicht für die Codefences:
2 x { und % mermaid align="center" zoom="true" % und 2 x }
...
(remove space between 2 x { und  and < resp > and  und 2 x } in header and footer for correct code)
...
2 x { und % /mermaid % und 2 x }
Anpassung des Themes
Konfiguration - in hugo.toml:
```native
baseURL = "http://www.diversityworkbench.de"
languageCode = "en-us"
title = "DiversityAgents"
theme = "relearn"
[outputs]
home = ["HTML", "RSS", "SEARCH", "SEARCHPAGE"]
section = ["HTML", "RSS", "PRINT"]
page = ["HTML", "RSS", "PRINT"]
[params]
themeVariant = [ "auto", "dwb", "dwb-dark" ]
</code></pre>
<h2 id="start-des-testservers">Start des Testservers:</h2>
<ul>
<li>mit einem Terminal in das Verzeichnis des Projekts wechseln</li>
<li>dort <code>hugo server </code> eingeben.</li>
<li>bei Problem mit Sonderzeichen: den Inhalt der Datei config.toml in hugo.toml kopieren und config.toml löschen (beide sollten wenn vorhanden UTF8 sein - werden manchmal als UTF16 angelegt - dieses dann nach UTF8 ändern)
<ul>
<li>Error: “…\diversityworkbench\hugo.toml:1:1”: unmarshal failed: toml: invalid character at start of key: ÿ</li>
</ul>
</li>
<li>Im Browser an die angegebene Adresse navigieren, e.g. <code>localhost:1313</code></li>
<li>Wenn als Basisadresse in hugo.toml etwas angegeben wurde, e.g. <code>baseURL = "http://www.diversityworkbench.de"</code> dann muss die passende Adresse eingeben werden also e.g. <code>localhost:1313</code></li>
</ul>
With the  MediaWiki tab you can generate markdown files according to MediaWiki.
Subsections of Access
Login Administration
To administrate the logins on the database server, their permissions and
roles respectively as well as access to projects choose
Administration - Database - Logins ... from the menu. A window
will open as shown below.
To set the website where information about details concerning the
General Data Protection
Regulation
are shown, click on the button.
To see the current activity on the server click on the
button. A window as shown below will open
listing all user related processes on the server.

To administrate the linked servers, click on the
button.
To send a feedback click on the  feedback button.
Statistics
To see the activity of a login click on the
button. A window will open as shown below listing all databases and
tables together with the time span (From - To) and the number of data
sets where any activity of the current login has been found.

Creation of login
To create a new login click on the button. A
window will open as shown below. A login that should be able to create
new logins must to be a System administrator.

Here you can enter the name of the new login, the password and the
information about the user which will be stored in a DiversityAgents
database. You may either create a new entry in this database or select
an existing one: Click on the DWB button
to search for a name in the database (see below).

Copy a login
To copy a login including all permissions etc. into a new login, select
the original login in the list and click on the
 button.
Edit a login
To edit the access for a login on the server select the login in the
list. If a login should be disabled , uncheck
the enabled checkbox (see below).

All databases on the server will be listed with the current database
showing a yellow background. The databases where the login has [no
access] will be listed in
[gray] while the databases accessible for a
login are black.
Access of a login to a database
To allow the access to a database select the database from the list and
choose database as shown below.

The state and date of
the privacy consent according to the General Data Protection
Regulation
is shown in dependence of the selected database.
Roles of a login in a database
Use the > and < buttons to add or remove roles for the login
in the database (see below).
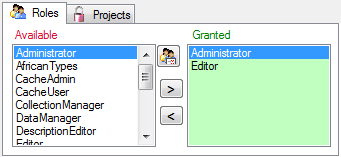
To see the detailed permissions of a role, select it in the list of
[Available] roles and click on the
 button. A window as shown below will open
listing all objects in the database the role has permissions for (see
below).
button. A window as shown below will open
listing all objects in the database the role has permissions for (see
below).
As a database owner you can edit the permissions and role memberships
with the and buttons. Please
keep in mind that any change of the permissions may cause serious
troubles and should only be used for testing and bug fixing. The final
setting of the permissions should be performed by a proper update script
of the database. For every action you will get the code that is to be
included in an update script (see below).
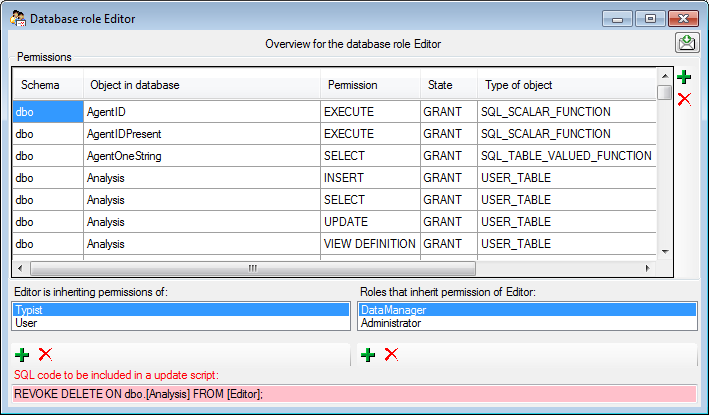
Projects for a login in a database
Depending on the database you can edit the list of projects accessible
for a login (see below). Projects are related to the module
DiversityProjects. To get additional information about a project select
it in the list and click on the
button.

Starting with database version 02.05.35 next to the projects with full
access, a second list provides projects with [Read
Only] access (see image
below). Use the  and
and  buttons to
move projects between Accessible and Read Only. If a
project is set on [Read Only]
a user can still add annotations. Starting with
version 4.3.219 a project as a whole can be locked with the restriction
of access to read only. For more details see chapter Project
administration.
buttons to
move projects between Accessible and Read Only. If a
project is set on [Read Only]
a user can still add annotations. Starting with
version 4.3.219 a project as a whole can be locked with the restriction
of access to read only. For more details see chapter Project
administration.
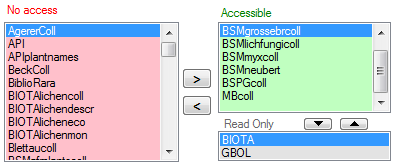
To load additional projects click on the Load projects
button. A window will open as shown below.
Projects already in the database will be listed in
green, missing projects in red (see below). Check all projects you need in your database and
click the Start download button.
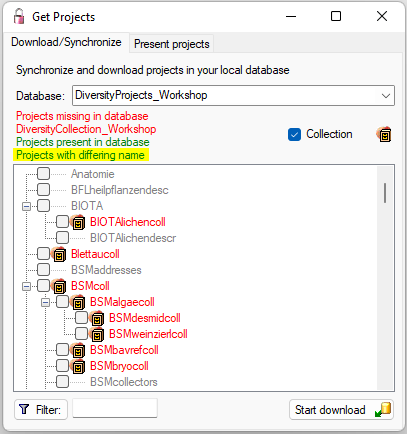
To see an overview of the users within a project select one of the
project in either list and click on the corresponding button
 . A window as shown below will open listing all
users and their roles with access to the selected project.
. A window as shown below will open listing all
users and their roles with access to the selected project.

To add or remove a role for a login, select the corresponding field and
choose or from the context
menu (see below).
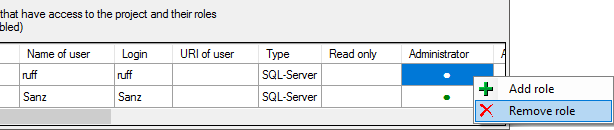
Settings of a login in a database
Depending on the database you can edit the settings of a login as shown
below.
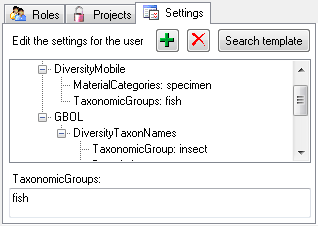
If you wish to use settings already defined for another login, click on
the Search template button. A window (see below) will open where you can
choose among the settings defined for logins in the database.
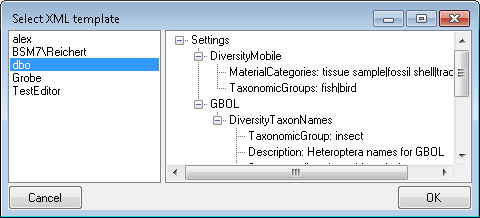
Overview for a login
If you want to see an overview of all permissions and project for a
login, click on the  button. A window as shown
below will open. It lists all modules
and their databases, the
roles, accessible projects and
read only projects for a login.
button. A window as shown
below will open. It lists all modules
and their databases, the
roles, accessible projects and
read only projects for a login.
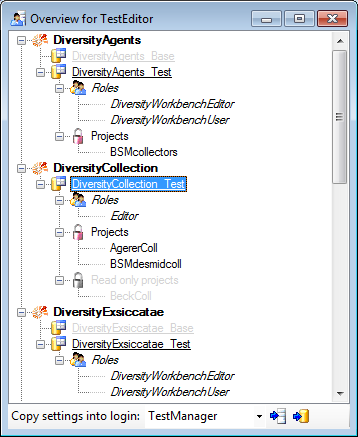
To copy the permissions and projects of the current login to another
login, select the login where the settings should be copied to from the
list at the base of the window and click on the  button to copy the settings for all databases or the
button to copy the settings of the selected
database into this login.
button to copy the settings for all databases or the
button to copy the settings of the selected
database into this login.
Overview for a database
If you see an overview of all user and roles in a database, click on the
 button. A window a shown below will open.
It lists all user, roles and
projects in the database.
button. A window a shown below will open.
It lists all user, roles and
projects in the database.
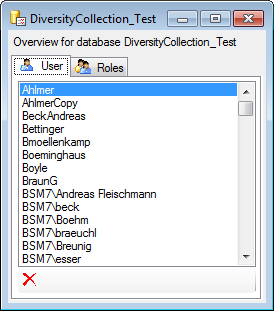
To remove a user, select it in the list and click on the
button.
Correction of logins
If you select one of the databases, at the base a
 button may appear. This indicates that
there are windows logins listed where the name of the login does not
match the logins of the server. This may happen if e.g. a database was
moved from one server to another. To correct this, click on the button.
A list of deviating logins will be shown, that can be corrected
automatically.
button may appear. This indicates that
there are windows logins listed where the name of the login does not
match the logins of the server. This may happen if e.g. a database was
moved from one server to another. To correct this, click on the button.
A list of deviating logins will be shown, that can be corrected
automatically.

If logins with the same name but different server are found, one of them
has to be deleted to make the correction possible. You will get a list
where you can select those that should be removed.

Select the duplicate logins that should be removed and click OK.
To find users within the database that have no valid login, click on the
button. A window as shown below will open,
listing the users without a login. Select those that should be removed
and click OK. This will include a removal from the collection
managers.
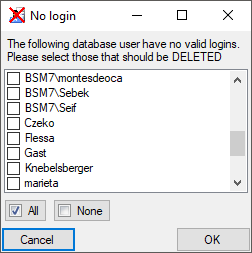
Security
A user may be in several groups with diverse rights in the database.
Here certain higher groups have all rights of lower groups in addition
to special rights for the higher group, e.g. the group User may only
read data of certain tables while Typist has the rights of User and
additionally may edit the data in certain tables - see overview below.
Summarized overview of some of the groups and their permissions as an example for the module DiversityCollection
| Role |
Permissions in addition to lower role and user group respectively |
Included rights |
| Administrator |
Delete data, edit user permissions |
DataManager |
| CollectionManager |
Administration of collections, handling loans etc. |
StorageManager |
| DataManager |
Delete data, edit image descripton templates |
Editor |
| Editor |
Create new entries and delete details (not entire data sets) |
Typist |
| Requester |
Has the right to place requests for specimen |
|
| StorageManager |
Administration of stored parts, handling loans etc. |
User |
| Typist |
Edit data |
User |
| User |
See the data of the data tables, add annotations |
|
To place a user in one of the groups, select Administration -
Database - Logins... from the menu. In the window that will open
select a login and a database. The roles available in the selected
database will be listed as shown below. Use the > and <
buttons to add or remove roles for the login in the database (see
below).
To see the detailed permissions of a role, select it in the list of
[Available] roles and click on the
button. A window as shown below will open
listing all objects in the database the role has permissions for (see
below).
If you are an Administrator you may add a user to one of these
groups.
Any user may have access to several projects.
Project access for user
The accessibility of projects for users can have 4 different states:
- No access: The current user has no access to
the project
- Accessible: The current user has access
to the project
- [Read only]: The
current user has read only access to the project
- [Locked]: The
project is locked. Any user can either none or read only access to
the project
To allow the current user access projects use the [ >
] button
for the selected project resp. the [ >>
] button
for all projects. To revoke access for the current user use the [ <
] button for the selected project resp. the [ <<
] button for all projects. To change the access for a
project to read only use the  button and the
button to remove a project from the read only
list.
button and the
button to remove a project from the read only
list.
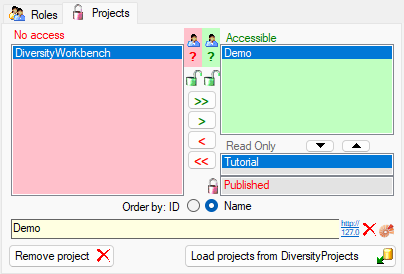
Locking of a project
To lock a selected project use the button.
For all users the project will be removed from the accessible or read
only list and transferred to the locked list.
This is only allowed for a database owner (dbo). Please make sure that
you really want to lock a project. Any dataset related to this project
will be set to read only for all users. For an introduction, please see
the a short tutorial
.
To remove the locked state of a project, select the project in the No
access list and click on the button. The selected project will be moved
from the locked list into the read only list for those users that had
access to the project.
Retrieval of projects from DiversityProjects
 Details of the projects within the DiversityWorkbench are stored in the
database DiversityProjects. To access further information on a project
click on the button. To edit details in projects you require the
application DiversityProjects.exe in your application directory and
access to the database DiversityProjects. To synchronize the projects
listed in DiversityProjects you may use the synchronize function in the
user administration window as shown below. If
DiversityProjects is not available, you may create a new project by
clicking the project button. If DiversityProjects is
available, use the synchronize function
Details of the projects within the DiversityWorkbench are stored in the
database DiversityProjects. To access further information on a project
click on the button. To edit details in projects you require the
application DiversityProjects.exe in your application directory and
access to the database DiversityProjects. To synchronize the projects
listed in DiversityProjects you may use the synchronize function in the
user administration window as shown below. If
DiversityProjects is not available, you may create a new project by
clicking the project button. If DiversityProjects is
available, use the synchronize function
 .
.

 .
.
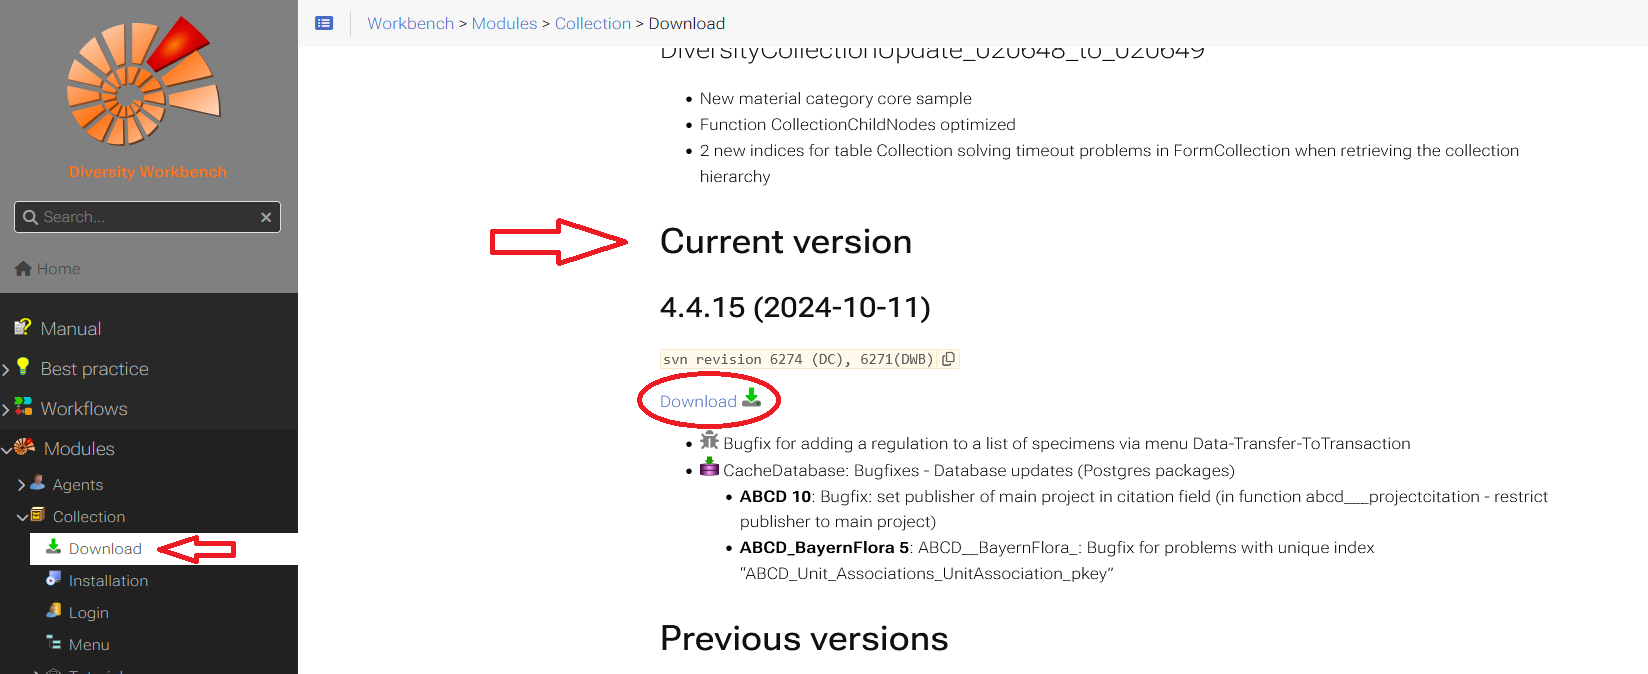
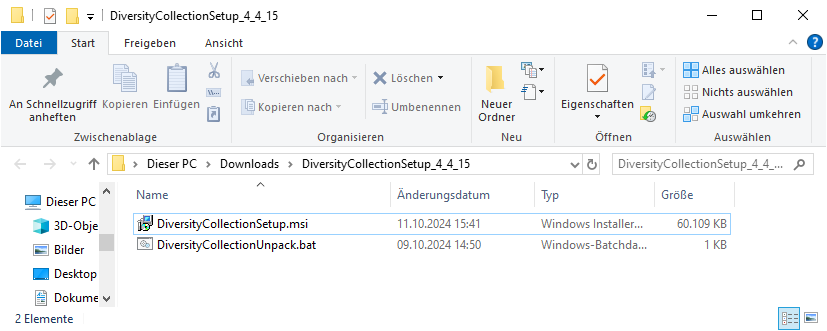
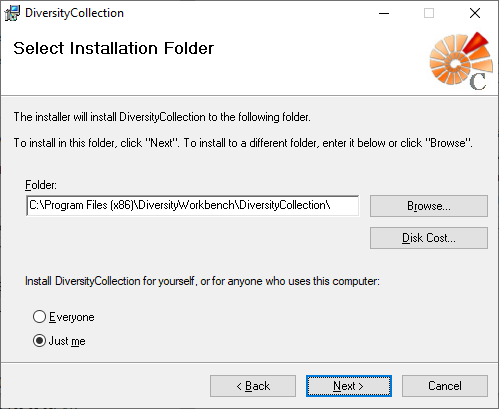
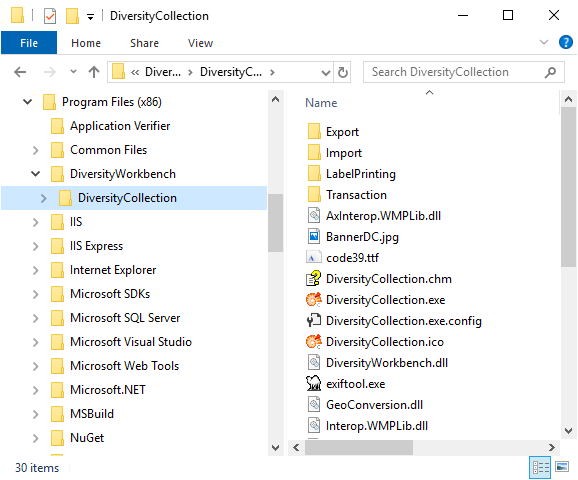
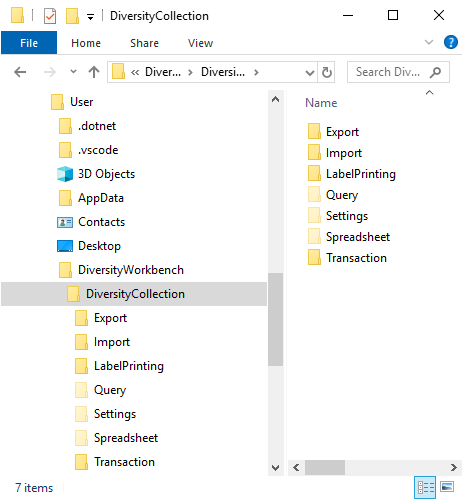
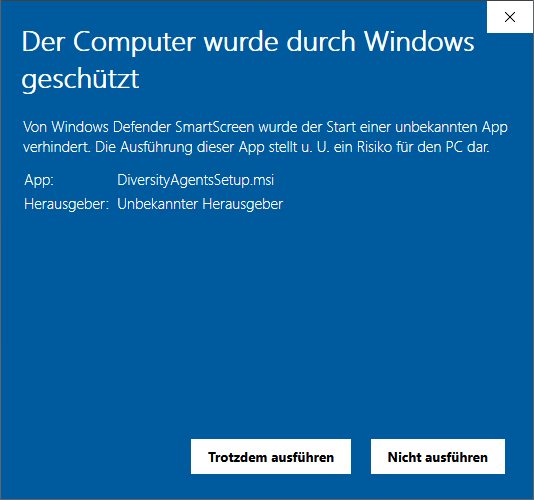
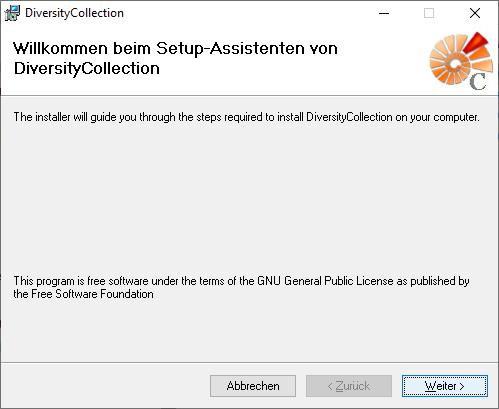
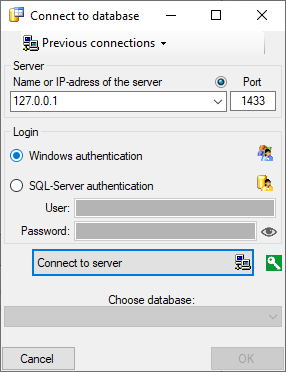
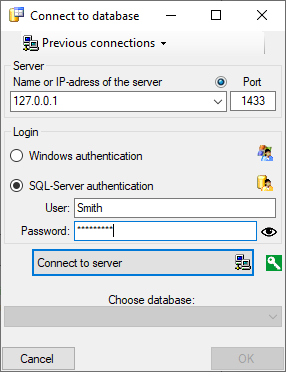
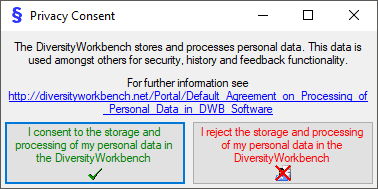
 .
. .
.
 next to the Connect to server button indicates an encrypted connection.
By clicking on the icon, you can switch to an unencrypted connection, indicated by the icon
next to the Connect to server button indicates an encrypted connection.
By clicking on the icon, you can switch to an unencrypted connection, indicated by the icon  .
.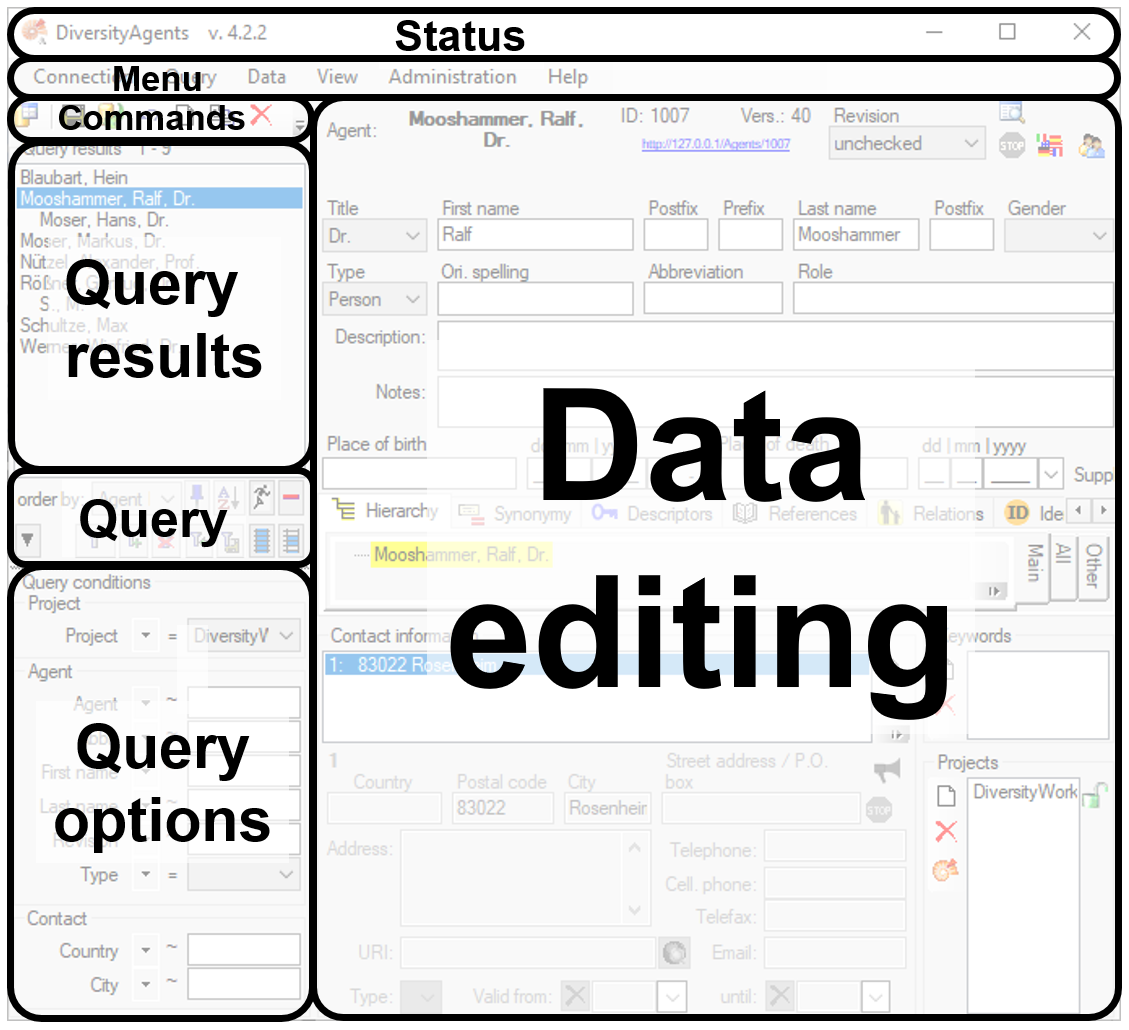
 - To save the changes in a dataset click on the
  - To propagate the changes in a dataset to linked modules click on the
  - To undo the changes a dataset click the
  - To create a new entry in the database, click on
the
- To create a new entry in the database, click on
the  - To copy a specimen, choose it from the list and click on the button
 - To options a dataset click on the button
 - To change the arrangement of the query click on the
 button.
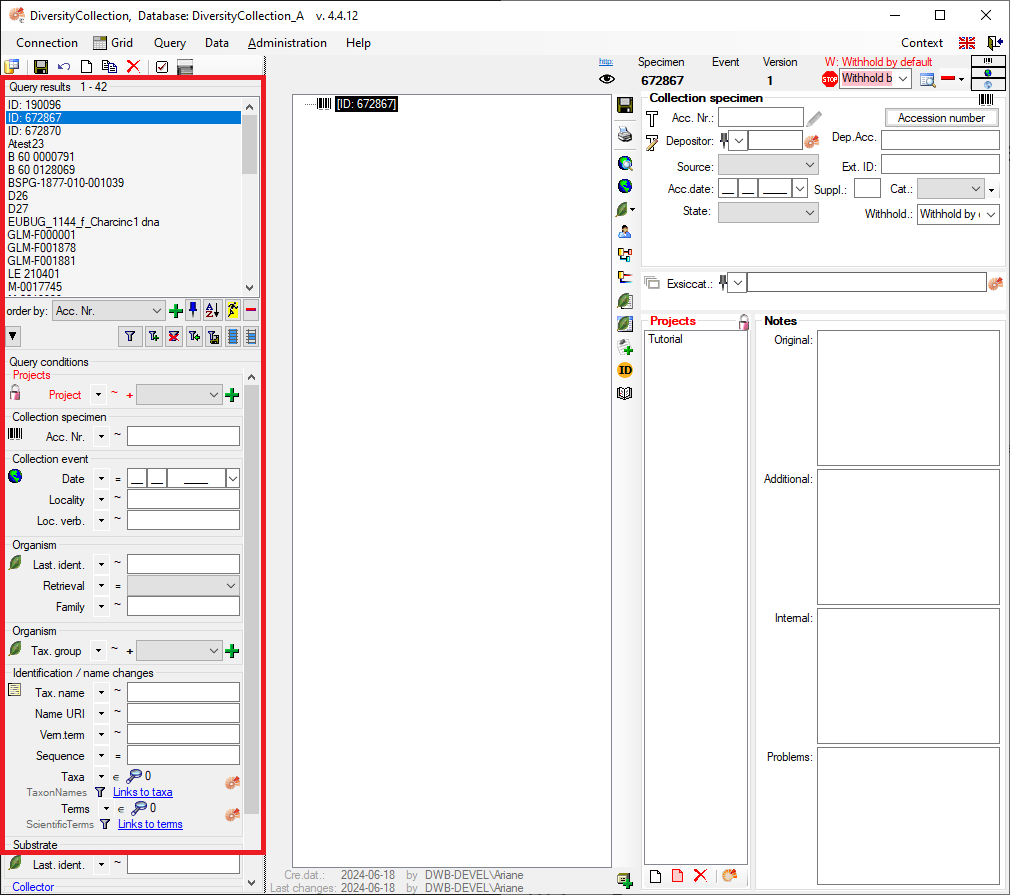
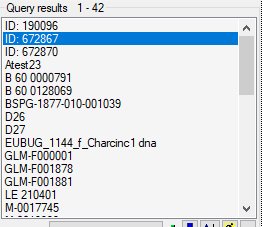

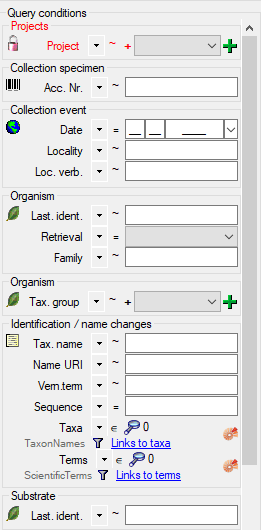

 .
.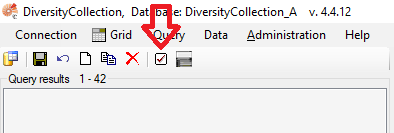
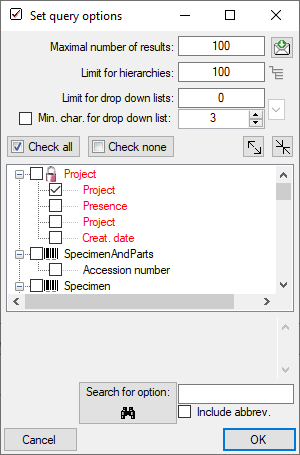
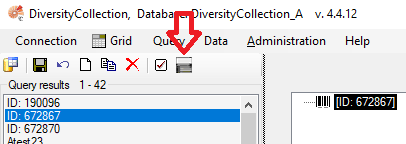
 .
. .
. , Problem
  , Reference
 ) and the linked table (see

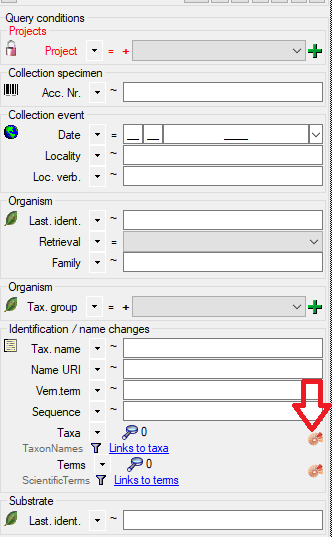
 .
.


 . To display
several columns in the result list, click on the
. To display
several columns in the result list, click on the  button.
To change the sorting of the added order column click on the
button.
To change the sorting of the added order column click on the
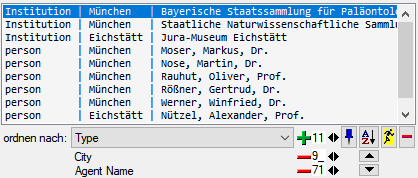

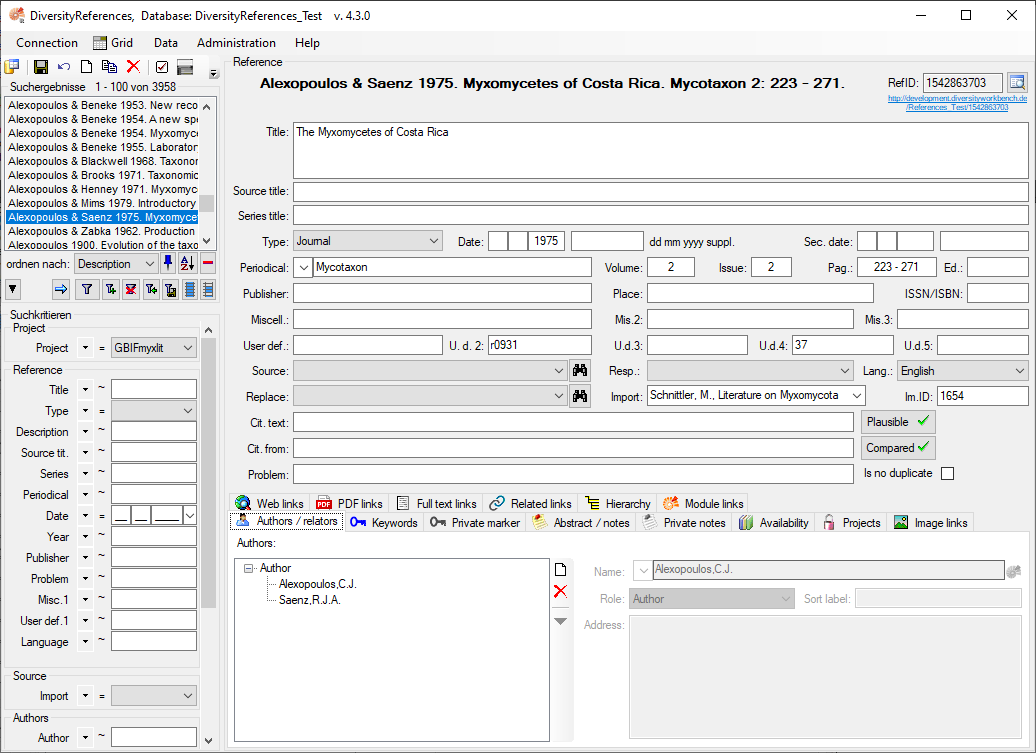


 botton if you want to return to the
homepage of this browser (
botton if you want to return to the
homepage of this browser (


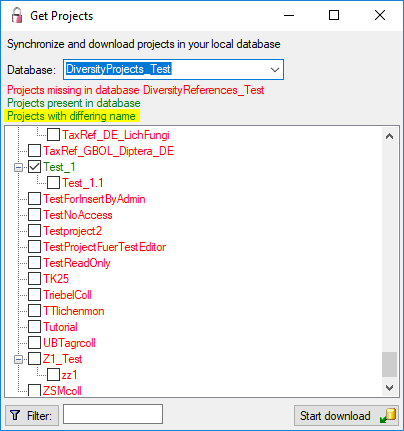

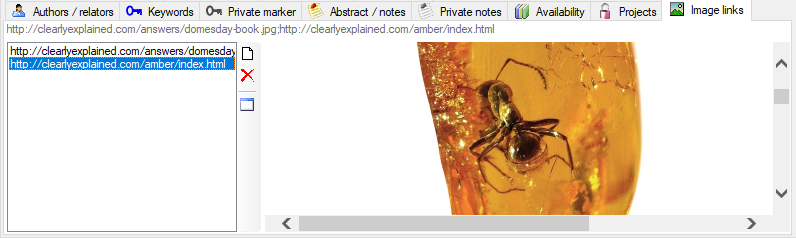
 or an image provided on a website
 button. To delete a selected link, click
on the
button. To delete a selected link, click
on the 
 resp.
resp.  button to
set or remove the superior reference (see below). With the
button to
set or remove the superior reference (see below). With the
 button you can change to one of the references
shown in the hierarchy.
button you can change to one of the references
shown in the hierarchy.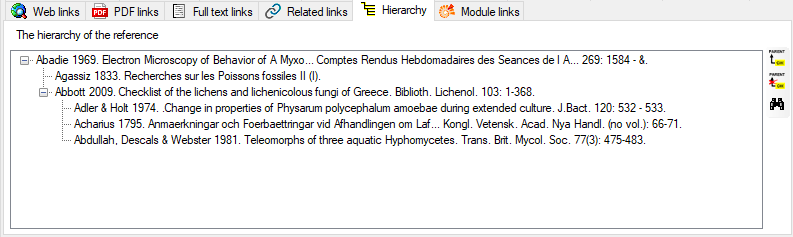


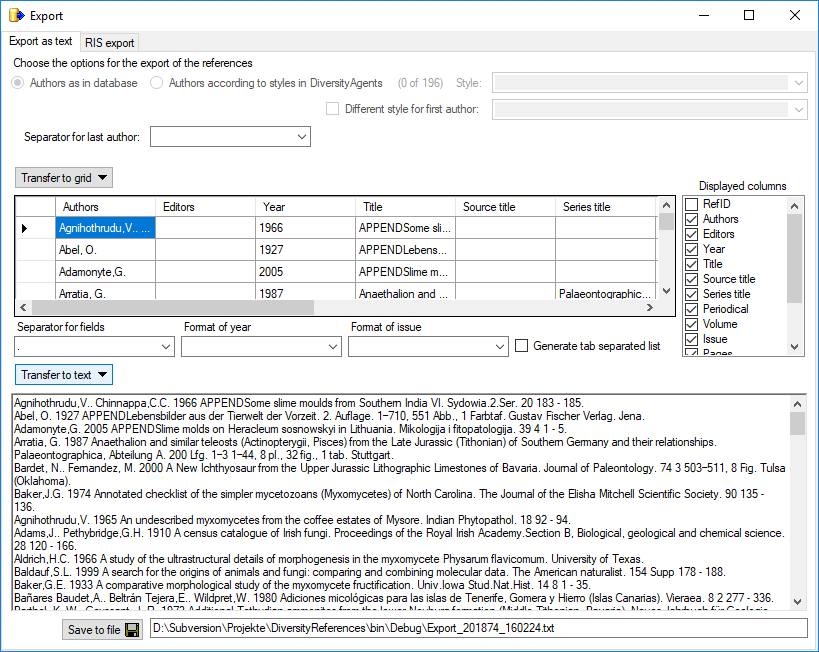
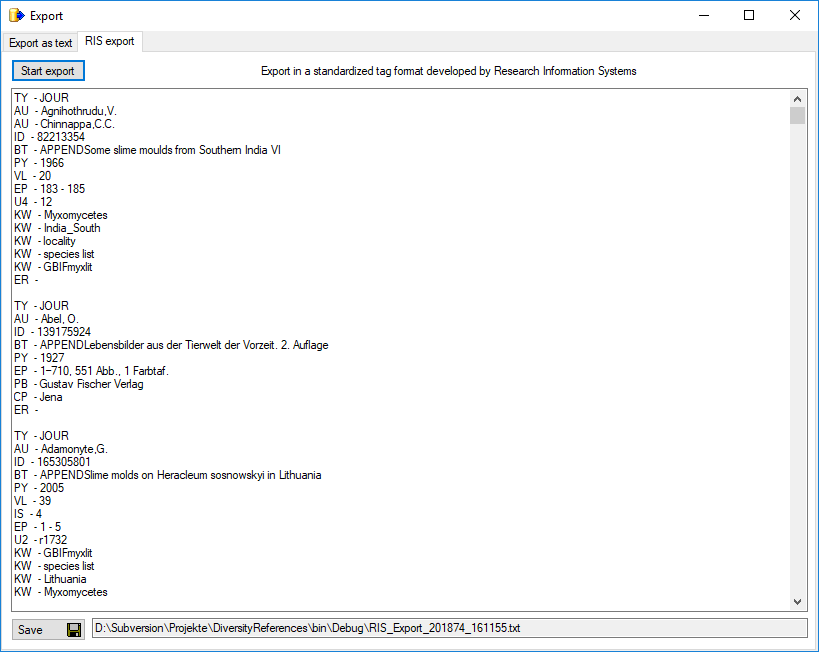
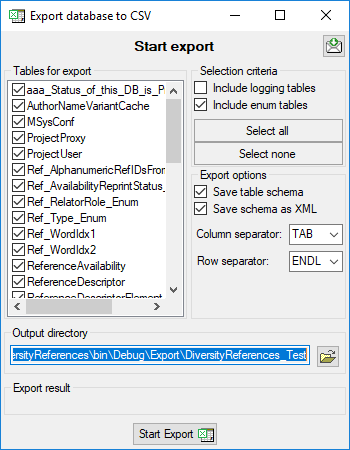

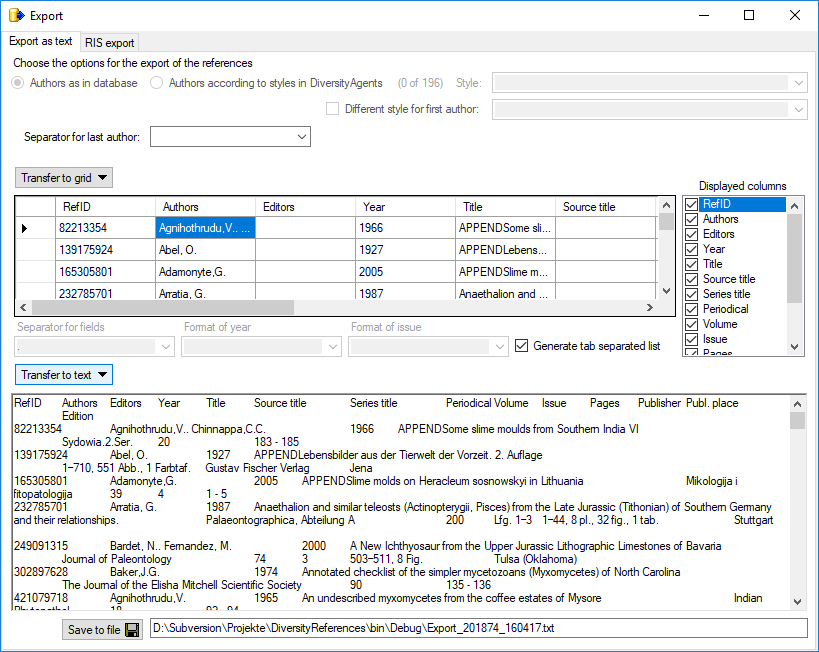
 Several parallel tables according to
selected data
Several parallel tables according to
selected data Dependent table
 or
descending
or
descending  or a module resp. webservice
 resp.
resp.  button. To fuse
a column with the previous column, click in the gray bar
button. To fuse
a column with the previous column, click in the gray bar
 on the left side of the column that will change to
  for fused columns. To remove a file column, use the
  This filter in contrast to the filter above strictly applies to the row
according to the sequence of the data. For an explanation see a short
tutorial
This filter in contrast to the filter above strictly applies to the row
according to the sequence of the data. For an explanation see a short
tutorial
 To test the export choose the
  To export your data into a
  To handle the settings of your export, choose the
 Cut out parts,
 Replace text and apply Calculations
Σ or Filters
Replace text and apply Calculations
Σ or Filters
 button and choose a column from the file in the window that will open.
If the column that should be compared is not the column of the
transformation, the number of the column will be shown instead of the
button and choose a column from the file in the window that will open.
If the column that should be compared is not the column of the
transformation, the number of the column will be shown instead of the
 Organism ... from the menu. A window as shown
below will open where the available tables for export are listed in the
upper left area. To show the data columns of a table, select this table
in the list.
Organism ... from the menu. A window as shown
below will open where the available tables for export are listed in the
upper left area. To show the data columns of a table, select this table
in the list.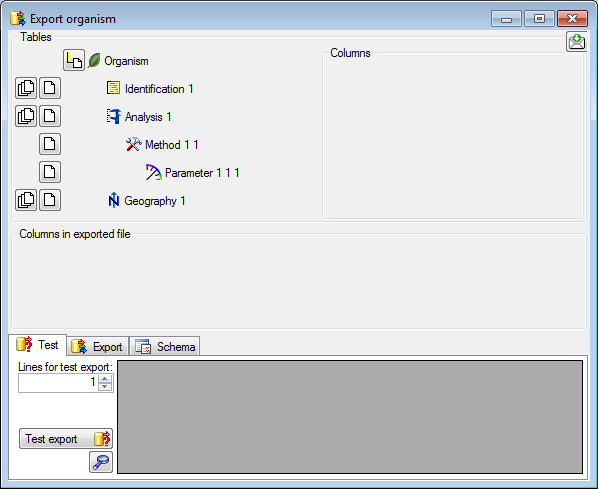
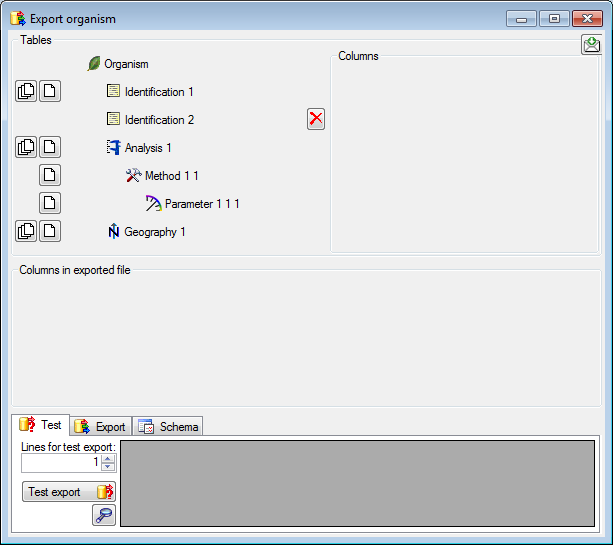
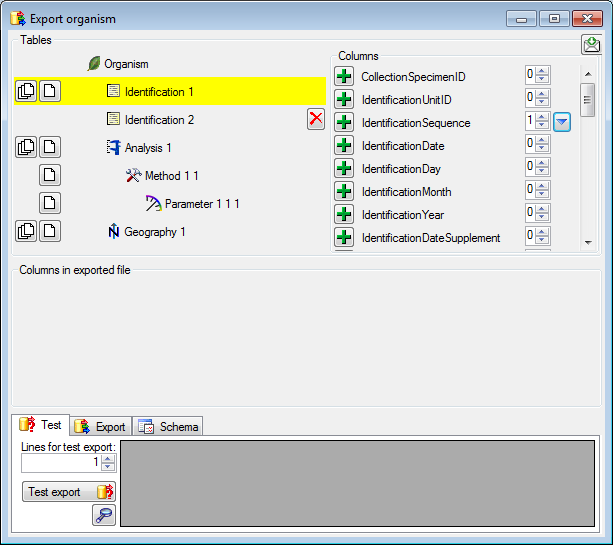


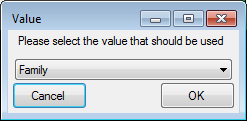
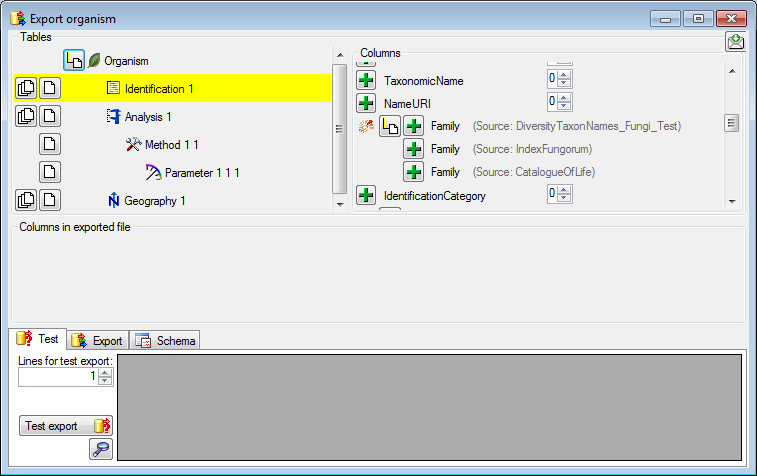
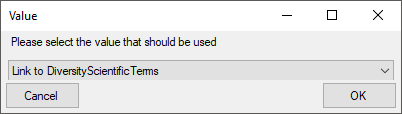
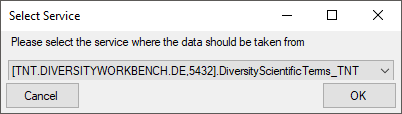
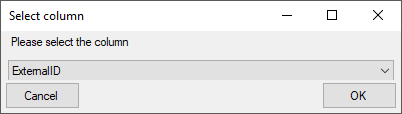


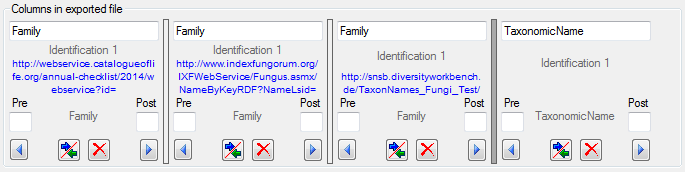

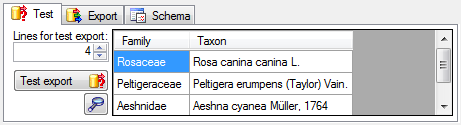
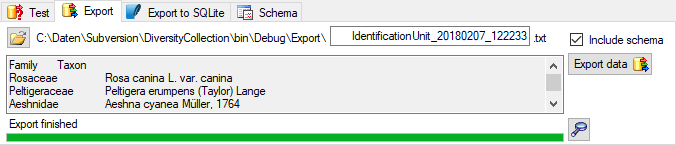
 button to choose the
file you want to import from your file system.
button to choose the
file you want to import from your file system.
 DiversityAgents, but are valid for any other module as well.
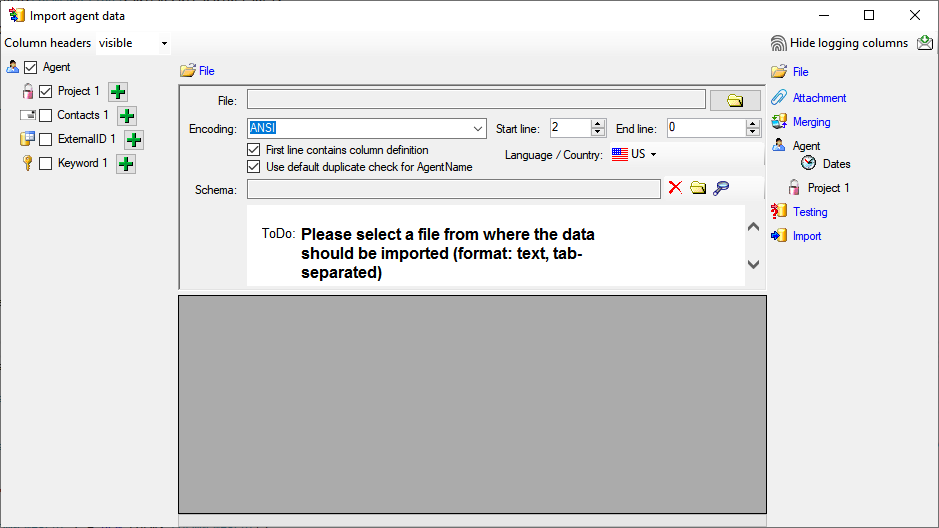
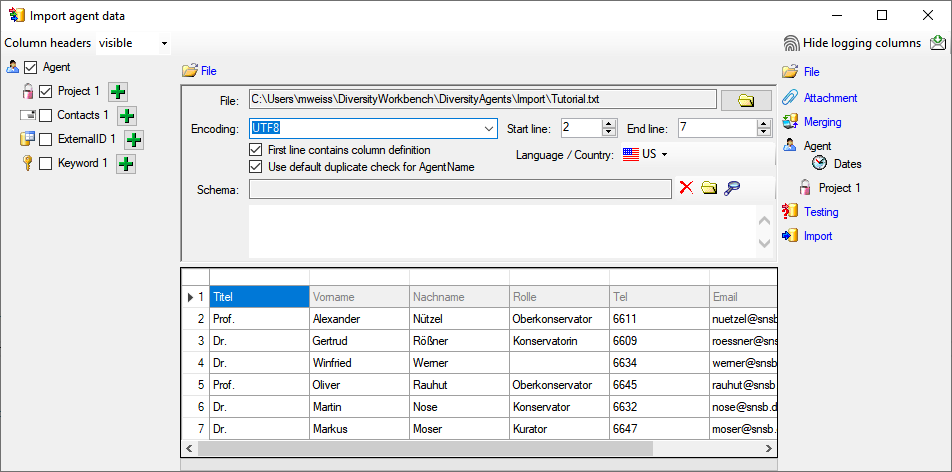
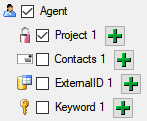
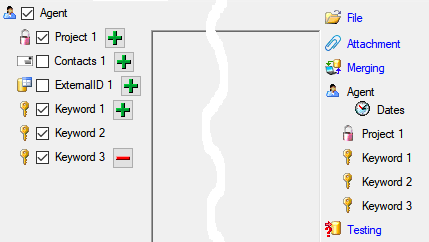
 include logging columns button in the header line. This will include additional substeps for every step containing the
logging columns (see below). If you do not import these data, they will
be automatically filled by default values like the current time and
user.
include logging columns button in the header line. This will include additional substeps for every step containing the
logging columns (see below). If you do not import these data, they will
be automatically filled by default values like the current time and
user.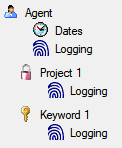
 Attach
them to data in the database. Select the import step
Attach
them to data in the database. Select the import step
 Import as new data or one of the
columns the attachment columns offered like SeriesCode in the table
Series in the example below.
Import as new data or one of the
columns the attachment columns offered like SeriesCode in the table
Series in the example below.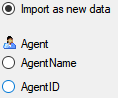

 Merge them with data in the
database. Select the import step
Merge them with data in the
database. Select the import step  Insert,
  Merge,
 Update and
  Key columns (see below). If no matching data are
found in the database, the data from the file will be imported.
Otherwise the data will be updated.
Key columns (see below). If no matching data are
found in the database, the data from the file will be imported.
Otherwise the data will be updated.
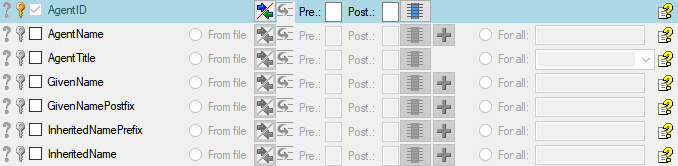
 = If data will be imported depends on the content of decisive
columns, so at least one must be selected.
= If data will be imported depends on the content of decisive
columns, so at least one must be selected. = You have
to select a value from the provided list
= You have
to select a value from the provided list = You have to enter
a value used for all datasets
= You have to enter
a value used for all datasets - To test if all requirements for the import are met use the
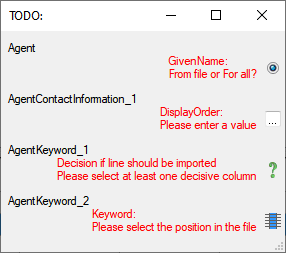
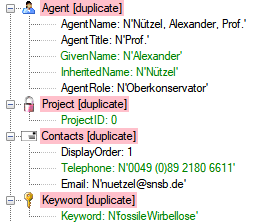


 button you can
generate a file containing only the description.
button you can
generate a file containing only the description.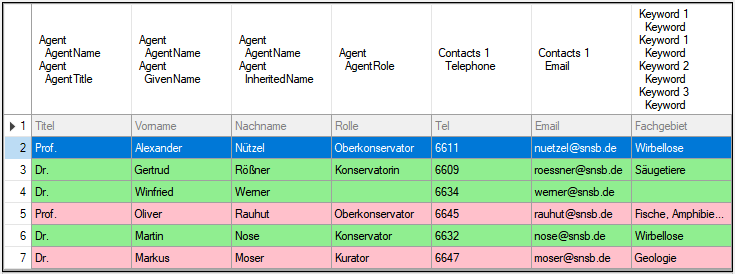
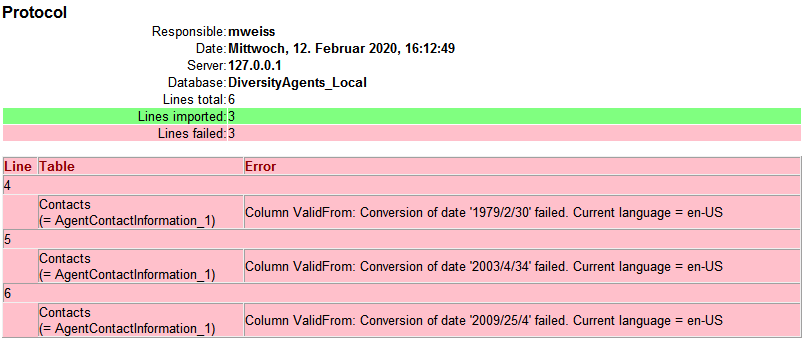


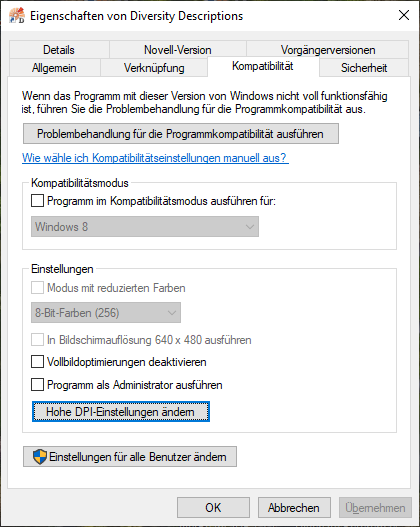
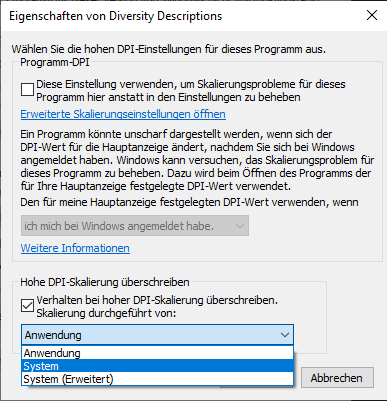
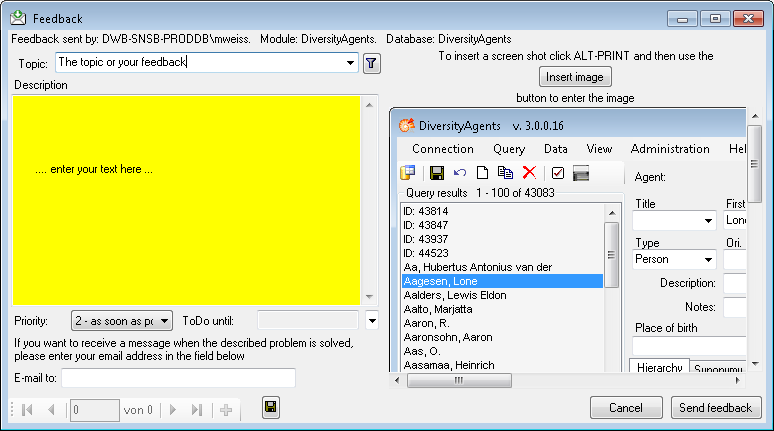
 from the menu. A window will open where
you can browse your past feedback together with the state of progress.
from the menu. A window will open where
you can browse your past feedback together with the state of progress.


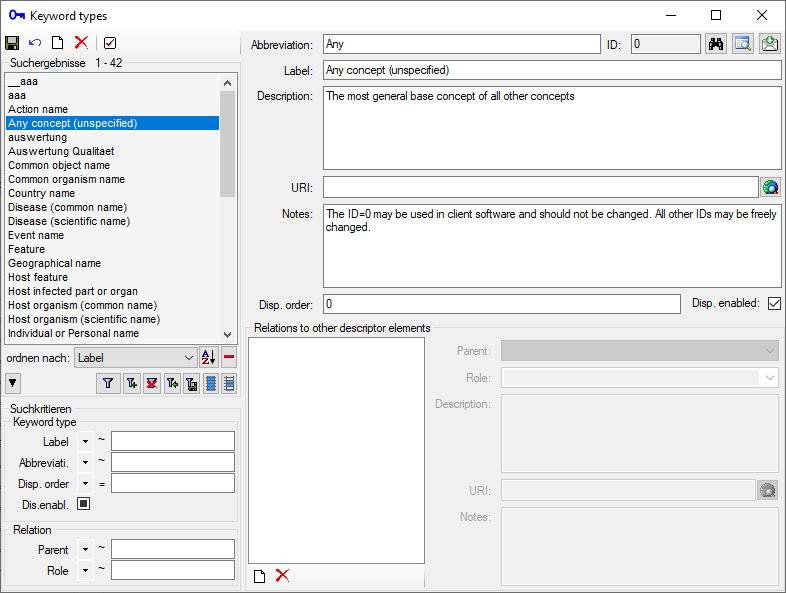
 button to enter a new
relation and the
button to enter a new
relation and the 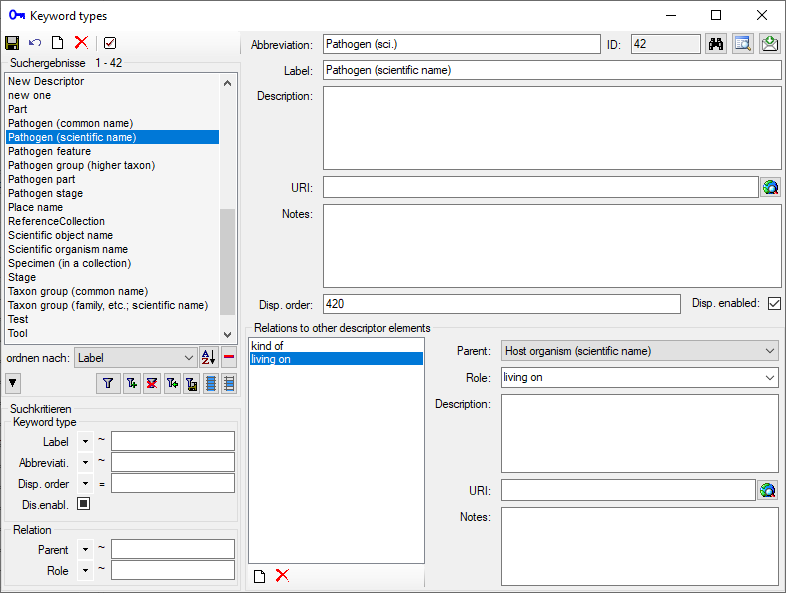
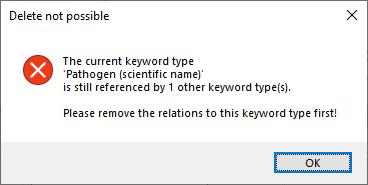
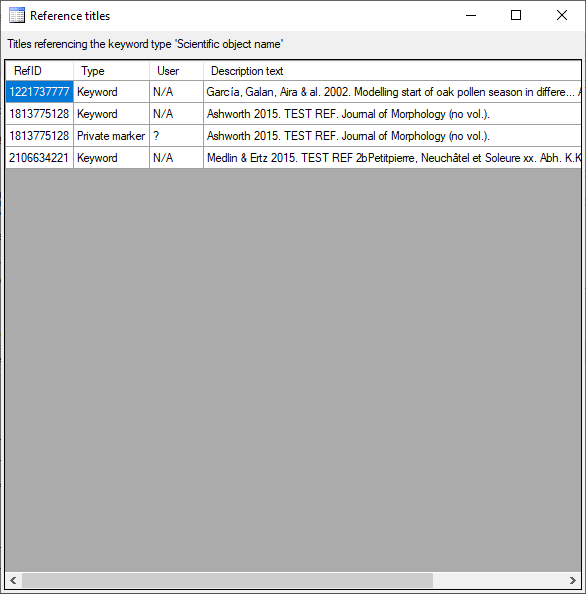
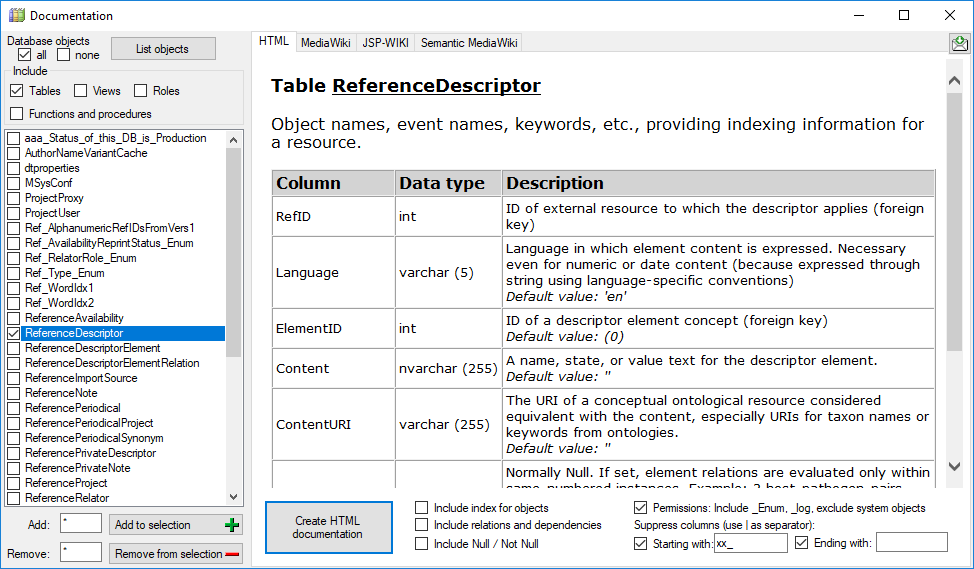
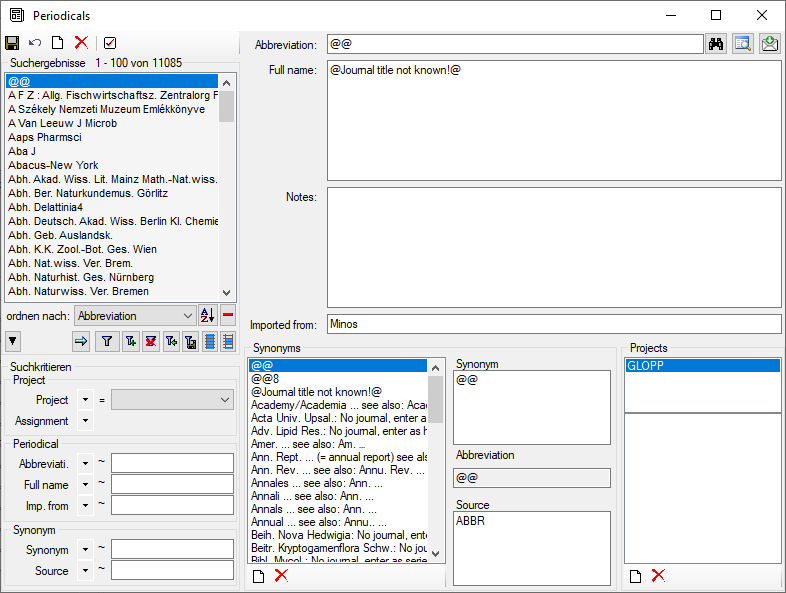
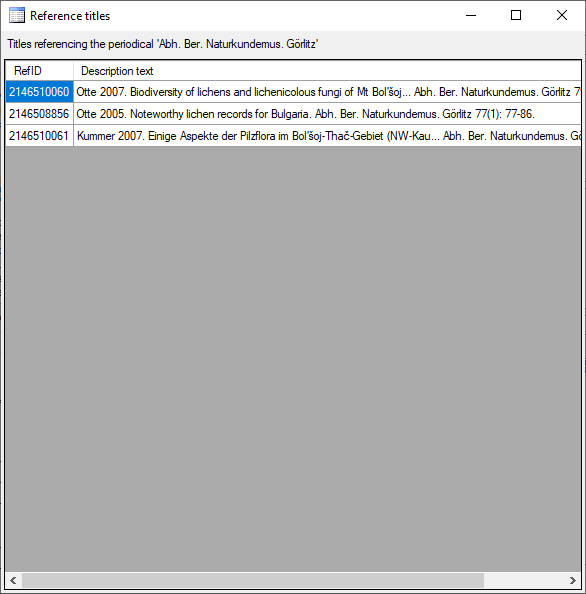
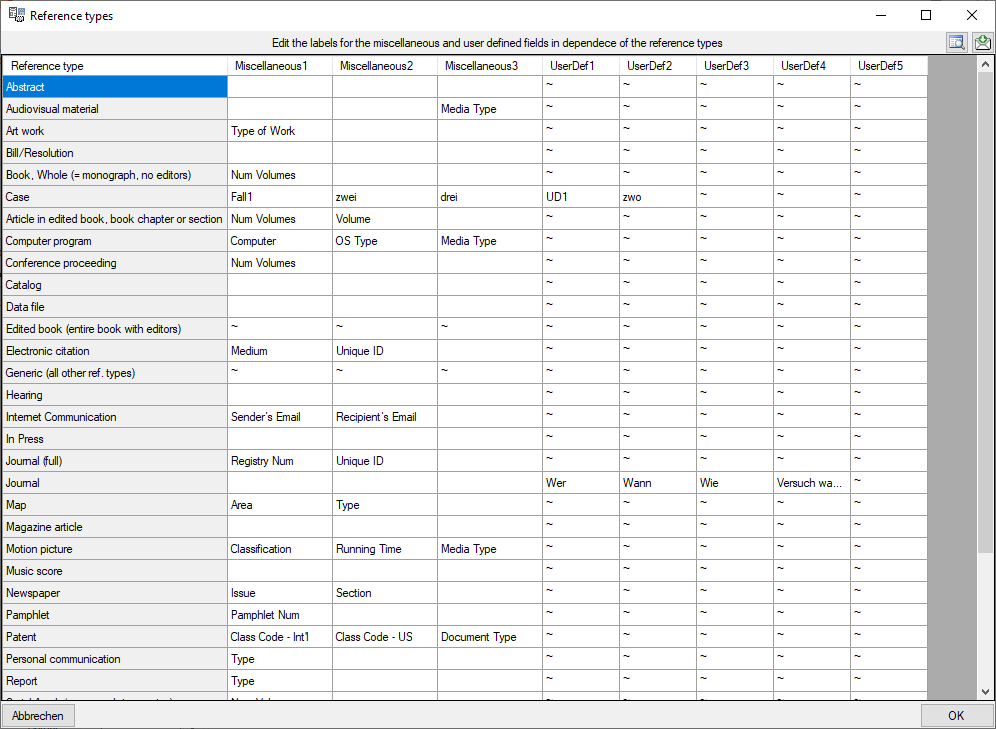
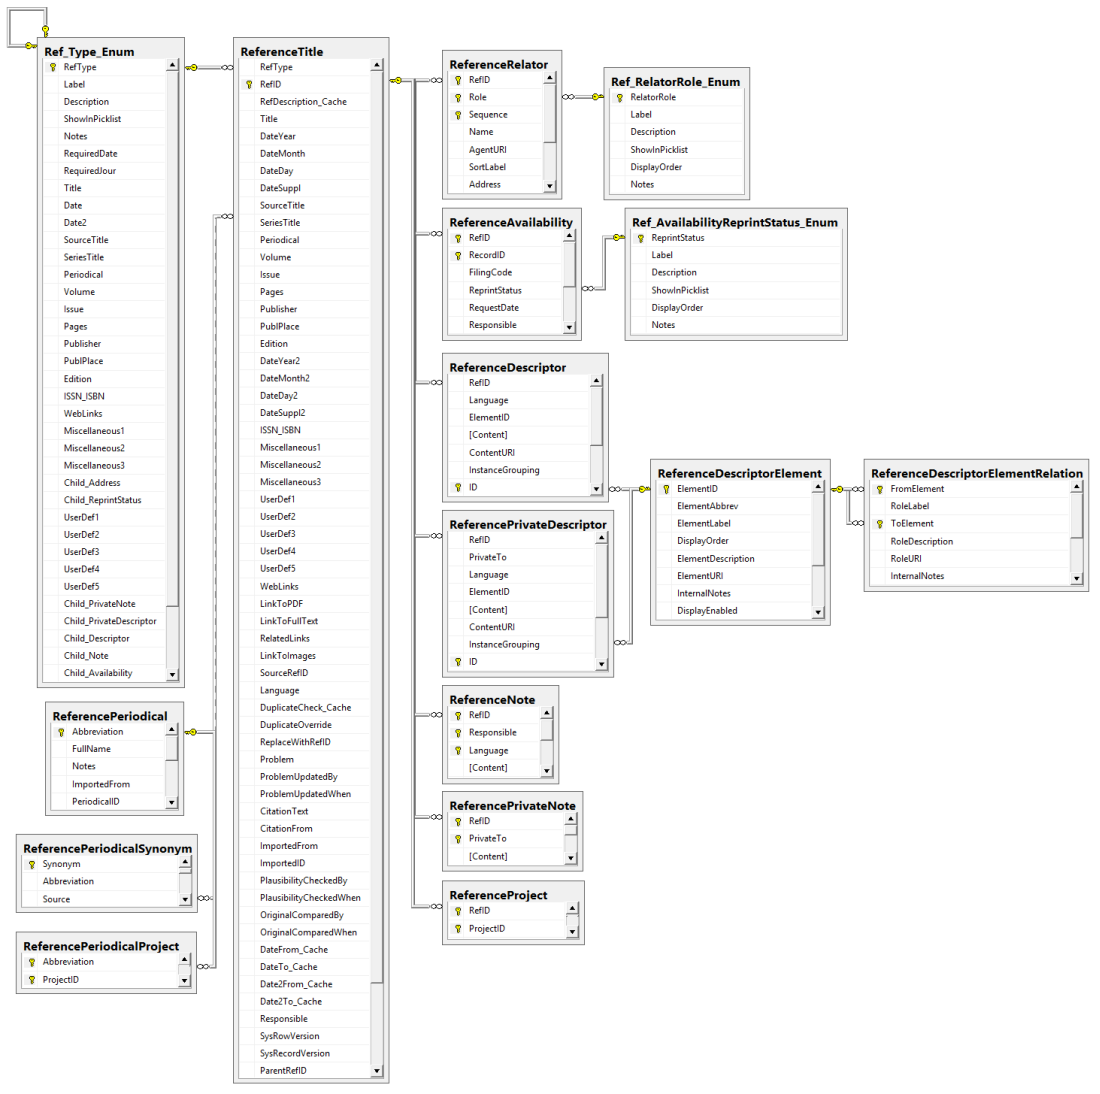


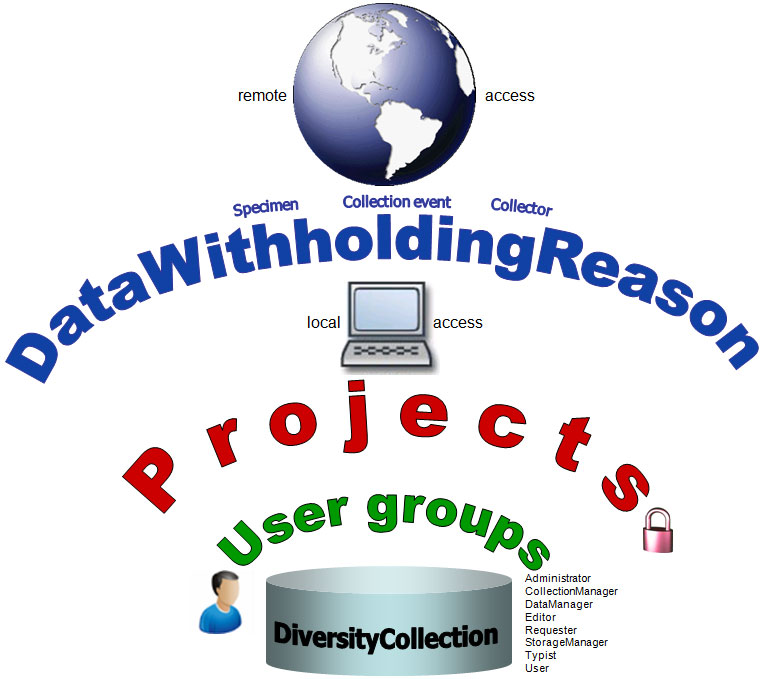
 Update.
 Update database … from the menu. See chapter Database update for details.
 Update client … and download the
lastest version of the client. ee chapter Update client for details.
Update client … and download the
lastest version of the client. ee chapter Update client for details.
 ErrorLog from the menu. A window will open showing the content of the errolog. By default the errorlog will be reset at program start. You can keep the errorlog if needed by chossing Help -
  Clear ErrorLog.