Diversity Scientific terms
Editing the data
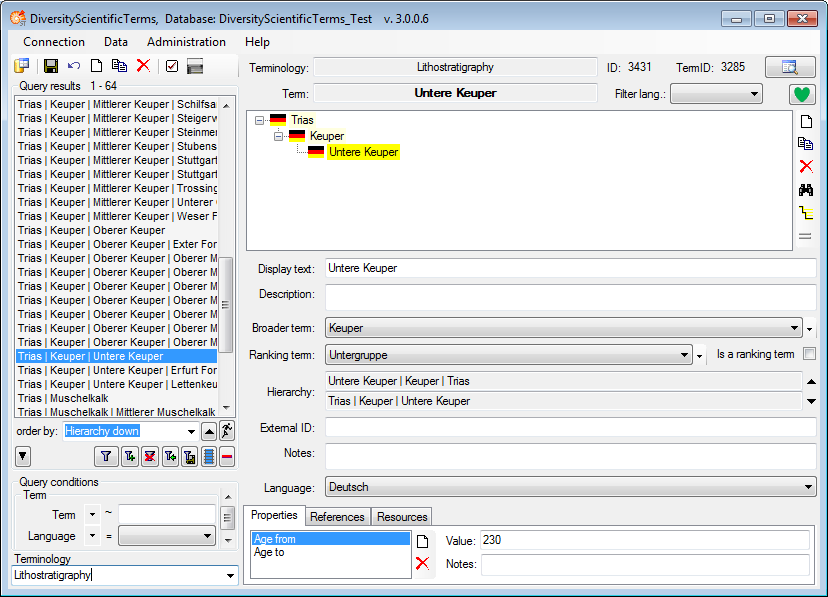
The main form of DiversityScientificTerms contains two main areas. On
the left you find the query and the results of this query.
On the right part the details of a dataset selected in the result list
is shown. The upper part of the data area shows the position of the
current term within the hierarchy. In the lower part
you find the fields for the details of a term. At the base of the window
the properties, references and
resources of a term are listed.
For every term one
representation can be set the preferred one, indicated by the
 icon. To make a representation the preferred
representation, simply click on this icon.
icon. To make a representation the preferred
representation, simply click on this icon.
Display settings for charts etc.
For display in an
interface used from other modules like DiversityCollection, e.g. via a
chart, a term may have a display order, a color for the background and
an image.
The display order
will be applied within the terms of the same hierarchy level and works
top down, so the term with the lowest display order will be presented at
the top of the list.
To set the display
color, click on the
 set color button. A window will open where
you can either select an available color or define a new one. The color
will e.g. be used as background in a chart. If depending terms should
use a color of the same hue, click on the
set color button. A window will open where
you can either select an available color or define a new one. The color
will e.g. be used as background in a chart. If depending terms should
use a color of the same hue, click on the  button to activate the inheritance for the color. The button will change
to
button to activate the inheritance for the color. The button will change
to
 . See chapter chart for
details.
. See chapter chart for
details.
To set the display image for a term, click on
the
 button. A window will open where you can
search for the image that should be presented. In a chart,
the size of the image will be scaled down to a maximal width of 100. To
remove an image, use the
button. A window will open where you can
search for the image that should be presented. In a chart,
the size of the image will be scaled down to a maximal width of 100. To
remove an image, use the
 button next to the image.

After editing the
data, click on the  save button to save your data. To see
the description of the fields, just move the mouse into it. A small
window will appear, showing the description. To see the description of
all fields turn to the description of thedatabase.
save button to save your data. To see
the description of the fields, just move the mouse into it. A small
window will appear, showing the description. To see the description of
all fields turn to the description of thedatabase.
Copy data
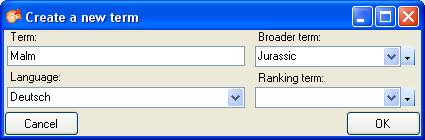
To create a new term
click on the  button above the query list. A form as
shown below will open where you can enter some basic informations for
the new term.
button above the query list. A form as
shown below will open where you can enter some basic informations for
the new term.
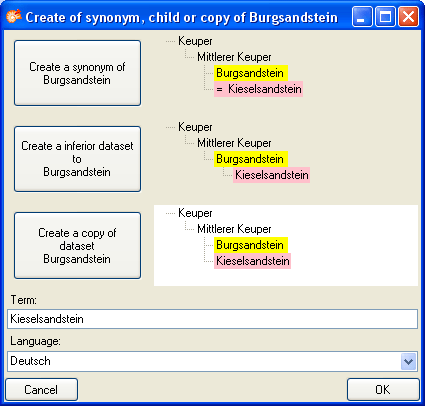
To create a copy of
a term, choose an entry in the query list and click on the
button besides the hierarchy. A form as shown below
will open providing you with the possibility to create a synonym, an
inferior dataset or a copy on the same level in the hierarchy as the
original dataset.
To create a synonym
of a term, choose an entry in the query list and click on the
 button besides the hierarchy. This will
create a synonym to the original dataset.
button besides the hierarchy. This will
create a synonym to the original dataset.
To make a term a
synonym to another term, choose the term in the hierarchy and click on
the  button besides the hierarchy. This will
open a window, where you can select the term to which the current term
should become a synonym to.
button besides the hierarchy. This will
open a window, where you can select the term to which the current term
should become a synonym to.
To delete a dataset,
select it an click on the delete button.
Subsections of Editing
Diversity Scientific terms
Chart
The module DiversityScientificTerms provides other modules the option to
query the terms on basis of a chart. These charts are created on basis
of the selected terminology or sections and in case there are sections
available To test the chart of the current terminology, select Test -
 Chart
from the menu. In case there are sections a window will open where you
choose the data you want to show in the chart. A window as shown below
will open. To test the chart, select an entry and click OK.
Chart
from the menu. In case there are sections a window will open where you
choose the data you want to show in the chart. A window as shown below
will open. To test the chart, select an entry and click OK. 
Ranking terms resp. types
The chart is not available for ranking terms resp. types  .
.
Sections
Terminologies may contain  sections. If no sections are available, only the whole terminology will be presented (see below).

If the terminology contains sections, you can choose either the whole
terminology or a section. If you choose a section only the terms within
the section will be shown and the name of the section is shown in the
header (see below).
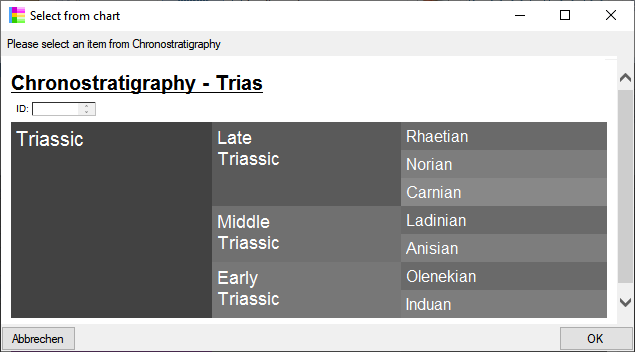
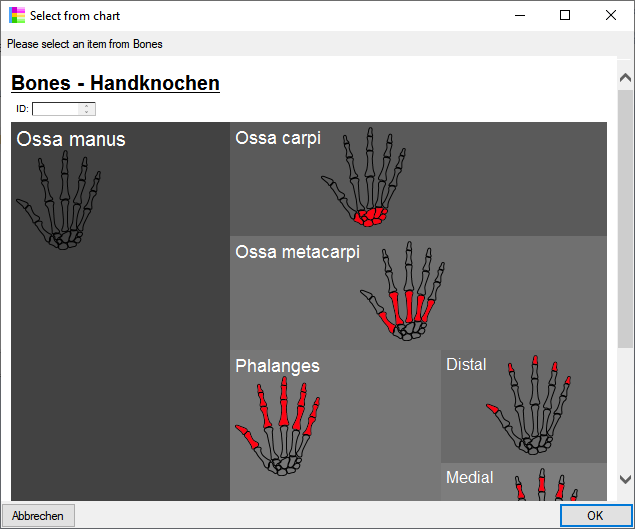
Images
If a term has  images, these images will be shown in the chart as shown below. The images will be shown according to the order
set for the images. If a title for an image has been defined, this will
be shown in the tool tip when you moove the mouse above the image. If no
title has been defined either the synonyms the term will be shown or if
no synonyms are defined the display text of the term. The width of the
images is restricted to 100 pixel, larger images will be adapted
accordingly.
images, these images will be shown in the chart as shown below. The images will be shown according to the order
set for the images. If a title for an image has been defined, this will
be shown in the tool tip when you moove the mouse above the image. If no
title has been defined either the synonyms the term will be shown or if
no synonyms are defined the display text of the term. The width of the
images is restricted to 100 pixel, larger images will be adapted
accordingly.
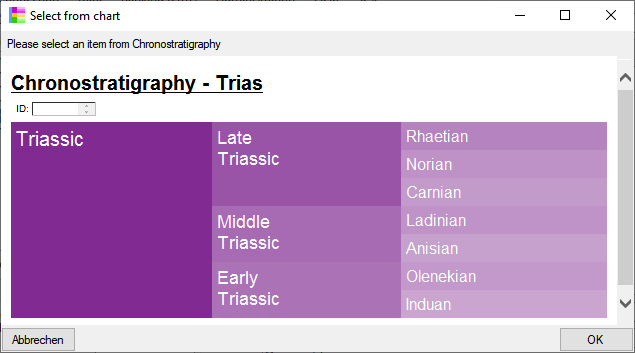
Colors
Every term may have display color . Click on the set
color button to select a color for the term. This color will be
shown as background for the term as shown below. If no color has been
choosen, a greyscale value will be used as background as shown above.
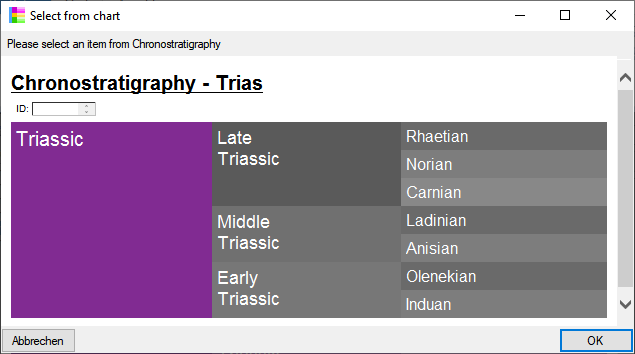
If the terms depending on a term do not have a color of their own and
the inheritance of the color is activated, a hue of the parent term will
be used as shown in the image below. To activate the inheritance of the
color, click on the
button. It will change to
and the color will be inherited to depending values as shown in the
image below.
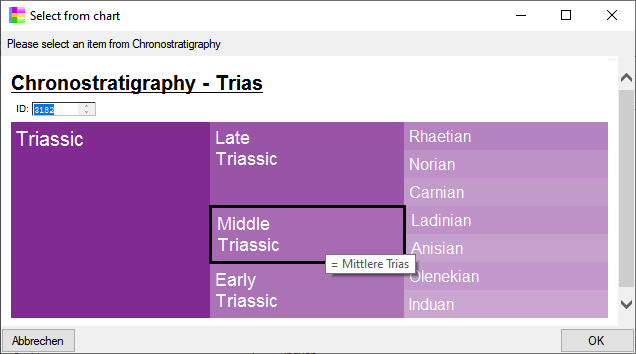
To select an item, click on it so the corresponding ID will appear in
the box in the left upper corner. If there are synonyms available for a
term these will be shown via a tooltip as shown below.
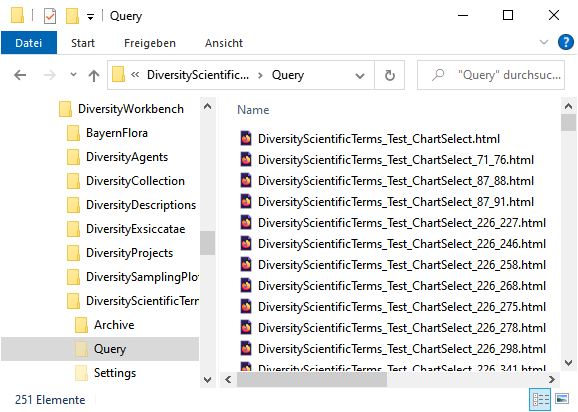
Files
The html files  for the chart will be generated in the user directory as
shown below. The file …_ChartSelect.html is the main file. the other
files like e.g. …_ChartSelect_71_76.html are depending files that
contain the items with the parent ID 71. These files will be removed
when you close the chart.
for the chart will be generated in the user directory as
shown below. The file …_ChartSelect.html is the main file. the other
files like e.g. …_ChartSelect_71_76.html are depending files that
contain the items with the parent ID 71. These files will be removed
when you close the chart.
The html files and the chart are adapted to the width of the window of
your application, so if you change the width of your main window, the
files will be regenerated to ensure that the displayed columns fit into
the available space. In the examples below, the chart has been selected
with two different widths that result in a regeneration of the files.
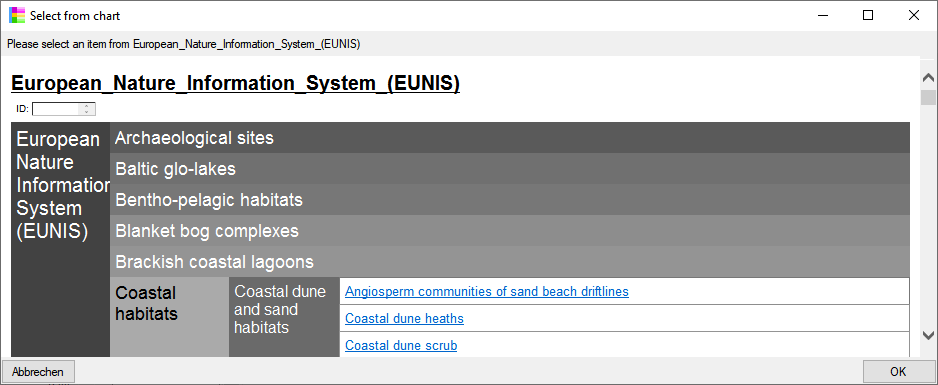
The html file below has been generated with a reduced with of the window
with the links to subpages starting on a higher level. The fields with a
colored background let you select the displayed items while the fields
with a link lead you to a subpage containing depending items (e.g. Coastal
dune and sand habitatas in the example below).
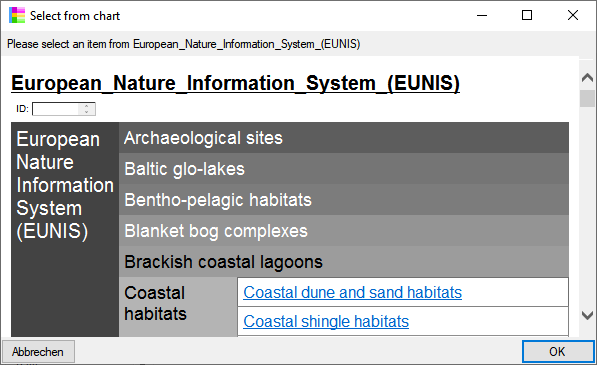
A field with a link will lead you to a subpage as shown below. The link
at the top of the subpage will lead you back to the page where you came
from (← Coastal habitatas in the example below).

Diversity Scientific terms
Dependency
For an introduction see the video:
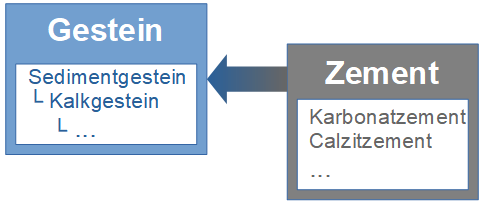
The terms of a certain type/ranking may be dependent on terms that are
no types/ranking, e.g. terms of the type Zement may only be available for terms
underneath the term Sedimentgestein
which itself is of the type Gestein.
Clients that want to use any term of a dependent type (e.g. Zement) must therefore first insert a term of
the type of these terms depend on (e.g. Sedimentgestein) or underneath in the
hierarchy (e.g. Kalkgestein). The
clients afterwards will contact the database including the information
of the first term (e.g. Kalkgestein)
and will in return get a list of all terms of which the type (e.g. Zement) is defined as dependent on the first
term (e.g. Kalkgestein) resp. a parent
of this term (e.g. Sedimentgestein).
The image below shows the relationships in an example.
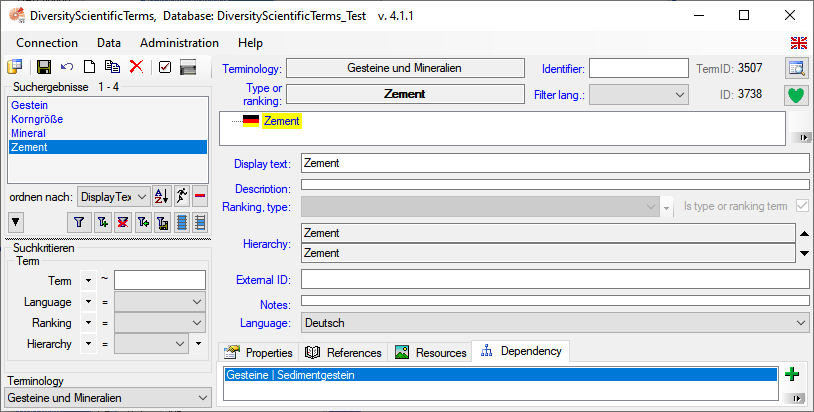
To define dependencies, change to Ranking terms (in the menu click on
Ranking terms to switch to the administration of the types resp. ranking
terms (see image below)). This part is only accessible for users in the
group Editor or above.
Diversity Scientific terms
Hierarchy
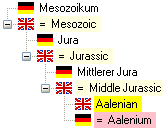
The upper part of the form shows the term in the hierarchical relation.
To insert a relation to a broader term, click no the
 button. In the window that will open, select
the broader term from the list and click OK. To remove the relation to a
broader term, click on the
button. In the window that will open, select
the broader term from the list and click OK. To remove the relation to a
broader term, click on the  button. The
image below summarizes the options to depict the relations in the
hierarchy.
button. The
image below summarizes the options to depict the relations in the
hierarchy.
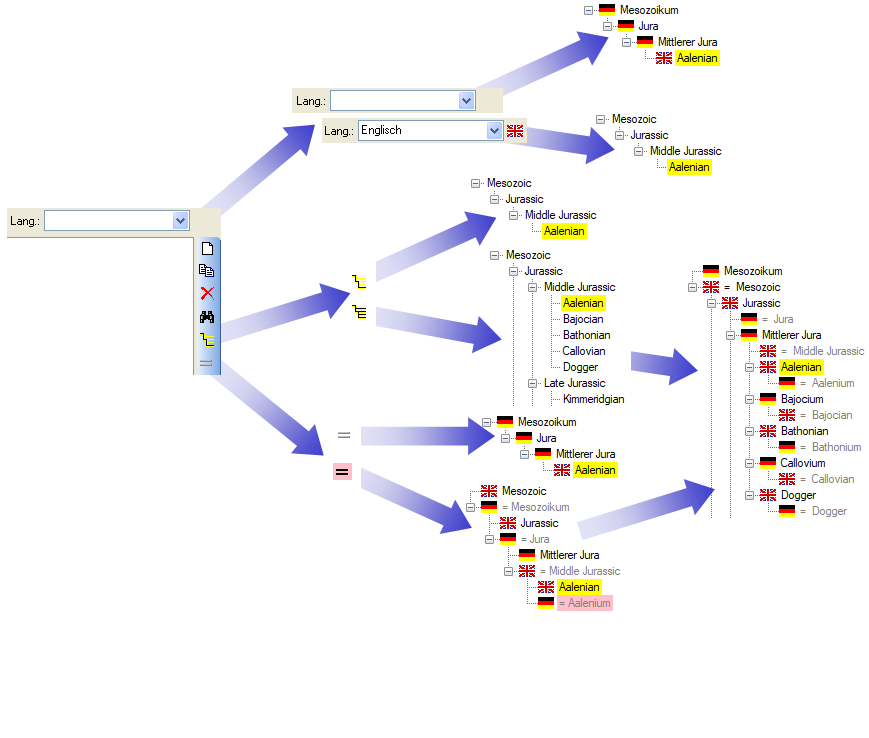
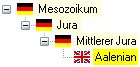
The default view of the hierarchy is shown below.
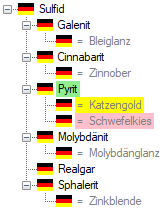
If you want to see the synonyms, click on the
 button. The button will change to
 and the hierarchy will show the synonyms
with the indaction of the language. Synonyms of the current term will
have a pink backgroud.
and the hierarchy will show the synonyms
with the indaction of the language. Synonyms of the current term will
have a pink backgroud.
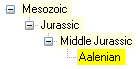
If you restrict the output in the hierarchy to a certain language,
 only one language will be shown in the
hierarchy as shown below.
only one language will be shown in the
hierarchy as shown below.
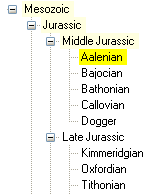
In the image above the hierarchy is restricted to the superior terms. If
you want to see the whole hierarchy click on the
 button. It will change to
and all terms will be shown. To return to
the previous view, just click the button again.
button. It will change to
and all terms will be shown. To return to
the previous view, just click the button again.
A cached value of the hierarchy is stored in two fields (downward and
upward) for every term. These entries are needed e.g. for queries where
the whole hierarchy is used instead of the term itself. The hierarchies
are build using the preferred terms (see Editing thedata
).
Diversity Scientific terms
History
To inspect the
history of a dataset click on the  history button. A form
will open, showing all former states of the data in the tables with the
current dataset at the top.
history button. A form
will open, showing all former states of the data in the tables with the
current dataset at the top.

Diversity Scientific terms
Language
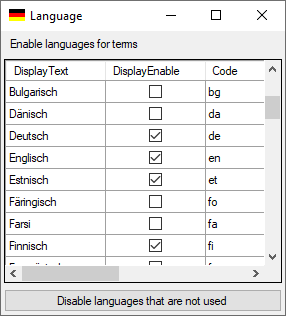
To edit the  language list available for the selection of the synonyms,
choose Administration -
language list available for the selection of the synonyms,
choose Administration -  Language from the menu. In
the window that will appear, you can enanble or disable certain
languages (see below). With a click on the Disable languages that are not used button,
you can disable all languages that are not used for synonyms so far,
which will shorten the list for selection in the main form..
Language from the menu. In
the window that will appear, you can enanble or disable certain
languages (see below). With a click on the Disable languages that are not used button,
you can disable all languages that are not used for synonyms so far,
which will shorten the list for selection in the main form..
Diversity Scientific terms
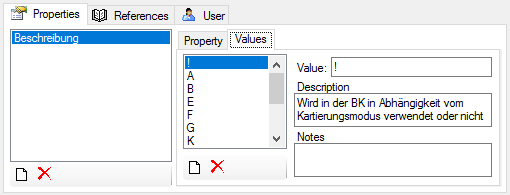
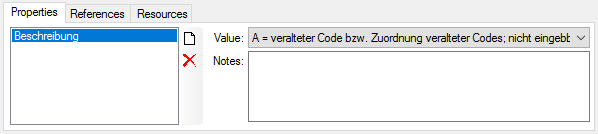
Properties
The properties that can be asigned for a term might be defined under the
terminology to which the term belongs. To insert a new property, open
the form Terminology. You find the properties defined
for a terminology in the base part of the form as shown below.

The properties that are defined in the terminology are then available
for a term. Depending on the datatype set for a property in the
terminology, you can either enter list, text, numeric or date values for
a property of a term as in the example above numeric values for an age.
For properties of the datatype list, an area for the entry of the
dedicated (text) values will appear as shown below.
The values for a term will be restricted to the list of values (see
below).
Diversity Scientific terms
Ranking terms
Every term should be characterized by a ranking term or type. These
ranking terms are edited in a separate list, not to be mixed up with the
terms. To switch to the editing of the ranking terms, click on Ranking terms in the menu that
will switch to
Ranking terms and list the ranking terms (see image below).
If in the query for the terms Ranking has been selected as the display column, this will be changed to Display Text as Ranking is not available for Ranking terms. To edit the ranking terms / types a user needs to be in the group DiversityWorkbenchEditor or above. For the ranking terms, you can define a dependency from a term.
Diversity Scientific terms
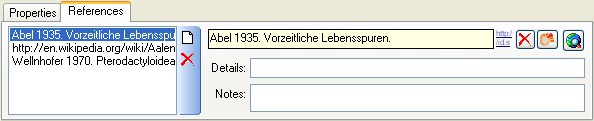
References
For every terminoloy and every term you can insert references.
There are 3 options to enter a reference:
-
As simple text
just enter the title of the reference in the text field as shown below
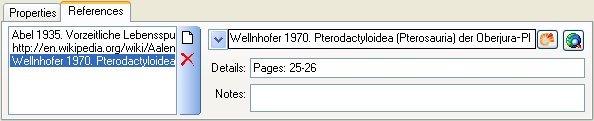
-
Linked to a module like DiversityReferences or a webservice
Click on the  button to open a window where you can search and select for a reference in e.g. the module DiversityReferences. You need access to DiversityReferences or a corresponding webservice to use this option.
-
A URI of a website
Click on the button to open a browser where you can choose the reference from the web
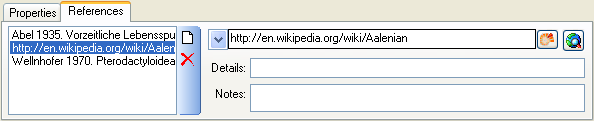
The data are stored in the tables TermReference and TerminologyReference
respectively.
Diversity Scientific terms
Resources
For every term you can insert resources, including informations about
the creator, the license etc. (see image below). Use the
and button to add or remove
images. If an image should not be shown in an external user interface,
e.g. in a chart in another modul like DiversityCollection,
enter the reason in the  field. The image will
change to
field. The image will
change to  and the pink background will indicate
the withholding of the image. The title will be shown as tooltip in a
chart.
and the pink background will indicate
the withholding of the image. The title will be shown as tooltip in a
chart.
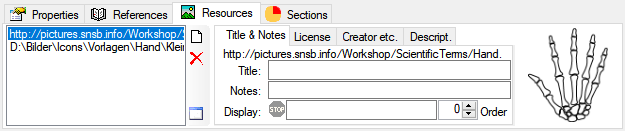
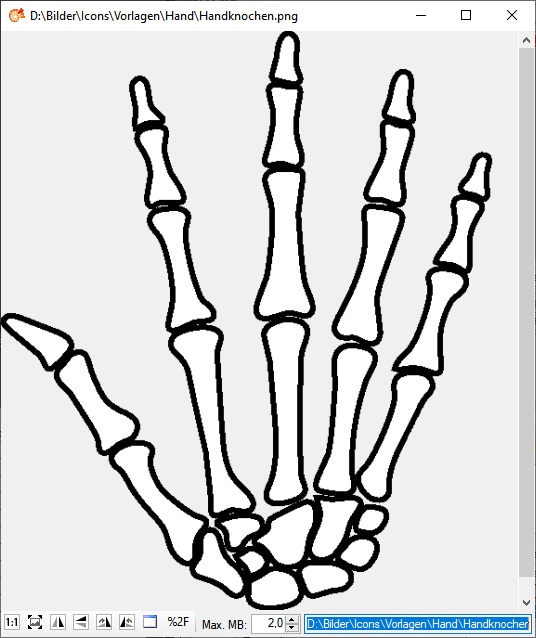
To see an image, click on the  button. A window
as shown below will open.
button. A window
as shown below will open.
The data are stored in the tables TermResource.
Diversity Scientific terms
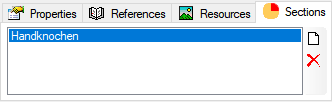
Sections
The sections that can be asigned for a term must
be defined under the terminology to which the term belongs. To insert a
new section, open the form Terminology. You find the
sections defined for a terminology in the base part of the form as shown
below.
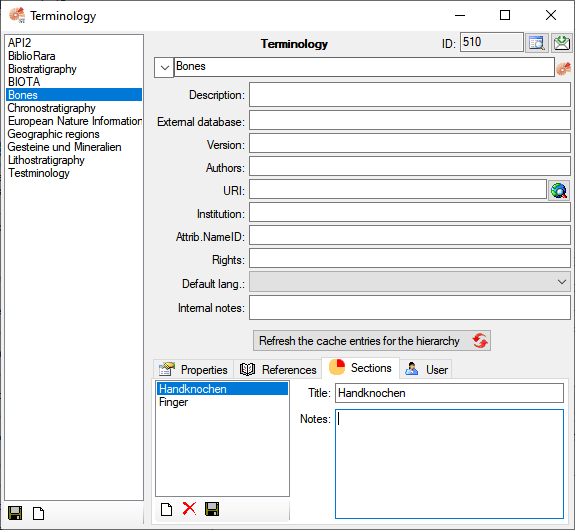
The sections that are defined in the terminology are then available for
a term. Choose the and button
to add resp. remove a term from a section (see below). To Insert all
Terms listed in the query results to a section, choose Data -
Add to section from the menu.
Diversity Scientific terms
Synonyms
Every term may have several synonmys. The preferred synonym, shown in
picklists and the like is marked with a green
icon. To make another synonym the preferred icon, click on the
 button. To make a term a synonym to
another term, click on the button. In the
window that will open, select the synonym from the list and click OK.
button. To make a term a synonym to
another term, click on the button. In the
window that will open, select the synonym from the list and click OK.
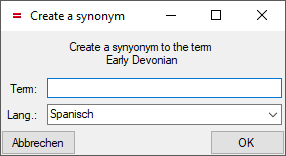
To create a synonym
of a term, choose an entry in the query list and click on the
button besides the hierarchy. A window as
shown below will open. Enter the display text and choose the language of
the new synonym. This will create a synonym to the original dataset.
To make a term a
synonym to another term, choose the term in the hierarchy and click on
the button besides the hierarchy. This will
open a window, where you can select the term to which the current term
should become a synonym to (see below).

If you want to see the synonyms in the Hierarchy, click
on the button. The button will change to
and the hierarchy will show the synonyms
with the indaction of the language. Synonyms of the current term will
have a pink backgroud.
If there are several synonyms, the perferred term will be marked
green while the other
synonyms are marked pink. The current term will be marked
yellow (see below).
Diversity Scientific terms
Table Editors
TableEditors  are provided for:
 Term…
Term… Representation…
- Resource…
For the data selected in the main window the table editors offer a
direct access to the tables of the database. The menu Data -
Table editors provide an editor for selected tables within the database.
A window with the content of the table will open. Columns with a gray
background can not be edited here. Columns with a light gray background
are linked to the contents of lookup tables where you can change
according to the contents of these tables.
Select  Set timeout ... from the menu to
increase the default timeout from 5 seconds to a higher value, e.g. for
greater amounts of data.
Set timeout ... from the menu to
increase the default timeout from 5 seconds to a higher value, e.g. for
greater amounts of data.
Editing
You can either edit the contents of the table directly or perform
changes to any number of marked fields. To mark a whole column use
the  button. Once you have selected the
contents to change, select one of the modes of change that appear in the
upper left corner. The modes of change are:
button. Once you have selected the
contents to change, select one of the modes of change that appear in the
upper left corner. The modes of change are:
 Insert: Insert the given value at the
beginning of the content
Insert: Insert the given value at the
beginning of the content Append: Append the given value at the end of
the content
Append: Append the given value at the end of
the content Replace: Replace a string in the content
with the given value
Replace: Replace a string in the content
with the given value Clear: Remove the content
After selecting the change mode, enter the text in the field where
necessary and click on the corresponding button to perform the changes
Deleting
If you select whole lines, a delete button will appear. Click on it to remove the selected datasets from the database.
Filtering
To filter the content of the table, click in the column that should be
used for filtering. Then choose the mode of comparision:
- = : The content must be exactly like the given value
- ~ : The content must contain the given value
- ≠ : The content must be different to the given value
If you want the filtering to be case sensitive, choose the
 a<>A option. After all parameters are set,
click on the
a<>A option. After all parameters are set,
click on the  filter button. To undo the filtering, click
on the
filter button. To undo the filtering, click
on the  button. This will reset the data to the
last saved version. If you want your changes to be saved, click the
button before you reset the filtering. If you close
the window all changes so far will be saved automatically. So if you do
not want to save your changes, click on the
button before closing the window.
button. This will reset the data to the
last saved version. If you want your changes to be saved, click the
button before you reset the filtering. If you close
the window all changes so far will be saved automatically. So if you do
not want to save your changes, click on the
button before closing the window.
Export
To export the data as a tab separated text file, click on the
 button. The file will be automatically saved in
the client-folder.
button. The file will be automatically saved in
the client-folder.
To export the data in a SQLite database click on the
 button. The data
will be exported into the SQLite database DiversityAgentTables.sqlite in
the folder Export in your application directory. If you want to save
previous exports, please rename the SQLite database or copy it to a
different directory.
button. The data
will be exported into the SQLite database DiversityAgentTables.sqlite in
the folder Export in your application directory. If you want to save
previous exports, please rename the SQLite database or copy it to a
different directory.
Log data
To see the log data of the table, you can click on the
button. The content of the log table can not be
changed, but is read only.
Diversity Scientific terms
Terminology
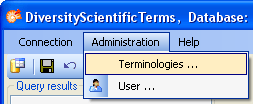
To edit the terminologies select Administration - Terminologies … from
the menu.
A form as shown below will open. A terminology may optionally be linked
to a project
 in DiversityProjects. Click on the
 button to get further
informations about the project or directly access the module
DiversityProjects. To remove the connection to
DiversityProjects, click on the
button.
button to get further
informations about the project or directly access the module
DiversityProjects. To remove the connection to
DiversityProjects, click on the
button.
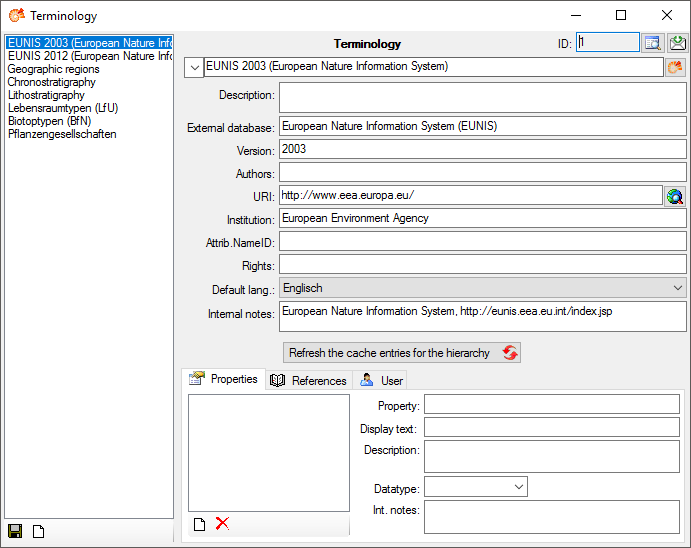
After changes in the data, especially in the hierarchy, please use the
button Refresh the cache entries for the hierarchy
 to update the hierarchy cache for the terms
within the terminology. The hierarchies are build using the preferred
terms (see Editing the data
).
to update the hierarchy cache for the terms
within the terminology. The hierarchies are build using the preferred
terms (see Editing the data
).
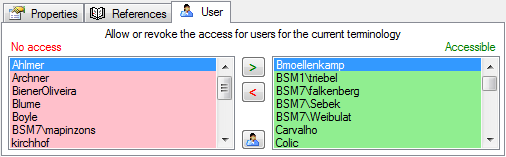
On the left the terminologies accessible for the user are listed, on the
right you find the details. At the bottom of the window the
properties, references and users
with access to the selected terminology are listed. In the User tab, use
the < and > buttons to decide if
a user has access to a terminology. To add missing users use
the  button. This functionallity is as well
available under the Login Administration.
button. This functionallity is as well
available under the Login Administration.