Diversity Taxon Names

Export
There are several options to export data.
- Export of hierarchy and synonymy
- Export of taxon list information
- Export via list view
- Export via export wizard
There are several options to export data.

To export the tables of the database in a tabulator, comma or semicolon separated format, choose Data → Export → Export CSV... from the menu. A window as shown below will open where you can select the tables to be exported in sections Selection criteria and in the Tables for export.
A prerequisite for this export is that the bcp program is installed on your computer. This has either been installed together with the installation of SQL-Server or you have to install the Microsoft Command Line Utilities for SQL Server.
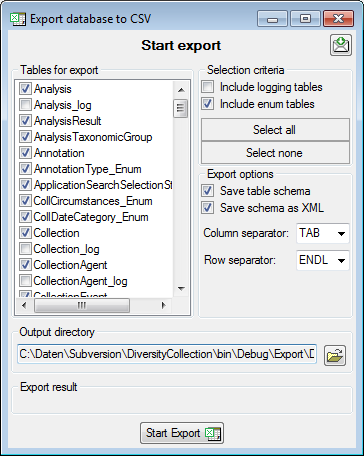
To start the export click on the Start export
button. By default the data will be exported into a directory
...\Export\<database_name> below your application directory. Click
on the  open button to select a
different target directory before starting export.
open button to select a
different target directory before starting export.
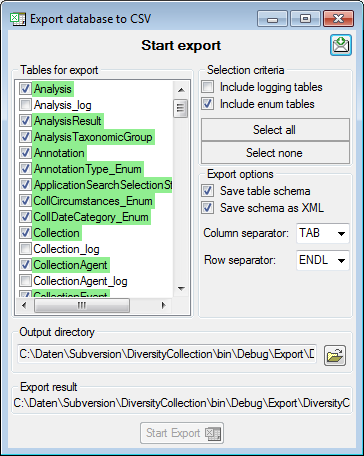
After export the tables are marked with green background, if table schema and data were exported successfully. If only the data were exported, this is marked with yellow background, if nothing was exported, the background is red. A detailed export report can be viewed by a click on the export result file name.

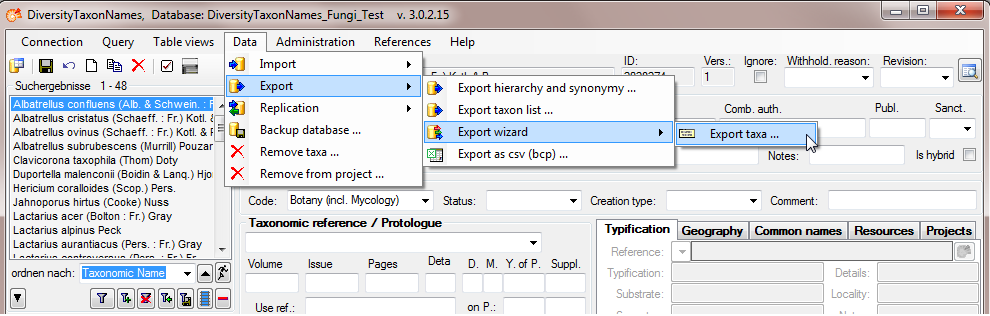
The export wizard provides a possibility to export the data selected in
the main form. The data are exported as tab separated text file. The
export may include transformations of the data as well as information
provided by linked modules and webservices. Choose Data - Export -
Export wizard from the menu and then
select one of the export targets (Event, Specimen, ...). For a short
introduction see the tutorial.
 There are the following ways to add tables:
One parallel table Several parallel tables according to
selected data
Several parallel tables according to
selected data Dependent table
All options will include the depending tables as defined for the default
table. The option for several tables will add
as many tables as there are found in the data.
If you added parallel tables, you should set the sequence of the
datasets within these tables: For the columns that should be used for
sorting the data, set the ordering sequence to a value > 0 and choose
if the ordering sequence should be ascending  or
descending
or
descending  .
.
Certain columns in the database may provide information linked to
another table  or a module resp. webservice
 . Click on the button
to add a linked value.
. Click on the button
to add a linked value.
 To add columns to the exported file, use the
buttons. In the textbox at the top of the file column, you can change
the header for the column. To change the position of a file column use
the
To add columns to the exported file, use the
buttons. In the textbox at the top of the file column, you can change
the header for the column. To change the position of a file column use
the  resp.
resp.  button. To fuse
a column with the previous column, click in the gray bar
button. To fuse
a column with the previous column, click in the gray bar
 on the left side of the column that will change to
  for fused columns. To remove a file column, use the
  delete button. Pre- and postfixes for the columns can directly be entered in the corresponding fields. To apply transformations on the data click on the
 ![]() button.
button.
 To filter the exported data, use the filter function. Click on the
button and
enter the text for the filter. Only data matching the filter string will
be exported. If a filter is set, the
button will have a red background to remind you of the filter. The
filter may be set for any number of columns you need for the restriction
of the exported data.
To filter the exported data, use the filter function. Click on the
button and
enter the text for the filter. Only data matching the filter string will
be exported. If a filter is set, the
button will have a red background to remind you of the filter. The
filter may be set for any number of columns you need for the restriction
of the exported data.
 This filter in contrast to the filter above strictly applies to the row
according to the sequence of the data. For an explanation see a short
tutorial
This filter in contrast to the filter above strictly applies to the row
according to the sequence of the data. For an explanation see a short
tutorial
 .
.
 To test the export choose the Test tab,
set the number of lines that should be included in the test and click on
the Test export button. To inspect the
result in a separate window, click on the
To test the export choose the Test tab,
set the number of lines that should be included in the test and click on
the Test export button. To inspect the
result in a separate window, click on the  button.
If you want to inspect the SQL commands created during the test check this option. To see the generated SQL click on the SQL button after the Test export. A window containing all commands including their corresponding tables will be shown.
To export your data to a file, choose the Export tab. If you want to store the file in different place use the
button to choose the directory and edit the name of
the file if necessary. Check the  include a schema option if you want to save a schema together with your
export. To start the export, click on the Export data
button. To open the exported file, use the button.
include a schema option if you want to save a schema together with your
export. To start the export, click on the Export data
button. To open the exported file, use the button.
 To export your data into a SQLite
database, choose the Export to SQLite tab. You may change the preset name of the database in order to keep previous exports. Otherwise you overwrite previous exports with the same filename. To start the export, click on the Export data
button. To view the exported data, use the
button.
To export your data into a SQLite
database, choose the Export to SQLite tab. You may change the preset name of the database in order to keep previous exports. Otherwise you overwrite previous exports with the same filename. To start the export, click on the Export data
button. To view the exported data, use the
button.
 To handle the settings of your export, choose the
Schema tab. To load a predefined schema,
click on the open button. To reset the settings to the
default, click on the
To handle the settings of your export, choose the
Schema tab. To load a predefined schema,
click on the open button. To reset the settings to the
default, click on the  undo button. To save the current
schema click on the
undo button. To save the current
schema click on the  save button. With the
button you can inspect the schema in a separate
window.
save button. With the
button you can inspect the schema in a separate
window.
![]() The exported data may be transformed e.g. to adapt them to a format
demanded by the user. Click on the
The exported data may be transformed e.g. to adapt them to a format
demanded by the user. Click on the ![]() button to open a window as shown below. For an introduction see a short tutorial
.
button to open a window as shown below. For an introduction see a short tutorial
.
![]()
Here you can enter 6 types of transformation that should be applied to
your data.  Cut out parts,
![]() Translate contents from the file,
RegEx apply regular expressions or
Translate contents from the file,
RegEx apply regular expressions or  Replace text and apply Calculations
Σ or Filters
on the data from the file. All transformations
will be applied in the sequence they had been entered. Finally, if a
prefix and/or a postfix are defined, these will be added after the
transformation. To remove a transformation, select it and click on the
button.
Replace text and apply Calculations
Σ or Filters
on the data from the file. All transformations
will be applied in the sequence they had been entered. Finally, if a
prefix and/or a postfix are defined, these will be added after the
transformation. To remove a transformation, select it and click on the
button.
With the cut transformation you can restrict the
data taken from the file to a part of the text in the file. This is done
by splitters and the position after splitting. In the example below, the
month of a date should be extracted from the information. To achieve
this, the splitter '.' is added and then the position set to 2. You
can change the direction of the sequence with the button
![]() Seq starting at the first position and
Seq starting at the first position and
![]() starting at the last position. Click on
the button Test the transformation to see the result of your
transformation.
starting at the last position. Click on
the button Test the transformation to see the result of your
transformation.
![]()
With the Start at Pos. option the given splitters will be converted into space (' ') and the whole string starting with the given position will be used (see below).
![]()
The translate transformation ![]() translates
values from the file into values entered by the user. In the example
above, the values of the month should be translated from roman into
numeric notation. To do this click on the
translates
values from the file into values entered by the user. In the example
above, the values of the month should be translated from roman into
numeric notation. To do this click on the ![]() button to add a translation transformation (see below). To list all
different values present in the data, click on the
button to add a translation transformation (see below). To list all
different values present in the data, click on the  button. A list as shown below will be created. You may as well use the
and
button. A list as shown below will be created. You may as well use the
and  buttons to add or remove
values from the list or the delete button to clear the
list. Then enter the translations as shown below. Use the
save button to save entries and the Test the transformation button to see the result.
buttons to add or remove
values from the list or the delete button to clear the
list. Then enter the translations as shown below. Use the
save button to save entries and the Test the transformation button to see the result.
![]()
To load a predefined list for the transformation use the
button. A window as shown below will open. Choose the Encoding of the data in your translation source and
indicate if the  First line contains column definition. Click OK to use the values
from the file for the translation.
First line contains column definition. Click OK to use the values
from the file for the translation.
![]()
The transformation RegEx using regular expressions will transform the values according to the entered Regular expression and Replace by values. For more details please see documentations about regular expressions.
![]()
The replacement transformation replaces any text in the data by a text
specified by the user. In the example shown below, the text "." is
replaced by "-".
![]()
The calculation transformation Σ performs a calculation on numeric value, dependent on an optional condition. In the example below, 2 calculations were applied to convert 2-digit values into 4 digit years.
![]()
The filter transformation compares the values from the data with a value
entered by the user. As a result you can either
 Export content into file or
Export fixed value. To select another
column that should be compared, click on the
Export content into file or
Export fixed value. To select another
column that should be compared, click on the  button and choose a column from the file in the window that will open.
If the column that should be compared is not the column of the
transformation, the number of the column will be shown instead of the
symbol. To add further filter conditions use
the add button. For the combination of the conditions
you can choose among AND and OR.
button and choose a column from the file in the window that will open.
If the column that should be compared is not the column of the
transformation, the number of the column will be shown instead of the
symbol. To add further filter conditions use
the add button. For the combination of the conditions
you can choose among AND and OR.
![]()

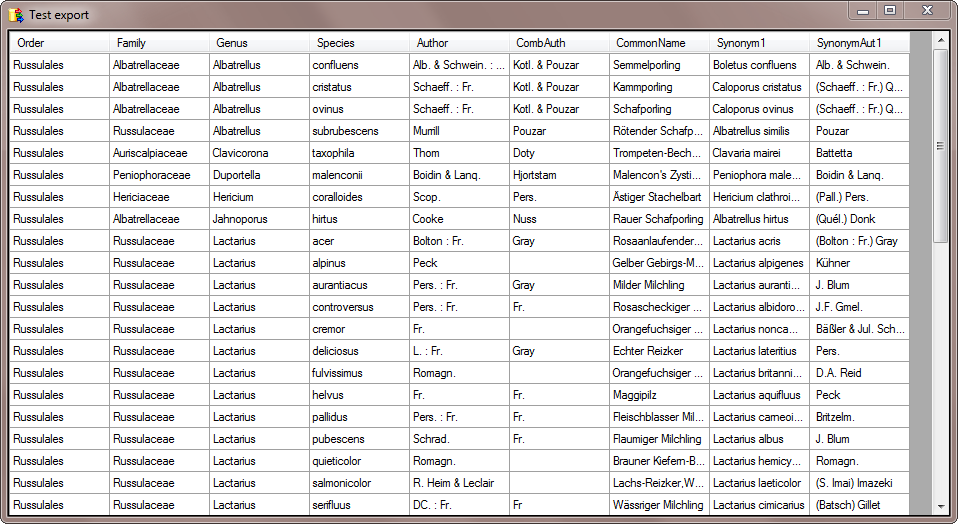
This tutorial demonstrates the export of a small sample of data from the database.
In the main form, select the data that should be exported (only the data displayed in the query results are exported).
Choose Data → Export → Wizard →
 Export taxa … from the menu.
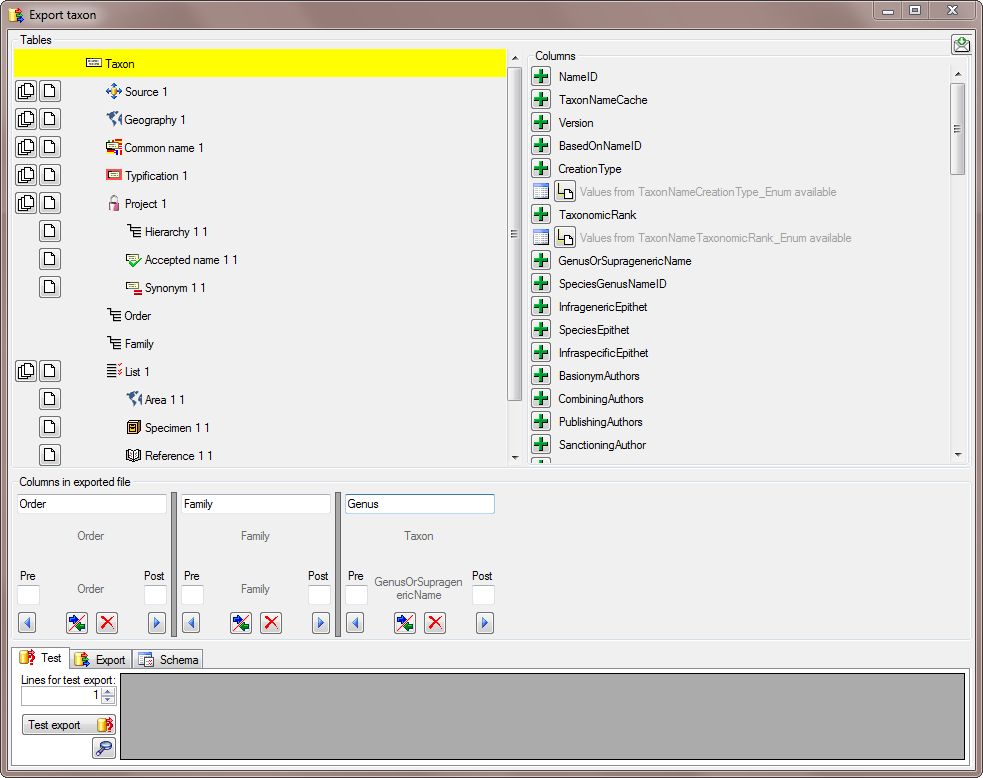
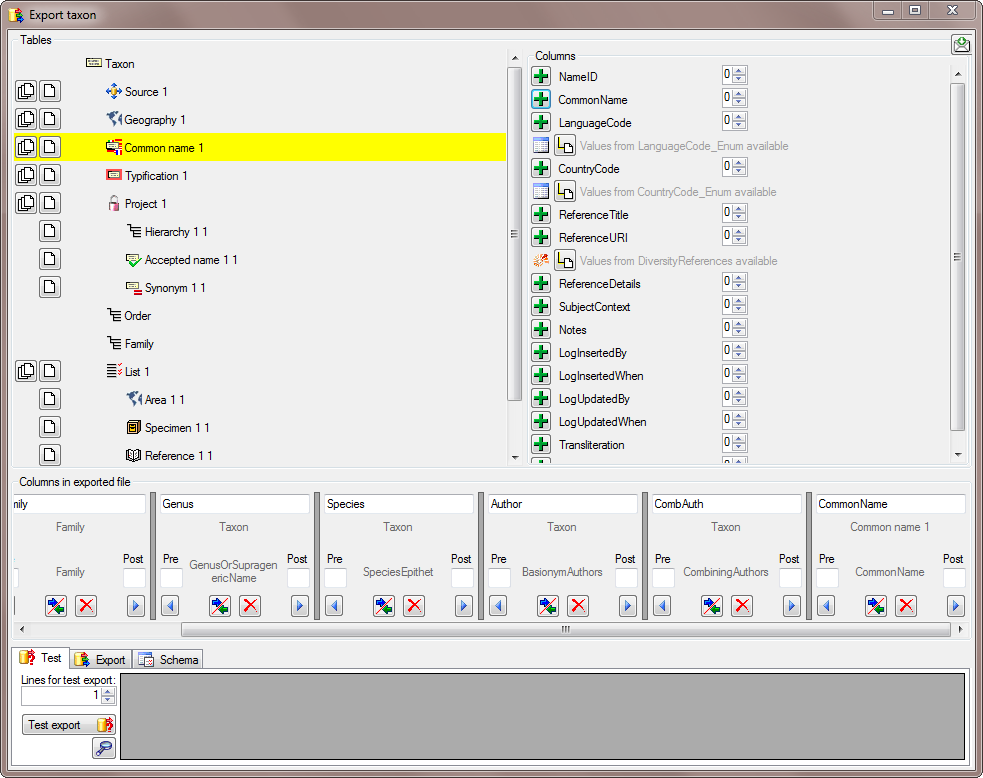
A window as shown below will open where the available tables for export are listed in the upper left area. To show the data colums of a table, select this table in the list.
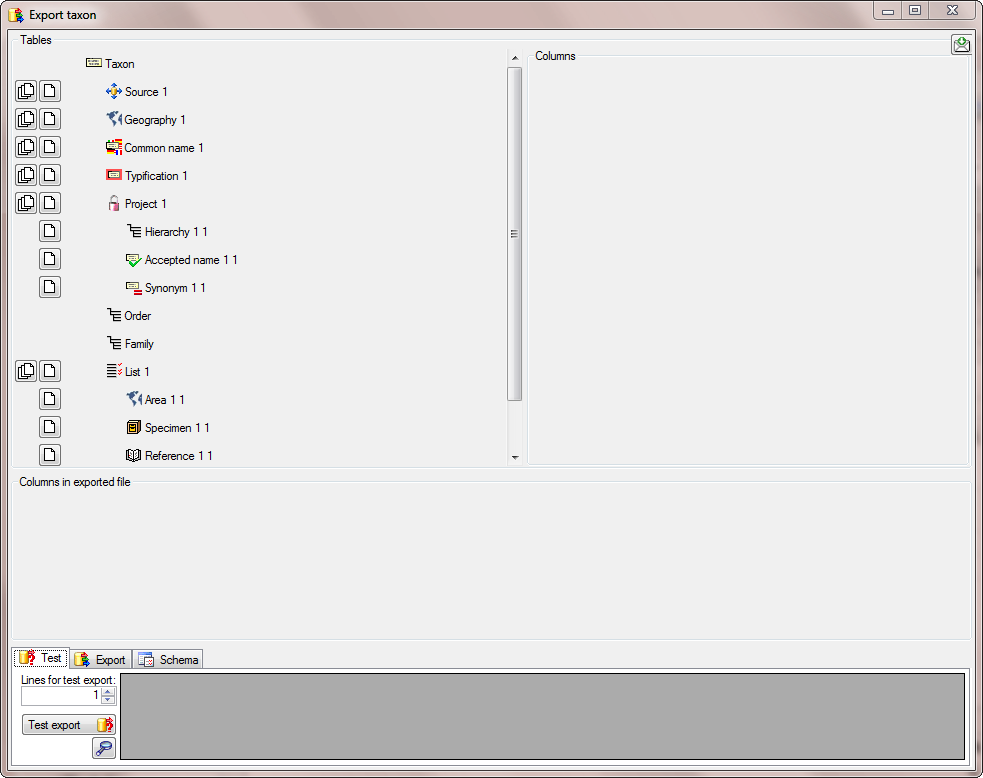
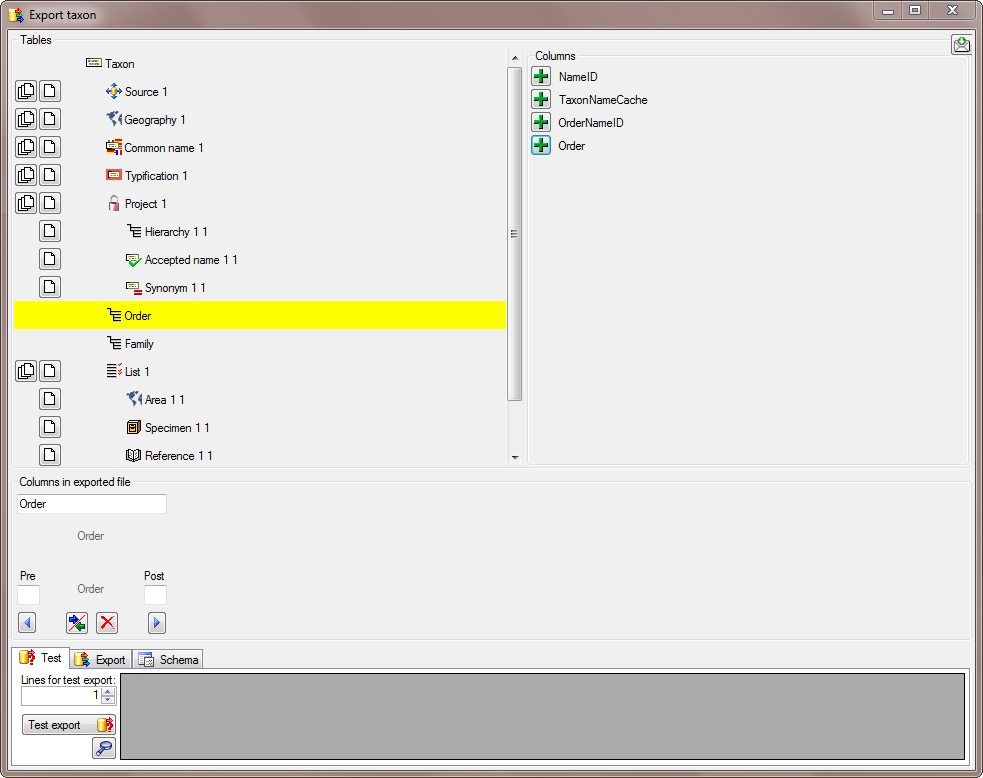
In this example, we want to add the higher hierarchy, starting with the
order. Select the  Order from the list as shown
below.
Order from the list as shown
below.
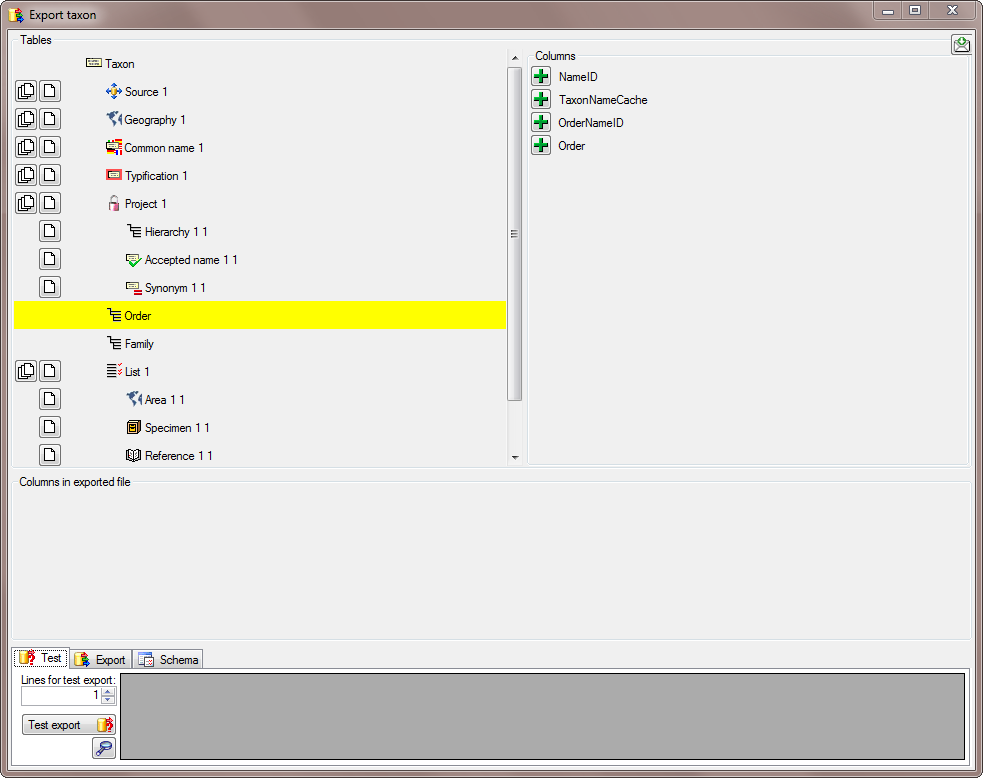
In the Columns area appearing in the area on the right click on the
button to add the Order to the columns list.
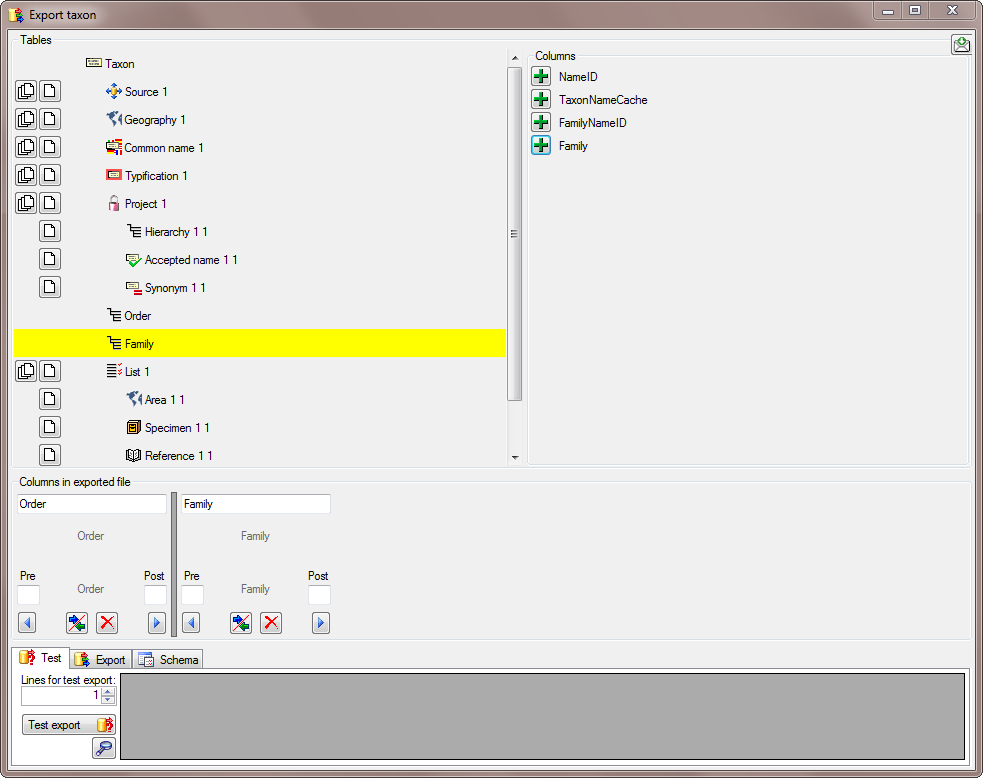
This is repeated for the Family and the Genus
(see below).
In the taxon table choose the column GenusOrSupragenericName to add teh genus to te exported (see below).
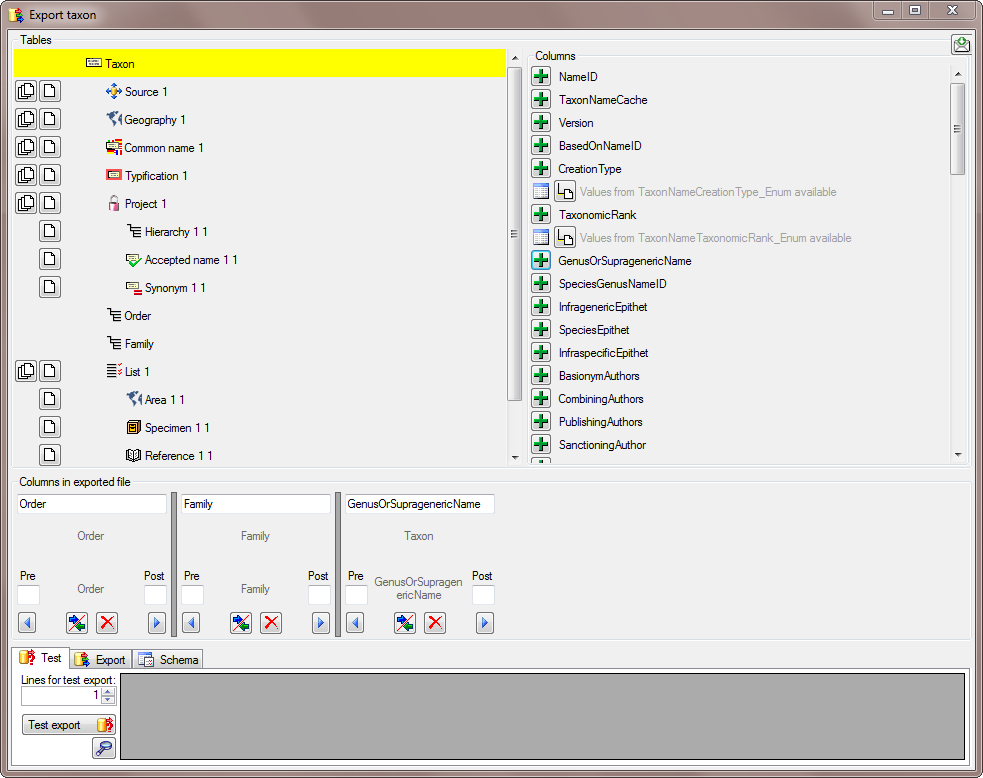
To avoid that the column name GenusOrSupragenericName appears in our export, we change the name to Genus (see below).
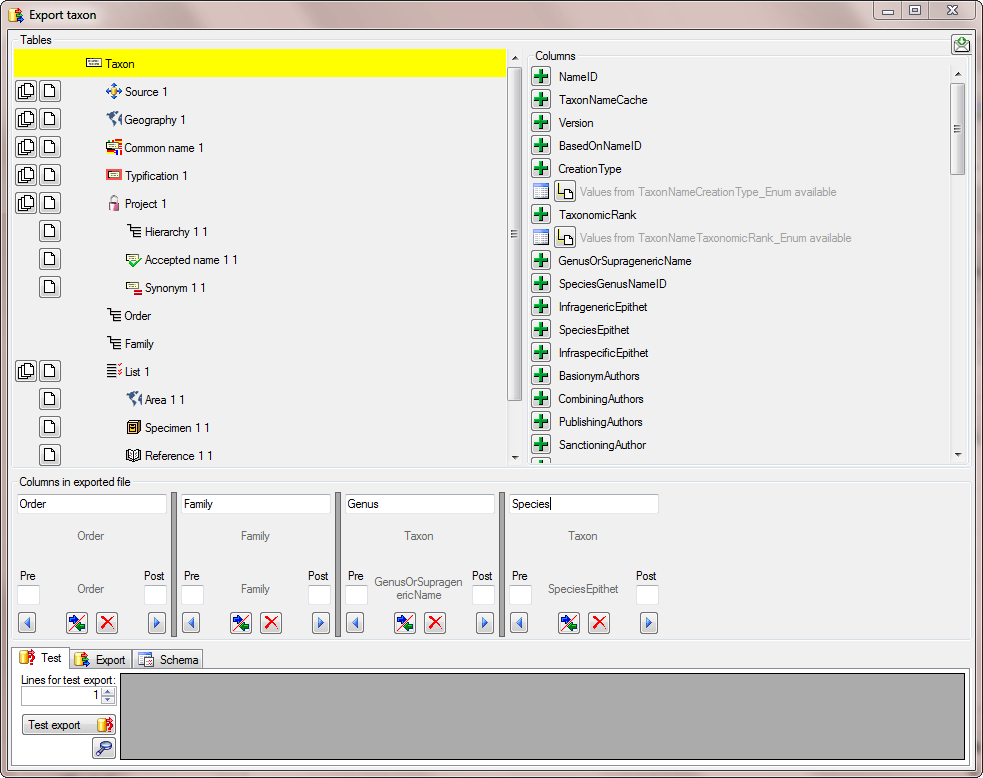
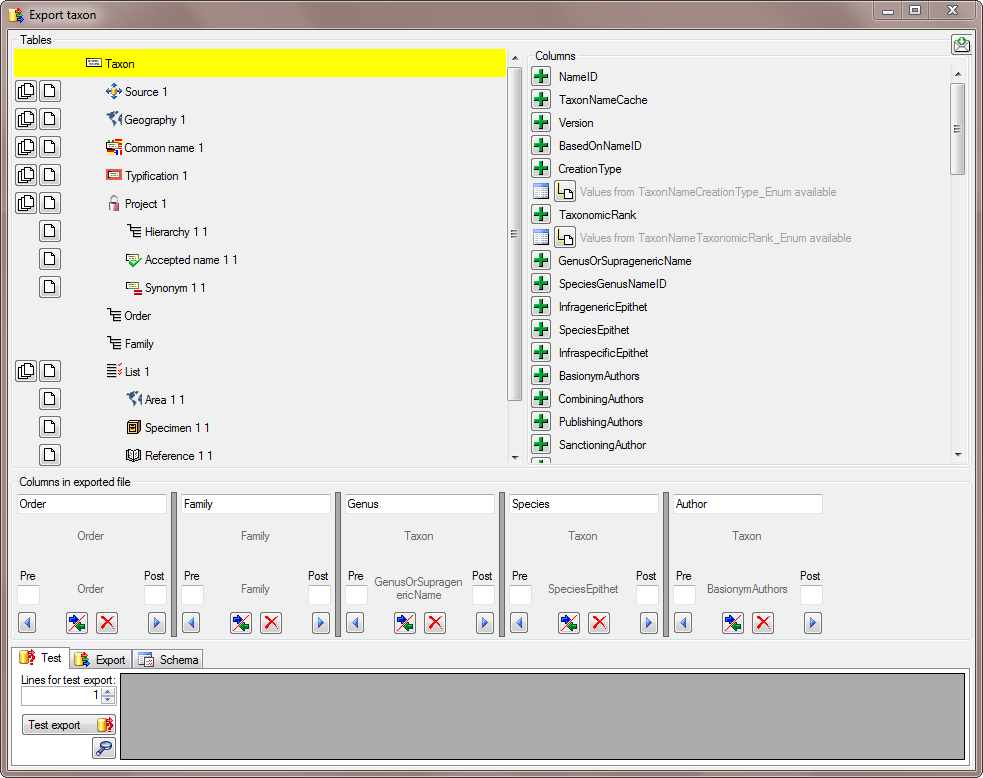
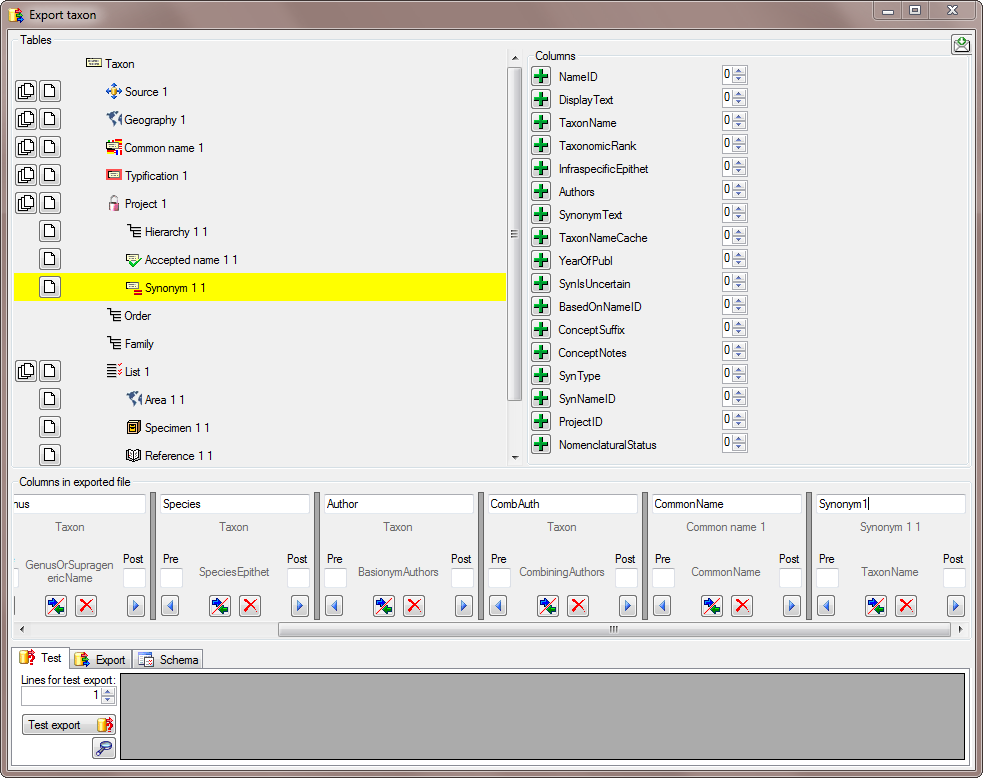
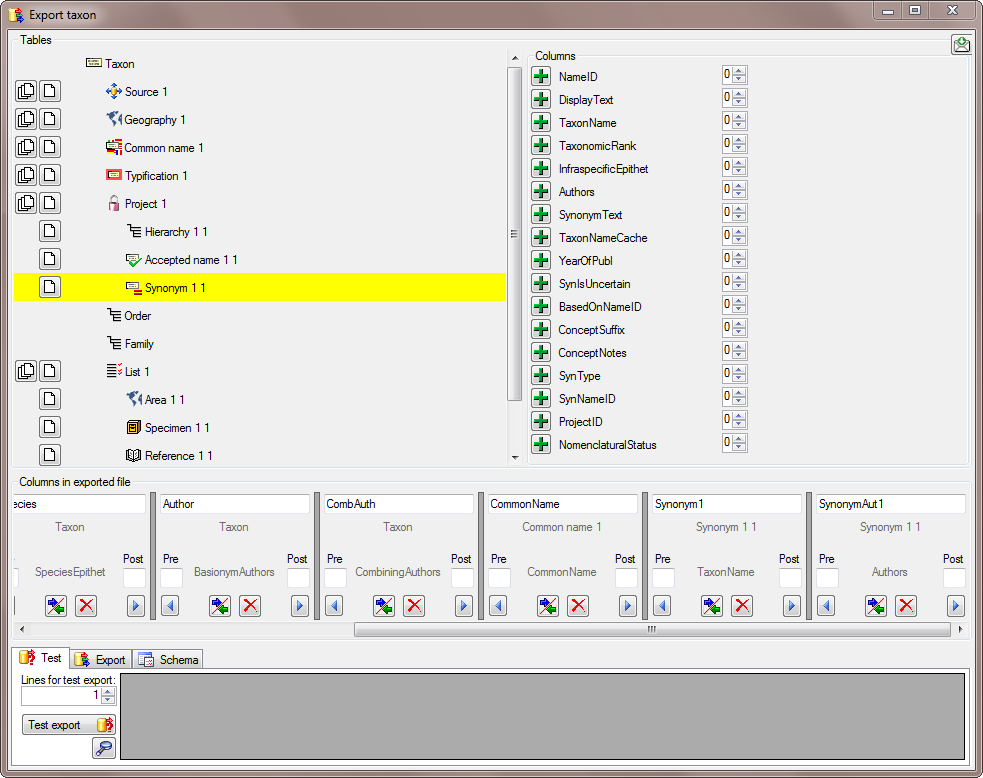
The same is repeated for the species, authors, common names and synonyms (see below).
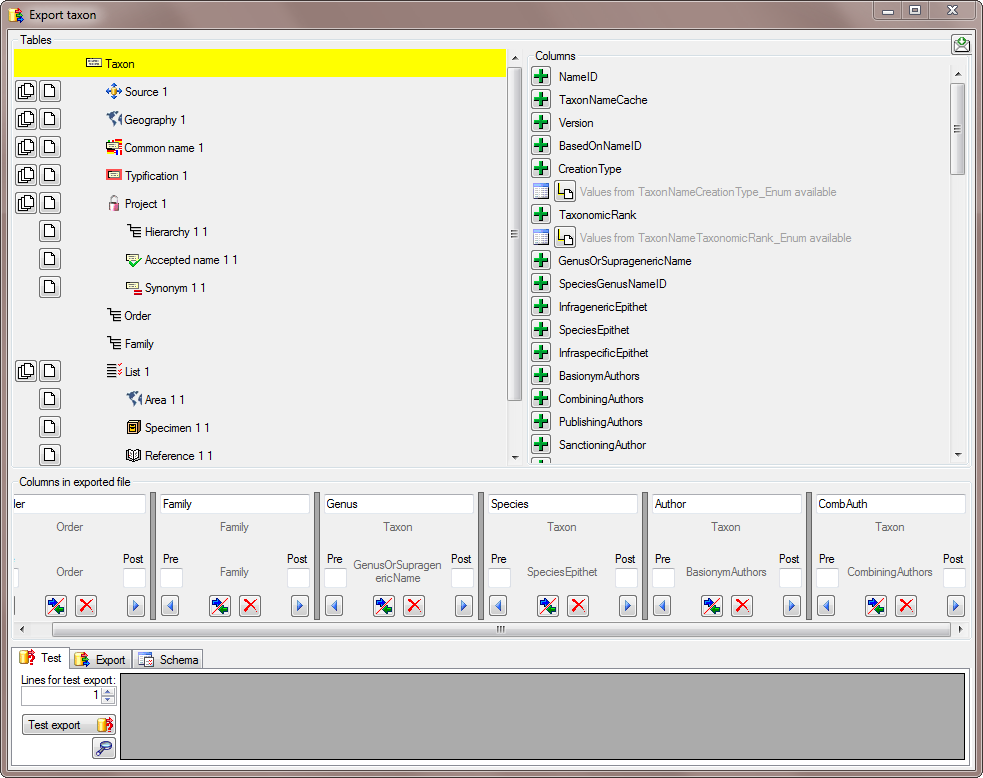
After all columns that should be exported and their transformations are
defined, we start Test export to see the
result as shown below.
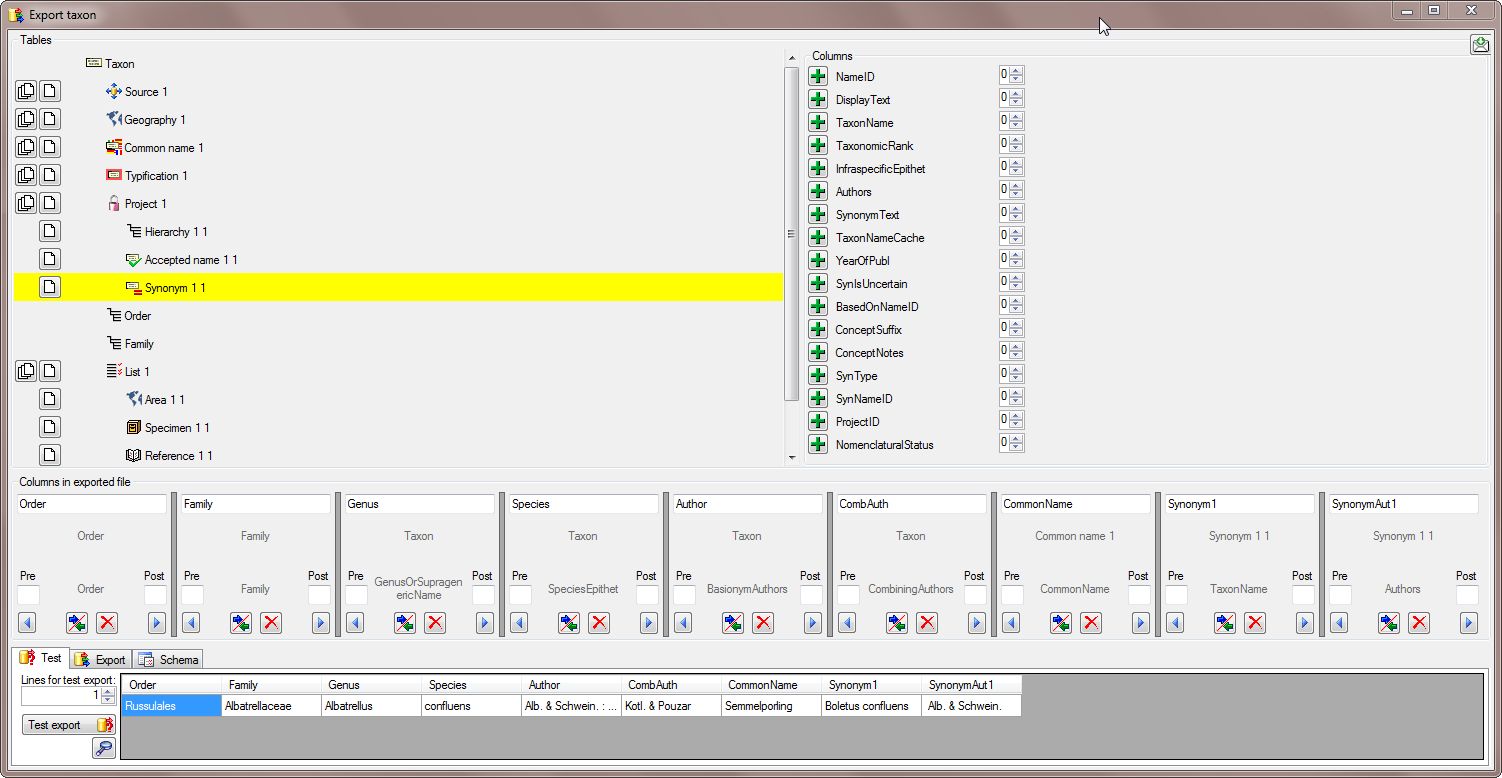
Click on the button to open the result in a
separate window (see below).
To export the data change to the tab and
click on the Export data button. The
result is shown in the textbox below and stored in the specified file
(see below).
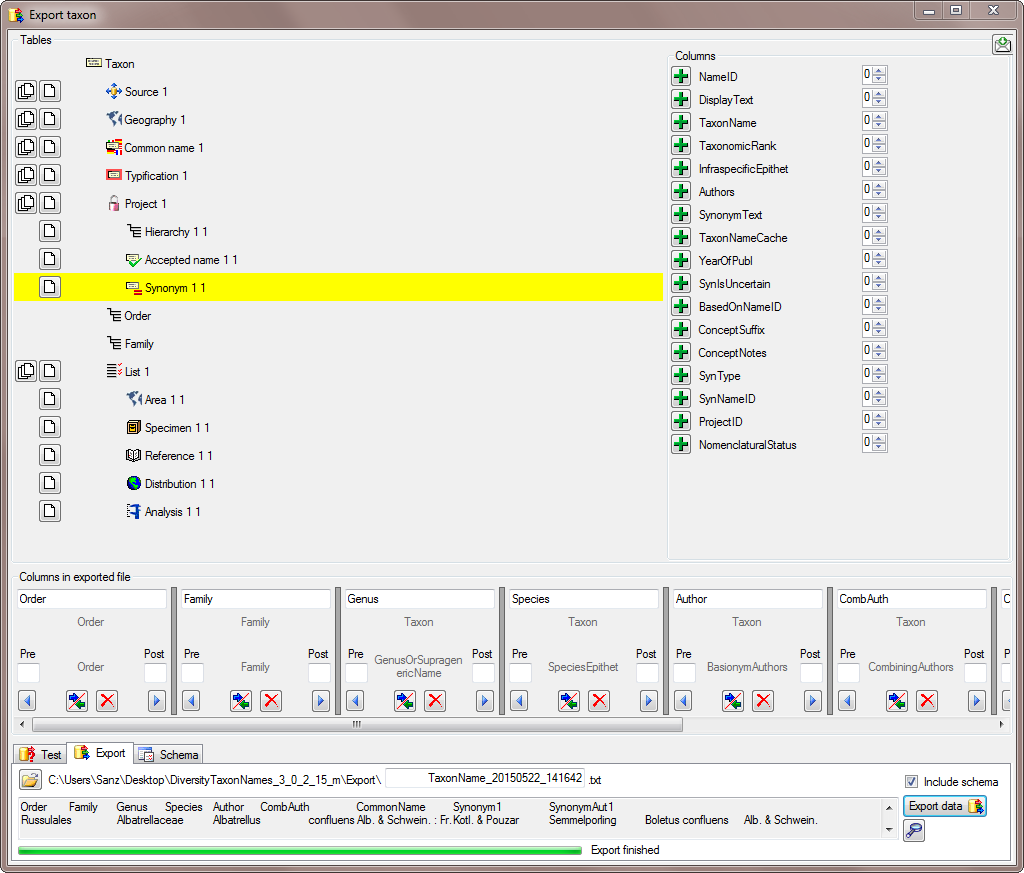
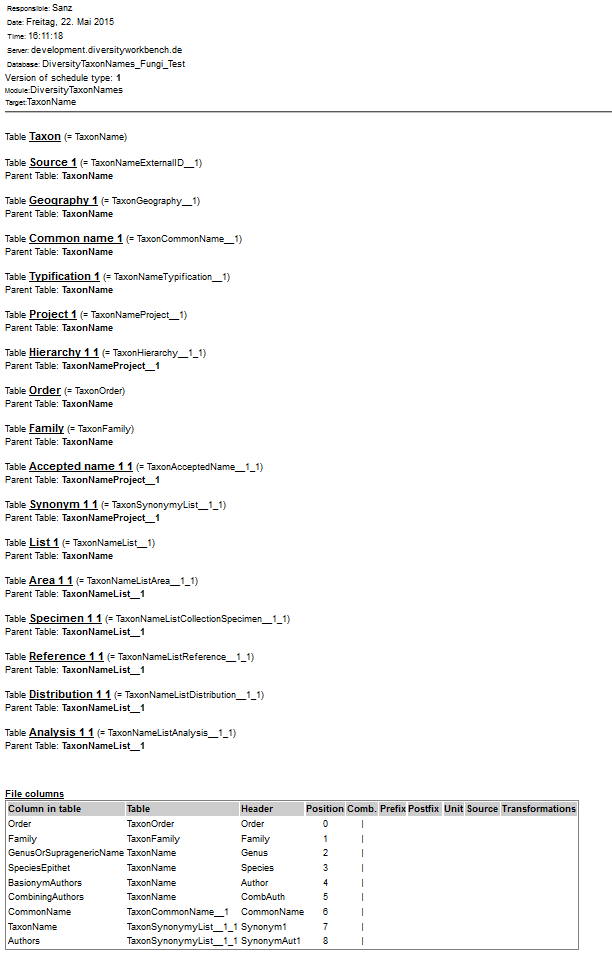
Together with the exported data, a schema is stored, containing all settings of the export. This schema may be reused for subsequent exports of the same type (see below).

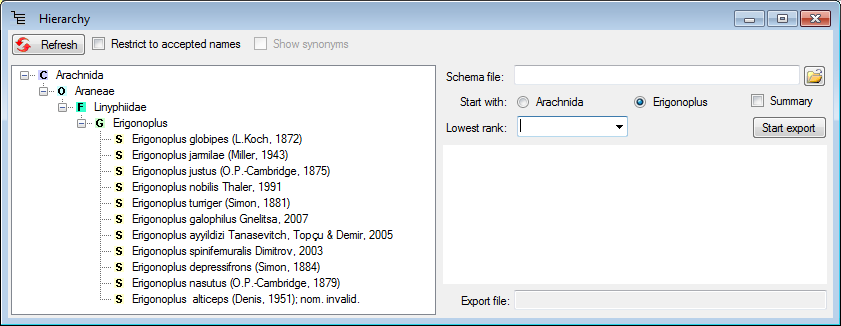
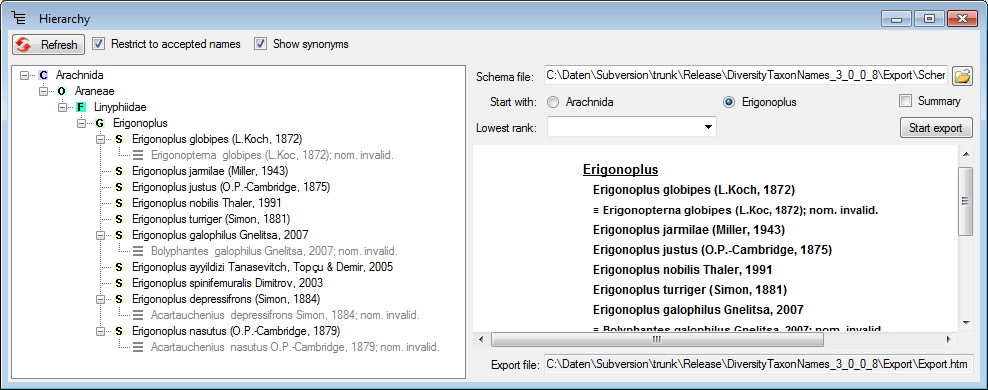
To export the taxonomy, including the hierarchy and the synonymy, select the corresponding taxon, choose Data → Export → Export hierarchy and synonymy… from the menu.
To see the whole
hierarchy, select the desired node in the hierarchy tree and click on
the  button besides the hierarchy.
A window as shown below will open
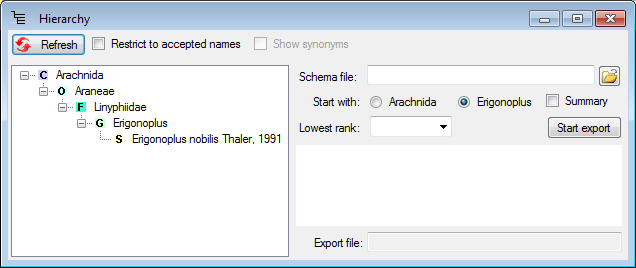
The data you in the export will depend upon the taxon you selected in the main form. So if e.g. you want to export the names within a genus, select the genus in the main form.
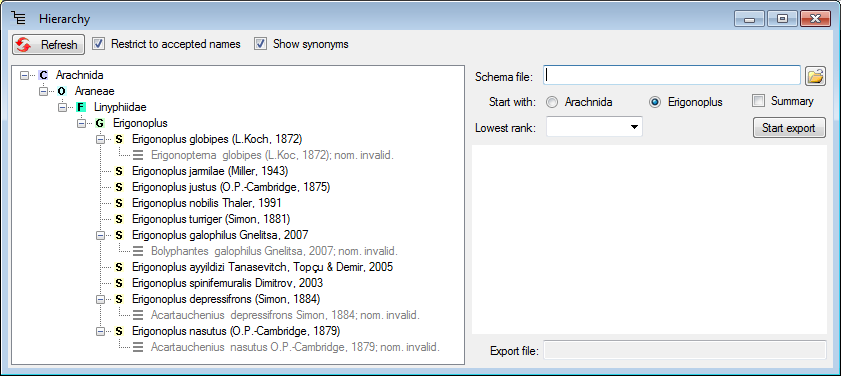
If you want to
include the synonyms, check Restrict to accepted names and Show
synonyms and click on the  button (see
below).
button (see
below).
If you start the export without any schema file, you will get the data strutured as xml (see below).
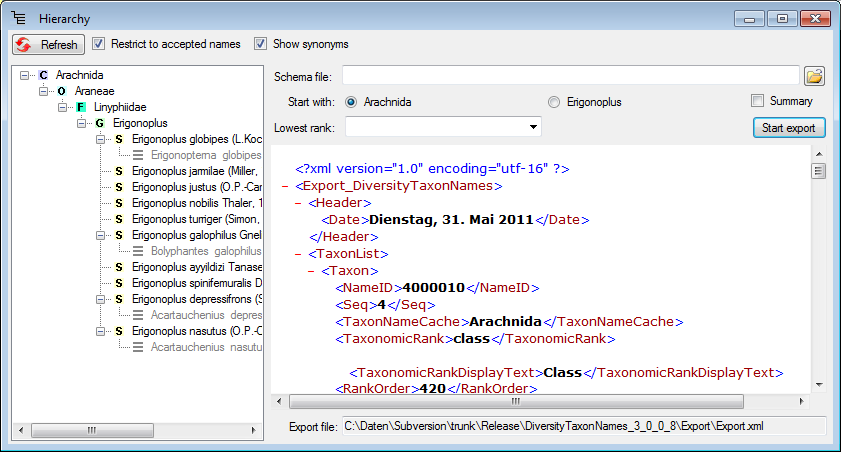
To format the data, specify the schema file containing your preferred format as shown below.
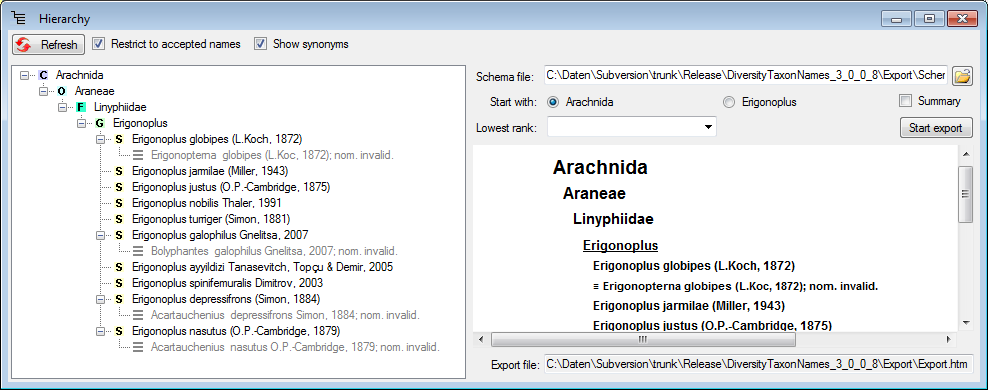
You can export the data including all higher taxa (see above) or starting with the taxon for which you selected the export (see below). mao format the data, specify the schema file containing your preferred format as shown below.
To export only the higher taxa, you can restrict the lowest rank to e.g. the genus as shown below.
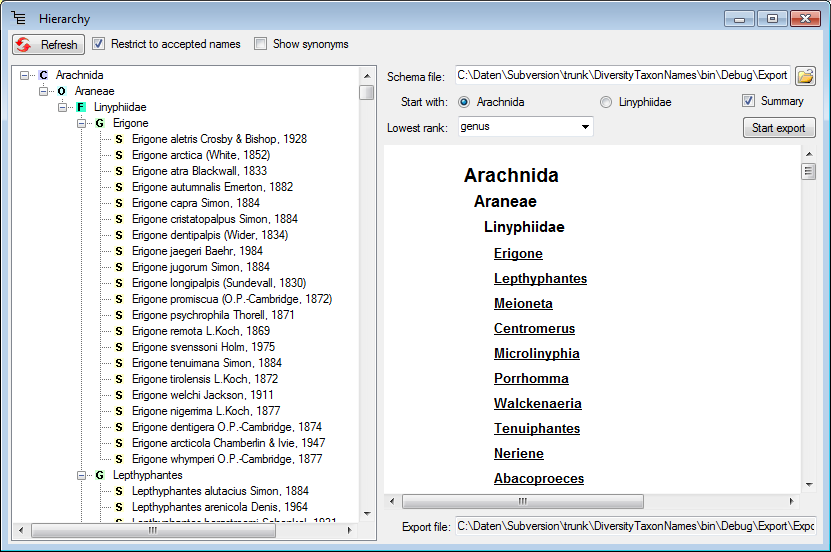
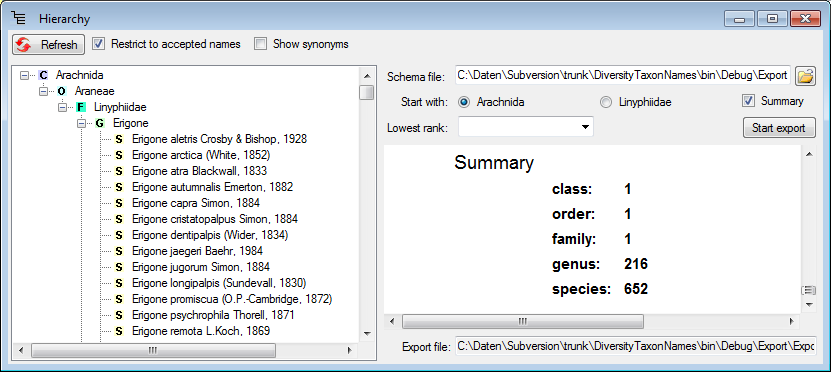
If you choose the option Summary, the numbers of the differnet hierarchical levels will be listed at the bottom of the report (see image below)

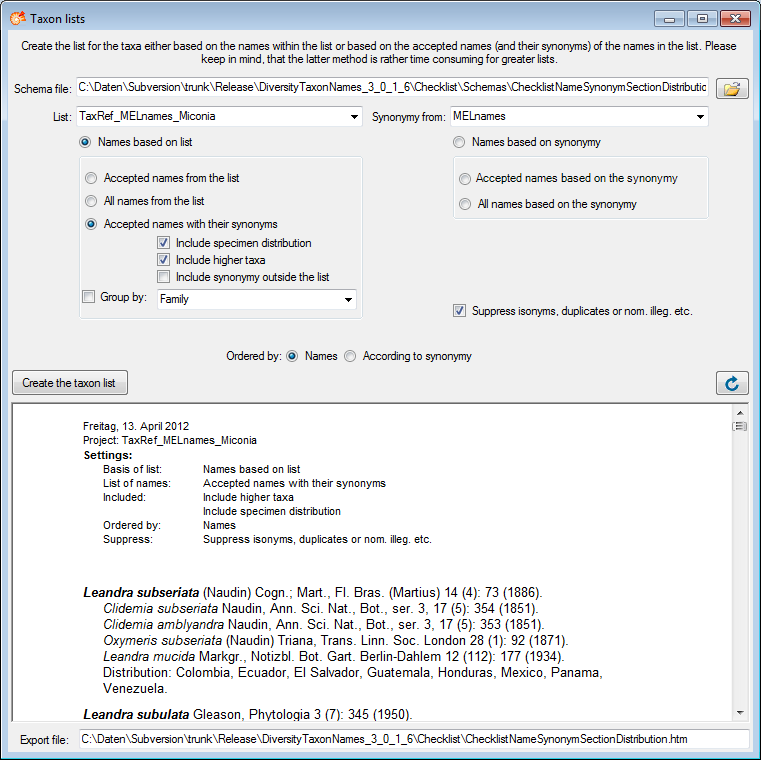
To export lists, including information about the distribution or the synonymy, choose Data → Export → Export taxon list … from the menu. A window as shown below will open, where you can choose the taxonomic list and the project where the synonomy of the taxa is documented.
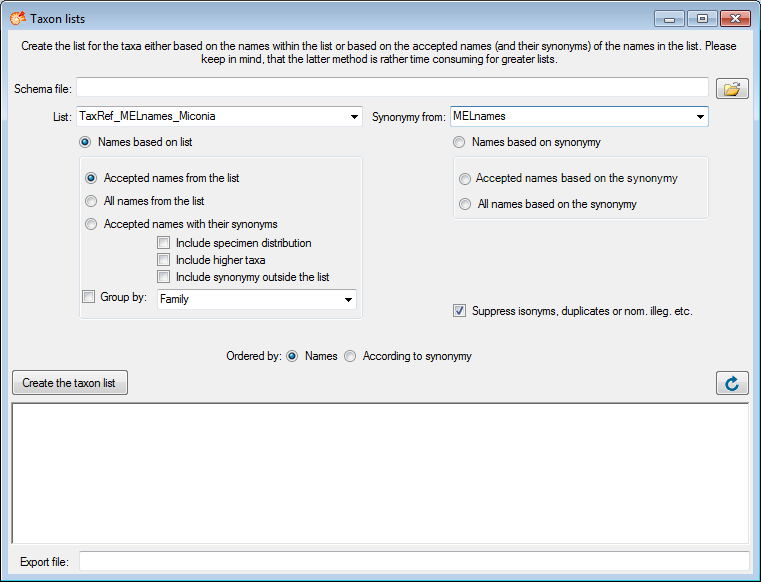
Choose a Schema file and the options for your export. Than click on the Create the taxon list to start the export. The resulting html file (see below) will be named according to the choosen schema file.
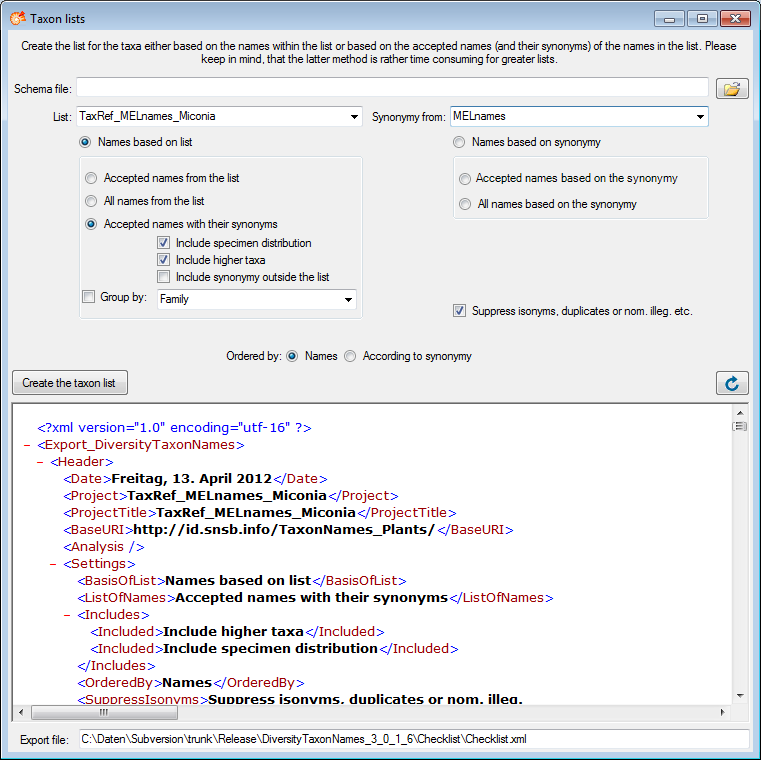
If you miss to
choose a schema file, the original XML file will be shown (see below).
To convert this into a html file, choose a schema file and click the
![]() button.
button.

To export a list of the synonyms for the taxa selected in the query, choose Data → Export → Export synonyms… from the menu. A window as shown below will open. With a click on the Find accepted names and synonyms button to search for the contents in the database.
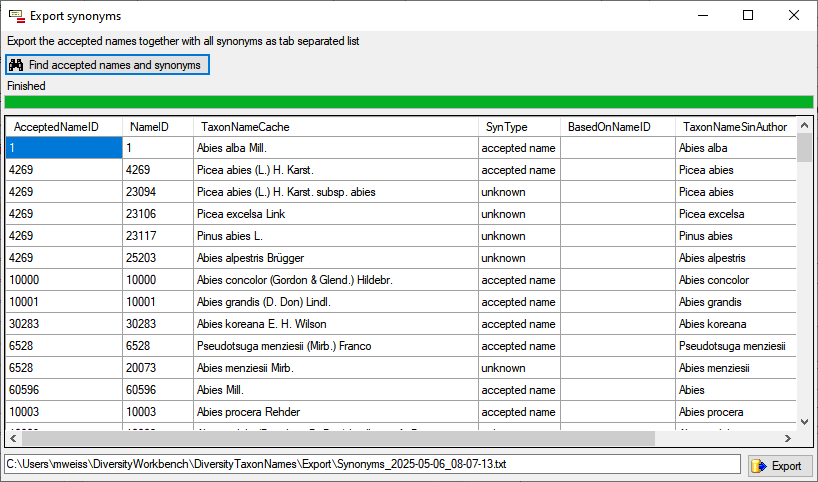
Use the Export button to export the data from the table to the specified file