 Data -> Cache database ... from the menu and select the tab
 Projects. If no projects were added so far the window will appear like
shown below.
Projects. If no projects were added so far the window will appear like
shown below.
The data transferred into the
cache database are always transferred according to a project they belong
to. Choose
Data -> Cache database ... from the menu and select the tab
Projects. If no projects were added so far the window will appear like
shown below.

To add a new project for the transfer into the cache database,
click on the Add project
 button. In the area below a new
entry as shown below will appear. The area on the right shows the number of datasets
in the project in the source database
together with the date of the last update. To ensure the separation of the data
between the projects, DiversityDescriptions creates a separate schema for every
project named Project_[name of the project] together with needed roles, tables etc..
button. In the area below a new
entry as shown below will appear. The area on the right shows the number of datasets
in the project in the source database
together with the date of the last update. To ensure the separation of the data
between the projects, DiversityDescriptions creates a separate schema for every
project named Project_[name of the project] together with needed roles, tables etc..

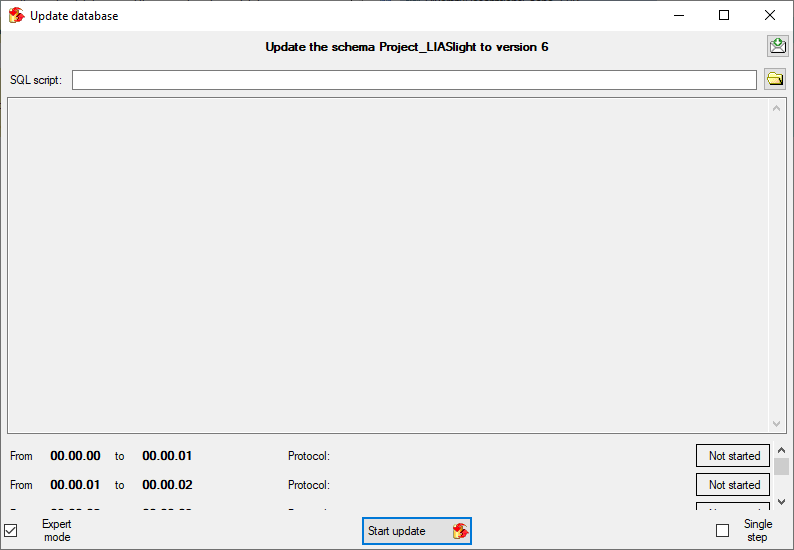
Before transferring data you have to update the project
schema to the latest version, indicated by the appearance of an update button
 . Click on the button to open a window
as shown below. Click on the Start update
. Click on the button to open a window
as shown below. Click on the Start update
 button to update the schema to
the latest version. For adding a project and performing the database update you
need to be a system administrator (s. Login administration).
button to update the schema to
the latest version. For adding a project and performing the database update you
need to be a system administrator (s. Login administration).
After the update the database is ready to transfer data into.
![]()
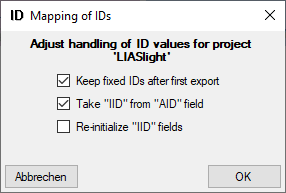
But before starting the cache transfer you should take a look on the ID mapping, data withholding and data restrictions. The first two items are stored in the descriptions database, the latter in the cache database.
With the ID mapping
you can determine how description items, descriptors and categorical states shall
be identified in the cach database and how changes are handled in subsequent cache
transfers. Click on the
 button to edit the ID mapping
behaviour for the data of the project (see below).
button to edit the ID mapping
behaviour for the data of the project (see below).
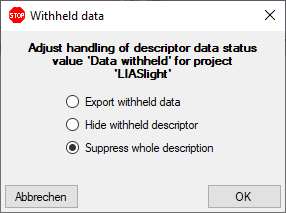
If any descriptors are marked with the data status Data
withheld, you have the options to exclude the whole description the export, to hide
only the marked descriptor data or to export the whole dataset. Click on the
 button to edit the data
withholding behaviour for the data of the project (see below).
button to edit the data
withholding behaviour for the data of the project (see below).
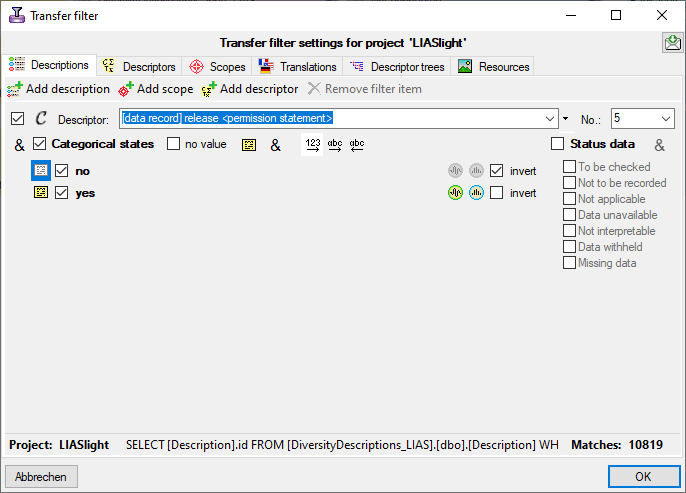
Besides the restrictions in the source database, you can
set further data restrictions for this
transfer. Click on the
![]() button and
choose the data restrictions for the cache transfer (see below).
button and
choose the data restrictions for the cache transfer (see below).
To transfer the data you have 3 options as described in the Transfer chapter.
Afterwards the number and date of the transferred data are visible as shown below.
![]()
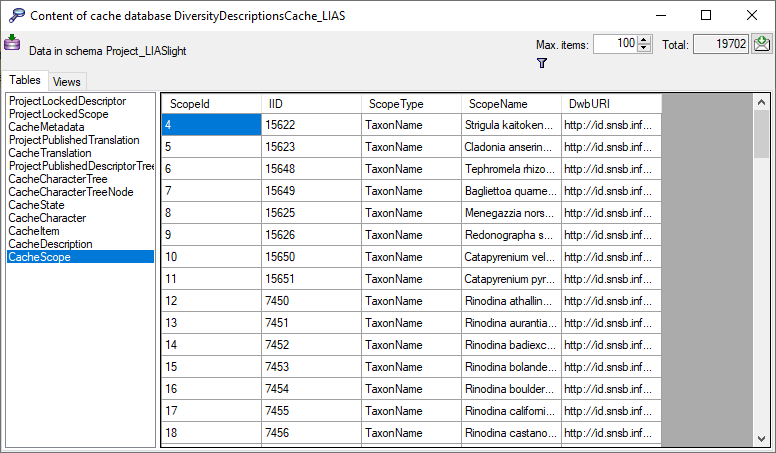
To inspect the transferred data use the View content
 button. A window as shown below
will open where all tables containing the data of the project are listed.
button. A window as shown below
will open where all tables containing the data of the project are listed.
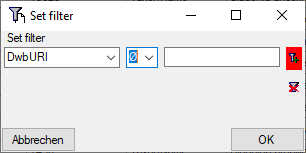
Click on the
 button to filter the content.
A window as shown below will open. Choose the column for the filter, the operator
(e.g. = ) and the filter value (see below).
button to filter the content.
A window as shown below will open. Choose the column for the filter, the operator
(e.g. = ) and the filter value (see below).
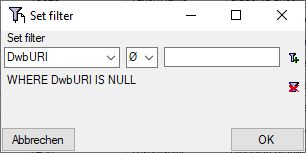
Now click on the
 button to add the filter criteria
to the table filter. You may add as many criteria as needed (see below). With the
button to add the filter criteria
to the table filter. You may add as many criteria as needed (see below). With the
![]() button you can clear
the filter..
button you can clear
the filter..
Before you can transfer the data into the
Postgres database, you have to connect
 to the Postgres database and
click on the
to the Postgres database and
click on the
 button to establish the project and run necessary updates
. After the project is established and up
to date, use the
button to establish the project and run necessary updates
. After the project is established and up
to date, use the
 button to transfer the data in the
Postgres area (see below).
button to transfer the data in the
Postgres area (see below).
![]()
If a project is exported into another
 Postgres database on the same server, these databases will be listed
underneath the Postgres block (see image below). For an overview of all target Postgres
databases click on the
Postgres database on the same server, these databases will be listed
underneath the Postgres block (see image below). For an overview of all target Postgres
databases click on the
 button.

If the target is placed on the current server, the text will appear in black instead of grey (see below). Packages, if administered, will be listed in the table as well.

In some cases, when a cache database has been deleted on the current Postgres server, there might still be some administrative information left. In this case the target is shown in red and you have the option to delete the administrative data for that target (see below).

In the
Postgres database you can install packages
 to adapt the data to any needed format.