Diversity Collection

Floor plan
&
geometry
Floor plan
To use floor plans and geometries and their inheritance, you must use the location hierarchy.
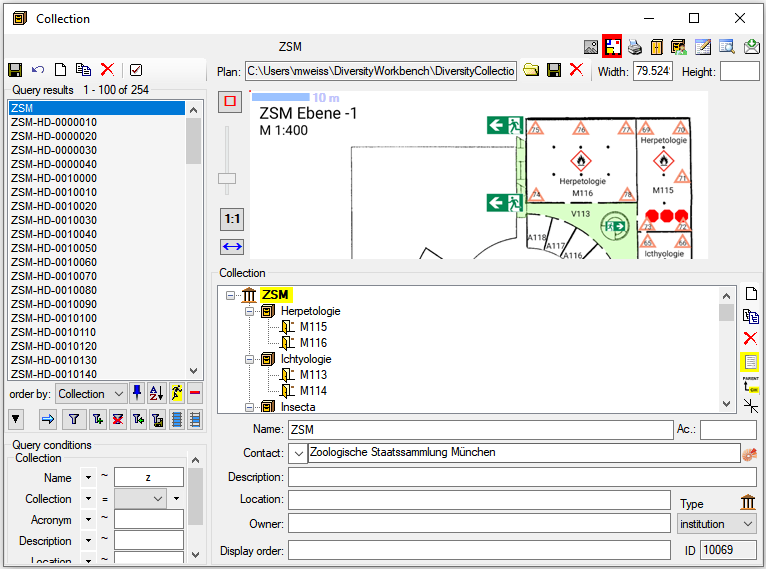
If a floor plan is available for a collection this will be indicated by
a yellow background . To provide
the floor plan of a collection click on the button in the menu. It will get a red background to indicate, that the plan is shown.
Then click on the  open button to select the floor plan.
Click on the
open button to select the floor plan.
Click on the  save button to save the plan. For a short introduction see the video
  .
.
Geometry
To provide the geometry of a certain area within e.g. a drawer the same can be applied with an image of the drawer as plan. See chapter Setting the geometry below.
Parent geometry
The floor plans are inhertited to depending collections along the location hierarchy and the geometry of
a parent collection will be indicated by a dotted line  (see below). The administrative hierarchy is ignored concerning the inheritance of floor plan and geometries.
Height
The field Height keeps the height of e.g. a sensor for temperature.
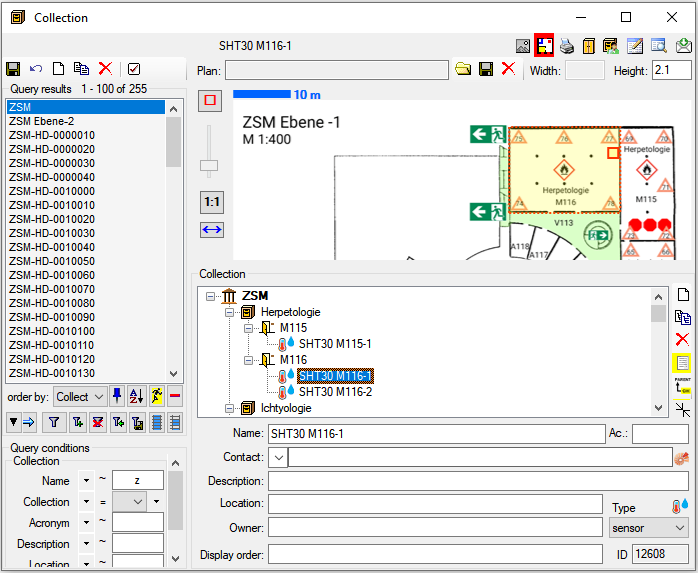
Besides floor plans you may as well specify certain positions within
e.g. a drawer (see below and the tutorial
).
Child geometries
If geometries are defined for the child collections, these will be indicated with blue and a blue dotted line  as in the image below. The inheritance of the geometries is linked to the location hierarchy. The name of the subcollections are displayed in transparent blue .

Restriction of layers
To restrict the layers of geometries of the child collections that should be shown, choose →  Customize display from the menu.
In the  Defaults and miscellaneous tab use the
  Number of displayed levels for location hierarchy to restrict the levels, where 0 means no child collections should be displayed.
Restriction of access to files
The access to files on the server can be restricted with a .htaccess file within the directory. An example for the content of the file is shown below
AuthType basic
AuthName "Protected Directory"
AuthUserFile /.htpasswd
AuthGroupFile /dev/null
Require valid-user
To allow users access to the directory these users must be listed in the .htpasswd file
Run the following command to create an .htpasswd file for a user (replace user1 with the desired username): htpasswd -c /.htpasswd user1
Enter a password for user1. The encrypted password will be stored in the .htpasswd file. Confirm that the .htpasswd file has permissions set to 644.
Setting the scale
To set the scale for a floor plan with a scale provided in the plan,
click on the button. A blue bar will appear that can be dragged and changed in length
to a object of known size, e.g. a scale in the plan. After the scale is
set, click on the save button and the floor plan will be
overlaid with the scale as shown above. The width of the whole plan will
be shown in field [Width].
Setting the geometry
To set the geometry of e.g. a room, click on
the button.
A red rectangle will appear as an overlay in the plan that can be
dragged into the right position.
The button removes the geometry from the current dataset. Click on the
button to store the geometry.
To edit the points within the geometry, click on the  button in the upper menu bar of the plan. This will activate the Editing options of the plan. Click on the button at the left side of the plan. Now you can move points with the mouse. With the buttons + and x you can add resp. remove points from a geometry (see image below).
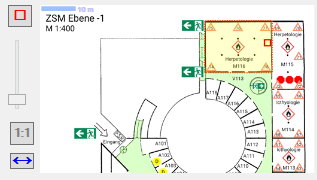
Zoom
To zoom the floor plan use the slider at the left or the mouse wheel. To
return to the original size with a click on the 1:1 button. If the current dataset has a geometry you can use the  button to zoom in the geometry.
With the
button to zoom in the geometry.
With the  button you can show the
whole image. With the slider you can set the zoom factor to any size between 10% and 400% with the zoom factor displayed in the menu left from the plan (see image above).
button you can show the
whole image. With the slider you can set the zoom factor to any size between 10% and 400% with the zoom factor displayed in the menu left from the plan (see image above).