
To enter information about
the CollectionEvent
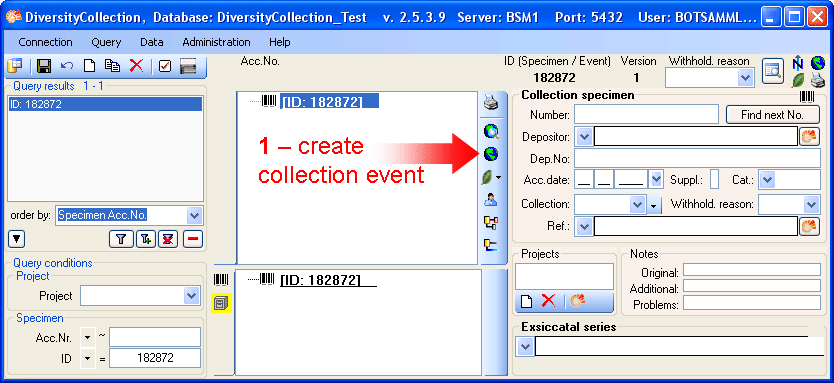
(when and where the specimen was collected) click on the  button (see point 1 in image below).

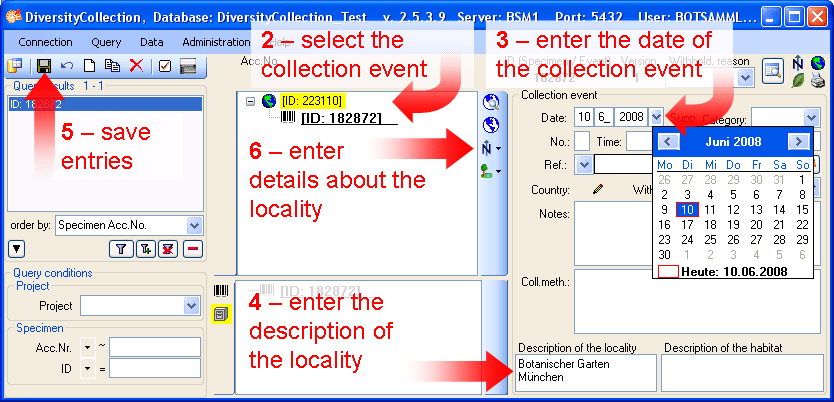
This will add an entry for the CollectionEvent in the upper tree as shown below. Select this entry in the tree (see point 2 in image below) to open the fields for the CollectionEvent. To see the projected contents of any data field simply place your mouse in the field. An explanation will appear as for the field Description of the locality:

See the Event part for further details.
Then enter the date (see
point
3 in image below) of the CollectionEvent. If you
click on the drop-down button
as shown in the image below, a calendar will open where you
may select
the date. Then enter the description of the locality (see point
4
in image below). To store the data entered so far click on the
 button (see point 5 in image below).

Now you have the possibility to
enter more details about the locality like
coordinates, named places, etc. by clicking on
the  button
(see point 6 in
image above).
This tutorial is continued in the sections listed below.