Tutorial New Project
Tutorial - Create a new project
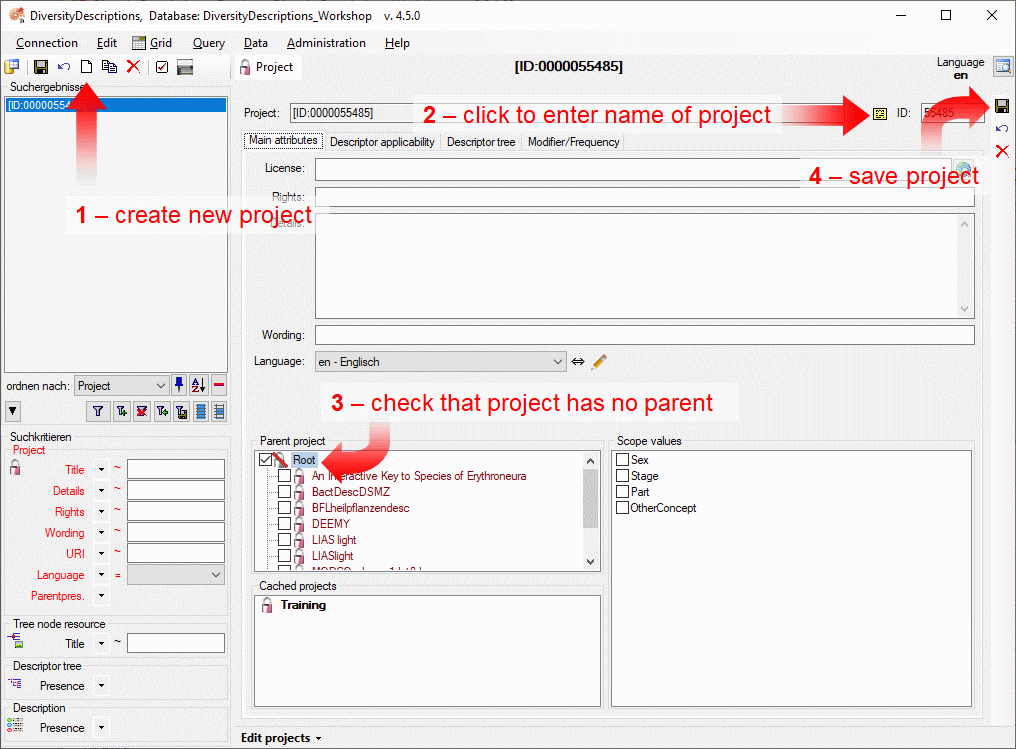
To create a new project, select edit mode projects from menu
Edit->Projects. Now click on the 

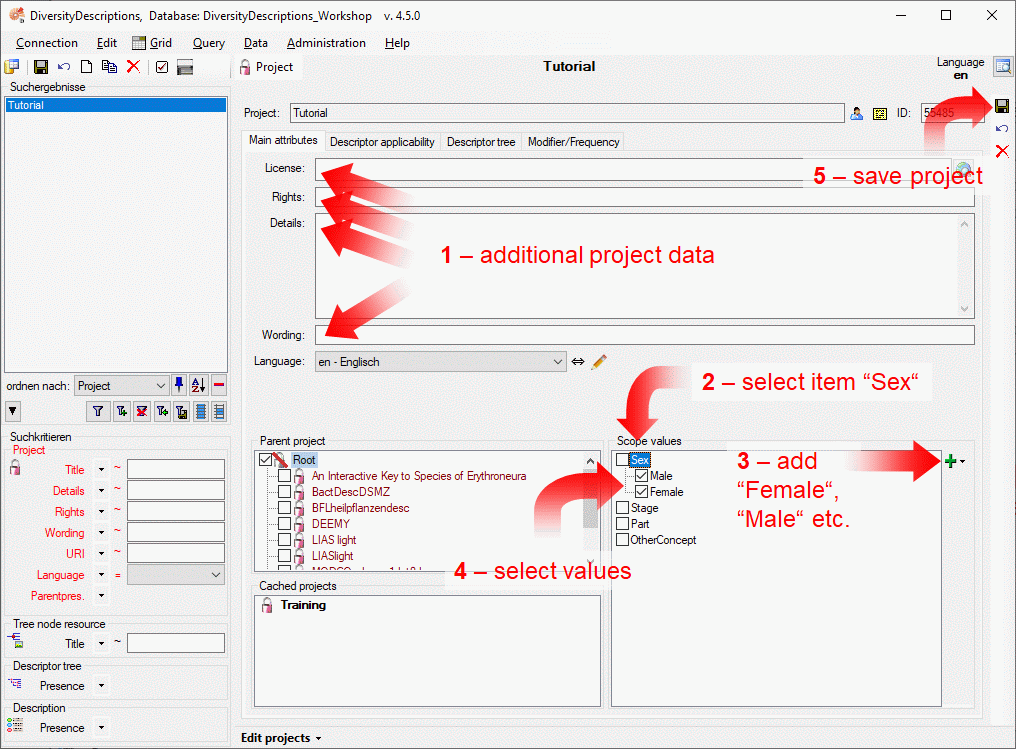
The new project is created with a numeric name. Click on button to change it to “Tutorial” (see point 2 in image above). Then check that no other project is selected as a parent of the new one (see point 3 in image above). Finally save the project (see point 5 in image above) and the project name will be updated in the header and the query panel at the left side of the window (see image below).
If you like, you may now enter additional project data like a detailled
project descripition (“Details”), a copyright text (“Rights”), the
address of a license text in the internet (“License” - button


If you want to use scope values for sex in your descriptive data, select
the scope category “Sex” (see point 2 in image above). Now the “Add”
button 


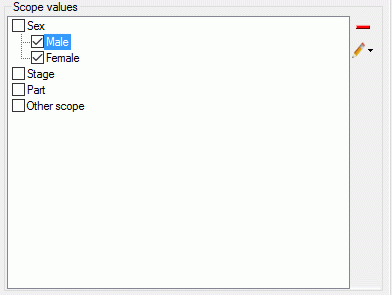
For the other scope categories no predefined values exit. When you click
the “

 Edit scope name”.
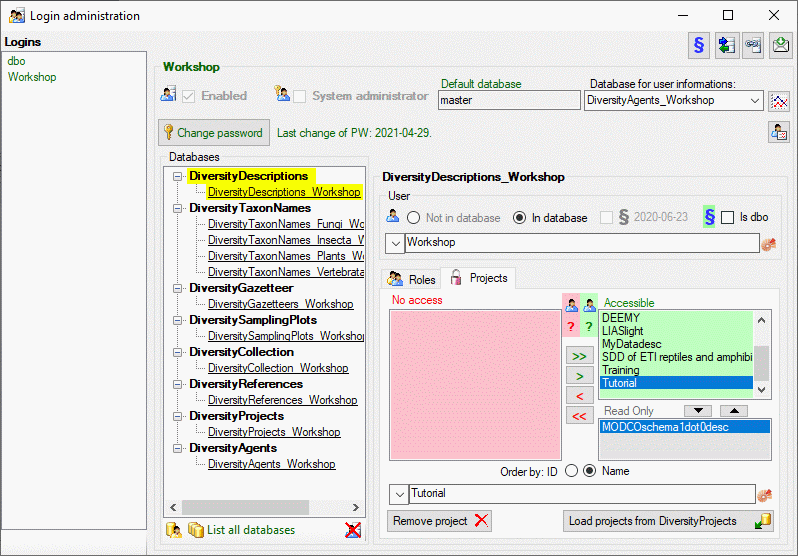
When you create a new project, your user account automatically gets access rights for that project. If you are “Administrator” - which is the case for user “Workshop” in the training database, you may take a look to the login administration from menu Administration->Database …->Logins …. Select the entry “Workshop” from Login, then click on the database “DiversityDescriptions_Base” and open the Projects tab in the login administration (see below). You find the new project “Tutorial” in the Accessible projects list.
If you are working with a private database installation and are logged in with the same Windows accout that has been used for installation of the Microsof SQL-Server, you are the “database owner” (dbo), which has the highest database access rights. In this case select entry “dbo” from Logins. As “dbo” you can administrate access rights of any user and create or delete logins.

A more detailled description of all editing options can be found in the Edit projects section of this manual.
This tutorial is continued in the sections listed below.
- section Enter a text descriptor
- section Enter a quantitative descriptor
- section Enter categorical descriptors
- section Enter description data
- section Searching the database
- section Generate an HTML document
- section Sort the descriptors
- section Assign modifiers
- section Enter descriptor dependencies
