Creation

To create or add a database, you need a  windows login on the server and sysadmin permissions.
New installation
If you start with a new installation of a DiversityWorkbench database connect with the
database with a click on the  database button. Set server
and port and as described in the chapter Database access. After connecting to the server, you will
get a message, that no database is available and the button will appear. Click on
the button to create a new
database on the server. A window as shown below will open where you
enter the name or the IP-address of the database server.
database button. Set server
and port and as described in the chapter Database access. After connecting to the server, you will
get a message, that no database is available and the button will appear. Click on
the button to create a new
database on the server. A window as shown below will open where you
enter the name or the IP-address of the database server.
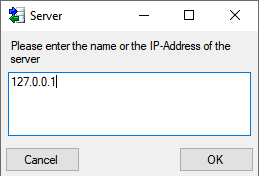
127.0.0.1 is the IP-address of your local machine, so in case of a local installation you can keep this value. Next you have to enter the port of the database server. See the chapter Installation of the database for details. 1433 is the default port for SQL-Server. We do recommend to change this port for security reasons.
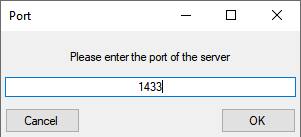
After server and port are set, the next step is the definition of the database as described below.
Adding database
If you are already connected to a database and want to add another
database, select Connection -
Create database...
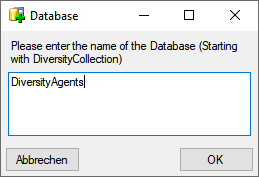
from the menu. A window will open as shown below where you have to enter
the name of the database, starting with Diversity….
After creating the database a window with the script for the creation of the objects in the database (tables, views, functions, ...) as shown below will open.
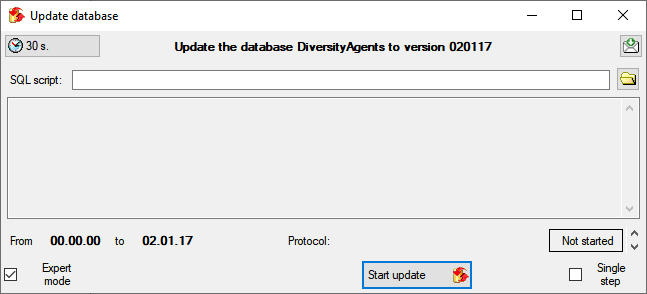
Click on the  button to start
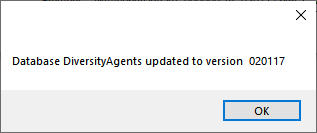
the script. After the application of the script you get a message as
shown below.
button to start
the script. After the application of the script you get a message as
shown below.
Close the window and you will be connected to the new database. In case there are additional updates available, please start the update of the database to ensure the latest version.