Editing in Diversity Agents

The main forms of all modules have a design as shown below
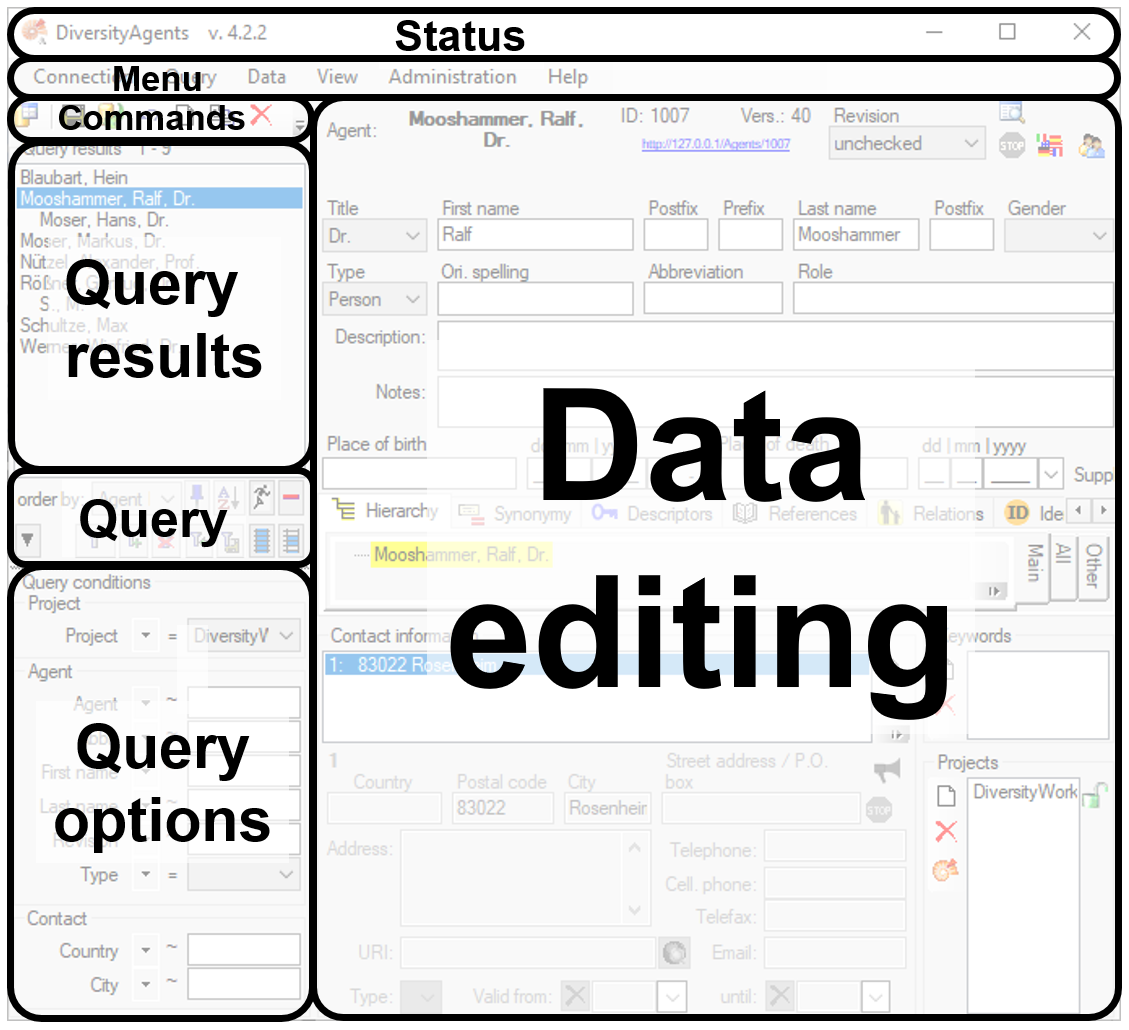
Status
In the status area you find
- The name of the module,
- The name of the database if different fron the module
- The version of the software
Menu
The menu contains the options provided by the module
Commands
The commands area contains buttons for e.g. handling the data:
 - To connect to a database click on the
button.
- To connect to a database click on the
button. - To save the changes in a dataset click on the
button.
- To save the changes in a dataset click on the
button. - To propagate the changes in a dataset to linked modules click on the
button.
- To propagate the changes in a dataset to linked modules click on the
button. - To undo the changes a dataset click the undo button. This will recover the original data unless the changes had been
saved or changes were done in certain tables or hierarchies were the
data must be stored to display the
hierarchy.
- To undo the changes a dataset click the undo button. This will recover the original data unless the changes had been
saved or changes were done in certain tables or hierarchies were the
data must be stored to display the
hierarchy. - To create a new entry in the database, click on
the new button below the
search result listbox. This will create a entry with the specimen and
show it in the list.
- To create a new entry in the database, click on
the new button below the
search result listbox. This will create a entry with the specimen and
show it in the list. - To copy a specimen, choose it from the list and click on the button
.
- To copy a specimen, choose it from the list and click on the button
. - To delete the selected datasets click on the
button.
- To delete the selected datasets click on the
button. - To options a dataset click on the button
.
- To options a dataset click on the button
. - To change the arrangement of the query click on the
resp.
- To change the arrangement of the query click on the
resp.
 button.
Agent Panel
The basic data for agents are entered in the upper part of the form (see image below).

Header
The header of the form shows automatically the combined name of the agent created by the database according to the data, the ID in the database, the version of the dataset and the revision level. The version is set by the database and will be increased with every change in the data.

The  JSON button will open a window showing the cached JSON data and the link will open a window showing the data available via the module interface.
History
To see the history of the changes within a dataset, click on the history button  (see the history part for further
details).
(see the history part for further
details).
Withholding data
By default an agent is not available for publication. This is indicated by the red stop sign  . If an agent should be published, click on the stop sign and remove all text in the withholding reason field. Any text, even white spaces, in the withholding reason field will prevent the publication of thie agent. The
sign will change to a gray stop sign
. If an agent should be published, click on the stop sign and remove all text in the withholding reason field. Any text, even white spaces, in the withholding reason field will prevent the publication of thie agent. The
sign will change to a gray stop sign  indicating the agent is now
available for publication.
indicating the agent is now
available for publication.
Language
To set the language of the content, click on
the language button  . The ISO-639-1-Code for the selected
language will be shown and the icon will change to a flag sign of the selected
language.
. The ISO-639-1-Code for the selected
language will be shown and the icon will change to a flag sign of the selected
language.
Synonymy
DiversityAgents can manage several representations of the same name resp. person. To link these entries you can declare one name a synonym of the other. An overview of the synonymy is shown in the Synonymy part (see below). The accepted name resp. the entry not declared to be a synonym is shown as the top of the hierachy. To change to a name within the synonymy, just double-click on it.
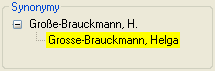
To set the synonymy, click on the synonym button  to open a
window where you can search for the entry, the current entry should
become a synonym of. In the field [Syn.type] set the type of the
synonymy. The service of DiversityAgents is used by other modules.
Therefore it must be avoided to delete datasets. Instead of deleting an
entry, set it a synonym of a valid entry and set the type of the
synonymy to replaced with. If an agent was replaced or declared a
synonym, the synonym button
to open a
window where you can search for the entry, the current entry should
become a synonym of. In the field [Syn.type] set the type of the
synonymy. The service of DiversityAgents is used by other modules.
Therefore it must be avoided to delete datasets. Instead of deleting an
entry, set it a synonym of a valid entry and set the type of the
synonymy to replaced with. If an agent was replaced or declared a
synonym, the synonym button  will change to a search button
  . Click on this button to get to the dataset that
replaced the current dataset resp. its synonym.
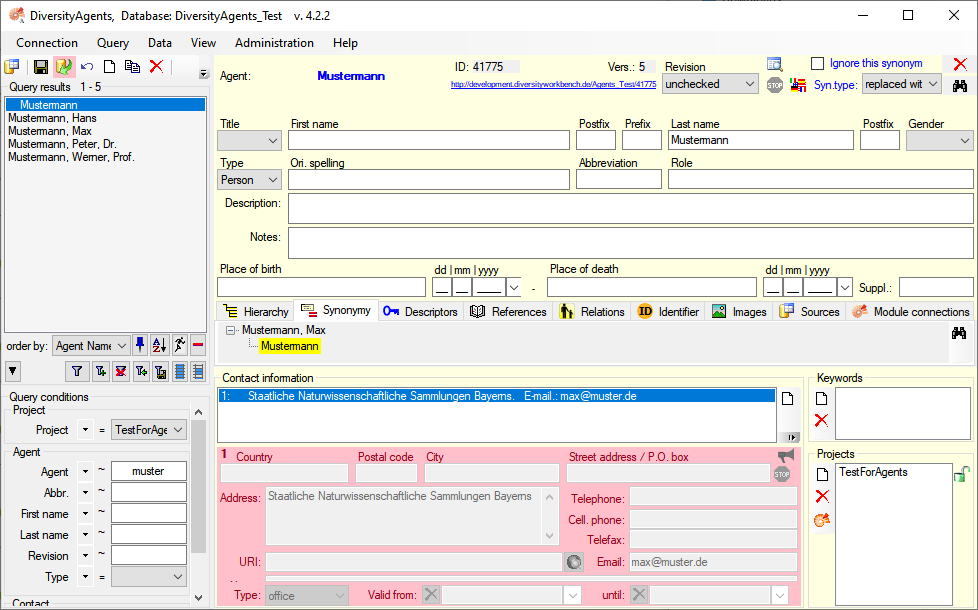
If a dataset was replaced by another entry, the form will change as shown below.
. Click on this button to get to the dataset that
replaced the current dataset resp. its synonym.
If a dataset was replaced by another entry, the form will change as shown below.
Data
In the area below the header, you can enter resp. edit the data related to an agent. The available fields depend on the type of the agent that differ between persons and other types. If you enter inconsistent values for the dates, you will get a message reminding you to enter valid values.
Storage
The data of the agent are stored in the table Agent.