Maintenance

Link Scopes
Maintenance - Link entries
If you have entries in DiversityDescriptions that shall be linked with data in other DiversityWorkbench databases that have a partly equal name, this may generally be done with two subsequent maintenance tasks. An example are taxonomic descriptions in that shall be linked with their corresponding entries in DiversityTaxonNames. In a first step taxon scopes must be generates, e.g. from the first two parts of the description names with Generate scopes. With a second step the generated scope may be linked to the target database using Synchroniuze databases. For descriptions without matching entries in the target database unlinked scopes will be remaining.
To generate the links with one step and avoid generating unlinked scopes
select the  Update description scopes tab and
choose the tab
  Link entries. Select the
Scope type, the Project and the Target database. Option
Only if no scope present filters for description items that do not
have a scope entry of the selected scope type. Furthermore the whole
description name may be selected (option Compare whole text) or only
the first parts (option Compare first parts). Click on Check for
missing scopes

The size of the query result list may be adapted by changing the value
Number of results or unchecking this option to get the complete list
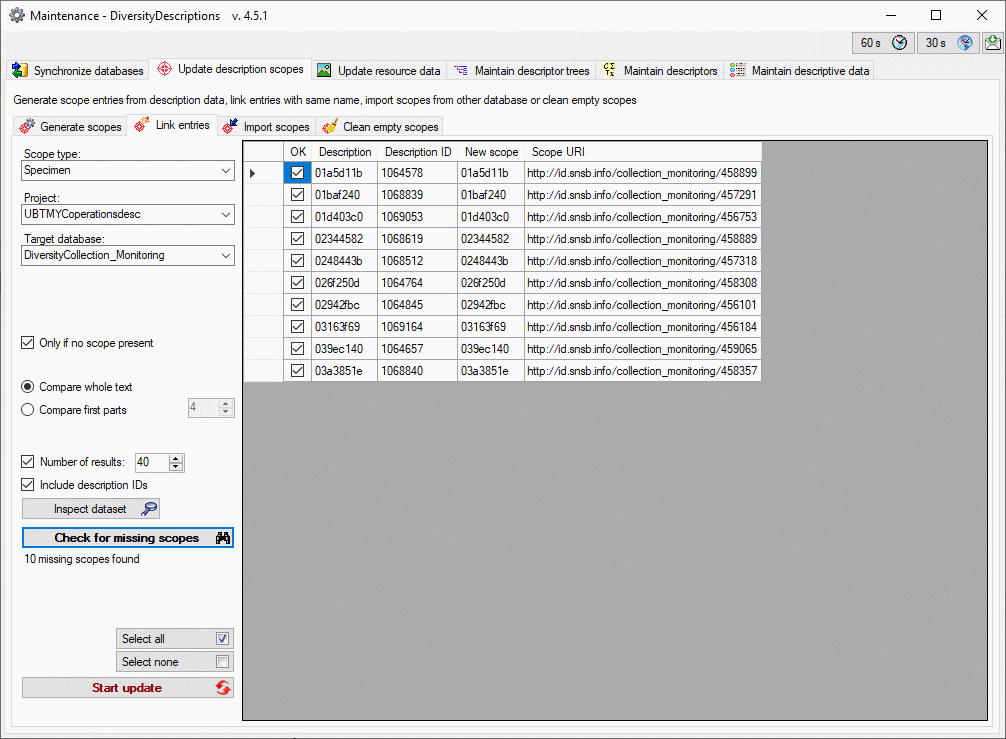
(see image below). You may select or deselect all entries of the result
list for the database update by clicking the buttons


If you select the option Include description IDs the button
Inspect dataset  will be shown (see image
above). By starting a new query (button
 you may directly navigate to
that dataset. To update the database click on the
 button.

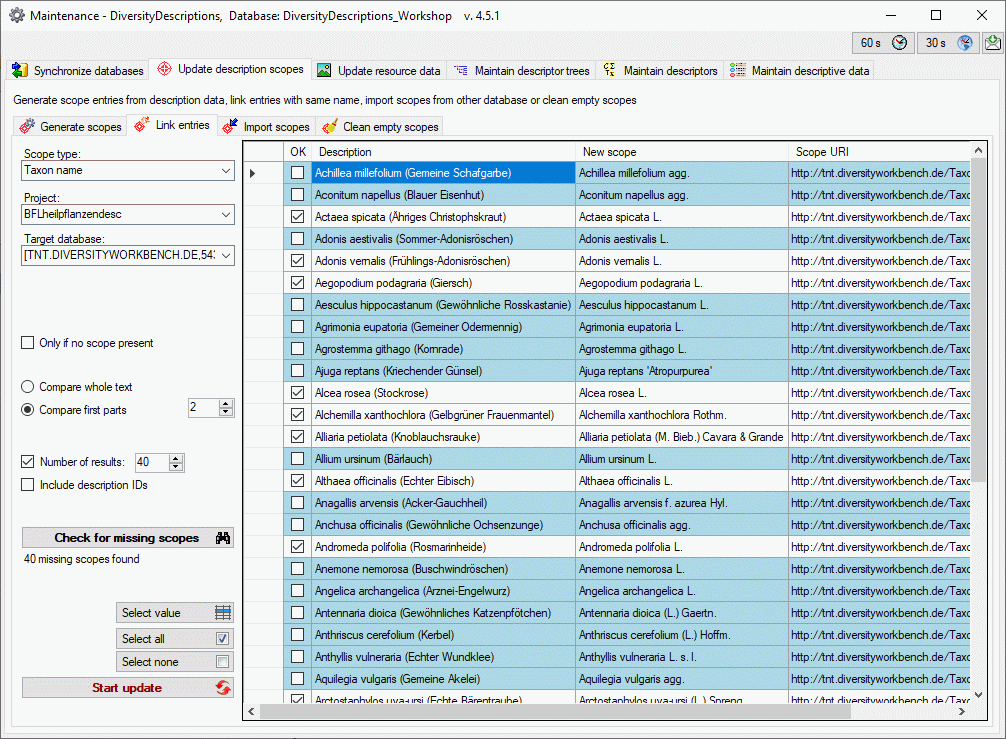
If more than one matching entry is available in the Target database
the entry is marked with blue background in
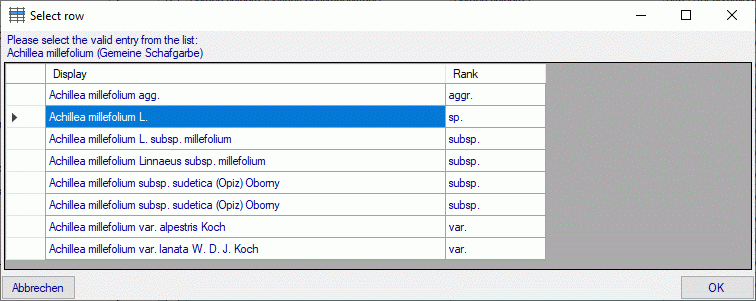
the result list (see image above). With button Select value
 you may view the available alternatives and
select the correct entry (see image below).
