Diversity Collection

Queries - overview
Once you are connected to your database, you can search across all data. A wide range of search options is available.
All functions related to querying can be found on the left-hand side of the main window.
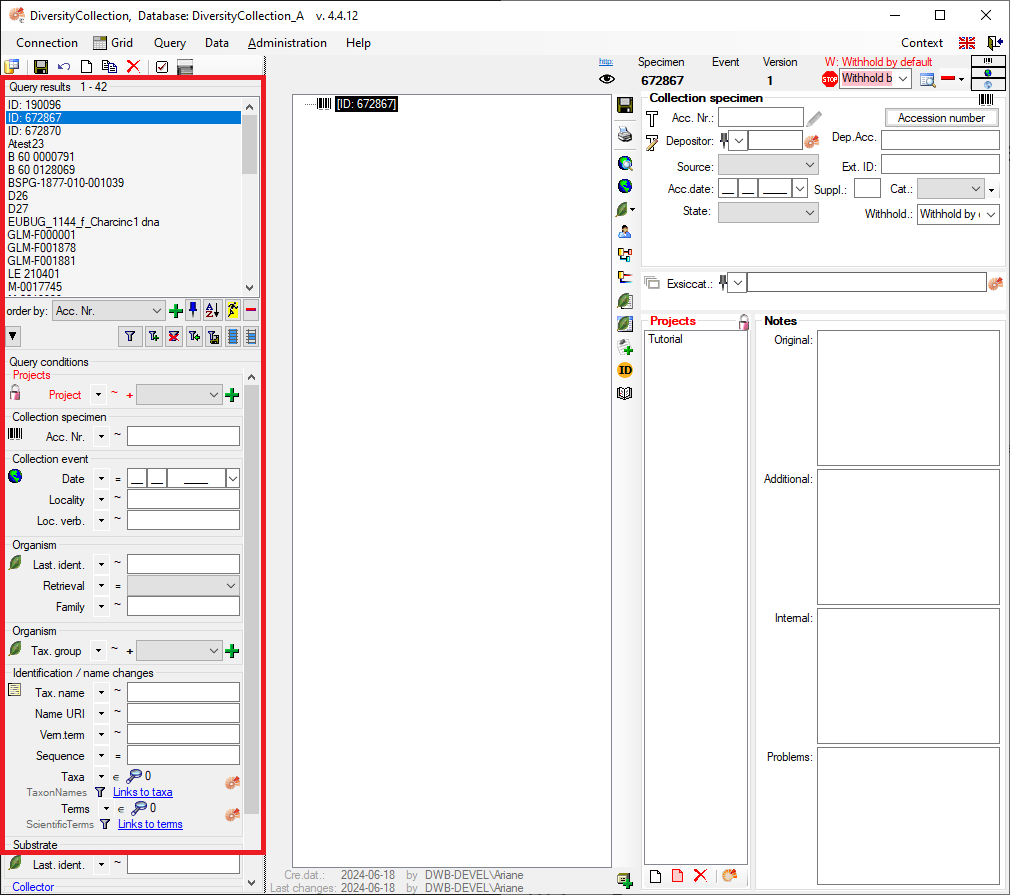
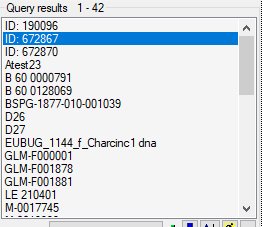
The upper part of the query section contains the list of all results, titled “Query Results”.
Below this, you will find a section containing all the buttons relevant to the search.

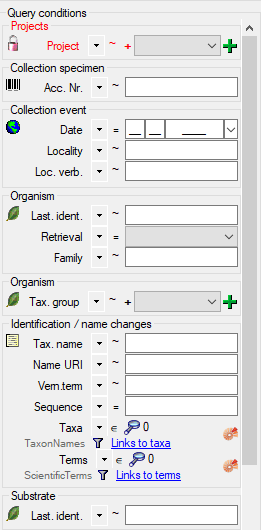
Below the query buttons, you will find the “Query Conditions” section. This is where you can enter all available search criteria.
Perform a Query
Display the Entire Dataset
To display the entire dataset, start a search without specifying any criteria in the “Query conditions” section:
-
In the middle of the query section on the left-hand side of the main window, click on the “Filter” button.

-
A list of the results will be displayed in the “Query Results” section. The number of results is shown above the list, next to the “Query Results” label.
Filter a Search
Below the query buttons, at the bottom of the query section, you will find the “Query Conditions”.
- Enter the filter criteria for your search. For example, you can select a project from the dropdown list.
- You can combine as many criteria as needed to narrow down your results.
- Start the query by clicking the “Filter” button .
- A list of results will be displayed in the “Query Results” section. The number of results is shown above the list, next to the “Query Results” label. If no results match the query, the list remains empty and the label “No match” is displayed.
Edit and Customise Query Conditions
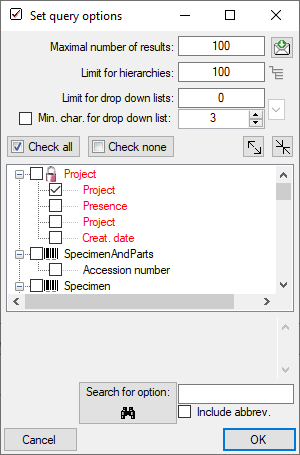
You can choose which query conditions are displayed in the main window, and you can change this at any time.
- At the top left, above the query results list, click the “Checkbox” button
 .
.
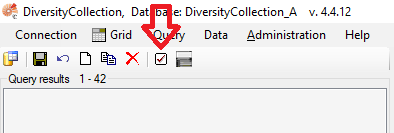
- Select any query conditions you want to use for your searches by selecting the respective checkboxes in the treeview.
Customise the Interface
Hide/Show the Entire Query Section
In the main window, go to the menu item Query → Show Query.
Hide the “Query Conditions” Section
On the left side of the “Query Buttons”, in the middle of the query section, click the “Arrow” button  .
.
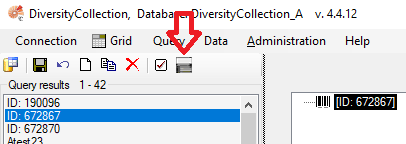
Switch Between Vertical and Horizontal Arrangement
You can change the layout of the query elements from vertical to horizontal and vice versa. To do this, click the button located below the main menu bar:
Edit the Result List
Add Results to the Existing List
You can add new results, based on different query conditions, to your current result list.
- Enter the new filter criteria for your additional search.
- Start the query and add the results to the existing list by clicking the button
 .
. - The new results will be appended to the existing list.
Remove Result Items from the List
You can remove entries from your current result list:
- Select the entries you want to remove.
- Click the button
 .
.
Important This does not delete the data from the database. It only affects the current display in the results list.
Many Result Columns
The option to display a result list with many columns is described in the chapter Many Columns.
Query Conditions
Remember the Last Query
By default, the values you entered for the previous query will be remembered. Your query criteria will be pre-filled when the programme starts. To change this behaviour, click the Pin button
 .
.
Query Annotation
The query for annotations differs from a standard query (see below).
In addition, you can specify the type of annotation (Annotation
 , Problem
  , Reference
 ) and the linked table (see
Annotation).
) and the linked table (see
Annotation).

Duplicates
Certain query condition fields allow you to add up to three duplicates of the same condition. For adding a ‘duplicate’ search criteria, click the green “Plus” button  . Remove a ‘duplicate’ search condition with a click on the red “Minus” button
  . The restrictions can be combined with AND
 + and OR |. To switch between these modes, click the resp. + or | icon.
Query Modules
In the “Query Conditions” section, some values may be linked to other modules. For example, within the “Identification” group, the fields “Taxa” and “Terms” are linked to the “DiversityTaxonNames” and “DiversityScientificTerms” modules, respectively. You can also add “linked” values to your query condition.
- Select the operator that determines how the entries are used in the search. An explanation of all available operators can be found in the table below.
- To connect to the linked module, click the “Ammonite” button located to the right of the relevant query field.
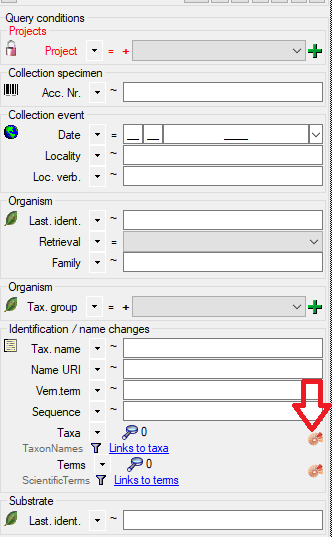
- A query window for the linked module will open.
- Search for values within the linked module and click “Ok” to confirm your section.
- If you want to view a list of the selected items, click the Magnifying Glass button
 .
.
Info: There is also a detailed  available, which explains all possible operators and how to use them.
| Operator | Meaning | Example |
|---|---|---|
| ∈ | Search for entries with a list | Rosa | Rosa caninia \ |
| ∉ | Search for entries not within a list | Rosa | Rosa caninia | ... |
+H  |
search for entry including lower hierarchy | Picea | Picea abies | ... |
+S  |
search for entry including synonyms | Picea abies | Pinus abies | ... |
+HS  |
search for entry including lower hierarchy and synonyms | Picea | Picea abies | Pinus abies | ... |
|
Change filter mode between link and text | http://tnt.diversityworkbench.de/TaxonNames_Plants/4269 <> Picea abies L. |
Videos
- Introduction on how to use the query conditions:
- How to use special query conditions:
- Tutorial on how to query modules:
- Tutorial on how to save a query:
.
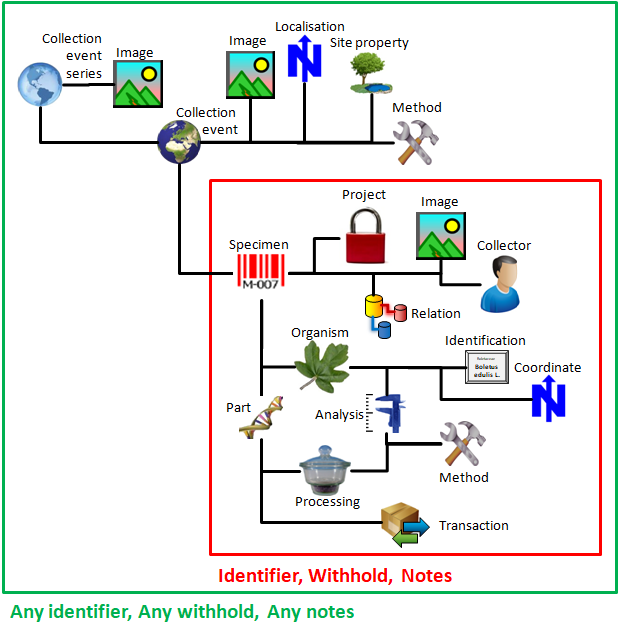
Query any fields
The query for any fields will search in several
fields, e.g., withholding reasons in specimens, images, etc. There are two
versions: The first version (e.g., Notes) will search in all tables but
not in collection event tables, while the second version (e.g,. Any notes)
will search in any table (see image below).