Diversity Collection
Tutorial

Localisation
You can add additional location information to your CollectionEvent, such as coordinates, named places, and more. In this tutorial, we will look at the three main options: WGS84 coordinates, NamedArea (DiversityGazetteer) and Altitude (mNN).
Add location information
- Click on the button button (see point 6 in the image below).
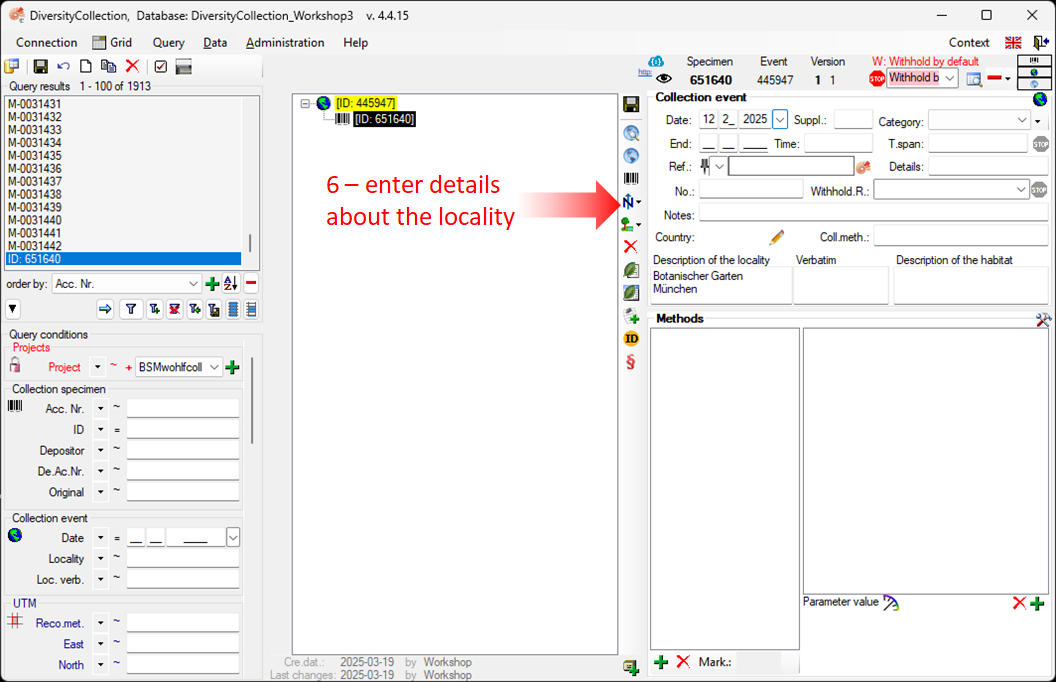
- Select an option from the list (see image below).
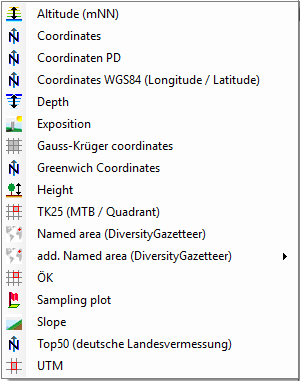
The three main options are:
New Coordinates WGS84
Using Google Maps, you can add the exact coordinates of the location.
-
Click the button
(see
point 6 in the image above) -
Select Coordinates WGS84 (Longitude / Latitude) – Google Maps uses the WGS84 coordinate system.
-
This will add a new entry to the tree view. Select it (see point 1 in the image below) to open the details for that entry.
-
Next, click the button
 (see point 2 in the image below).
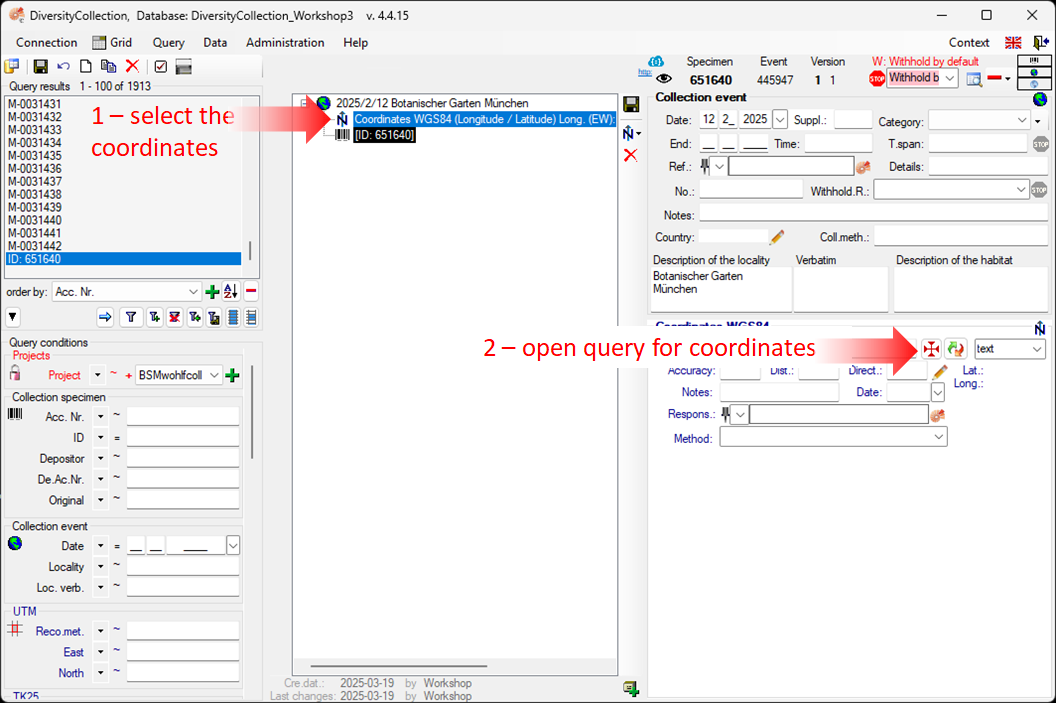
-
A window will open (see figure below) where you can set the coordinates simply by dragging the map with the mouse. The coordinates correspond to the center of the map, symbolised by the
. Click on the OK button to save the
coordinates.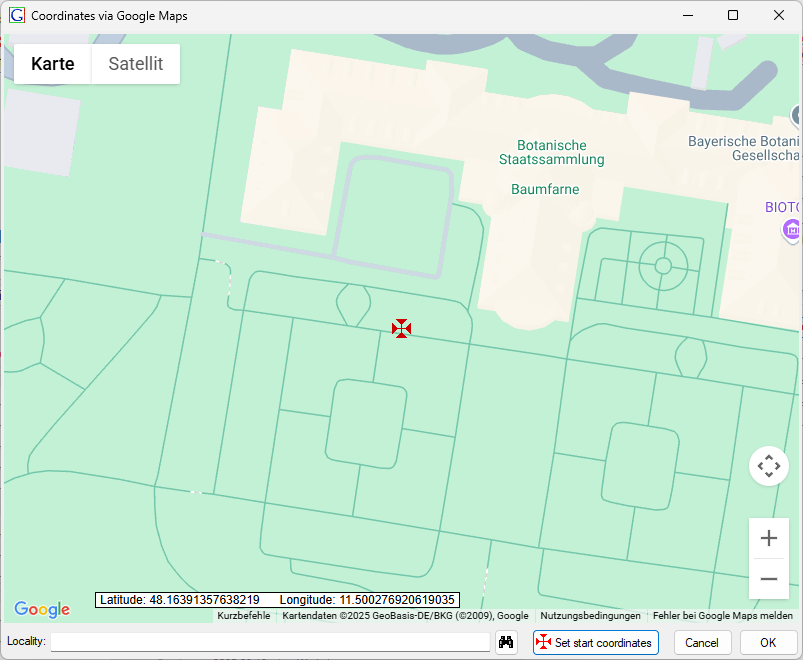
-
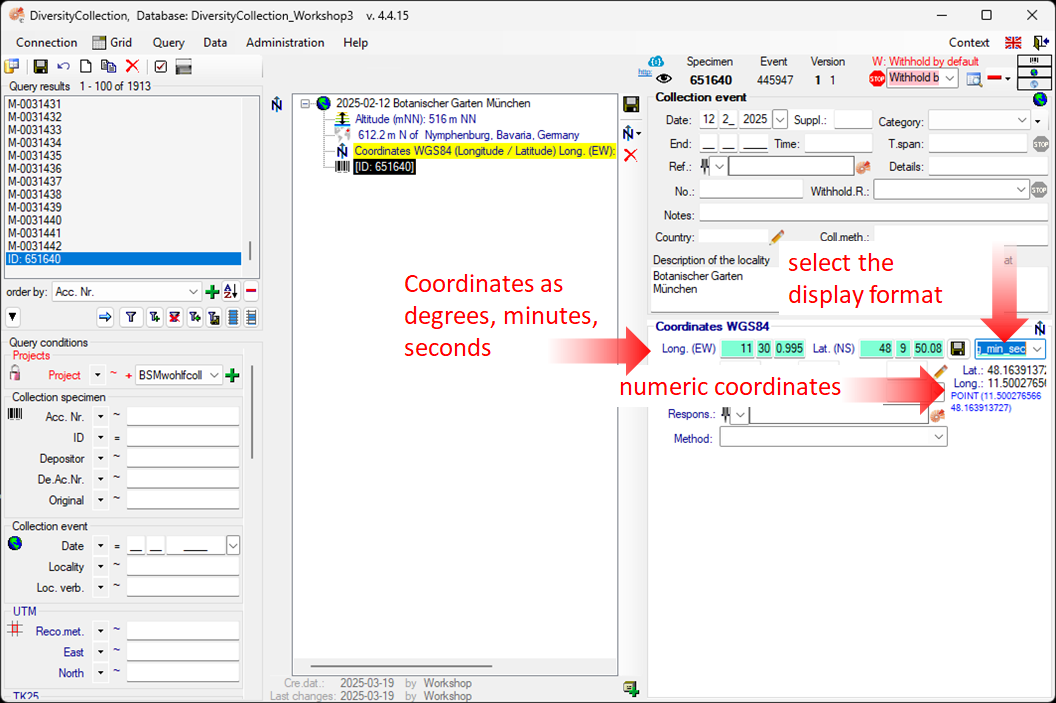
In the main window, the coordinates are stored in two locations – see the screenshot below. In the upper section, you can adjust the values and select a different display format, such as the commonly used format with degrees, minutes, and seconds. To apply any changes, edit the values and click the
 save button. At the same time, the numeric values are saved in fields that cannot be edited by the user (see below).
New Named Area (Diversity Gazetteer)
-
To enter a place name via the Diversity Gazetteer, select “New Named Place (Diversity Gazetteer)” from the list.
-
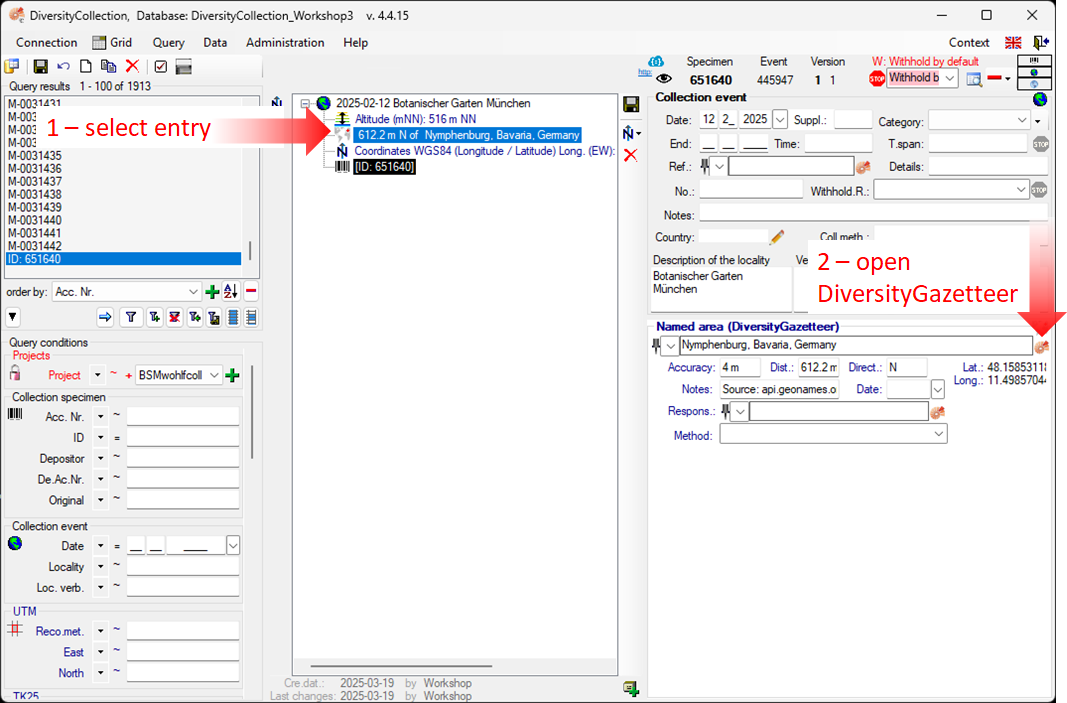
An entry will be added to the overview tree in the center of the window, as shown below.
-
Select this entry to open its detail fields (see item 1 in the image below).
-
To connect to the DiversityGazetteer, click the button
 (see point 2 in the image above).
 -
A window will open, as shown below.
-
Enter a search string - for example, the name of the city you are looking for (see point 3 in the image below)
-
Start the query by clicking the button
 (see point 4
in the image below).
(see point 4
in the image below).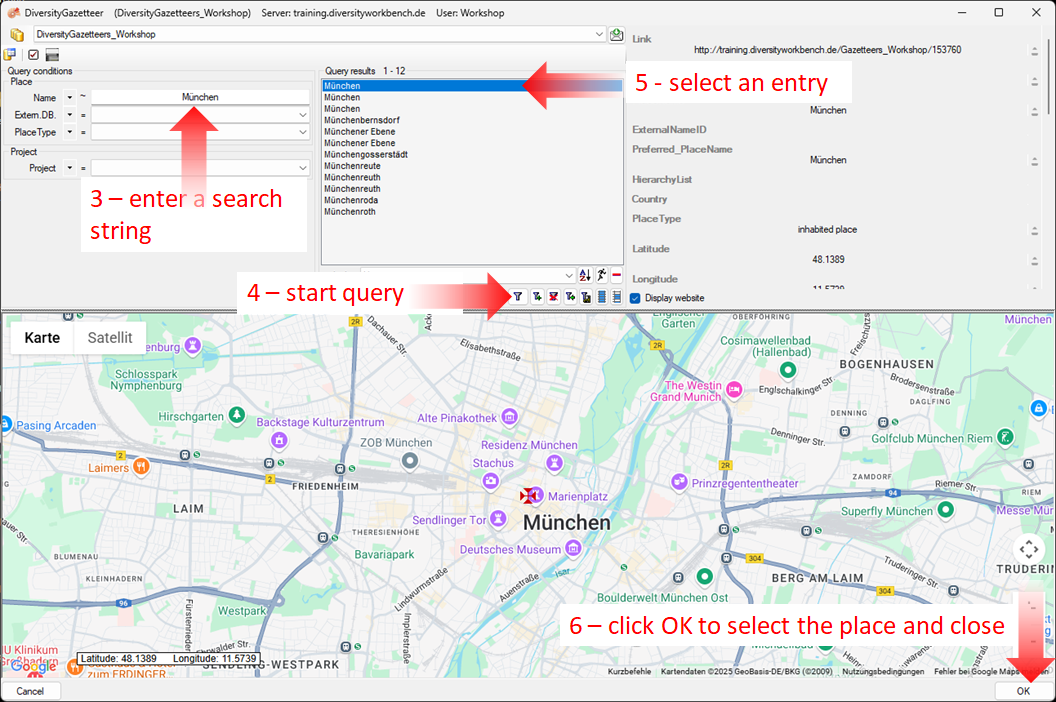
-
The query results are listed in the center of the form. Select one of the results. To help you choose the correct entry, the details for the selected location are displayed on the right side of the list. A map with the corresponding coordinates is shown at the bottom. After selecting the correct entry (see point 5 in the image above), click OK to return to the main window (see point 6 in the image above).
-
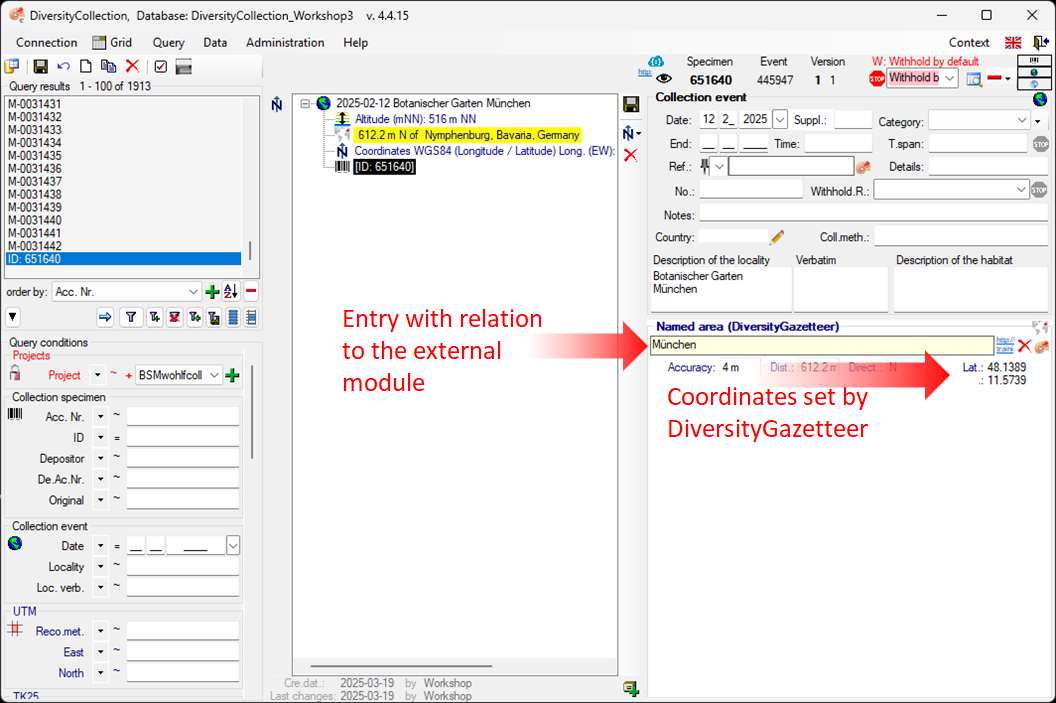
As shown below, the data retrieved from the gazetteer is displayed in different panels. In addition to the location name, the DiversityGazetteer also displays the coordinates and country, as shown below.
-
The input field where you entered the place name is now locked to prevent changes (see image below). Next to the location field, you will find a link to
 the external module.
Click it for more details.
the external module.
Click it for more details.
-
If you wish to remove the connection to the external module, click the
 button. This will retain all entered data (country,
place, coordinates) but remove the link to the DiversityGazetteer.
button. This will retain all entered data (country,
place, coordinates) but remove the link to the DiversityGazetteer.
New Altitude (mNN)
The last information we provide about the location is the altitude.
-
Click the button
(see point 6 of the first image on this page) -
Select New Altitude (mNN) (see point 1 in the image below).
-
Select the new entry in the overview to open the data fields (see point 2 in the image below).
-
Suppose you only have altitude values in feet - change the display format to feet (see point 3 in the image below). Enter your values (see point 4 in the image below) and click the
save button (see point 5 in the image
below) to save your entries. Your values will now be automatically converted to meters,
which is the internal format used by DiversityCollection. If you switch the display format back to meters,
you will see the result. The program calculates an average value for altitude and accuracy in meters, based on the precision of your original input (see below).
The original values you entered are saved in the Notes field.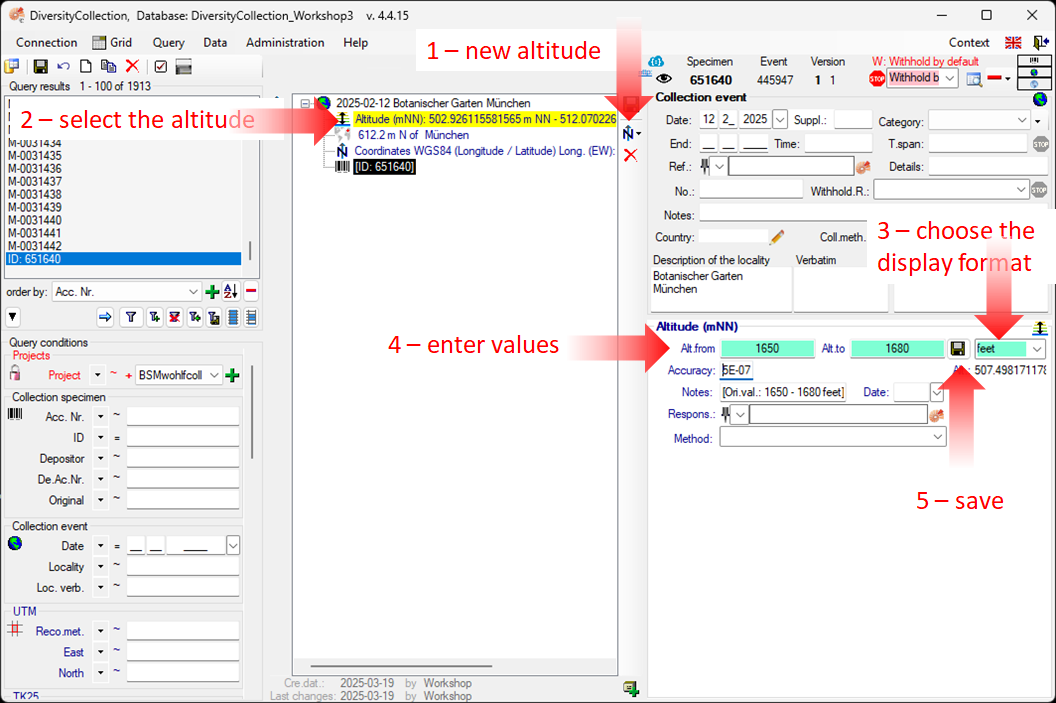
Next chapters
This tutorial continues in the sections listed below.
- section CollectionEventSeries
- section CollectionSpecimen
- section Collector
- section Collection specimen relations
- section Organisms and identifications
- section Specimen parts and storage
- section Searching the database