Diversity Collection
Tutorial

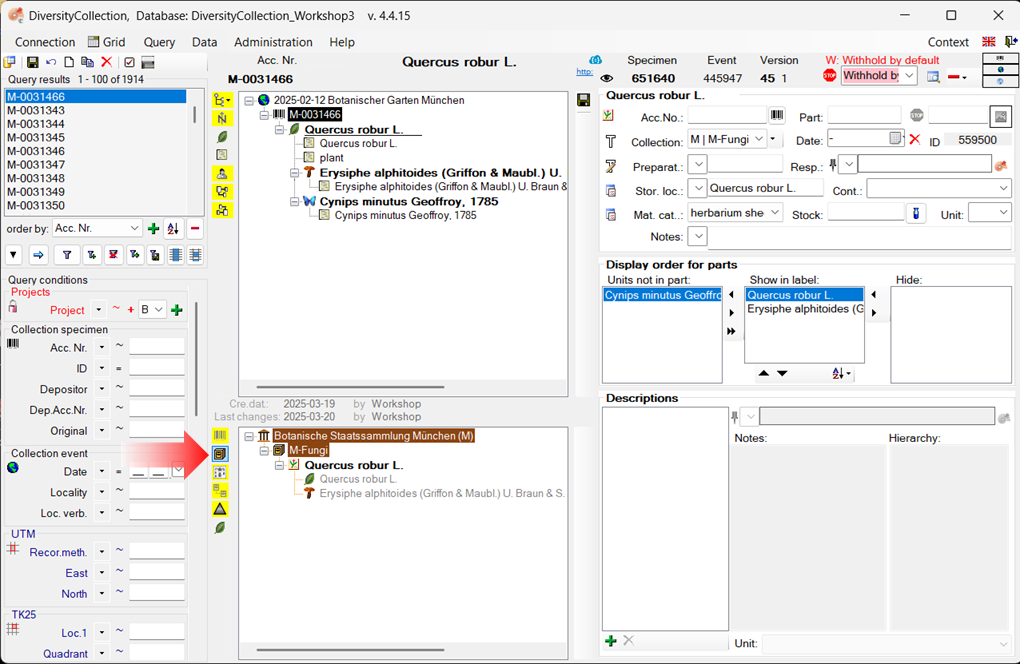
Storage tree (= specimen parts tree)
A specimen may consist of multiple parts, which can be housed in different collections. These parts may represent different material categories, such as herbarium sheets, microscopic slides, etc.
For more detailed information about “Specimen Parts”, see the
chapter Parts of the specimen.
There is also a German-language video available for this chapter  .
.
View the storage tree
The parts of the specimen are displayed in the storage tree, located below the main specimen tree.
-
To display this tree, click the button
 located beneath the specimen tree (see point 1 in the image below).
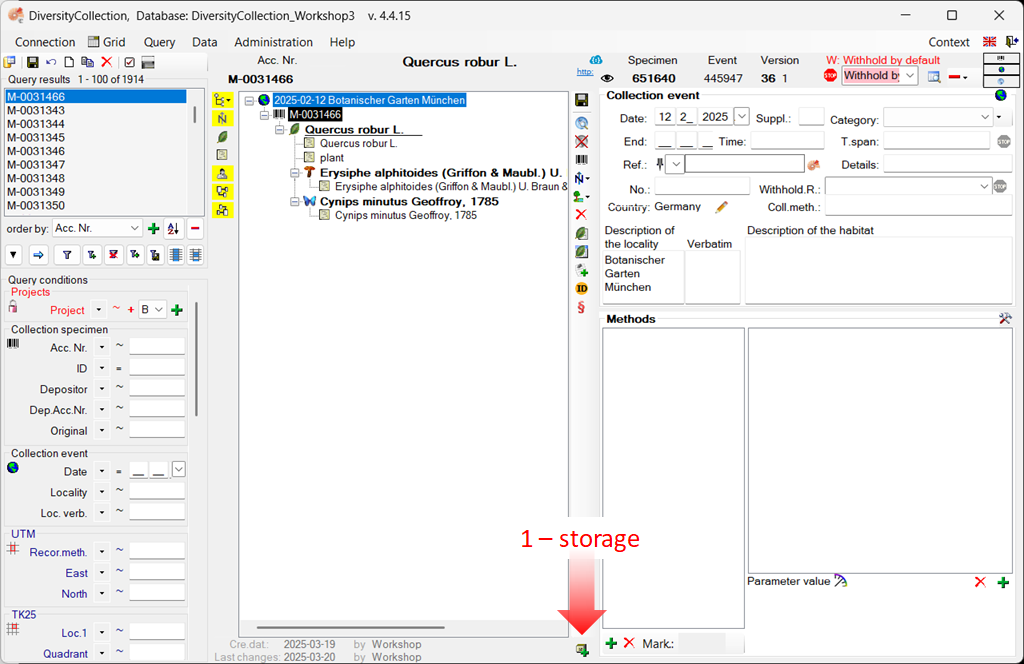
-
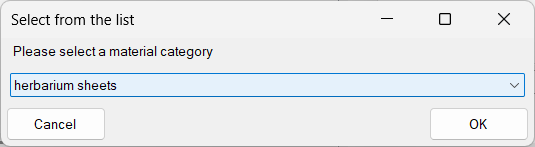
A window will open in which you must select the material category of the part you want to insert (see the image below). Select “herbarium sheets” from the list.
-
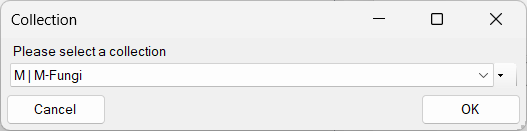
Another dialogue window will then open, where you must enter the collection in which your samples are stored (see the image below).
-
Select the collection from the list or hierarchy and click “OK” to close the dialogue. The lower tree now disyplays the selected material category along with all associated organisms (see all organisms in the image below).
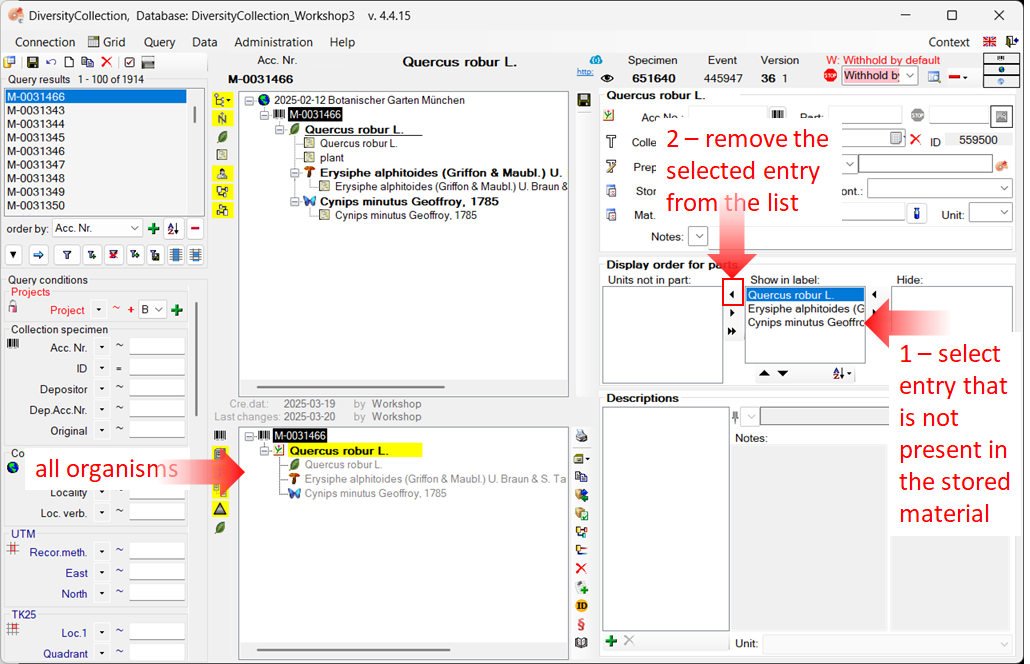
Edit the storage tree
Assume that the insect is not physically present in the specimen, but was only observed during sampling, for example. To document this, move the insect entry from the Show in label list to the Units not in part list.
- Select the entry (see point 1 in the image above)
- Click the < button to remove it from the label display (see point 2 in the image above).
The result is shown below.

Switch to the location tree view
To view the exact location within the collection, click the button on the left side of the tree.
The tree view will change as shown below, listing all collections and subcollections along with the parts of the item.
Print a label for a stored part
You can print a label for a stored part of the specimen. To do this, open the “Print and Label” view.
-
Select the part in the tree (see point 1 in the image below).
-
To open the “Print and Label” area, click the dropdown menu in the upper-right corner of the header and select
 Printing (see point 2 in the image below).
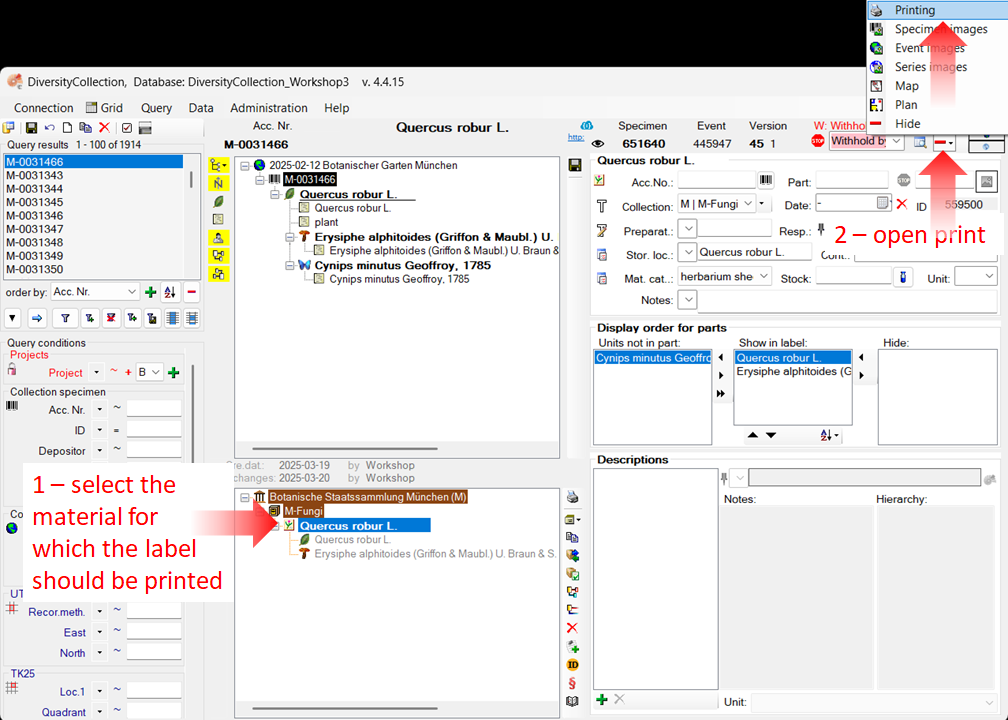
-
The “Print and Label” view will now be displayed (see the image below).
-
Click the button
 (see point 3) to select a schema file (e.g. Standard.xslt).
 -
Then click the button
to generate a preview of the label (see point 4).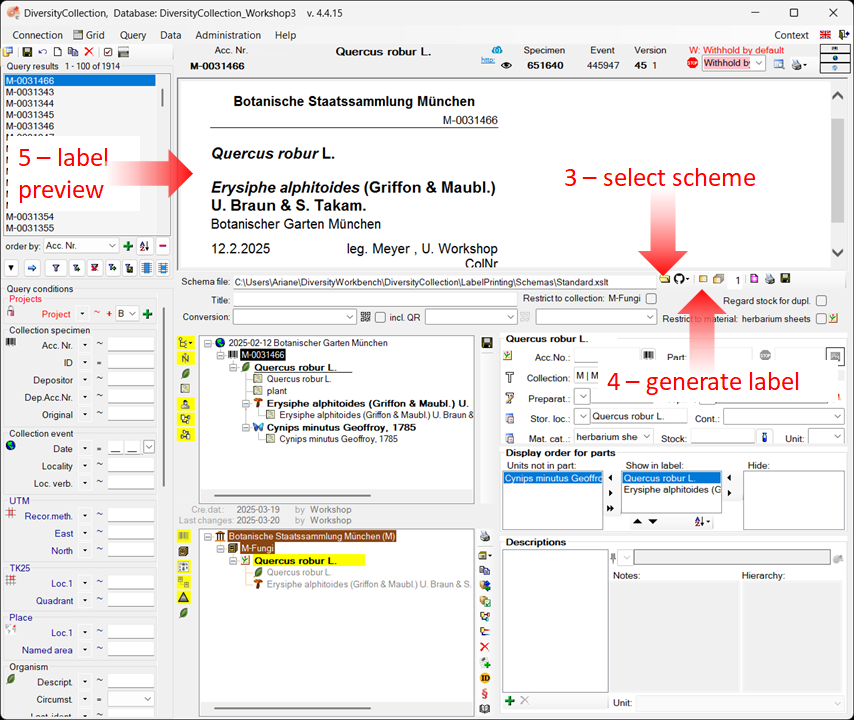
Next
This tutorial continues in the sections listed below.
- section Searching the database