Diversity Collection
Tutorial

Creation
Tutorial - Creating a new dataset
At the beginning of this tutorial, we will create a first dataset step-by-step.
A short introductory video (in German) is also available:  .
.
Add a new dataset
-
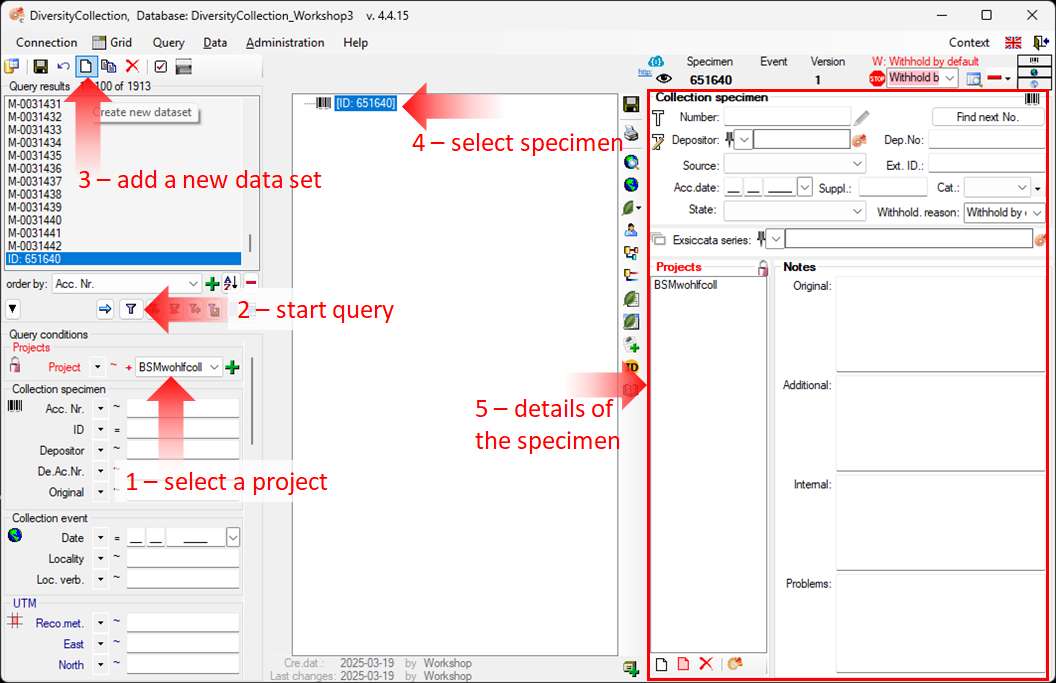
Each record must be linked to a project. Therefore, the first step is to select a project
 within the query conditions (see point 1 in the image above), and then start the query (see point 2). If no project has been selected, the program will remind you to choose one.
 -
To enter a new dataset, click the button
in the top left corner (see point 3). -
If accession numbers are available in the database, the software will ask whether you want to use the next available number (see chapter Accession for more information). Click “OK” to search for the next available accession number, starting with your current number.
-
The new entry will appear in the Query results list on the left. Select it to view the specimen tree structure on the right (see point 4 in the image above). All details and input fields will be displayed in the right part of the window (see point 5). NOTE: If you haven’t specified an accession number, the entry will appear as shown above. Otherwise, the assigned accession number will be displayed.
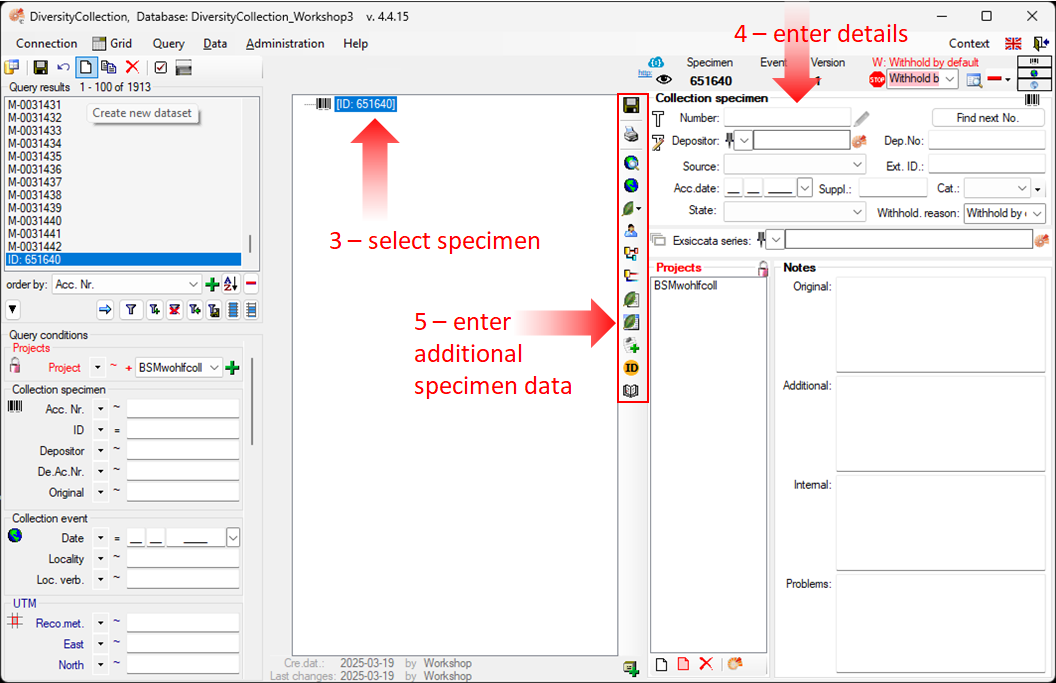
Enter data for the specimen
-
To enter your data for the specimen, click on the corresponding entry in the upper part of the tree (see point 3 in the image below).
-
This opens the input fields in the right-hand section, where you can enter the details (see point 4).
-
In the middle section of the form, several buttons will appear that let you add more information about the specimen (see point 5). These options are explained in the following chapters of this tutorial.
For more information on specimen trees see the chapter Specimen tree. If you want to define parts of your specimen, see the Storage chapter.
For more information on the query results, see the chapter Specimen list and an overview of the menu bar, visit the Data Handling chapter.
Next chapters
This tutorial continues in the sections listed below.
- section CollectionEvent
- section Localisation
- section CollectionEventSeries
- section CollectionSpecimen
- section Collector
- section Collection specimen relations
- section Organisms and identifications
- section Specimen parts and storage
- section Searching the database