Cache Database
Linked Server

Transfer of data to Postgres via linked server
For projects with great amounts of data the preferred way to transfer data is a linked server. To use a linked server you have too install the ODBC driver software for Postgres on your SQL-Server, e.g. provided here: postgresql. Download and install the software, e.g.:

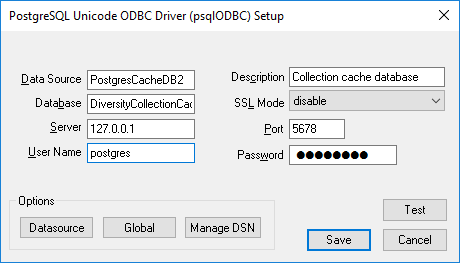
After the software has been installed, add a ODBC datasource.
Configured to access your Postgres cache database.
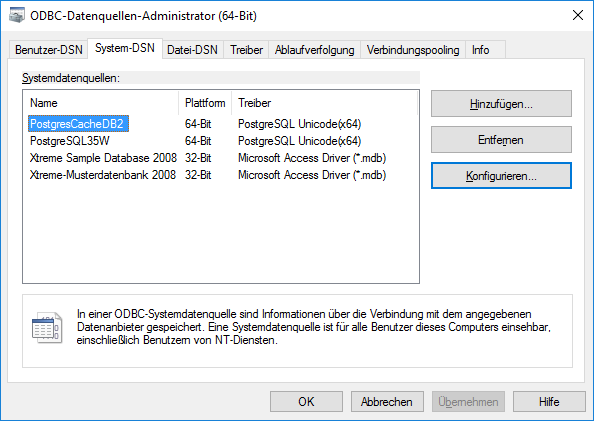
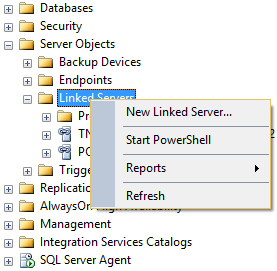
Now you can add a linked server in the SQL-Server Management Studio
 (see below).
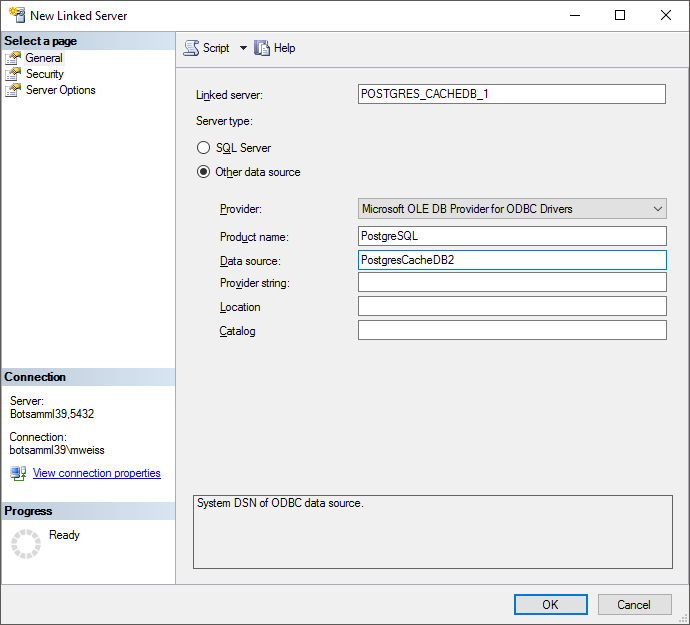
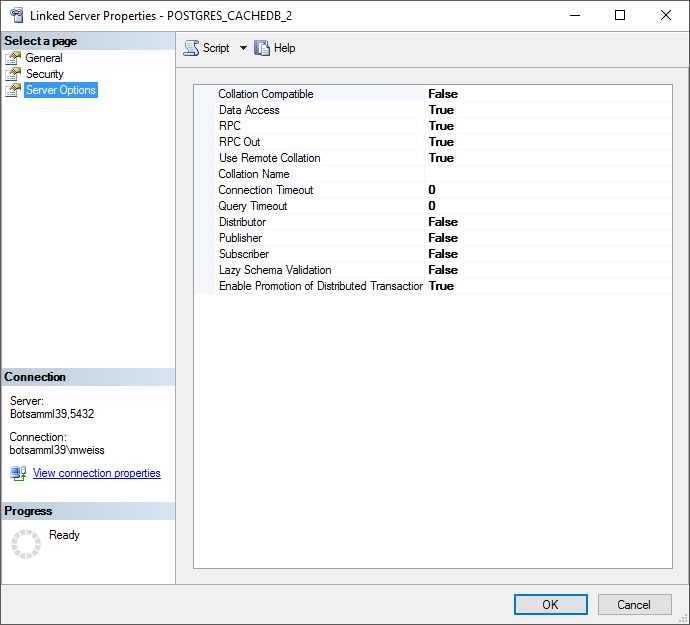
Configure the linked server using Microsoft OLE DB provider for ODBC Drivers and the new created ODBC source as Data source (see below).

Now you are prepared to transfer your data on the fast route to the postgres database.
Configure the linked server using Microsoft OLE DB provider for ODBC
Drivers and the new created ODBC source as Data source (see below).ow
you can add a linked server in the SQL-Server Management Studio
(see below). edit the
general settings for the transfer, click on the button in the main
form. A window as shown below will open. Here you can set the  timeout for the transfer in minutes. The value
0 means that no time limit is set and the program should try inifinite
to transfer the data. Furthermore you can set the parameters for the
transfer of the data in chunks. If the amount of data is above a certain
threshold, it is faster to devide the data into smaller chunks. The
threshold for transfer into the
timeout for the transfer in minutes. The value
0 means that no time limit is set and the program should try inifinite
to transfer the data. Furthermore you can set the parameters for the
transfer of the data in chunks. If the amount of data is above a certain
threshold, it is faster to devide the data into smaller chunks. The
threshold for transfer into the  cache
database and into the
cache
database and into the  Postgres database can
be set as shown below, together with the maximal size of the chunks.
Postgres database can
be set as shown below, together with the maximal size of the chunks.
The scheduled transfer is meant to be lanched on a server on a regular
basis, e.g. once a week, once a day, every hour etc. . The transfer of
the data via the scheduled transfer will take place according to the
settings. This means the program will check if the next planned time for
a data transfer is passed and only than start to transfer the data. To
include a source in the schedule, check the  selector for the scheduler. To set the time and days scheduled for a
transfer, click on the button. A window as
shown below will open where you can select the time and the day(s) of
the week when the transfer should be executed.
selector for the scheduler. To set the time and days scheduled for a
transfer, click on the button. A window as
shown below will open where you can select the time and the day(s) of
the week when the transfer should be executed.
The planned points in time a shown in the form as shown below.
The protocol of the last transfer can seen as in the window above or if
you click on the  button. If an error occurred
this can be inspected with a click no the
button. If an error occurred
this can be inspected with a click no the  button.
If another transfer on the same source has been started, no further transfer will be started. In the program this competing transfer is shown as below.
![]()
You can remove this block with a click on the
button. In opening window (see below) click on the  delete button. This will as well remove error
messages from previous transfers.
delete button. This will as well remove error
messages from previous transfers.
A further option for restriction of the transfers is the comparision of
the date when the last transfer has been executed. Click on the ![]() button to change it to
button to change it to
 . In this state the program will compare the
dates of the transfers and execute the transfer only if new data are
available.
. In this state the program will compare the
dates of the transfers and execute the transfer only if new data are
available.