Import DELTA

Import DELTA file
Remark:
- To import data from a DELTA file at least TerminologyEditor rights are neccessary.
With this form you can import data from a file in
DELTA format into the database.
Choose Data →  Import ->
 Import
DELTA … from the menu to open the window for the import. In the
window click on the
Import
DELTA … from the menu to open the window for the import. In the
window click on the  button to select the file with the data you want to import. If the
Multi-file option is selected before pressing the
button, a folder
selection window opens to select the folder where the DELTA files are
located. For muti-file processing currently the files “chars”, “items”,
“specs” and “extra” are evaluated. If during analysis or import any
problems occur, you may click on the
button to select the file with the data you want to import. If the
Multi-file option is selected before pressing the
button, a folder
selection window opens to select the folder where the DELTA files are
located. For muti-file processing currently the files “chars”, “items”,
“specs” and “extra” are evaluated. If during analysis or import any
problems occur, you may click on the  button to
reload the file and re-initialize the window.
button to
reload the file and re-initialize the window.
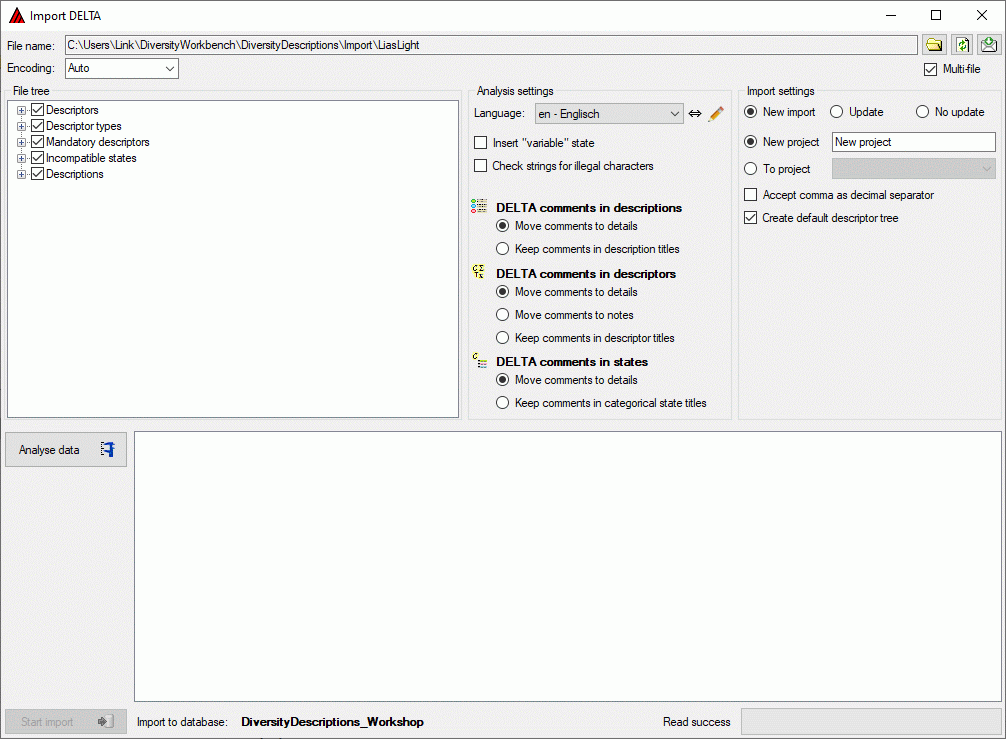
The contents of the file will be shown in the upper part of the File
tree section. If special characters are not displayed corretly, try a
different Encoding setting, e.g. “ANSI”, and reload the document
using the button. In the bottom part of the
window you find the import database and the actual processing state.
In the file tree you may deselect entries that shall not be imported into the database. Use that option very carefully, because if you deselect entries that are being referenced by other parts of the input tree, e.g. descriptors referenced by descriptions, the analysis or import step might become erronous!
If during reading of the files expressions cannot be interpreted, suspicious entries are maked with yellow background (warning) in the file tree. When you move the mouse curser over the marked entries, you get additional information as tool tip or the tree node text itself tells the problem (see example below).

Analysis
To analyse the data in the file click on the Analyse data
 button. During
the analysis the program checks the dependencies between the different
parts of the data and builds up an analysis tree in the lower part of
the window. The analysis tree contains all data in a suitable format for
the final import step. During data analysis the icon of the button
changes to
button. During
the analysis the program checks the dependencies between the different
parts of the data and builds up an analysis tree in the lower part of
the window. The analysis tree contains all data in a suitable format for
the final import step. During data analysis the icon of the button
changes to  and you may abort processing by clicking
the button.
and you may abort processing by clicking
the button.
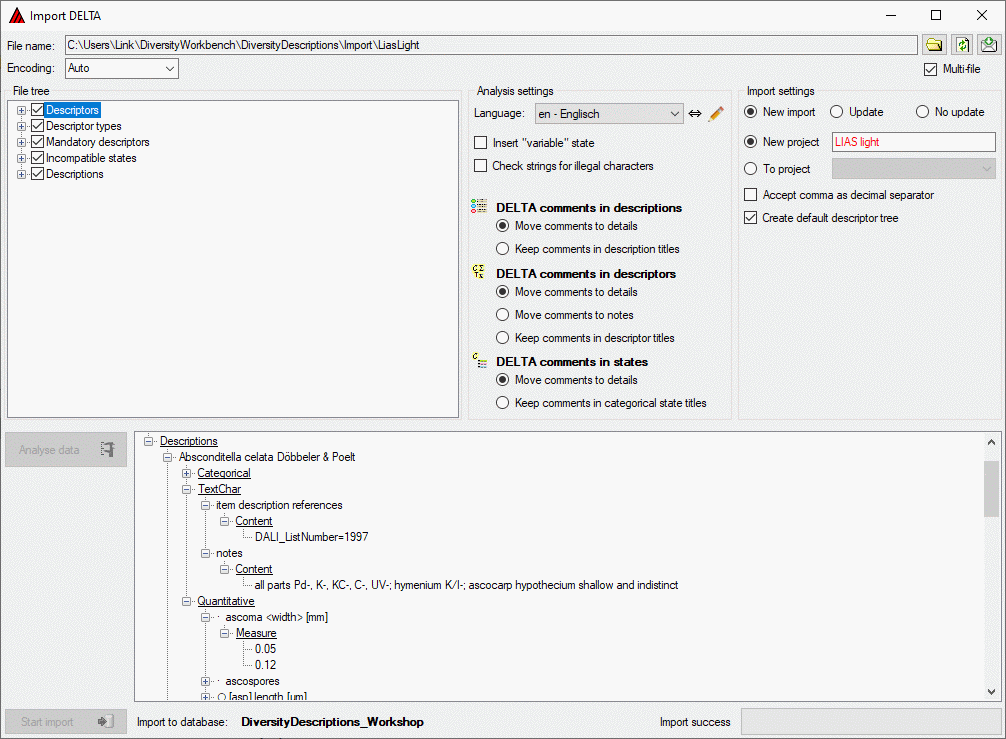
In the Analysis settings section (see image below) you set the
document’s Language. You man change the display and sorting of the
entries in the Language combo box from “<code> - <description>”
to “<description> - <code>” (and back) by clicking the button
 . If you need language codes that are not included
in the list, click the
. If you need language codes that are not included
in the list, click the  button. For more details
see Edit language codes.
button. For more details
see Edit language codes.
The Insert “variable” state controls the handling of the DELTA state “V” for categorical summary data. If possible, a categorical state “variable” is inserted to the descriptor data and set in the summary data, when the state “V” is present in the description data.
If the Check strings for illegal characters option is checked, all string literals that shall be exported from database are scanned for illegal non-printable characters and matches are replaced by a double exclamation mark ("‼"). Activating this option may increase the analysis processing time.
In DELTA text in angle bracket (<text>) usually denotes comments, which are by default imported into the “Details” fields of the database. In the lower parts of the Analysis settings you may adjust a different handling for description, descriptor and categorical state items.
- For DELTA comments in descriptions you may Move comments to details (default) or Keep comments in description titles.
- For DELTA comments in descriptors you may Move comments to details (default), Move comments to notes or Keep comments in descriptor titles.
- For DELTA comments in categorical states you may Move comments to details (default) or Keep comments in categorical state titles.
After changing one of these settings click on the Analyse data
button to make
the changes effective.
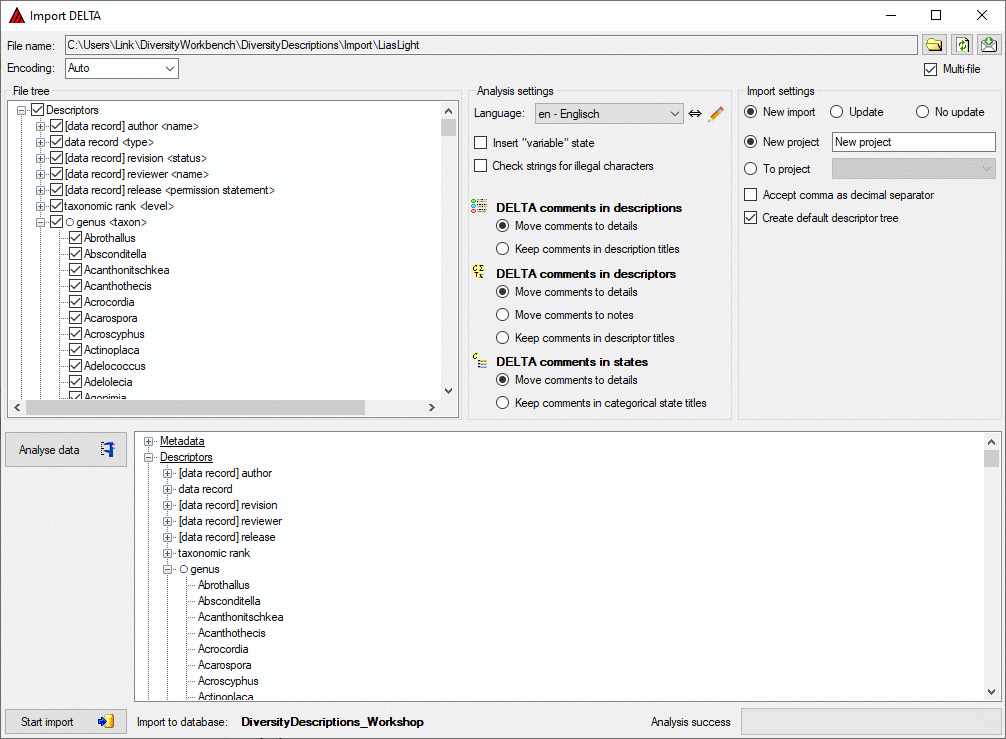
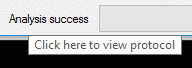
After analysis a message window informs you if any warnings or errors occured. You can find detailled error and warning information at the file and/or analysis trees by entries with red text (error) or yellow background (warning). When you move the mouse curser over the marked entries, you get additional information as bubble help or the tree node text itself tells the problem (see example below). By clicking on the status text besides the progress bar, you can open an analysis protocol (see below, right).
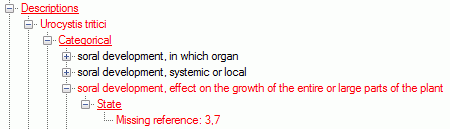
If an analysis error occured, you are not able to proceed. You will first have to correct the problem, e.g. by excluding the erronous descriptor in the example above (after reloading the file). If a warning occured, it might not cause problems during import, but you should take a closer look if the imported data will be correct.
Import
If you want to import new data to a project you have two import options:
- New import - import new data and save mapping information to an
import session.
For descriptors, categorical states and descriptions the mapping information from the DELTA import will be storen in an import session. Therefore by a subsequent import run updated information, e.g. a modified label or detail information can be done (see section “Update” below). - No update - import new data without saving of mapping
information.
This option might be faster, but you will not be able to update the titles or to import additional translations from a DELTA file.
Before starting the import, you should take a look at the import settings:
- New project - import data to a new project.
The project name is specified in the text box right from this radio button.
This option is only available if at least ProjectManager rights are available. - To project - import data to an existing project.
The combo box at the right shows all projects where write access is possible.
If only TerminologyEditor rights are availabe, no changes in the existing project (e.g. detail or copyright) will be done. - Accept comma as decimal separator shall help to overcome problems
with localization of some programs that create DELTA files.
If this option is checked, a floating point value like “1,0” (e.g. used in german localizations) instead of “1.0” will be accepted as “1”. - Create default descriptor tree creates a default descriptor tree
and assigns all imported descriptors to that tree.
Additionally the statistical measures “Minimum”, “Lower limit”, “Mean”, “Upper limit” and “Maximum” are set as recommended for all quantitative descriptors.
This option is useful to avoid unassigned descriptors if the import file does not specify any descriptor tree assignments.
To start the import click on the Start import
 button. Now the
data from the analysis tree are written into a local database cache and
finally stored into the database.
button. Now the
data from the analysis tree are written into a local database cache and
finally stored into the database.
After import a message window inform you if any warnings or errors occured. You can find detailled error and warning information at the file and/or analysis trees by entries with red text (error) or yellow background (warning). When you move the mouse curser over the marked entries, you get additional information as bubble help or the tree node text itself tells the problem. By clicking on the status text besides the progress bar, you can open an import protocol (see below).

Handling of special DELTA states
In the DELTA format the special states “-” (not applicable), “U” (unknown) and “V” (variable) are available for categorical and quantitative characters. These states are treated in the folloging manner during import:
- “-” (not applicable)
The data status “Not applicable” is set. - “U” (unknown)
The data status “Data unavailable” is set. - “V” (variable)
The data status “Not interpreterable” is set.
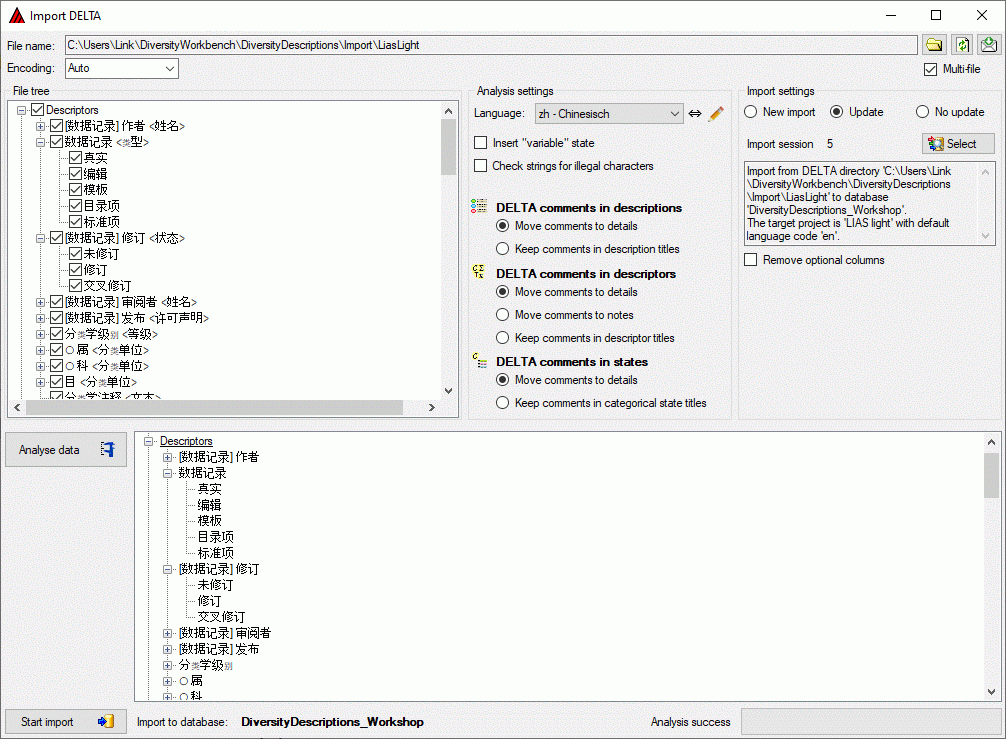
Update
If you imported new data using option New import, a new import session with the following data will be created:
- Descriptor keys - the “character number” that is used in DELTA to identify a dedicated character.
- Categorical state keys - the “state number” that is used in DELTA, together with the “character number”, to identify a dedicated chategorical state.
- Description keys - the item position in the item list. Since in DELTA there are no explicit item numbers, the position within the item list is taken for this key. If you want to update the items using the DELTA import, you must be sure that the item list has exactly the same sequence as for the first import!
For those entities you may update the columns “label”, “detail” and “data_entry_notes” (only for descriptors). To achive this, you must specify the same Language in the Analysis settings as adjusted as project language. If you specify a different Default language, the data will be imported as translations for the columns “label” rsp. “detail” (see image below). For descriptor column “data_entry_notes” translations are not supported.
Preparation
By changing the Analysis settings and a clicking the Analyse data
button you may
modify the handling of DELTA comments. E.g. if you used the default
settings during a past import, a DELTA character “data record <type>”
was imported as descriptor “data record” and “type” was written into the
columns “detail”. In the Analysis settings you may now select option
Keep comments in descriptor titles to update the descriptor title to
“data record <type>".
Import settings
Before starting the import, you should take a look at the import options:
- Update - perform an update import.
- Import session - click on button
 Select to select the correct import session.
In the text box below that option the automatically generated descriptive text of the import session is displayed. - Remove optional columns - clear optional columns if no contents is
present.
If during update import for an optional column (“detail” rsp. “data_entry_note”) no data are present, by default an existing entry in the database will not be removed. Check this option to clear the data.
Start the import click on the Start import
button. Now the
data from the analysis tree are written into a local database cache and
finally stored into the database.