Diversity Taxon Names
Import Wizard Tutorial

Species & Family
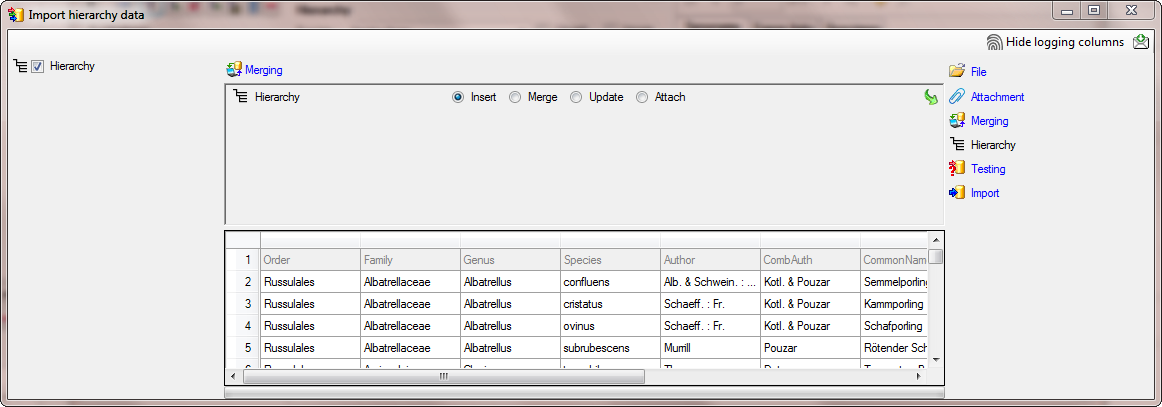
Step 4 - Import of the hierachycal relation between species and families
To import the hierarchical relation between the taxa choose Data →
 Import Wizard →
Import Hierarchy … from the menu. For every hierarchical rank, you
have to import the relations between the taxa. We start with the
relations from the species to the family (the genus as intermediate rank
between species and family is omitted in this example).
Import Wizard →
Import Hierarchy … from the menu. For every hierarchical rank, you
have to import the relations between the taxa. We start with the
relations from the species to the family (the genus as intermediate rank
between species and family is omitted in this example).
As described in the previous steps, open the file ImportTutorial.txt
shipped with this application. In the  Merging
step leave the table on
Merging
step leave the table on  Insert (see
below).
Insert (see
below).
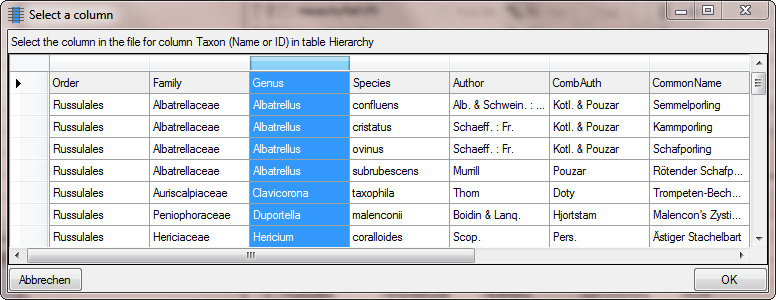
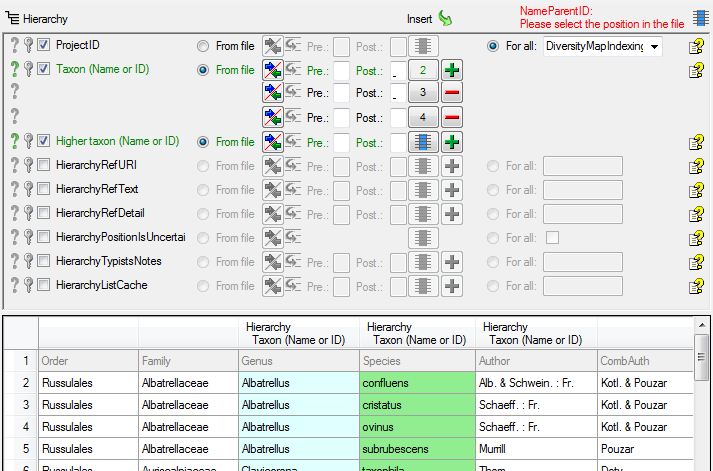
In the Hierachy step, select the
columns Taxon (Name or ID) and Higher taxon (Name or ID) as
 Decisive
columns (see below).
Decisive
columns (see below).

For the column ProjectID, select
 For all as shown below and select the
project of your choice from the list (e.g. DiversityWorkbench if
available).
For all as shown below and select the
project of your choice from the list (e.g. DiversityWorkbench if
available).

As the file does not contain the IDs of the name, we let the program
determine the ID on basis of the name. To enable the program to detect
the ID we need to provide the whole name from the data in the file. We
start with the column Taxon (Name or ID). As
first step, click on the  button to set the
source for the genus, the first part of the taxonomic name. A window as
shown below will open. Mark the column as shown below an click on the
OK button.
button to set the
source for the genus, the first part of the taxonomic name. A window as
shown below will open. Mark the column as shown below an click on the
OK button.
Next we need the species epithet as second part of the names. Click on
the  button to add another column. A window as shown
below will open where where the previous selected column for the Genus
is marked with 1. We select the column containing the species epithet
(see below) and click OK.
button to add another column. A window as shown
below will open where where the previous selected column for the Genus
is marked with 1. We select the column containing the species epithet
(see below) and click OK.
Now we need the authors as last part of the names. Again click on the
button to add a column and select the source as
shown below.
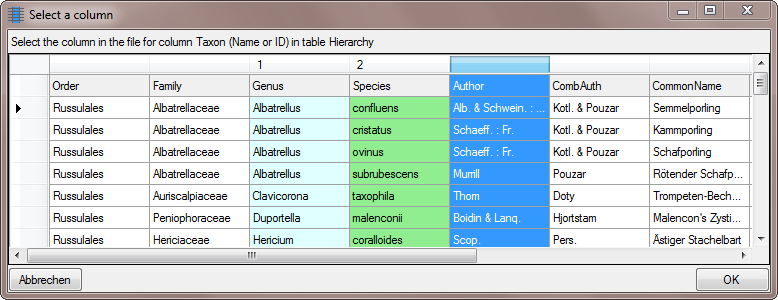
As shown below, enter a space in the Postfix for the first 2 columns.
If combining authors do exist for a name, the authors of the basionym
are set in brackets. To ensure the correct build-up of the name, we need
to add a transformation. Click on the ![]() button to
enter the a
button to
enter the a  filter as shown below where an
opening bracket ( is inserted in dependence of the content of the
column of the combining authors.
filter as shown below where an
opening bracket ( is inserted in dependence of the content of the
column of the combining authors.
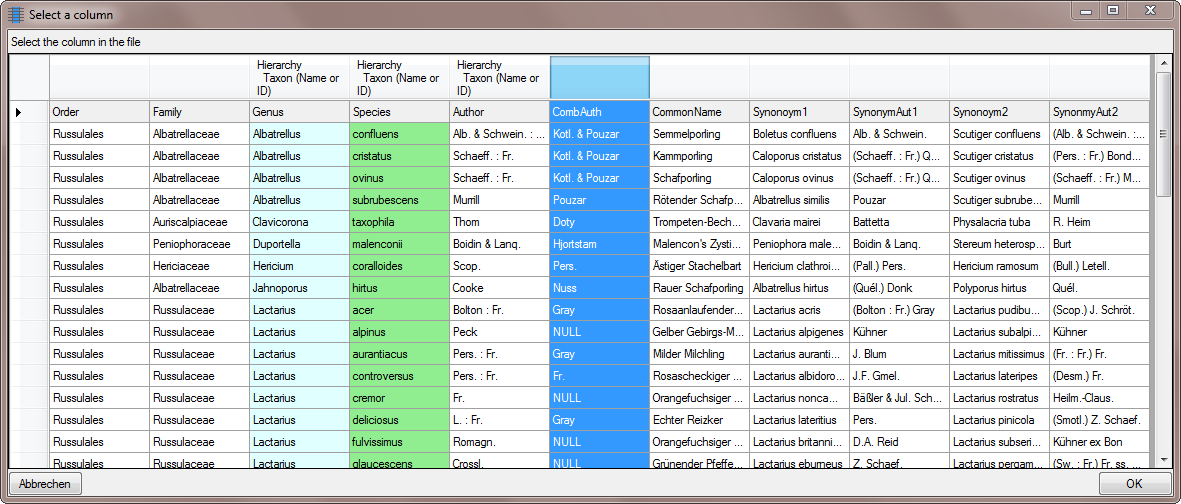
To set the column for the filter, click on the
button and choose the column containing the
combining authors as shown below.
The final Transformation should look like shown below.
After adding the optional opening bracket we add the authors of the
basionym. Click on the button and select the column
as shown below.
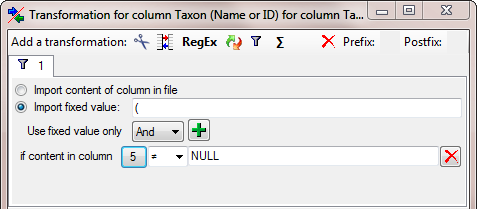
As final step for the authors of the basionym we need the optional
closing bracket. Click on the button and select the
column as shown above. For the new colum enter another
filter ![]() transformation as
shown below. To set the column for the filter, click on the
button as described for the opening bracket.
transformation as
shown below. To set the column for the filter, click on the
button as described for the opening bracket.
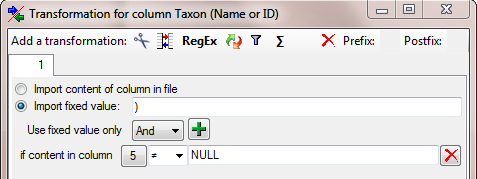
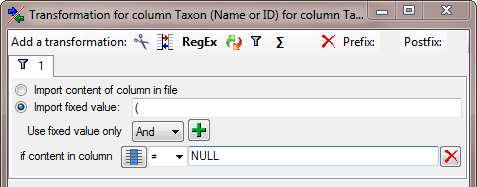
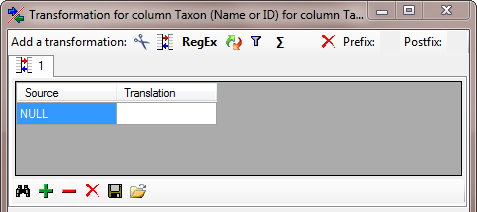
Finally we need the combining authors, provided they do exist. Click on
the button and select the column containing the
combining authors. As these are missing for some names we have to add a
![]() transformation where the content NULL is
translated into nothing. Click on the
transformation where the content NULL is
translated into nothing. Click on the ![]() button to
add a transformation and in the window that will open, click on the
button to
add a transformation and in the window that will open, click on the
![]() button to add a translation (see below).
button to add a translation (see below).
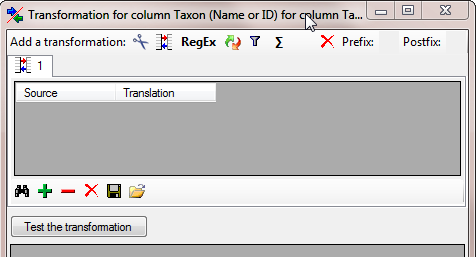
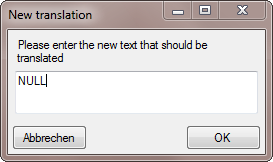
To add a value that should be translated, click on the
button and type NULL into the window as shown below.
The final transformation should look like shown in the image below.
The final build-up for the Taxon should look like in the image below.
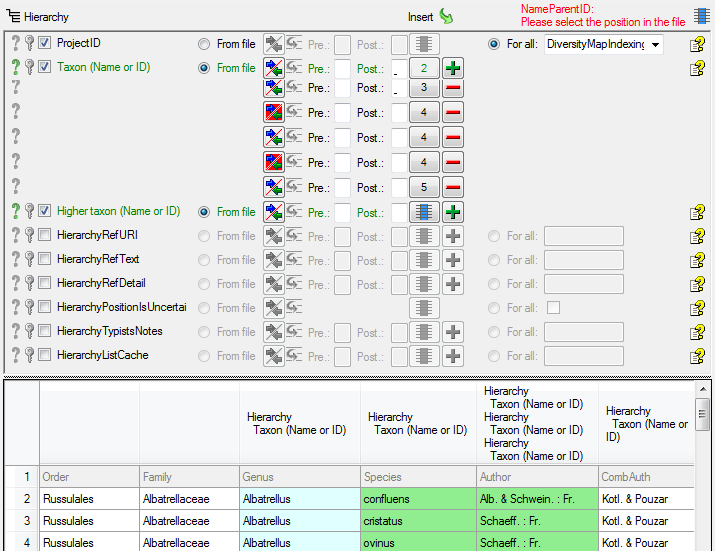
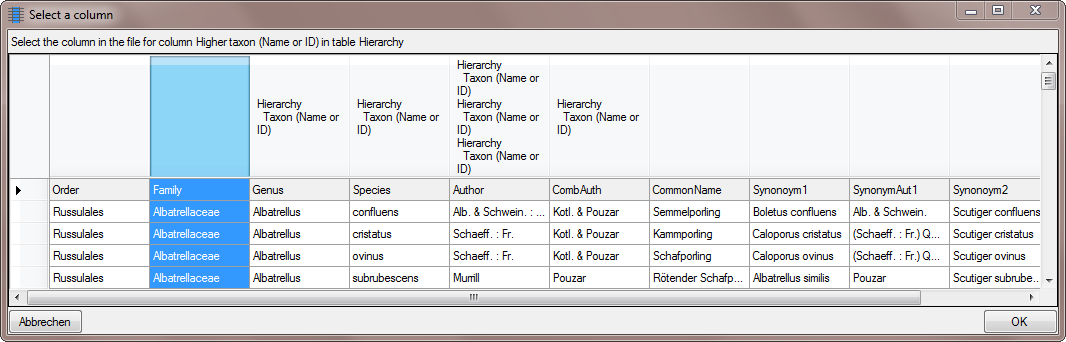
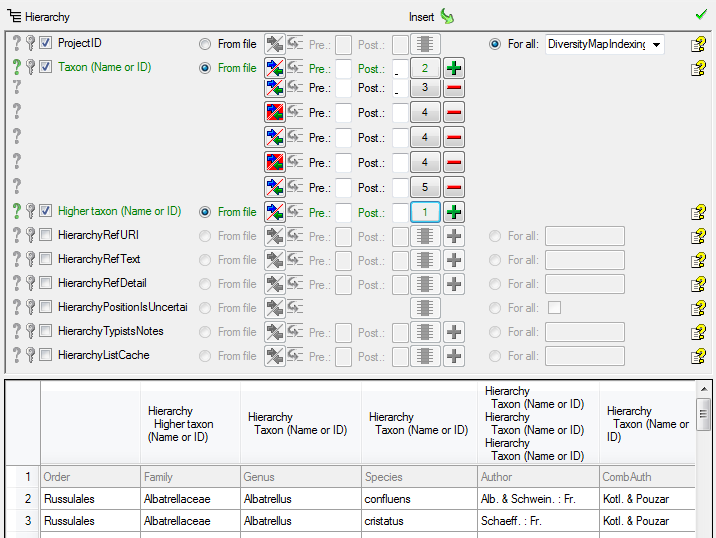
Now we enter the higher taxon, in this example the family. Click on the
button and choose the column containing the
family as shown below.
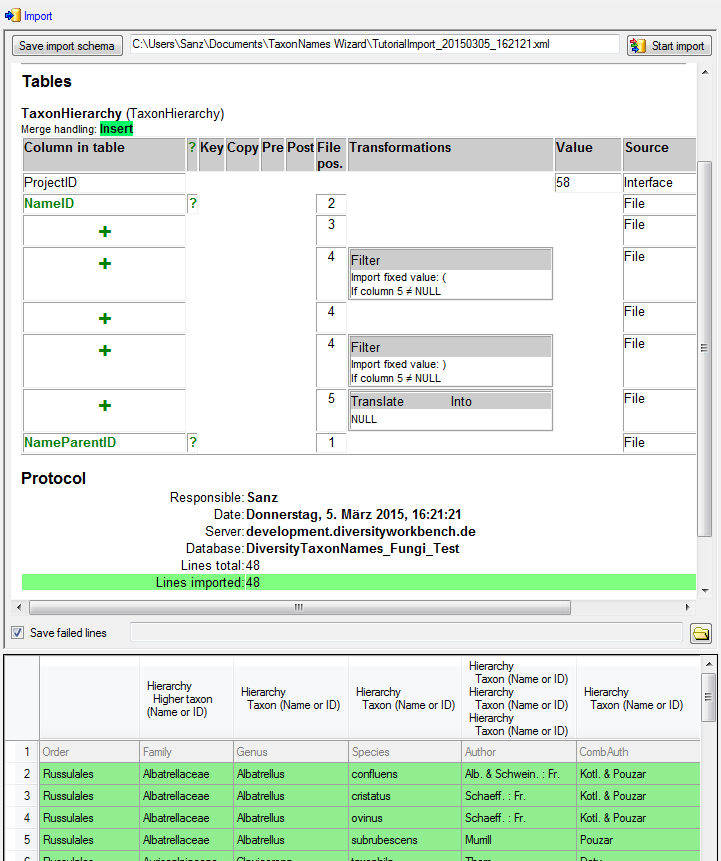
Now the Hierarchy step is finished and
should look like shown below.
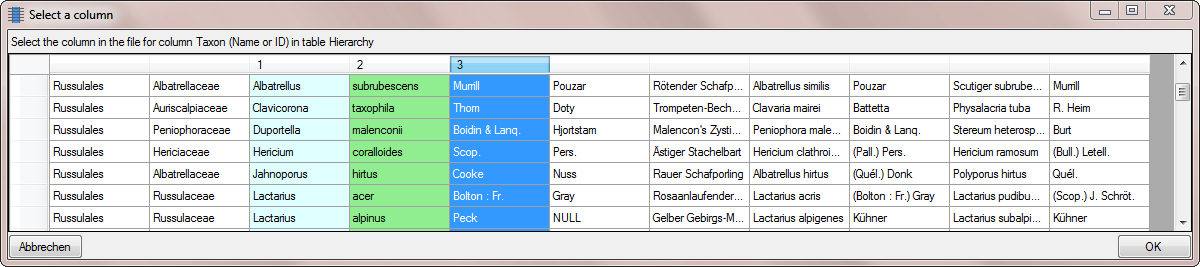
In the  Testing
steps use the test for a check if you missed any settings described
above. The result of the test should appear like shown below.
Testing
steps use the test for a check if you missed any settings described
above. The result of the test should appear like shown below.

Finally  Import the
data according to your settings. The result of the import should appear
like shown below.
Import the
data according to your settings. The result of the import should appear
like shown below.
Proceeded with Step 5 - Import of the hierachycal relation between families and the order 