Import SDD
Import SDD file
Remarks:
- To import data from an SDD file at least TerminologyEditor rights are neccessary.
- Currently SDD statements concerning natural laguage descriptions and identification keys are not evaluated.
With this form you can import data from an XML file according schema
SDD 1.1 rev 5 into the database.
You may download an example SDD file with from the Diversity
Descriptions example file
repository. Choose
Data -> 
 Import SDD
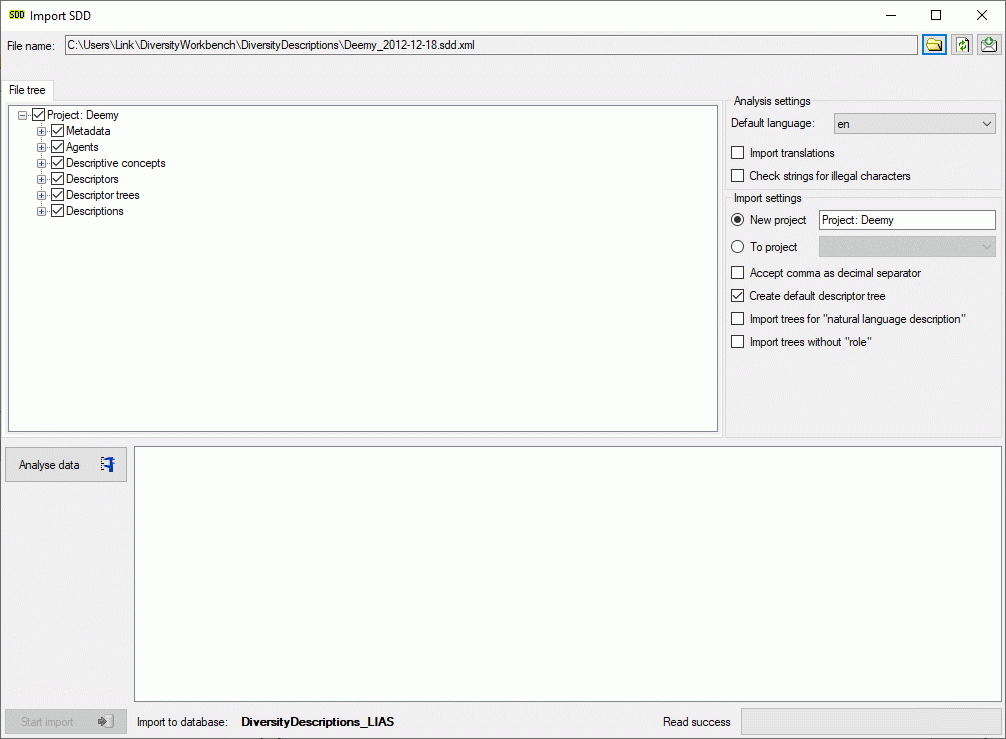
… from the menu to open the window for the import. In the window
click on the button to
select the file with the data you want to import. If during analysis or
import any problems occur, you may click on the
 button to reload the file and re-initialize the window.
The contents of the file will be shown in the upper part of the File tree tab page. In the Analysis settings part you find the document’s Default language. If additional laguages are contained in the document, you may select one of them as the new default language of the database. By checking Import translations you select all additional document languages for the import. This option is automatically pre-selected if more than one language has been found in the file. In the bottom part of the window you find the import database and the actual processing state.
If the Check strings for illegal characters option is checked, all string literals that shall be exported from database are scanned for illegal non-printable characters and matches are replaced by a double exclamation mark ("‼"). Activating this option may increase the analysis processing time.
In the file tree you may deselect entries that shall not be imported into the database. Use that option very carefully, because if you deselect entries that are being referenced by other parts of the input tree, e.g. descriptors referenced by descriptions, the analysis or import step might become erronous!
Analysis
To analyse the data in the file click on the Analyse data
button. During
the analysis the program checks the dependencies between the different
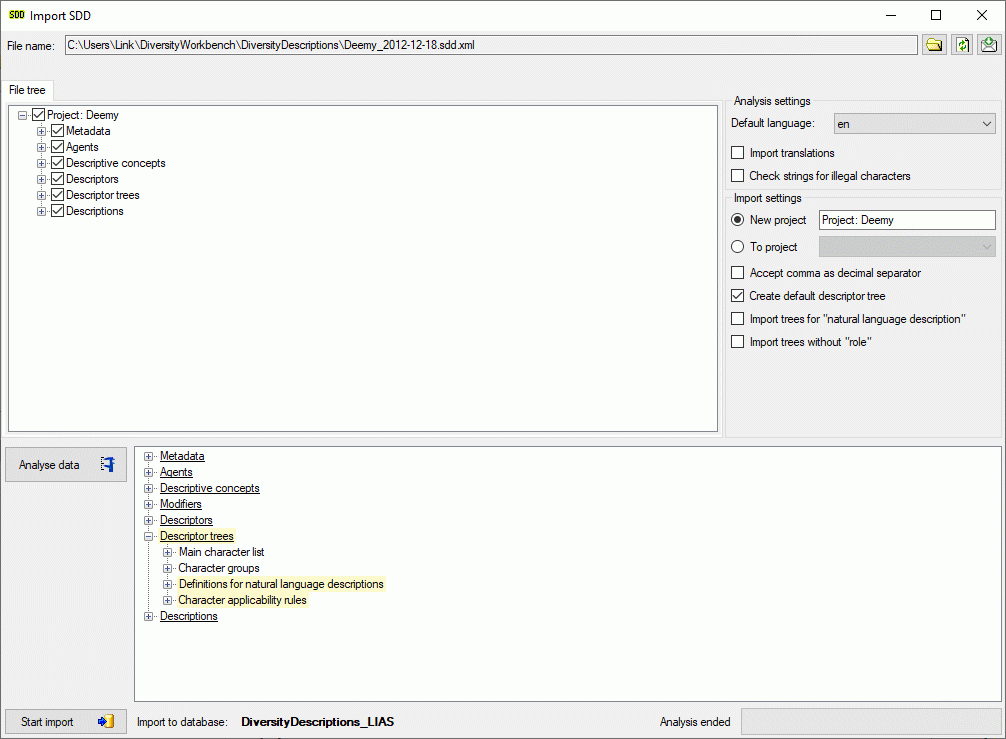
parts of the data and builds up an analysis tree in the lower part of
the window. The analysis tree contains all data in a suitable format for
the final import step. During data analysis the icon of the button
changes to 
 and you may abort processing by clicking
the button.
After analysis a message window informs you if any warnings or errors occured. You can find detailled error and warning information at the file and/or analysis trees by entries with red text (error) or yellow background (warning). When you move the mouse curser over the marked entries, you get additional information as tool tip or the tree node text itself tells the problem (see examples below). By clicking on the status text besides the progress bar, you can open an analysis protocol (see below, right).
If an analysis error occured, you are not able to proceed. You will first have to correct the problem, e.g. by excluding the erronous descriptor in the example above (after reloading the file). If a warning occured, it might not cause problems during import, but you should take a closer look if the imported data will be correct.
Import
Before starting the import, you should take a look at the import options:
- New project - import data to a new project.
The project name is specified in the text box right from this radio button.
This option is only available if at least ProjectManager rights are available. - To project - import data to an existing project.
The combo box at the right shows all projects where write access is possible.
If only TerminologyEditor rights are availabe, no changes in the existing project (e.g. detail or copyright) will be done. - Accept comma as decimal separator shall help to overcome problems
with localization of some programs that create SDD files.
If this option is checked, a floating point value like “1,0” (e.g. used in german localizations) instead of “1.0” will be accepted as “1”. - Create default descriptor tree creates a default descriptor tree
and assigns all imported descriptors to that tree.
Additionally the statistical measures “Minimum”, “Lower limit”, “Mean”, “Upper limit” and “Maximum” are set as recommended for all quantitative descriptors.
This option is useful to avoid unassigned descriptors if the import file does not specify any descriptor tree assignments. - Import trees for natural language descriptions - currently natural language descriptions are ignored.
- Import trees without “role” - usually those trees only contain descriptor dependency information.
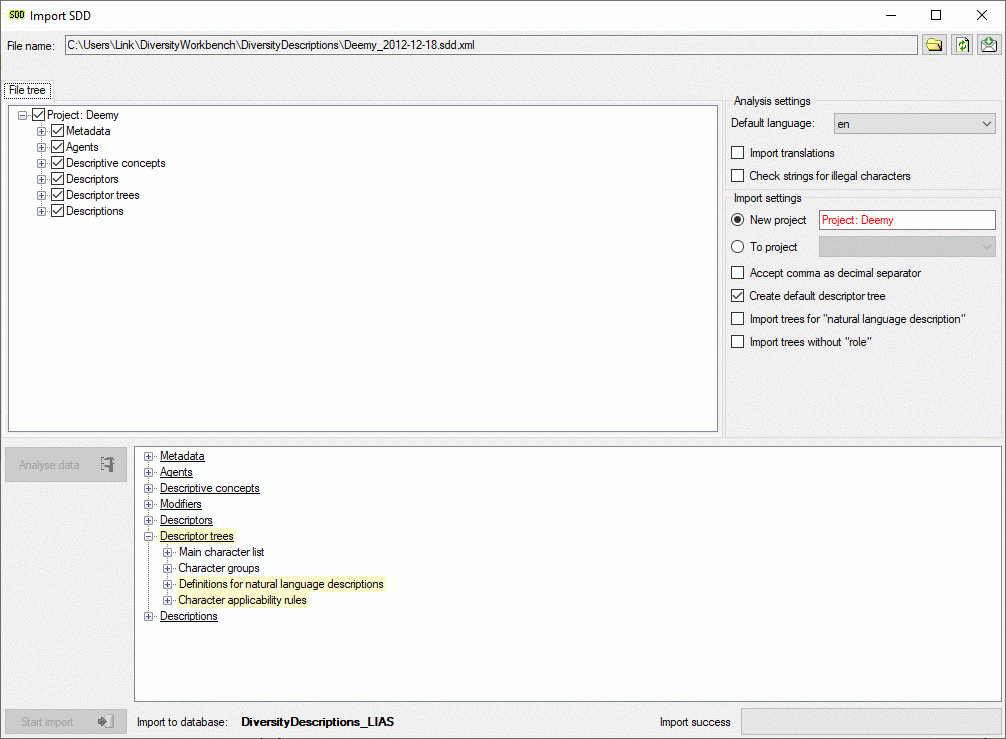
To start the import click on the Start import button. Now the data from the analysis tree are written into a local database cache and finally stored into the database.
After import a message window inform you if any warnings or errors occured. You can find detailled error and warning information at the file and/or analysis trees by entries with red text (error) or yellow background (warning). When you move the mouse curser over the marked entries, you get additional information as bubble help or the tree node text itself tells the problem. By clicking on the status text besides the progress bar, you can open an import protocol (see below).


